You are getting me excited for mine! That is pretty dang square for something not cut on a CNC…but assembled by hand!!
The half table I built I screwed and glued. I pulled out the screws yesterday before I trashed it…you don’t need screws at all. When I finally broke it all the glue joints held and the wood ripped apart. So I might just glue the top on and drop a bunch of weights on it while it dries.
Isn’t this where bessel or airy points come into play. You are minimizing your reliance on the stressed skin and instead you are letting much smaller sections be under tension or compression and sort of balance each other out.
That looks excellent. Sorry you had a stressful glue up. It is well within the tolerances of sheet goods and you will be able to surface the spoil board if you want.
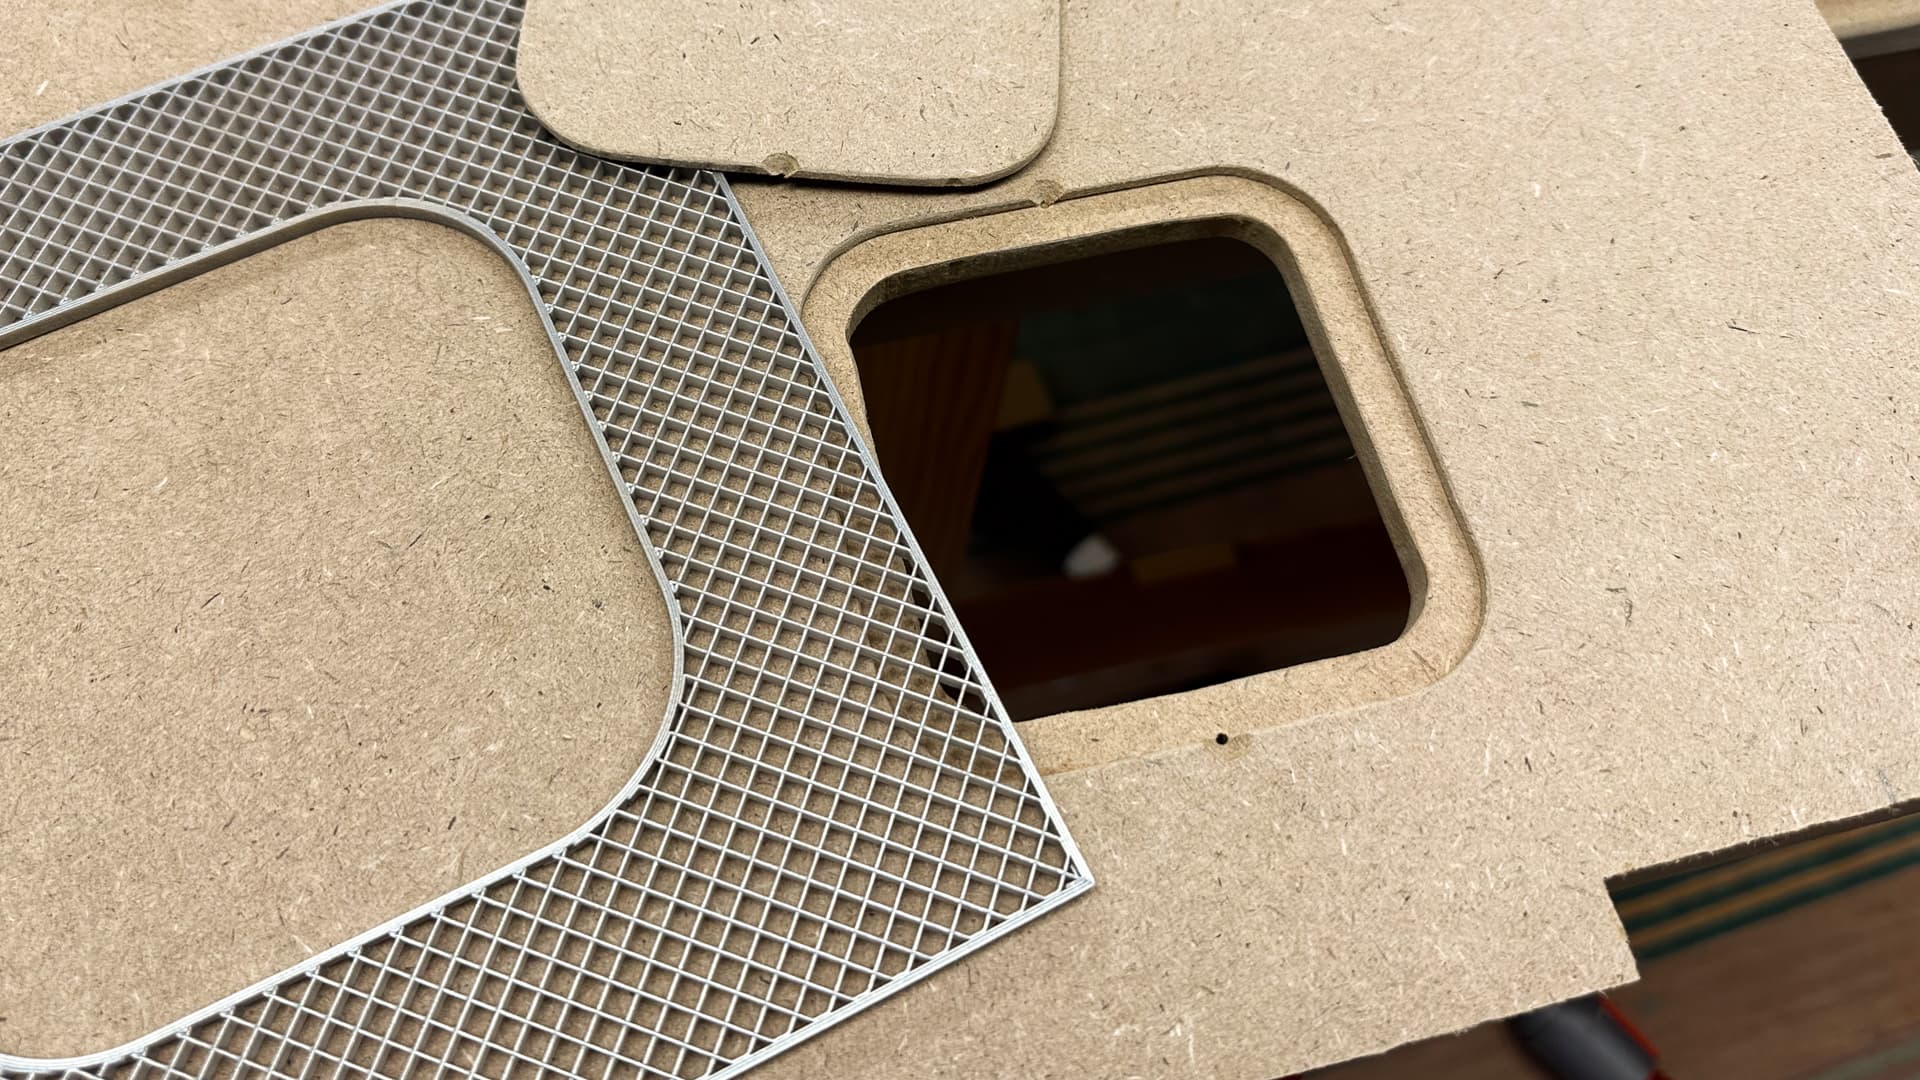
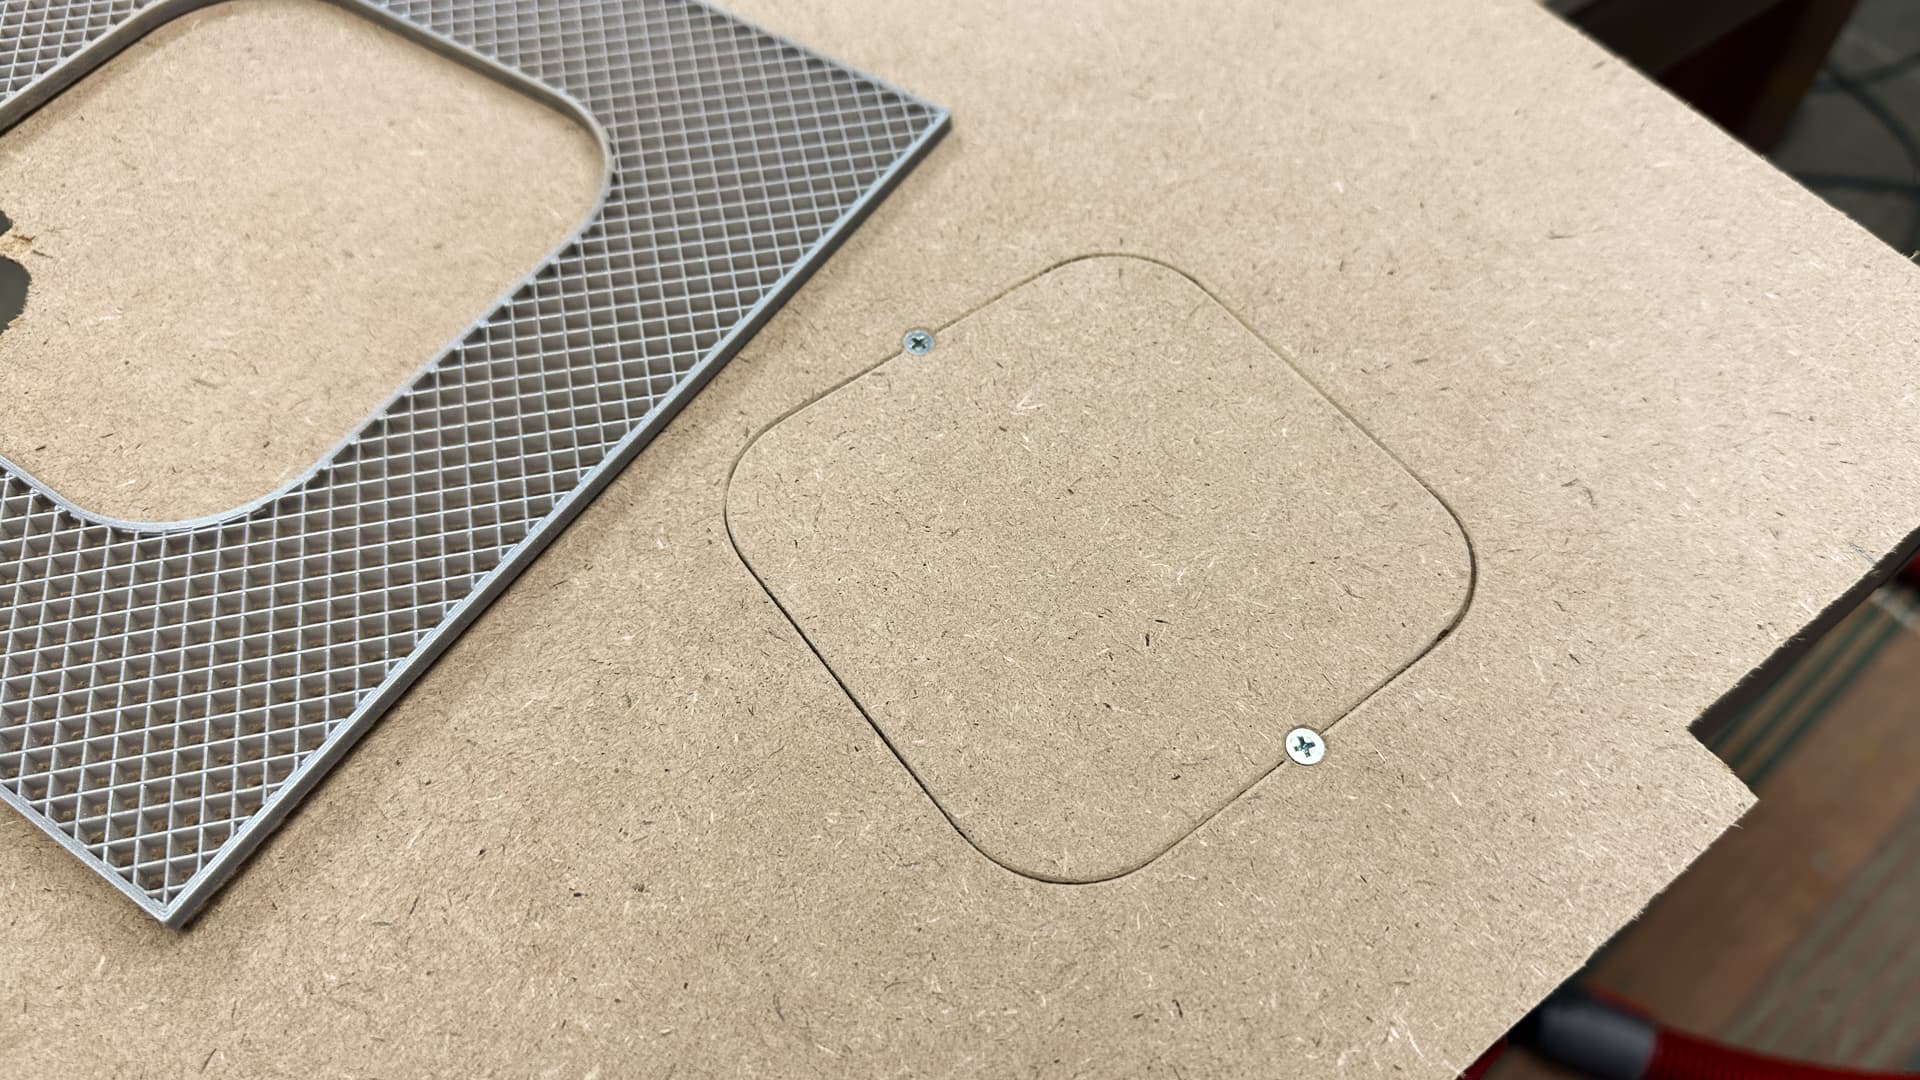
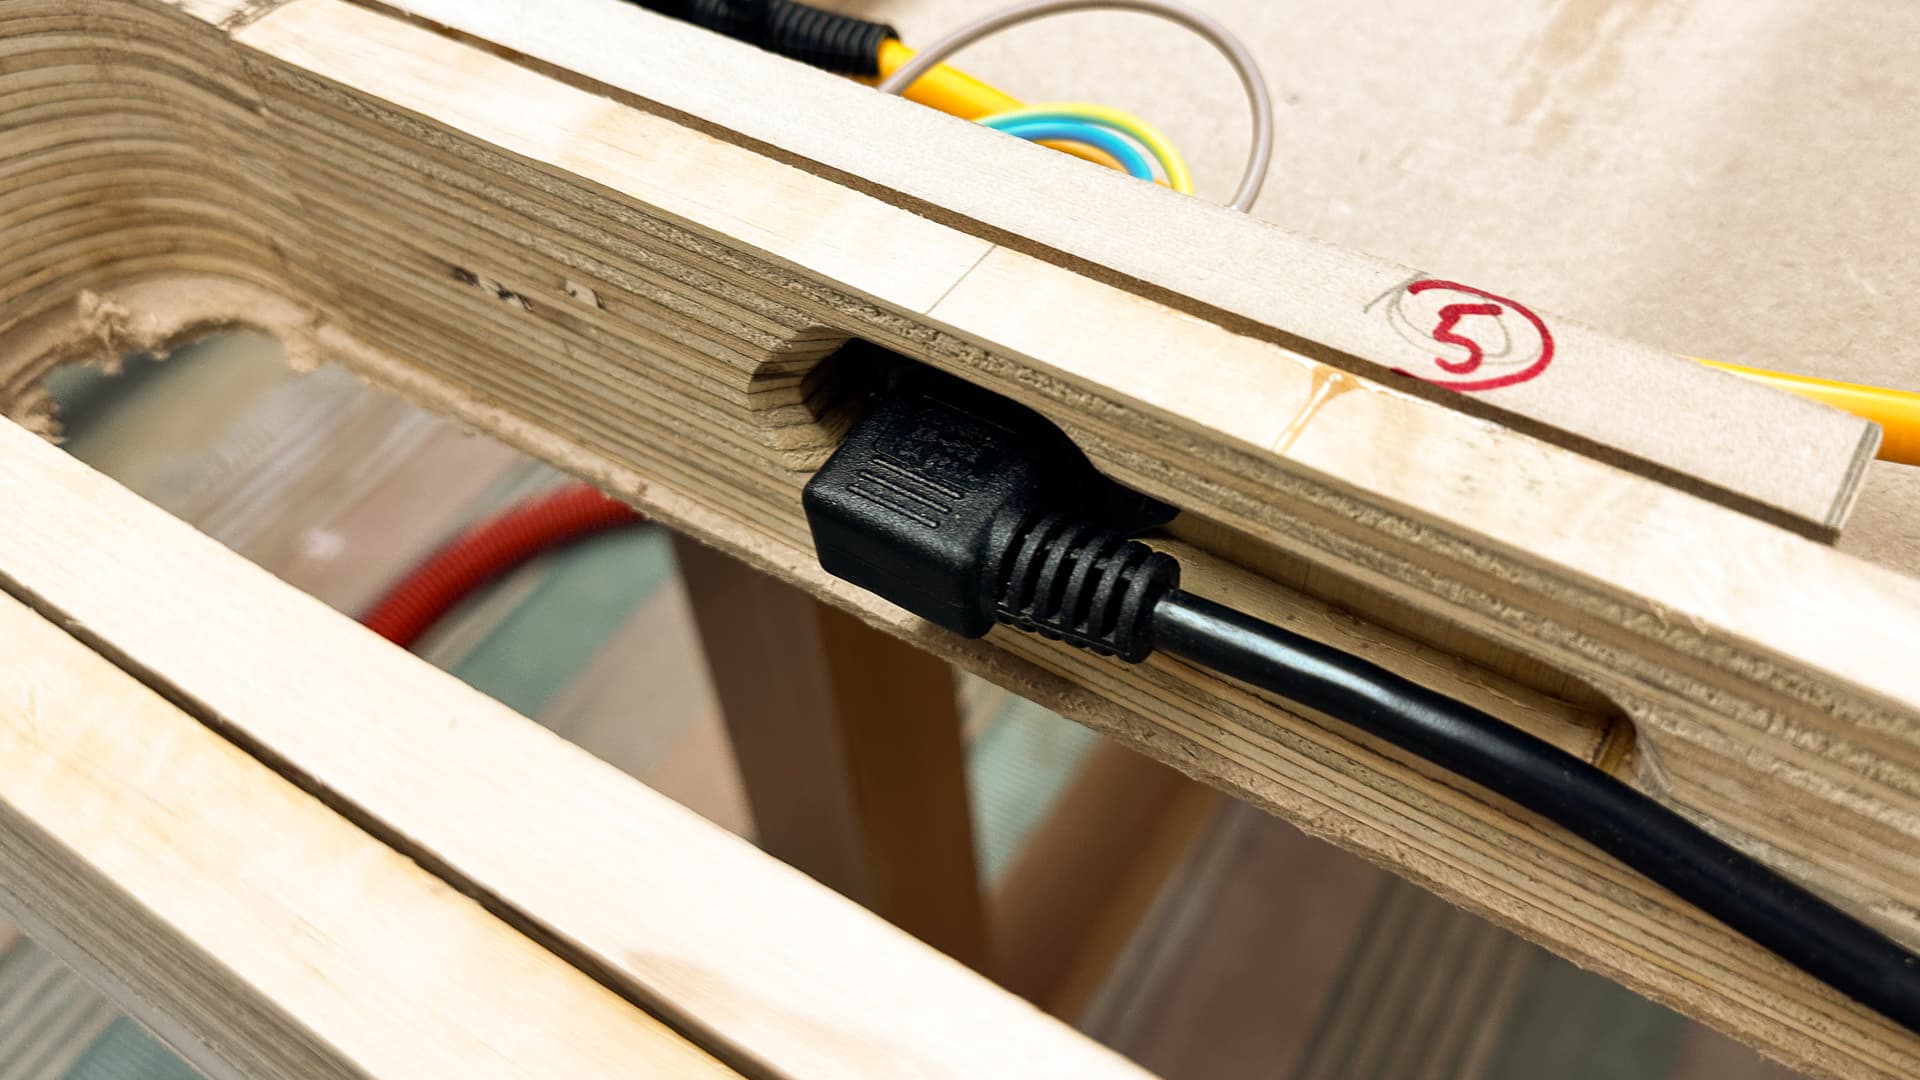
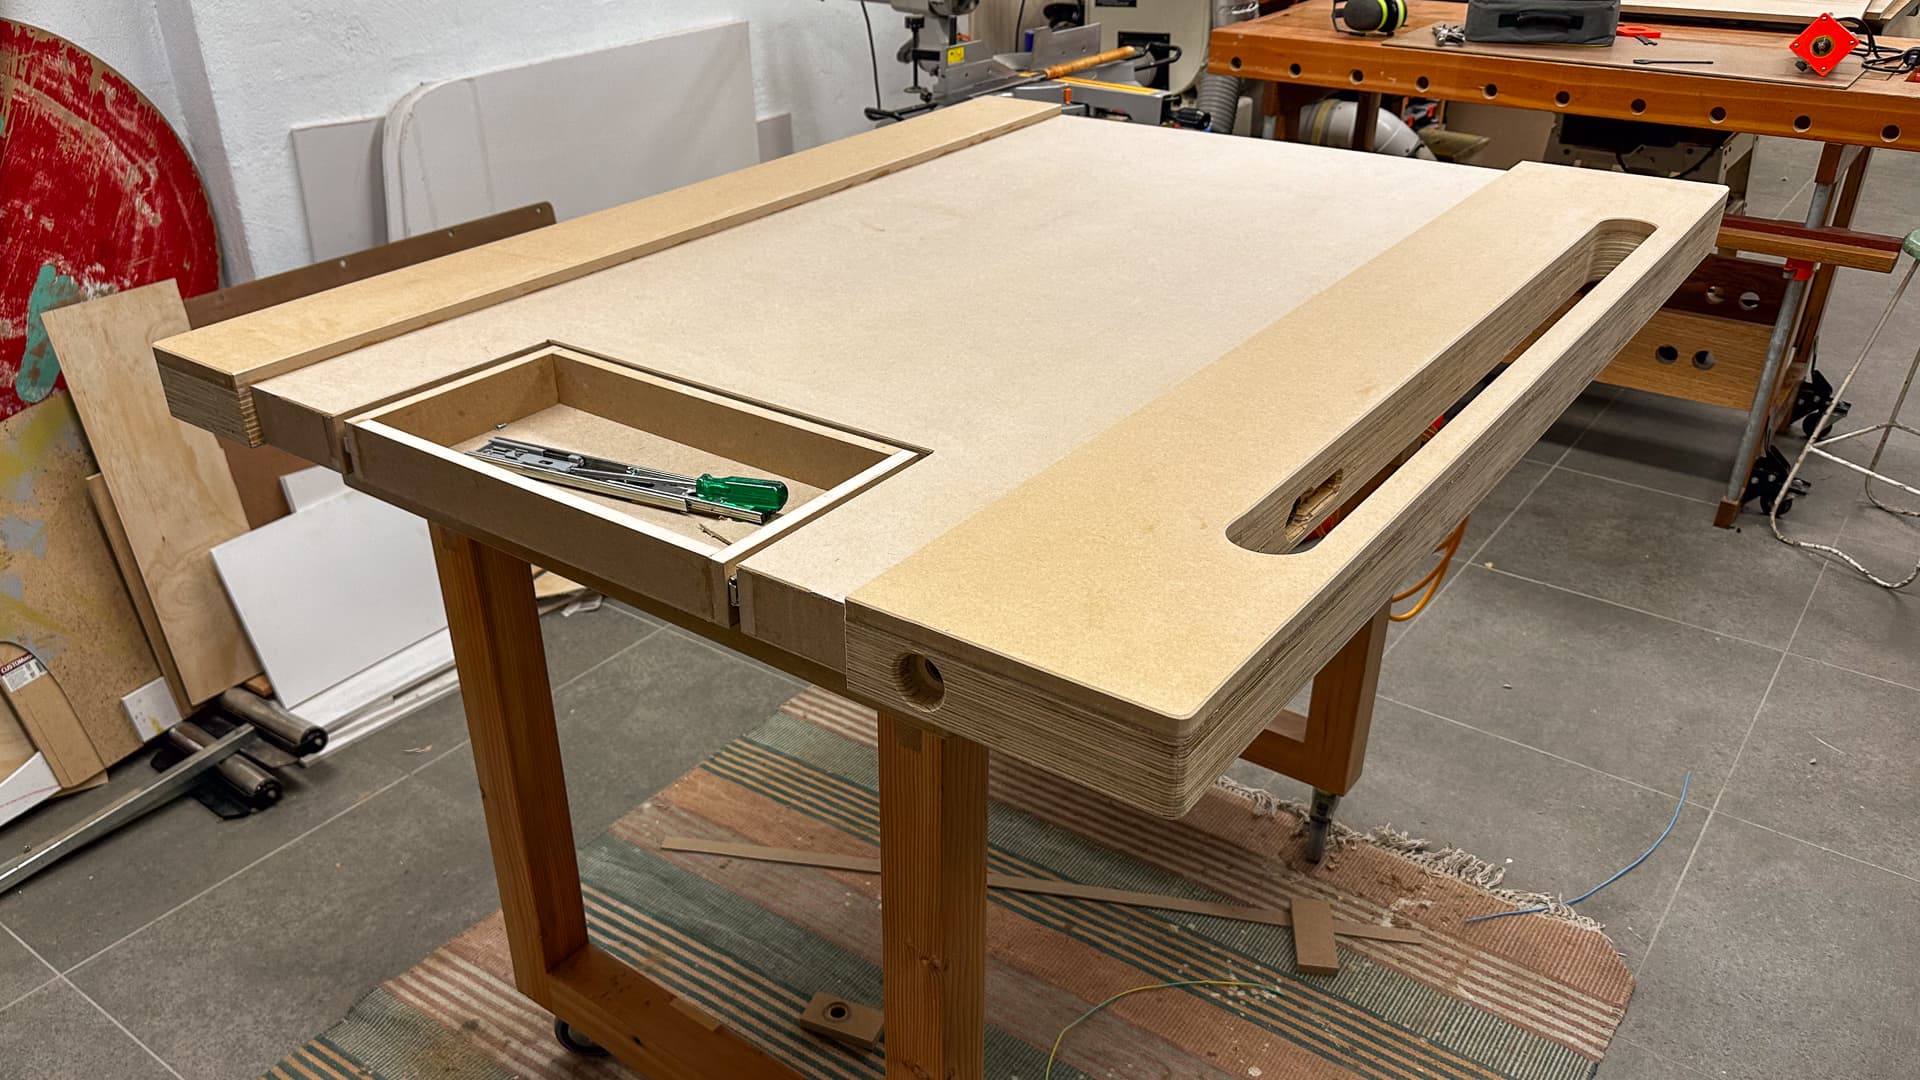
A bit of fun this morning - an access panel in the bottom skin for the emergency stop button wiring. I suppose I could have just left a hole but this is way more satisfying.
Thanks to @Fabien for the tip about leaving the top and bottom layers out of the templates too - it even looks cooler!
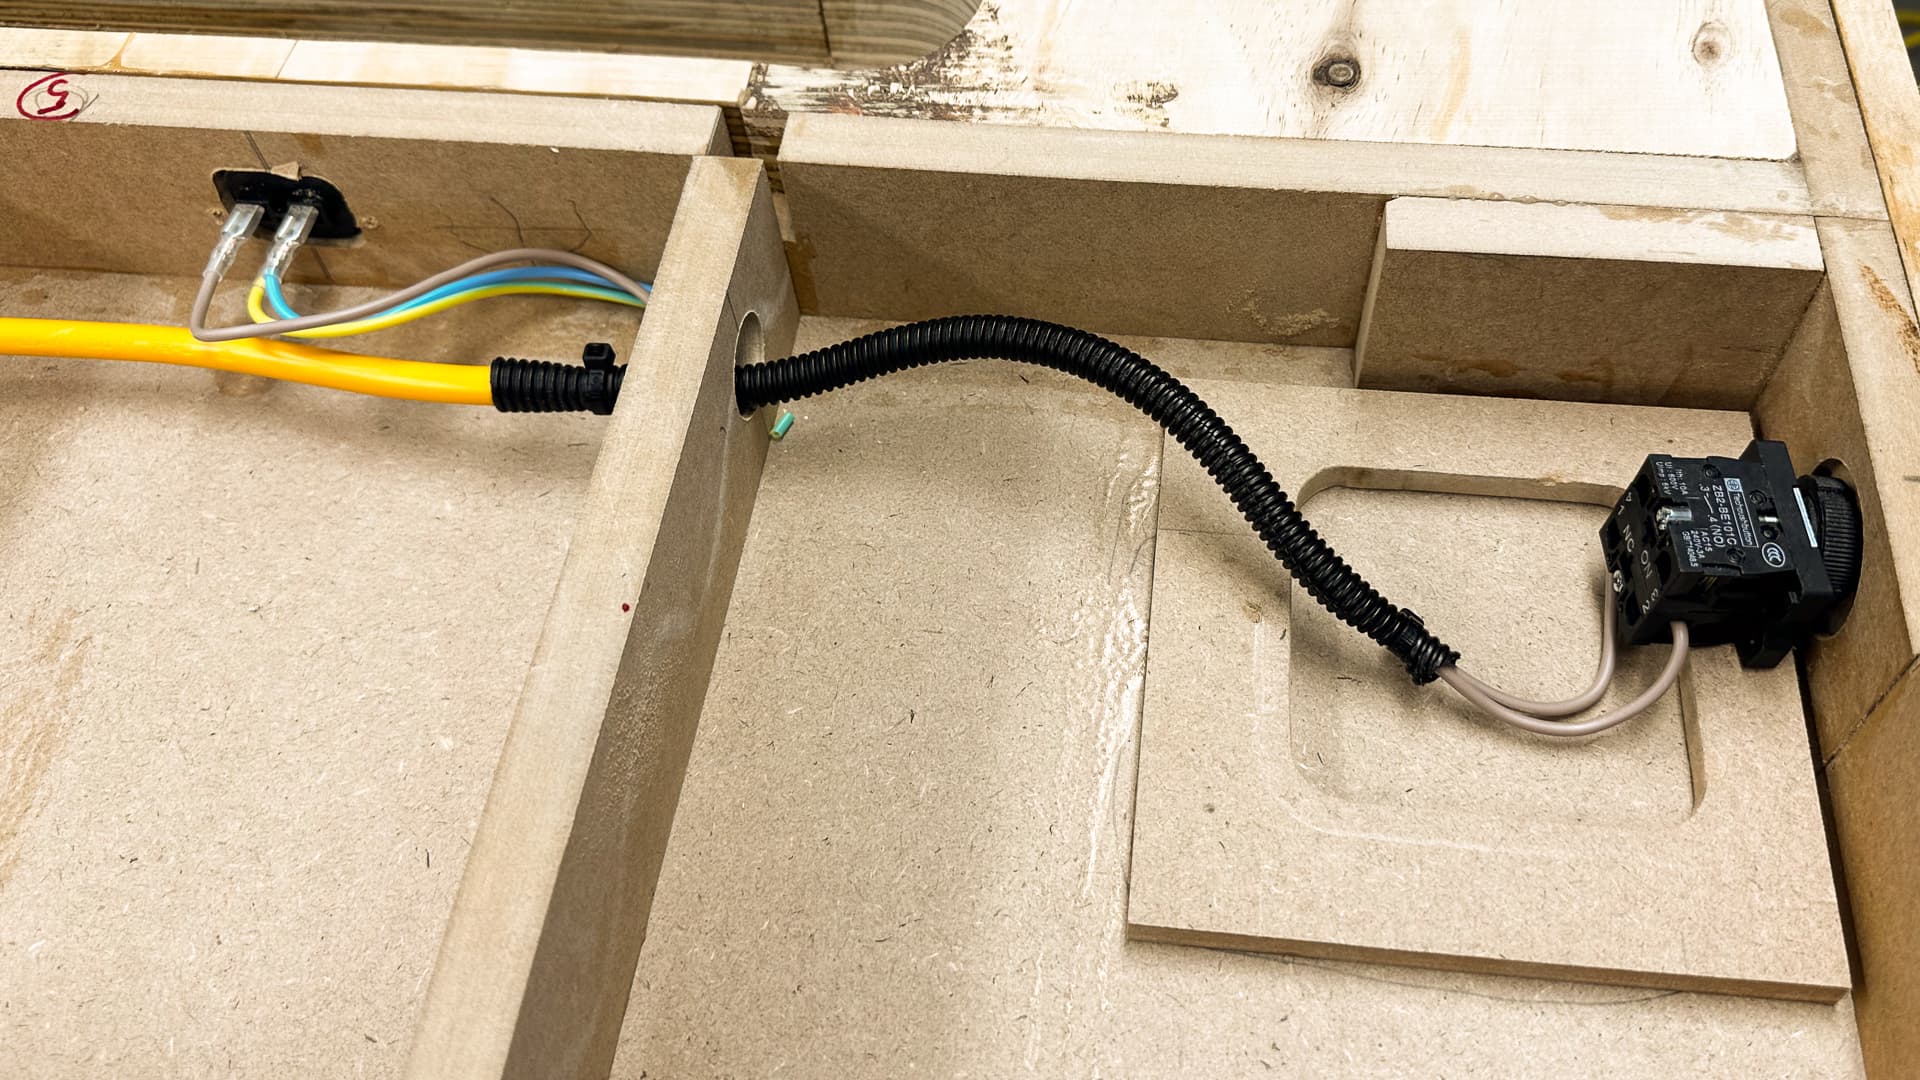
Now the machine can be easily disconnected if need be, and we have a permanent E-Stop mounted.
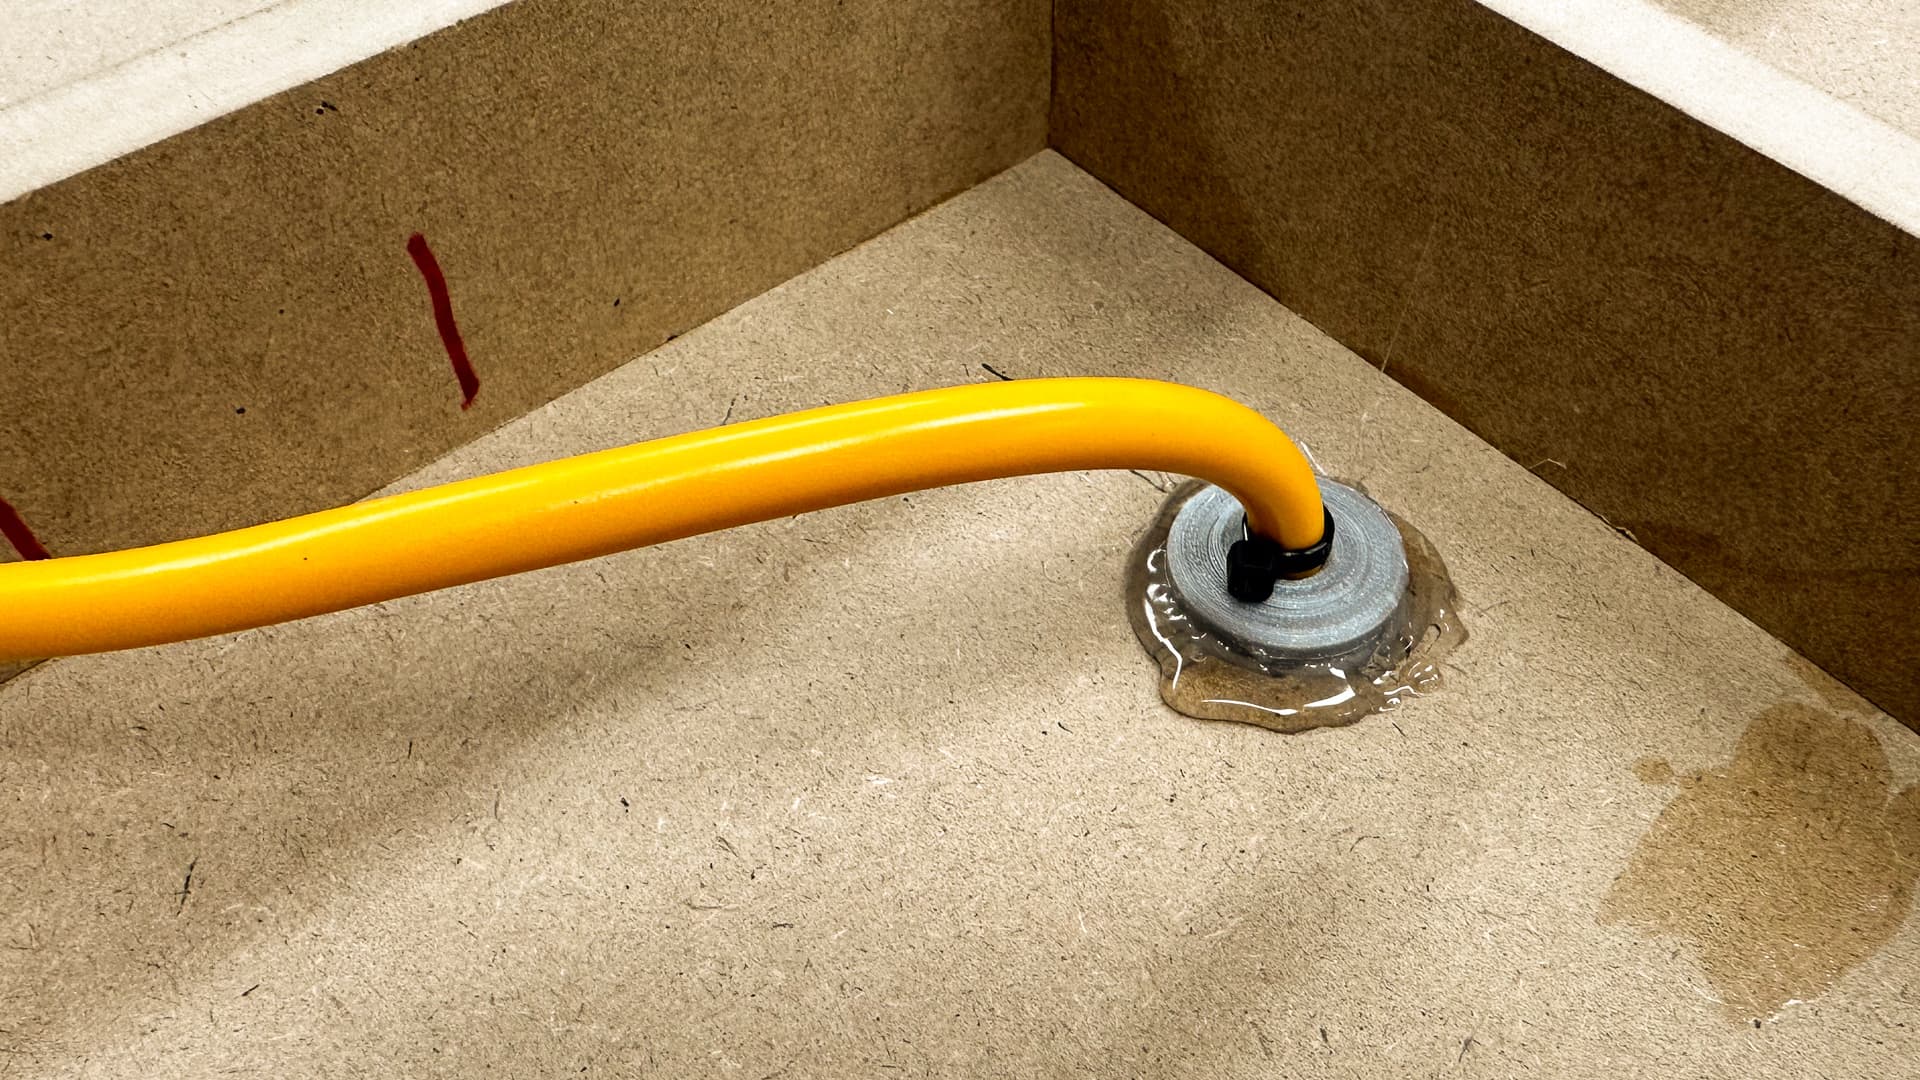
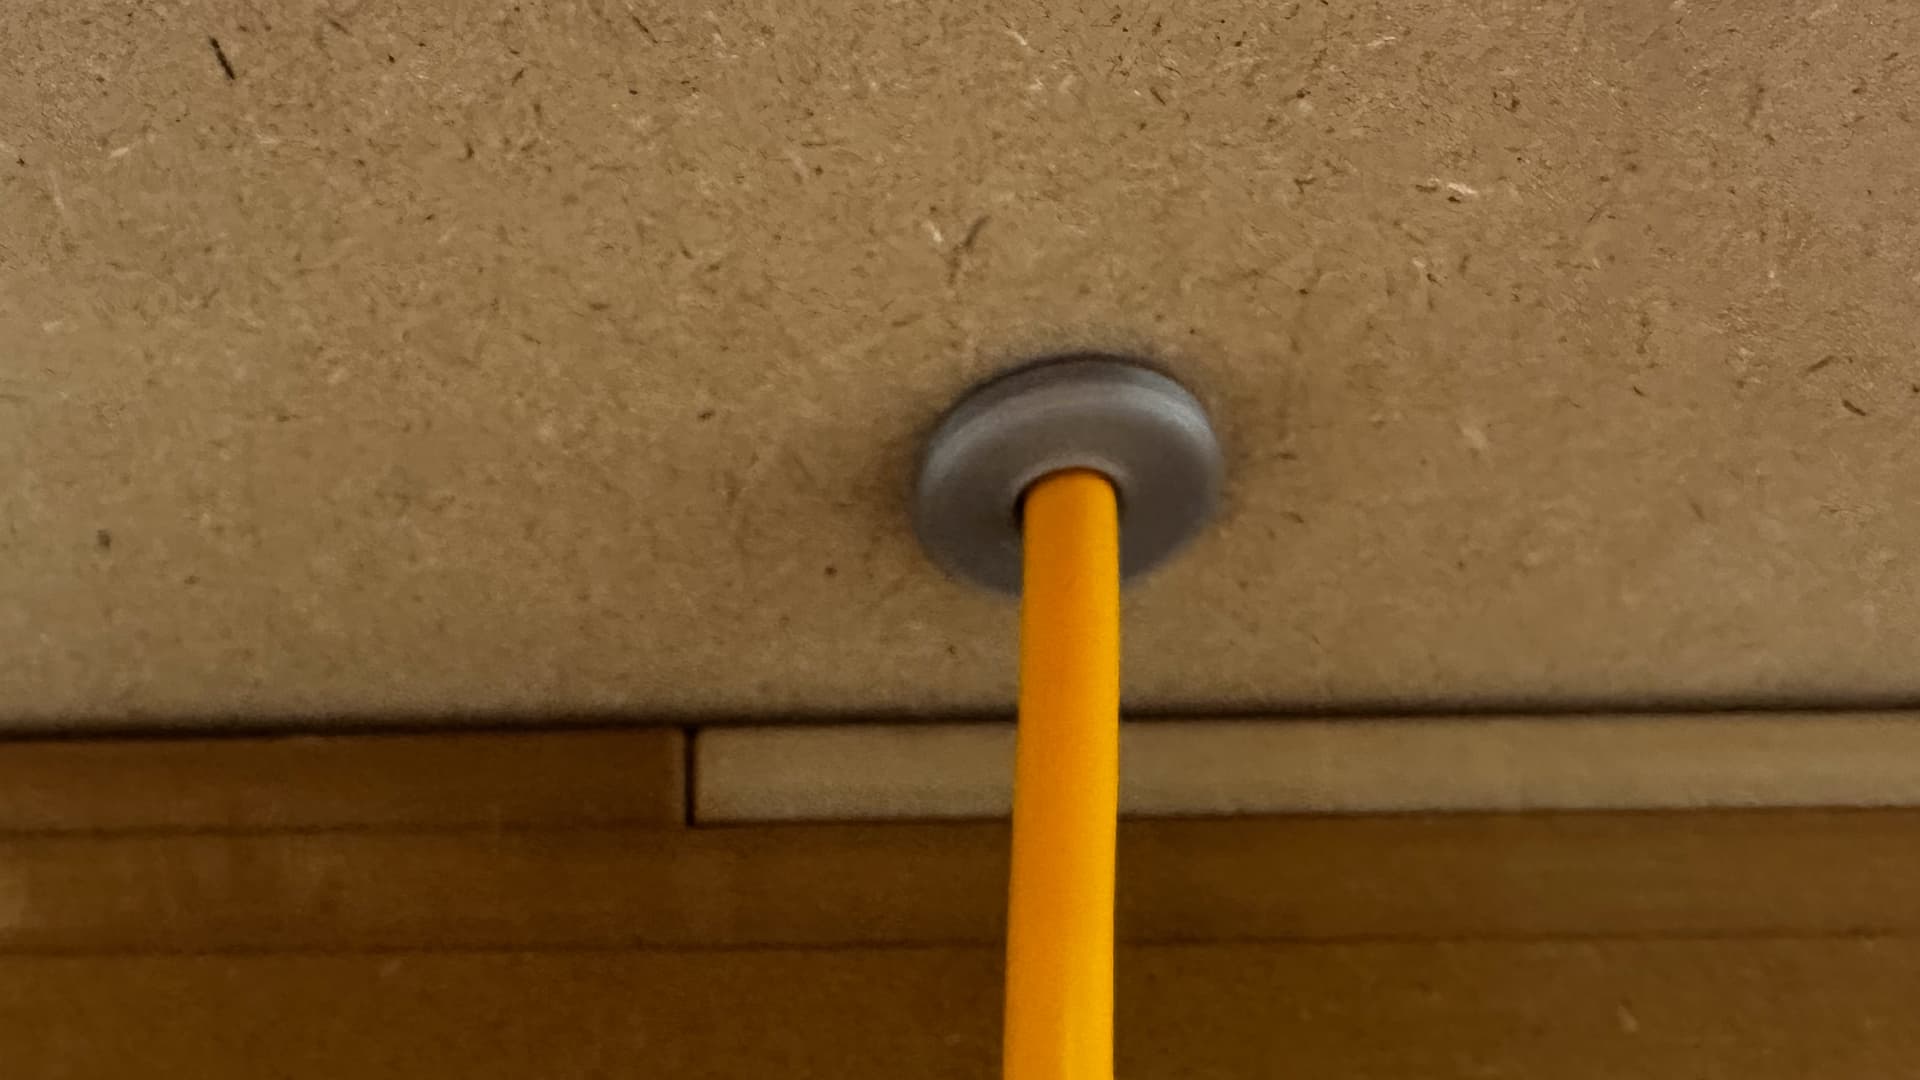
The 240v lead enters via a simple screw-together cable gland so that it can be removed if need be, the flange on the inside is just held with gobs of hotmelt glue.
E-Stop not permanently fitted which is why it’s wonky in the pic, which also handily shows the inside view of the access hatch.
A smarter man than me might have just used a 16mm top skin like he did last time, and wouldn’t keep second guessing himself.
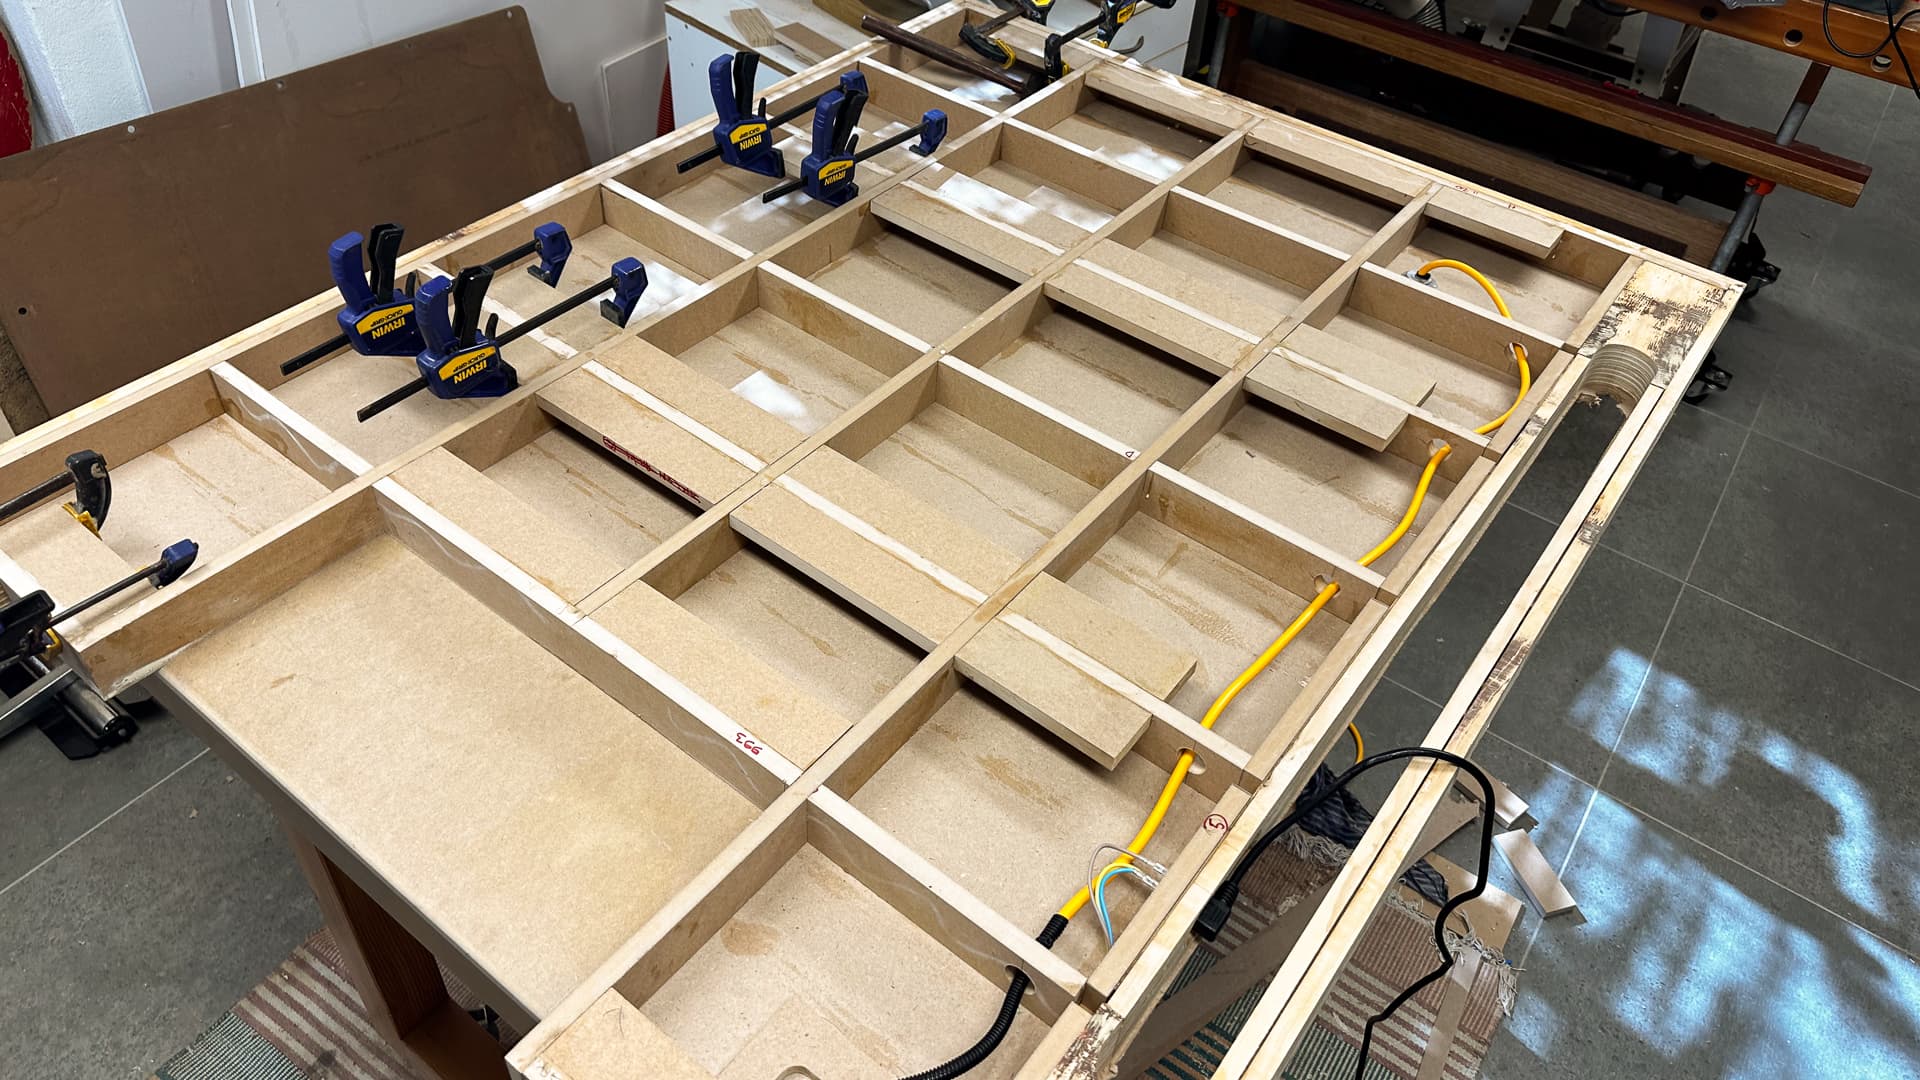
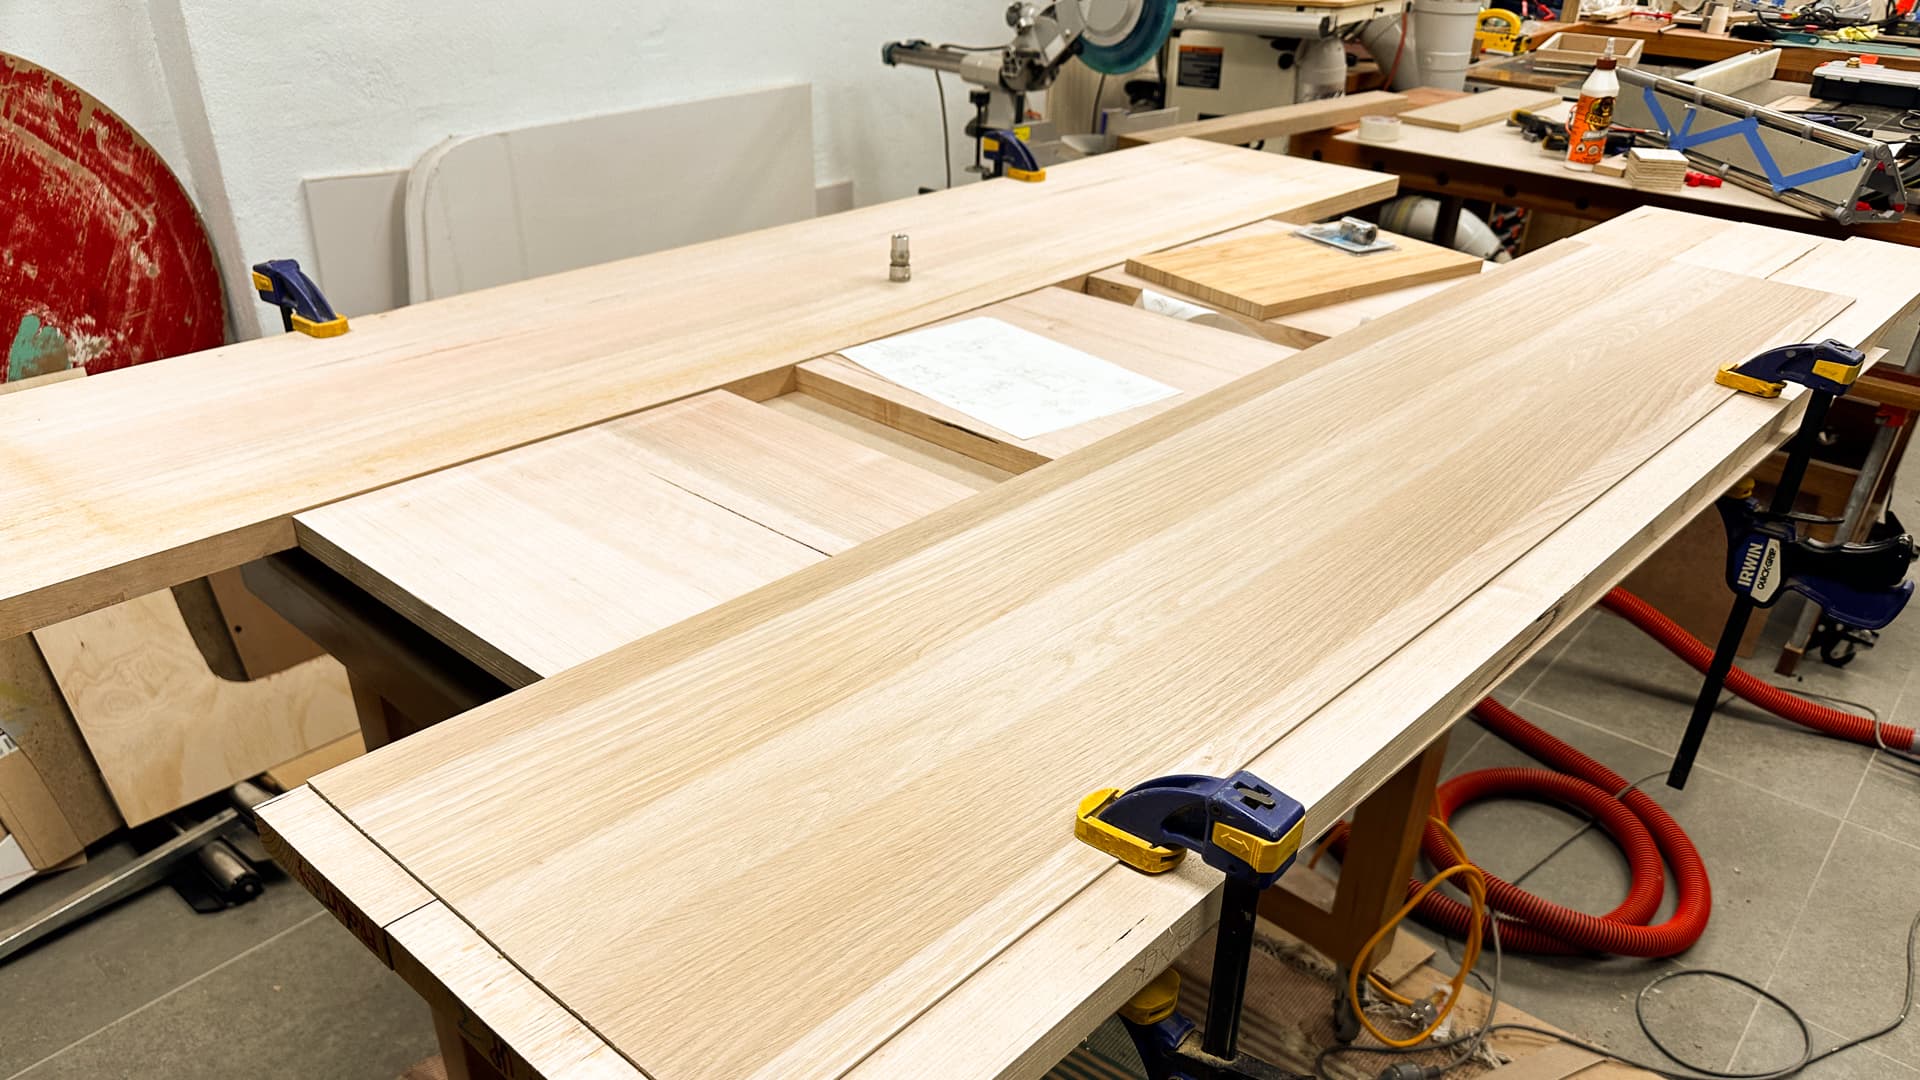
I had planned to simply double up the cross beams at 500mm centres to give myself a bit of screwing leeway for the spoil board(s), but realistically screwing into the end of MDF is not something you want to do too often and a near miss will result in a certain split. So gluing little landing pieces in was a relaxing way of filling in a small amount of time followed by a lengthy wait for the glue to dry.
I do have a plan at the back of my head - can’t be sure if I proceed or not, because all that is sensible says “just use screws”, but there’s a not a lot about this build that smacks of taking the easy way out.
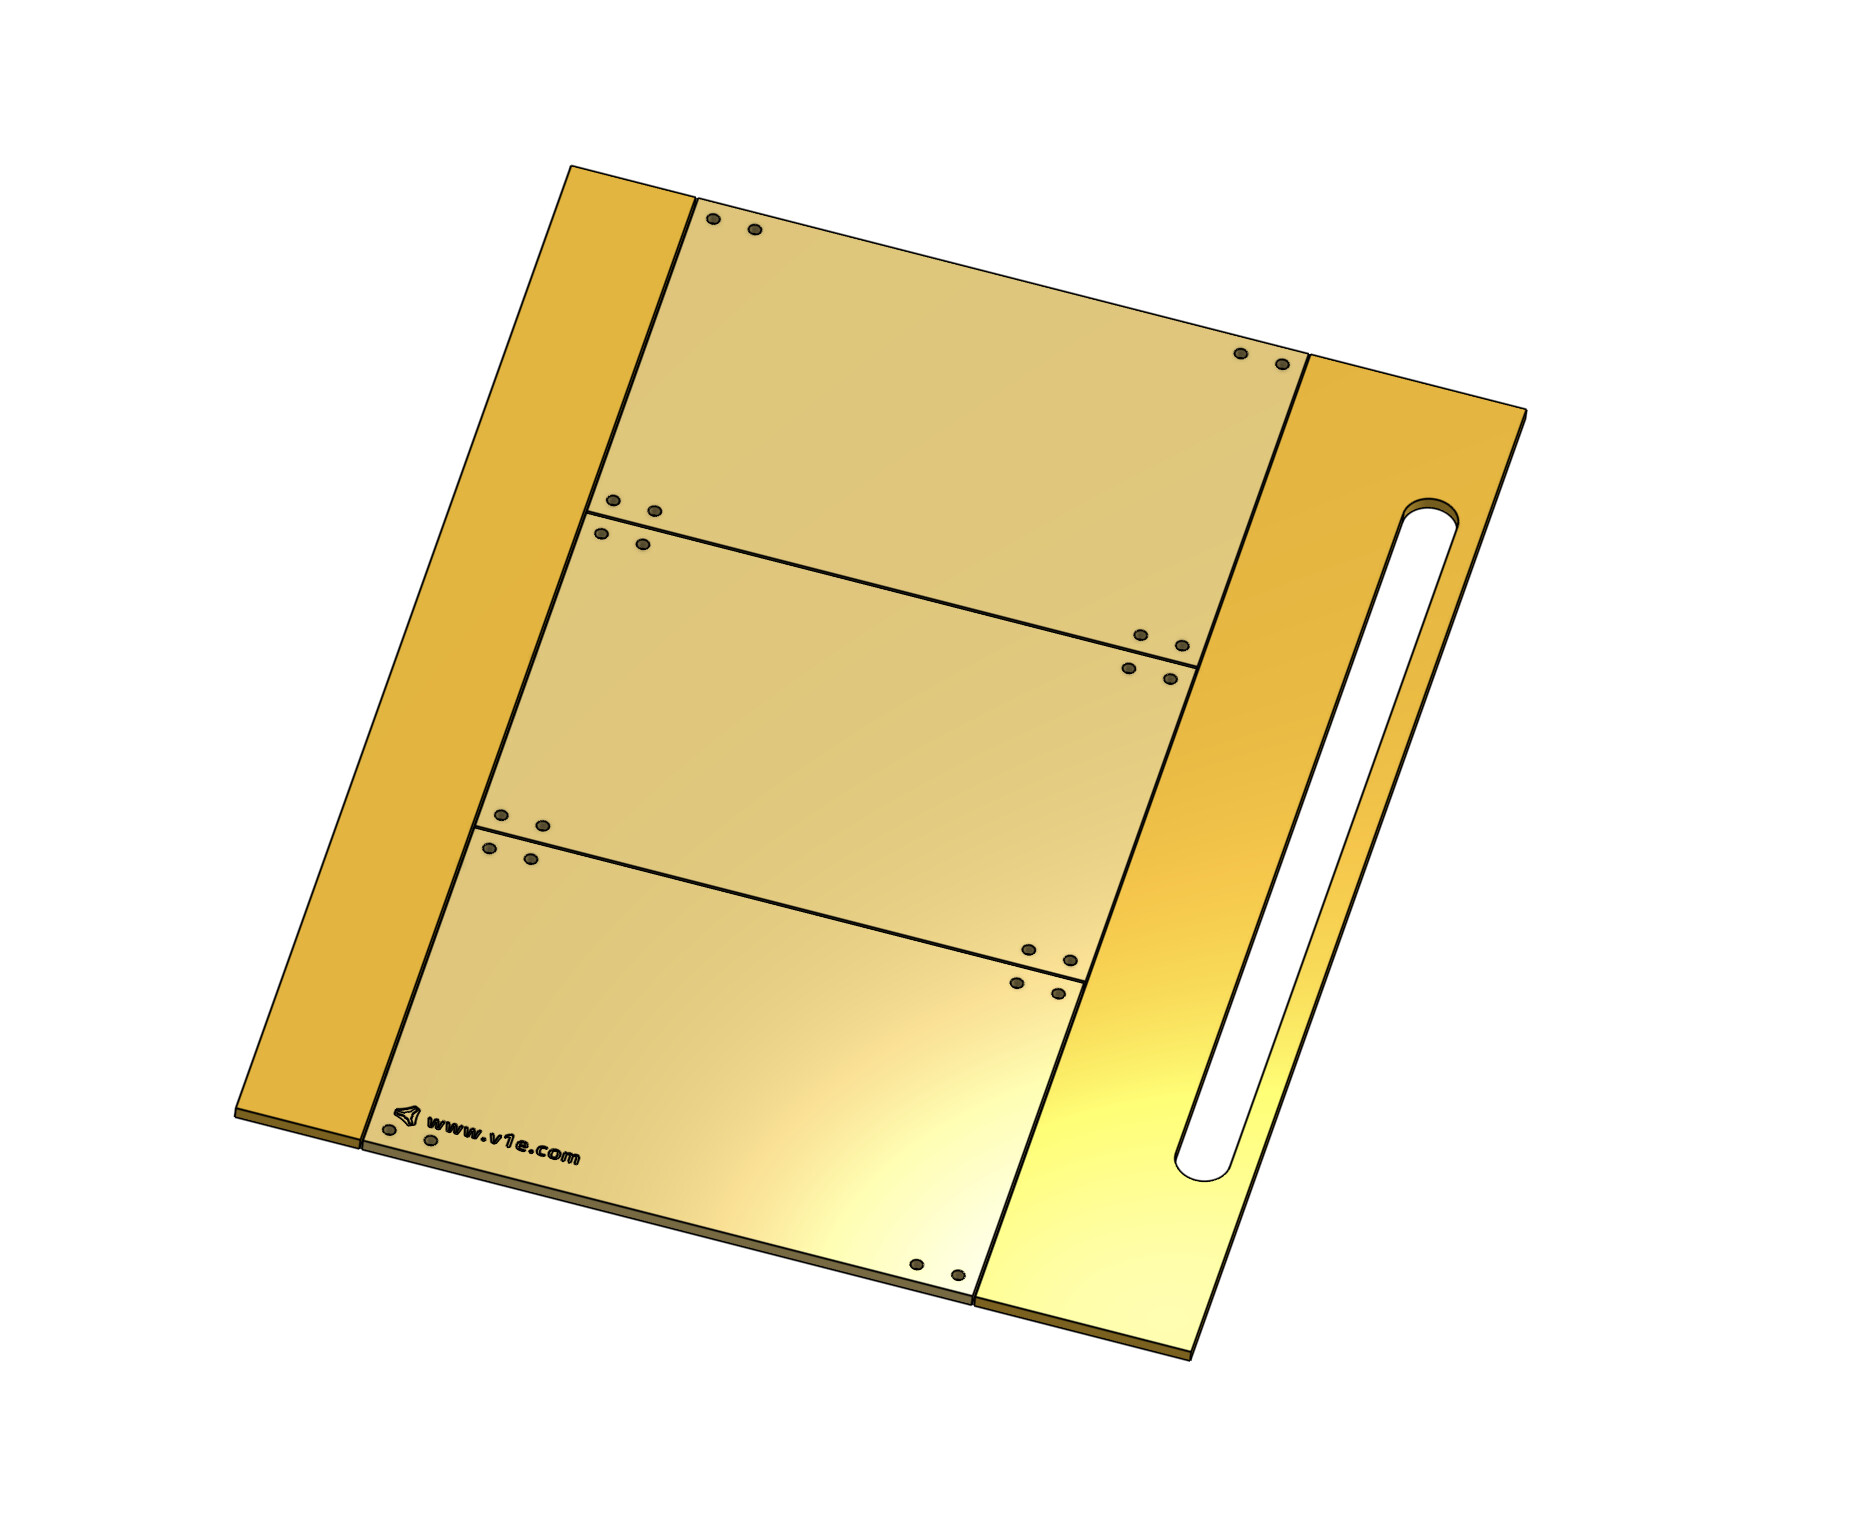
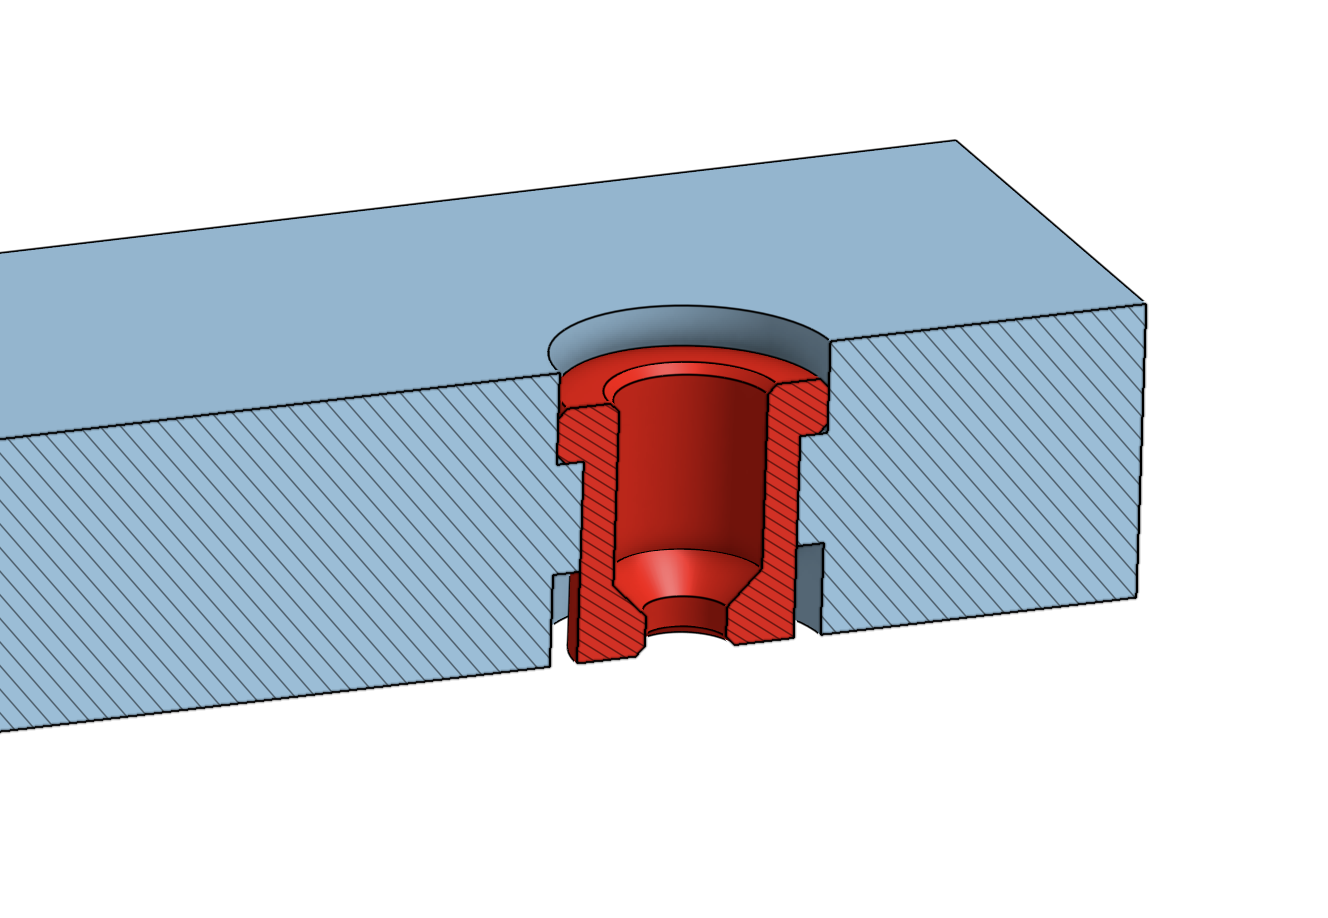
So the concept, if indeed I proceed once the machine is up and running, is to use printed grommets which will lie about 2mm below the surface, that carry screws ten or twelve mm down, and hold into a stepped recess cut symmetrically, so the board can be flipped. All boards are exactly the same size, and like many things on this build, if I proceed this will be more in the name of art than speed of construction.
Happy to hear suggestions and criticism on this one particularly!!
If this looks like the same shot as a day ago only reversed, it’s because it’s the other skin under the same pile of weights.
Progress has been steady but we have grandchildren coming for a few days, so sadly this is how it will look until the weekend. We are getting closer on all fronts though.
I can’t quite see what you’re tring to achieve with the grommet though?
Why not just make a countersunk hole?
Do you fear the mdf would crumble/deform at some point?
Or is it just a “typical Peter thing” where you just want every single piece of this build to look gorgeous?
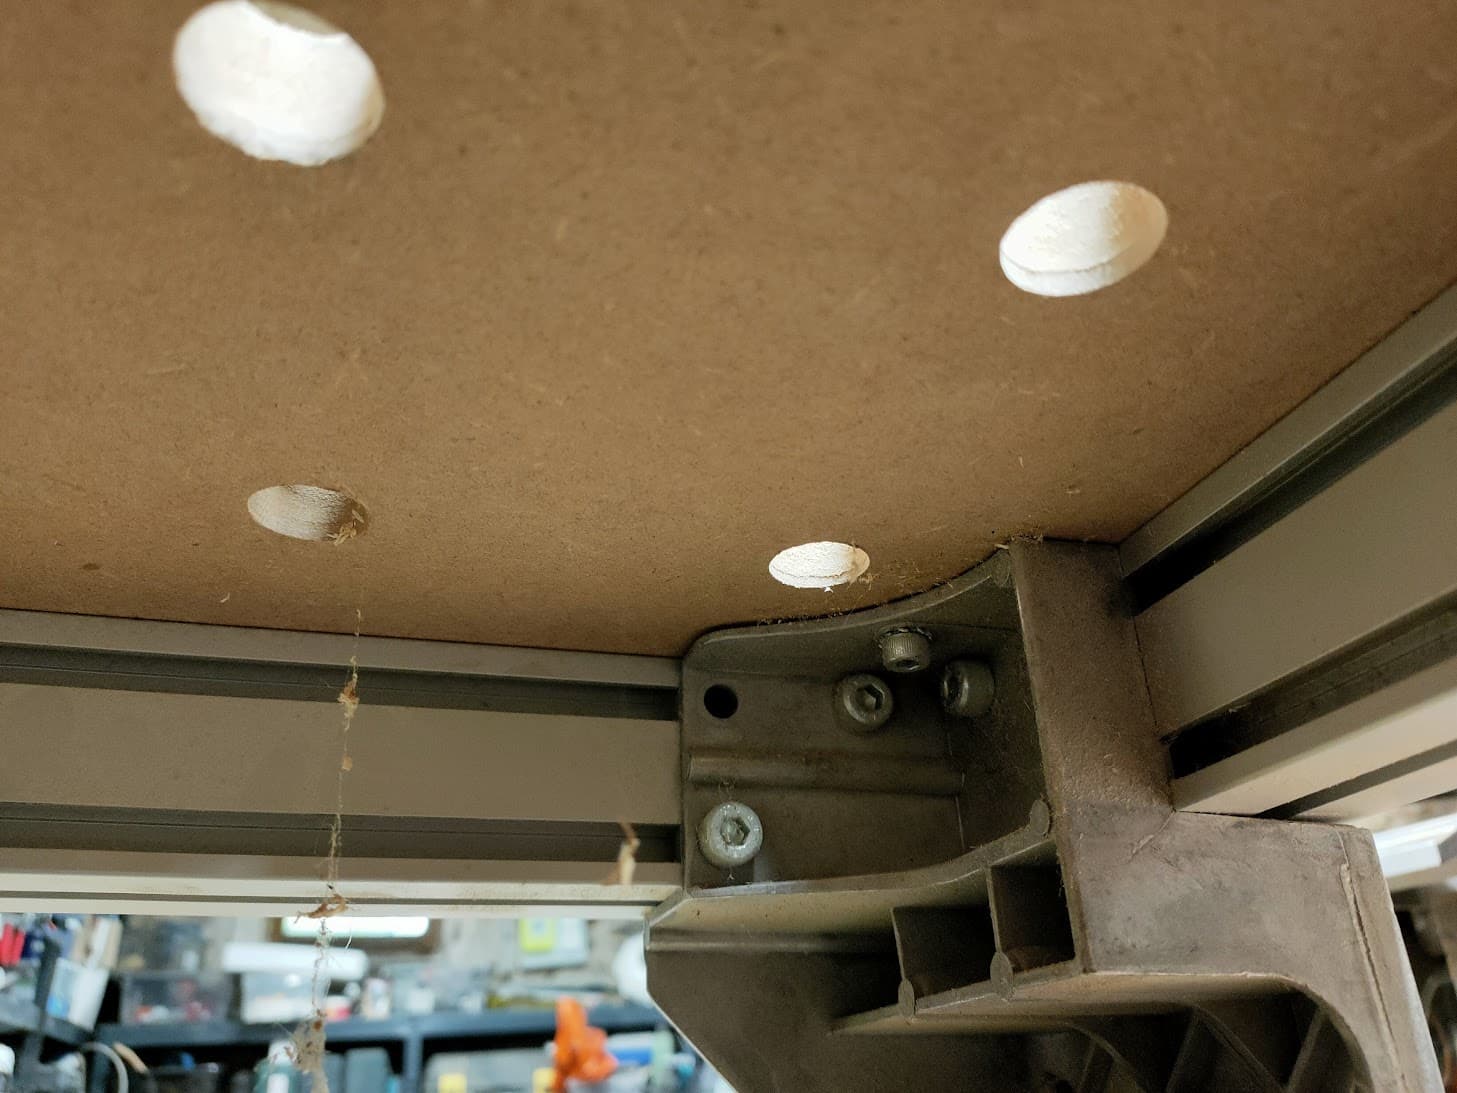
If you want some inspiration on a similar idea, here’s how the top of my MFT3 is held
They buried an M6 insert into the MDF top, and then added a bracket underneath the table with an m6 screw pulling the top down
Counter sunk screws are the most likely end result but there is some logic to the thought process. This is one of those cases where “good enough” probably is.
I’m thinking to save ten dollars worth of MDF, I can flip it and use the other side when the first side gets manky, just like I taught the kids to do with toilet paper!
I have tapped holes in MDF very successfully in the past, and have considered doing that and using nylon screws - but the real reason is to get the screw head as far below the surface as possible and still keep the thing reversible.
After completely macerating several sheets of foam with the LR2, disaster is inevitable!
Note that the boards are identical so they can be flipped, rotated and interchanged. It’s all stupid overkill, but I’m building this one to use and screw into.
Or is it just a “typical Peter thing” where you just want every single piece of this build to look gorgeous?
To be fair, there’s a lot of that in the thought process as well - I guess I am just trying to get a “shop-bought” kind of feel…
with an MDF table…
Yeah… I can cut out a mid section or two, but I decided a few days ago not to make that provision - I know how it would work but will I ever need it?
Since when has that ever been relevant? I really would like to do some nice artistic finger joints, but can’t at the moment though my table theoretically has got the option to make a hole. Or not, since I have the drawers… Eh…
Makes sense
Once again that’s how thé mft3 is meant to work: flip the top when it’s too awful
With the insert, you can easily do this I think, just set it in the middle and it can be bolted down from both sides
Your grommet design could bé easier, cheaper and more flexible though
Coming from someone who has never had a CNC and has no idea how this is going to play out…
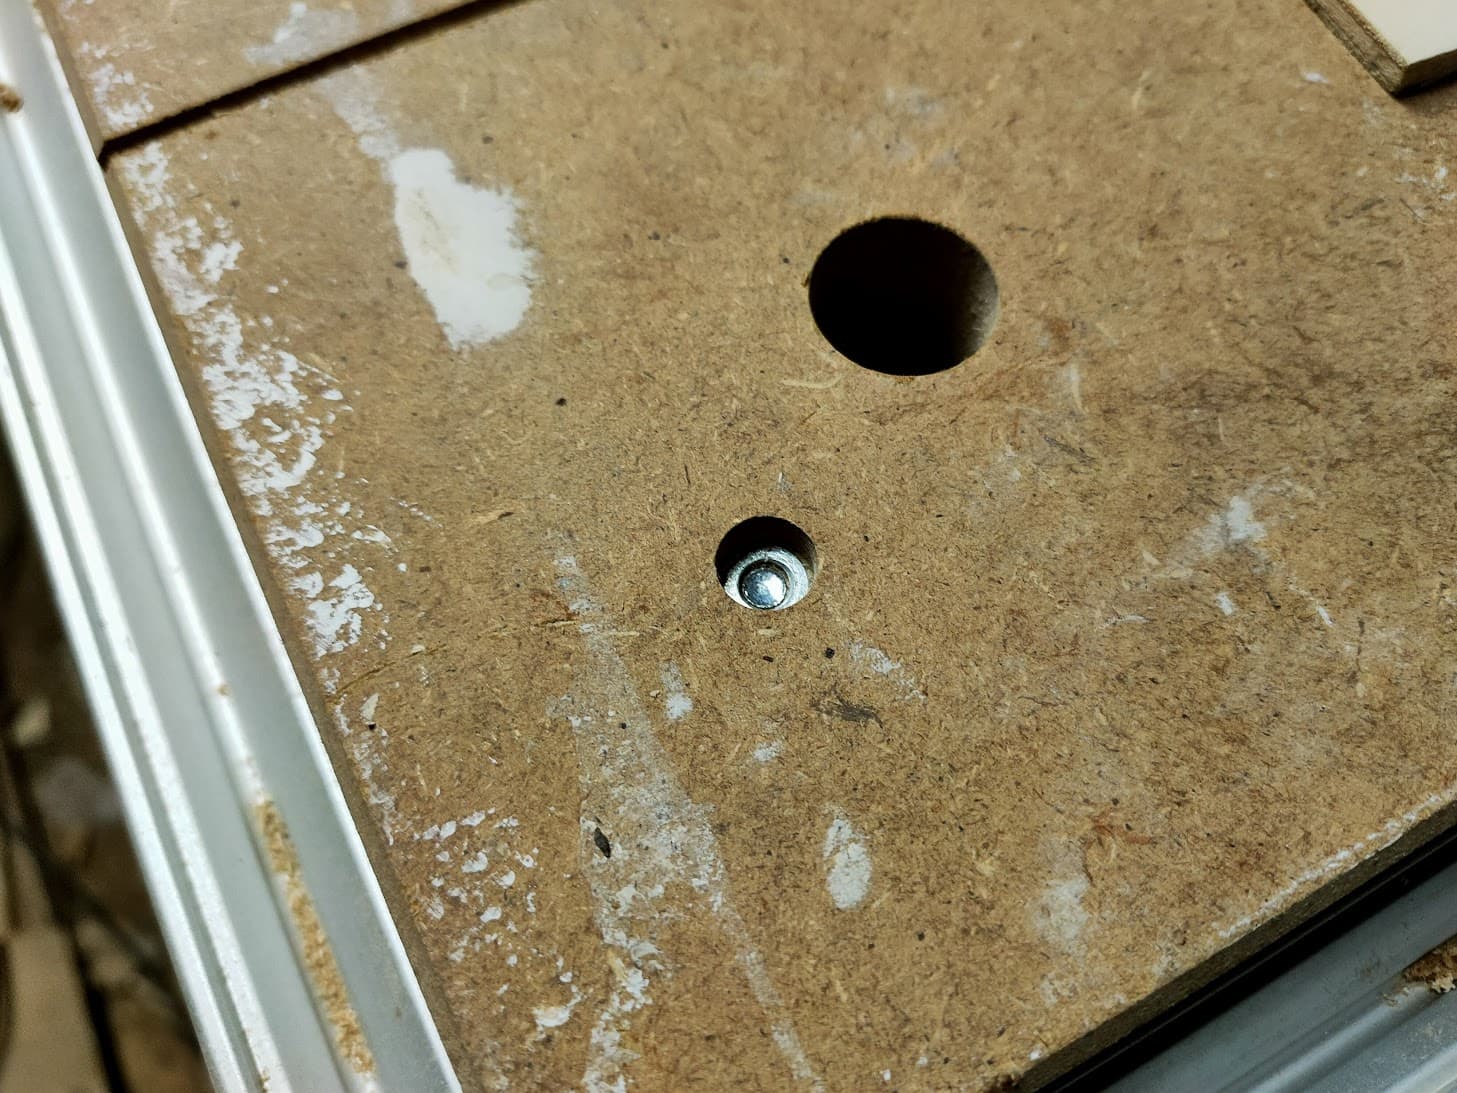
My spoil board is 3/4" MDF. A new sheet sits 1/4" taller than the rails my machine rides on. I figure this gives me a good 10mm at least of surfacing that can be done over time, so I just buried my screws pretty deep so I can keep surfacing until I run out and need to change it.
This is how I do mine. It doesn’t sit proud but i have yet to have any issues with it. You can let it get pretty bad before you ever need to surface it. And if you pay attention when you set up your cam you will rarely get too deep into it. Always want to go into it some. But don’t make the same mistake as me and run it 5mm+ into it LOL
I haven’t double checked it yet, but I’m not 100% sure that I could hit that screw if I tried. Definitely not if I have 1/2" or greater material on top.
Will have to watch it as it gets thinner maybe.
My goal was to make it have to be a REALLY bad mistake to ever hit it
Well it turns out they were a bit late arriving, and there’s no point in having a hulking great 17 year old grandson at your disposal if you don’t get some help moving the nasty MDF table outside for a bit of router fun.
I’m not saying I’ll be getting any more done for a few days, but this was a lovely surprise.
The drawer suffered from my “clamp and glue no brad” construction and it’s a teensy bit out of square. It’s just enough so that I really should rebuild it, but I might just give it a touch up with the table saw and see how it goes - there’s nothing to lose really.
Ha! I snuck down this evening while the teens were engrossed on “their devices” and slapped on the first coat of sealer.
Couldn’t stop thinking as I did, that a litre of quality clear waterbased satin cost 140% of the total MDF cost, or 60% of the job!
I could have lessened that percentage if I’d lived out my dream and bought coloured MDF for the spoil boards, but really, at more than six times the price of the standard stuff that isn’t going to happen.
Still I’m so pleased with what we have so far that I didn’t wait for the paint to dry before cracking off a pic!.