The answer is no you are not allowed to do that. If you want an exemption, please contact me privately.
You have to understand If I give public permission, that makes my license invalid. I think most of you understand the spirit of the license. But please, best not to suggest breaking it.
I think i watched the same video which gave me this idea…
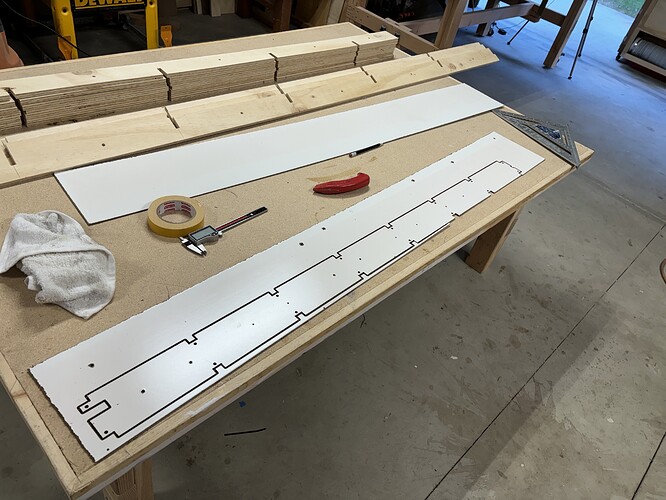
I used my Primo with 18 x 27 workable area to cut my full size struts. I used lightburn to import the SVG file from the calculator generation, then placed 1/8” holes equally spaced down the exact center lengthwise. Then I made three identical copies of that original.
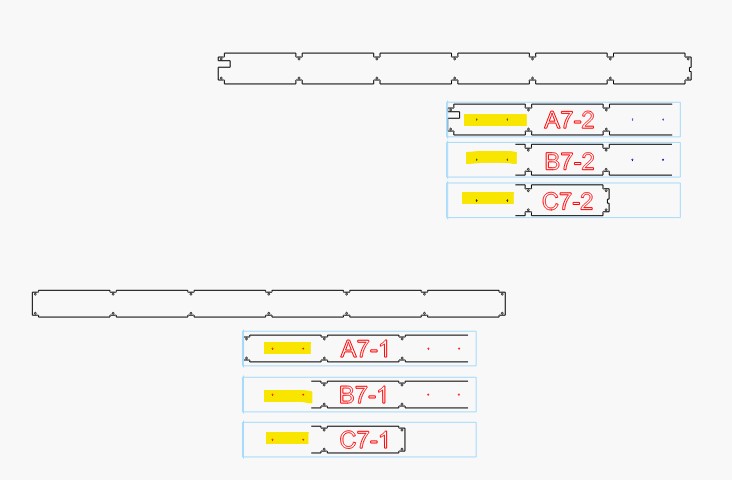
Taking those three copies, I took one and cut 2/3 of it by subtracting a rectangle. Used it to line up the next removal… etc. until I had three pieces of the strut plates minding where the 1/8” locating holes were. The idea was to cut the first dxf file, then slide the strut down and line up two locator holes and cut the center section, then the last. Worked perfectly. I used screws where the 1/8” holes were.
Created the dfx files so the left one had right side open, middle had both L and R side open and the right side had the left side open. Using estcam (whatever) i created the tool paths accordingly, three separate files, one for each section,
Ran repretier with left cnc file, then moved strut to new location, screwed it down and ran middle cnc file, then the third. All on the short Primo.
You can see the location holes in tis image… done in three separate cnc files
the highlighted holes are where I put the screws to locate the position for the 2nd and 3rd cuts.
basically, if I can do this, anyone can do this
He’s got that cool enclosure, which likely complicates cutting the strut, even indexed.
I do think it would be interesting to look at installing a slot in the wall, with a removable cover that would allow a longer workpiece to be passed through when needed. Looking at the surroundings there appears to be more room on the sides, but it might not make sense if the machine is installed so the Y rail and belts block anything from that direction.
I went back and looked and I have to admit that my method provides no help given that enclosure restriction. My apologies.
Guess you can learn a lot by reading. LOL
I will try the indexed method next time I will need to redo the Strut Plates. The sides/front/back are removable. So I can handle a piece bigger than the enclosure.
In that case, you can do it with the indexing method… just as I did. Good luck. Lightburn was so easy to use making the dxf files.
I keyed off the bolt holes already in the struts. First cut i cut the holes a couple mm into table. Then my cuts were between those sections.
If you open the front you can do it with flipping. I can’t do the indexing thing and pushing it further either, since there is a wall behind my Y.
W.r.t. making the gantry the longer axis:
One thing I didn’t see mentioned is that if you built a 4’x8’ LR4, and you use the gantry on the 4’ axis (so your gantry is almost 5 feet wide), your results would be similar to a machine that had a 5 feet wide gantry and only 3’ on the other axis. You only lost out because a 3’ gantry is more rigid than a 5’ gantry.
It is always better (all else equal) to make the shorter axis the gantry. But it is possible to make either axis the gantry up to 4’ working distance without going significantly “out of spec”.


