Nice,
So did you give the the MGN9 as a proof of concept a go?
Nice,
So did you give the the MGN9 as a proof of concept a go?
Not at this time, because Mike Pensinger @probrwr kindly arranged for an MGN12 to be shipped to me in a shorter time frame than my own delayed orders were taking. ![]()
Cool!
thanks @probrwr for getting it to him!
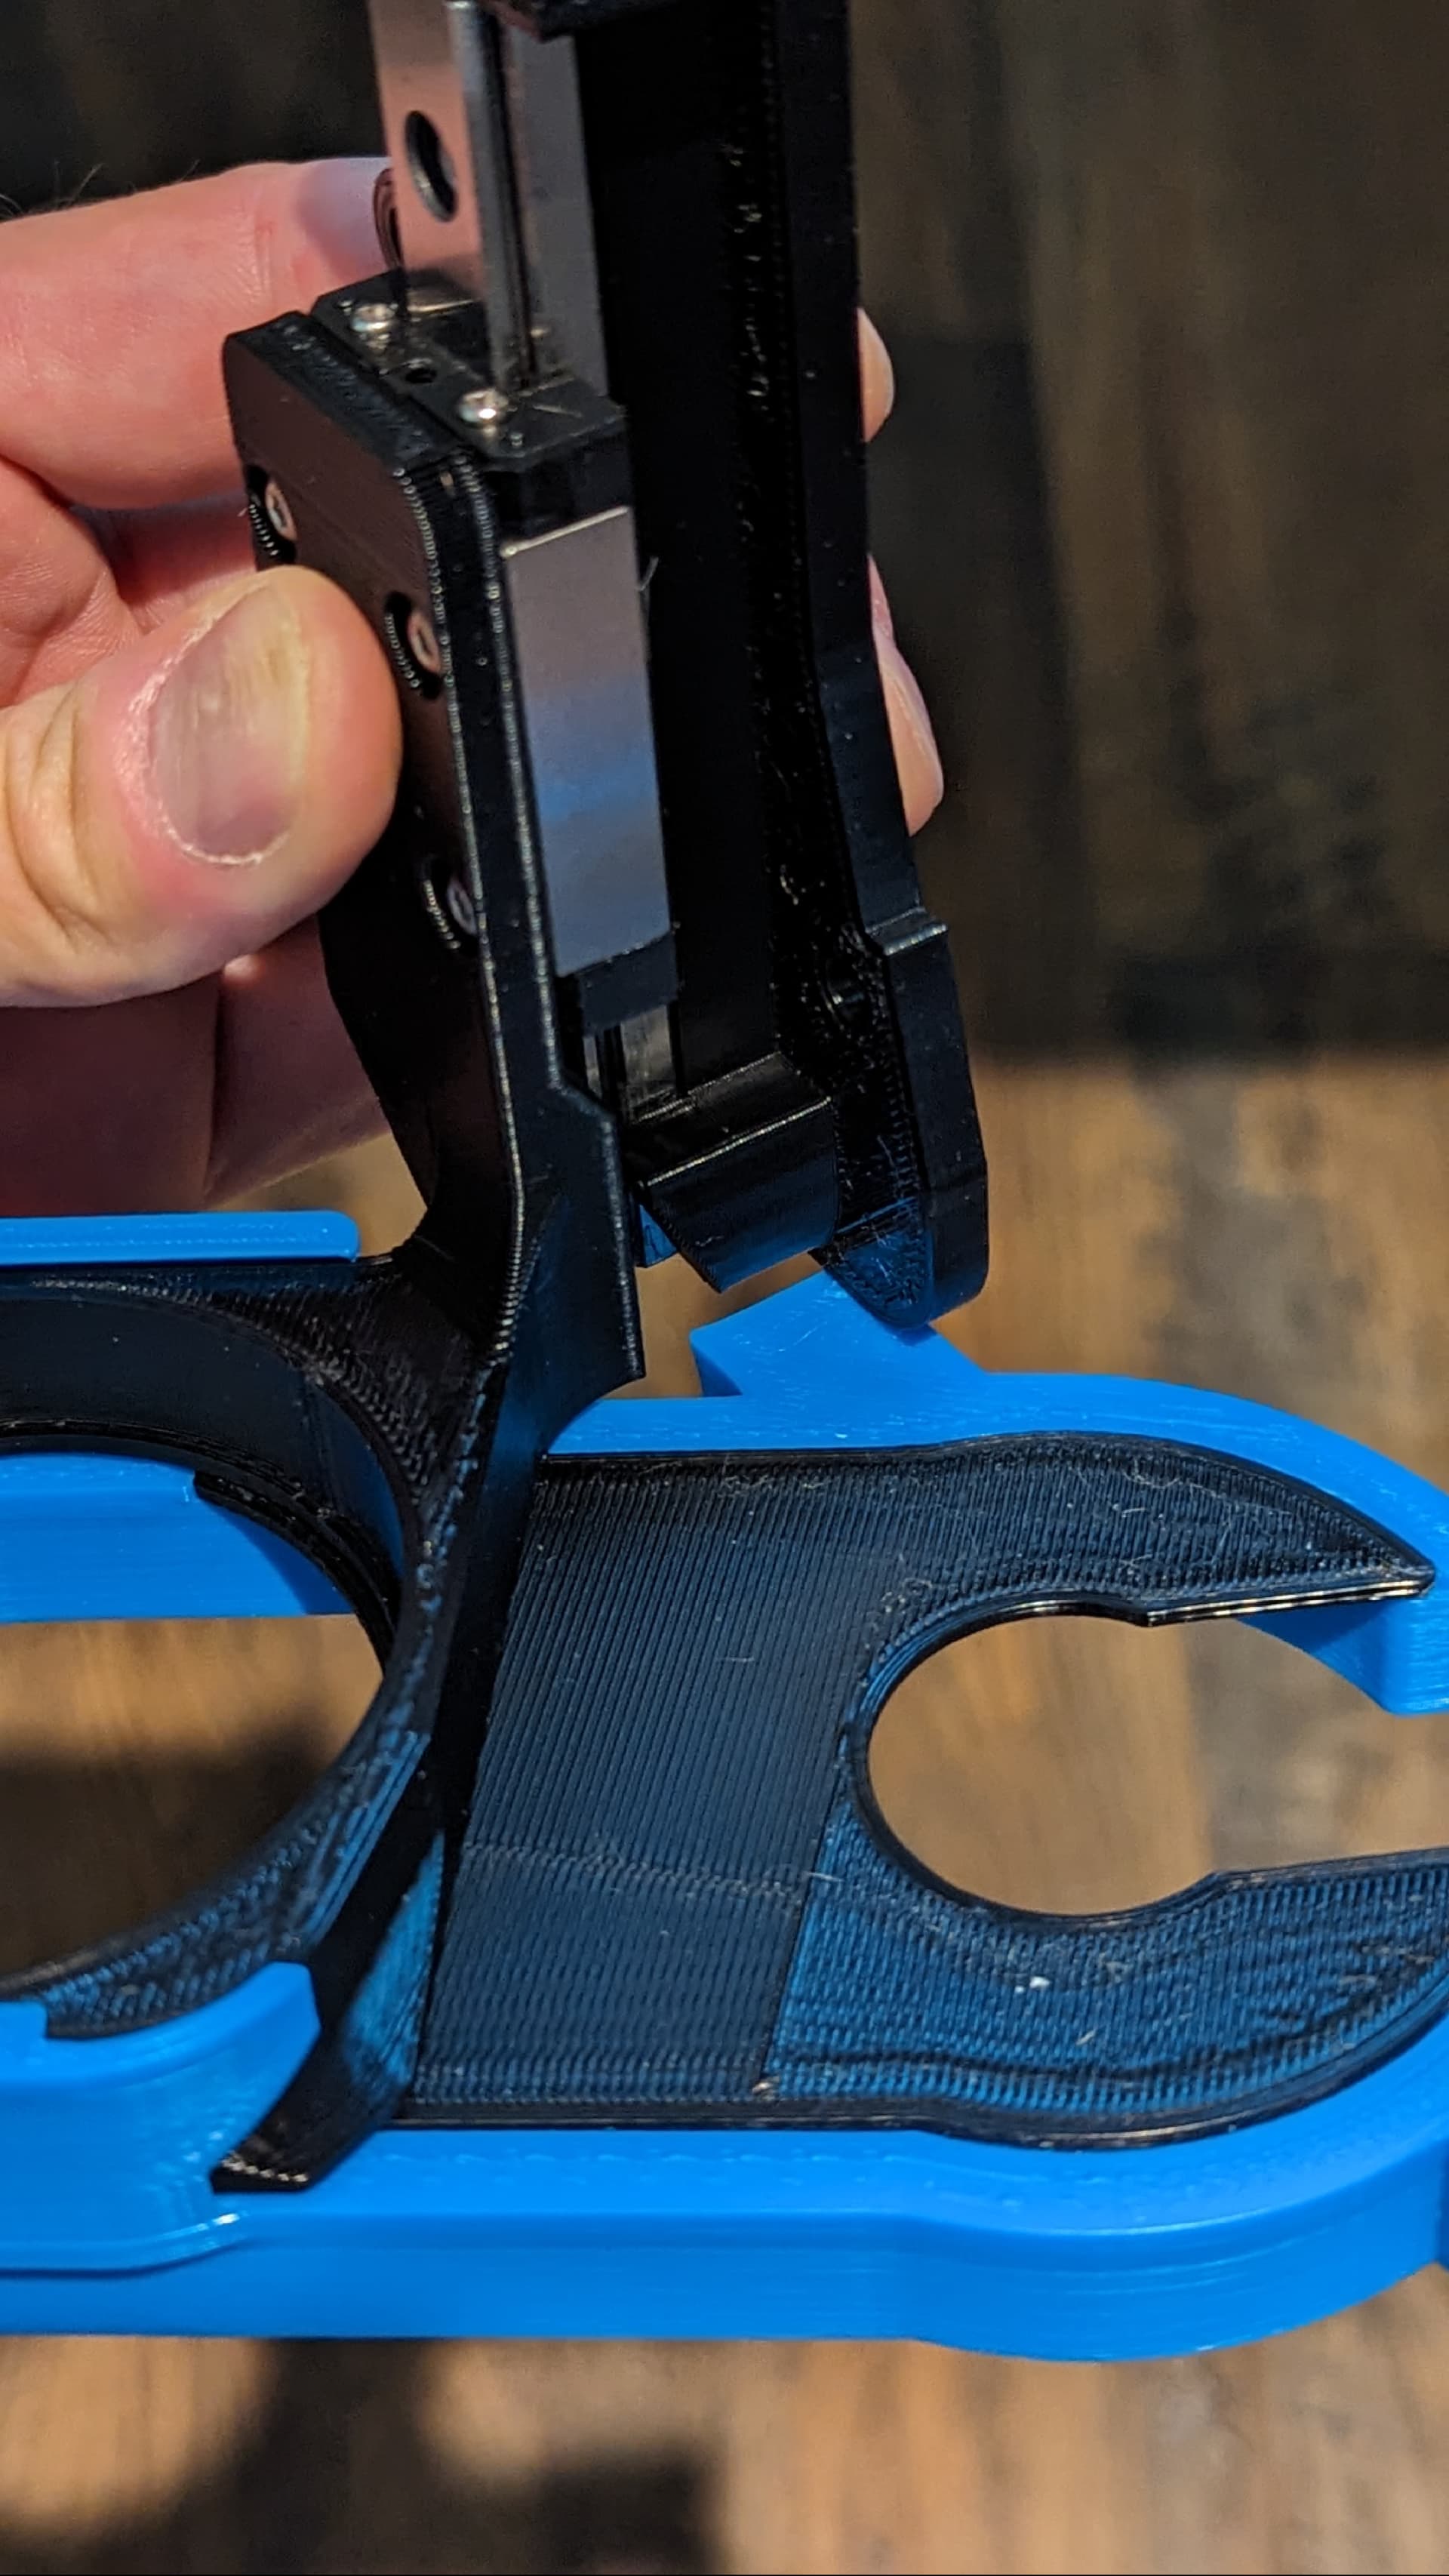
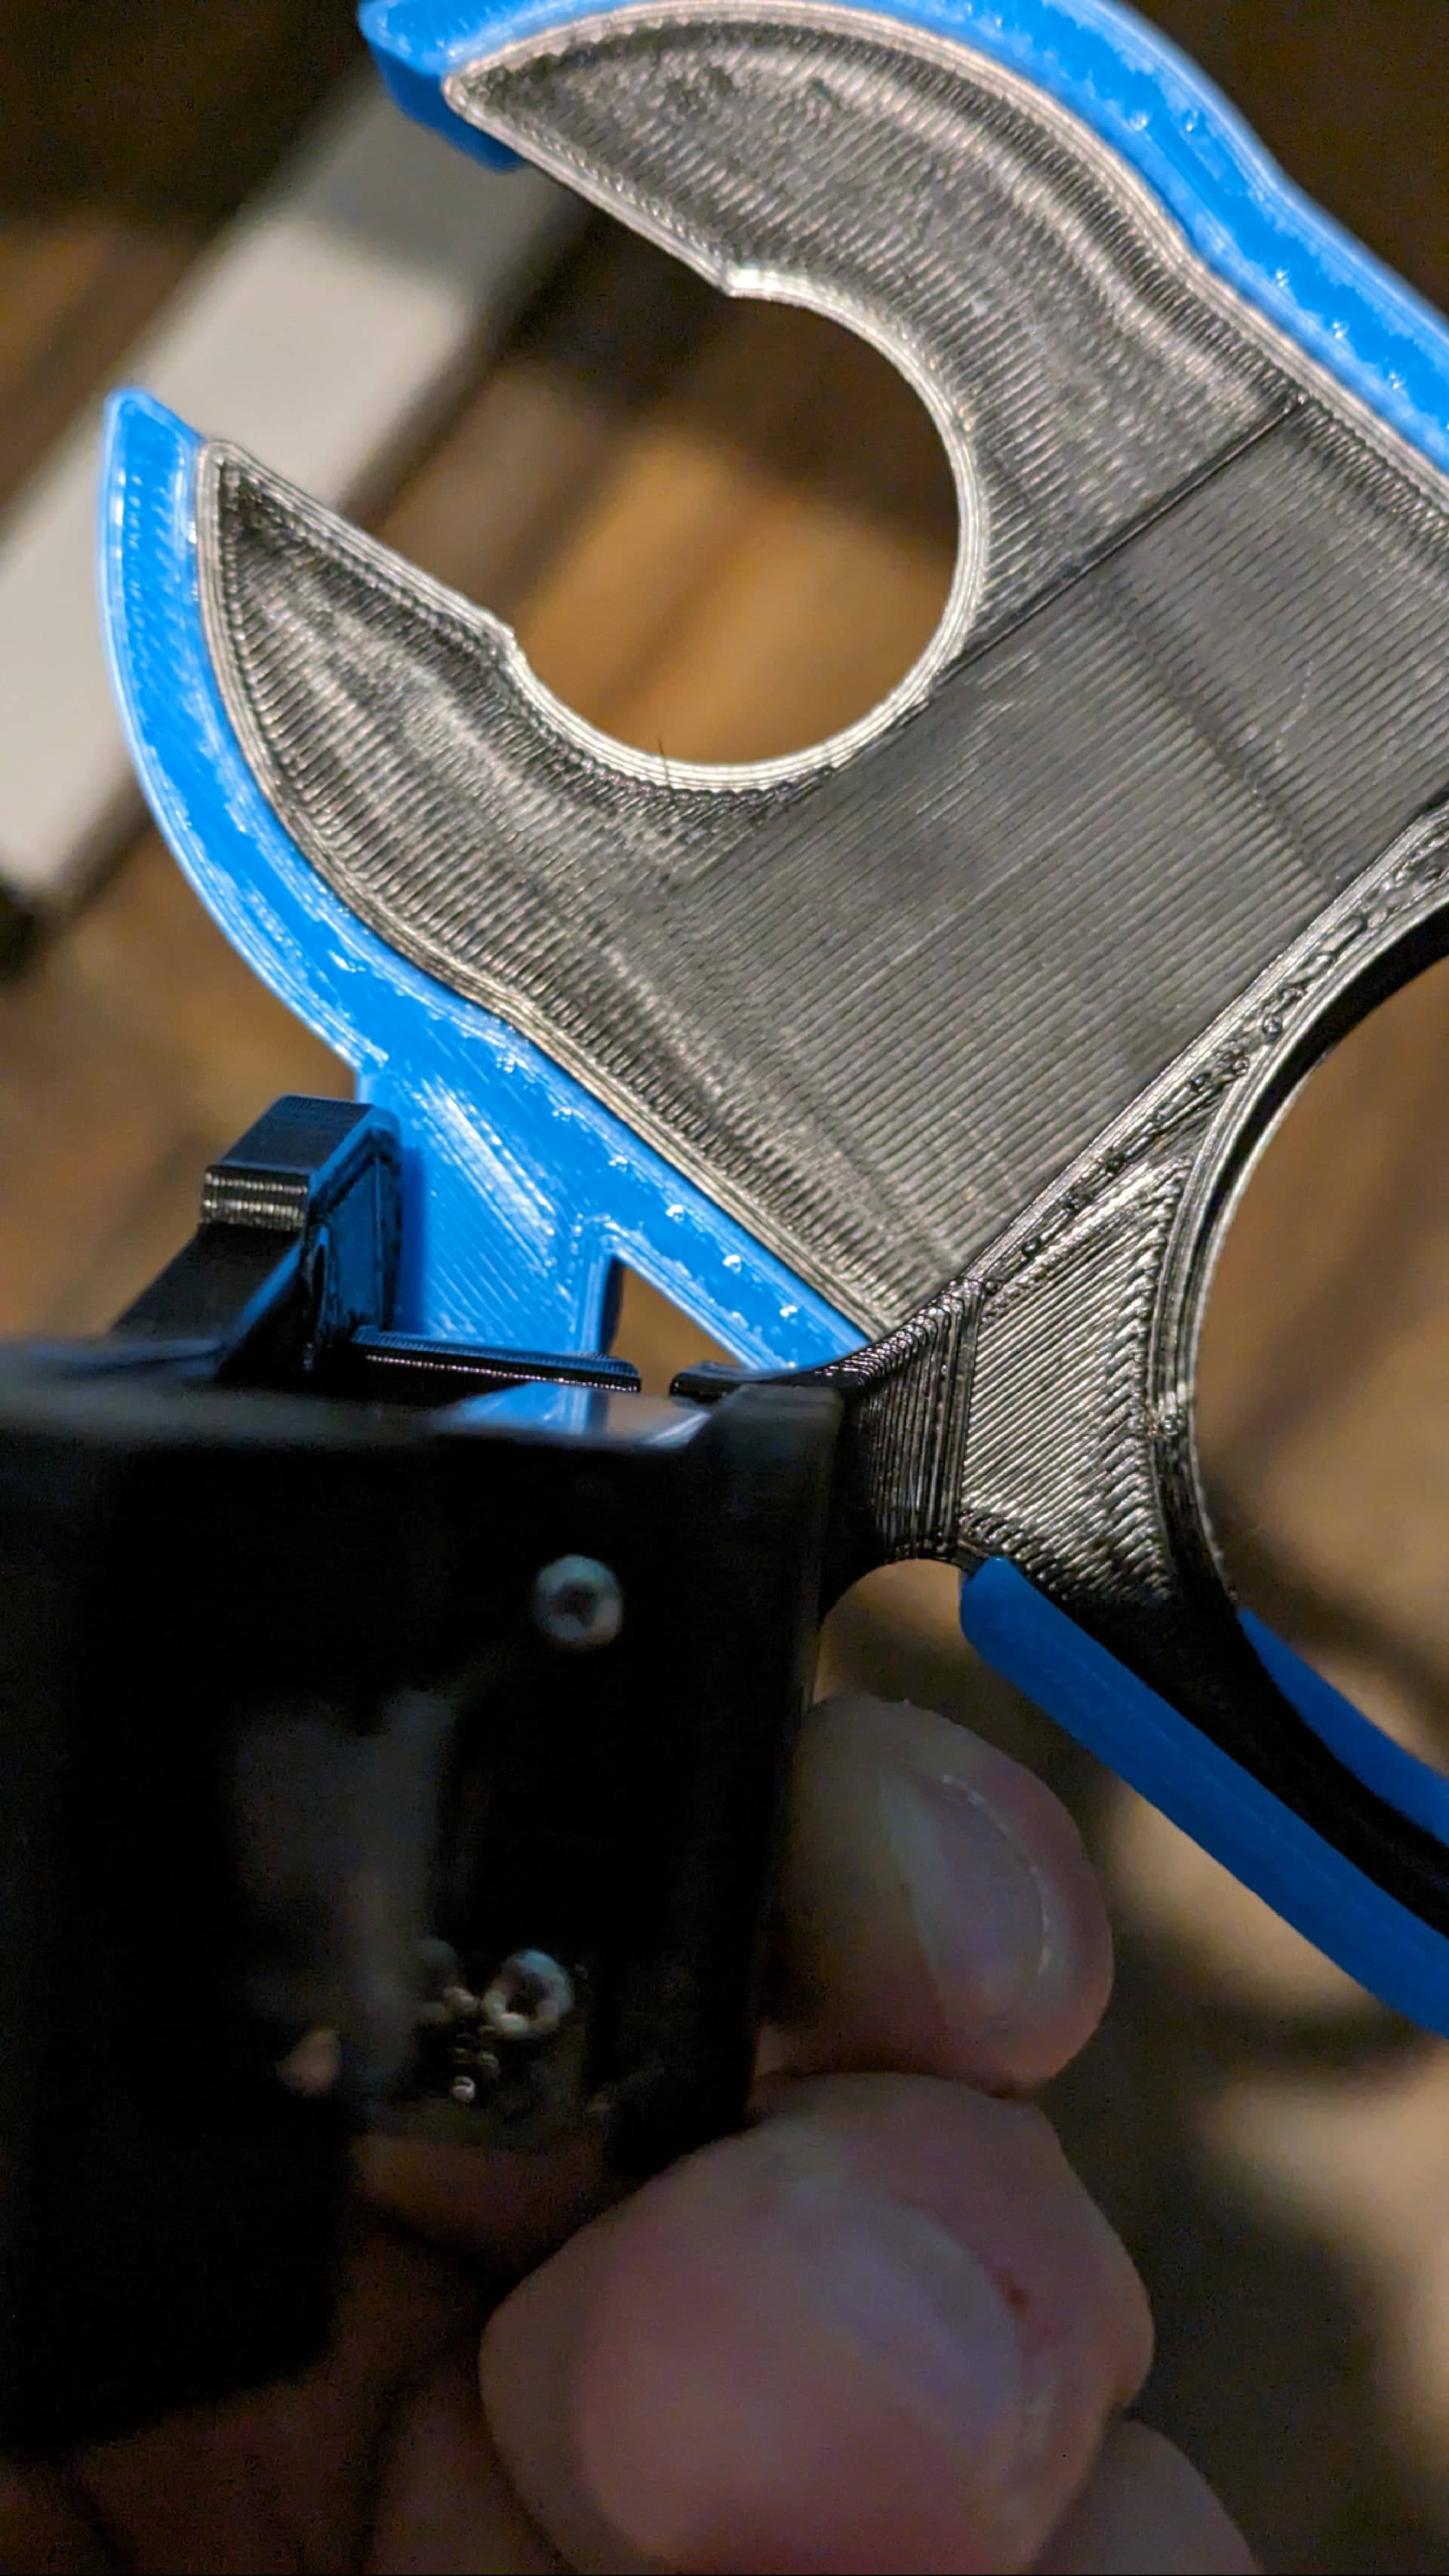
I have printed a lot of the parts for this so far. I just assembled the Dust Shoe Mount/MGN12/Linear Rail Mount v1.0-B. Perhaps I assembled something wrong, but with the Shoe BODY on the Shoe Mount, I have lost full range of motion along the linear rail:
The rail mount hits the shoe body as shown. I believe this is with the shoe body from Aug 24. Did I do something wrong here?
Edit: looking top-down, it looks like the tab on the shoe body would hit the linear rail mount on two sides, so range of motion would be limited even if it cleared where it’s currently hitting (as shown in pic 1).
Thanks for the photos and helpful feedback. Will check this out.
OK, I have confirmed that this was a design flaw — you detected a collision that I had missed.
I have now modified both the Linear Rail Mount, and the Shoe Body.
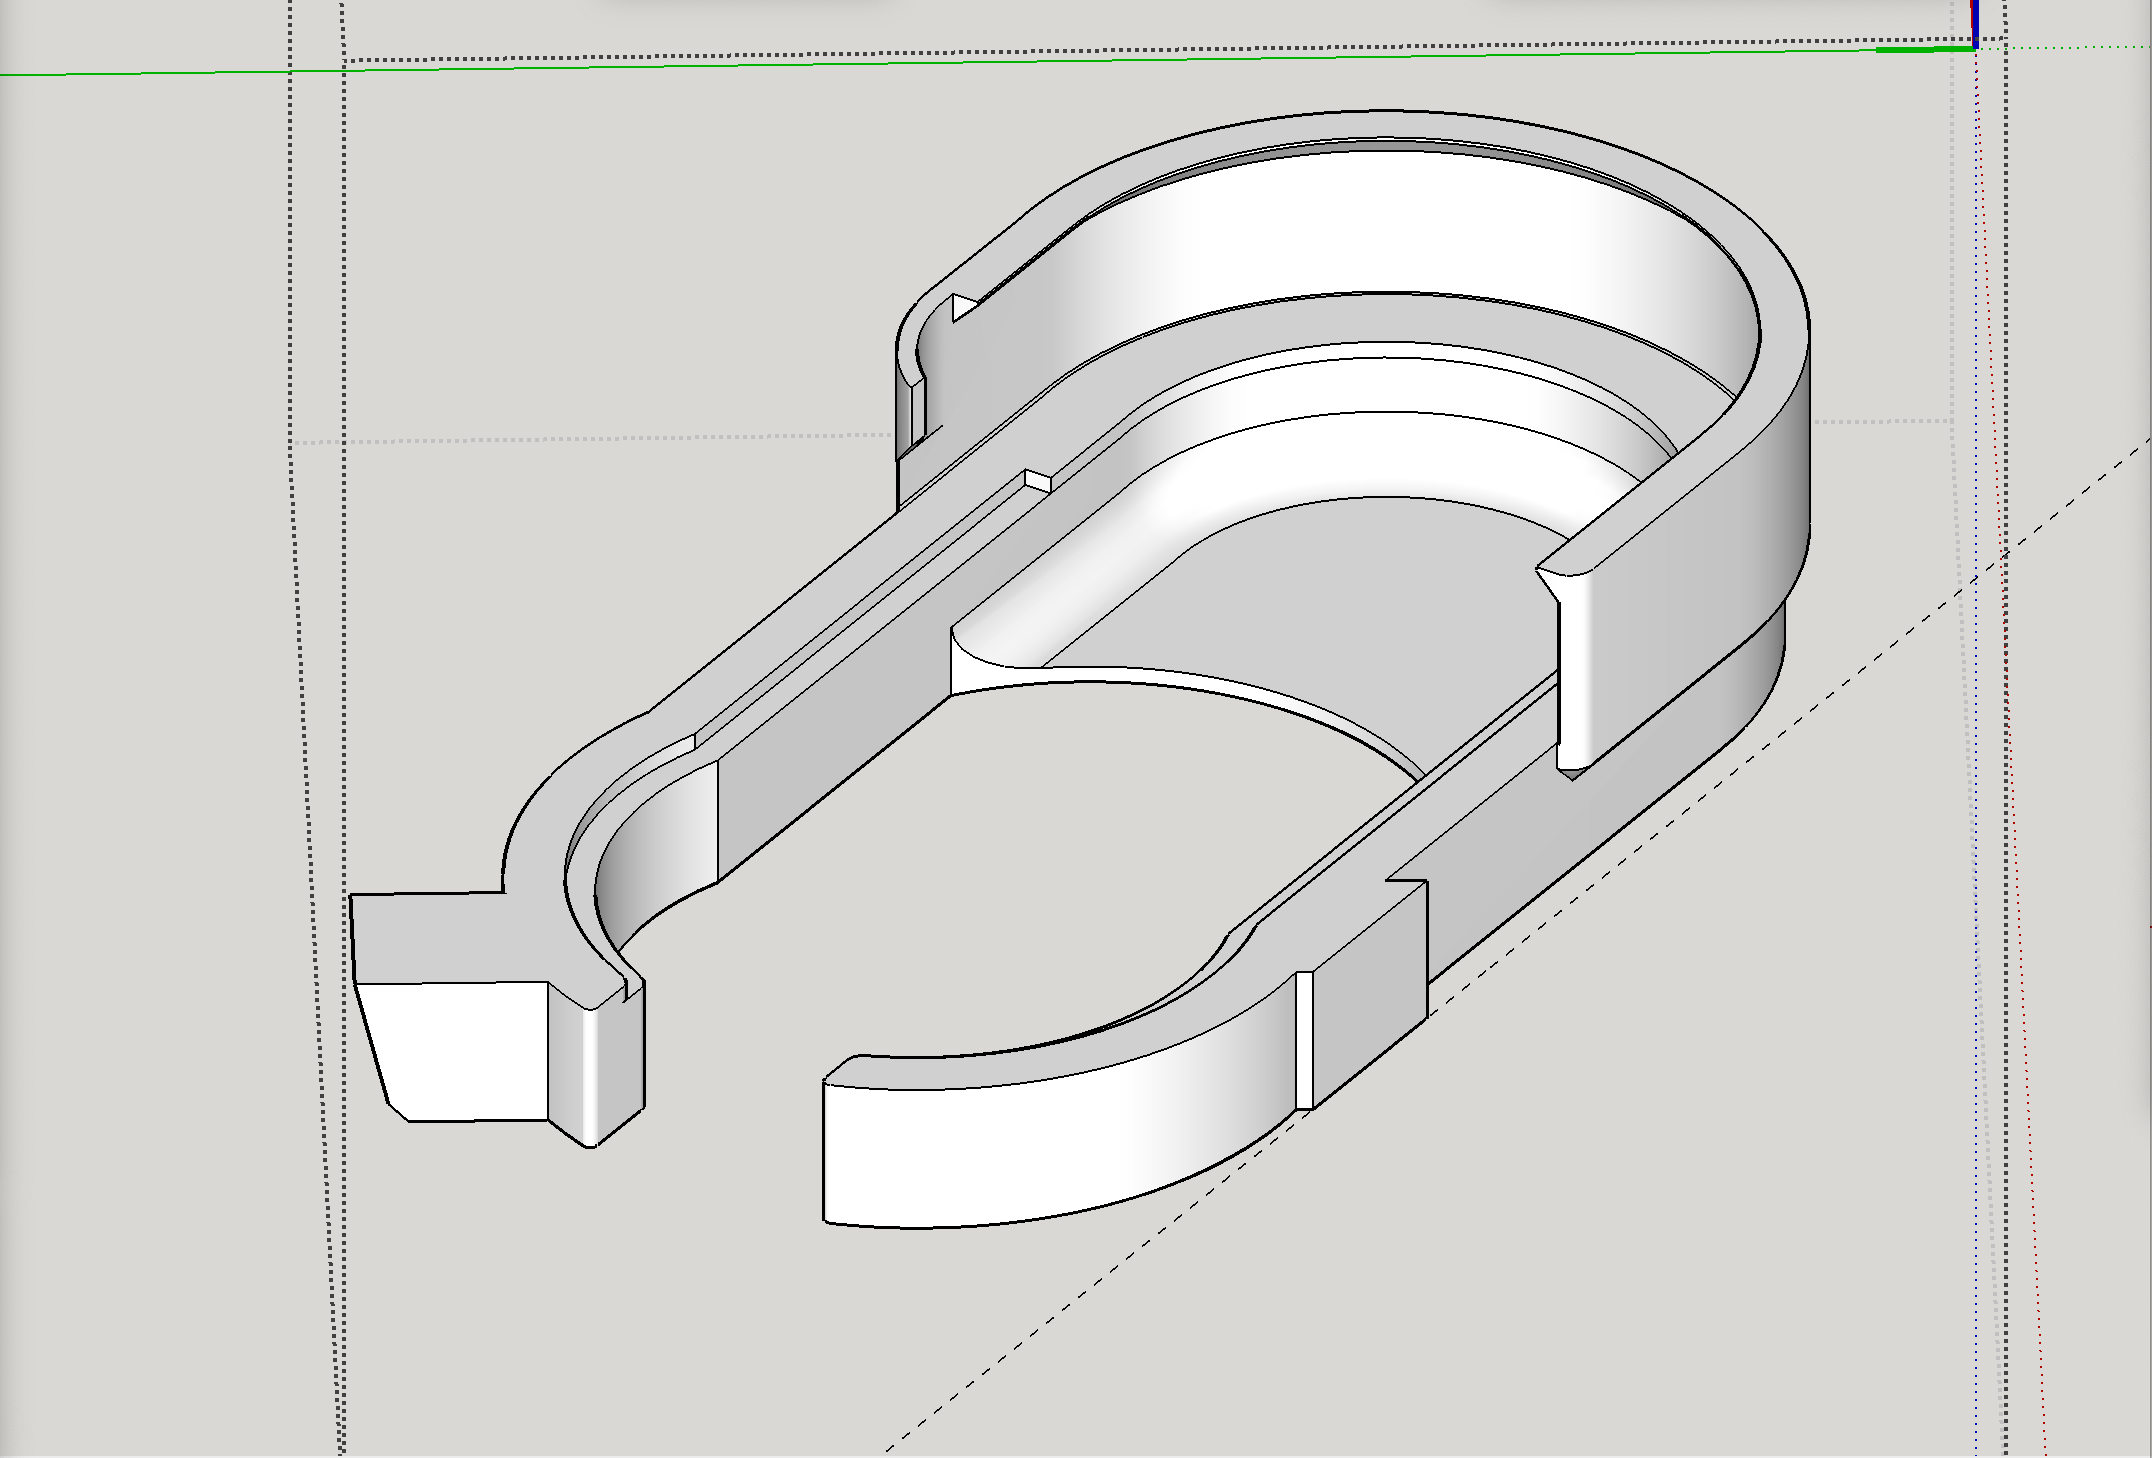
Before I post them, here’s a question. The two wingtip-like tabs on the Shoe Body are apparently aesthetic only at this point (I think). I can either lop one of them down to what I show here (see below) or else just get rid of them entirely. Thoughts?
Here is a screen shot, from same angle, showing how the new Linear Rail Mount has been altered:
I am in the process of building my first LR3 (This is my first Post ![]() ),
),
I saw these videos on your YouTube channel, and it looks great, I think it will work a lot better then stock one.
One thought as I was watching the part of the video you were getting the length of the flex hose just right, is to make the upper mount adjustable. Maybe a length of solid pipe with a clamp to hold it to motor mount, that will allow the pipe and flexible hose to be adjusted up and down based on project requirements. This will provide a base position for the flex hose to ride up and down from with wanted ‘spring’ pressure.
I am working on a little different design of boot that is centered in front of motor, with a more streamline shape that I am thinking I want to make if floating like yours now.
Thanks for all the details you add to your posts, I am planning on also building one of your tables soon as the machine is up and running.
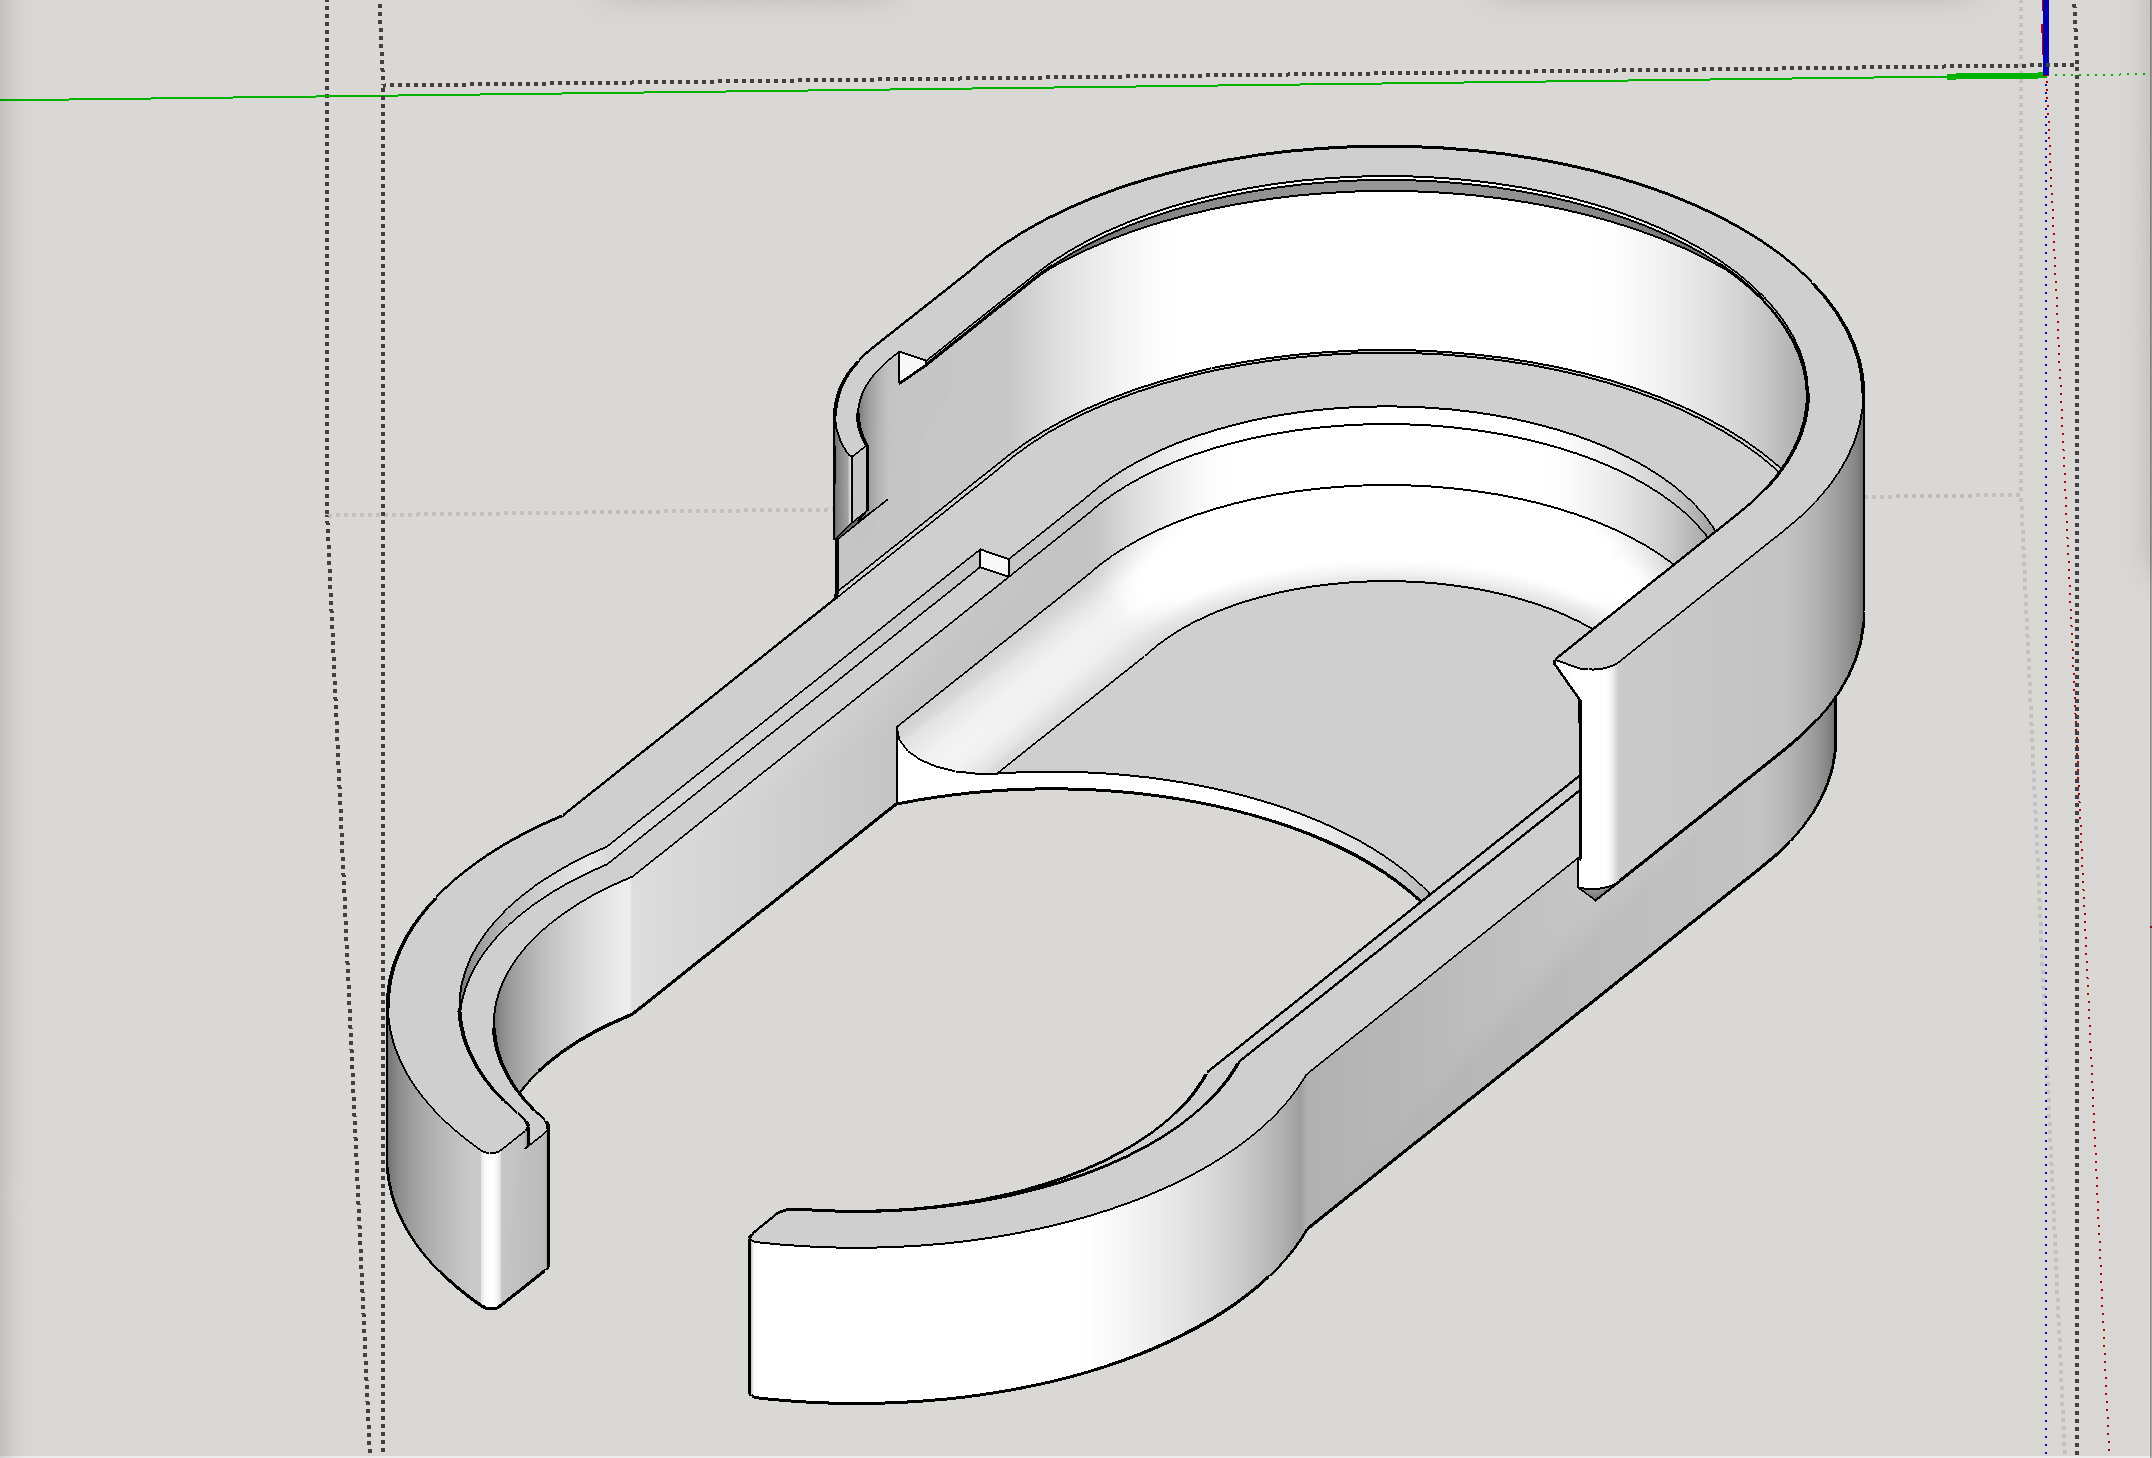
The design, as modified, with the wing-tip taps gone, has room for insertion and removal as shown. So sorry for not catching the collision prior to this point.
Hello and welcome! Sounds exciting. The only caution I would mention about going straight out the front with a dust shoe design, is to make sure you leave room for access for bit changes. This seems to be the primary reason for Ryan going at an angle on his design, upon which my remixes are based.
That is a great point, I was planning on making it attach with magnets to the bottom of a modified motor mount, so I would just take it off to get full access to the router and bits, but that will change a little with making it a floating design.
I will have to see how to make that work, maybe the whole thing will come off front of the motor mounts.
I am also planning on having the hose suspended from above to keep it out of the way.
OK, the new files are now uploaded to the Printables listing.
The description includes this update to the Change Log section:
Change log:
The two wingtip-like tabs on the Shoe Body are apparently aesthetic only at this point (I think). I can either lop one of them down to what I show here (see below) or else just get rid of them entirely. Thoughts?
I think getting rid of the tabs, along with the linear rail mount change, solves the problem. I’m happy to print those off once I have the STLs and continue testing!
I am also planning on having the hose suspended from above to keep it out of the way.
This is also my plan, probably creating a boom arm to keep the hose from interfering with the operation of the LR3. All part of my plan to make the LR3 as easy to remove from the table as possible.
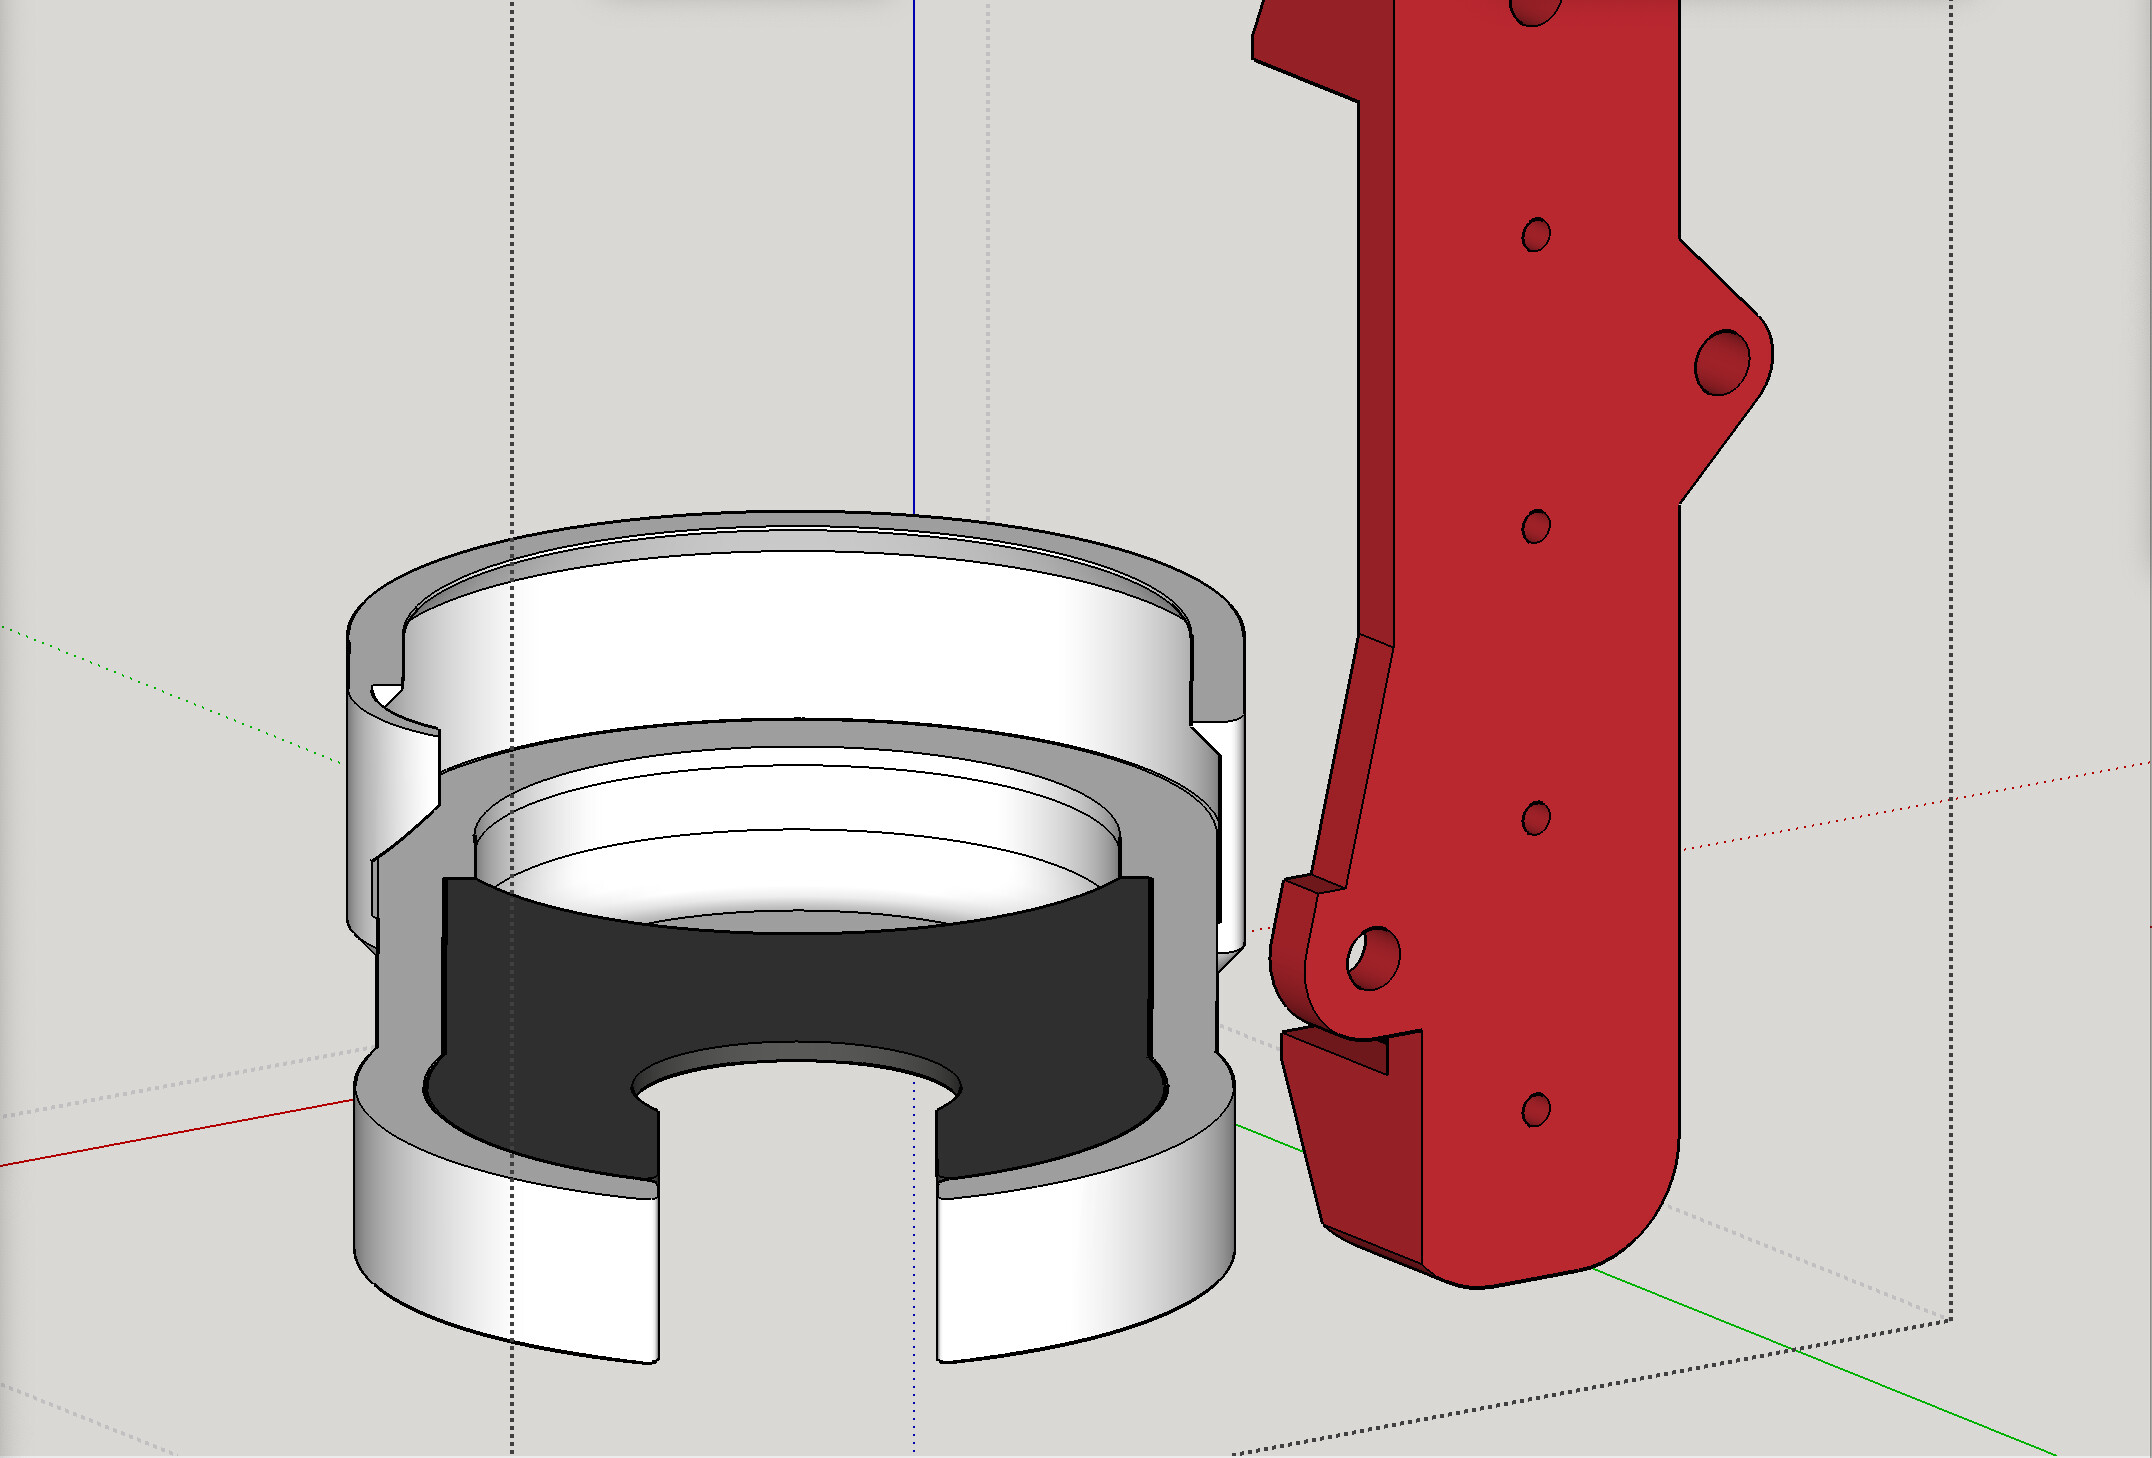
On a dry fit of the latch just now, I discovered that the inside of the latch at the pivot point makes contact with the linear rail block, interfering with the block’s movement. I am planning on just sanding that part of the latch down for now.
OK. got it.
Please let me tweak either the Linear Rail Mount or the Latch or both…
OK, so I just posted another revised “Linear Rail Mount v1.0-B (with slide latch).stl” to fix this. Once you print the new one, it should fix the rub. You should not have to do any sanding then. The update below has been added to the Change Log section:
Change log:
Awesome, I will probably print the new linear rail mount later this afternoon, once one of the drag chain parts is finished. The new shoe body will get printed tomorrow and I’ll test everything again then.
Thank you! Your testing is ahead of mine as I am still waiting on arrival of a linear guide and bearing block.
Because the shoe body and shoe lid have both had another correction related to the angle of the front slot, when you print the new shoe body you will also need to print the new lid as well.
My upper and lower motor mounts were the victim of a slight layer shift last night, so I will reprint those along with the newest linear rail mount and shoe lid tonight. (I think the V-slot wheels on my printer are wearing out and slip sometimes. I have some linear rail upgrades on order for my printer, but they probably won’t arrive for a while. Alas.)