Printable files for the torch mount (for LR3-based plasma cutting table) are now available on Printables. Click here!

Note: this is designed for a machine torch (aka pencil torch, or straight torch), but could no doubt be modified to hold a hand torch.


The following is copied and pasted from the Printables listing description:
On my Design8Studio YouTube Channel I have a 6-part series of mini-installments on the process of designing and assembling this plasma torch mount with floating Z and magnetic breakaway. Below is the 6th and final video from that series. Consider watching them all (individual links below). All are shorter in running time than the final one, which takes time to explain why floating Z is desirable for plasma cutting .
Playlist links (with running times) of the mini-installments:
Links of interest:
- V1 Engineering - LowRIder v3
- My thread on V1E forum about my LR3 Plasma Cutting Table — LowRider 3 - Plasma Build “On a Budget” - Clarksburg, WV
Products used as shown in video:
- Round Magnets — 12mm x 3mm (actual dimensions ~ 12mm x ~ 2.8mm) — shown in this video — quite strong, and can be used for this type of application, working great — MIN CI 100Pcs Super Strong Neodymium Disc Magnets, 12 x 3mm Small Magnets for Dry Erase Board Whiteboard Office Fridge Crafts, Mini Round Rare Earth Magnets for DIY Building Scientific Models
- Linear Rail with Sliding Bearing (bought 200mm that came with two slide bearings, cut in half as only needed 100mm and only needed one slide bearing) — MGN12H Linear Rail Bearing Sliding Block Match use with MGN12 Linear Guide for CNC xyz DIY Engraving Machine (200mm, H-Type)
- End-stop I used for floating Z — from a set of 6 high-quality end-stop switches that came included with an Emergency Stop button I ordered from Amazon — Push Button Switch AC 400V Red Sign E-Stop Emergency Mushroom 22mm NO NC + 6pcs End Stop Limited Micro Switch for CNC
- Crimp-on spades used to attach wiring to end-stop for floating Z were from this set — Nilight 540PCS Mixed Quick Disconnect Electrical Insulated Butt Bullet Spade Fork Ring Solderless Crimp Terminals 22-16/16-14/12-10 Gauge Electrical Wire Connectors Assortment Kit, 2 Years Warranty
- The amazing saw I mentioned in one of the videos — Evolution Power Tools R185CCS 7-1/4" TCT Multi-Material Cutting Circular Saw, 7-1/4"
- Heatserts I used in the mount clamp back piece and as “stand offs” on two of the screws used to mount the linear rod — Female Thread Brass Knurled Threaded Inserts
- Screws & Nuts Assortment — M2 M3 M4 M5 Alloy Steel Socket Head Cap Screws Nuts Set 1060pcs Carbon Steel Screws Assortment Kit
Other Amazon links:
- Round Magnets (larger — awesomely strong — not shown in use, but I bought some and they are super powerful, and could definitely be used for this type of application) — FINDMAG 12 Pack Neodymium Magnets Cup Magnets with Countersunk Hole, Strong Round Base Rare Earth Magnets, 90 LBS Pull Force, 1.26"D x 0.2"H, 12 Screws Included
- NOT USED (TOO WEAK - DON’T USE FOR THIS TYPE OF APPLICATION) shown in first video: Bar Magnets - which were too weak, apparently NOT neodymium, don’t use these for this — Amazon.com
Features:
- Magnetic breakaway — allows the torch to “bend” away instead of damaging the tip whenever an immovable blockage is encountered unintentionally. Can save your plasma torch tip in a pinch.
- Floating Z with end-stop — for a full explanation of why a floating Z is desirable in plasma cutting, watch the sixth video in the series (linked above).
Print and Assembly:
- Print the parts as oriented. No supports needed, assuming your printer is capable of a decent amount of bridging.
- Attach your wiring to your end-stop. See link above for the crimp-on spades I used (avoids soldering and easy to remove if need arises). Leave the excess wiring plenty long enough to go through the LR3 core, all through your drag chain*, and onwards to your CNC control box, wherever you plan to locate it. *(Consider my printable drag chain if you’re short of cash, otherwise opt for store-bought, injection-molded, as that’s better for drag chains than printed.)
- Use two (2) M3 x 16mm screws and two (2) matching M3 nylock nuts to attach your end-stop (product link above) to the printed part labeled “1.magnetic-torch-FLOATING-Z-mount."
Note: Remember to now run your excess wiring through the hole in the center of the LR3 core. - Use at least four (4), and up to six (6) M5 x 25mm screws, along with matching M5 nylock nuts, to mount the printed part labeled “1.magnetic-torch-FLOATING-Z-mount” to your LowRider 3 core. The LR3 core has nut capture slots in the back for this purpose. As shown in the videos, it’s advisable to pre-thread the nylon parts of the nylock nuts before attempting the mounting in this step. While mounting, it’s helpful to carefully hold the nylock nuts straight (and deep) in their capture slots (with something like needle nose pliers) while you run the screws in from the front, at least until the screws get threads into the nuts.
Note: For the upper sets of screw holes on the LR3 core, which normally on a LowRider 3 are for mounting a router, you can get away with using M5 x 30mm screws (instead of 25mm). However, if attaching to the lowest screw holes (normally used for dust collection ring on LowRider 3) avoid 30mm, and use 25mm instead, or else the screws will collide with the 608 bearings in the core. - Use two (2) M3 x 8mm screws to mount the linear rod (product link above) to the printed part labeled “1.magnetic-torch-FLOATING-Z-mount”
Note: these two shorter screws are for the two middle holes in the linear rod, not the upper most hole or the lower most hole—see below for why. This step is shown in video #1 in the playlist above. - Use either two (2) M3 x 12mm screws or two (2) M3 x 16mm screws, together with knurled threaded inserts, either M3x4x5mm inserts (on 12mm screws) or M3x6x5mm inserts (on 16mm screws) (with the inserts acting somewhat like super thick washers) to mount the linear rod to the printed part labeled “1.magnetic-torch-FLOATING-Z-mount”
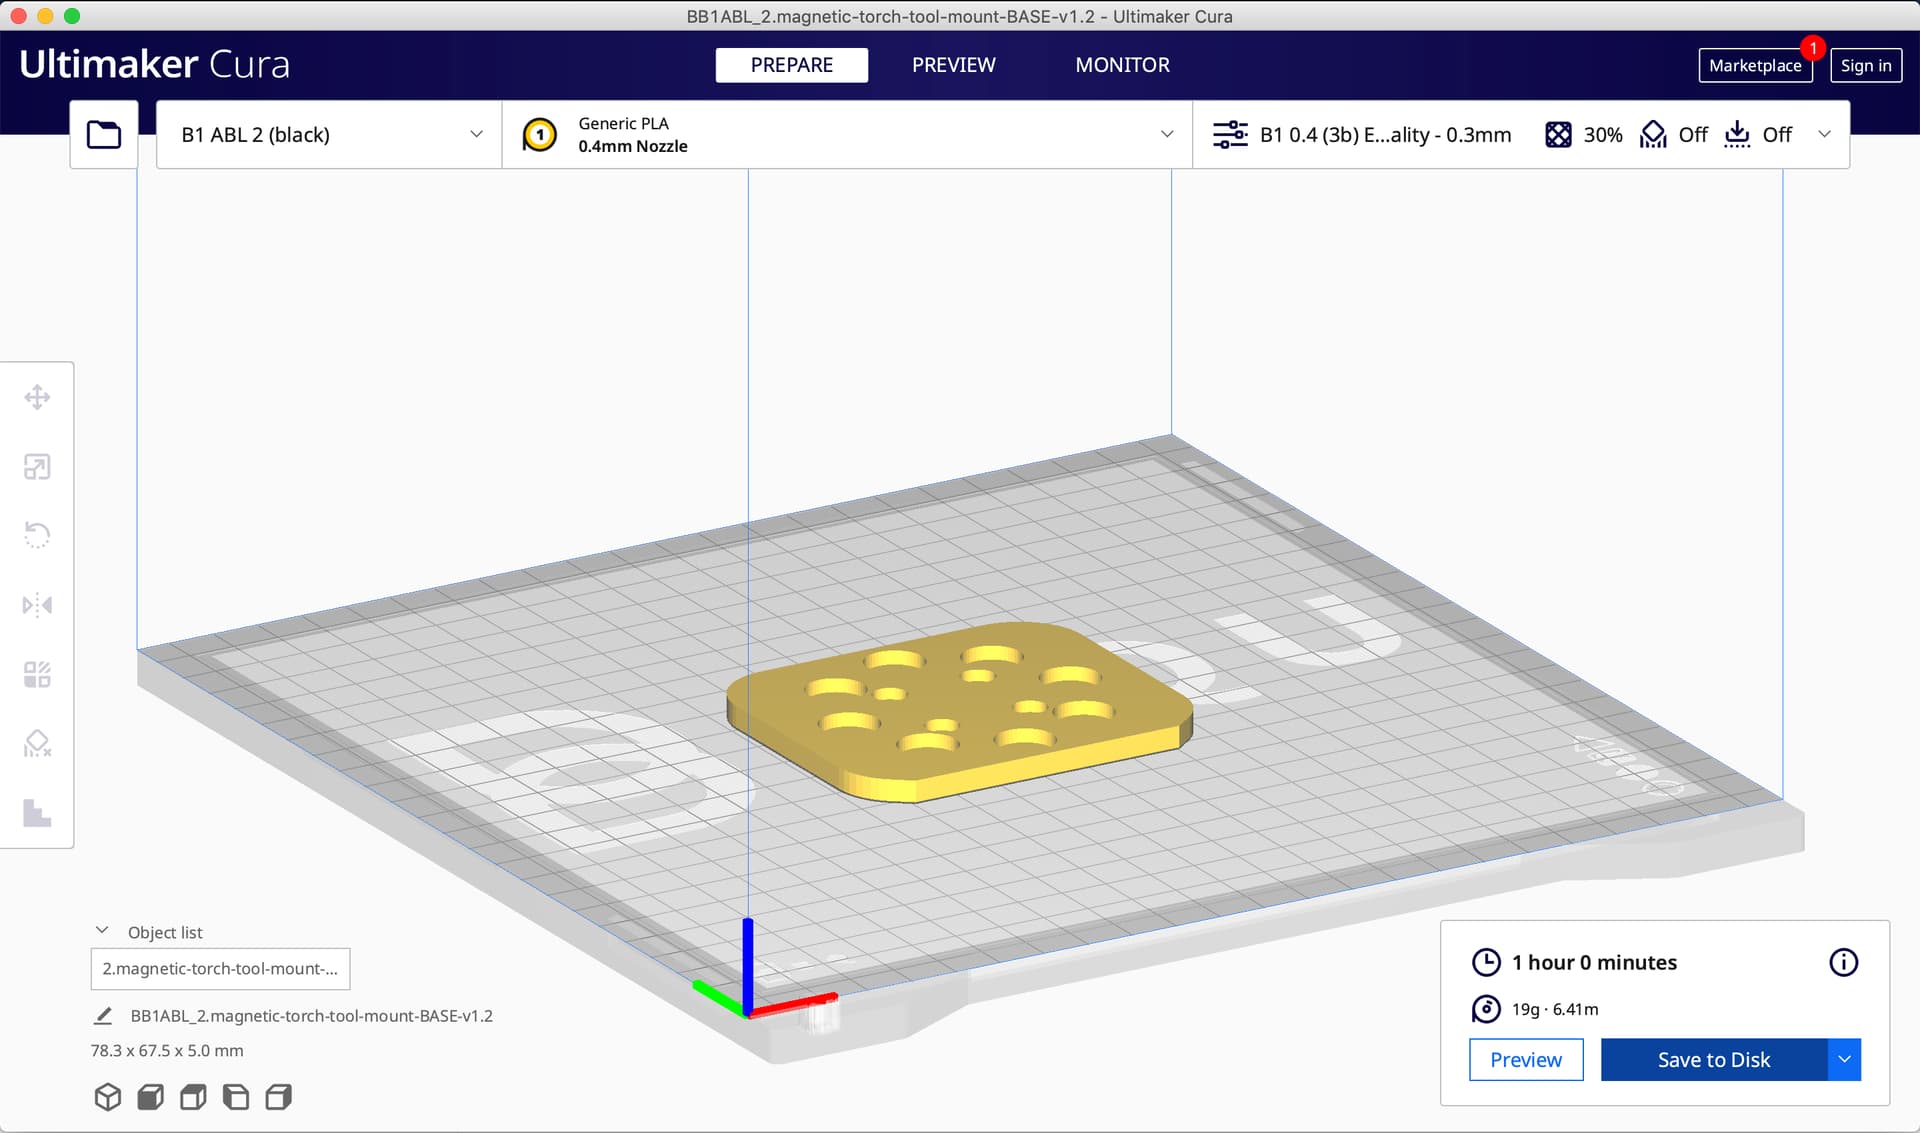
Note: these two longer screws are for the upper most hole and the lower most hole, to have the screw heads “proud” to act as stop blocks, to prevent the slide bearing from sliding off the linear rod. This step is shown in video #1 in the playlist above. - Using a metal file, slightly scuff the bottoms of eight (8) of the round, neodymium magnets (product link above), and then using two-part epoxy, mixed well, evenly applied to the eight slots in the printed part, glue the magnets (with scuffed bottoms downward) inside their slots in the printed part labeled “2.magnetic-torch-tool-mount-BASE.”
Note: In the scuffing, the goal is scratches, not simply to remove material. The more scratches, the more the glue has something to grab onto. This step is shown in video #5 in the playlist above. - Use either four (4) M3 x 4mm screws, or four (4) M3 x 6mm screws, to mount the printed part labeled “2.magnetic-torch-tool-mount-BASE” to the sliding bearing on the linear rod. This is the same part you glued the magnets into in the step above. This step is shown in video #5 in the playlist above.
- Using a soldering iron, insert four (4) of the knurled threaded inserts (aka “heatserts”), size M5x10x7mm, into the four larger holes on top of the printed part labeled “3.magnetic-torch-tool-mount-BACK-v1.2.stl.” This step is shown in a couple of the videos, but certainly in video #6 in the playlist above.
- Repeat the scuffing and gluing of eight (8) more magnets, this time into the printed part labeled “3.magnetic-torch-tool-mount-BACK-v1.2.stl.” This is same part you just put heatserts into. This step is shown in video #6 in the playlist above.
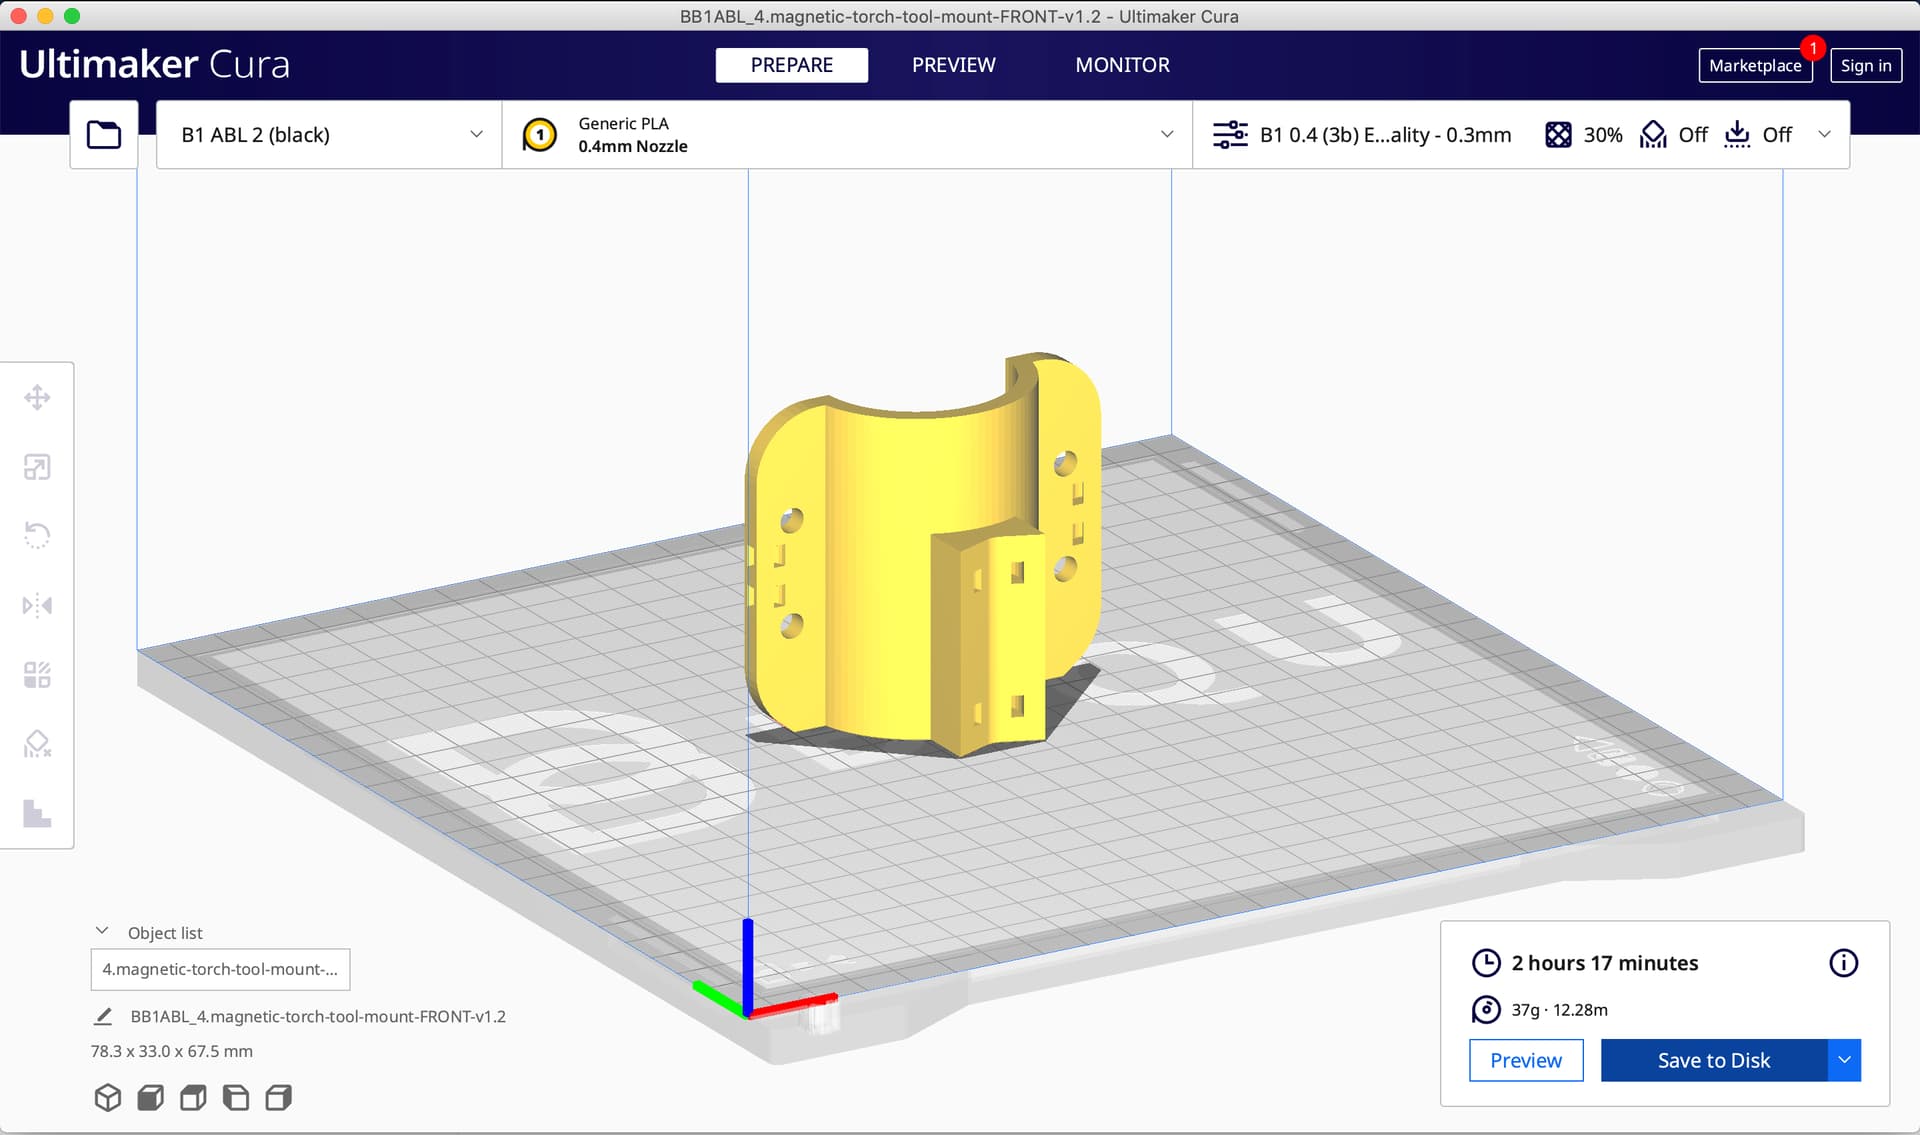
- Use four (4) M5 x 12mm screws to mount the torch between the two printed clamping parts labeled “3.magnetic-torch-tool-mount-BACK” and “4.magnetic-torch-tool-mount-FRONT.”
- After waiting a day or two for the epoxy to fully cure, magnetically attach the torch (with clamping parts) to the LR3 core, and test out both the magnetic breakaway feature and the floating Z feature. As Ryan of V1 Engineering would likely say, “make plasma cutting sounds with your mouth and you amaze your friends with your powerful creation skills.”
- If all is well, you are now ready to mount the modified LR3 core to your LR3 bridge (X gantry).
Change log:
- September 10, 2022 at 3:00 pm — initial upload of v1.2 (previous iterations were privately printed and tested, never uploaded here).
My PayPal tip jar: https://paypal.me/dougjoseph
View all my LowRider 3 CNC remixes:
View all my models and remixes on Printables:
*Product links are Amazon affiliate links.
