Low & Slow. This is gonna be a while

That looks like a great design. I don’t like the steel belts. I also wonder if the gantry rail should have some kind of 2020 support. But otherwise, I really like it.

That is tempting …

I didn’t notice the base frame was 3D printed. We should remake it with 10mm belts (because moar! and 10mm idlers) with plywood base.

For as short as that rail is, it’s not going to need support.

1 Like

Me neither, but that’s an easy substitution, and I have tons of 6mm belt left over from my first Zen table that I disassembled, even after building the MP3DP.

My frame base won’t be entirely 3D printed, and I’m going to leave the MGN15 rail to span the center portion. I chopped out the portion of it that I need, and will mill the rest.

Hopefully. It looks like a nice lightweight design. The tolerances are super tight. I needed to file my 3D prints a touch to get things to fit, and like I said, my printer sucks with supports. (The MP3DP just isn’t dialled in tight enough to make it possible, but I might need to re-do that one piece with it anyway because I may need the print cooling fan.)

I have a translucent red filament that I’ve been printing parts for this in…

Looks pretty cool in the sun!

The MGN12 rail in that photo is longer than the one I will use… but I’m having trouble getting the test fit parts off.

The base parts seem more than sufficient cut down like that., but it’ll need more support when it’s done.

3 Likes

That filament looks like jolly rancher red.

3 Likes

Oh, please. That’s twizzler red. Fight me…

Okay… Now that the distraction from the distraction from the distraction is sorted, time to get back to the project.

I was looking at adapting V1’s case for the TFT35 E3… But Ryan beat me to it, so I just printed his. I still needed a mounting solution for my power supply and the SKR Pro 1.2, so I came up with this:

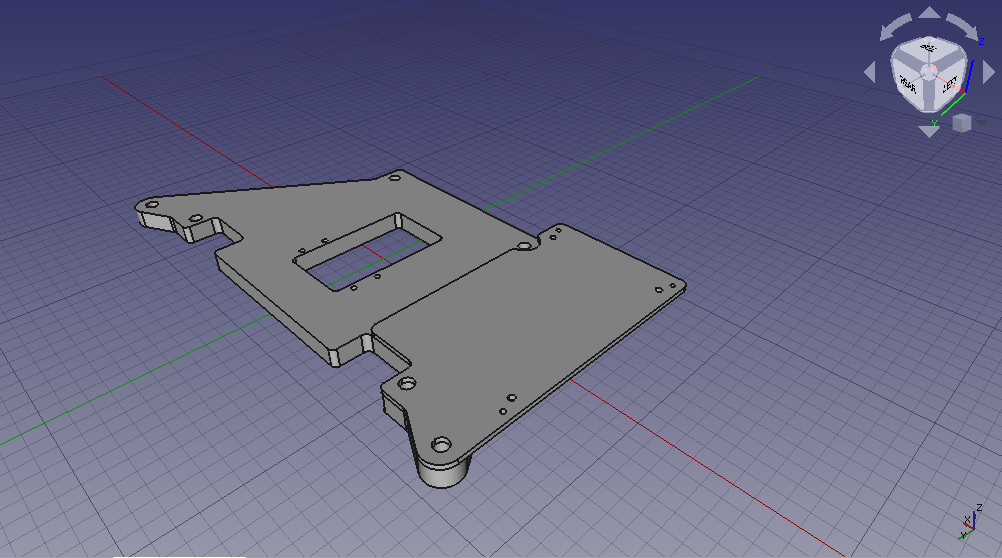
The outer holes are 86.5 by 138mm, sized for the SKR Pro board. The other ones are 80 by 120mm, sized for the power supply that I intend to use with it. (The one from the V1 kit is powering the laser engraver…) They won’t go on the same piece, I intend to make 2 from the same .DXF, one with each set of holes, then use standoffs to mount the board.

I see that I have at least 5mm of extra thread on the bolts that go through to the wheel and top holder piece, so 1/8" material should be easy to cut for this and bolt on. I’ll probably do a simple cover with more standoffs to protect the board and probably hold a fan.

Got the word from work that my steel is finally in, but the cost has increased, almost threefold from when I bought the same pieces for my Primo.

1 Like

Cut the plates and painted them my faux Makita blue.


The board fits perfectly. I am printing a cover for the SKR Pro board to go over it, it will go on the 40mm stand-offs which I attached to the board already.

3 Likes

If you’re going to colour match your Makita…


Go hard.

I didn’t want to bother with a cover for the power supply, so I did this instead.

4 Likes


And just where I stopped tonight on this one…

The cover is still printing, because somehow I transposed a number dimensioning it first time, but now the power and SKR Pro are mounted to the Y plate.

I still haven’t picked up my steel, need to do that pfsn. And build a table, too. Steel prices are apparently also soaring, so gotta find an affordable way to go.

The green LEDs glow through the white plastic. Might need something more opaque, but… kind of cool, and configurable…

3 Likes

That looks very nice! Love it that your matching the colors:)

Would you mind sharing the design for the SKR board plate? I am still trying to figure out how to do mine.
Are you not affraid that the added weight might cause an out balance during usage?

And yes all prices keep increasing in price for no good reason other than easy profits:) To give you an idea, I managed to find a local metal supplier. They offer steel (not rust free however) for a cost of around 40USD. That’s for 6 meters.

Sure RVS wil be more expensive but, for a start I think that’s reasonable?

LowRider2_SKR_Pro.zip (3.5 KB)

That has the .STL for the cover, and the .DXF for the plate. your PSU is likely to need a different mount than mine, but it should be good for the SKR Pro

Edit: 2 .DXF files instead. One for the mount plate and one for 30mm stand-offs for a second plate. Easier this way, and I can colour match it. :stuck_out_tongue:

1 Like

Actually, please ignore the cover STL in that, it’s the one I dimensioned wrong. It’s too tall and doesn’t have the cutout for the USB port.

1 Like


Not much progress, just painted a cover plate for the board. Now of course there’s a possibility that I’ll be using the SKR for a printer… but I’ll proceed as though I’m not doing that. If I switch to the Duet, I’ll probably make an adapter to use the SKR size mounting holes.

thanks Dan!


Finally a bit of progress on the table.

Did you know it isn’t possible to fit a 45X60" sheet of plywood into a Ford Focus hatch? Managed to get home with it tied to the roof with some cardboard padding…

I just cut the stringers and tested for size. Nothing is actually attached yet.

Looks like a working area of 37" of X by 45" of Y, mostly limited by room in the basement. Still bigger than the Primo.

I will need a spoilboard still.

2 Likes


Looks the same, but now with construction adhesive and pocket screws into the top surface.

The top surface is 3/4" this time, but I’ll use 1/4" for the bottom skin of the torsion box.

I still have to cut and place the longitudinal stringers, but as per instructions, I put the solid braces in across the X plane to make that the stronger axis. I doubt, however, that there will be any appreciable flex in the Y axis with this box either…

Once the glue sets up, I’ll glue and screw the bottom of the box in place.

Not 100% sure how I will attach the spoilboard. I could just screw it down, of course, but kind of a shame to do to that birch.

Edit:

I was just going to get a couple of the tough built sawhorses to stand this on, but the C550 model is too short for me, and I’d be bending over the table working on it, which would suck. The C700 has adjustable legs, and would be ok… but they’re $85 each, which seems more than a little steep. I don’t need the collapsible function for a machine that should stay in place most of the time.

2x4 and 2x6 legs like I did for the Primo would be OK, and the drawer under it is good. Can’t just re-use that, since this is bigger tho. Need it for the table surface anyway. Still spendy despite the recent “collapse” in lumber pricing.

Ikea has Kallax shelving that is slightly cheaper, and about 31" tall, by just under 5’ long. 2 of those would be taller than the sawhorses and provide a bunch of convenient storage. Ikea also has casters for the Kallax shelving, which would raise it another 5" or so, basically countertop height with the 4" torsion box on top, and lockable casters under it for convenient mobility. If I gotta spend another 2 bills to support the table, seems like a no brainer. The built in storage is way too tempting. They’re about 16" deep, so a pair, one on either side would give excellent support. There are provisions in them to bolt them to the wall, which I could use to space them to support the torsion box with room for the LR mechanism.

Then of course there are the various accessories for the Kallax shelves, like door compartments, drawers, baskets…

Man, I wanted to see a picture of this. For some reason I keep thinking on that movie with Mister Bean, where he´s coming from the shopping mall with his sofa on the car roof:)

I was just going to get a couple of the tough built sawhorses to stand this on, but the C550 model is too short for me, and I’d be bending over the table working on it…

I love it that you´re thinking to go the same road as me. And I do agree that the sawhorses are pretty low. I personally did go with a C500 alternative because the C700 is twice the price over here.

Consider this, if you are making a torsion box, with bottom and top sheet, it will still raise higher then the sawhorses because you will be placing it on top of them?

Another way you could go is buy a toolbox cabinet on wheels. Mount the torsion box on top of this?

1 Like

Yeah, I went through that. The torsion box is about 3.5" tall (To keep it below the 4" recommended thickness), still too short on the sawhorses.

  • C550 sawhorses, $120 CAD, 28" height, 32" with box. Too much money for something too low. No storage, and takes up more floorspace because sawhorse legs.

  • C700 sawhorses, $170 CAD, 32" height, 36" with box. Still no storage, more floorspace.

  • Ikea Kallax 4x2 shelving. 2 units, $160 CAD, 31" height, 35" with box. Tons of storage, though maybe not much room for the shop vac…

  • Ikea Kallax 2x2 shelving, 2 units. $120 CAD. 31" height, 35" with box. Lots of options. Both of these also allow me to link them together with some available material to make them a unified piece. Castors would make positioning easier, and add a couple inches of height…

  • 2x4 / 2x6 legs.$50 CAD with bracing. Height is whatever I choose within reason. Storage is whatever I build. Assume another $75-$100 on that, because. Still the cheapest, but somehow not appealing.

Time to start working on some CNC-able leg options? Sit it on the old table while you use it to cut the new legs? Solid “2x” legs are easy and what my tables all are but everyday I go out and want to make some flat pack style ones. At least the corners. For me the drawback is I get lost in the options. I want to wrap a cord, hang some tools, shelves, wheels, at least one drawer…

I have one of the ikea shelves, it has lasted forever but for every self you take out (say for a shop vac) it gets significantly more wobbly.

2 Likes

I had fun with the CNC on my Zen project table for sure.

I don’t think the shop vac is a problem, and wasn’t going to remove any of the shelves because rigidity.

In the 4x2 solution, the 2 shelves would go along the length of the table, back to back. They’re a little under 16" deep, and the table is 45" wide. Leaving a couple inches for the LR2 clearance under the table, leaves about 10" between the shelves. I probably can’t squeeze the shop vac into that, but I could arrange some long storage…

In the 2X2 solution, the shelves would face the ends. The table is 5’ long, so lots of space between them. No problems whatsoever with the shop vac.

This is the biggest detractor for me with the sawhorses. It’d be one thing if it was cheap, but… It isn’t.