So this week on projects I don’t really have time for but wanted to do anyway… with my Lowrider2 - pingpong build
As part of my role as a technical engineer for a European manufacturer of semi trucks, I am responsible for all of the electric chassis’ in our market. This includes assisting bodybuilders with high voltage installations and verifying high voltage measurements as part of an infant care package for new electric vehicles.
This work takes me all over the country and so I am lucky enough to have a company car. The problem is, I have more kit to carry than will fit in a small hatch back, minimum size I have made work is VW golf. For the winter I wanted something a bit more suitable that would also allow me a better loadspace for carrying tools and wood from the lumberyard,etc.
Really I should have a van but the company car tax rules in this country make that tricky so I have been threatening for years to take the backseat out of a car and to line it with wood to create a van. with this in mind I ordered a caddy 7 seat mpv and immediately removed the rear two seats.
The options to keep it as a five seater was really appealing so I wanted some sort of compromise to allow this. Luckily the rear seats folds right forward into the front so I could keep those in while maximising the space.
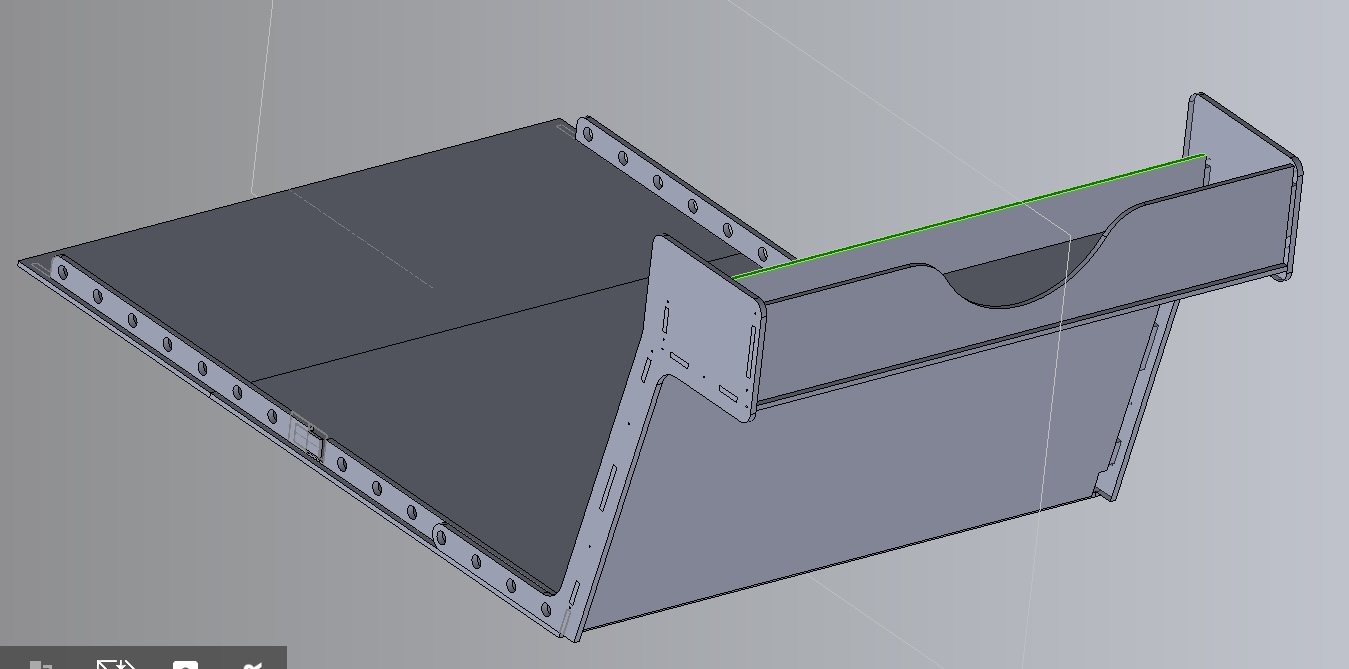
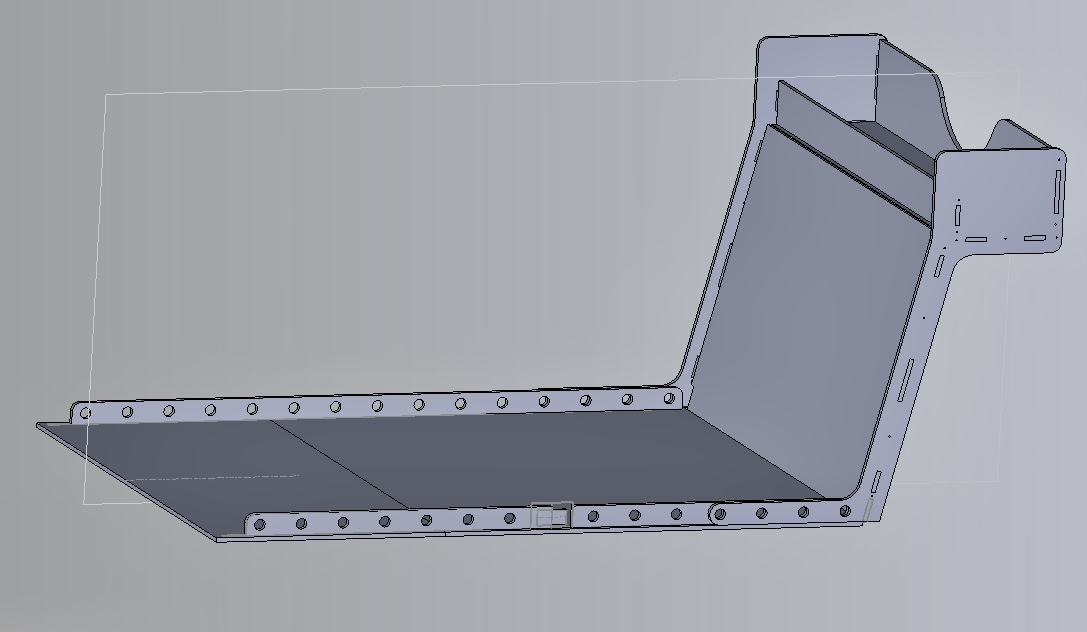
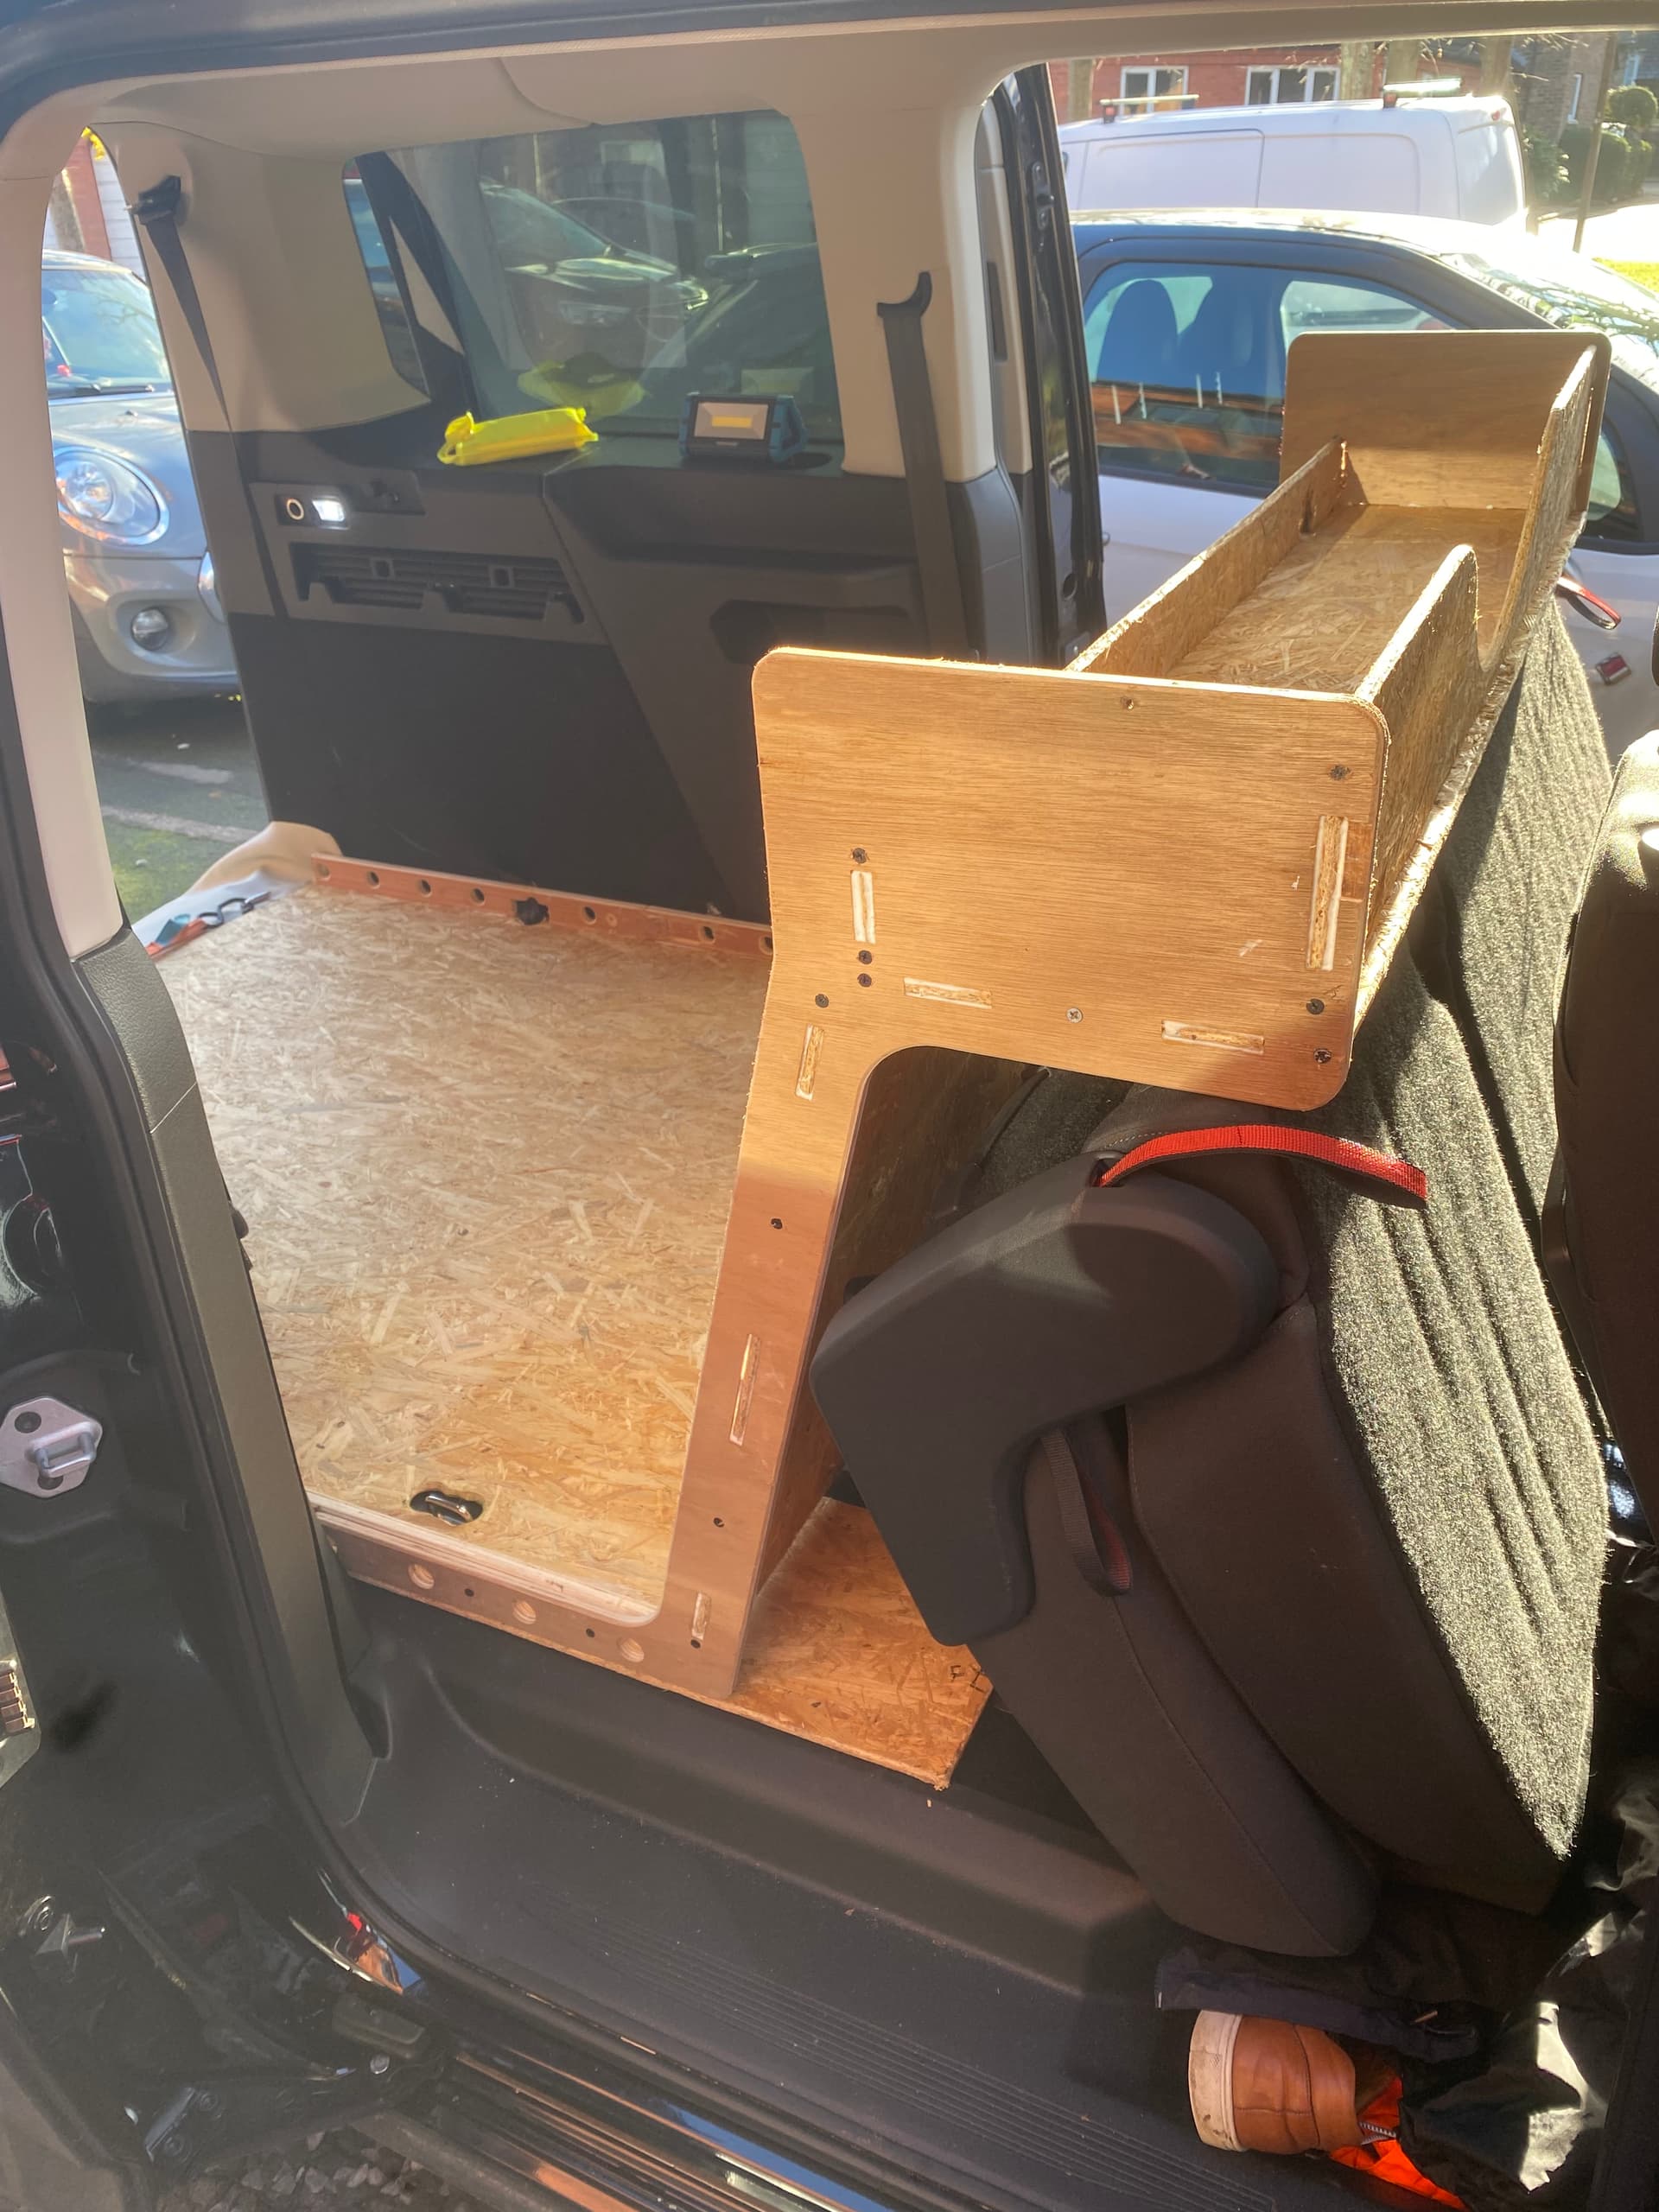
I was inspired by the guys at https://aribabox.com/ And created a floor with a front shelf bulkhead unit that can be moved forward and backwards to allow the seats to fold back down - cutouts in the floor allow for this. This was my first time using dog bones, and while not perfect the fit was more than adequate when screwing and glueing the joints. The locating rails on each side of holes which aligned to the shelf sides to allow 25mm dowels to act as locking pins - when not in use the holes in the rails can be used as mounting points for straps, etc. Panels are 10 mil. Shelf sides are 12mm and the rails 15mm. No hand finishing apart from a quick chamfer with a handheld trim router.
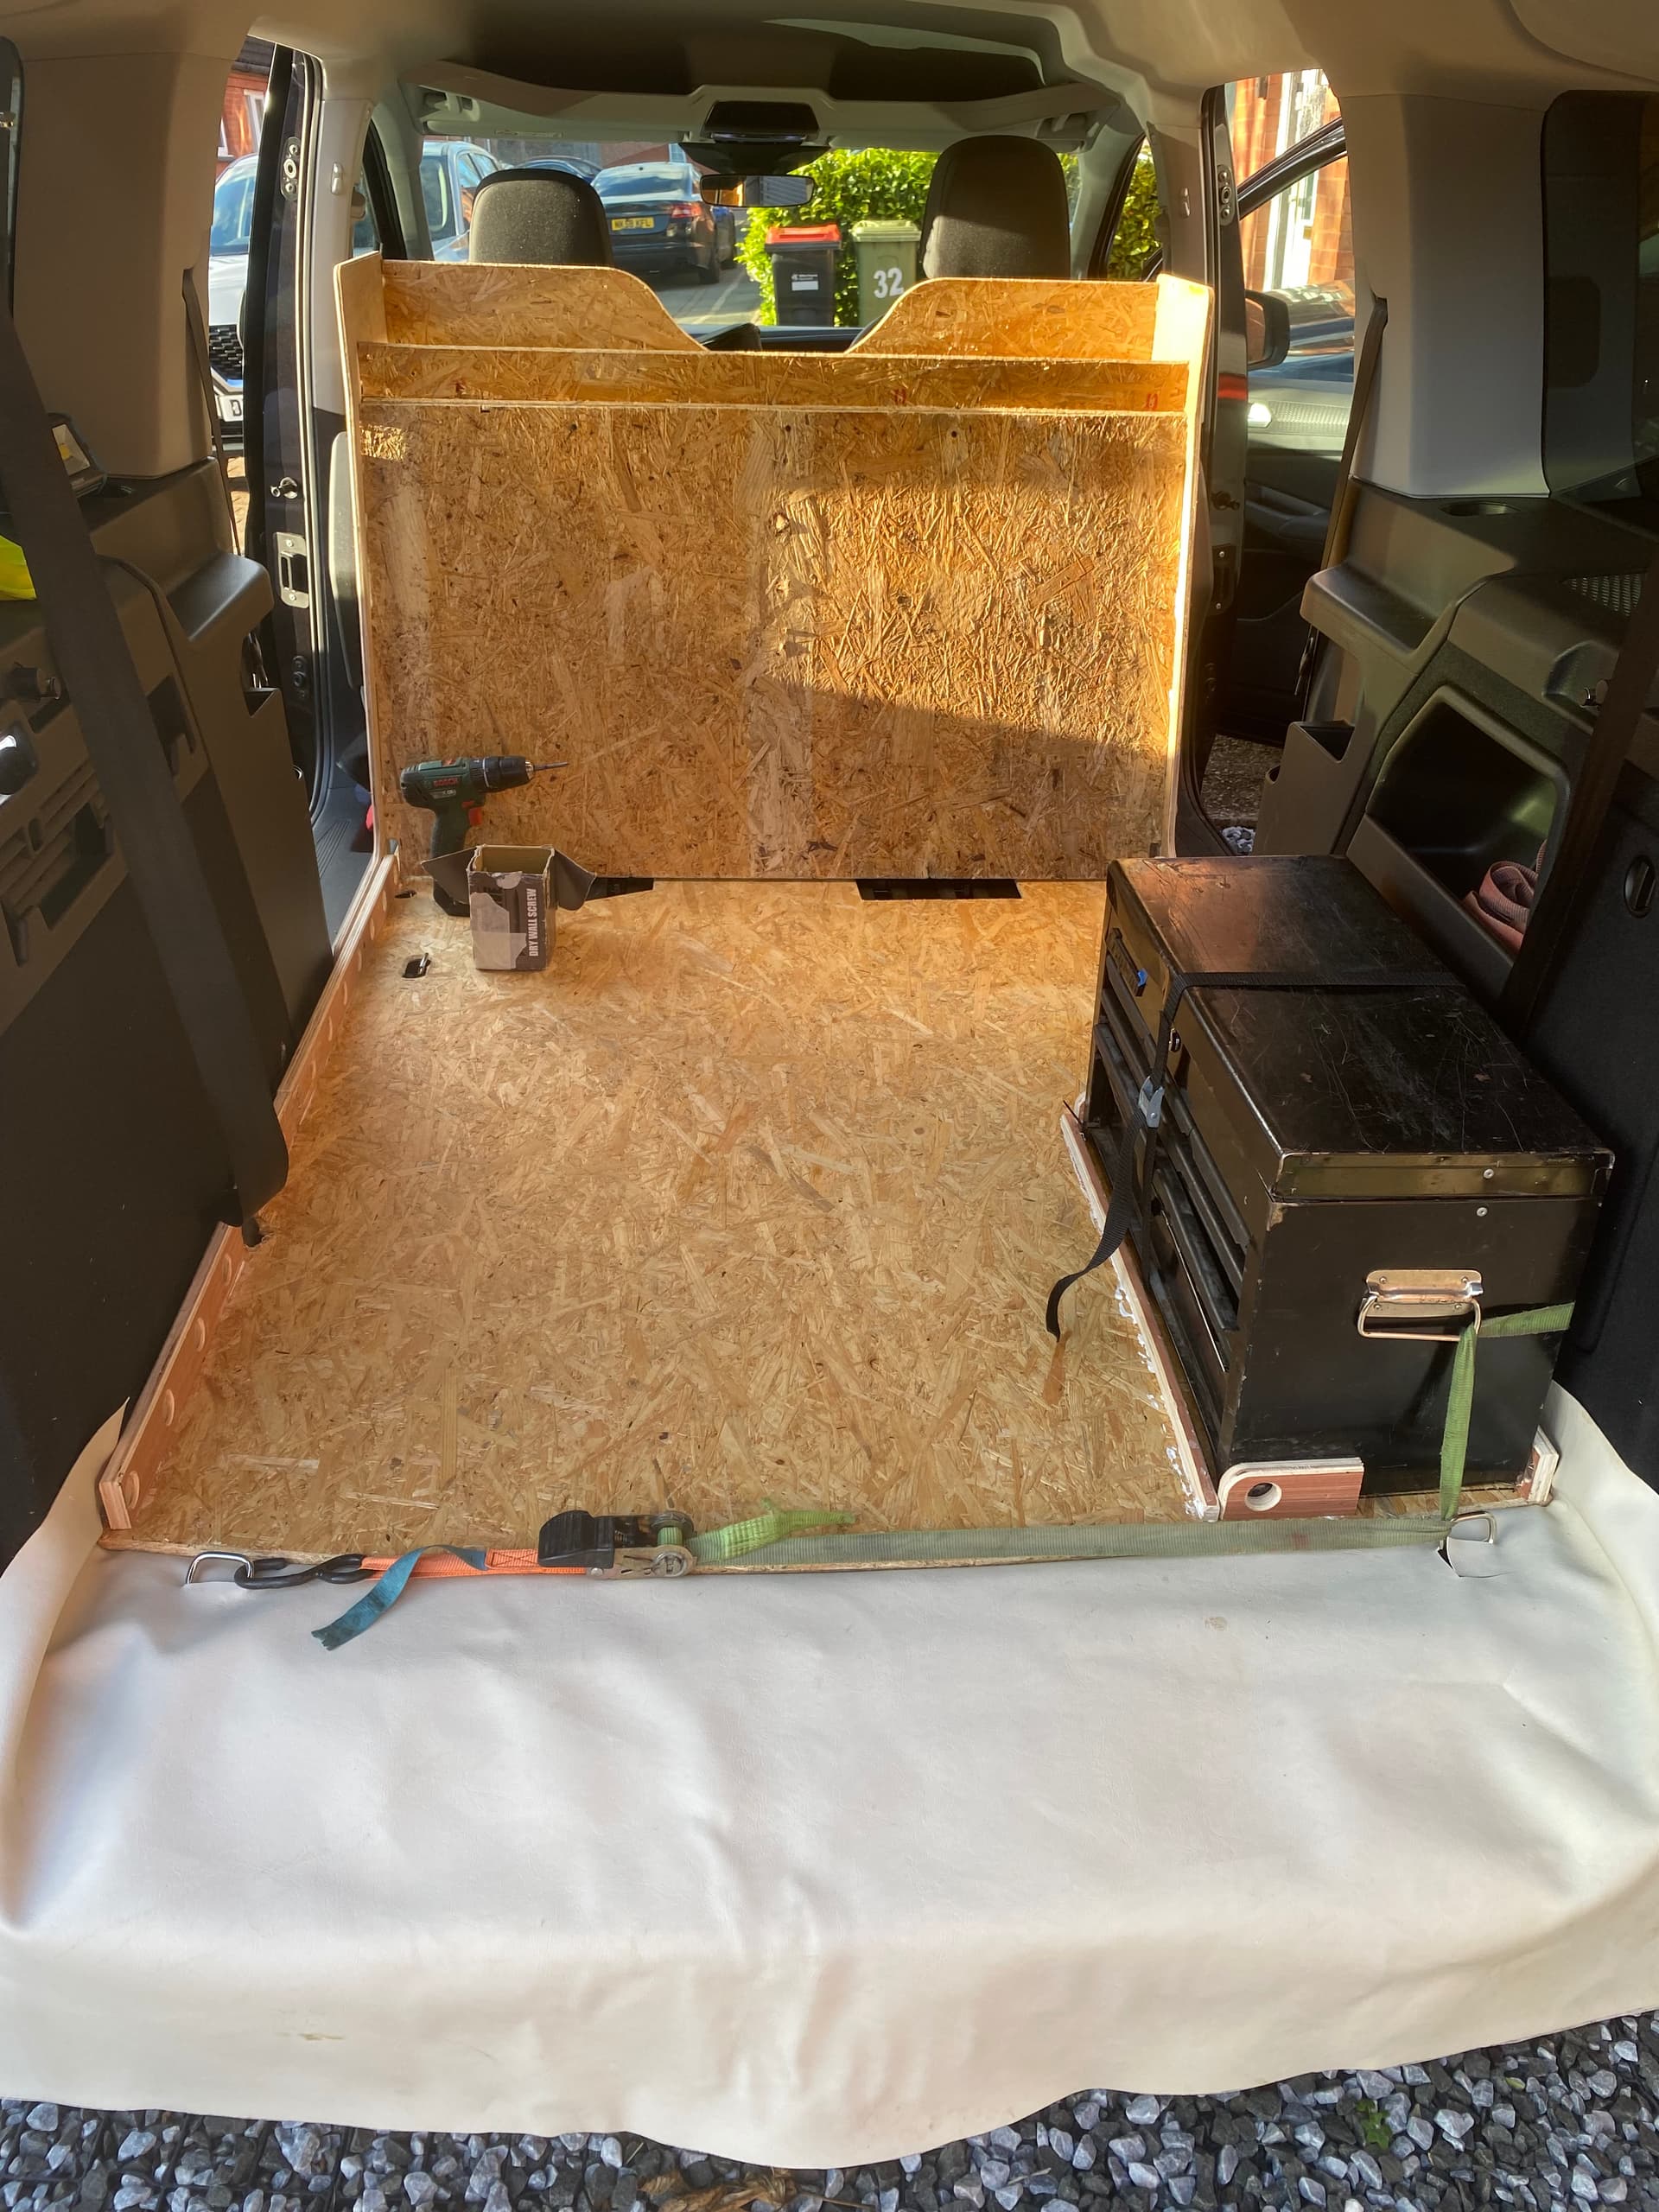
I did a 300 mile journey today with all of the kit I need secured down easily with loads of room to spare while protecting the OEM trim and carpet. (If I damage it I have to pay) The shelf works perfectly for little items and does not squeak Rattle or move because it rests against the seats which are protected by padding to prevent chaffing. Extra vinyl leather stapled to the rear of the floor protects the bumper. All the wood is reclaimed, I am less than £30 into this project, which is a good thing as I will only have this car for six months before I’ve done enough mileage to send it back!
Perhaps a bit overkill for a short term solution, but this was a great excuse to learn more about designing for CNC and I am now looking forward to improving the accuracy of the machine to get good dog bones for futureprojects!
I love the concept. Your build seems to fit perfectly.
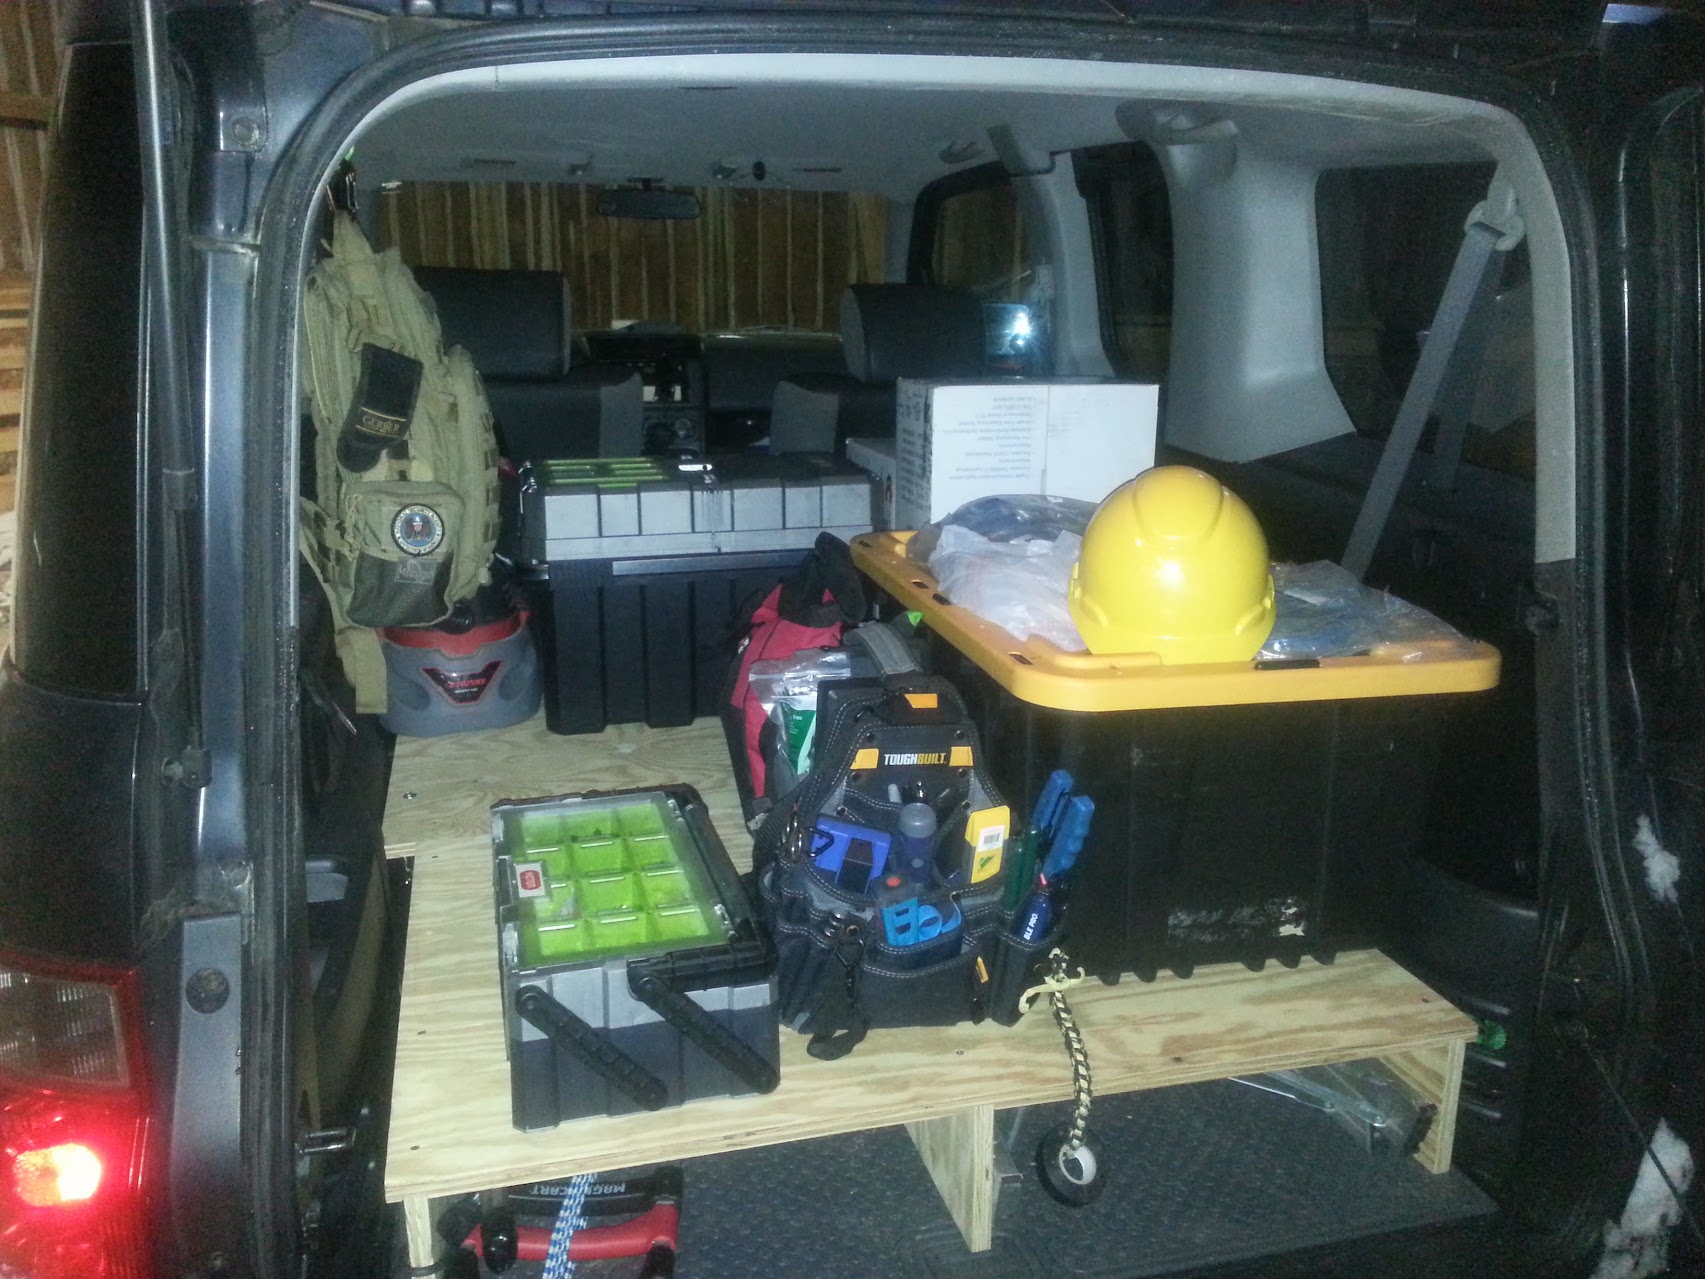
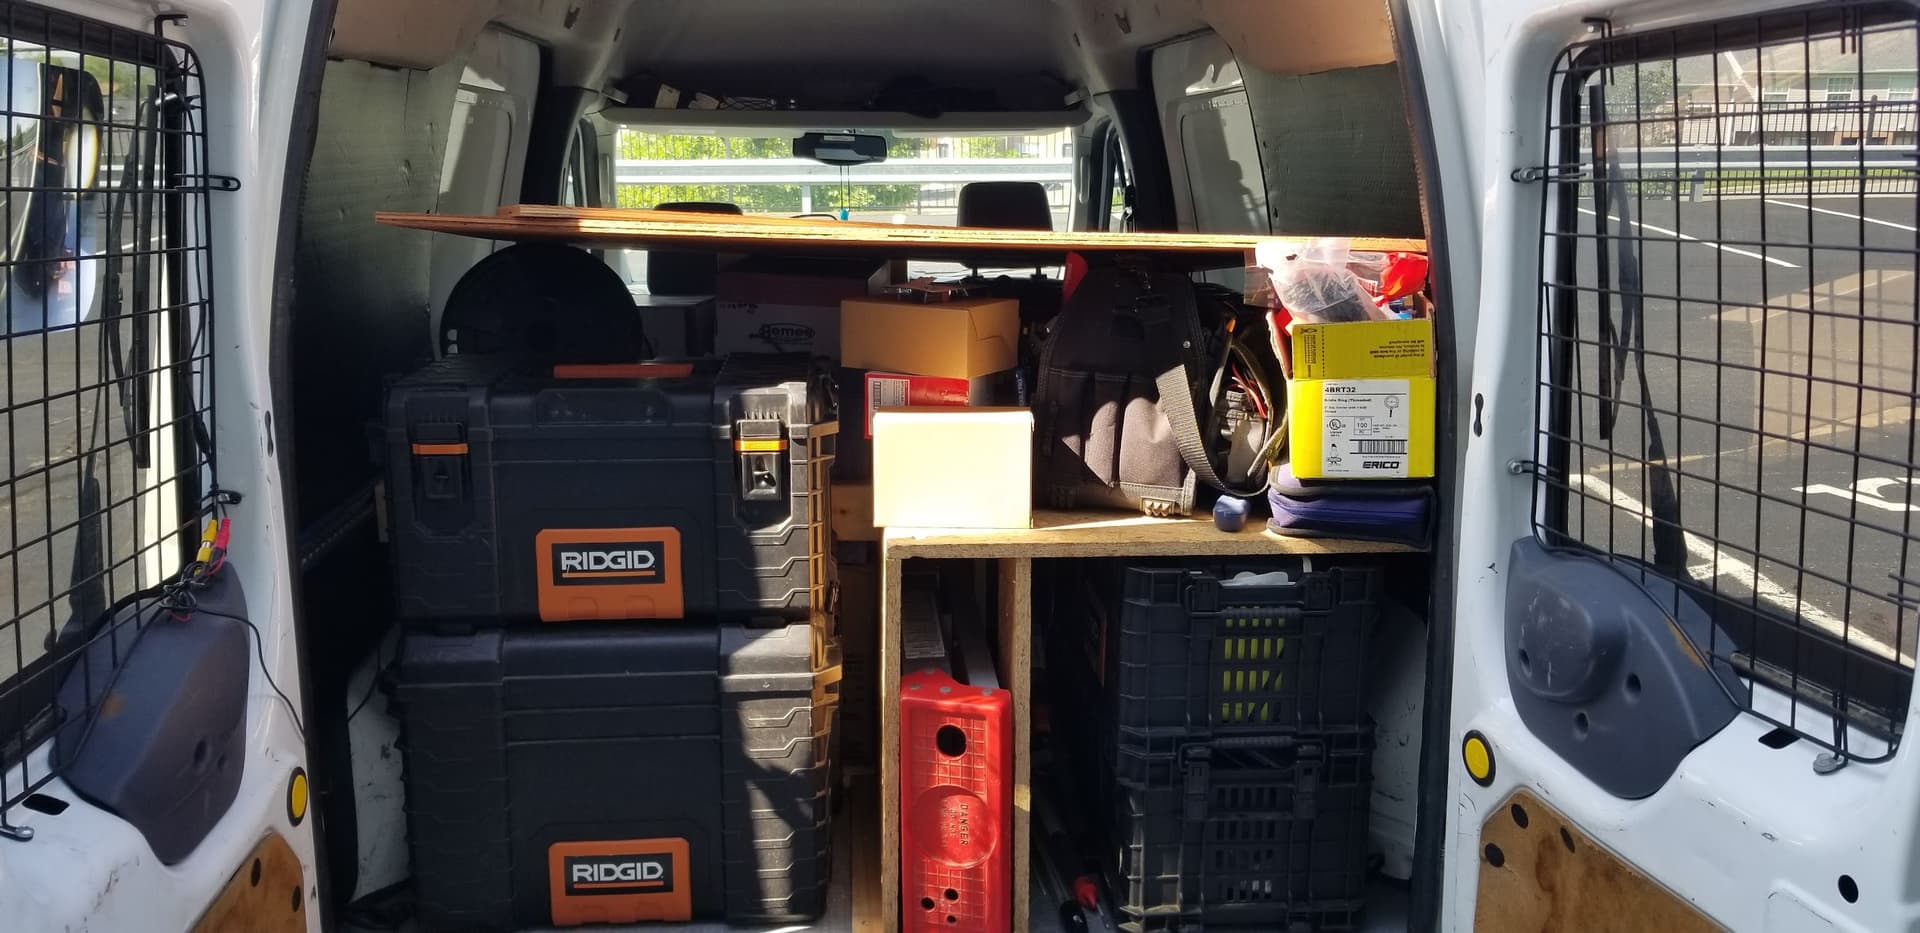
I used to think it was odd to see contractors around here in minivans until I saw the doors open up. They had a full shop built out in those things and the tools always stayed well concealed, and those vans have fairly large motors so hauling wood on top was no big deal.
Keep it up, I am sure that is a platform that is going to do a lot of evolution over your next few biz trips.
Only suggestions would be two (maybe three?) sets of HEAVY DUTY slides to allow you to slide your kit out of the back and sides of the vehicle. Maybe not full extension, but enough to avoid having to climb all the way in there to grab a @#*! piece of trim or box of connectors.
Bonus points if you set up a mobile shop table on the back tray that you can pull out and set up to work on, so you’re not dependent on local space availability…
Edit: be careful, if you’re not the only guy in your position, you may have multiple orders when your coworkers see your setup…
I want to keep it as basic as possible, the whole point is that I can use it as a van first, but maybe slide in/out modular units - If I keep it long enough. We have to change every 9000miles so it won’t be around forever! Would happily make more for colleagues but I’m hoping I can just move this one on when I am done with it - that’d be good enough for me!
We have a VW ID.Buzz (The US version is based on the LWB EU version). It is great! I wonder if the SWB version would work for your tax rules. I’m only talking about after your theoretical 9,000mi swap out to the next car.
This project feels like a pickup truck liner for a hatchback and I love it.
“Pickup truck liner for a hatchback” you Sir have hit the nail on the head! I wanted versatility of my pickup in the company motor, without damaging it and this is what I came up with!
once done with, the floor might go into the pickup bed on top of the liner for the extra tie down points… now you’ve got me thinking about what I could do to organise in the backseats of the supercab
Zero tolerance, but I think I have runout on the Katsu router as they went together fine with a bit of percussive persuasion! I did chamfer all the edges with a handheld router though which I think helped get them started. I was in a rush so didn’t have time or spare wood to make tests etc.
All joints glued and screwed anyway which took up any slop - because car vibrations etc
Wow! This is a fantastic website! I just finished my LR4 which opens up so much potential. I need to expand my sights and this webpage sure inspired me. Great job BTW on your project. Love it.