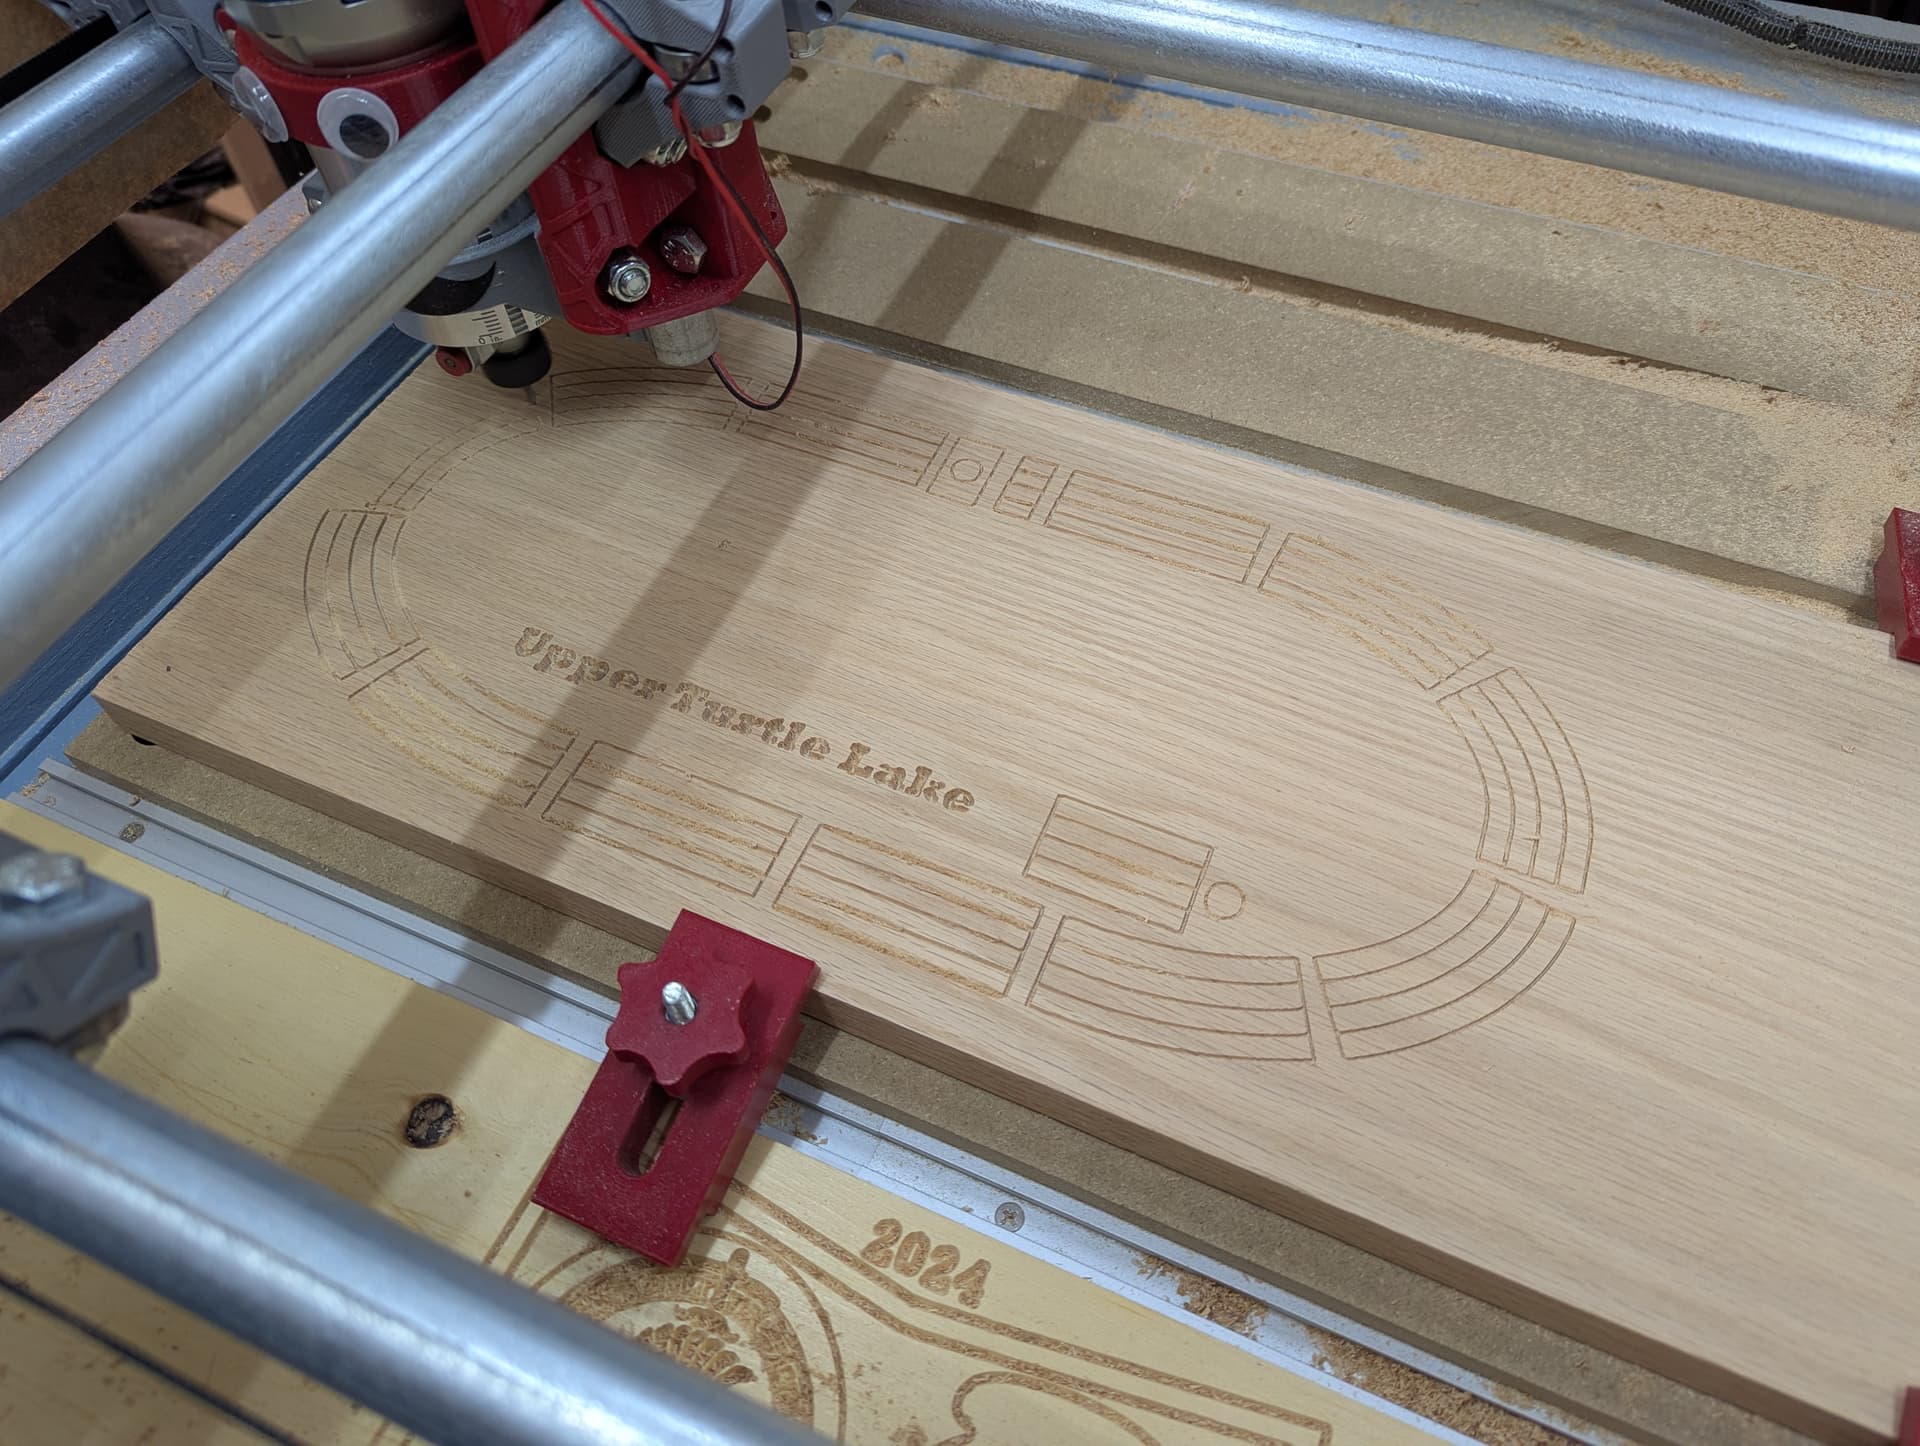
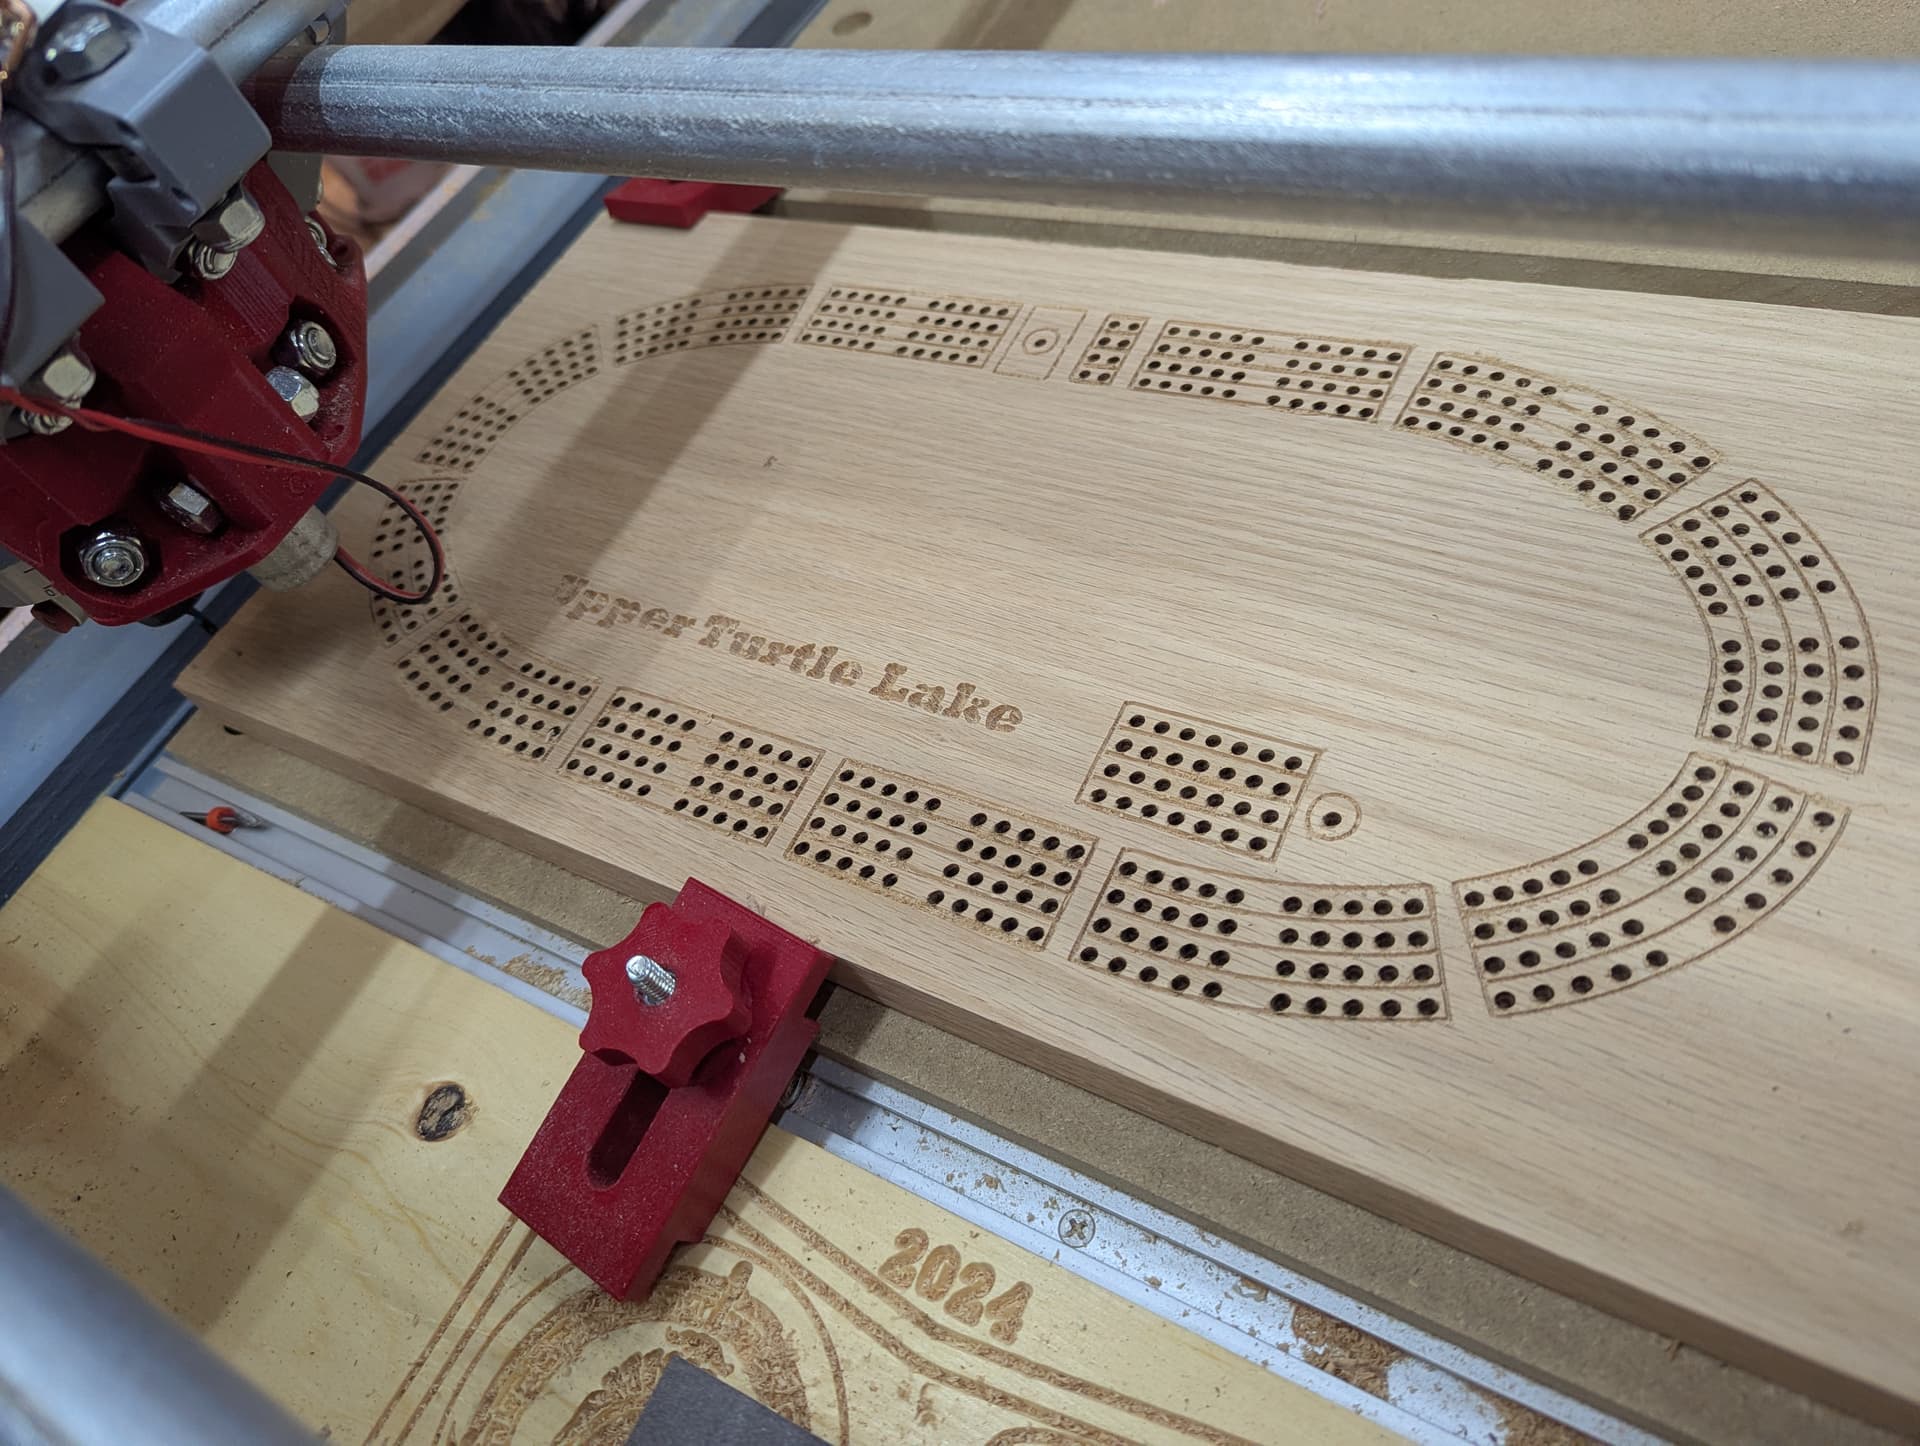
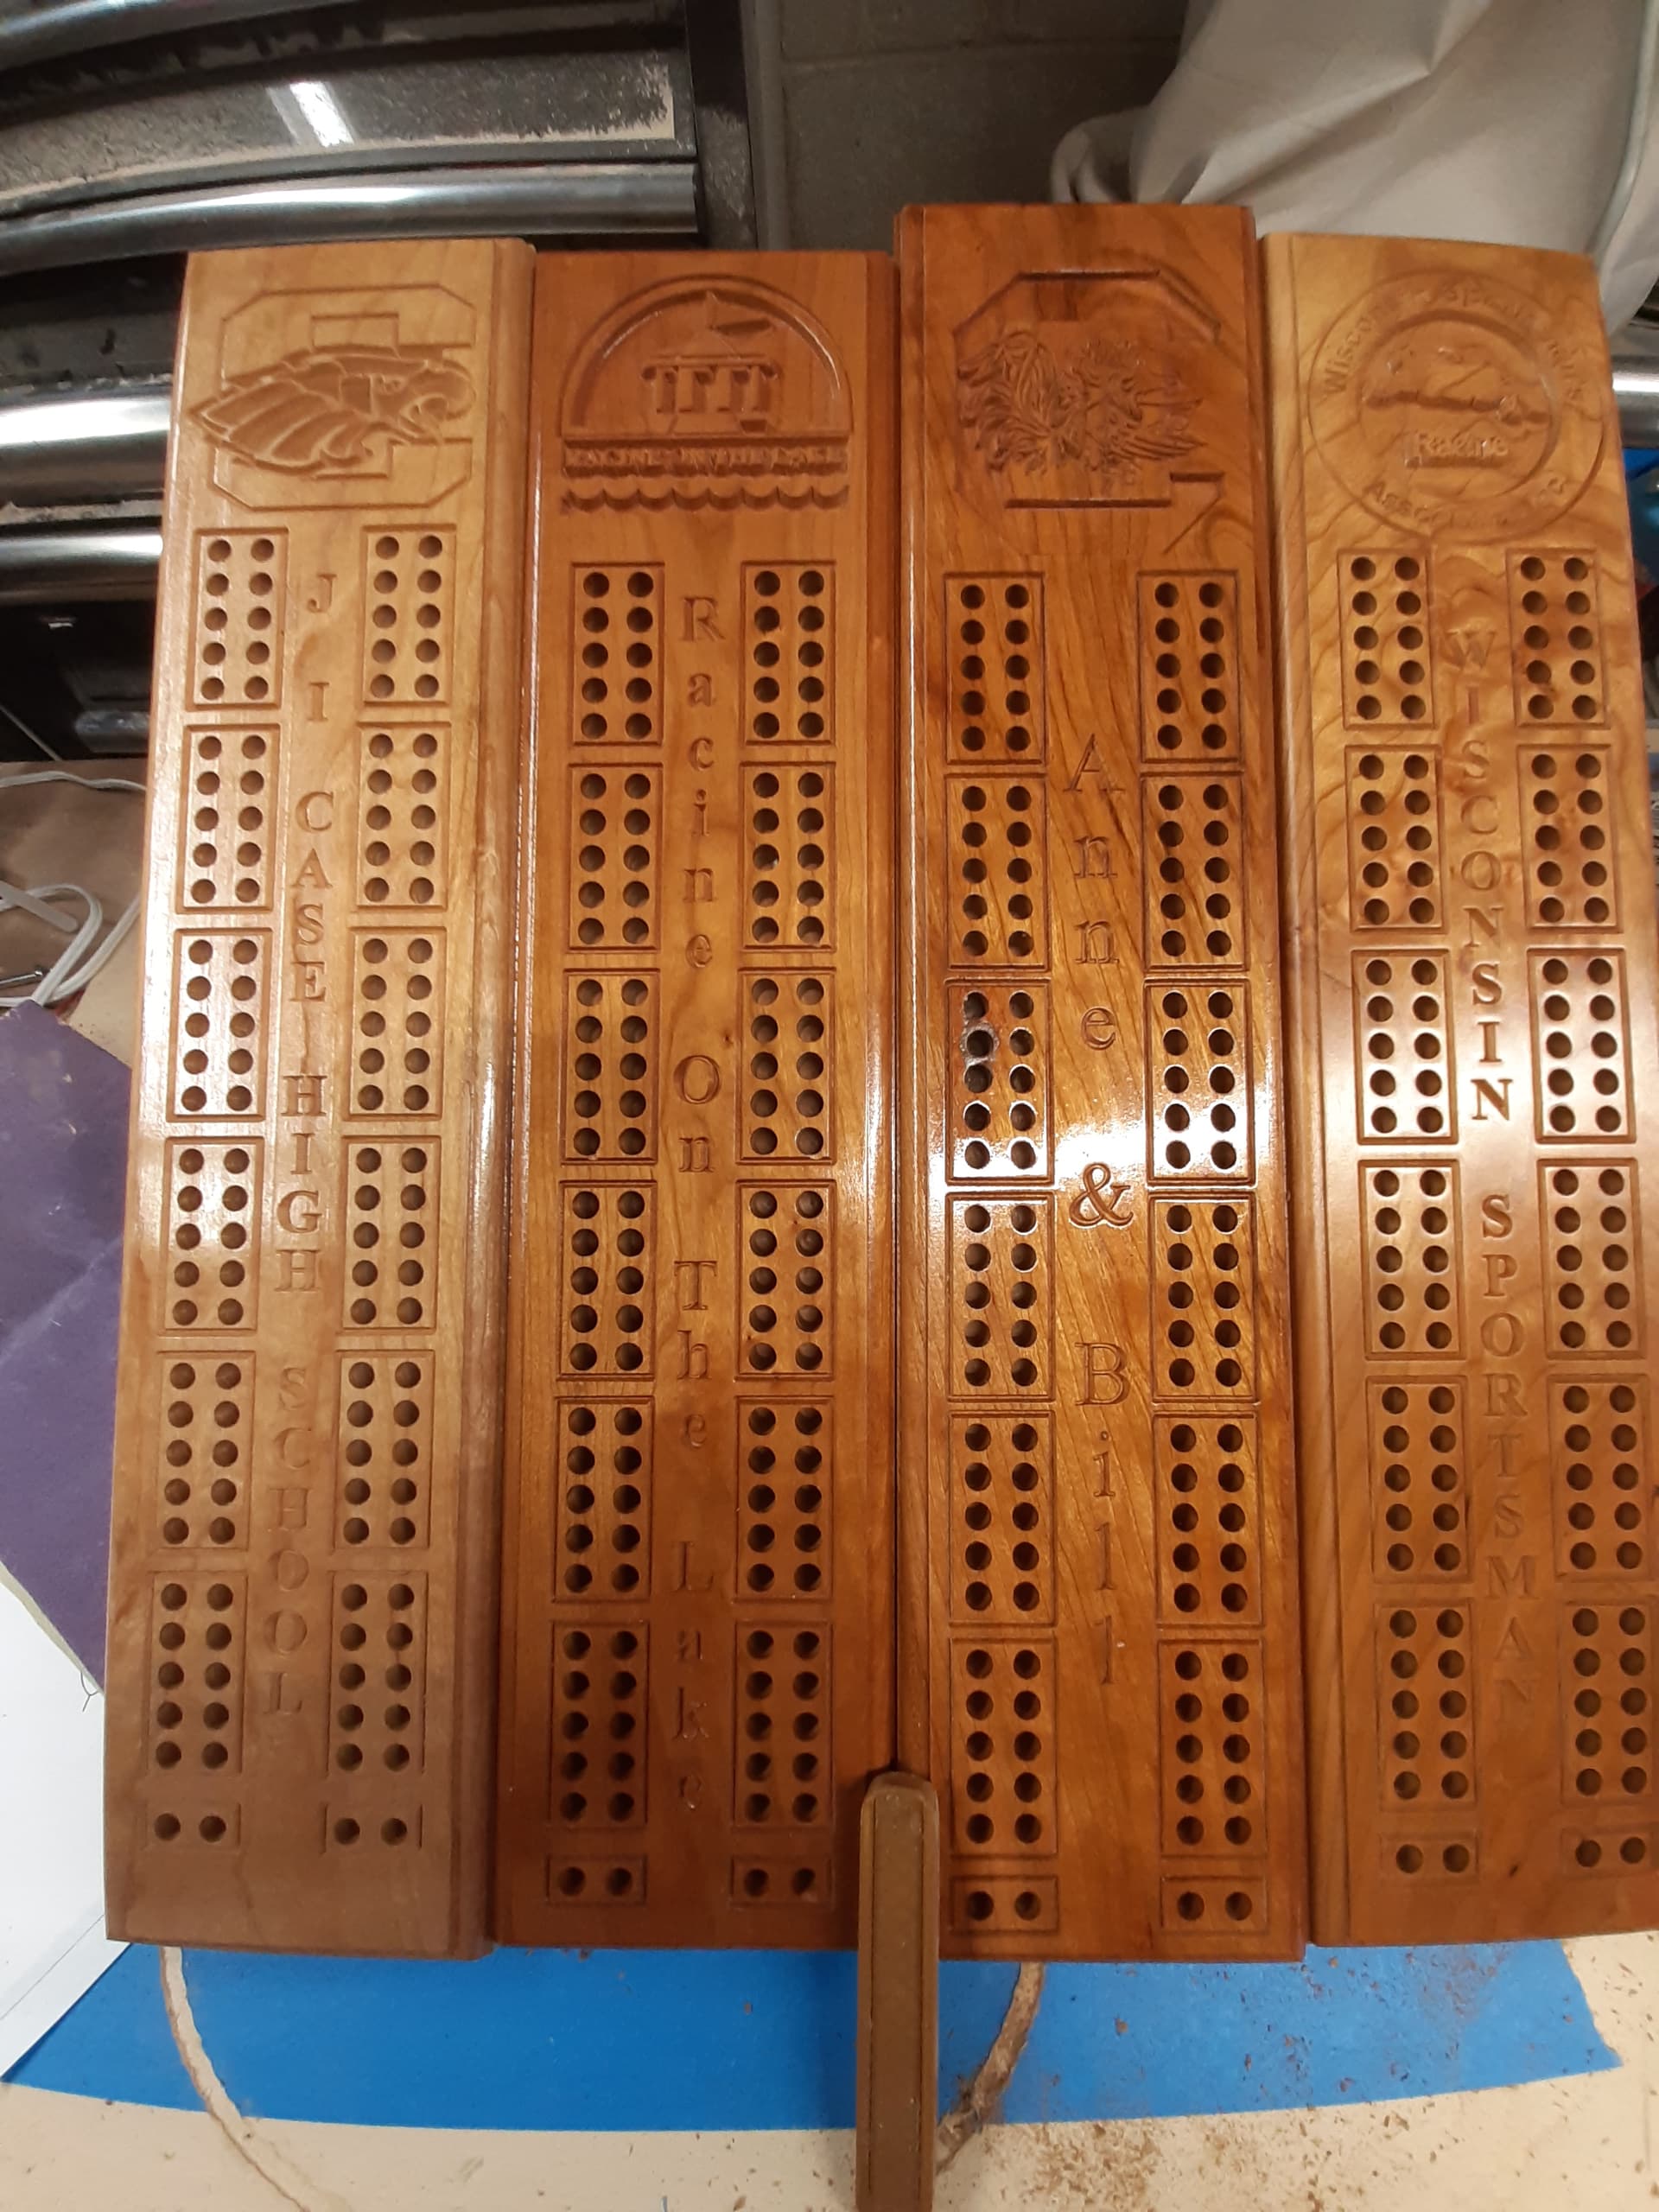
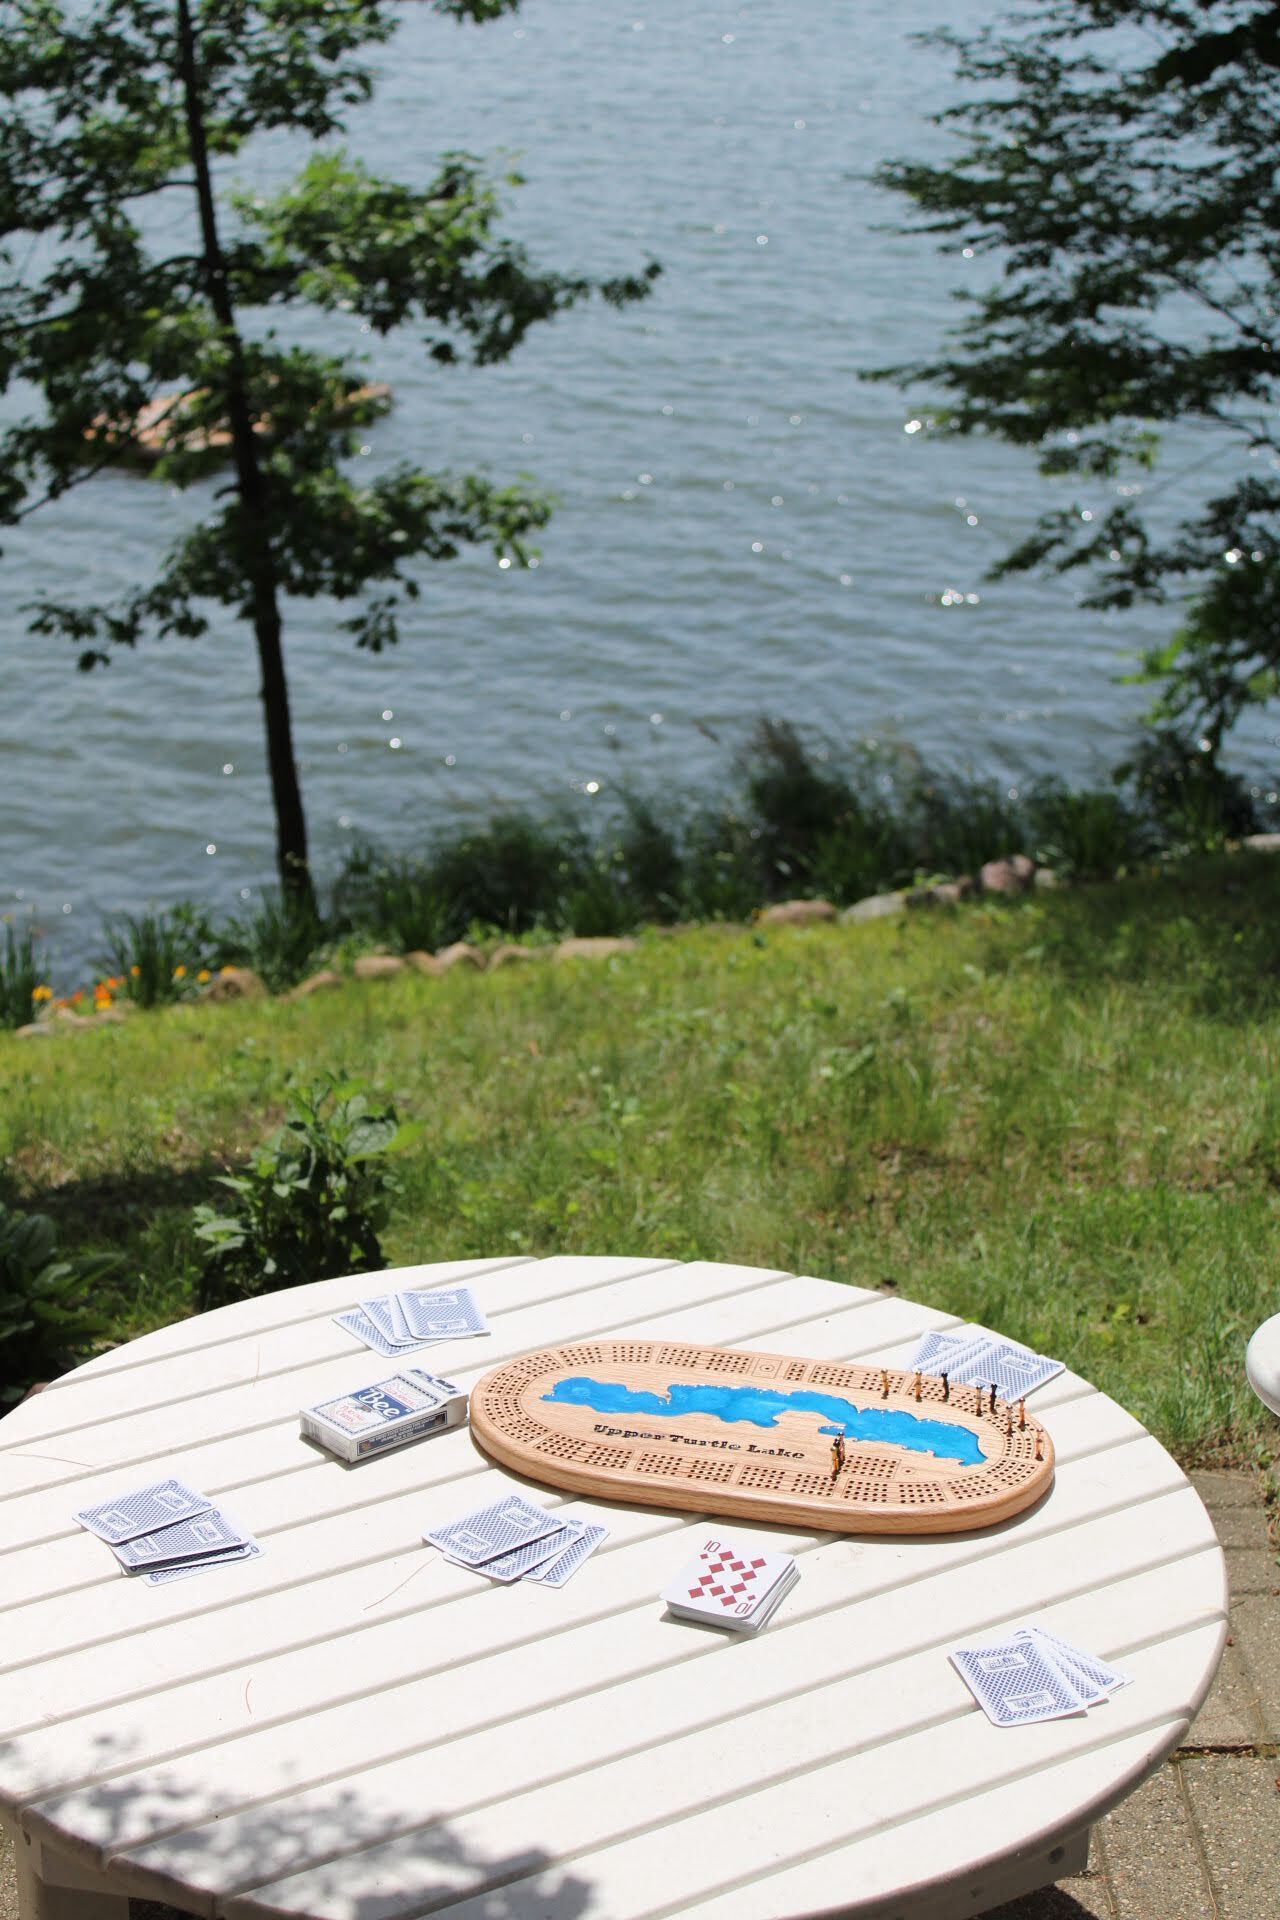
One of my main reasons for wanting to build a CNC was that I loved making cribbage boards but I was sick of drilling hundreds of holes. This is my first cribbage board on my MPCNC and it will be a gift for my dad.
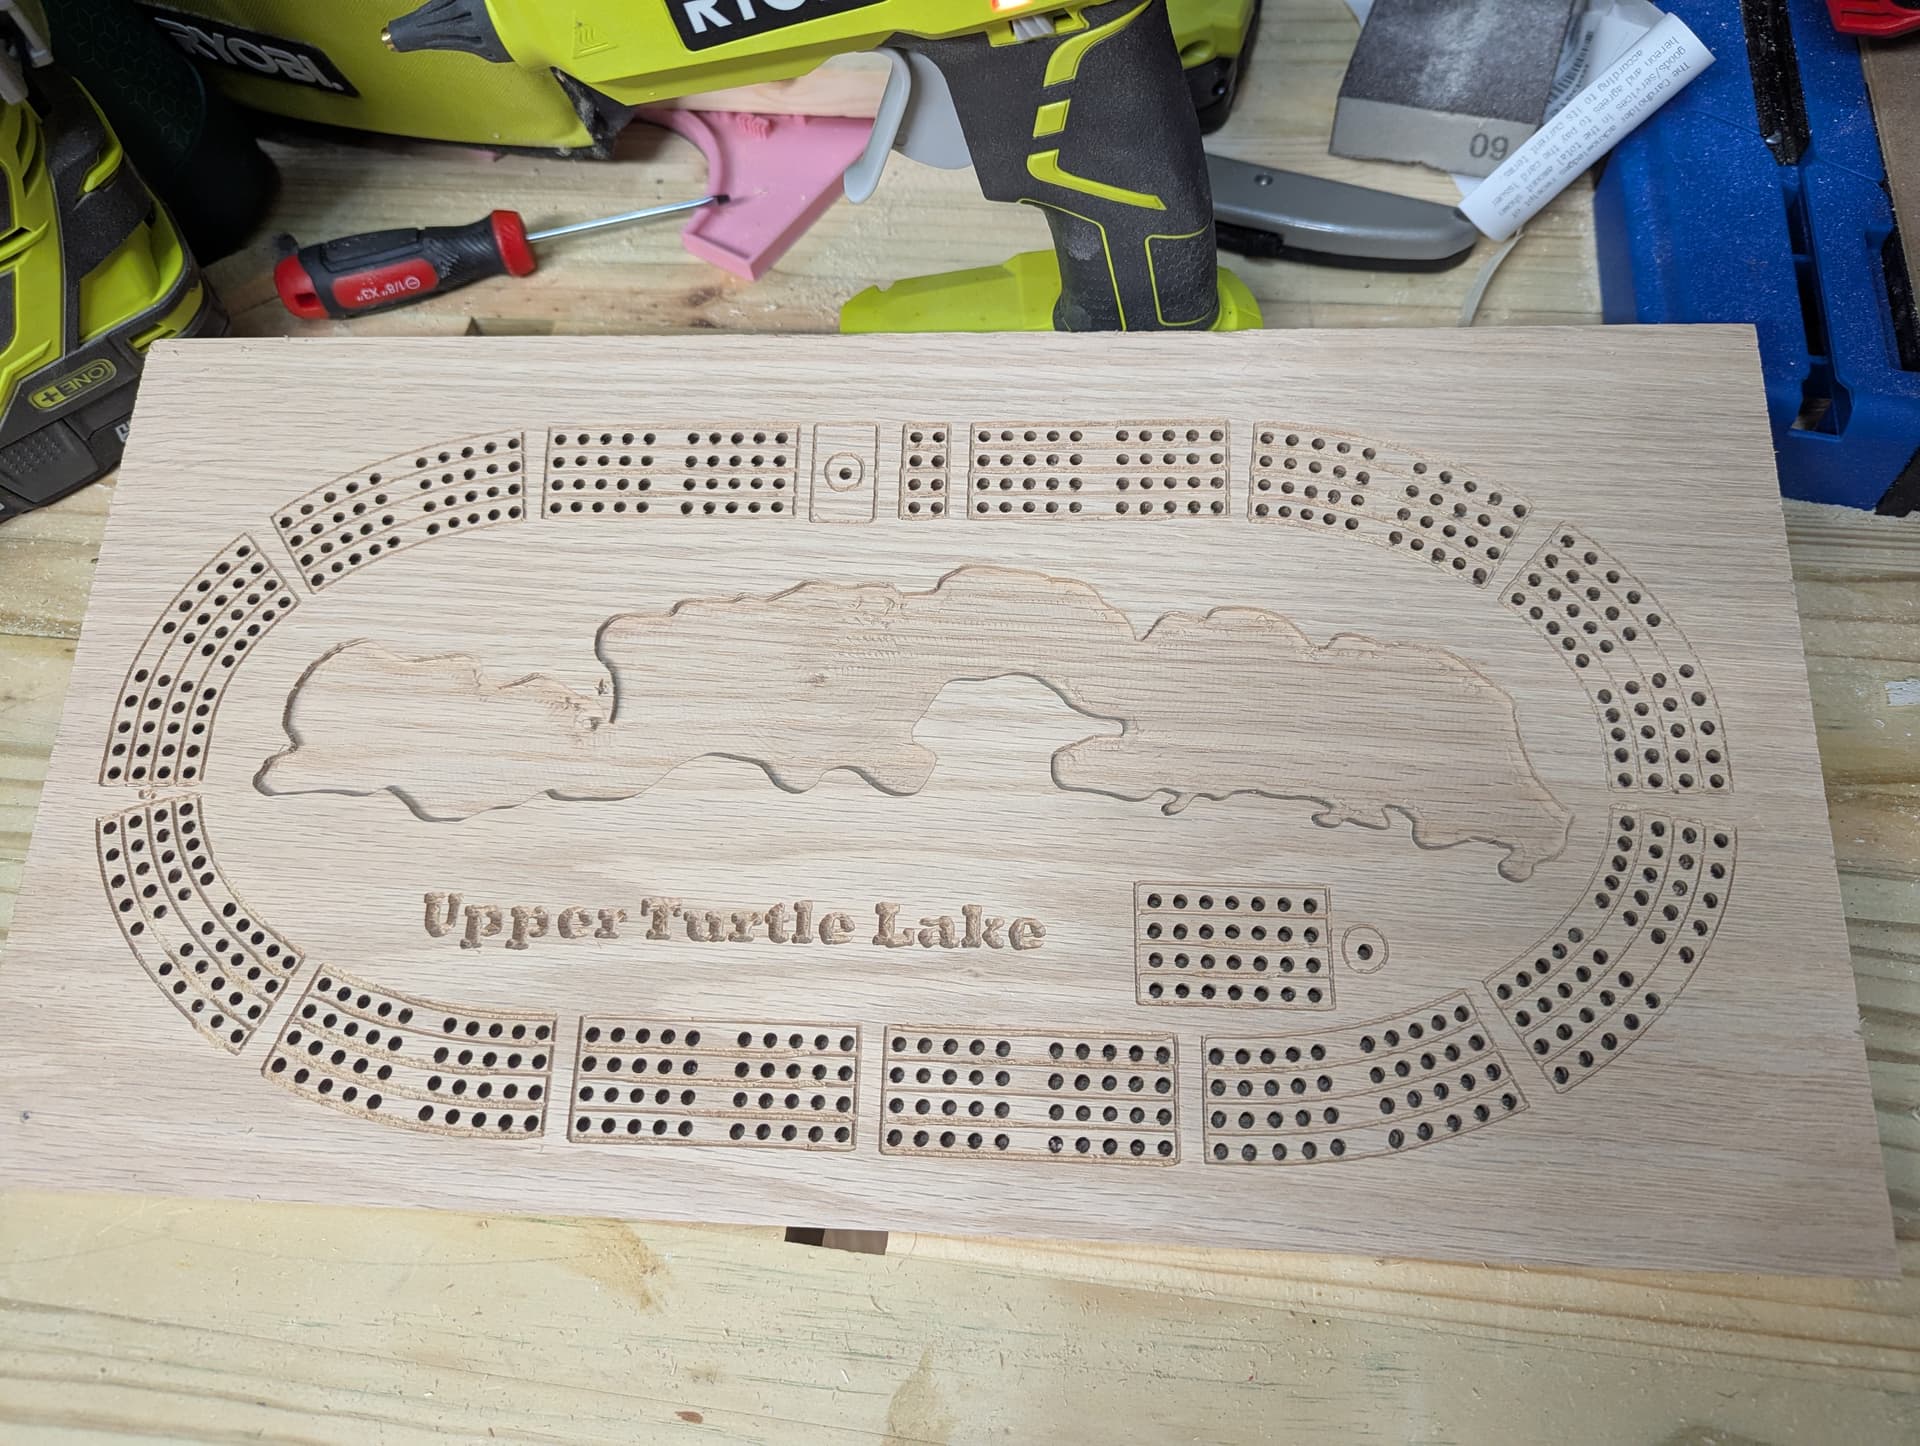
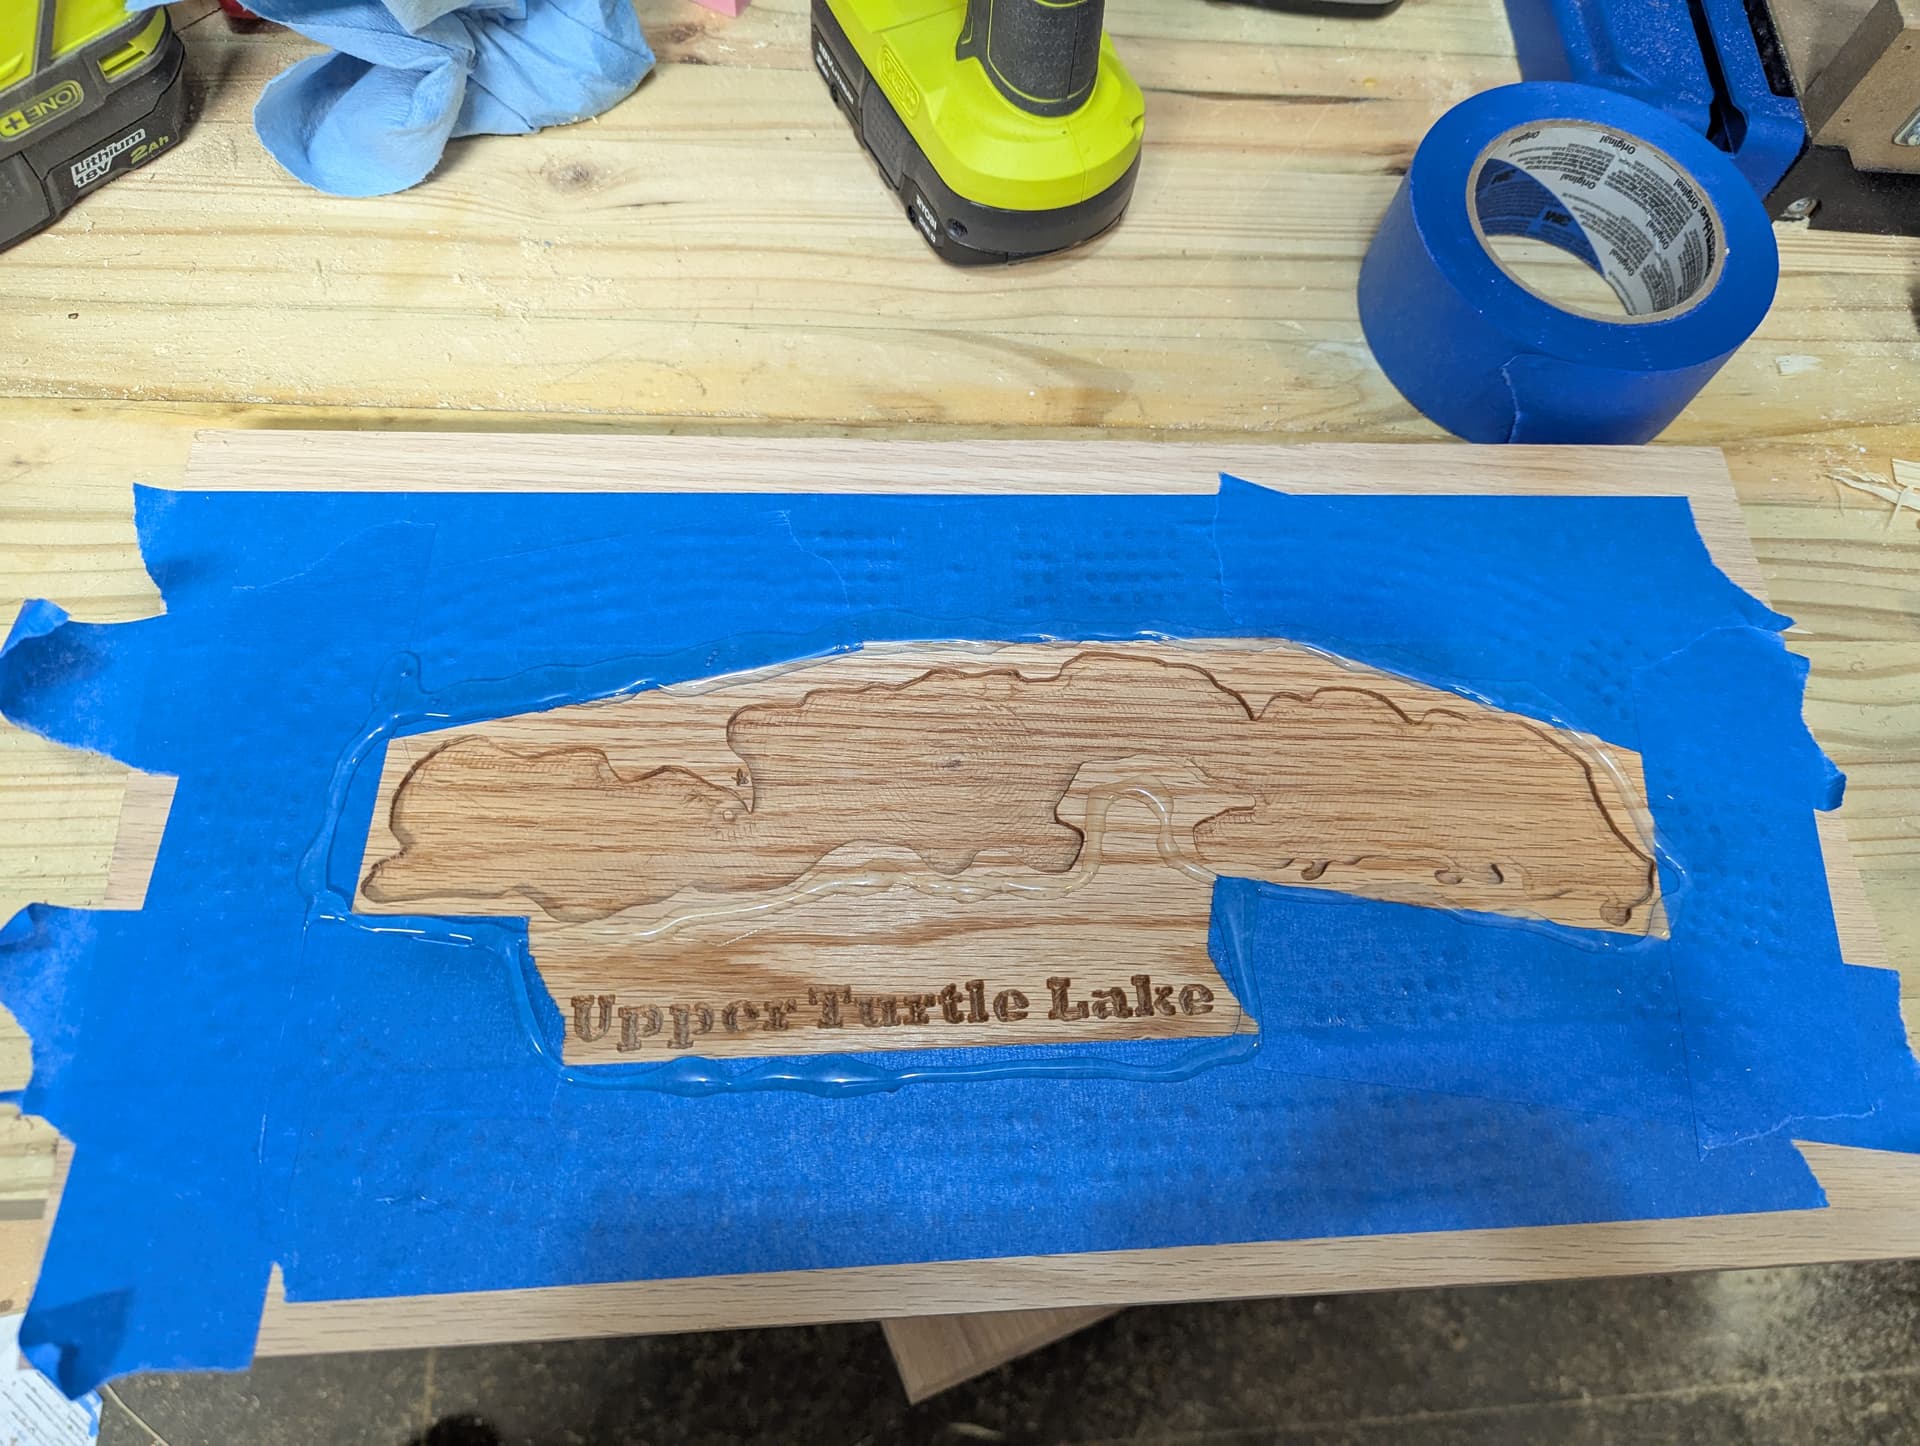
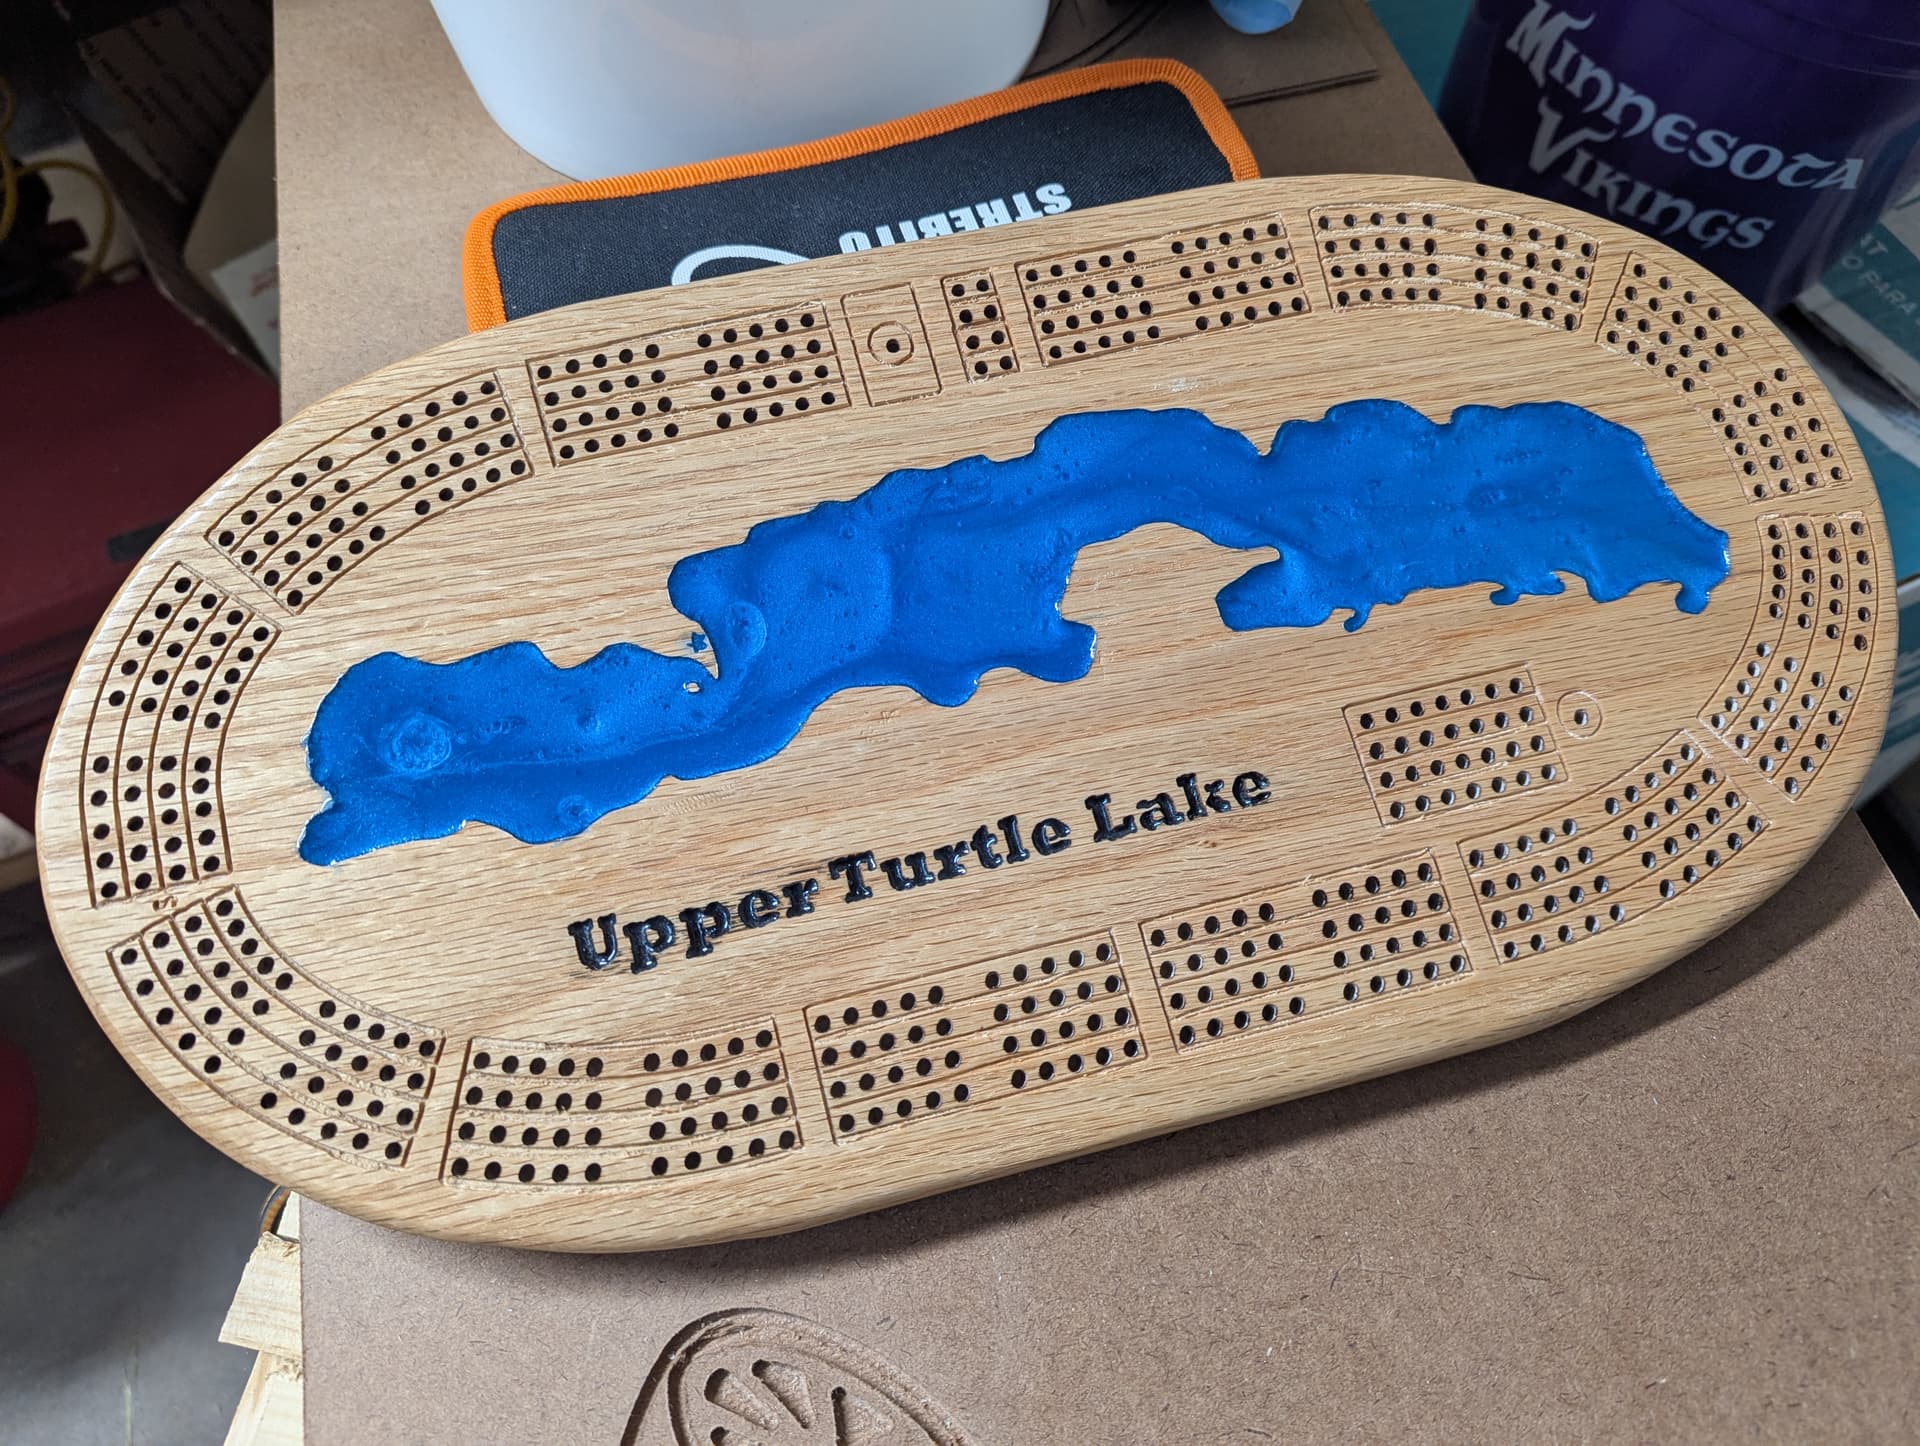
The lake carving made me very nervous as during my first run at this project, my toolpath was off and suddenly the shores of the lake were drastically changed.
This time the lake went very smooth although I was watching it like a hawk the whole time. The blue tape was an experiment that I do not think made a difference or was worth it.
After carving, I prepped the board for resin pouring. I put down fresh blue tape to protect the holes, sprayed a quick coat of lacquer and then made a ring of hot glue to prevent running.
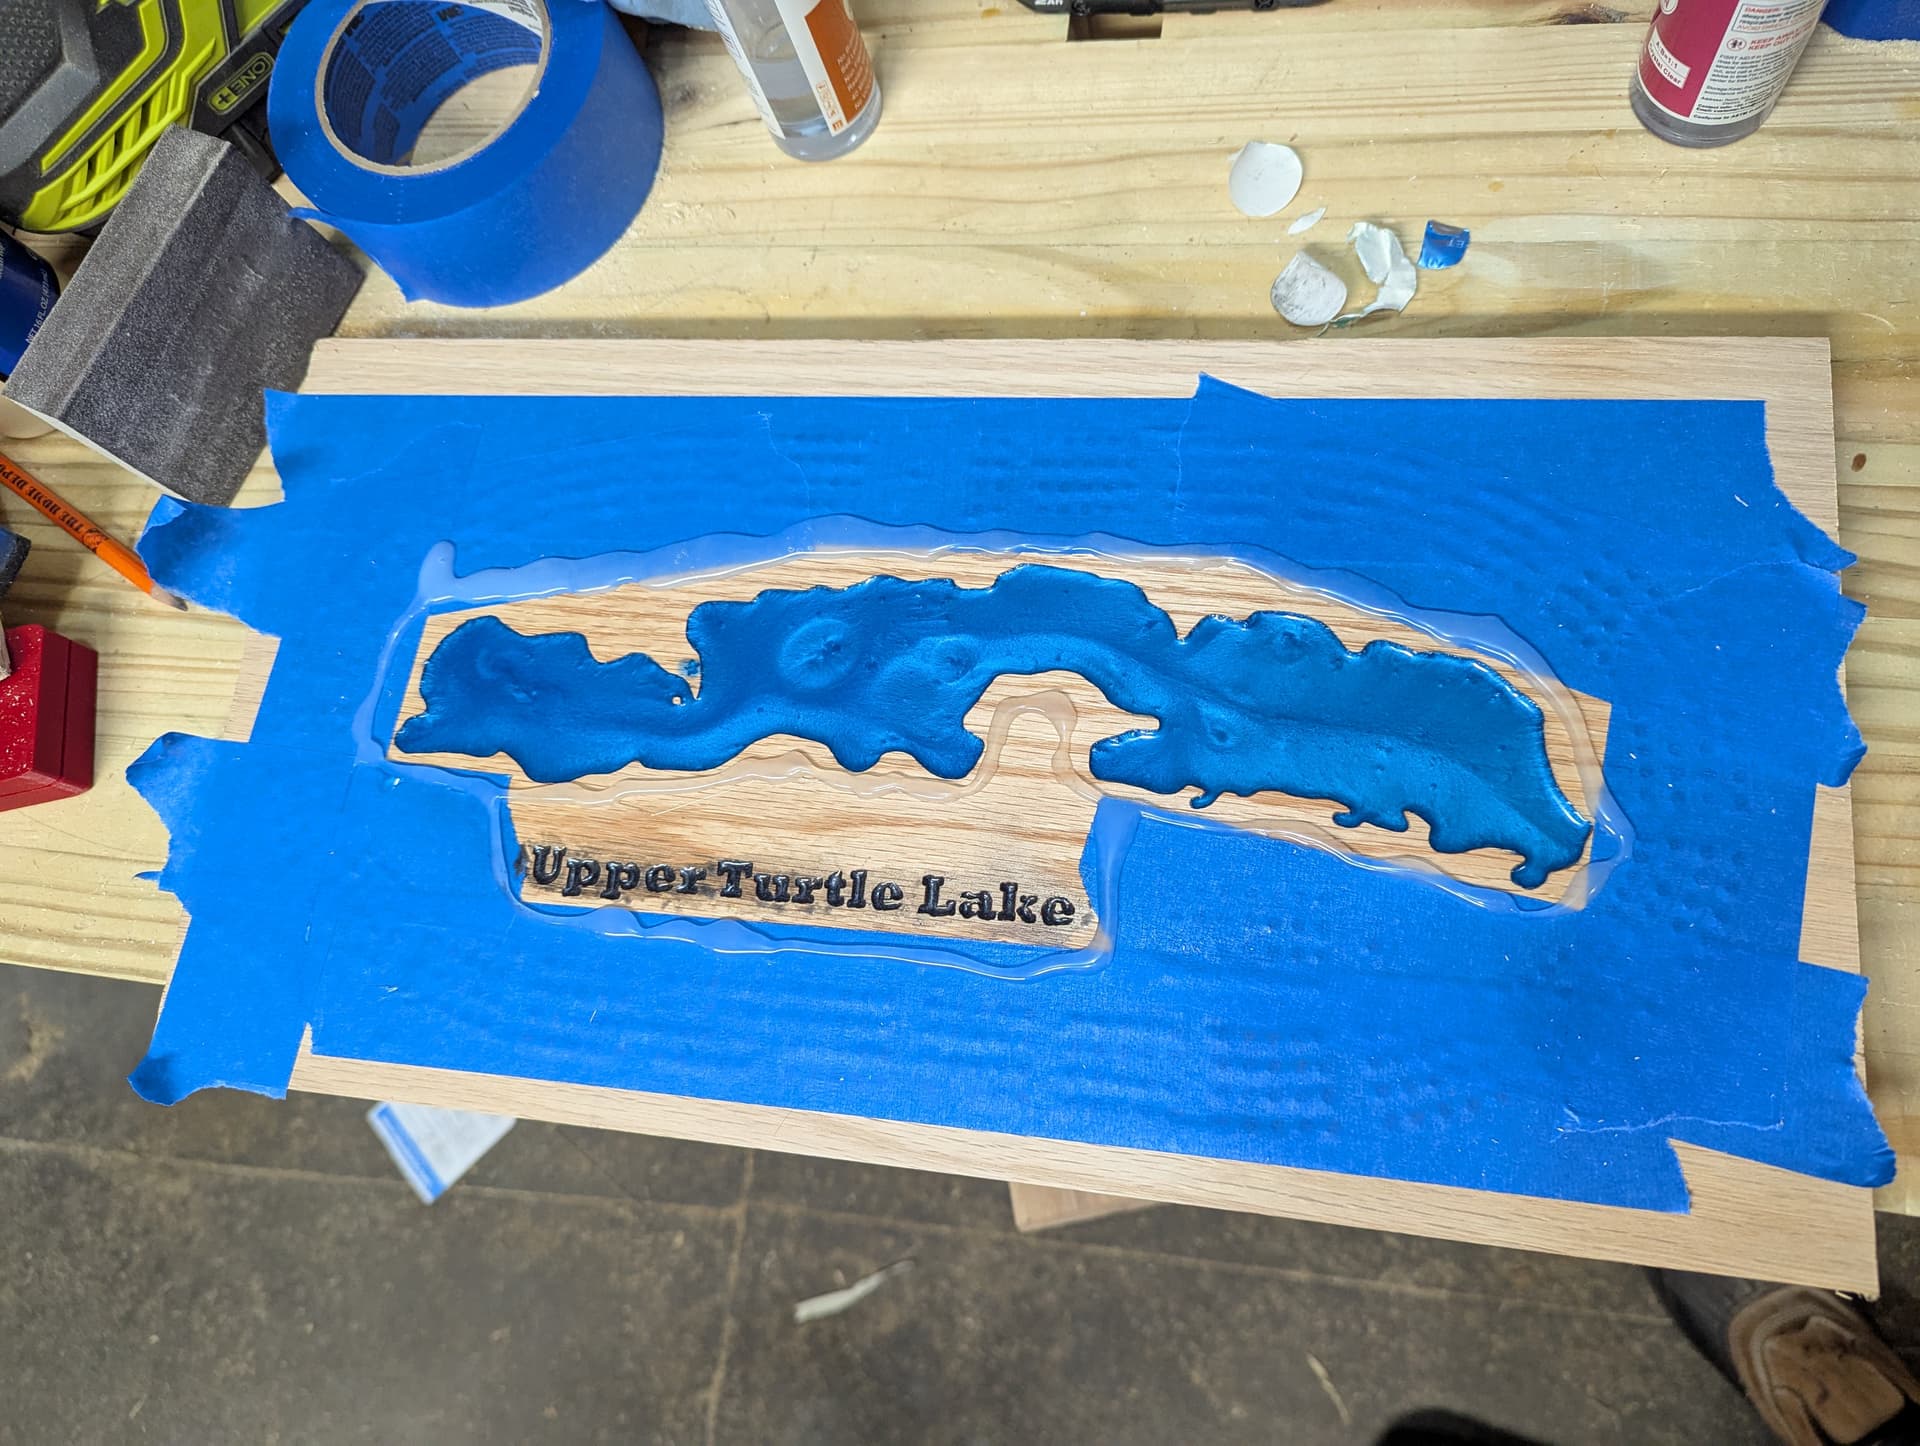
Now that the resin is poured, I need to patiently wait for it to cure and then I will work on cleaning up the edges of the board and putting a finally finish on.
This is such a prime example of a CNC project. Drilling all those holes is not fun by hand and getting all of them perfect is extremely difficult, and free handing the lake shape would not be easy. There are not too many one off projects that start to finish faster on a CNC (CAD/CAM time factored in), but this is definitely one of them.
Looks amazing so far!
If you do another one you can use the carve function and pocket with the endmill, then it will do the edges with a V bit and you will get extreme shoreline detail if that is something that interests you.
And to take it one step further, get the bathymetry data of thelake and do multiple carve depths. With some semi-translucent epoxy, the deeper cuts will appear darker and near the shore will be a light blue. Time is probably better spent playing cribbage though.
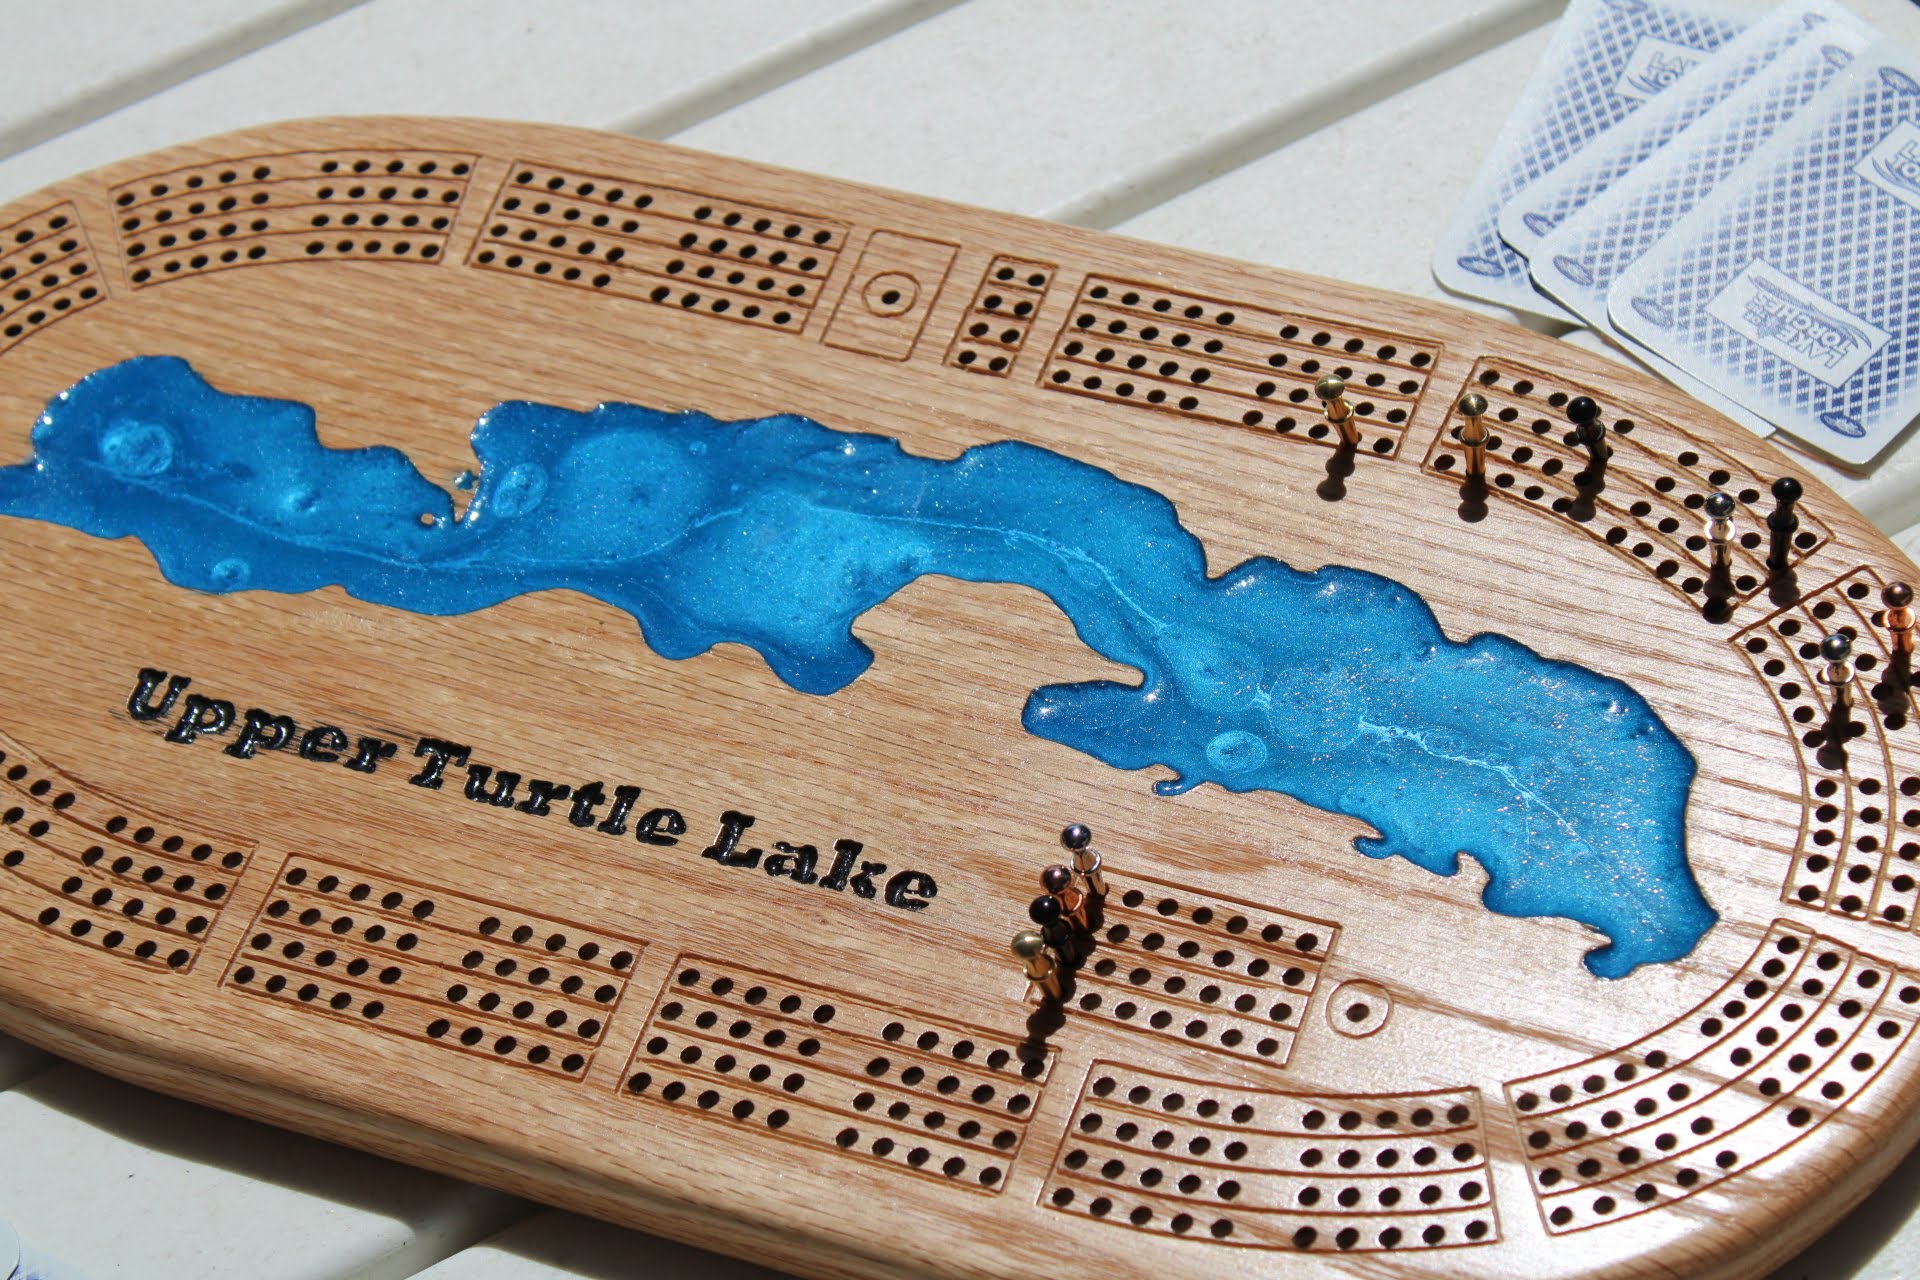
I also used UV resin for the first time. It was super nice applying light for a few minutes and then continuing on with the project. Might be worth experimenting with if you plan on doing epoxy pours more often.
After the carving the outlines, I did notice that there was some small movement with my tool mount. I tightened the screws up and that cleared it up for clearing the holes.
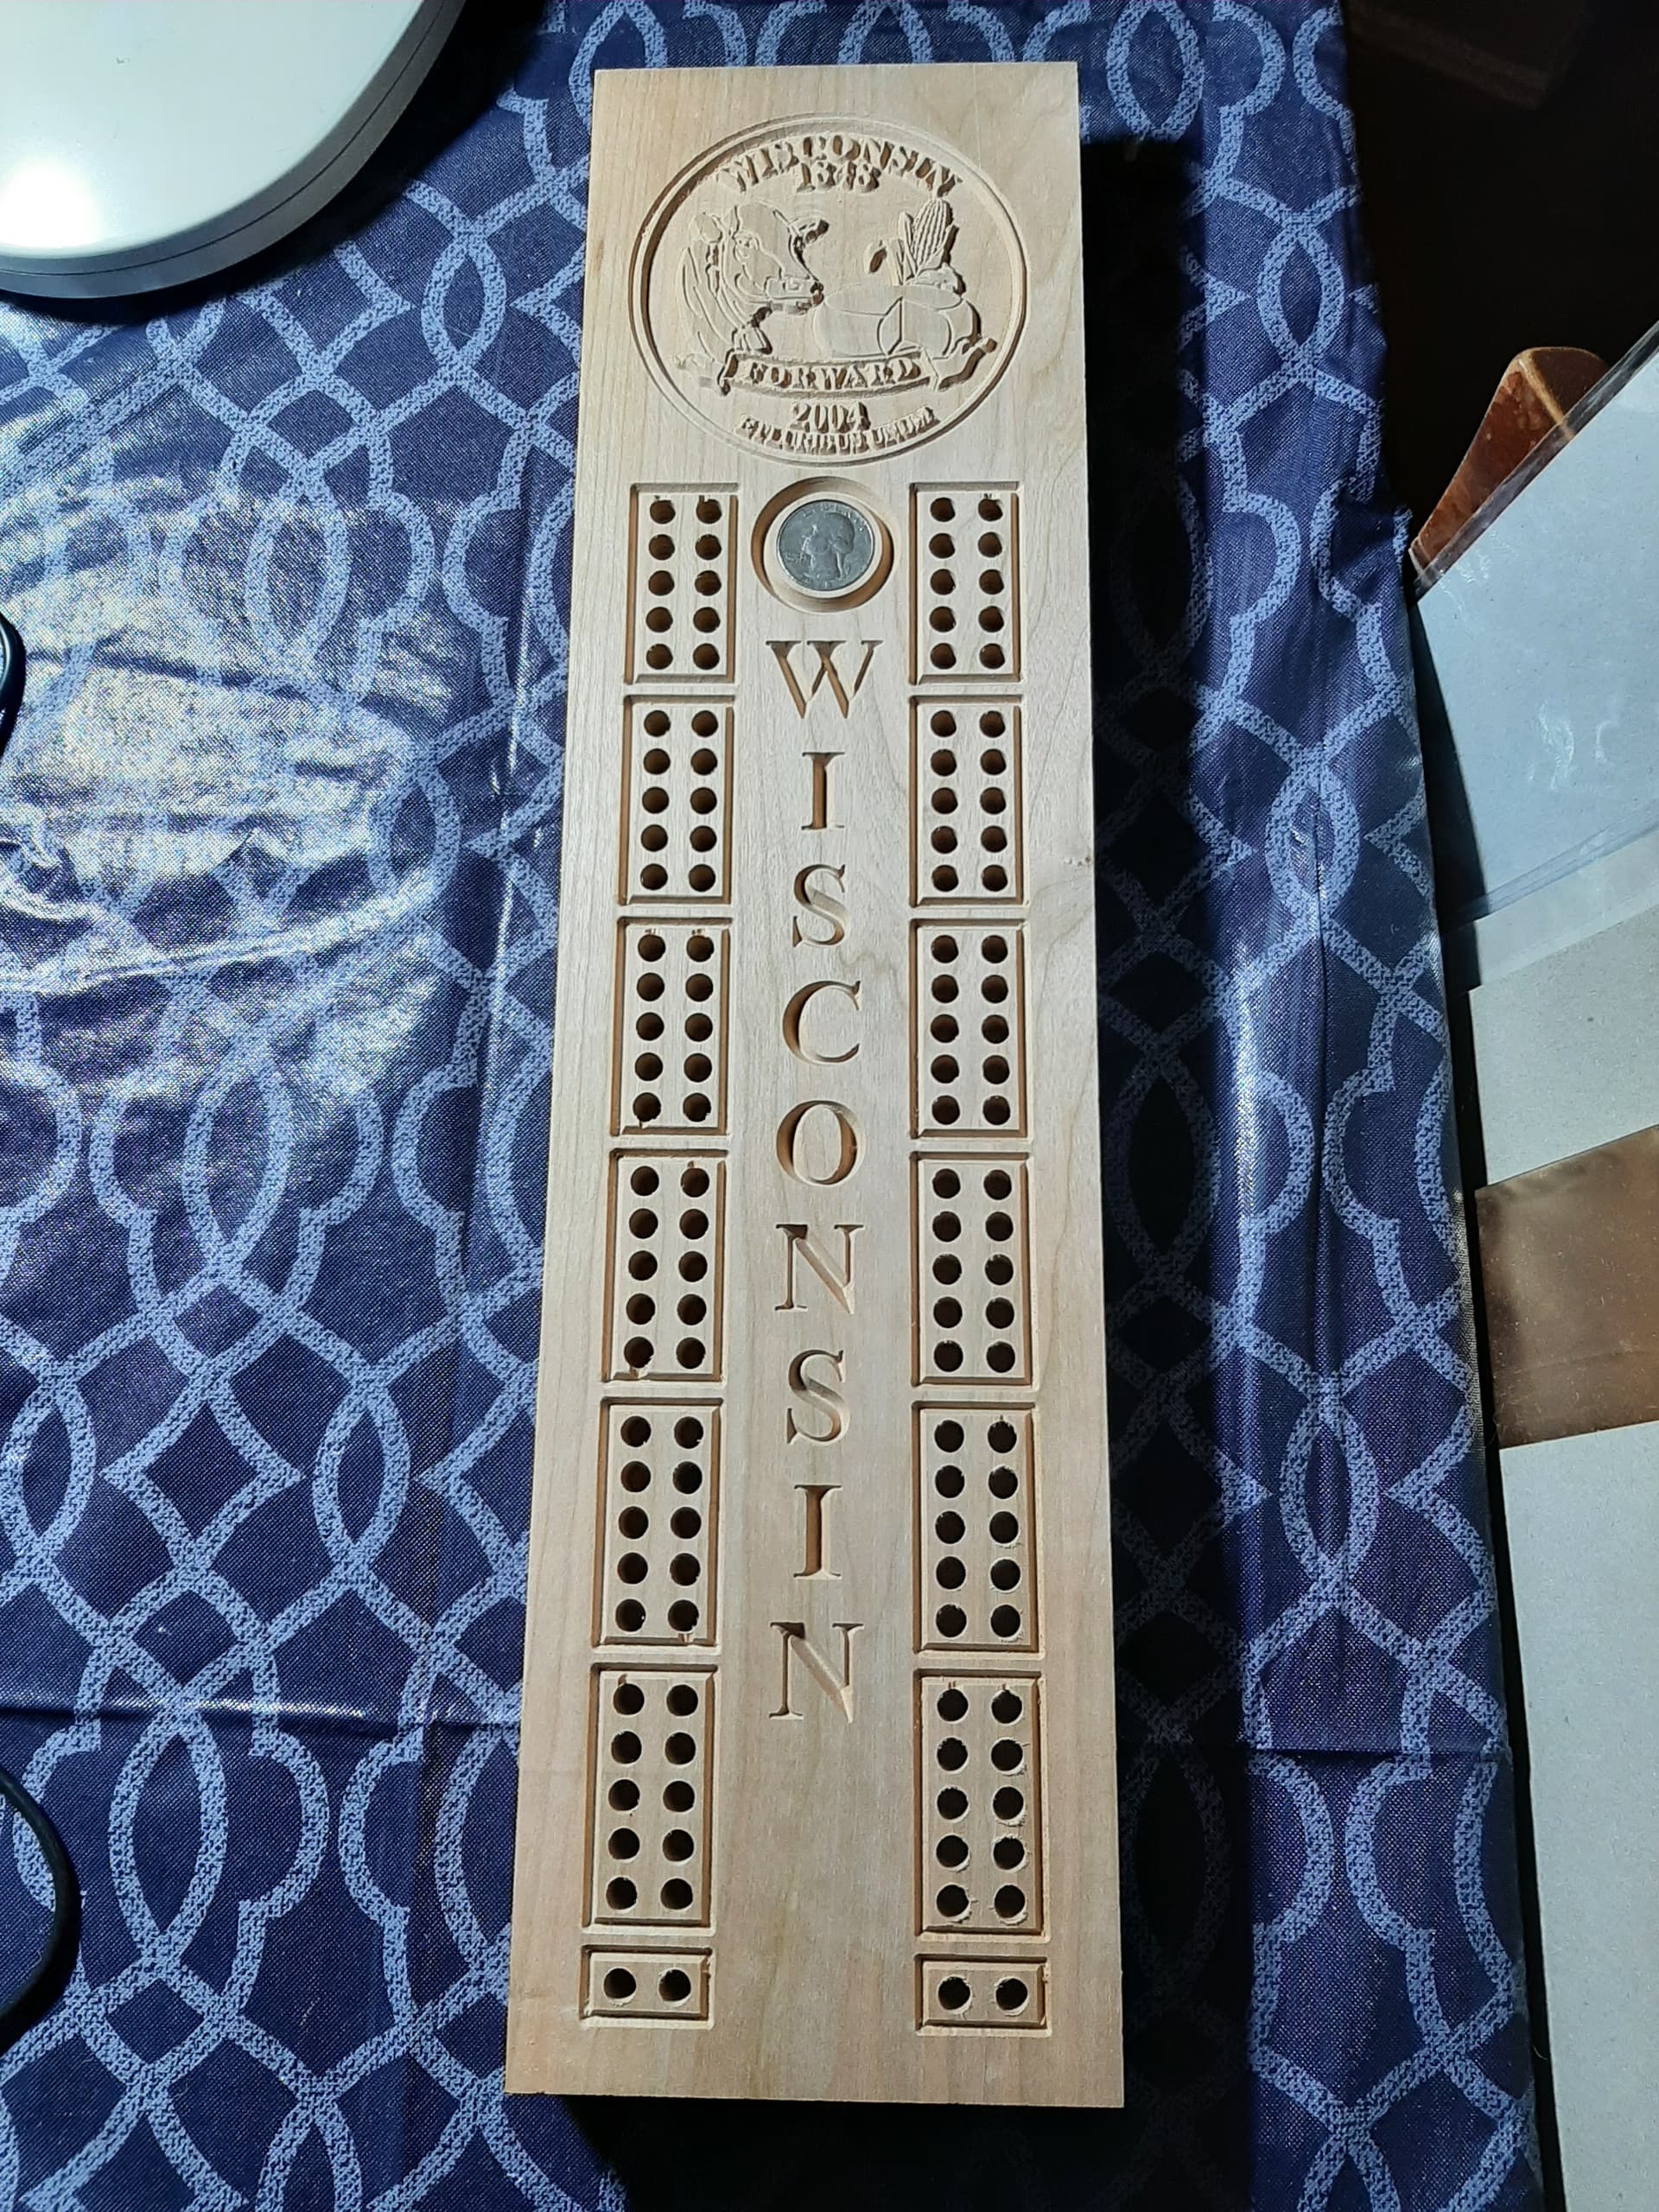
For a state that typically does not have standards for what it counts as a lake, Wisconsin DNR has a pretty good database of maps for many of the lakes in the state.
The main downside is most of the maps are scans of hand drawn maps surveyed decades ago. The data is there but it can take a few file conversions and pixel by pixel clean up to make usable lake outline.
This is my first real project with resin and I just used some basic 2 part mix that takes a day to cure. I will need to look into the UV stuff since I have heard good things about it.
Nice job! What wood are you using? I used oak when i made one and it was challenging. The epoxy went great though and i cheated and laser etched the surface details. Drilling the holes though: Sooo much better with cnc!
It is red oak. Not the most fancy but it is one of my favorite species to work with. I like how well it takes finish. A few years back I made my bed out red oak and red oak plywood.
I would not count that as cheating in my book. Someday when I pick up a laser module, I will probably switch to that for the details too.
The mica powder that I used to dye the resin has just enough metallic in it that it really sparkled in the sun. The picture, here does not do it justice.
Cribbage is completely unknown here in Germany, I did ask about it the last time and @jeffeb3 gave me a short explanation.
I did make aggravation (Mensch ärgere dich nicht) and the Catan Board thoug.
I feel the same way every time I see these! It did occur to me I could just make a couple cool scoreboards for something like Dominoes, you can play to one end or one end and back.
Just seems like a cool scoreboard is the ticket to a even more fun game.
Cribbage has about a dozen easy to follow rules. It is a little difficult to explain, but very easy to play once you learn the rules. It’s pretty common to play while having idle conversation and drinking a cool beverage.