Exxcept the layer lines are radial too! ![]()
frigging Awsome!
1 Like
I just had a look at these nuts finally. They’re injection molded for sure - the radial lines must be the milling marks. I was a bit worried - they didn’t seem to want to thread but I think I had the wrong glasses on ![]()
I intend to try and wrap my head around how I’m going to tackle the next few steps I have here before me. I need to get these machines running in the freezer but I keep getting big jobs that require me to make and store as much ice as I can so that I have enough when the job date hits. The last one was the big Michael Kors job - 40 blocks of ice. Now I have a job for May 10th that’s going to need about 24 blocks. My block machine gives me 2 blocks every 60 hours (2 1/2 days on the 24 hour day) so in order to get 24 I need 12X2.5=30 days. Literally just enough days to make what I’ll need on the 10th (I have six blocks in the freezer right now).
So mathematically I have a few extra blocks of ice I could play with and I think I better…I need marketing samples of both cubes and carvings. The trick is, once I get more than 10 blocks stashed away there is little room left to set machines up. I think I can set up the machines on top of the stored blocks and run them there. Doesn’t leave me much room or access to climb around and keep an eye on things so I have to just hope it goes smoothly once I swap out the lead screw nuts.
I need a second block maker is what I need but with the Canadian dollar as bad as it is and the risk of cross border shopping introducing unexpected surprise fees at the border I kinda have to hold steady. 25% on $10k is a big surprise.
2 Likes
I’ve installed the new nuts along with the subzero lube and will be freezing Bumble down again tonight to see what happens. I had to drill out the screw holes that were on the new nuts and sand the outer edges down to fit. I just chucked a threaded rod into my drill, ran the nuts up to the chuck and then spun them against a file. I was a bit gooey because, well, plastic and all. But it all fit in and I was able to get one screw in to secure the rotation.
They felt about as smooth running as the brass ones so it all comes down to what happens when it’s at subzero temps. I really hope it works - I’ve got a good sized job but I’ll only take it if Bumble can run in the freezer. The Makitas throw too much warm wind to do any engraving outside of a cold environment.
3 Likes
So far so good. To be fair, I didn’t let the machine cool right off (which would have taken a few hours). I needed to get some tests cut so I could send to the customer tomorrow. I’ll leave it to sleep in the freezer tonight and run it again tomorrow stone cold.
For now I just disabled all screen sleep and computer sleep to run this. Next time it’s out of the freezer, and before I take it off AP mode I’ll rerun and record so I can document the issue I was having with pausing and reconnection.
(Can someone remind me how to embed the YouTube video? I’ll update this thread.)
3 Likes

Success! Mostly anyway. There was an uneven lift after the homing but hoping it was just an anomaly. I’ll know soon. I have about 600 cubes to make next week if they like what I show them.
3 Likes
Okay, it’s for real this time. I’ve got the Bumble running the first of 18 slabs for a finished total of 400 custom engraved ice cubes. Estlcam said 58 minutes per run so hope we don’t have any hiccups along the way. The job ships Saturday and of course I’ve got bad time slugs stuck in my day tonight, tomorrow and Friday so it’ll get a break here and there.
Before I started I took the gamble and farted around with the ESP so I could get it off AP mode and onto the Wifi network in Client/Fallback mode. Just about did wrong things but thankfully V1 had all the answers I needed before I made too many mistakes.
I’ve also just ordered a new IP camera (old one won’t connect to our new network). I’ll install it in the freezer so I can monitor from the warm side of the thick walls.
3 Likes
Usually, we warn people not to leave the CNC alone. But cutting in ice is probably not a big fire hazard.
5 Likes
That was the purpose of the previous IP camera. Not that I ever left the machine running alone - like went our for a beer ‘alone’ but I would often leave it running in the shop and keep an eye on it via IP camera. I also made sure I was never beyond earshot as I came to know quite well what the machine “should” sound like vs those sounds that maybe one might wanna go have a quick look in-person.
Funny enough, milling ice doesn’t really make the same amount of noise so it’s a new bit of listen-learning to do. I can barely hear the two routers running over the noise of the cooling unit on the freezer. Sure wish I could…all I hear when the freezer is running is the sound of the power bill climbing. ![]()
2 Likes

Question:
Is there a way to fine tune things on-the-fly when a job is running? I find the probing always has a little variance. Sometimes the bit gets pushed hard down to the touchplate, sometimes it registers with a whisper of a touch. When you’re dealing with 1/2mm variance making a giant difference in a fine engraving it could be useful to have a way to nudge it up or down once the job is underway.
My Creality printers have a function like this. On the ender it’s referred to as babystepping, on the CR10 it’s just a Z adjust.
If we’re talking FluidNC, I don’t think so. You could do something sketchy like pause it and physically rotate Z forcing skipped steps to get it where you need it.
You could also try probing at a lower feedrate to see if that’s more accurate.
Or I have some gcode for auto Z-leveling that could be tweaked where it probes 3 times and averages them together.
This would be a dream! (Not so much for this particular issue but for what I have to do pre-run for each slab.) Tell me more when you have time.
1 Like
It’s one of those things I should revisit. I’m not sure which version of the gcode is best right now. The idea is that a fancy gcode script has some values based on the size of your machine, it probes the left and right sides 3 times each calculating averages, and then automatically sets the Z motor pulloffs. It’s not perfect. I actually had an extension for doing this but it all could use some tweaking.
It starts here:
1 Like
Something is not right here. It should trigger with a very light touch.
Try slowing down your probing, another thing would be to try reversing your probe polarity. There has not been probe issues since the super early firmware.
It does for the most part but the odd time it pushes pretty good. When I get this job in the bag (well, I guess this particular job is going to be boxed) I’ll poke around at the probing speeds etc.
I’m really intrigued by this notion of Z levelling but I don’t think it’s going to be effective on this machine with two cores - need to ensure both cutters are installed at exactly the same heights etc…or maybe actually the levelling could help compensate for that? Lots to think through there.
Okay, another question:
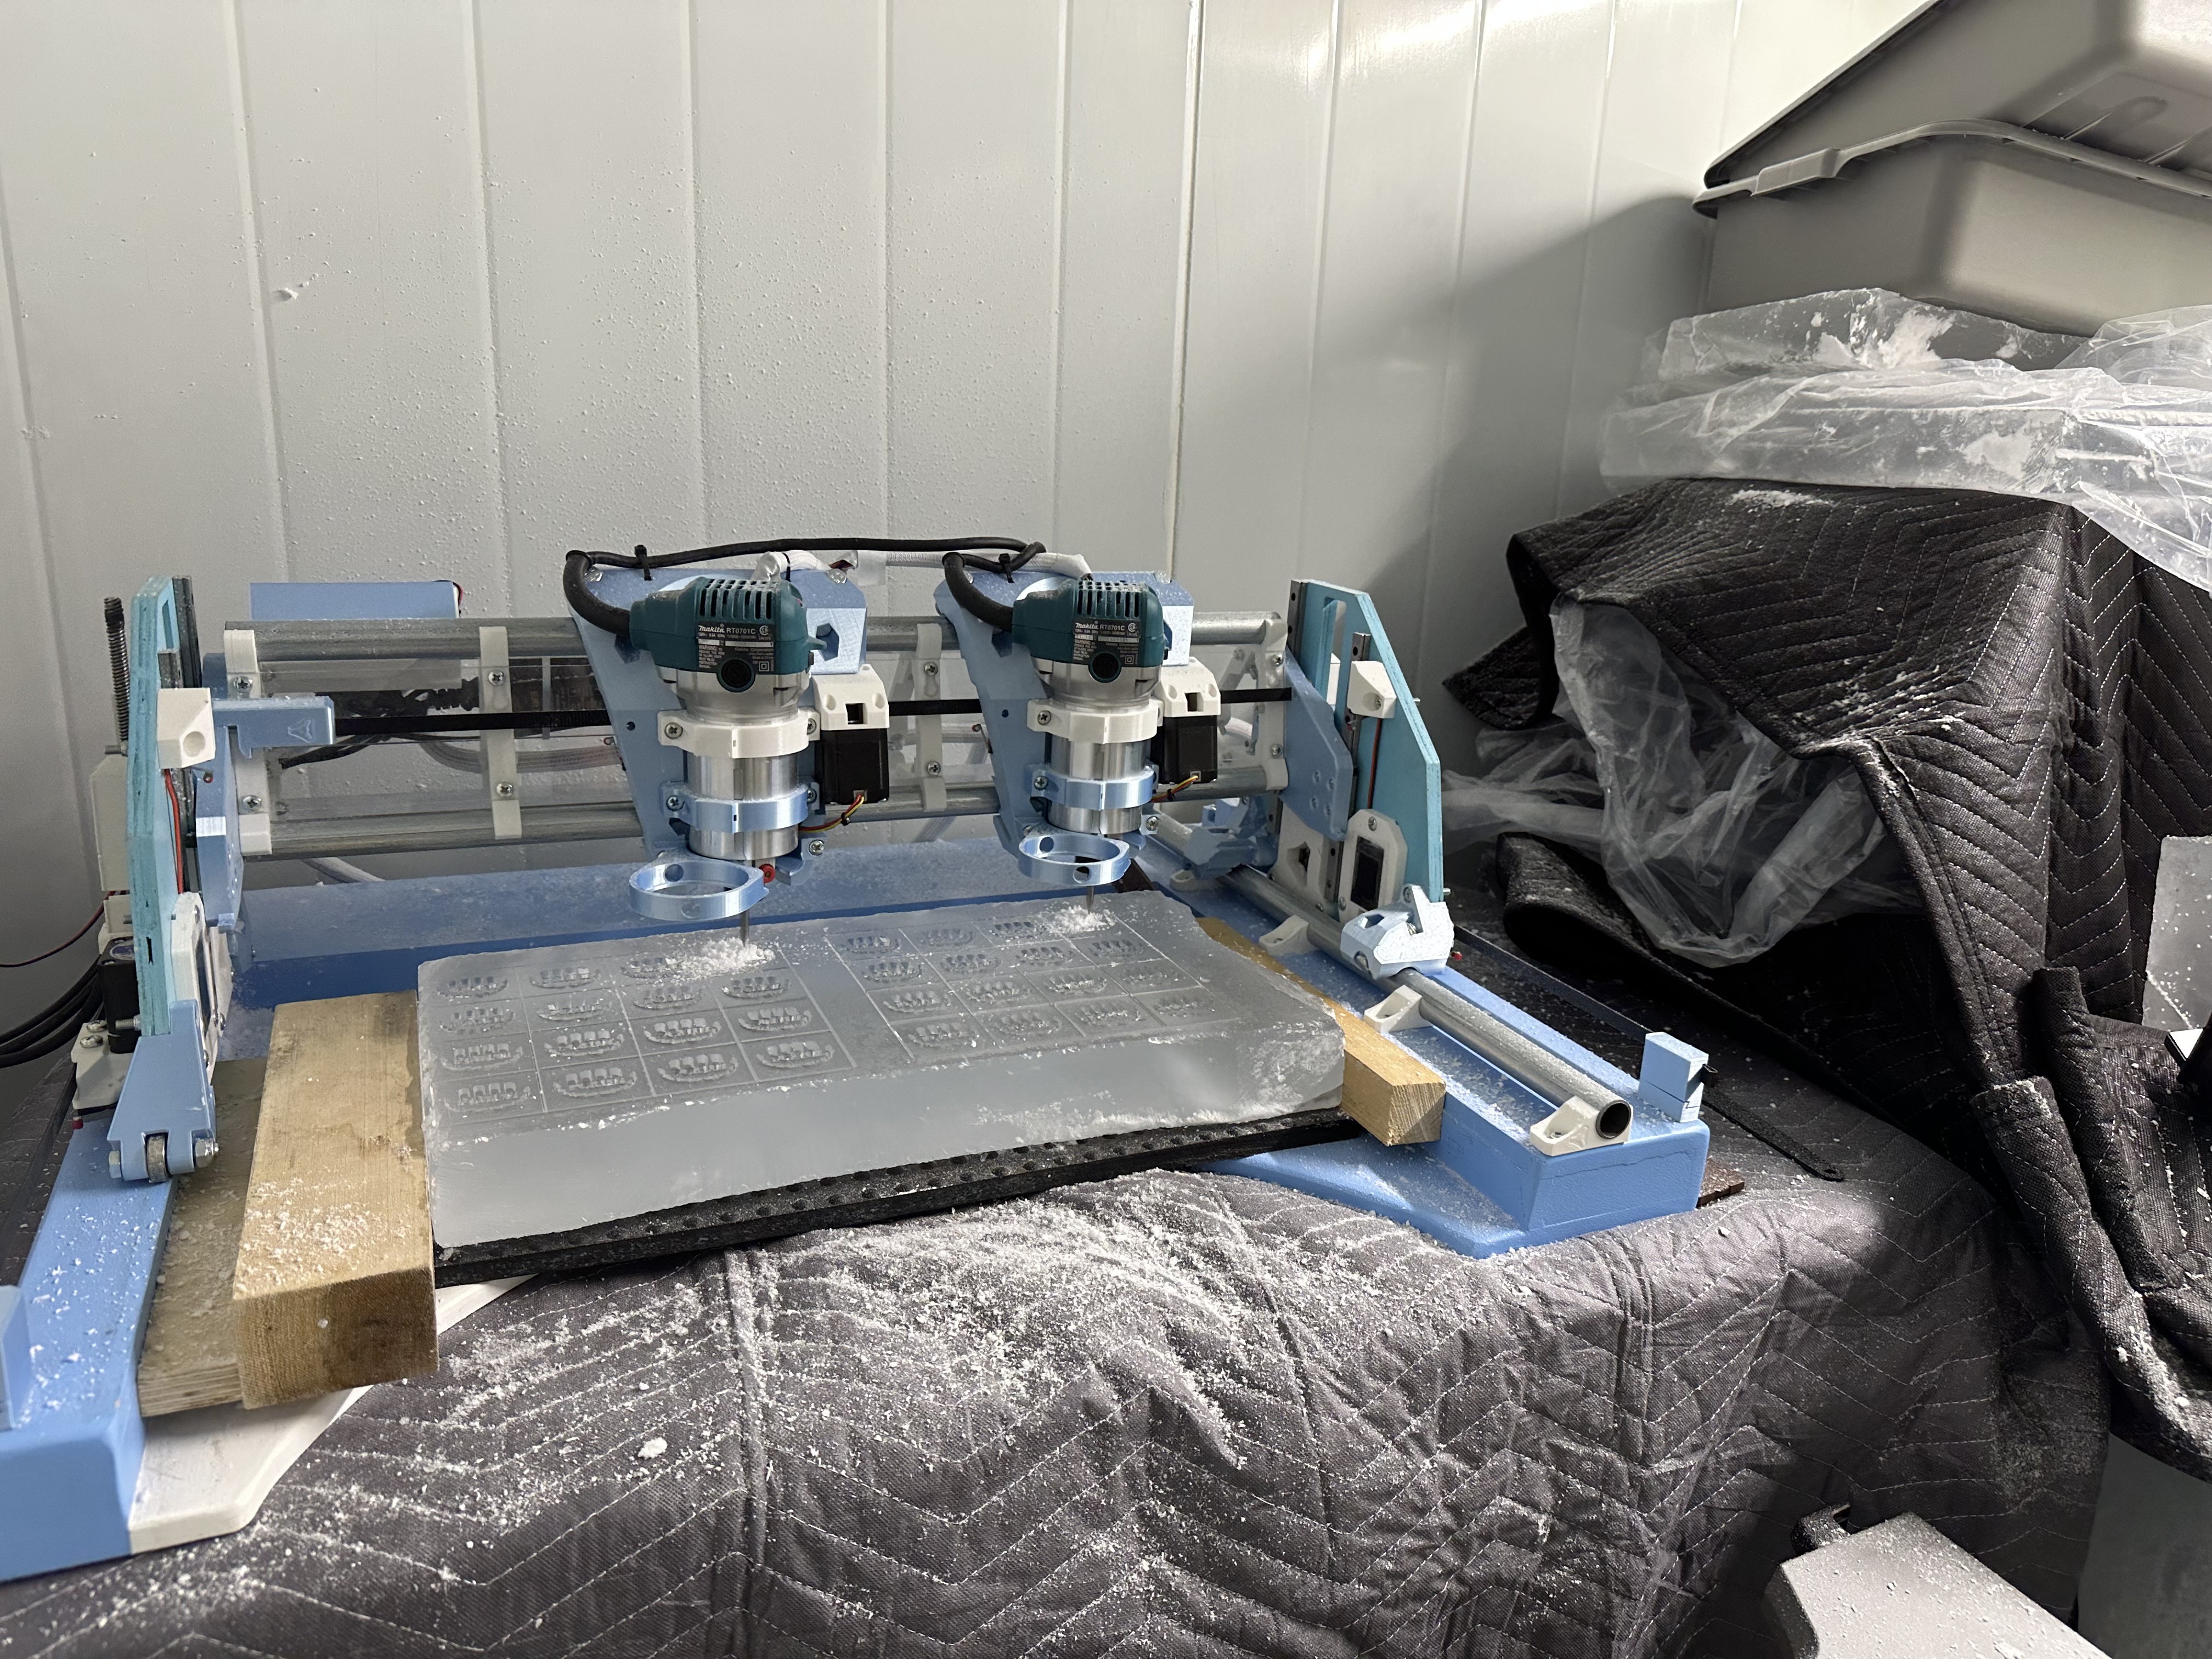
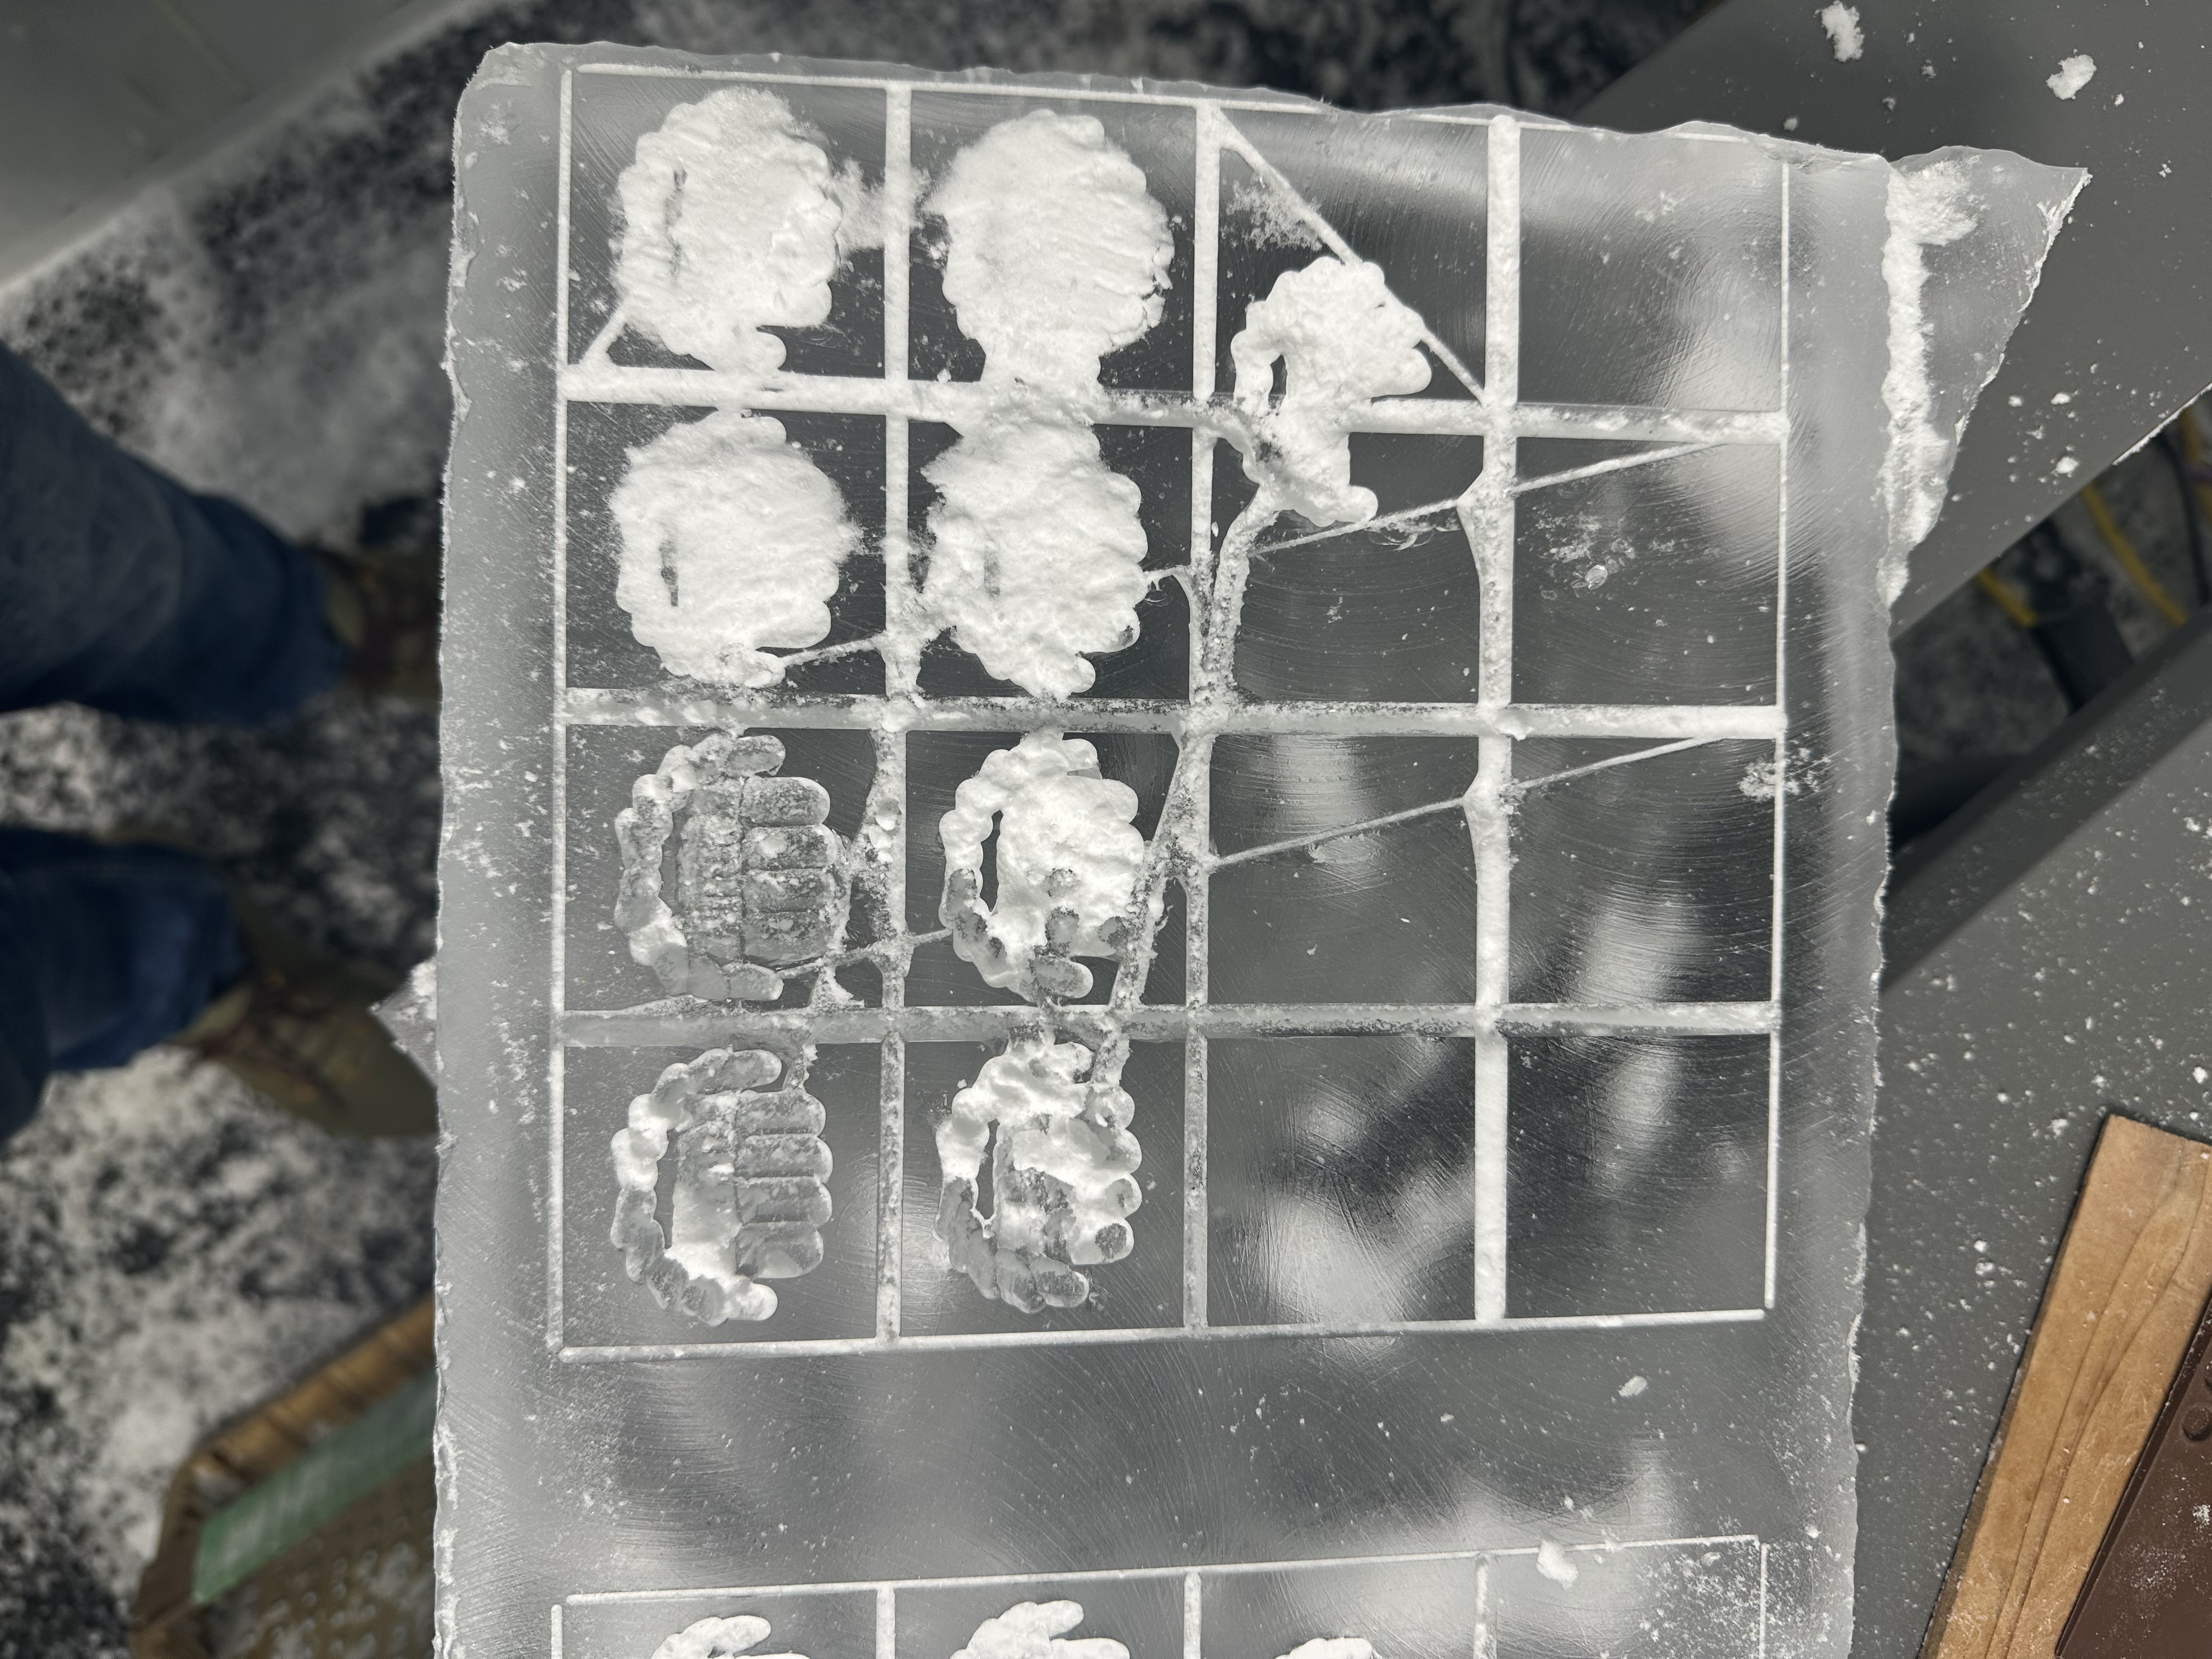
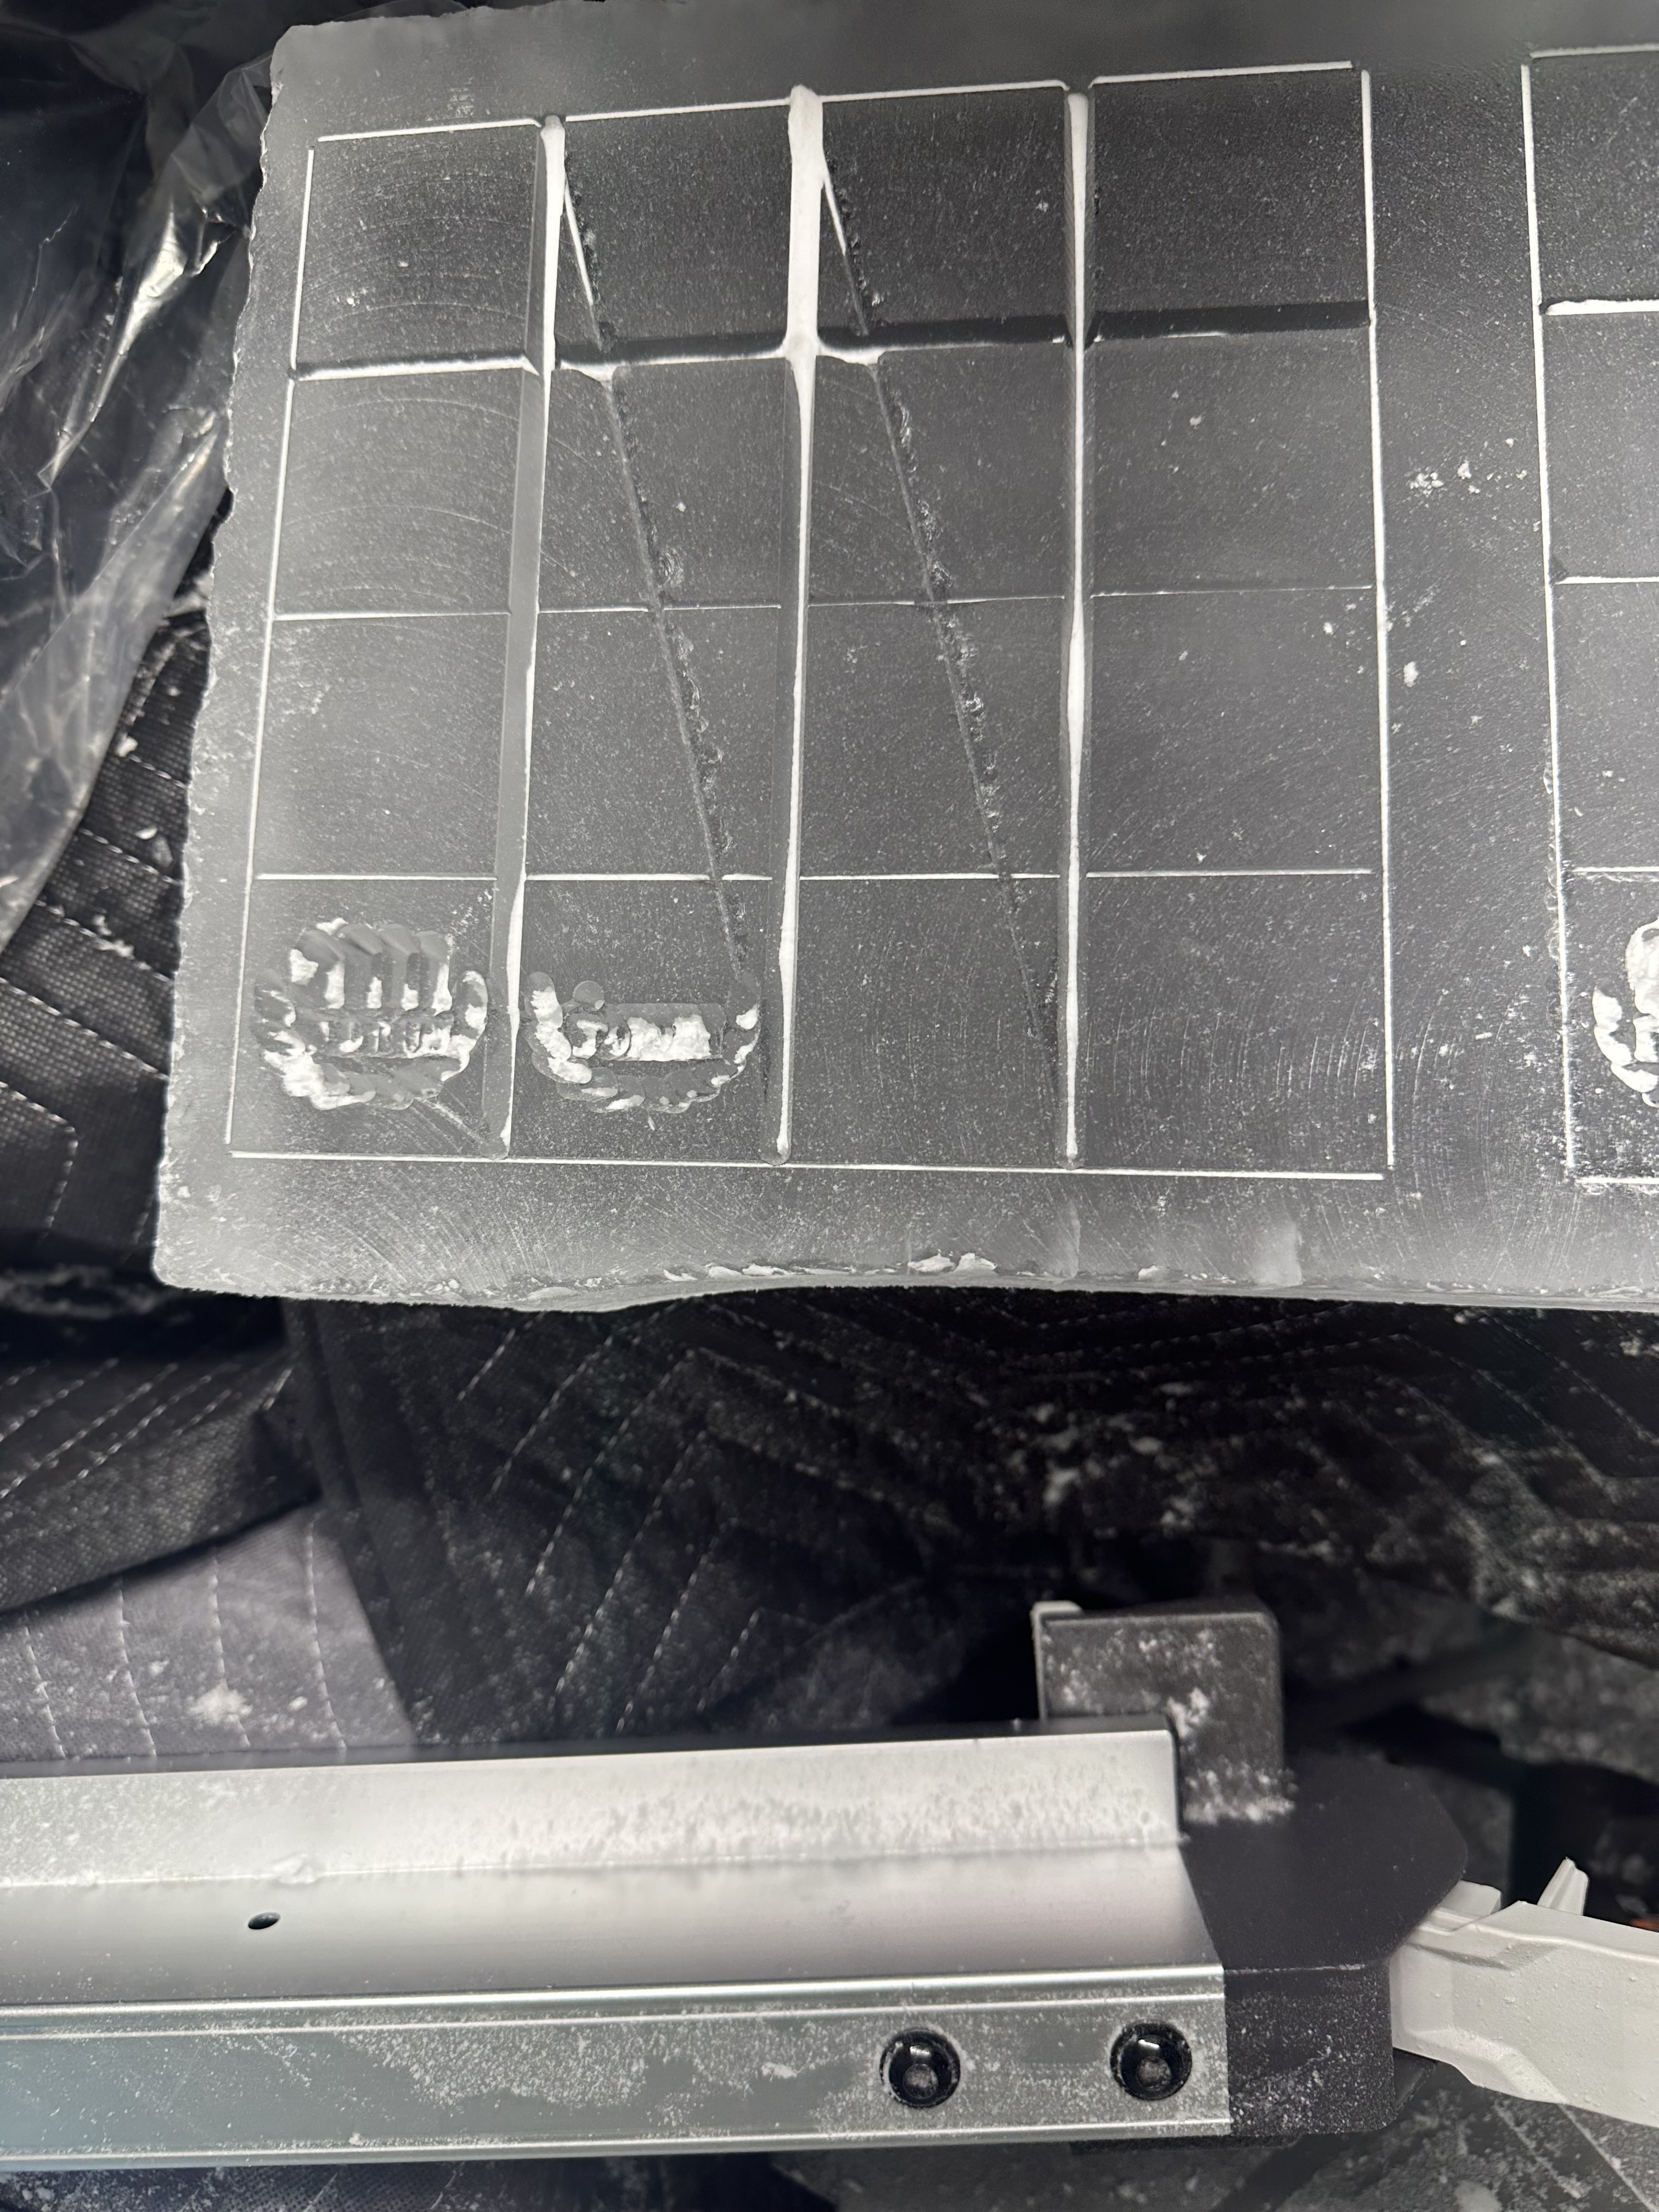
I’ve seen a recurring failure here last night and today but not on every run. If you look at the wide shot (photo) in the post above you’ll see the grid drawn out and then all the logos inside. The grid is just a guide for me when I get the slabs to the saw to cut each cube. These guides cut first and only 2mm deep. They are composed of four straight lines around the perimeter, short lines marking the horizontal separations and then full lines marking the inner vertical cuts. This is also the order they are cut in.
I have a repeated/sporadic Z lift failure on the left hand motor at the end of the middle horiz separators as it lifts to go back to the far left and start cutting the last row of separators. It’s always at the same point. Why would this be? At this point the weight of the routers is pretty much all the way to the right side so the left motor should have the easy job.
Can someone tell me where in FluidNC I can give a little more oomph to both Z motors? Maybe that can overcome whatever is happening here. I’ll grab my phone and take some pics of a couple of the failed slabs.
In the meantime I’m going to reCAM and see if I can just run a crosshatch straight over each other instead of hopping on the horizontals where the lines cross the vertical.
You would definitely get some benefits using the pwncnc stop bit collars/bitsetter given you can have both spindle/collets at the same height.
1 Like