That’s the one I saw! Yuppers! Thanks gang! I think I’ll do the same to the Bumble build too.
3 Likes
Interesting…when I got out to the shop this morning I was adjusting the bed frame finding my max travels etc so I could set up Estlcam. I had a look at the pulloff changes I made yesterday and they had reverted back to 4mm each side (Y axis). I reset the motor1 pulloff to 7mm, saved and then restarted the board for good measure. Checked and the setting held. Oddly though the stepper doesn’t actually pulloff. I changed it to 10mm just to make it real obvious and confirmed that nope - it doesn’t pulloff. Is there another setting I need to change maybe to enable the pulloff?
Use my save macro in the webui before restarting.
The other way is just manually edit the config.yaml.
Are you referring to the “Save” button that appears down by the other buttons at the bottom of the screen when I make the edit and the field highlights in yellow and the flag displays? I certainly did press that button prior to restart. The recent changes have been holding - not sure what happened to the setting when I changed it last night.
Or maybe this Save button on the dashboard?

I’ll see if I can just edit the yaml directly. Just popping out for a bit.
That save from the picture should work. If you are on webui v3 there is two buttons, one at the bottom of the settings page and then the one in your picture.
1 Like
The pulloff had reverted back to 4mm when I got back to the machine after powering it down and doing my running around. I changed it back to 7mm, hit save at the bottom of that screen and then hit the “Save Config” macro button on the dashboard. Restarted the board and the setting held AND, more importantly, the pulloff actually worked.
Thanks as always! It’s hip to be square.
Ice must be real close…I can feel a chill in the air ; )
2 Likes
Okay. I think it’s time to do this even if the machine hasn’t been officially battle tested here.
@vicious1 is always remarking how all of our machines are “too clean” and that we need to “get them dirty”. Trouble is with a machine destined to carve ice it actually just keeps getting cleaner and cleaner.
So how do you work around that?
Pretty simple.
Head to Amos Eisey on Tatooine. Make your way to Hangar 3-5 and ask Peli Motto if you can rummage through her scrap piles. If you’re kind and respectful to her I’m sure she’ll let you. And if you dig deep enough there’s a mighty good chance that you’re going to come across an ancient hunk of machinery that was once known as an LR3. (I know, I know, timelines sorta conflict here but just humor me).
The thing about these old machines is they are so darn trustworthy. Just blow the dust off, throw some power at it and it should bark to life.
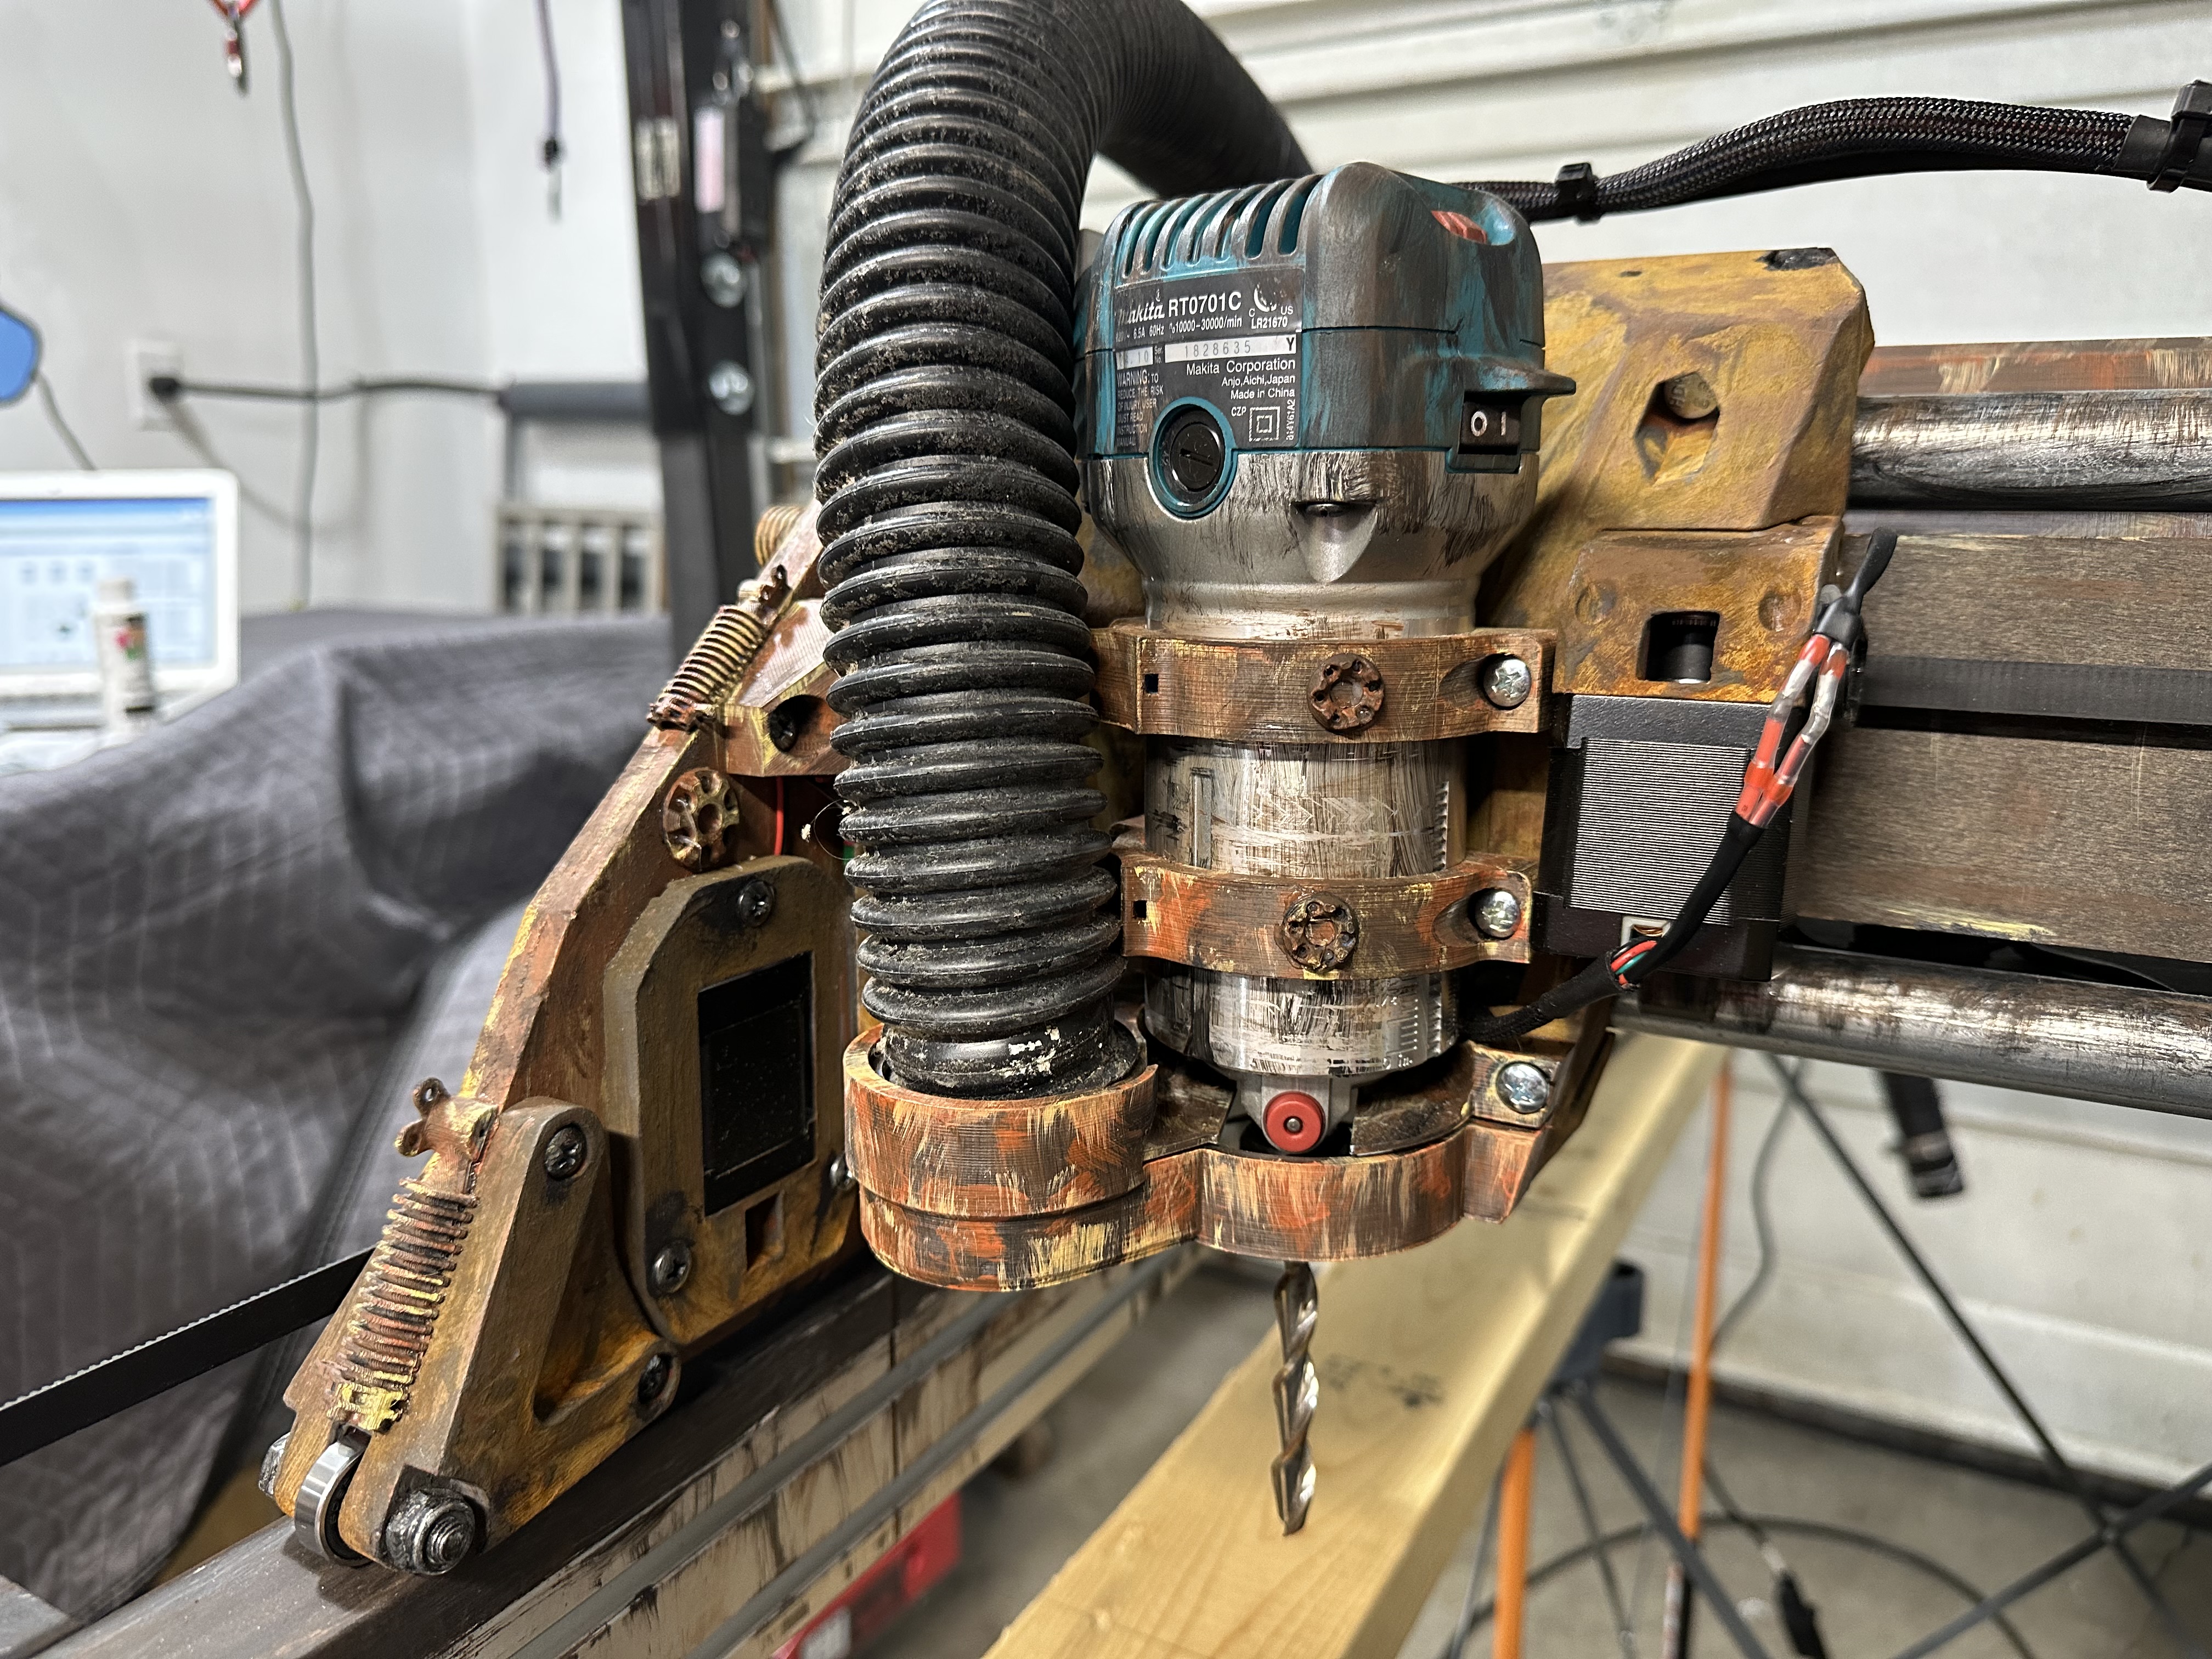
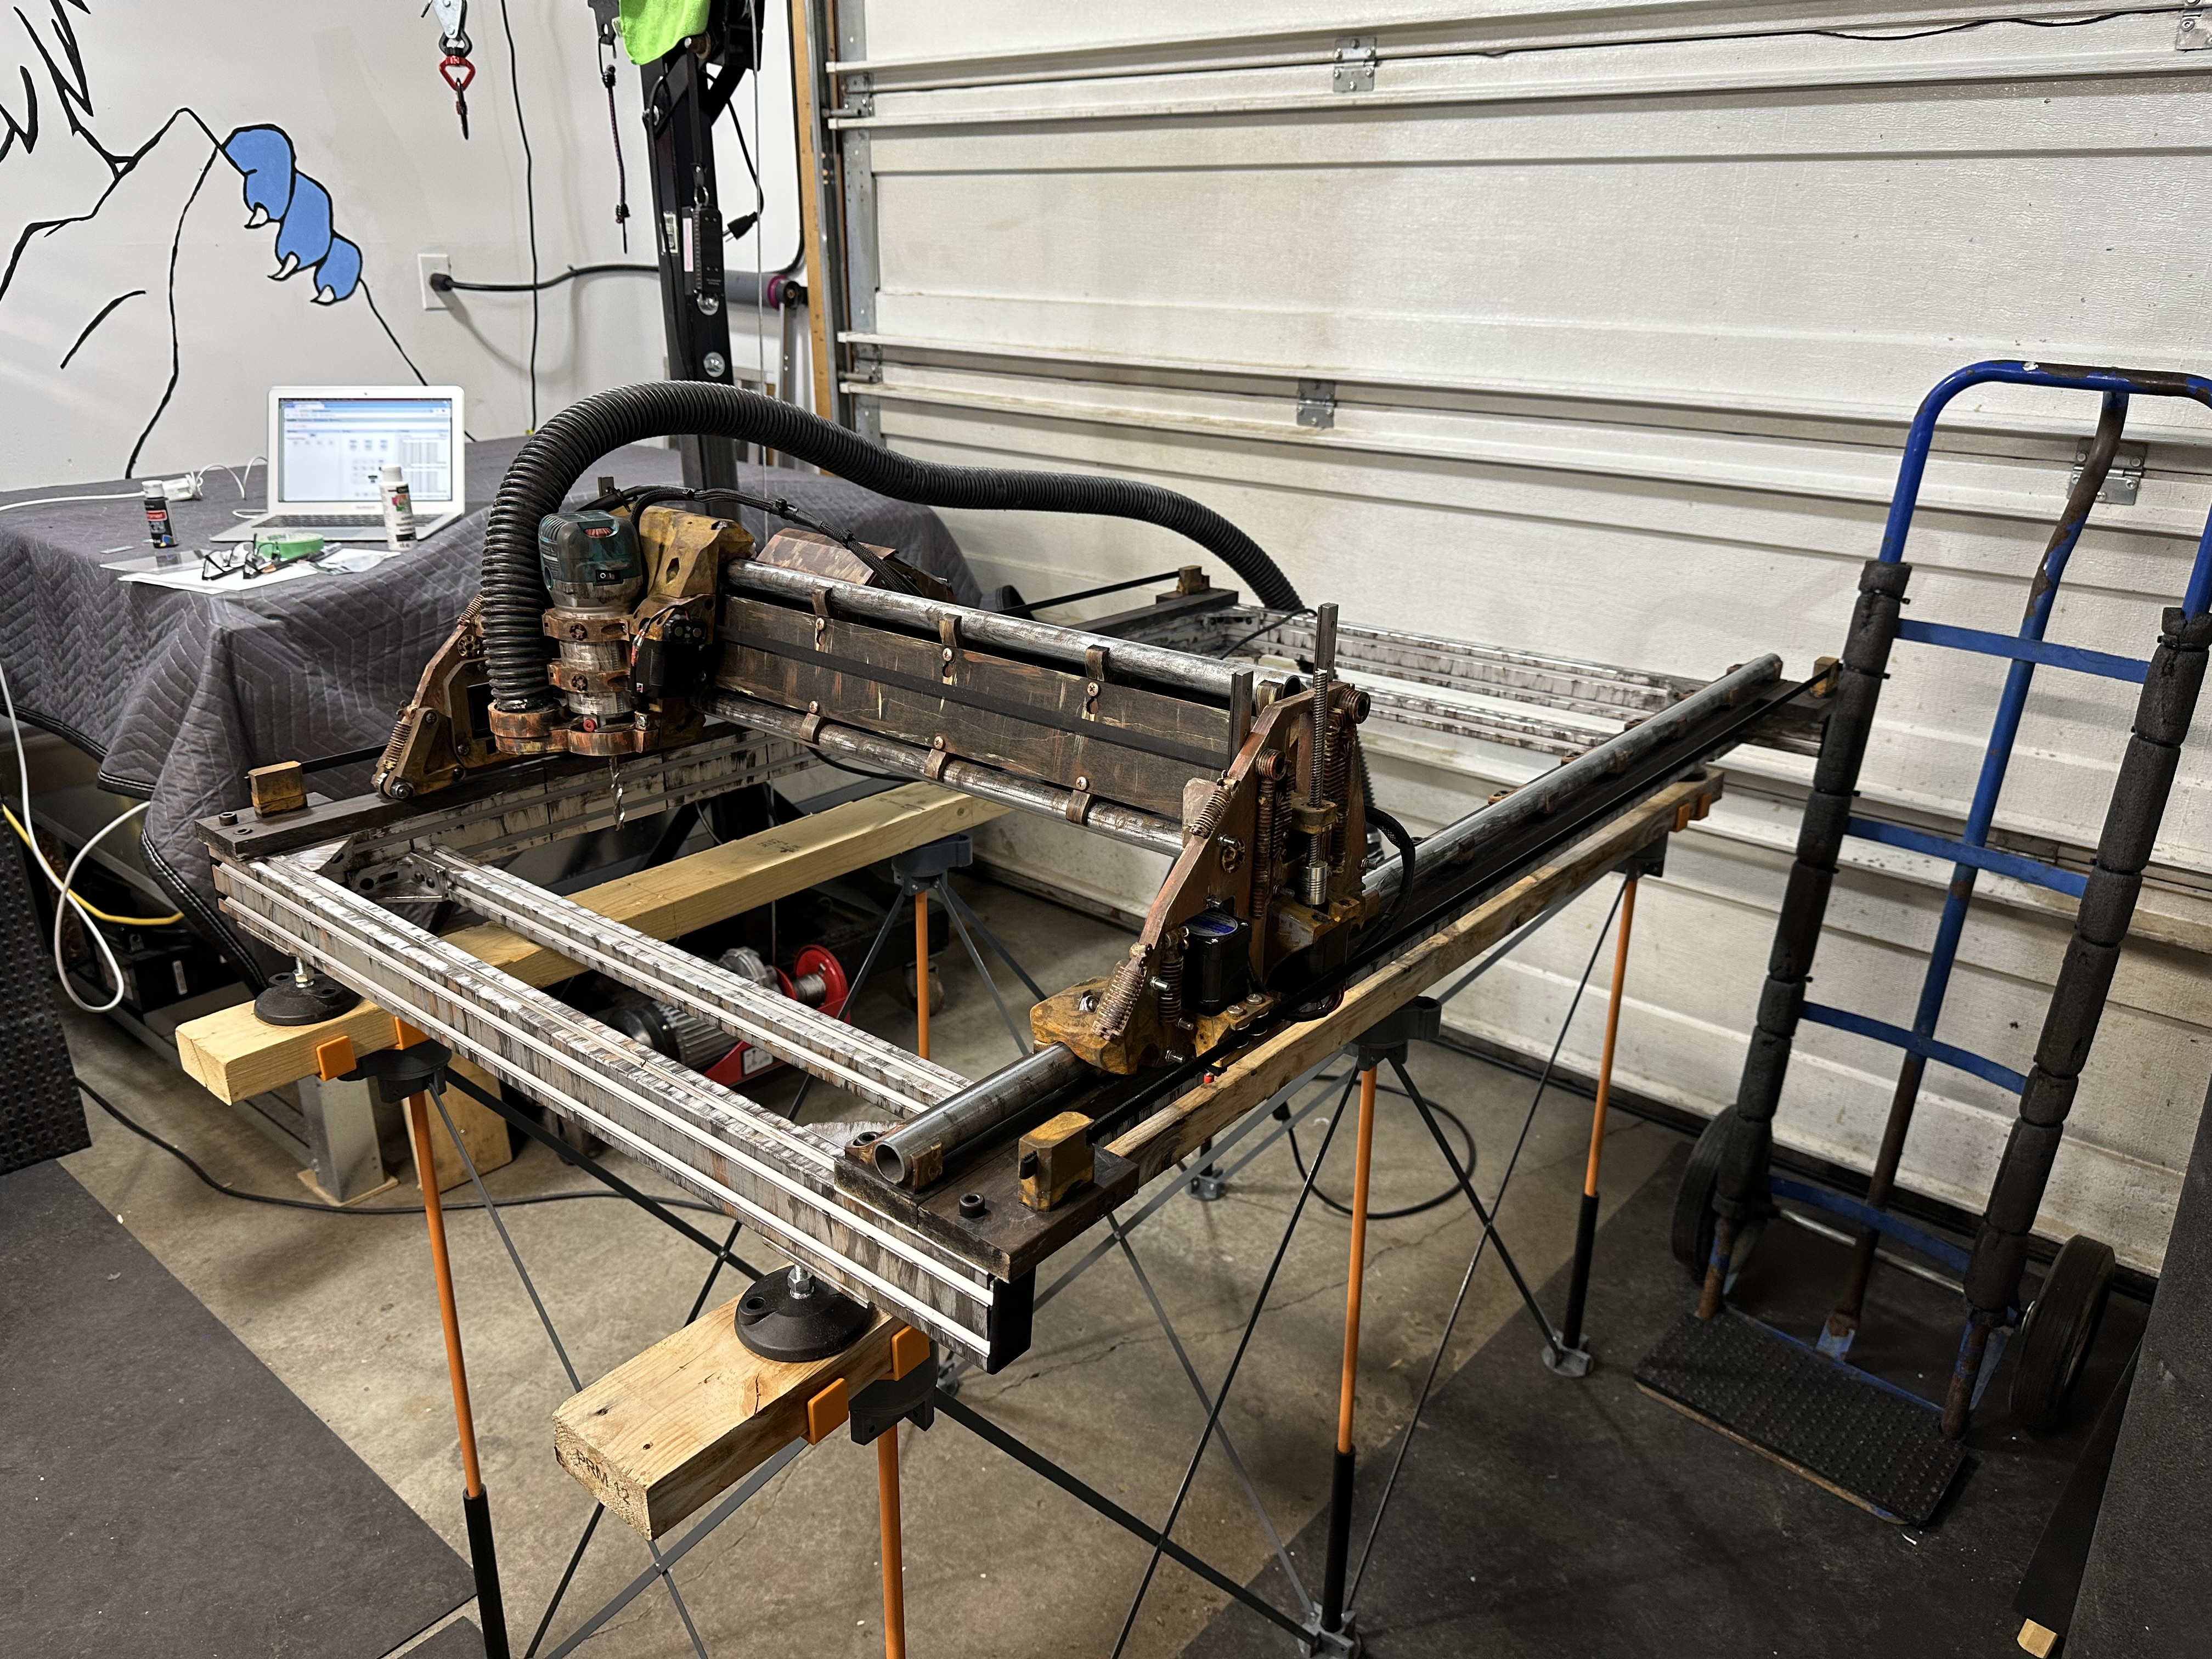
Further detail will follow but for now may I present to you, the LR32:

10 Likes
Yeah, I hope to move to webUI3 soon so the instructions can be simplifies a bit and to confusion around this saving get sorted out
Sorry for the hassle.
1 Like
What fun build! All the little added details is super cool.
Thanks for finally sharing the details!
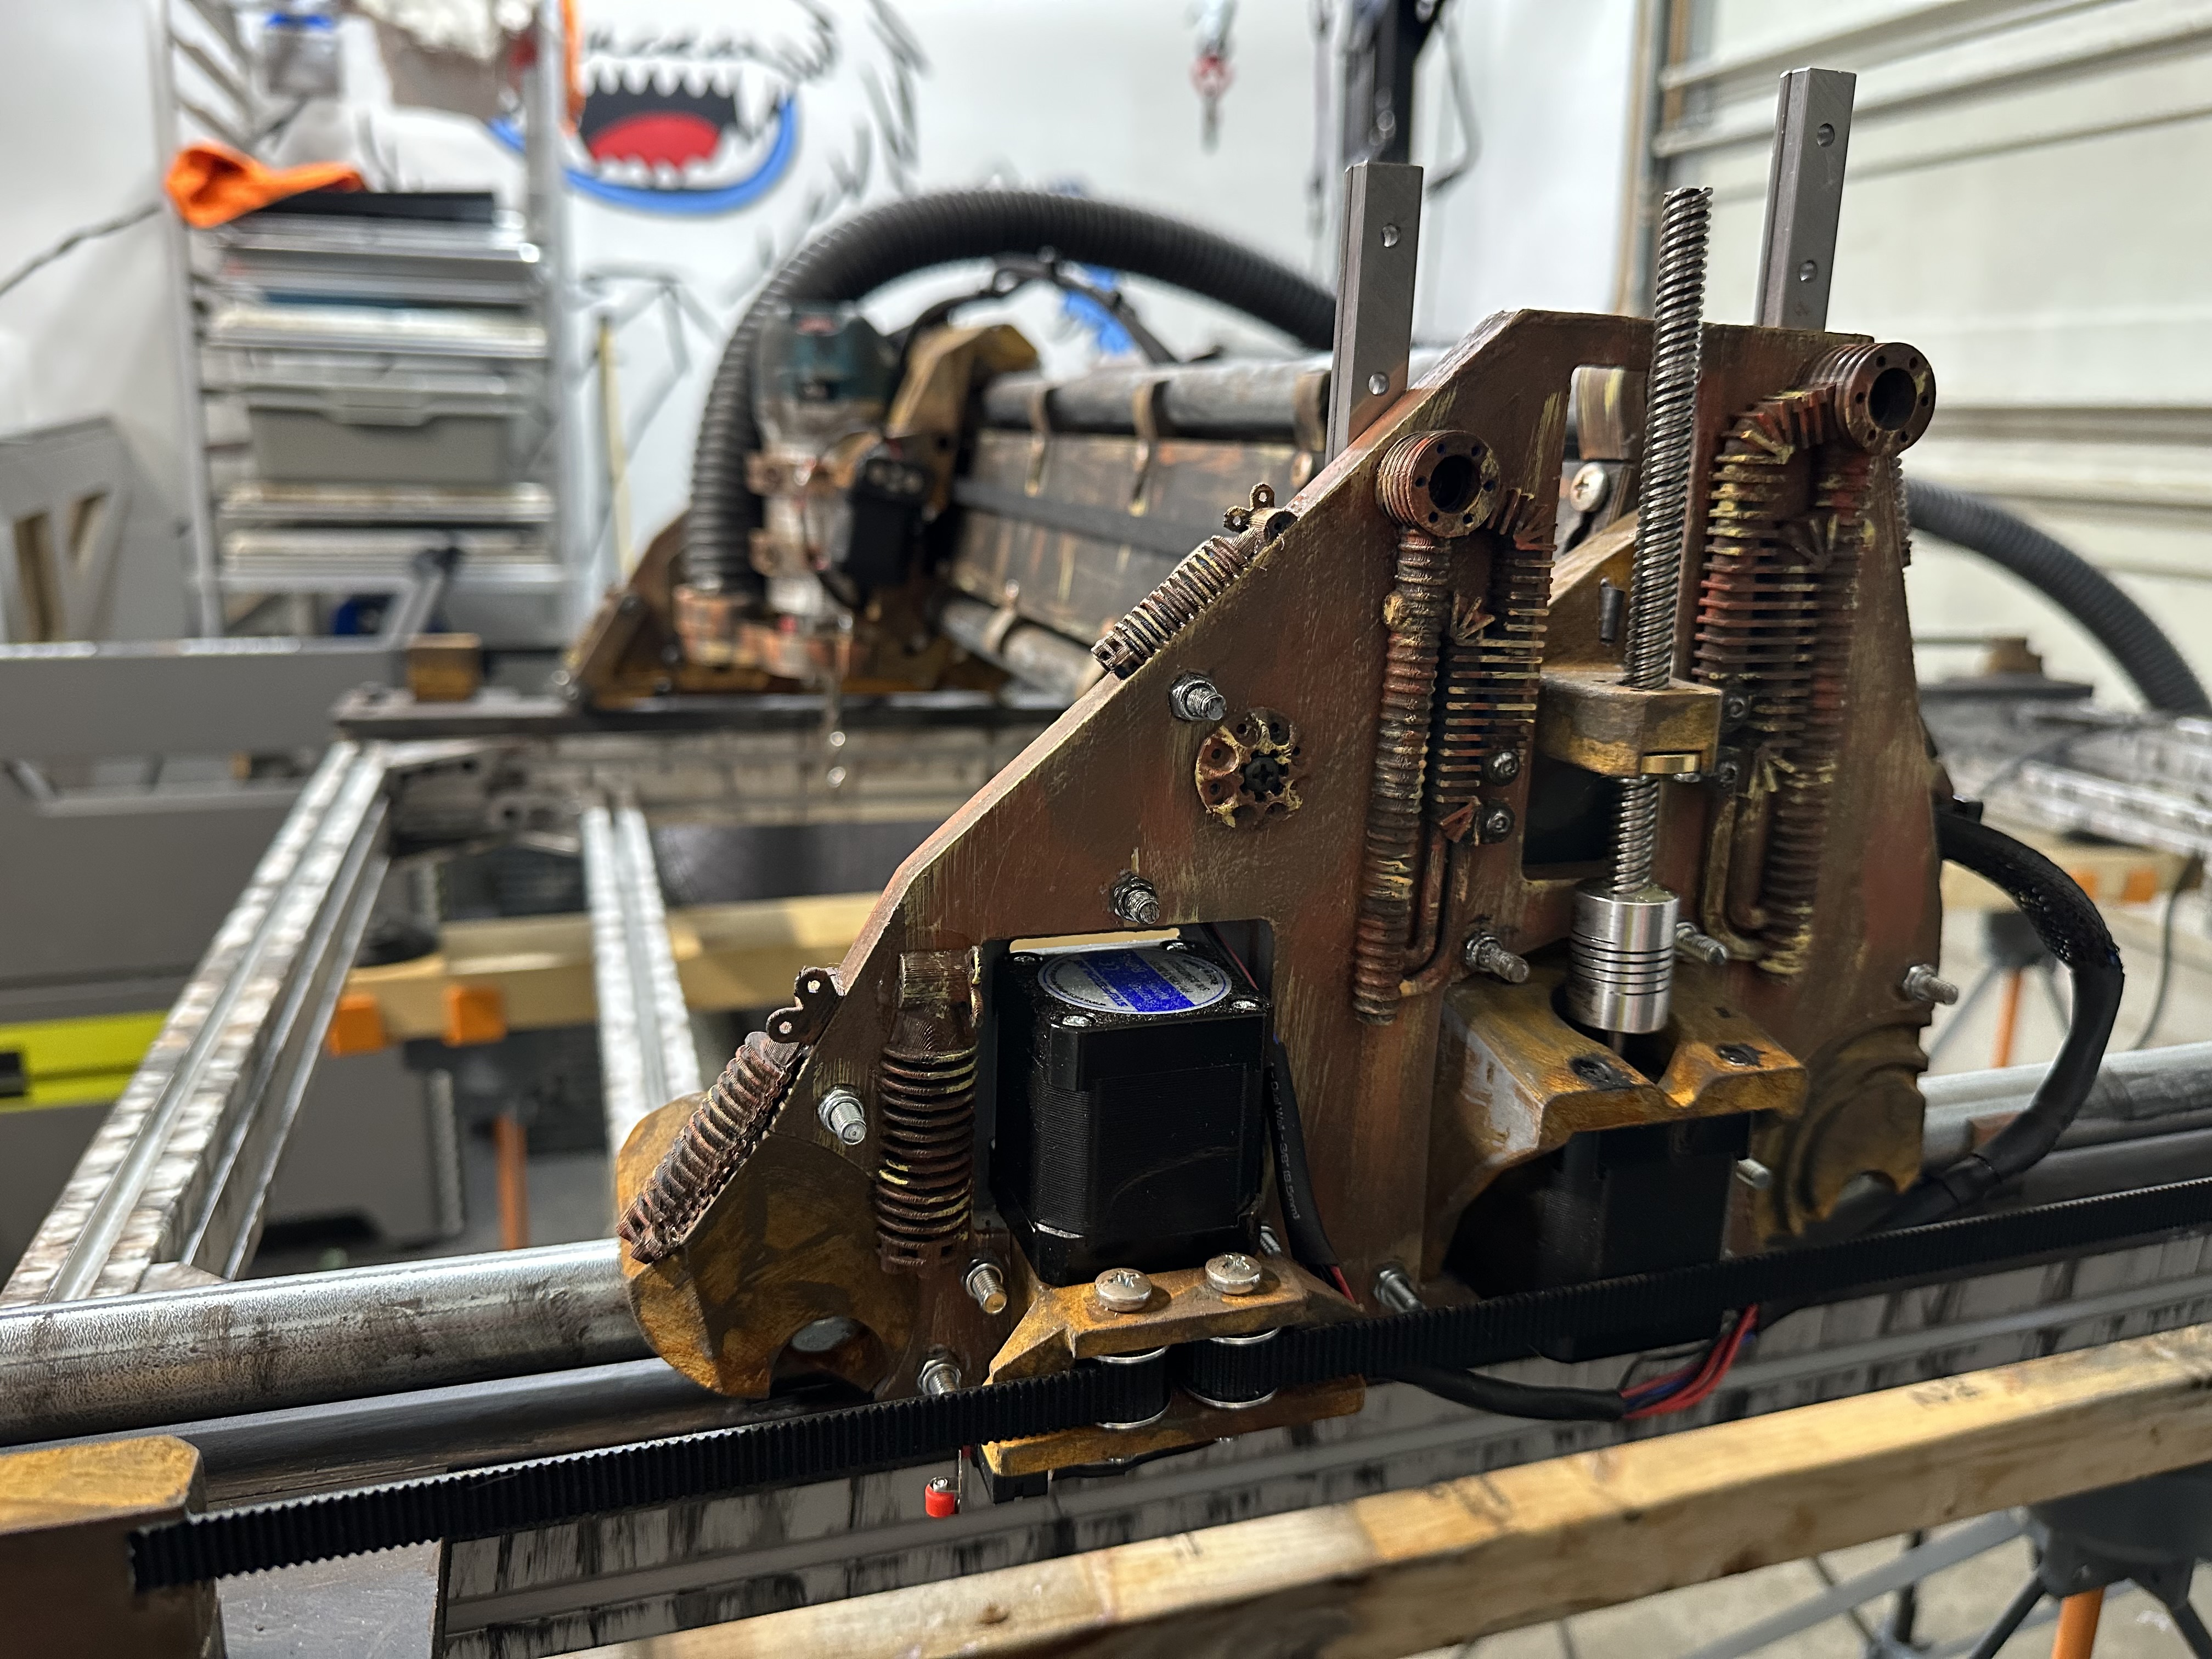
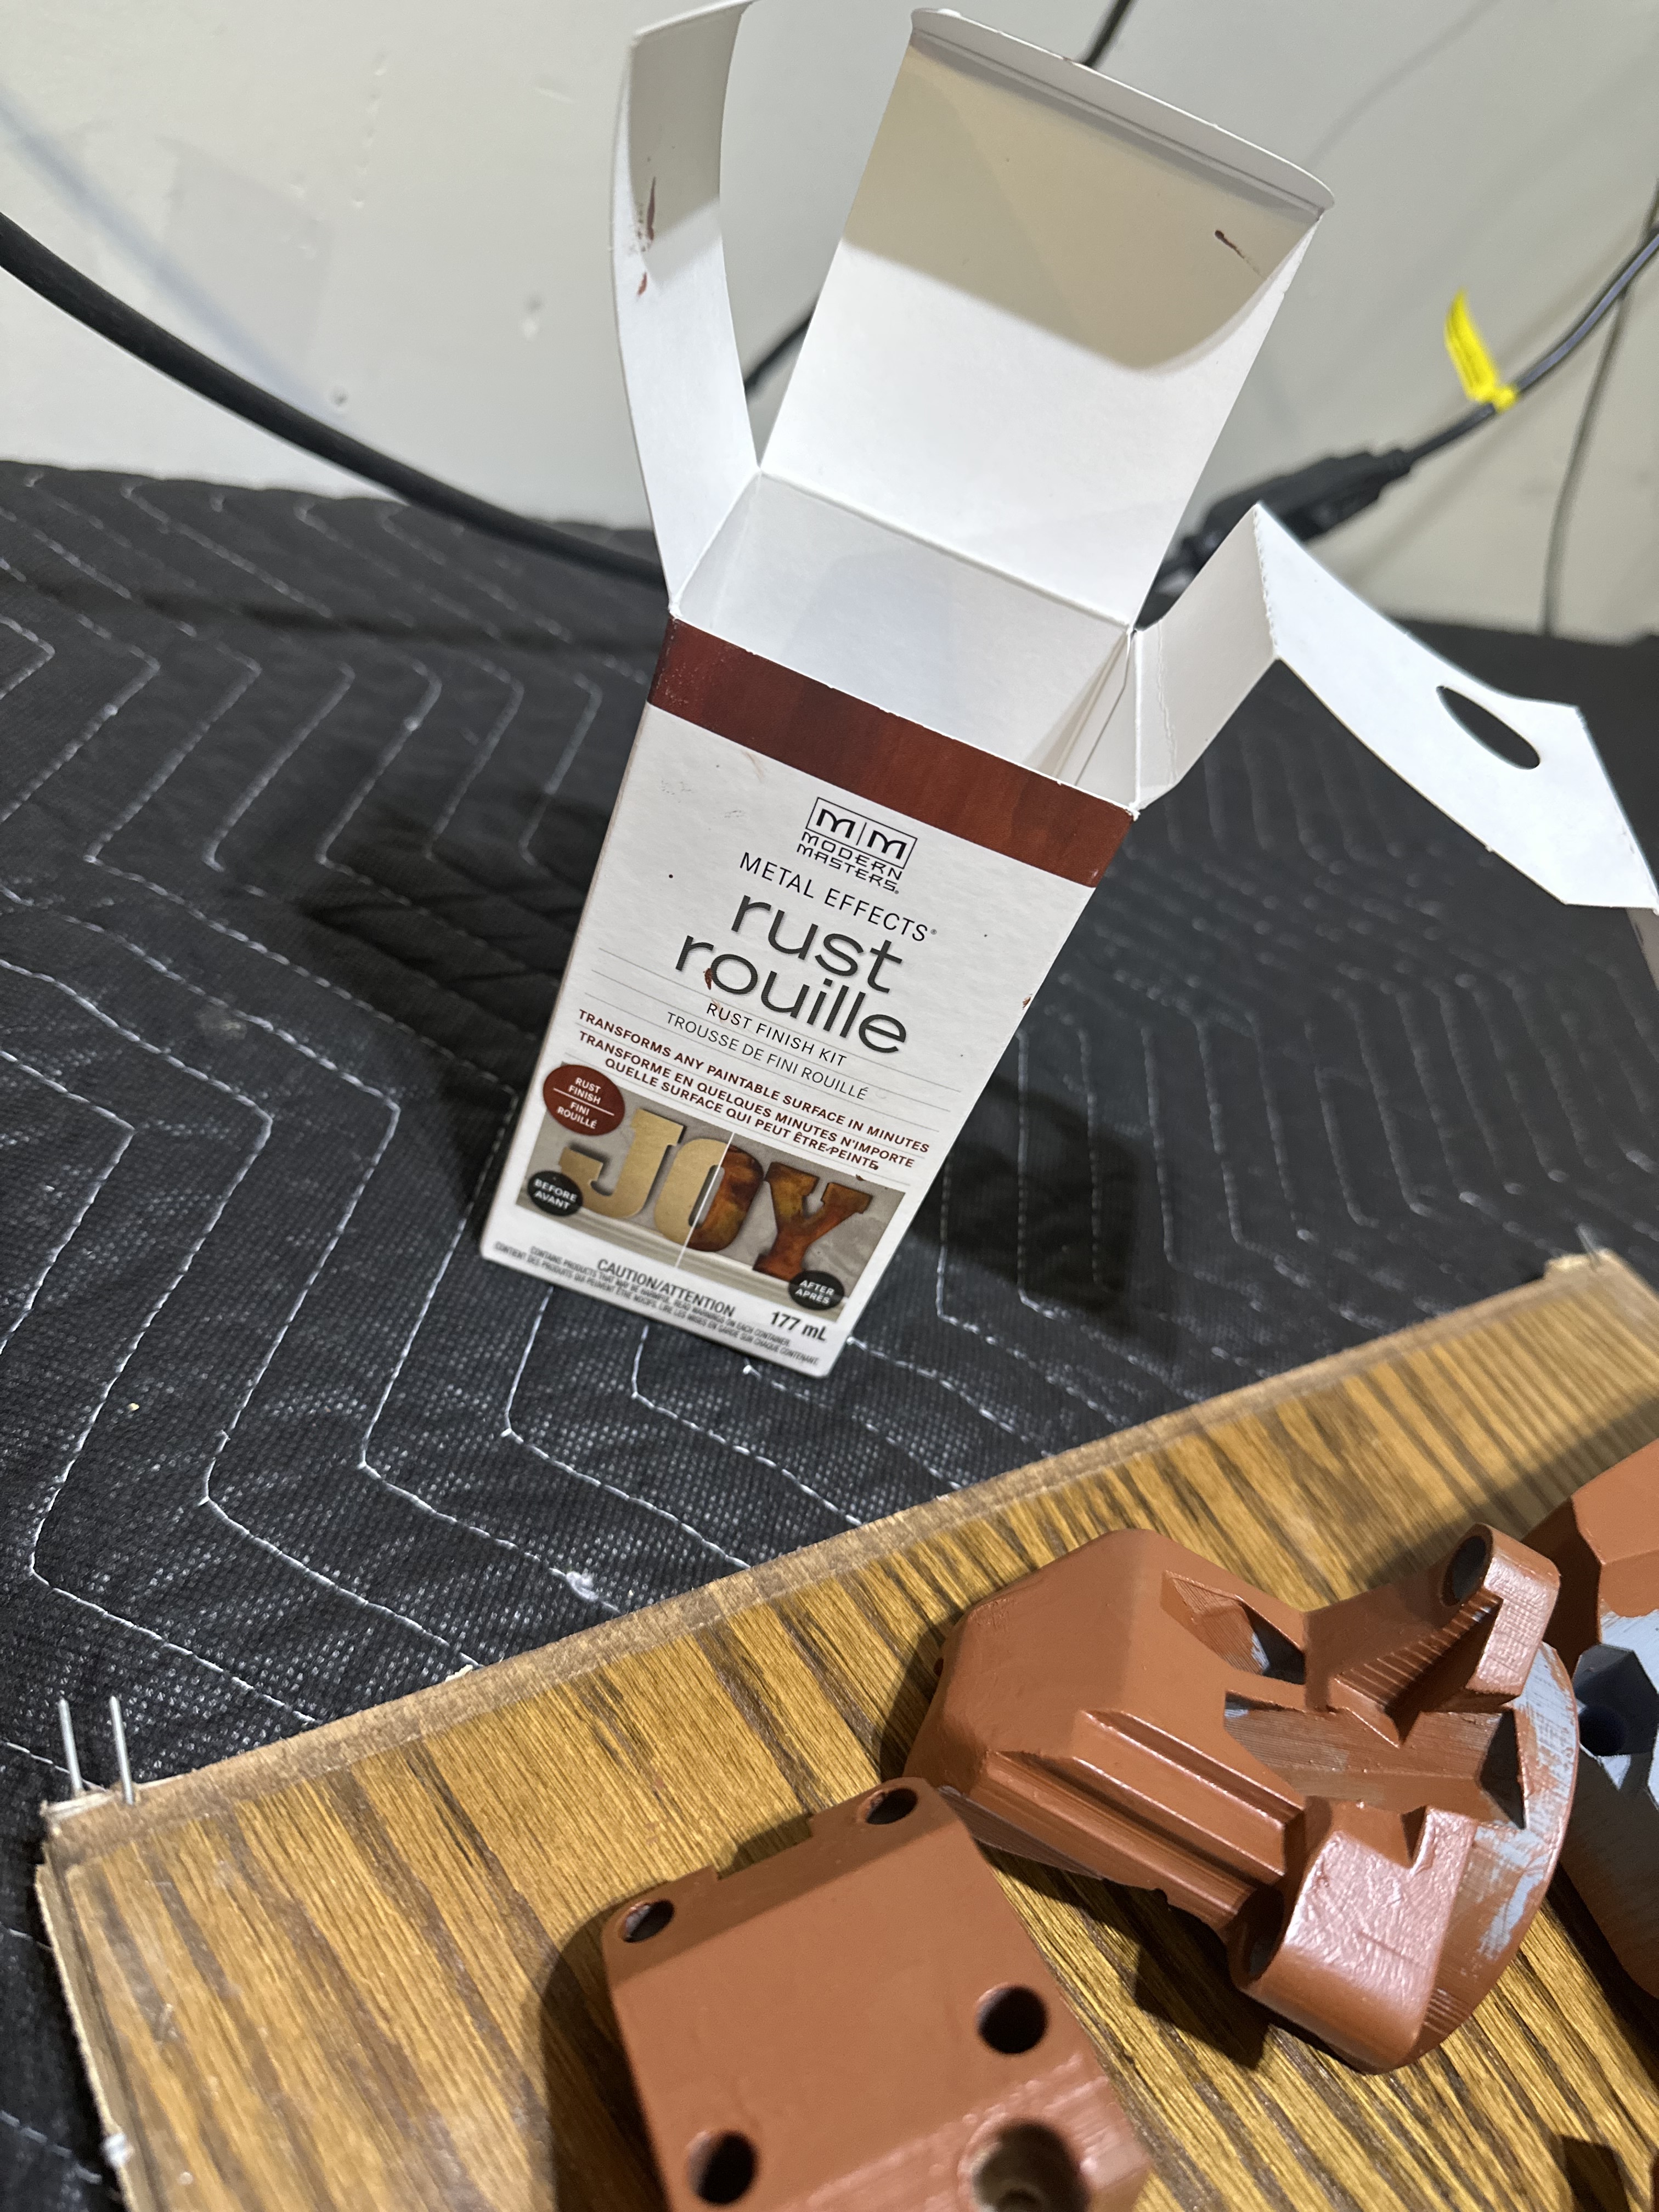
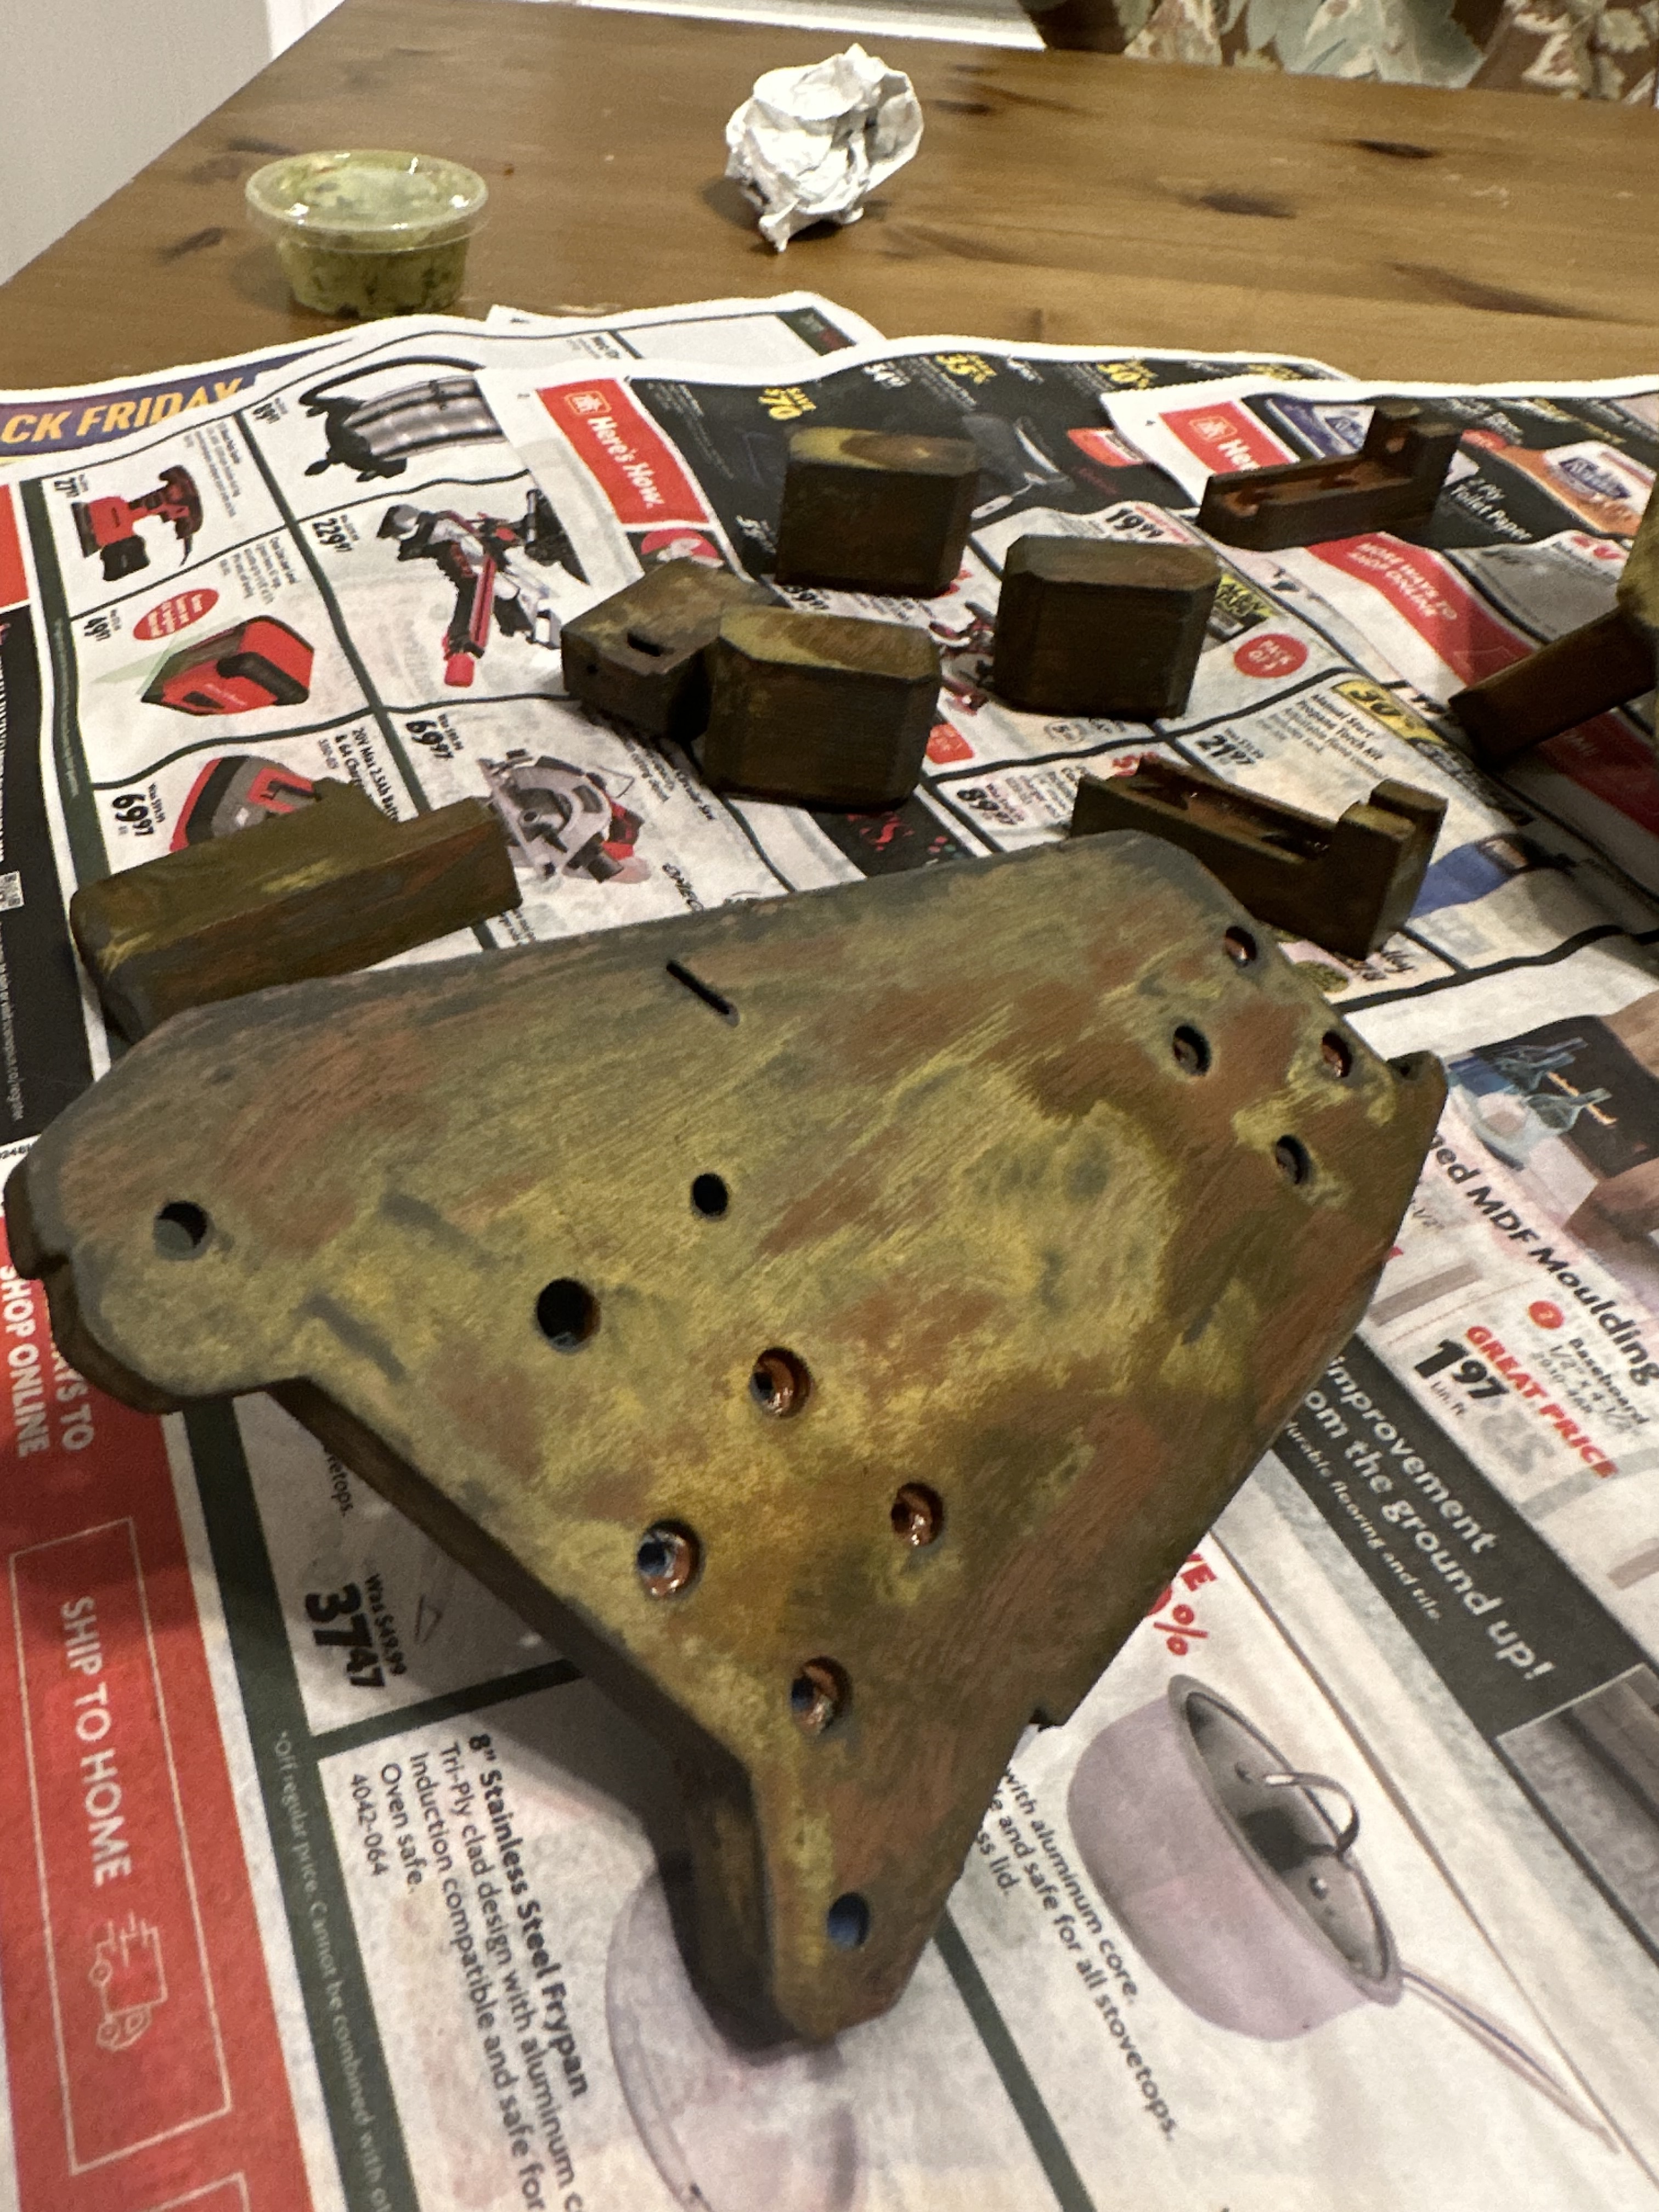
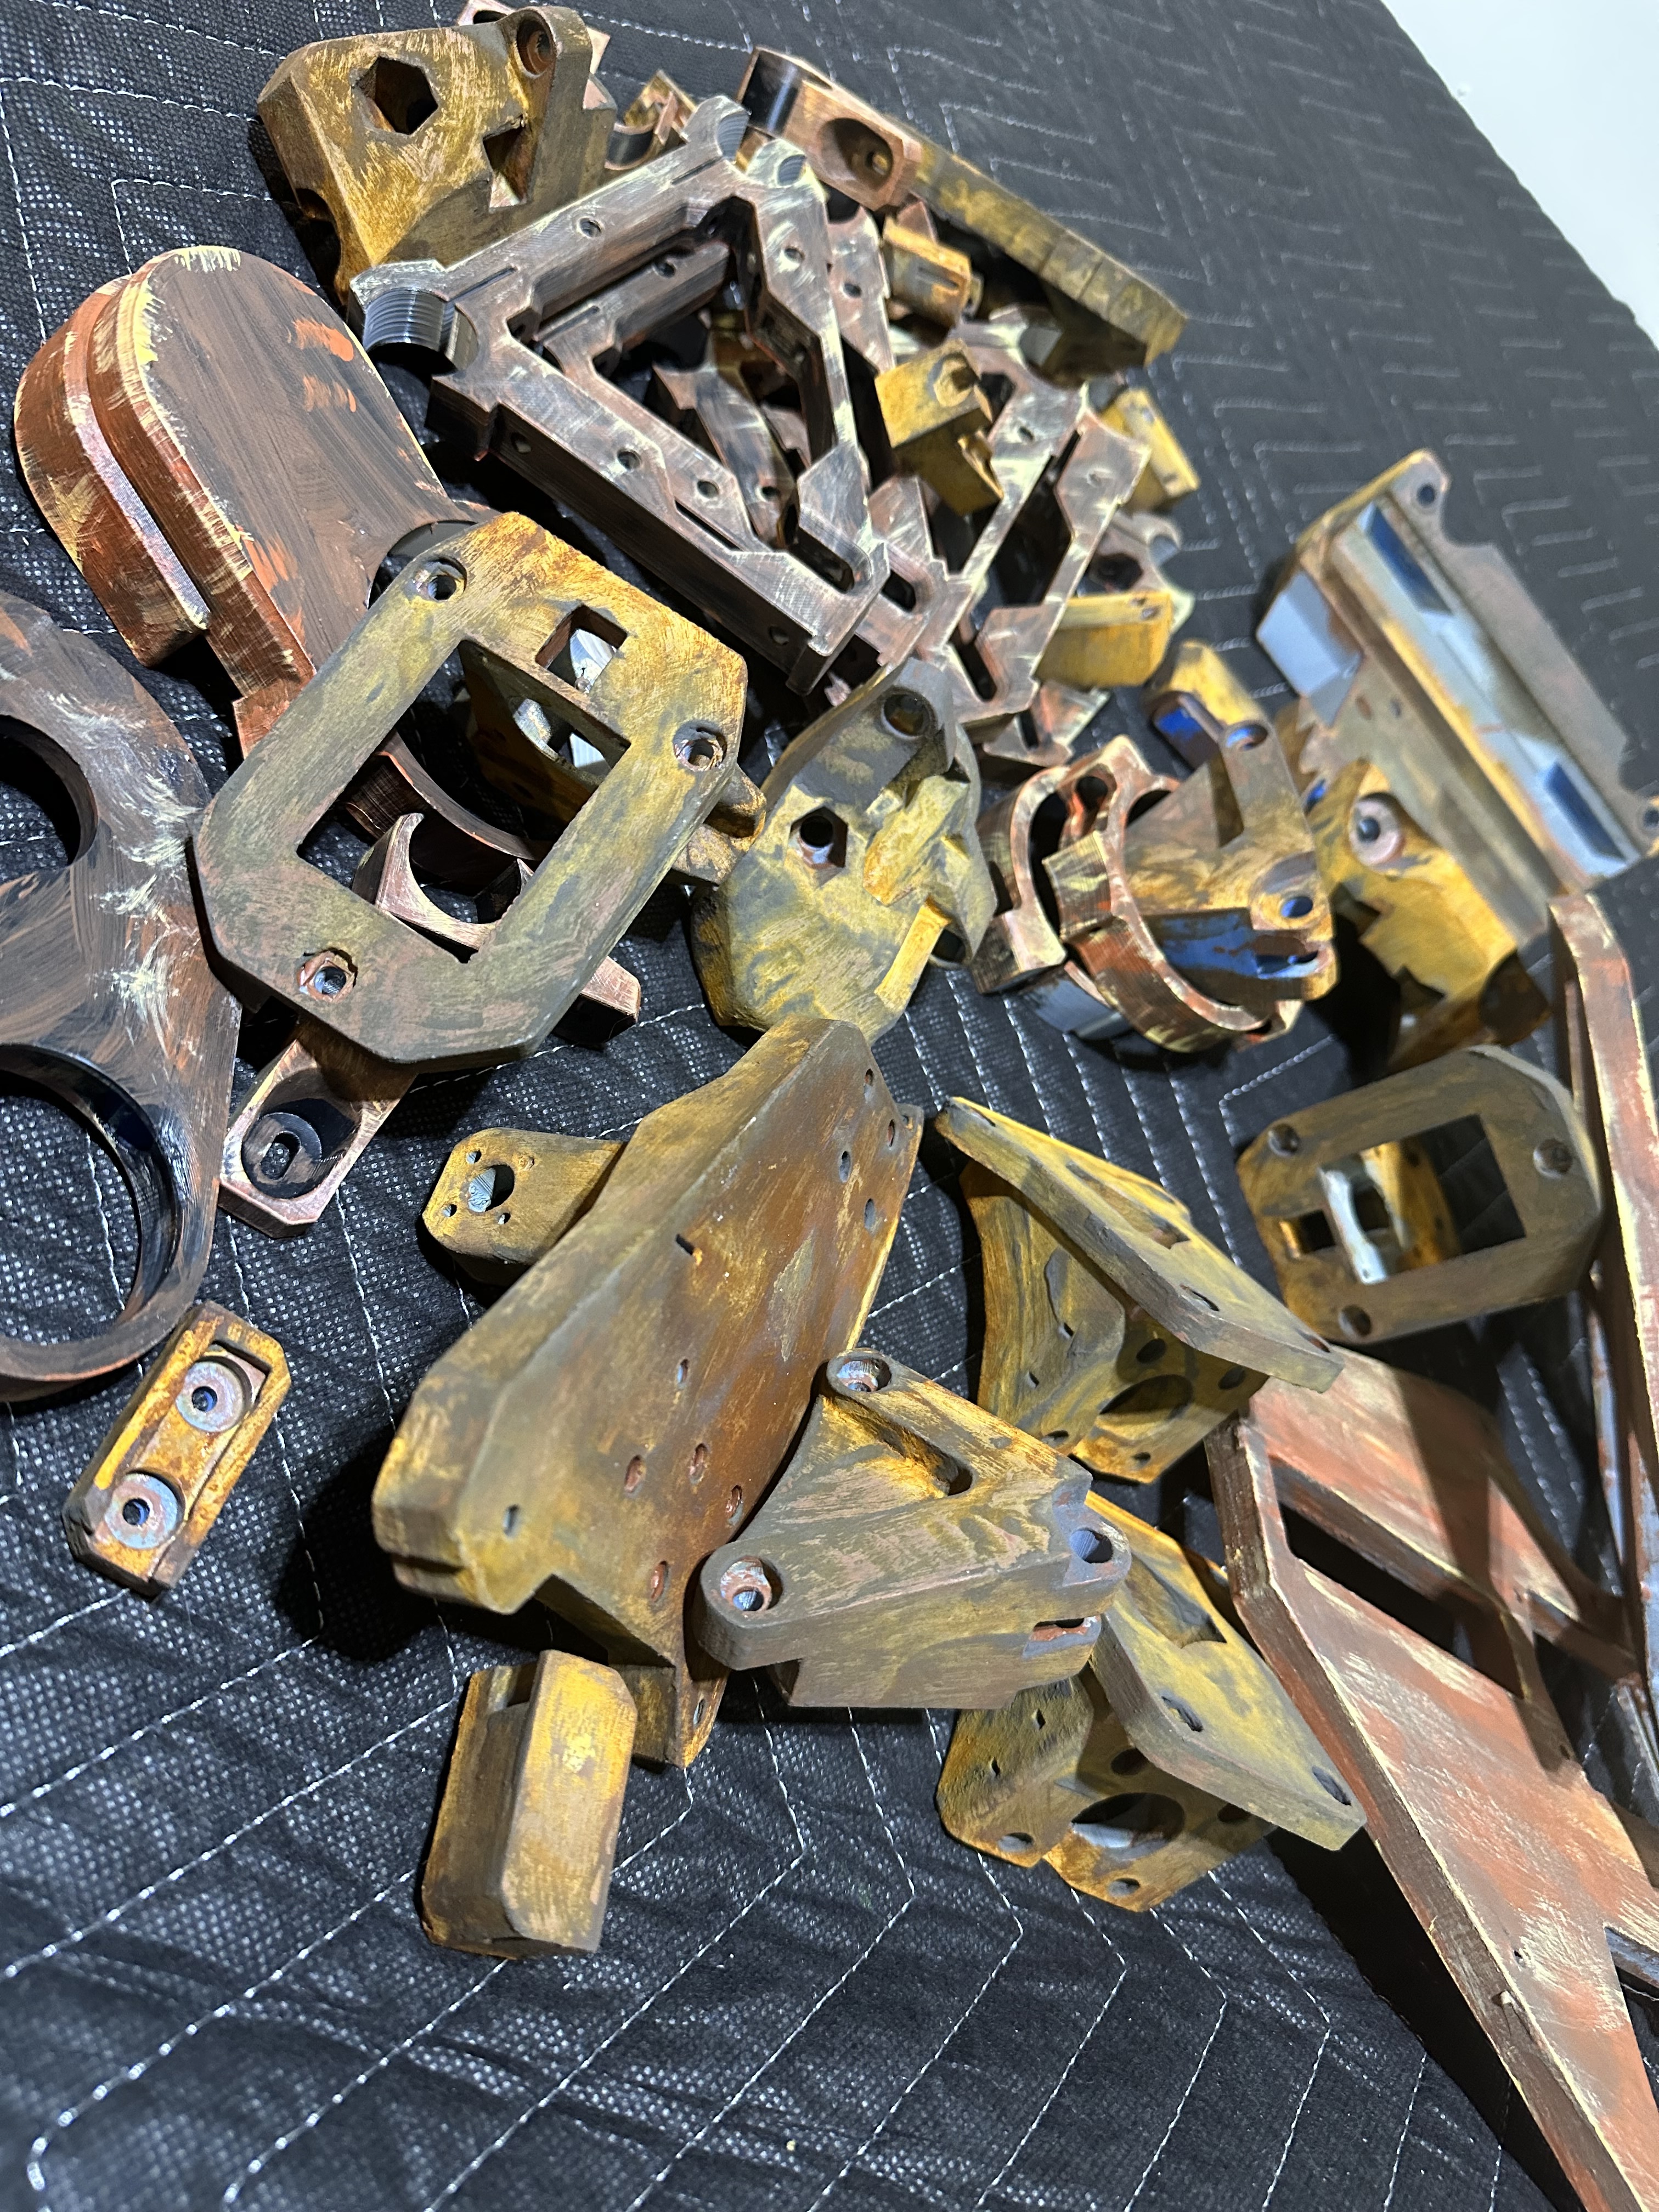
For the most part the machine’s parts were coated with Modern Masters “Iron” paint system. Incredibly expensive ($50 for 2 oz package) but the paint actually goes a long, long way. It’s the ‘activator’ that doesn’t go so far and despite all the chemistry I tried to throw at it I just couldn’t replicate the patina the actual activator gave. So, for those parts that hadn’t been treated I broke out the dollar store acrylics and faux painted everything else - yes, even the brand new Makita! To see the effect the Modern Masters creates look to the core, the stepper holders and the wheel/bearing assemblies. It’s literally as simple as painting the iron paint on, spraying it with this Windex type stuff and when it dries it’s gone from clay brown to WOW!
The adornments were from a pretty cool steampunk lamp I found on Thingiverse that I may print and build one day. Literally stuck on with silicone. Odds are they’ll fall off randomly but that’ll just make it better. Ha!
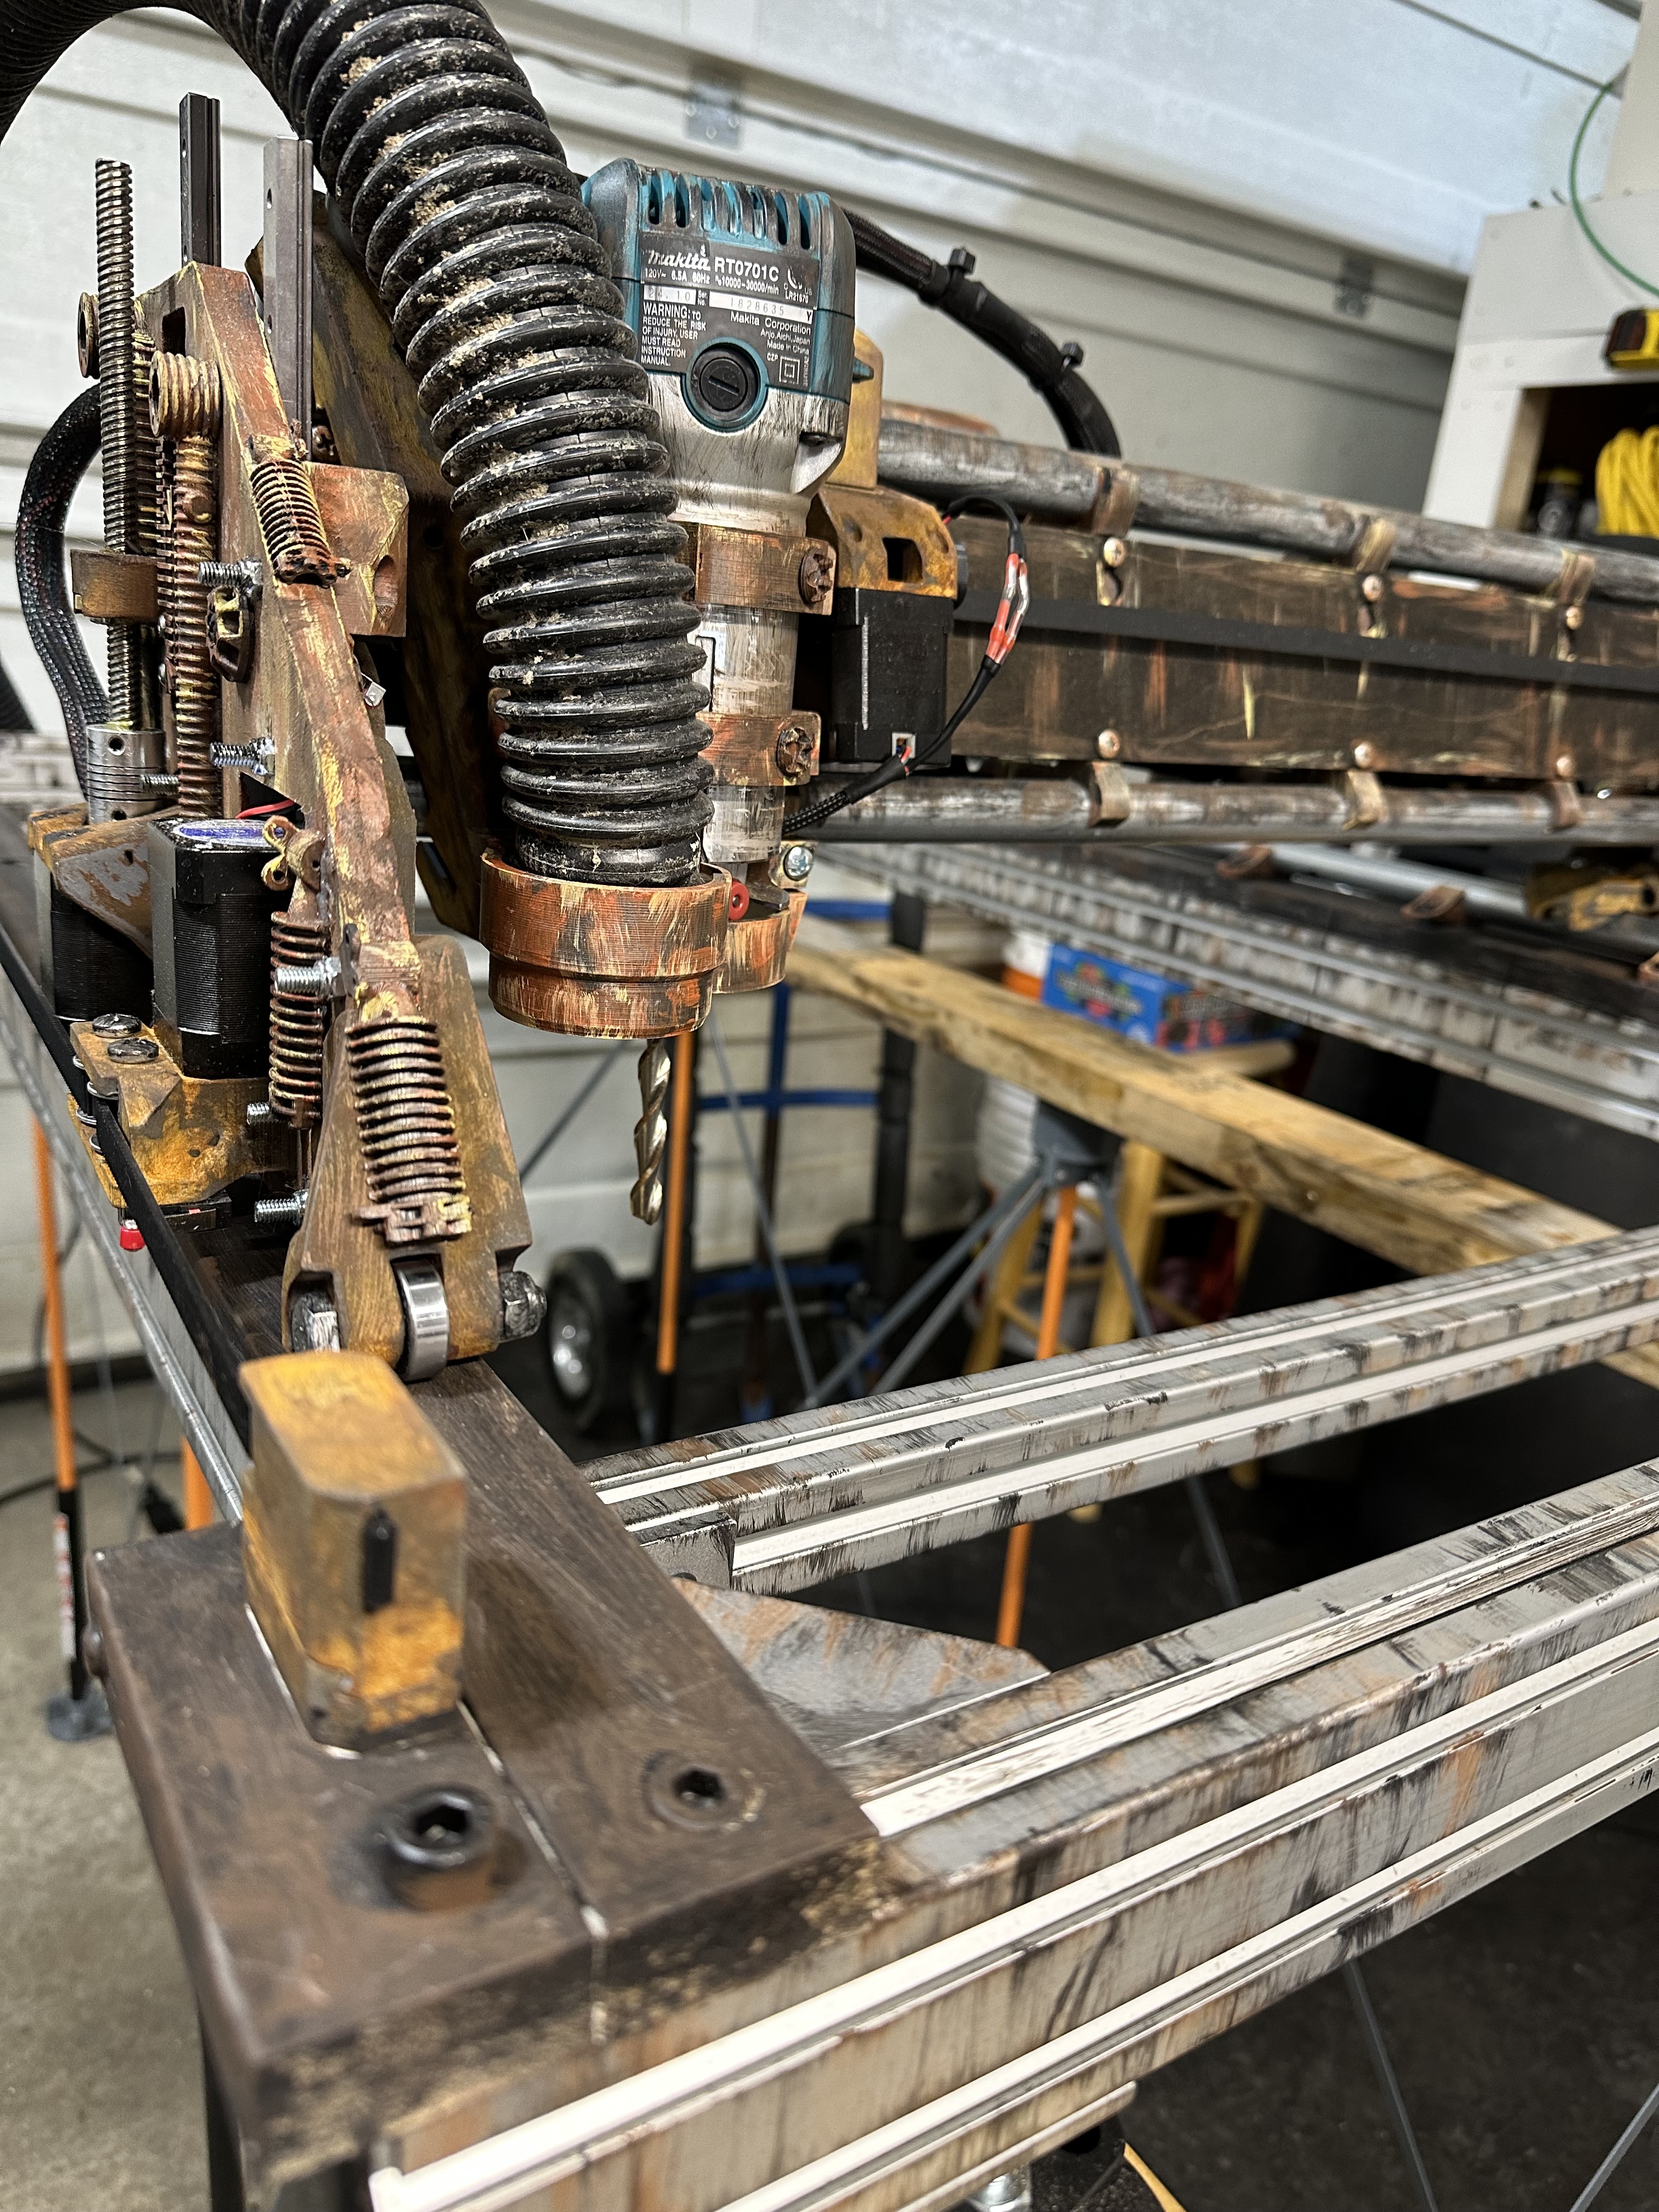
The extrusion believe it or not is brand new but sure doesn’t look like it. The cross bar at the front of the machine in the photos above is adjustable, the rear one fixed. I’ve mapped out the measurements for setting up Estlcam at 5" increments. Fully open, the machine can take a 40" piece of ice. It’s been measured down to 15" - any smaller than that and I can use the Bumble dual core build - even if I have to pull the second core for the task at hand.
Because the ice is so heavy (a 40" block can weigh as much as 350lbs depending on the thickness) this machine is designed to be dropped onto the ground/floor over top of the piece of ice. The front sliding crossbrace slides up to squeeze the ice and “lock” the machine to the block of ice. With the adjustable feet attached the distance from the ground to the collet at full Z is just shy of 9". a 9" thick block of ice is almost a perfect thickness for a typical tabletop sculpture you might see at a buffet. So, add a 2X4 or 4X4 block under each foot and I should be able to run almost the full length of the 3" bit. Most often I’ll be using a 2" bit.
Because I only have 72mm of useable Z travel the machine will be used to carve templated sculptures for specific events like weddings, birthdays, new years etc. The ice will then have to be removed from the machine (or the machine removed from the ice I guess) and the sculpture will need to be finished by hand. Which is totally fine and will still help with my workflow but more to the point will ensure a level of accuracy and repeatability that paper templates and 100% hand cutting would never give me. Still, this height limitation may see me upgrading this machine to the tall plates (unless I make the switch to a tall LR4).
More useful to me is to use the machine for engraving logos or artwork or personalization elements like bride and groom names etc. These get engraved on the backside of the piece, in reverse which makes for a bit of a mind bend when doing by hand so to have a machine that won’t stop to question if that ‘n’ is forwards or backwards is a welcome addition to the shop. These engraved elements are never more than 30-40mm deep so the machine travel as-is is absolutely perfect. Also, these engravings are rarely added to ice any thicker than 4"-5" so the machine frame as it exists is almost perfect. Not planned, just a lucky bonus that it worked that way.
When all is said and done I pop the belts, lift the gantry and carry away the frame. Totally transportable to and from the freezer or to and from a worksite. I do believe I’m going to build a travel/storage case of some sort for the gantry to protect it if I do end up taking it to worksites. It’s well designed and well built but I can see a piece of ice sliding across the truck and snapping one of the side carriages off or something.
And lastly - and I’ve teased this before - but I’m not done with the build. There are still 3 more kgs of printed PLA parts waiting to be added. But that will have to wait for springtime so I can paint those pieces before adding them.
Now for some photos of the build process thus far:
1 Like


That looks sick! What a fun build. May the ice be with you! ![]()
1 Like
More extrusions! ![]()
You can also think about a drop table. ![]()
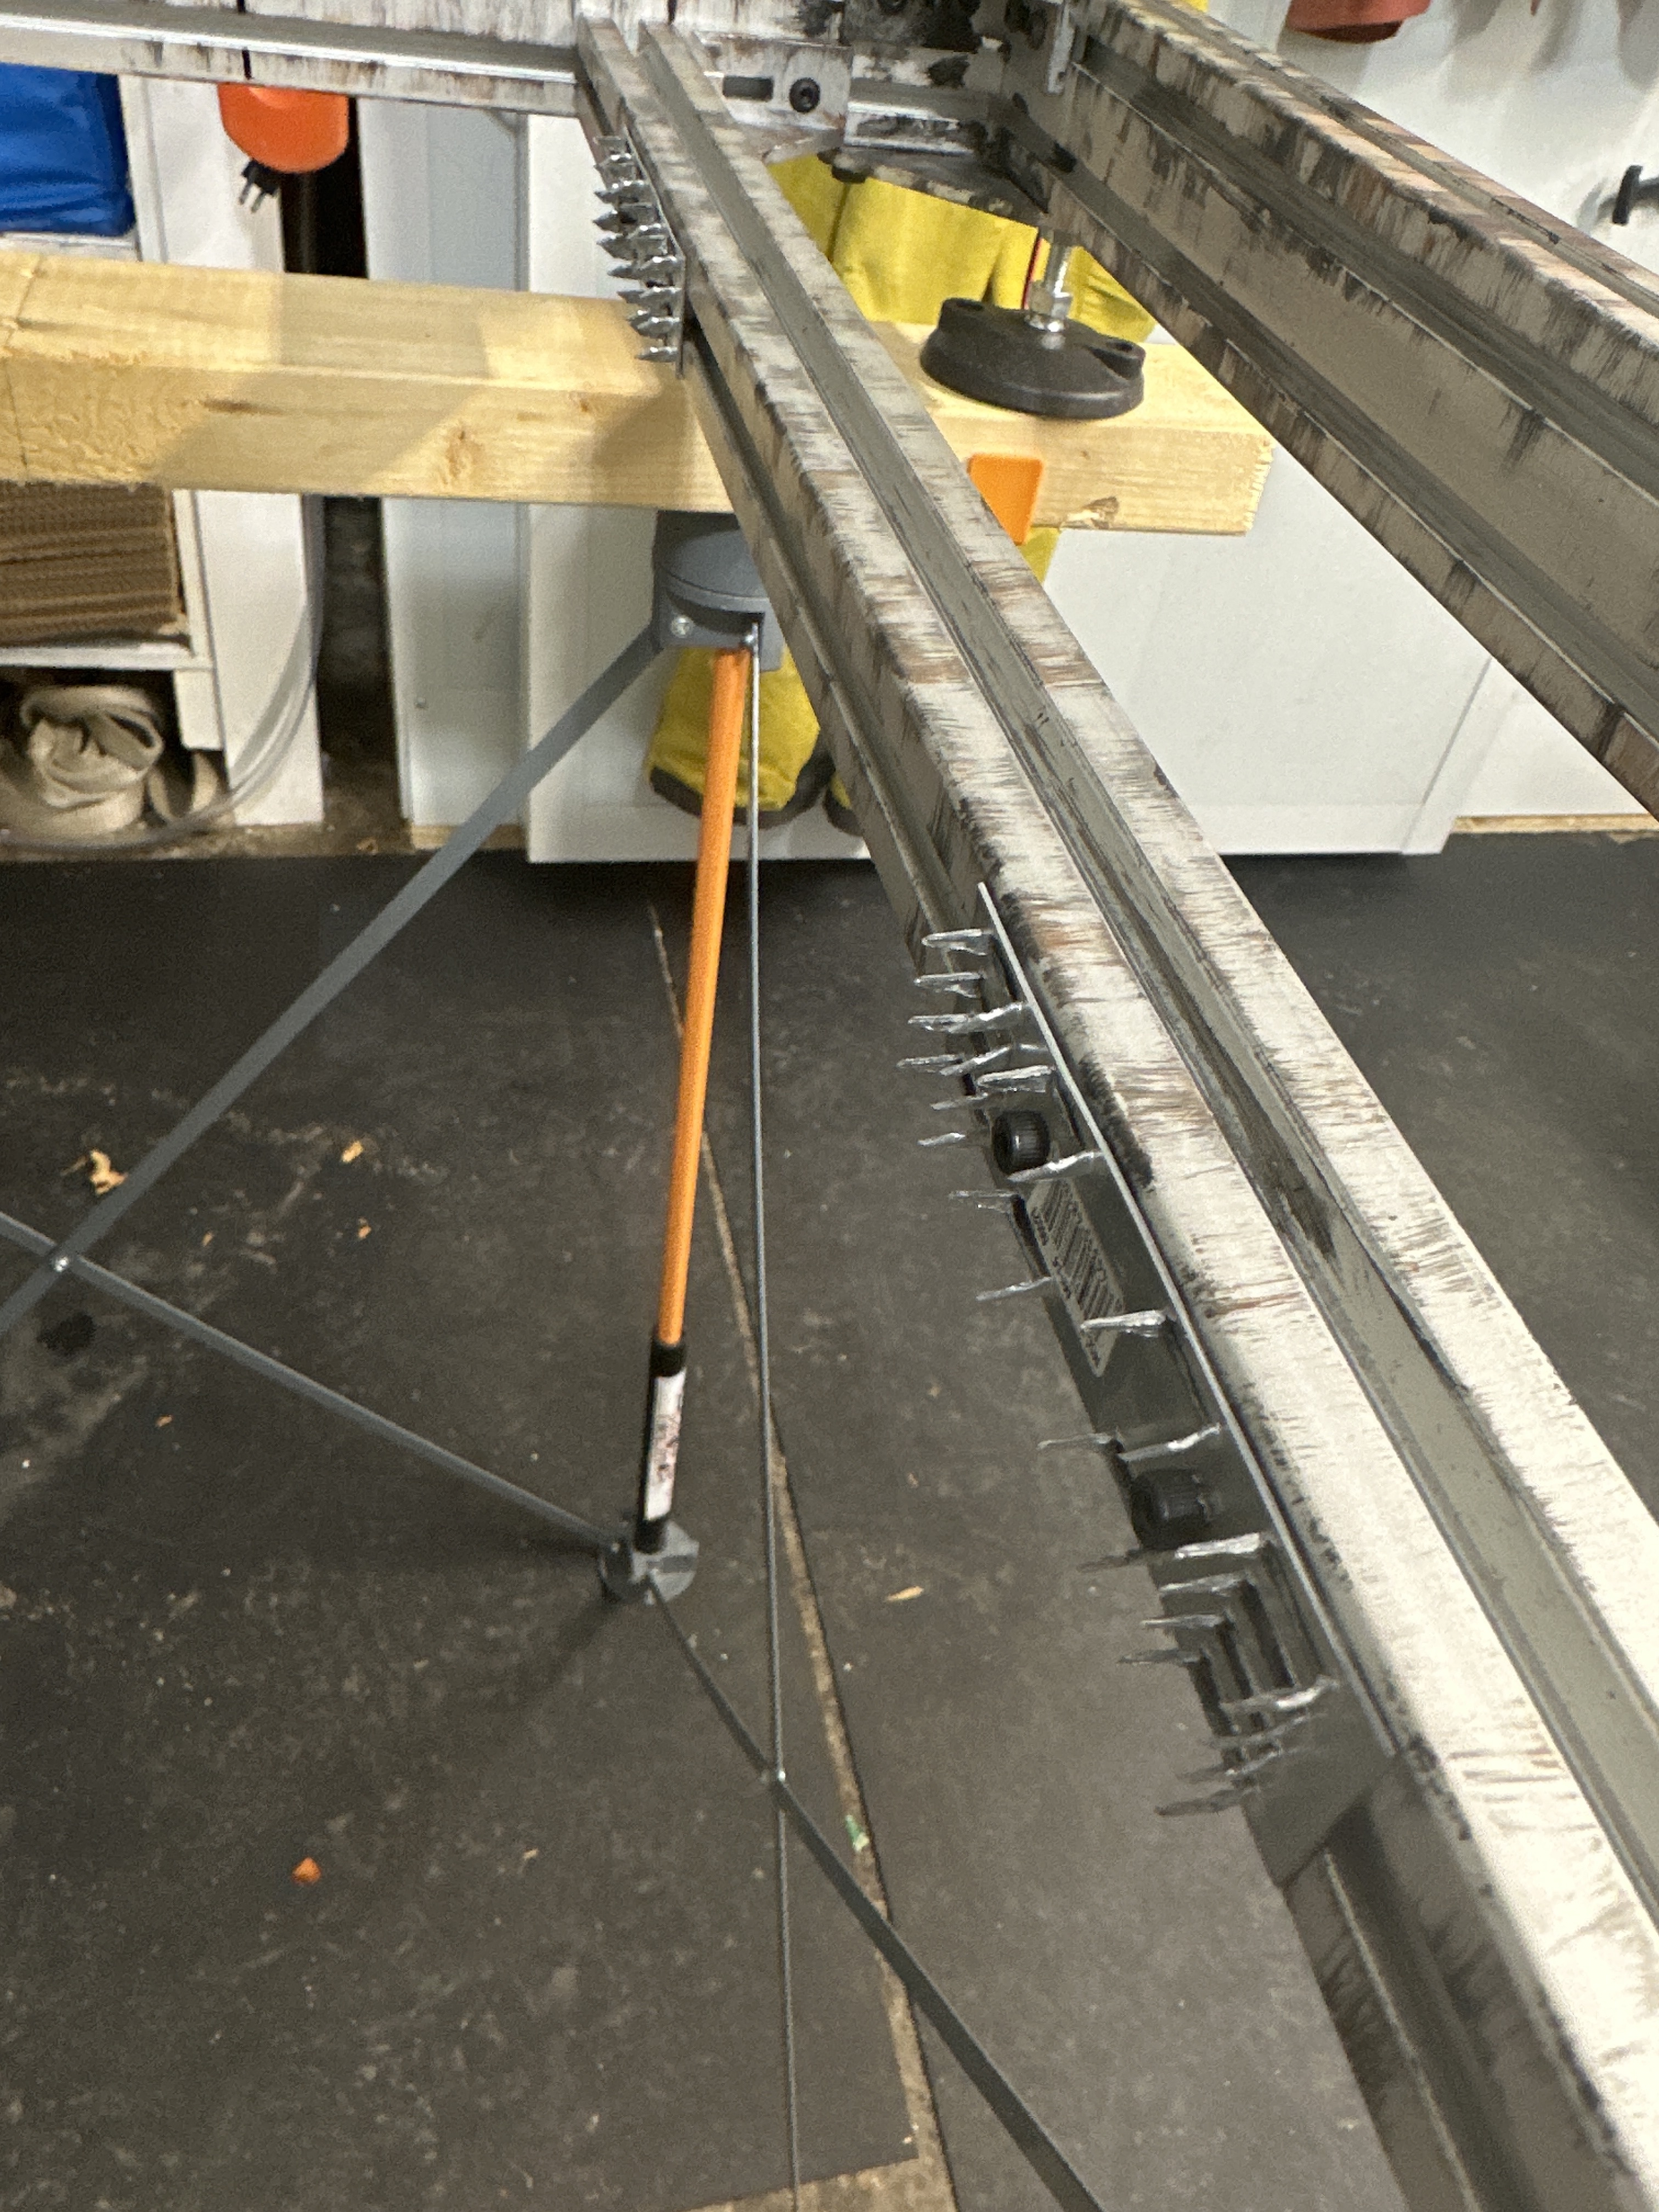
The last piece of the puzzle - some “teeth” to enable me to clamp the machine to the ice block. And right on time. Tomorrow this machine will head into the freezer for its first real job.
2 Likes
This machine is basically a drop table. Hahaha
Now, a drop table that could be controlled by the jackpot thereby increasing the z travel? As long as I had a long enough cutter I guess. Feels like the tall plates are easier. But they’d have to be re-Tatooined…
I don’t think that works but I am just thinking: what if the Z axis would not move but the table? Like with a core XY printer? ![]()
And I’m thinking what if both? Ha!
1 Like
Stepper controlled motorcycle lift….
2 Likes
Stepper controlled cake platter. WITH a rotary axis as well. Just hold the knife and the cake will cut itself. Of course you’d want an “on-the-fly” variability component built into the rotary axis to adjust the size of the piece of cake being cut for your own plate…
1 Like