Boom. One side done.
5 Likes
Not an easy journey but you got there!!
3 Likes
I am almost out of red 
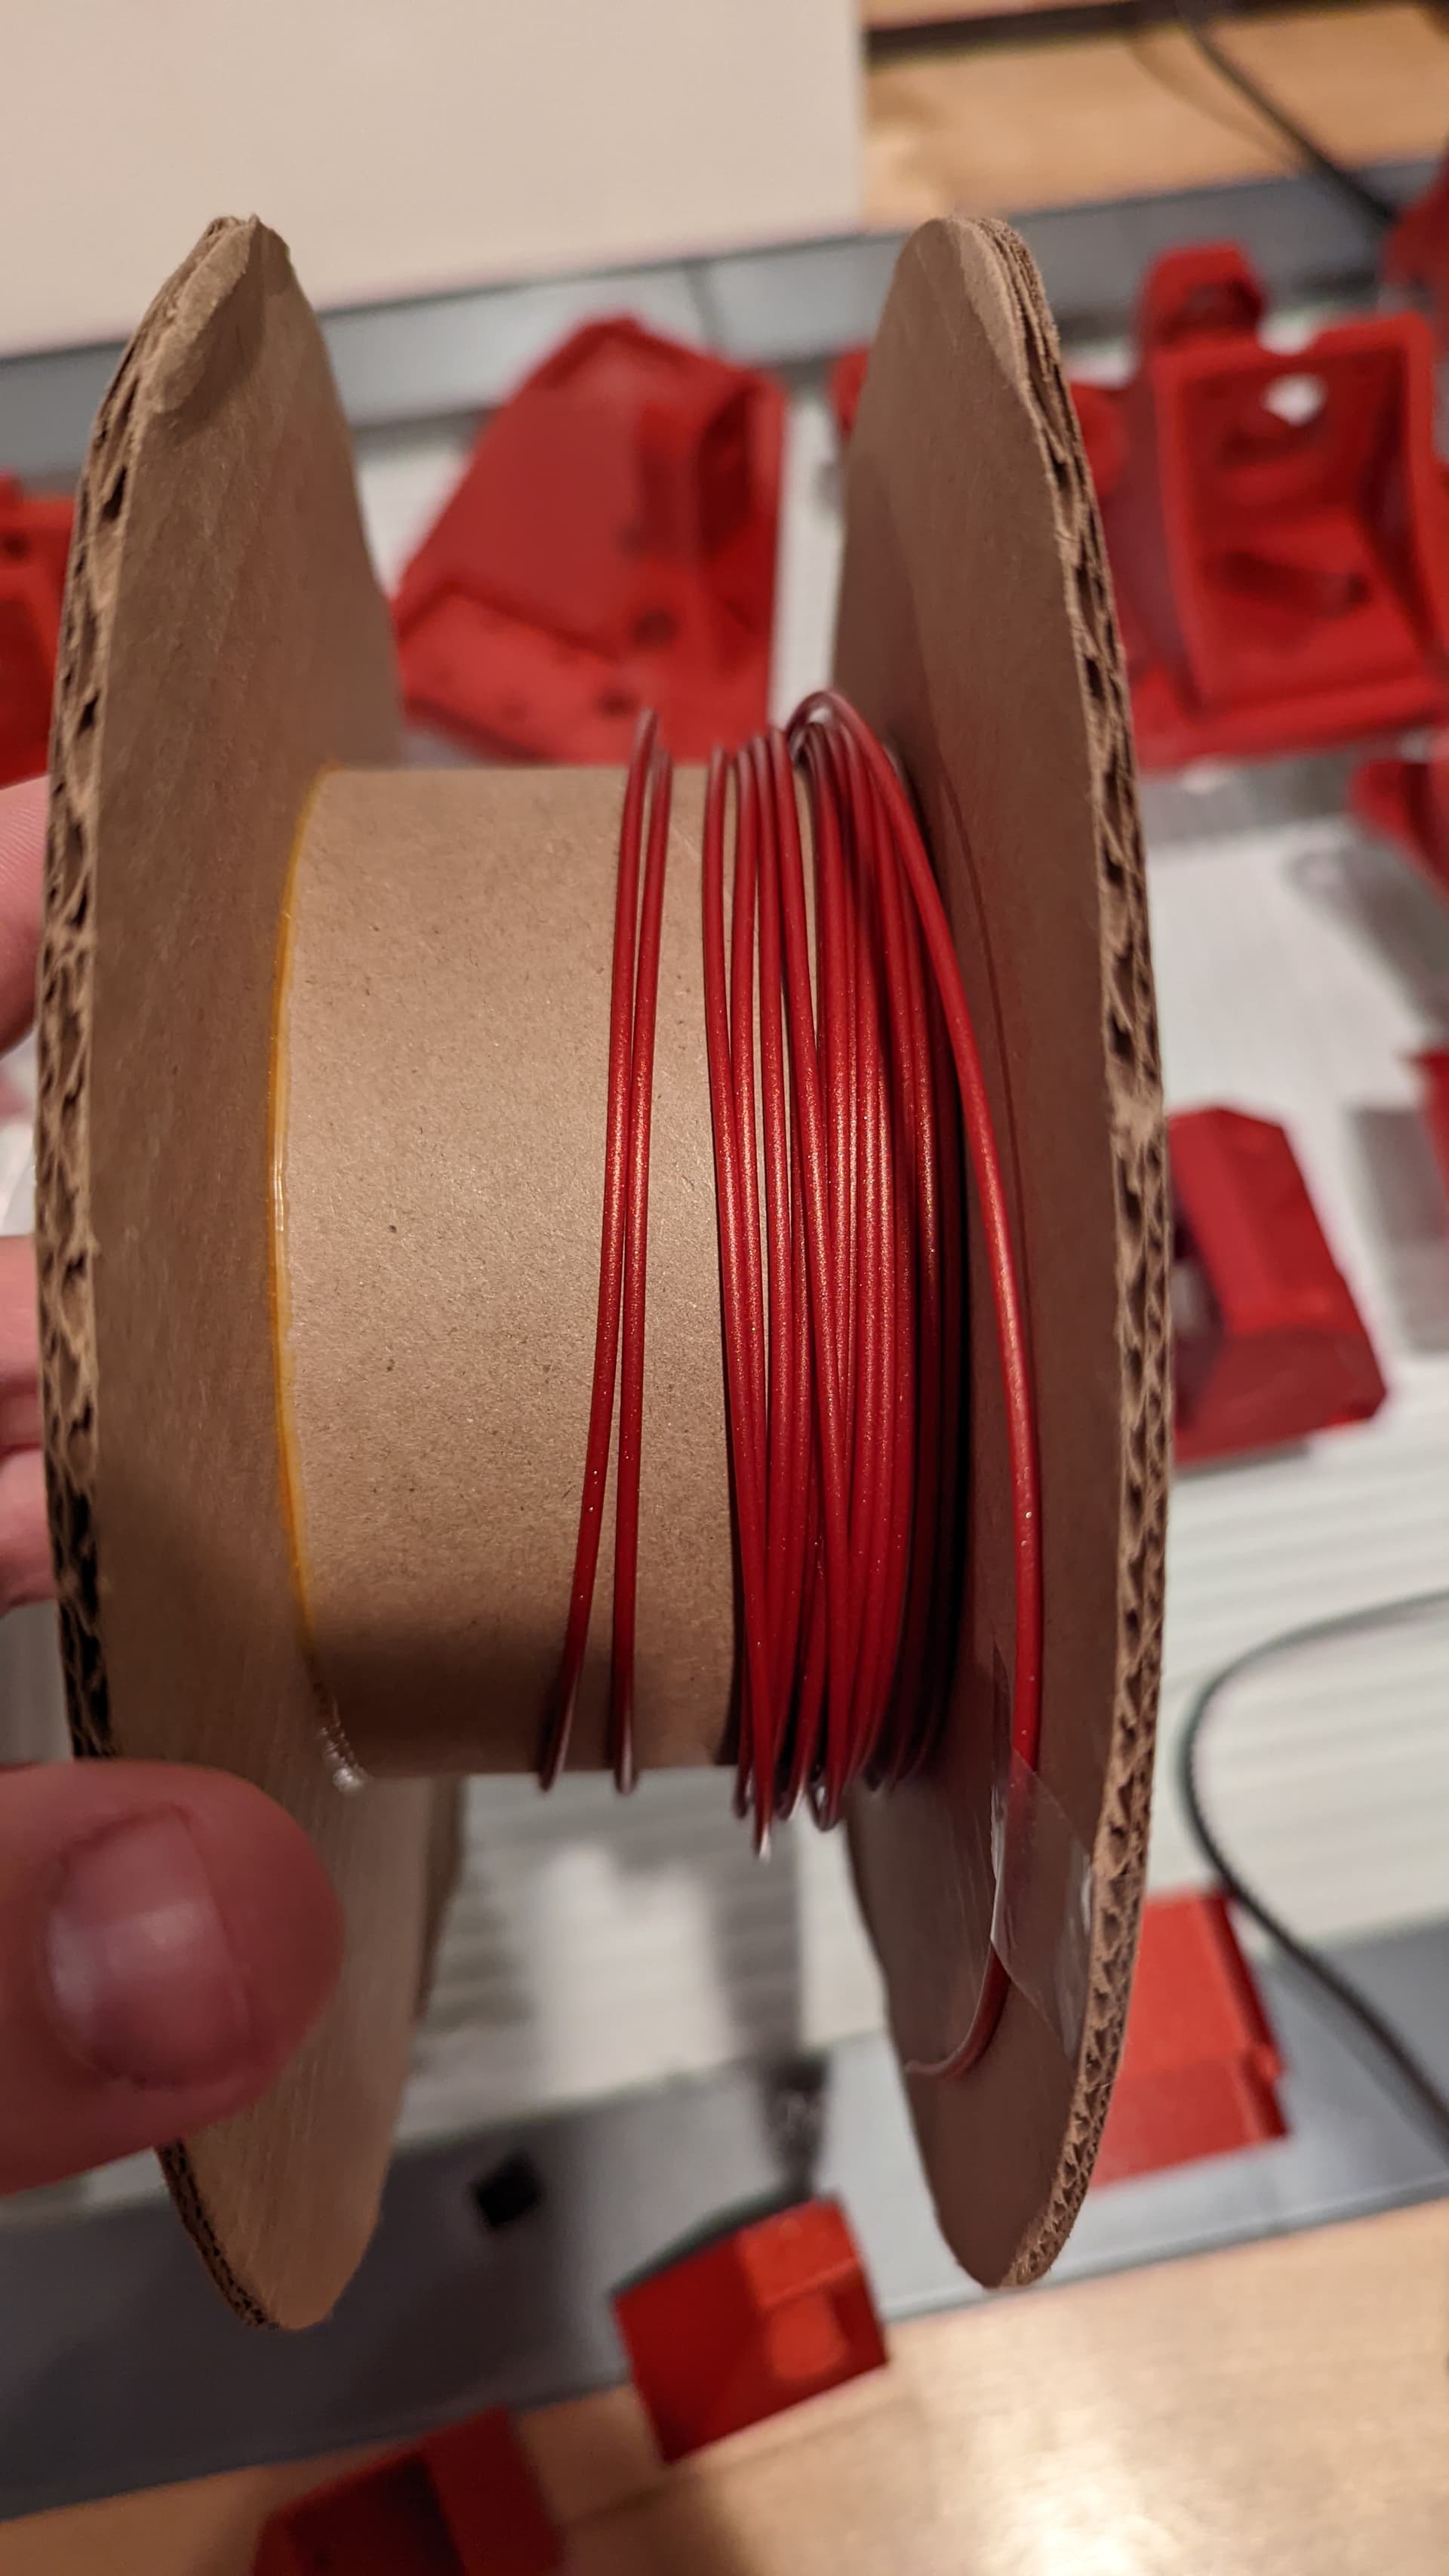
100mm diameter * 16 turns left * pi = about 5m left. I need a tiny part to print!
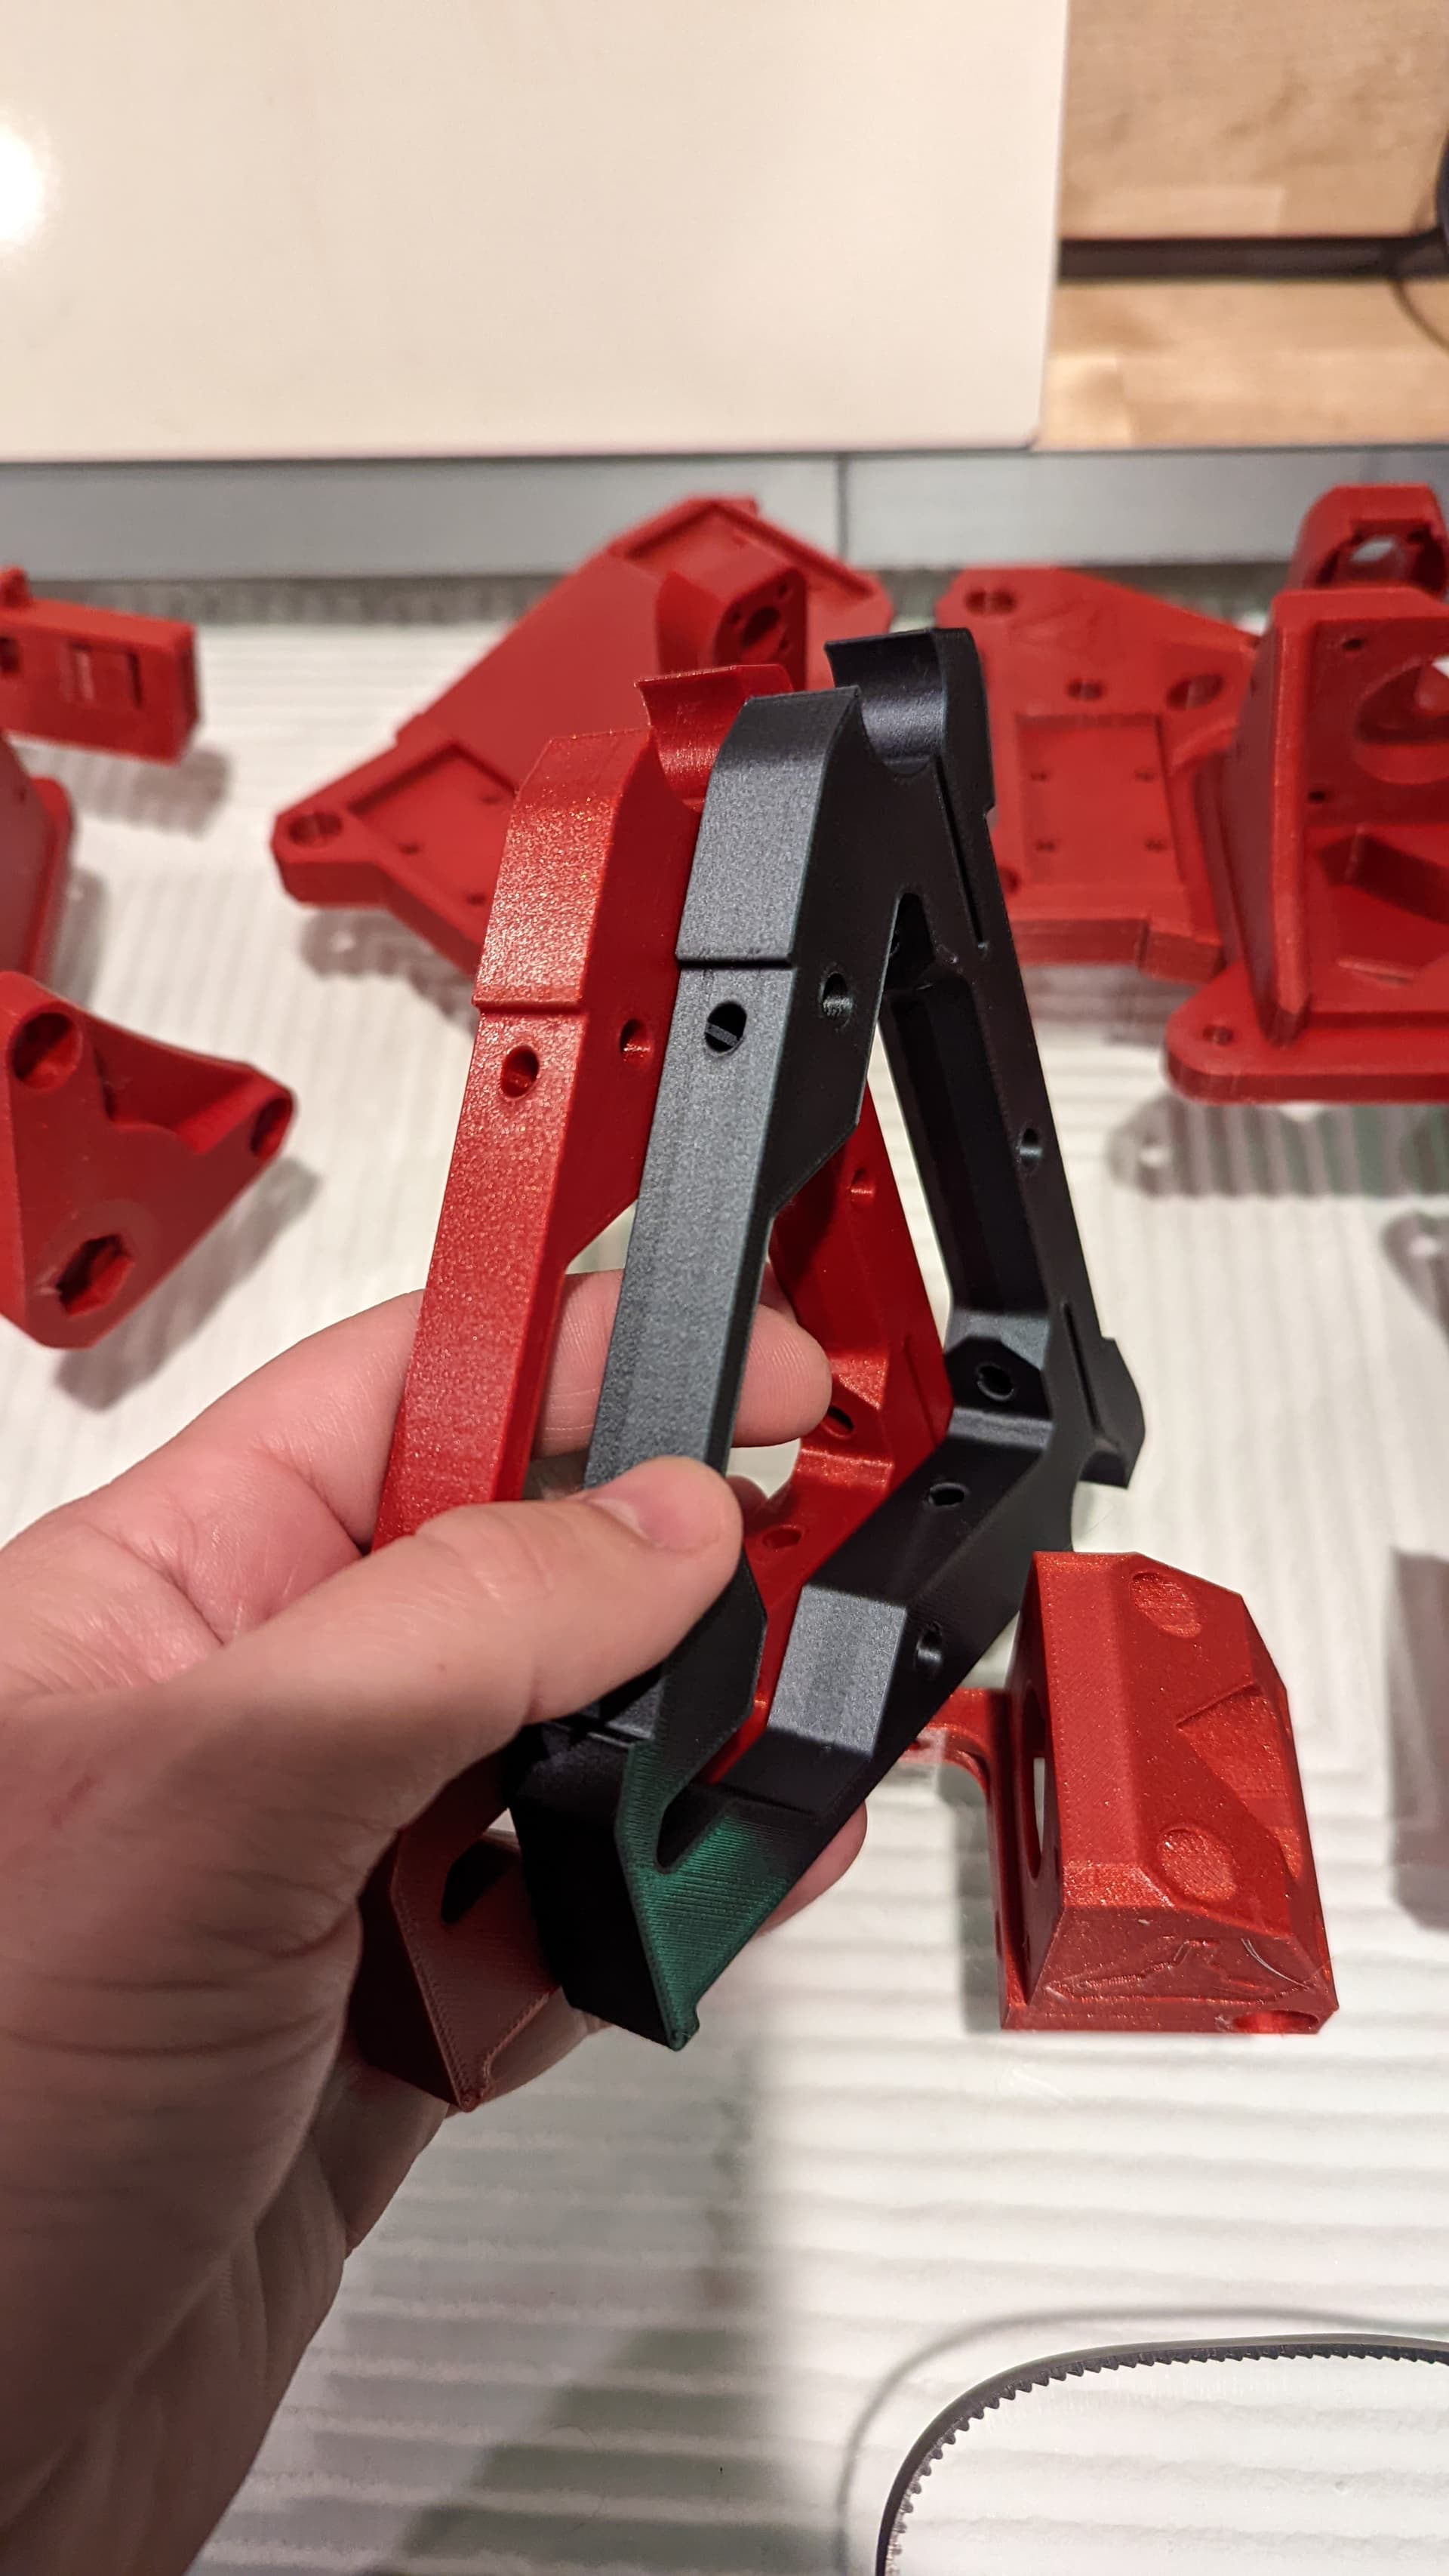
I swapped in some of the ziro CF PLA and I think it looks pretty good now. I am not sure how it will look with the black plates. But we will see.
1 Like
Save it to print your board box, that will let you have a coordinated color stripe like on my Red Primo box.
2 Likes
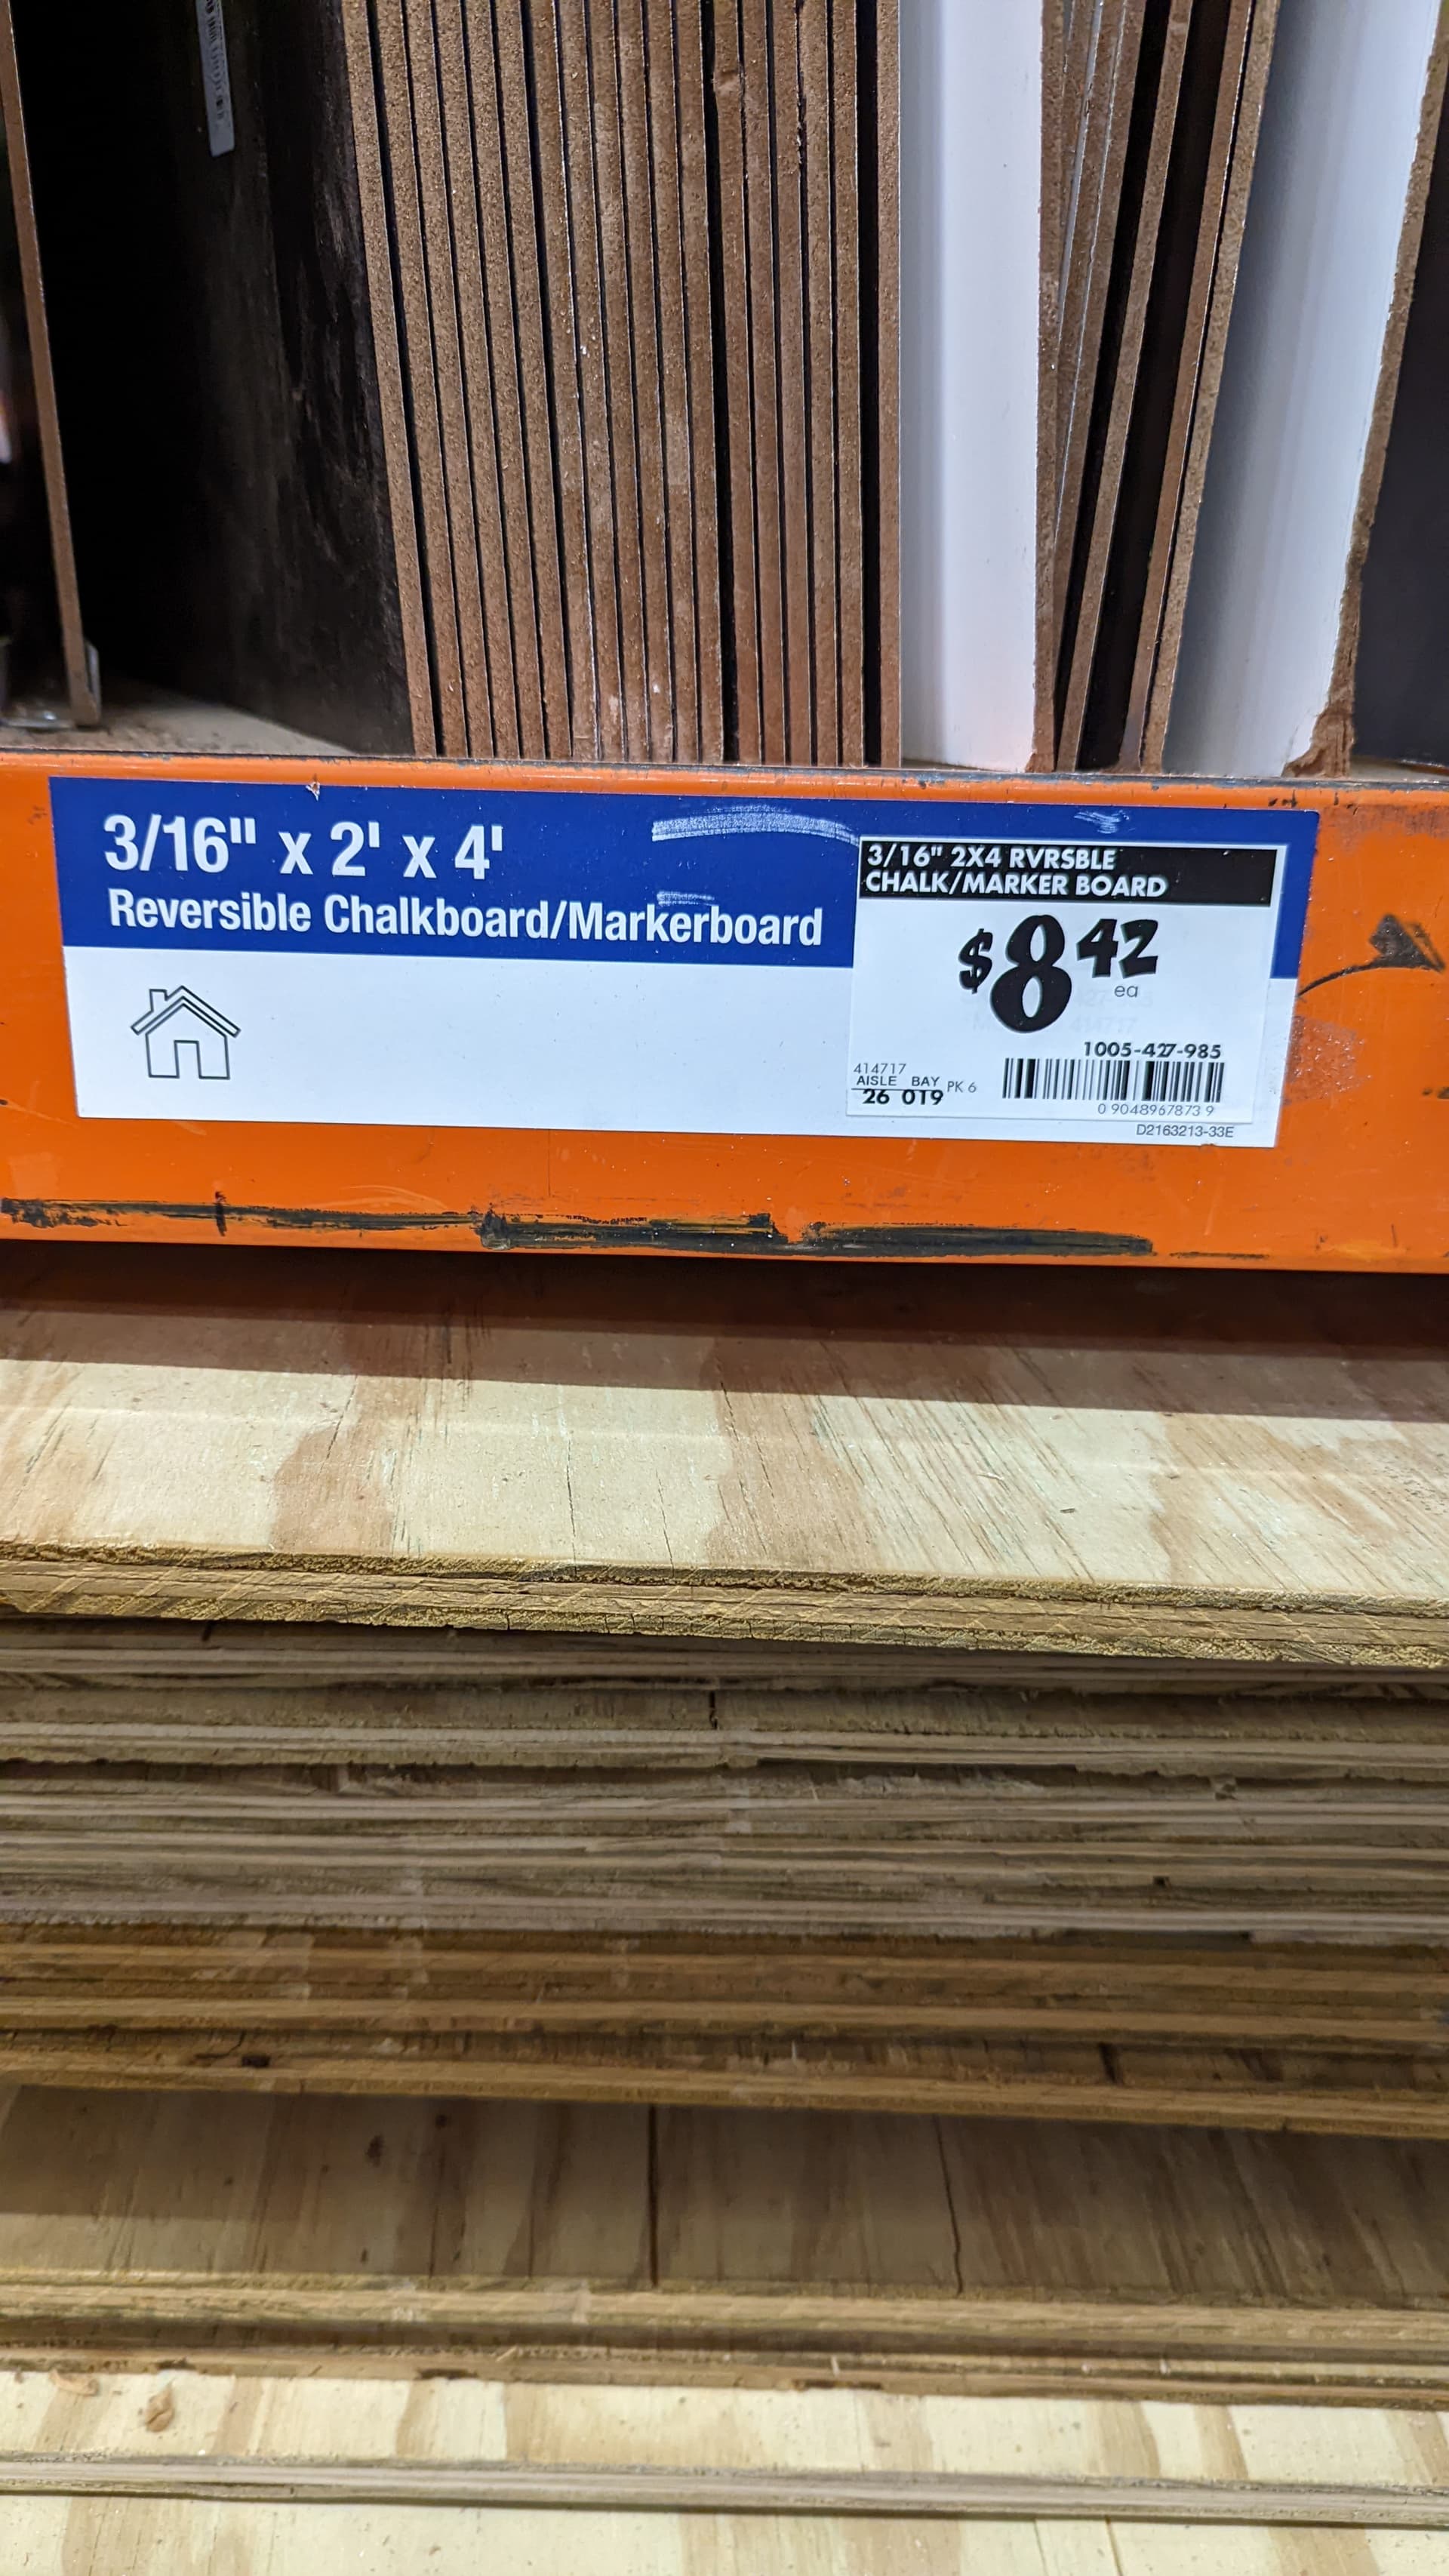
I went shopping today. I bought a 2’x4’ blackboard/whiteboard. I have a small piece of scrap. It should fit great and I might get a bit out of the scrap.
I bought some EMT. They have 5’ lengths, and it is about 2" short on the long rail. I can buy a ten footer (and even cut it in the parking lot to fit in my car). But I will think about it. I might rather test using two pieces and splice them together. With the clips, it may still be perfect.
I have been staining (with India ink) my YZ plates. I also got some poly to give them a clear coat and I should be able to show some pictures with the parts and plates together.
1 Like
I like it! That is the exact stuff I think I will use next build.
I think the splicing could work, the worst case a tiny divot at the end of your travel.
2 Likes
I’m giving live updates here.
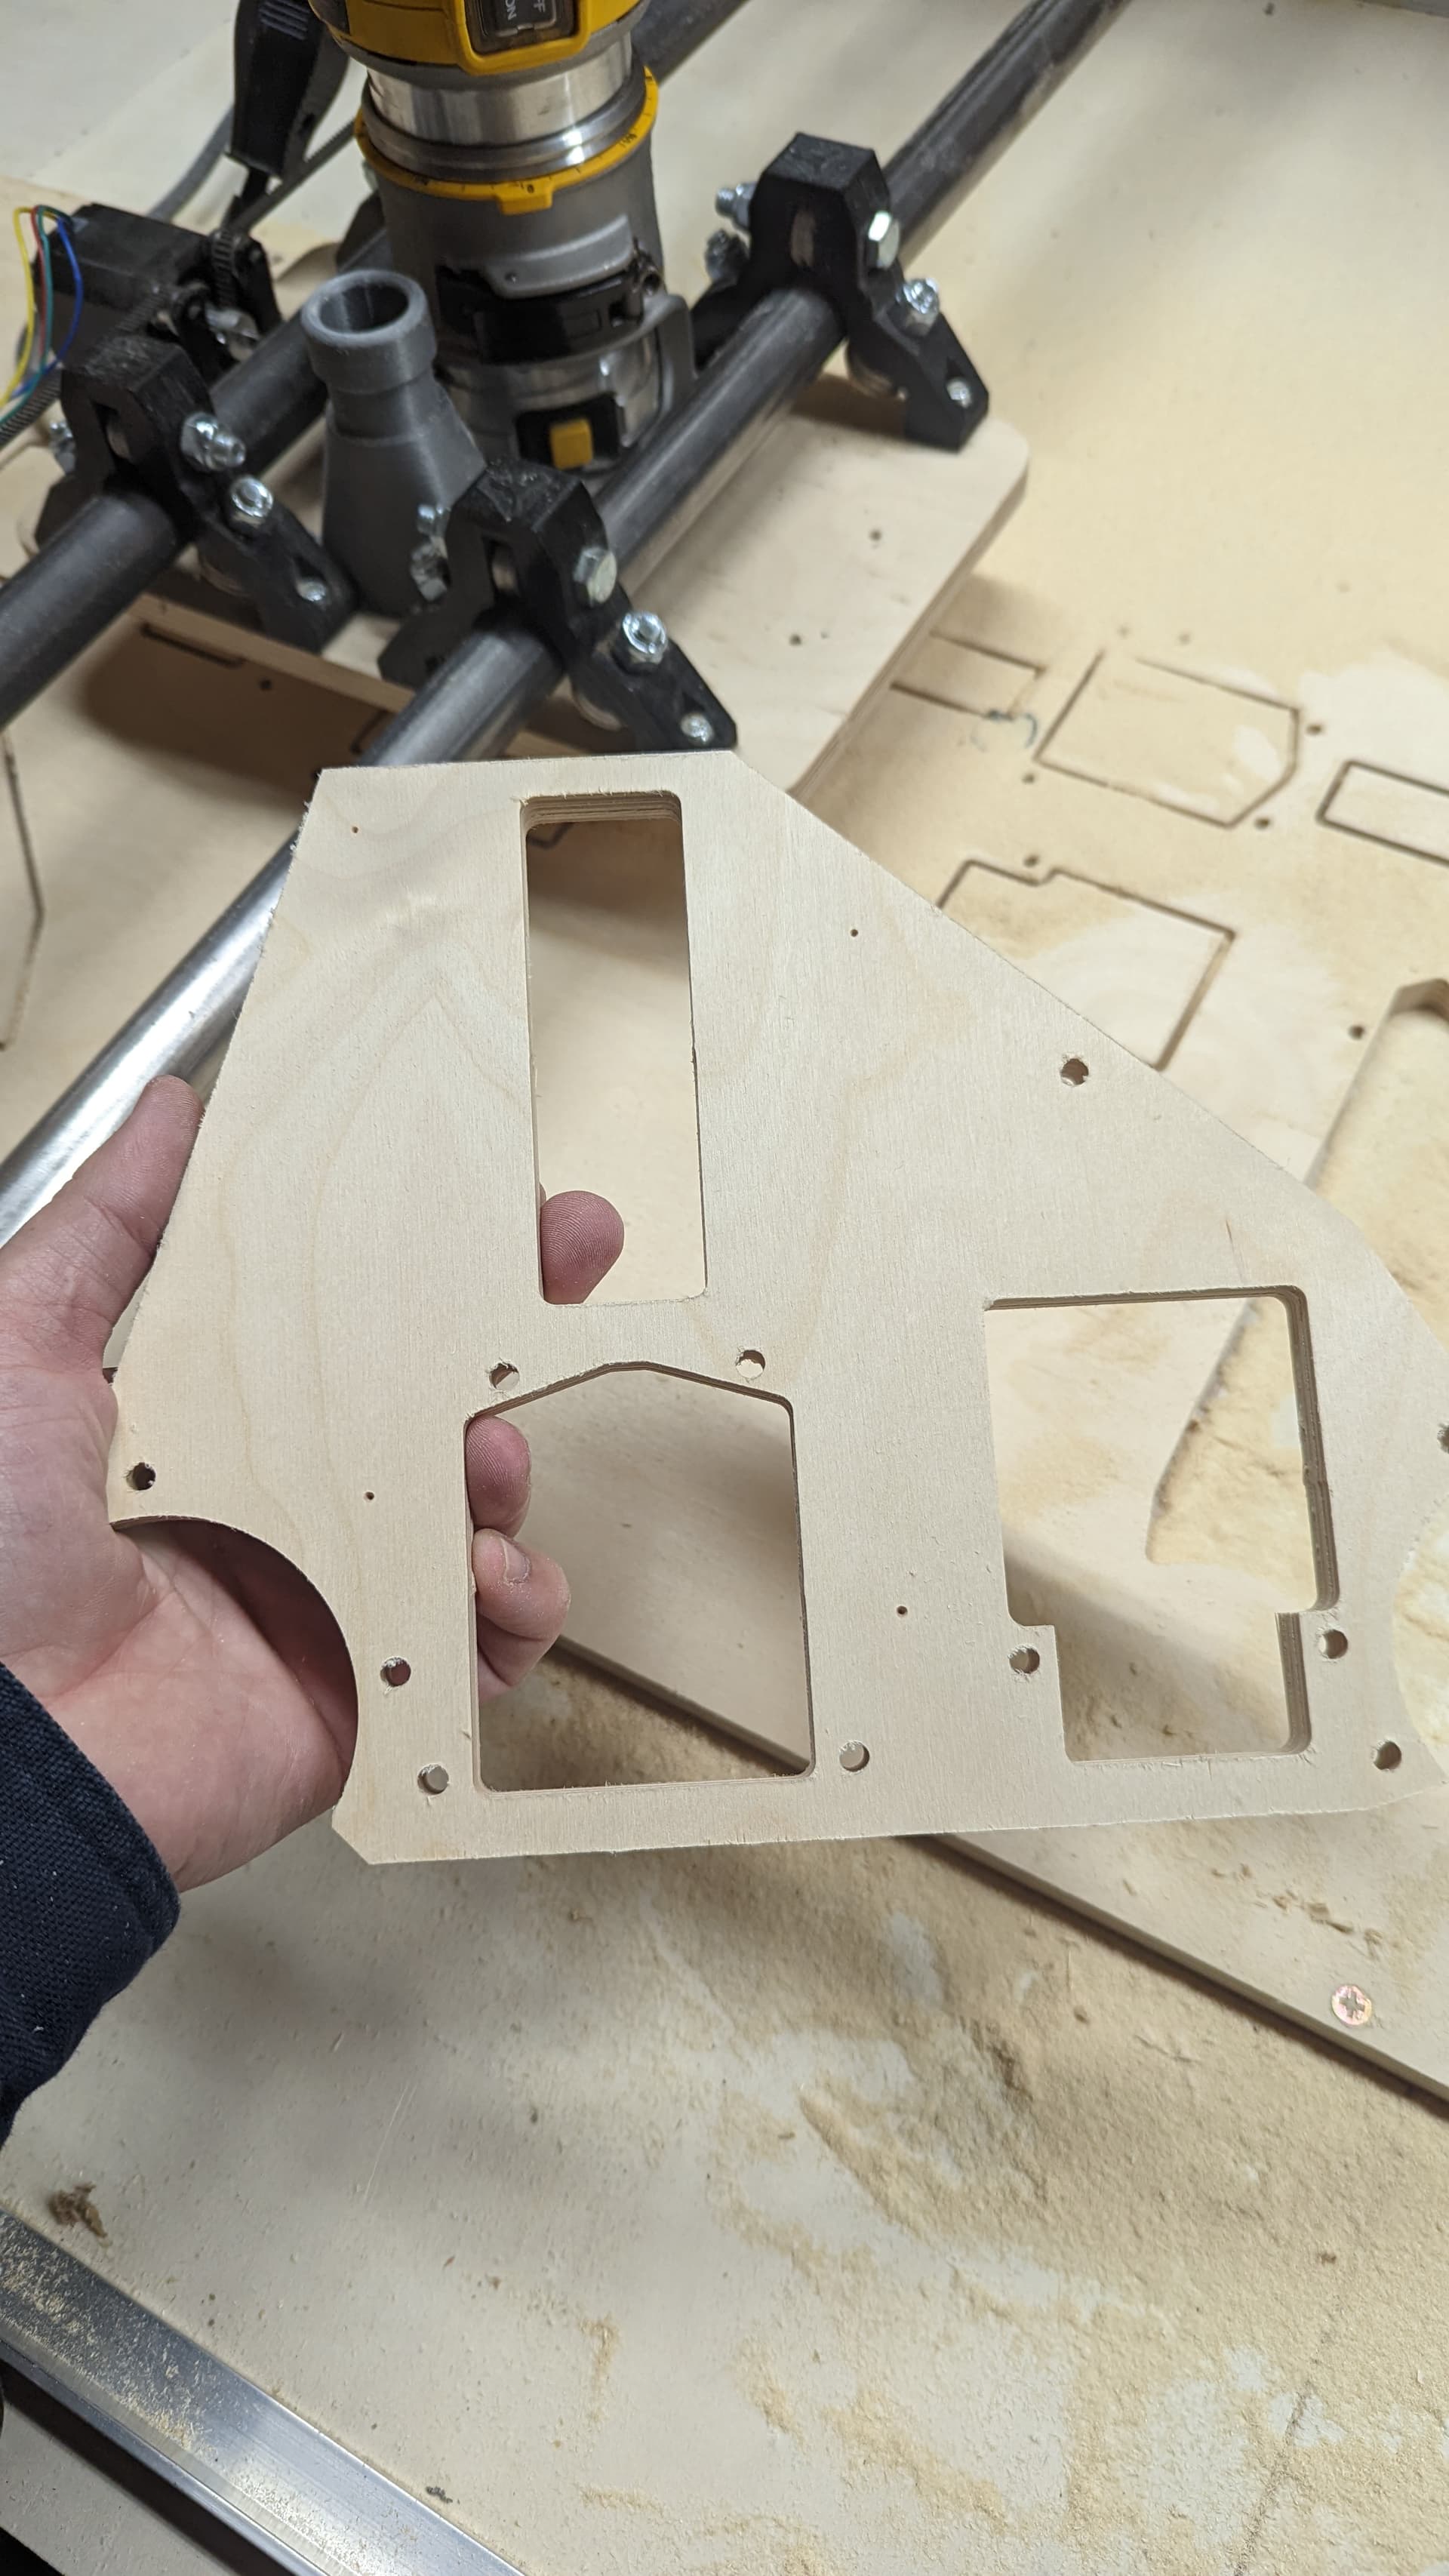
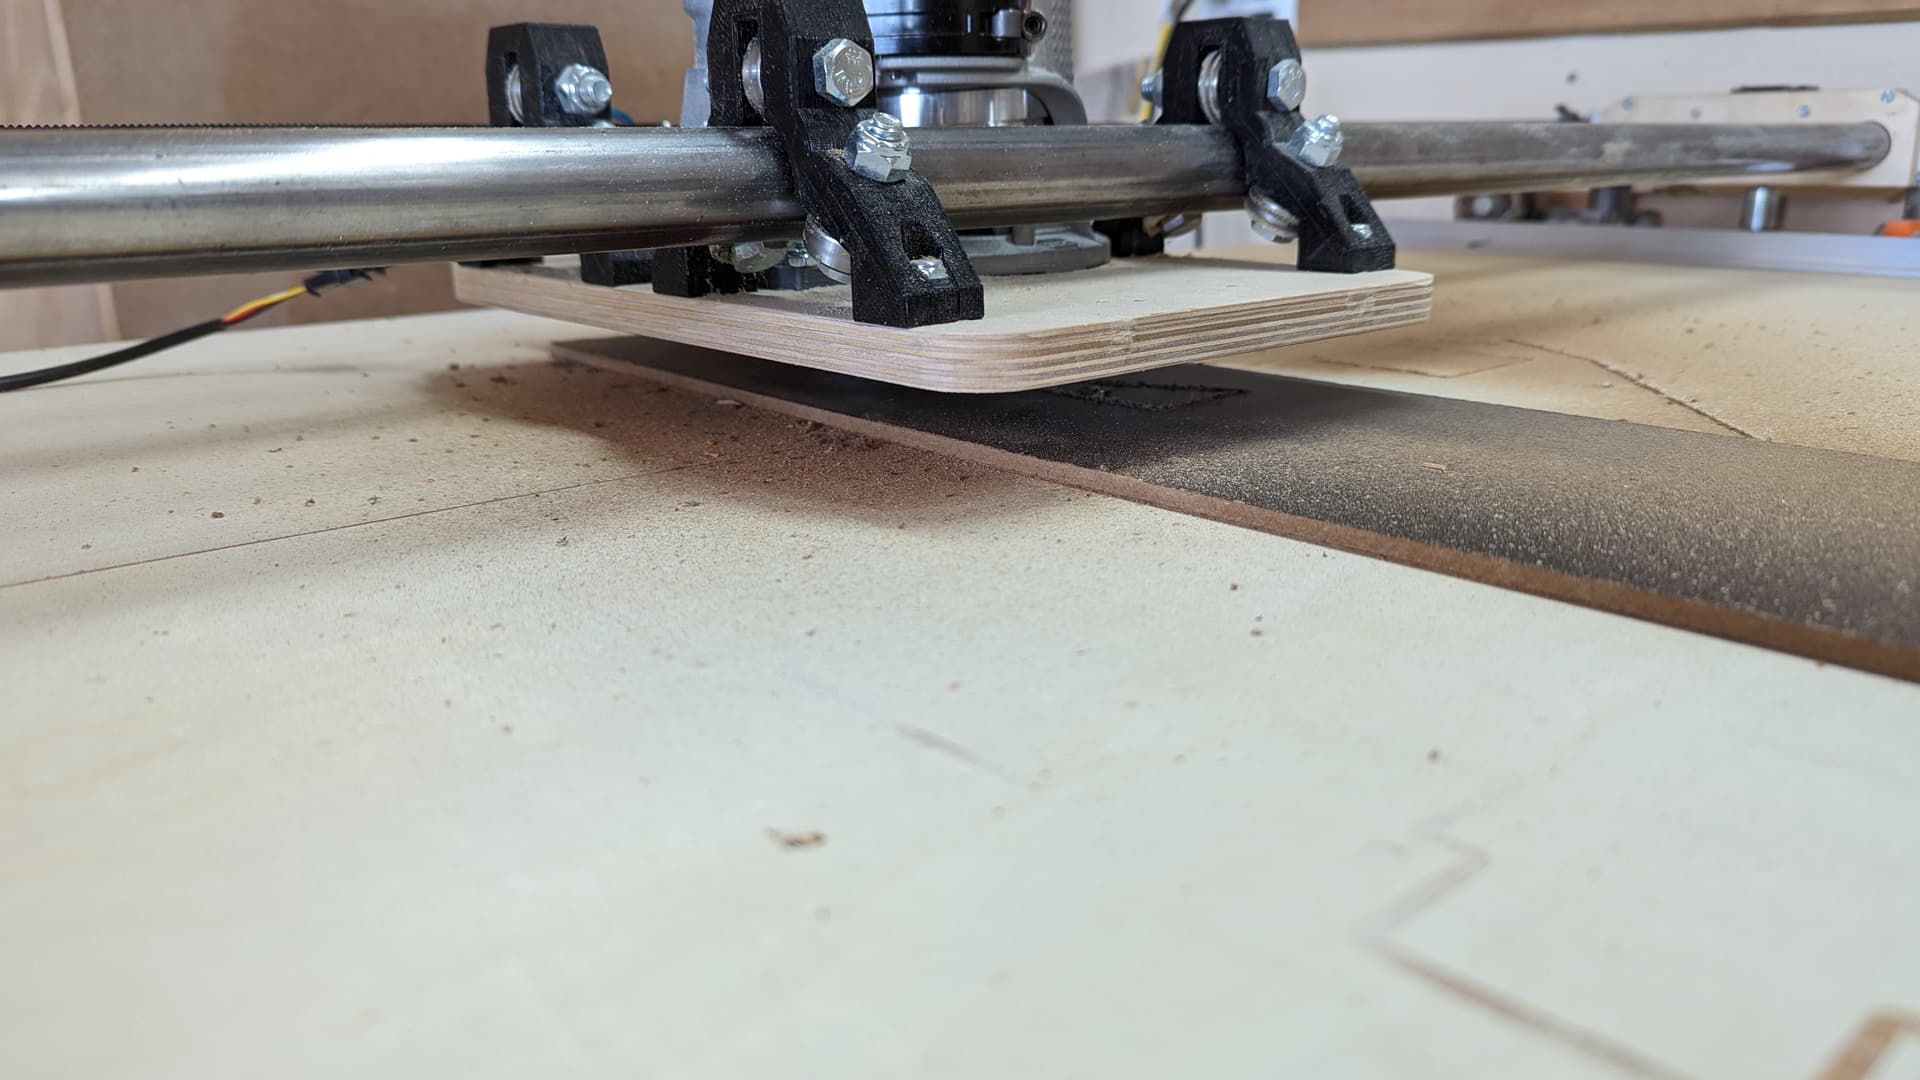
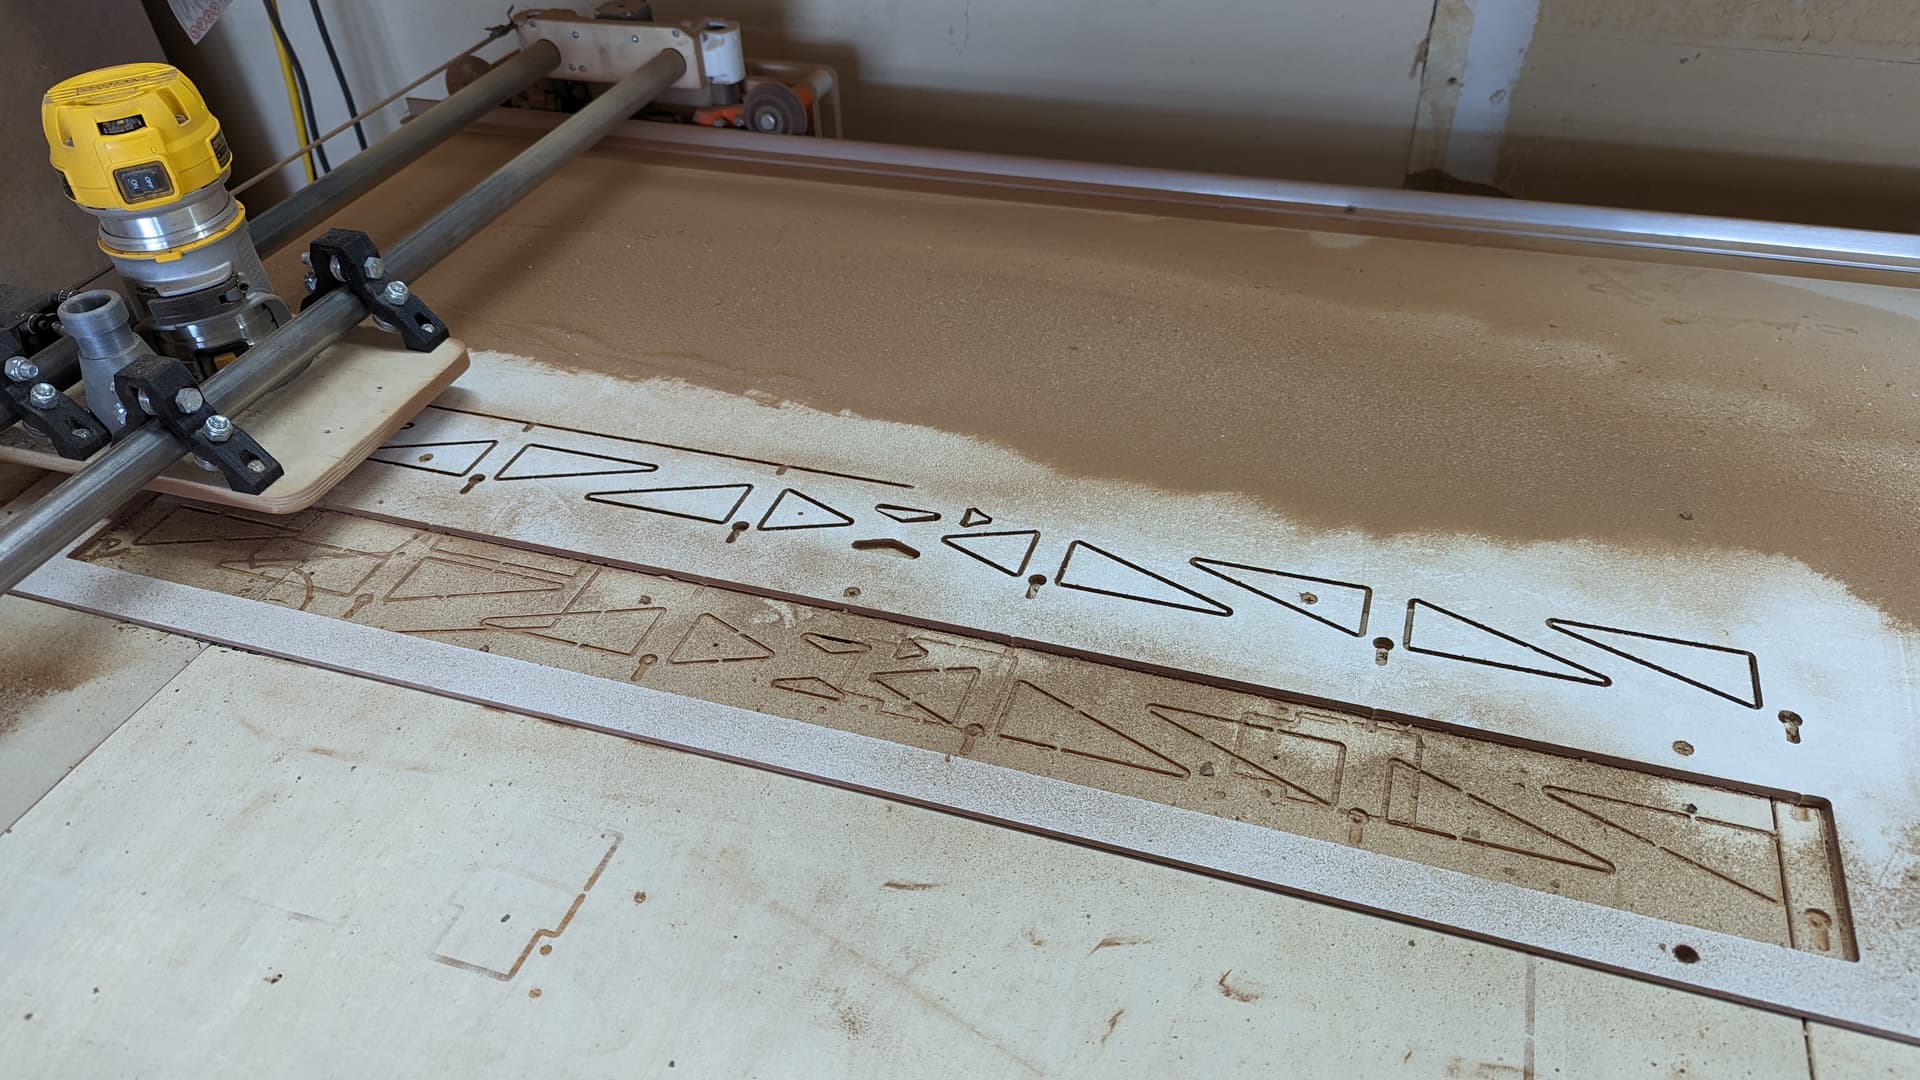
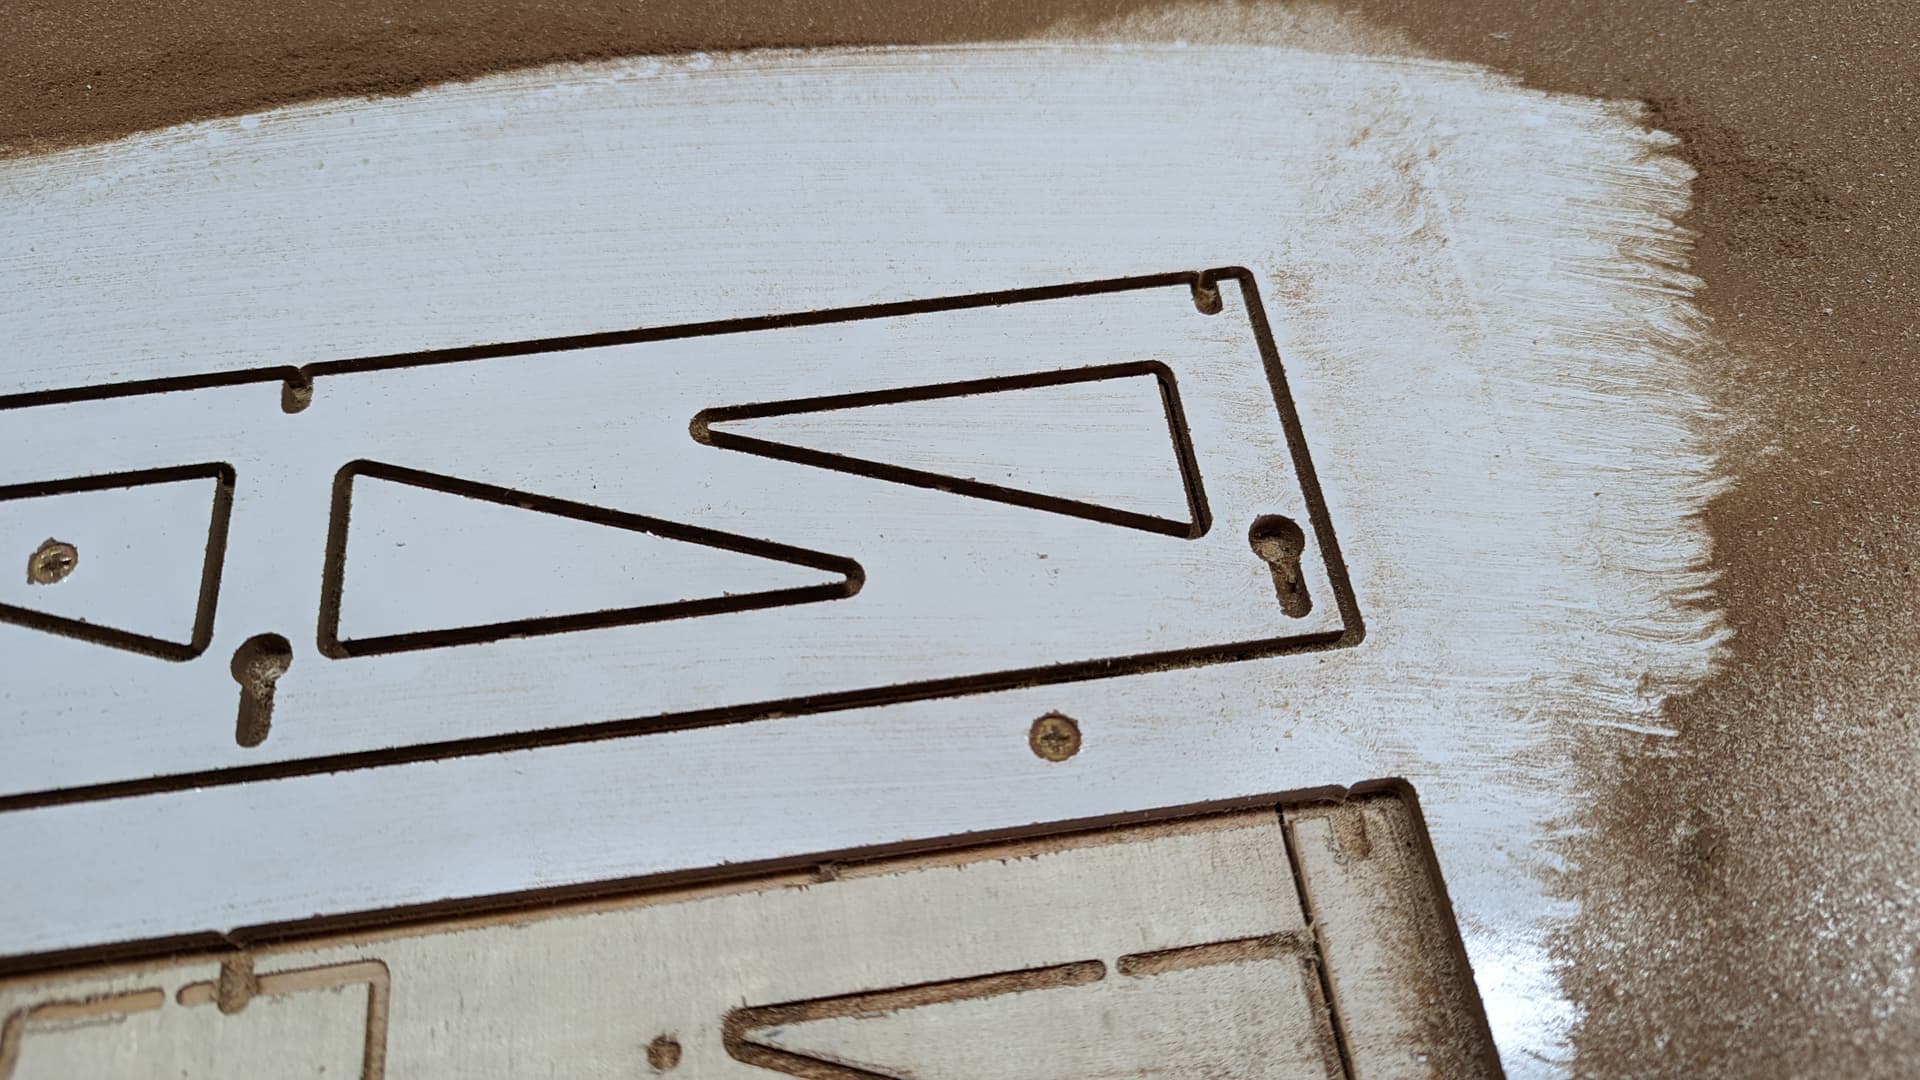
The first one I cut blackboard up. These are all up it bits (2 flute, FWIW). This is straight off the machine:
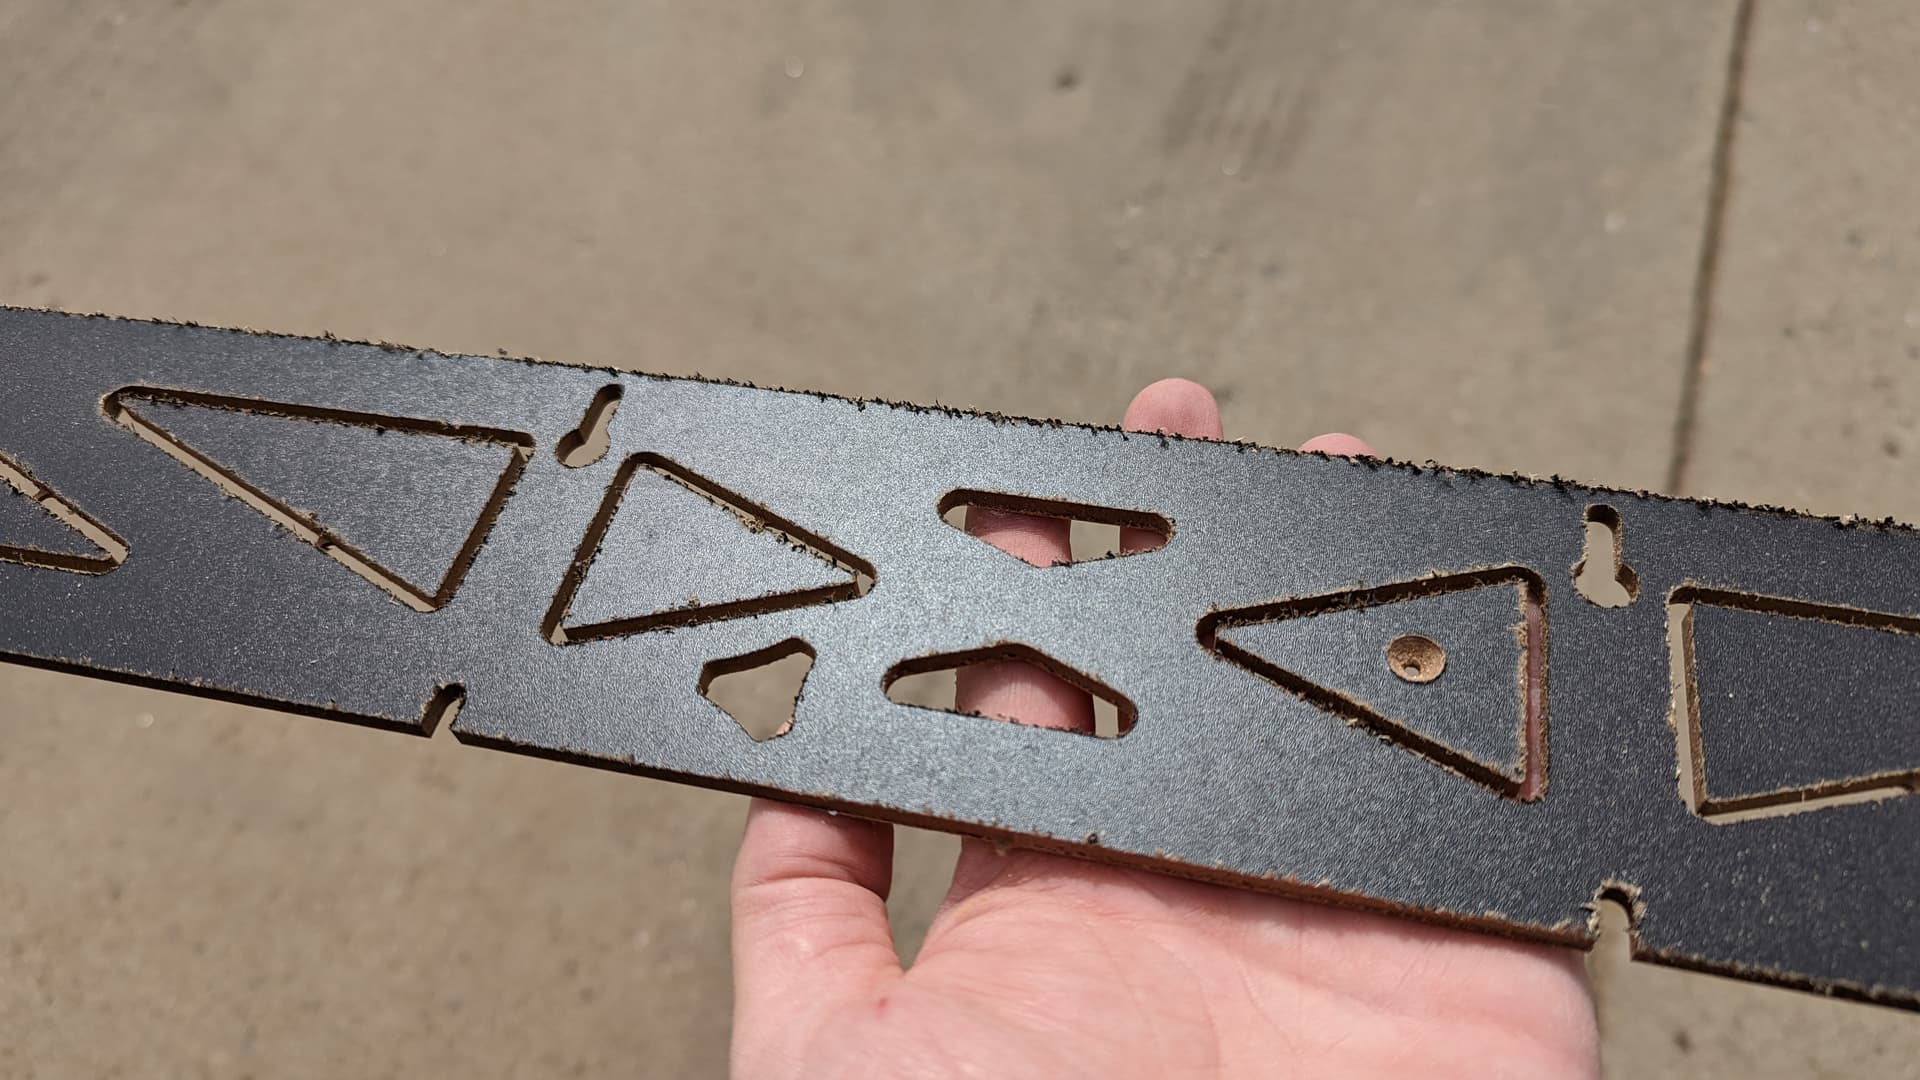
No surprises there. A little sand paper cleaned it up.
The second I cut with the whiteboard up. It is much tougher (but chips). The black looks much cleaner (again right off the CNC).
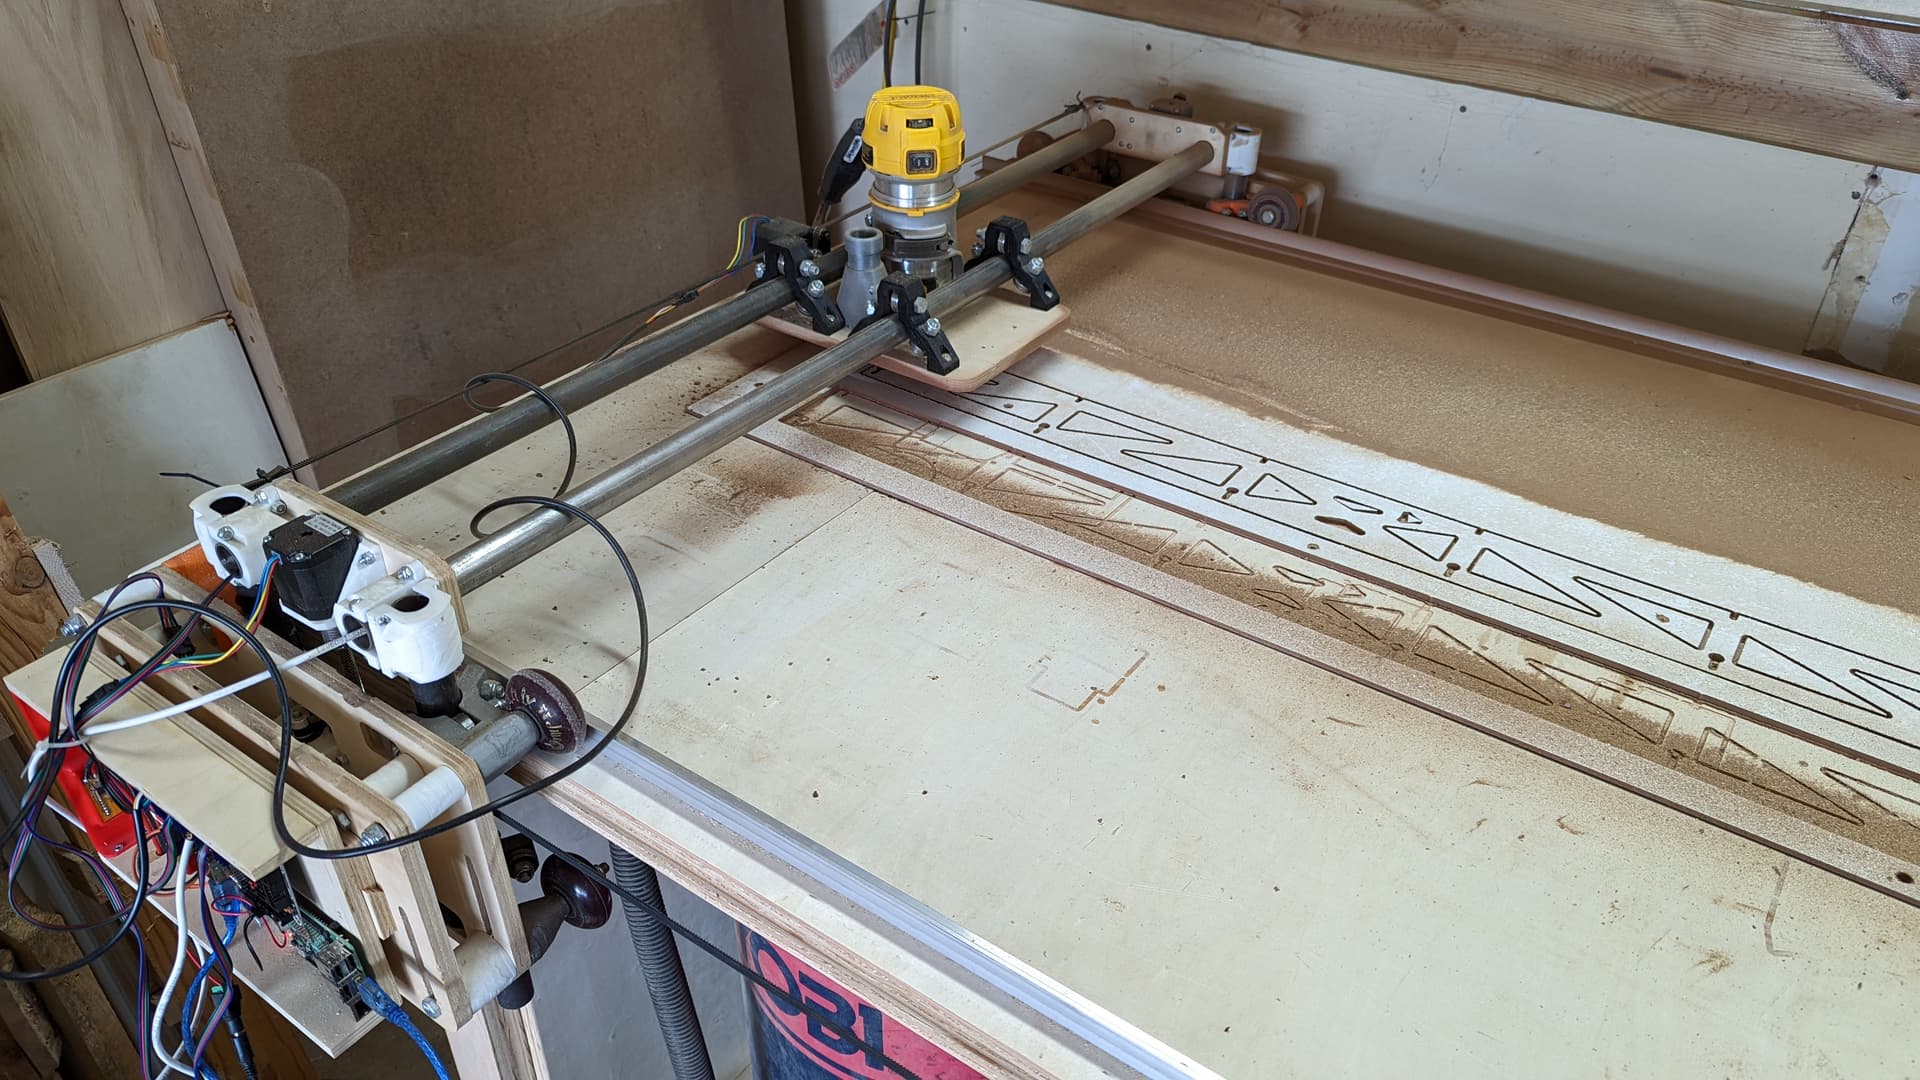
I also cut the two X EMT. This is all feeling a lot smaller than I imagined from the pictures. I am excited to see it come together.
I am reminded why I hate MDF. This dust is nuts.
4 mins left 
3 Likes
Finished.
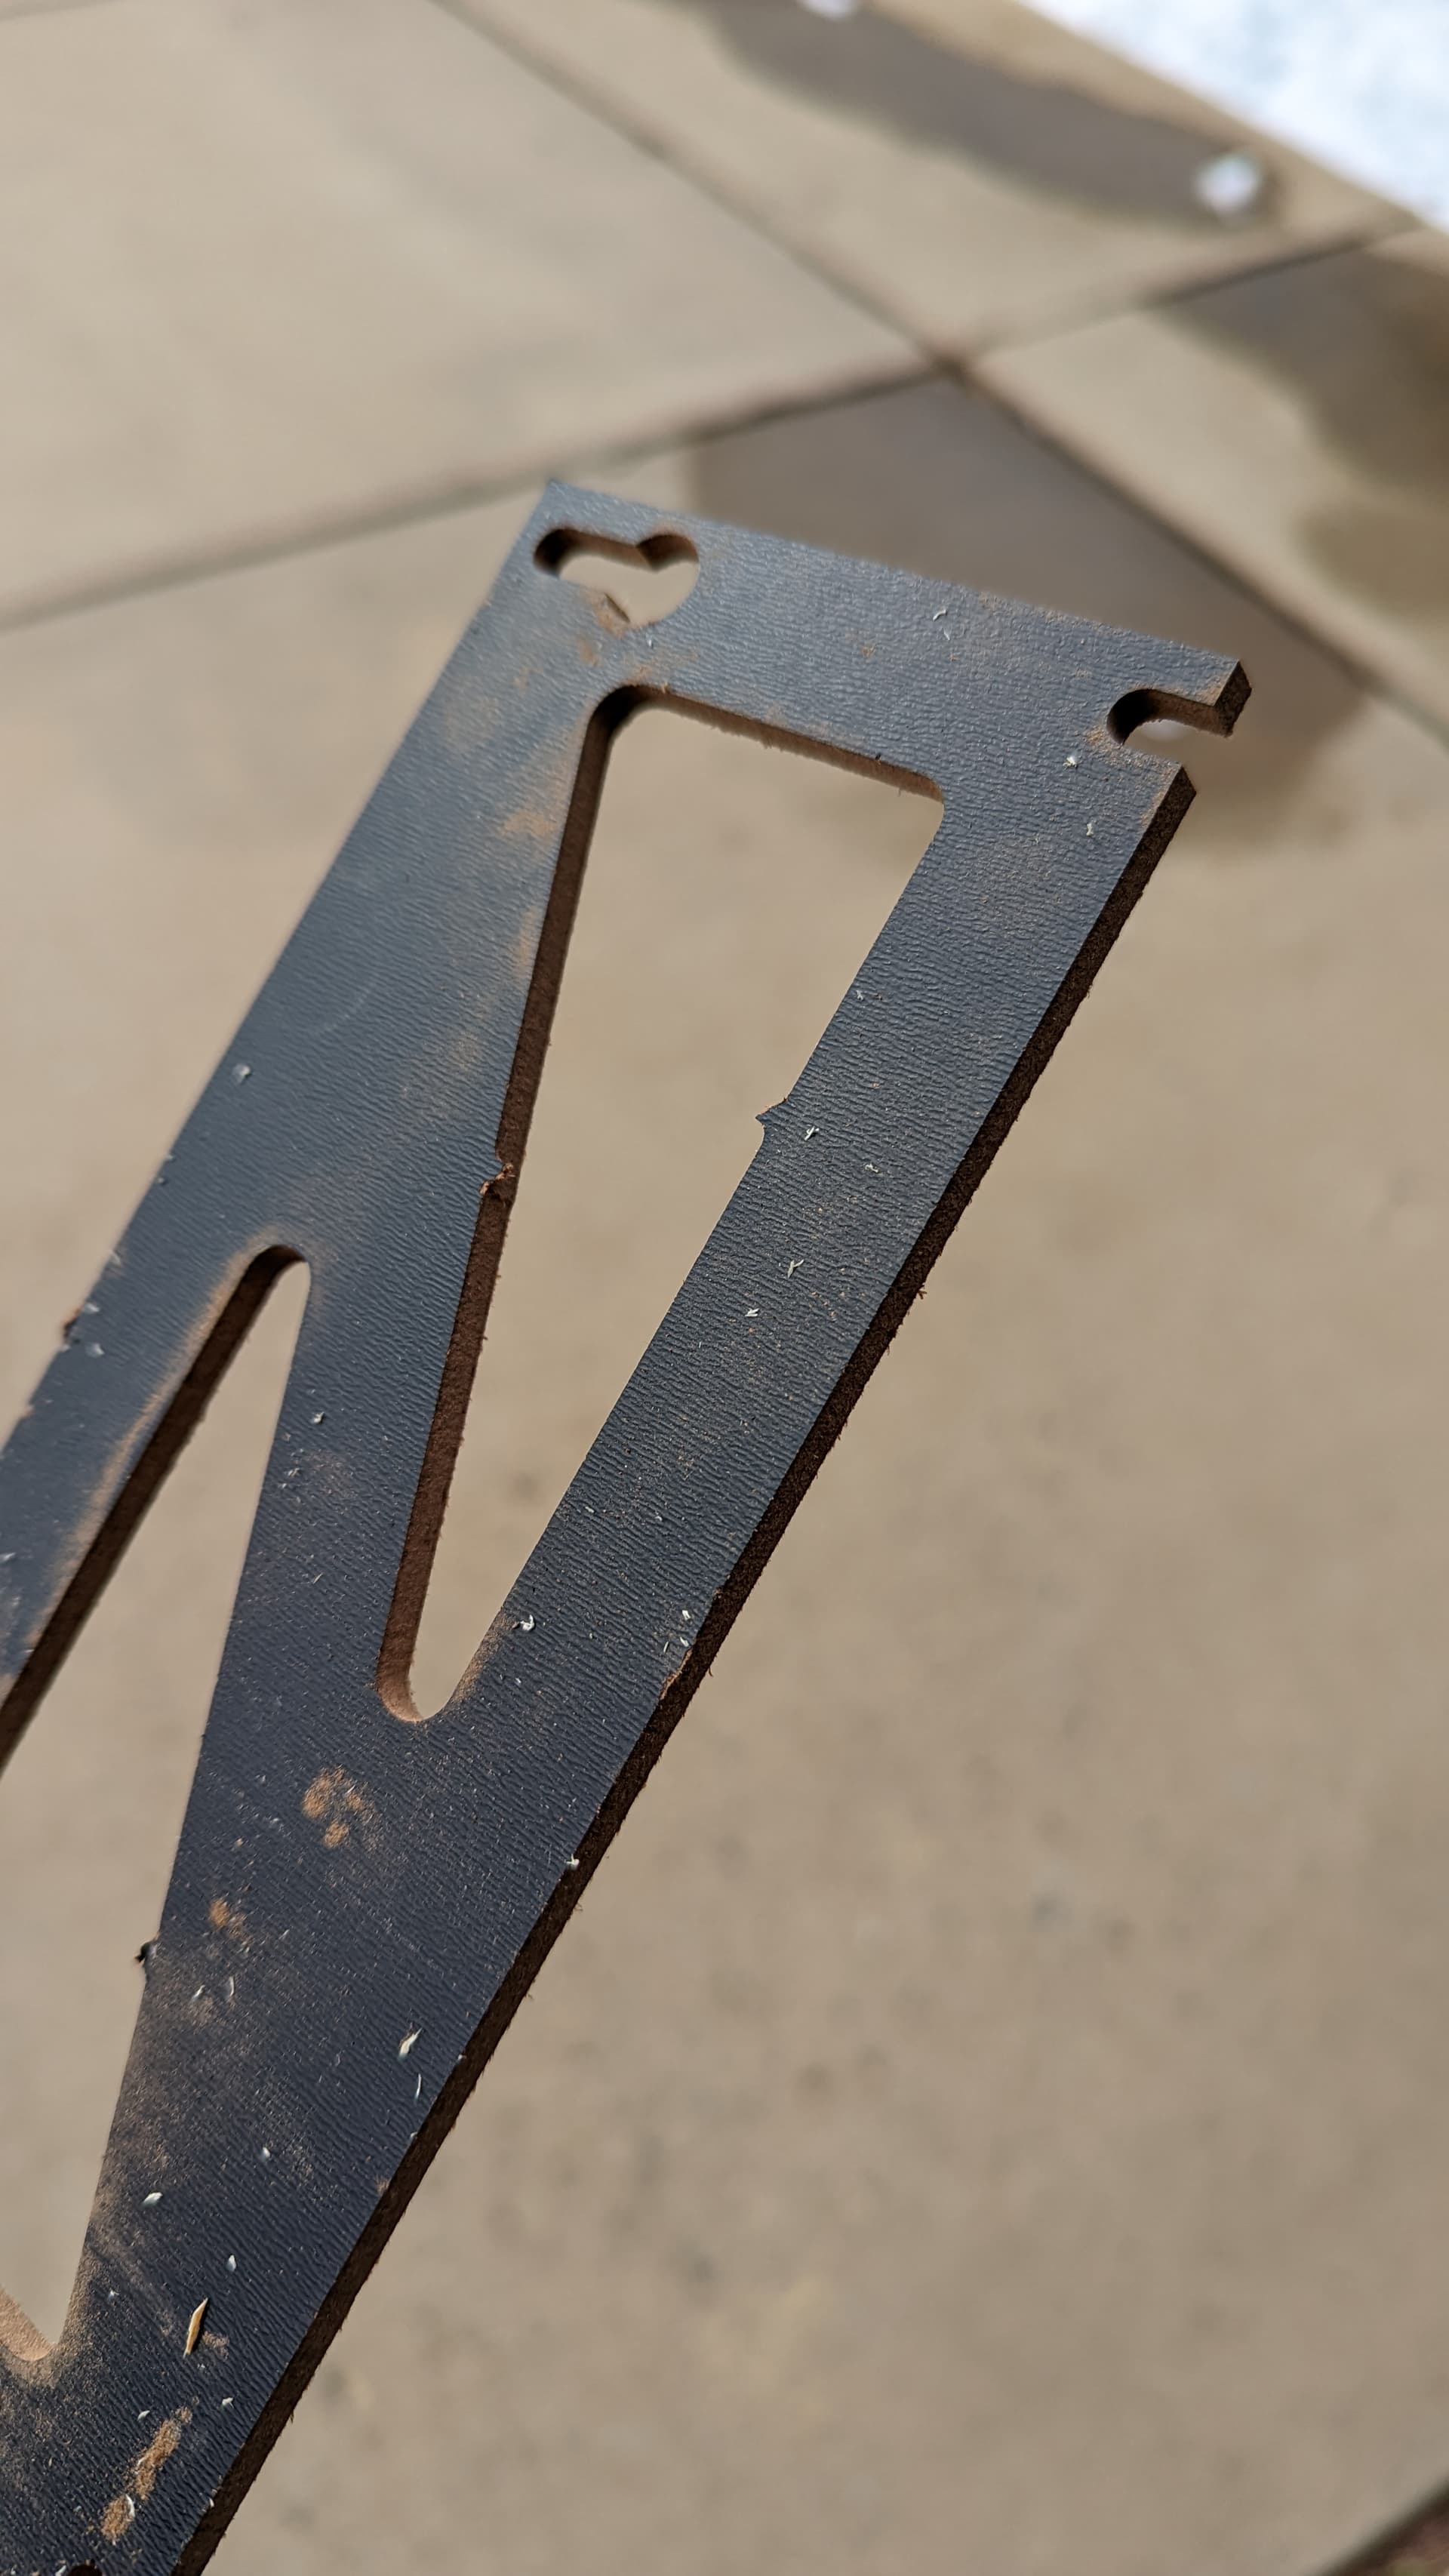
Here is a shot of the top, whiteboard up. Pretty good. A few small chips. But useable (for the inside, at least).
And here is a picture of the LR1. It was one of the first made and it might be one of the last alive. It is held together with spare parts and zip ties (but it was built that way  ). It will be missed. But hopefully not for long.
5 Likes
LR1!!! awwww shucks.
Loving the texture on that black side. With some white in the middle, that is gunna be nice.
It is ocurring to me as I clean these boards… These surfaces are designed to hold onto dust (chalk and marker) and then let go later. I think I will wipe them down and then do one dry fit to make sure nothing is too weird. Then I will have to take it apart and cover it with poly. Otherwise, it will just be forever brown.
3 Likes
Oh bummer, didn’t think of that.
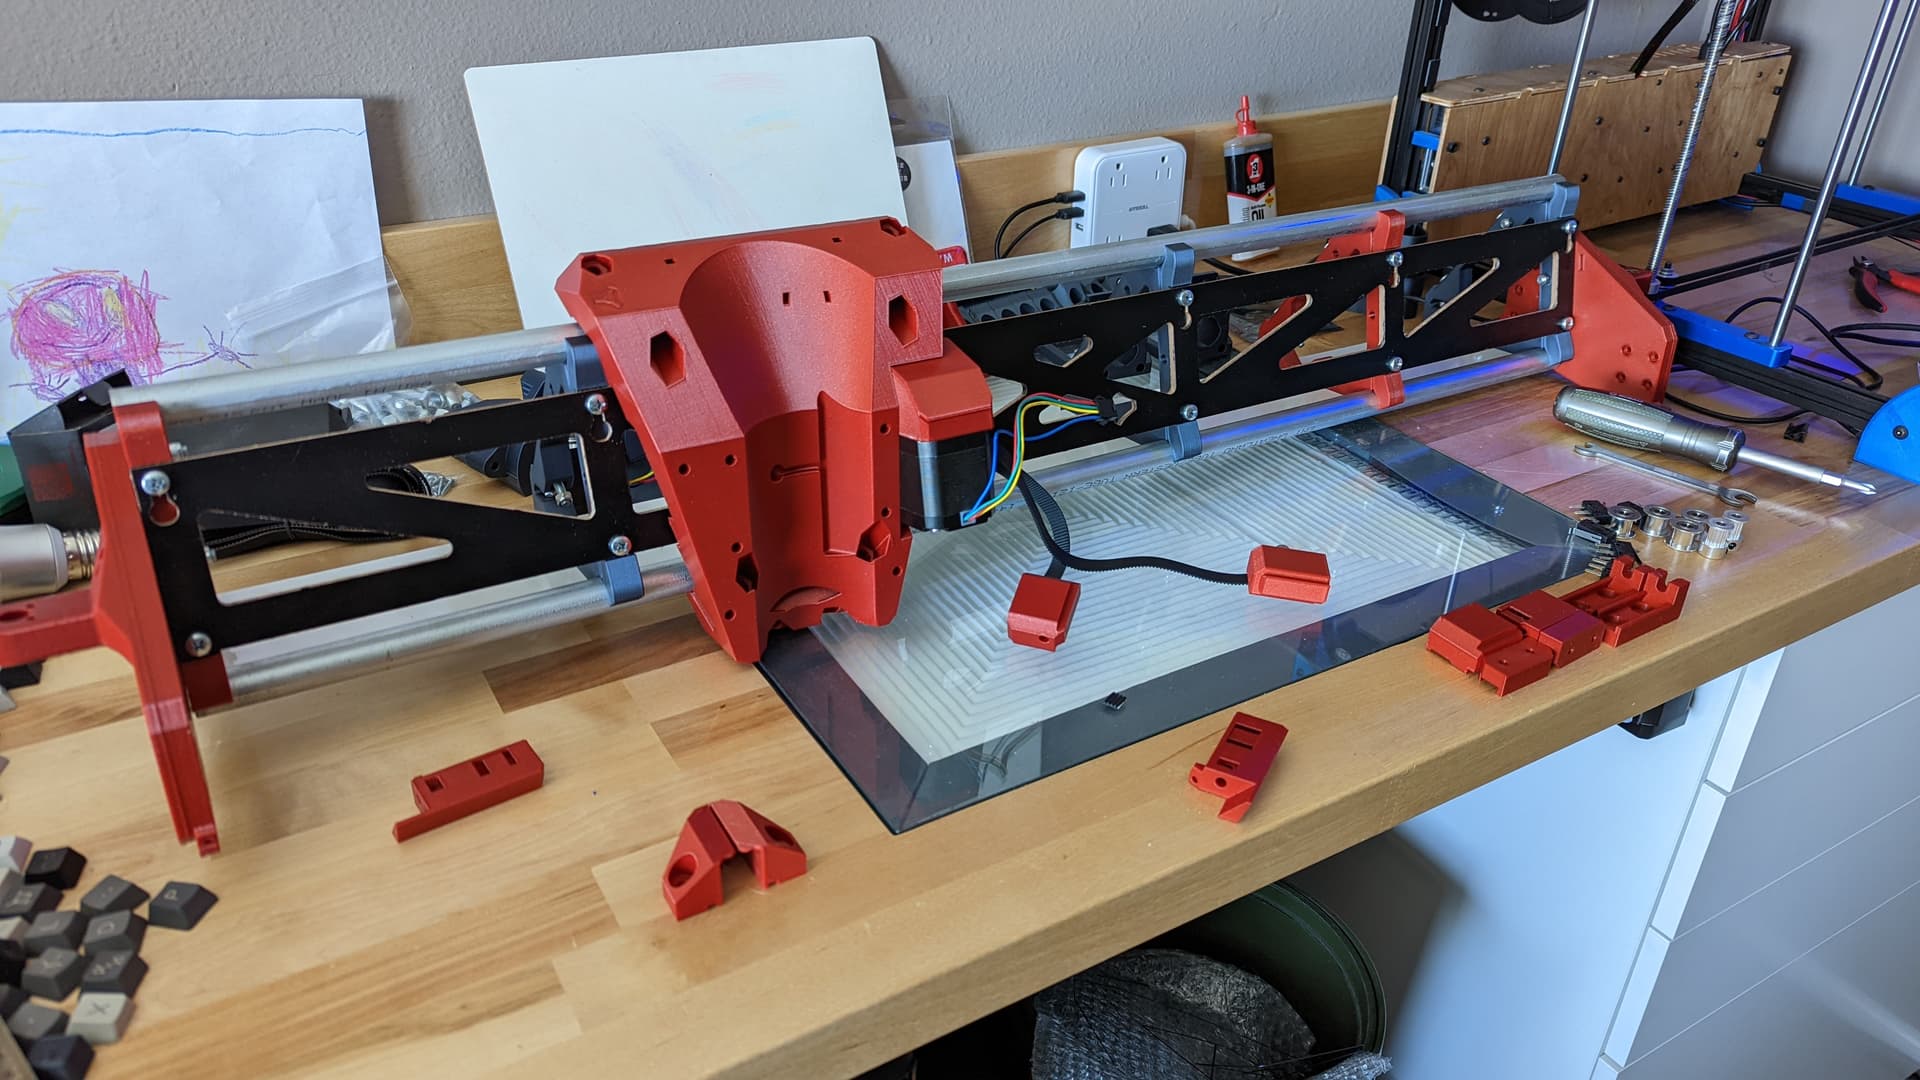
Made some progress today. Having parts come off the LR1 helped a lot. I am still putting finish on the side plates (I really should have just used a rattle can of black paint).
This strut is so neat. It is a bit of a pain to assemble. But it really is a neat design. I am working without instructions. So I am leaving the back panel off for now. Until I know I don’t need to get those side panels off.
WDYT of the colors? I think I want to flip the bottom panel so the black is up.
3 Likes
I have some bad bed adhesion on the front rail roller part. It meant the hex nut wasn’t fitting in there. I will reprint it.
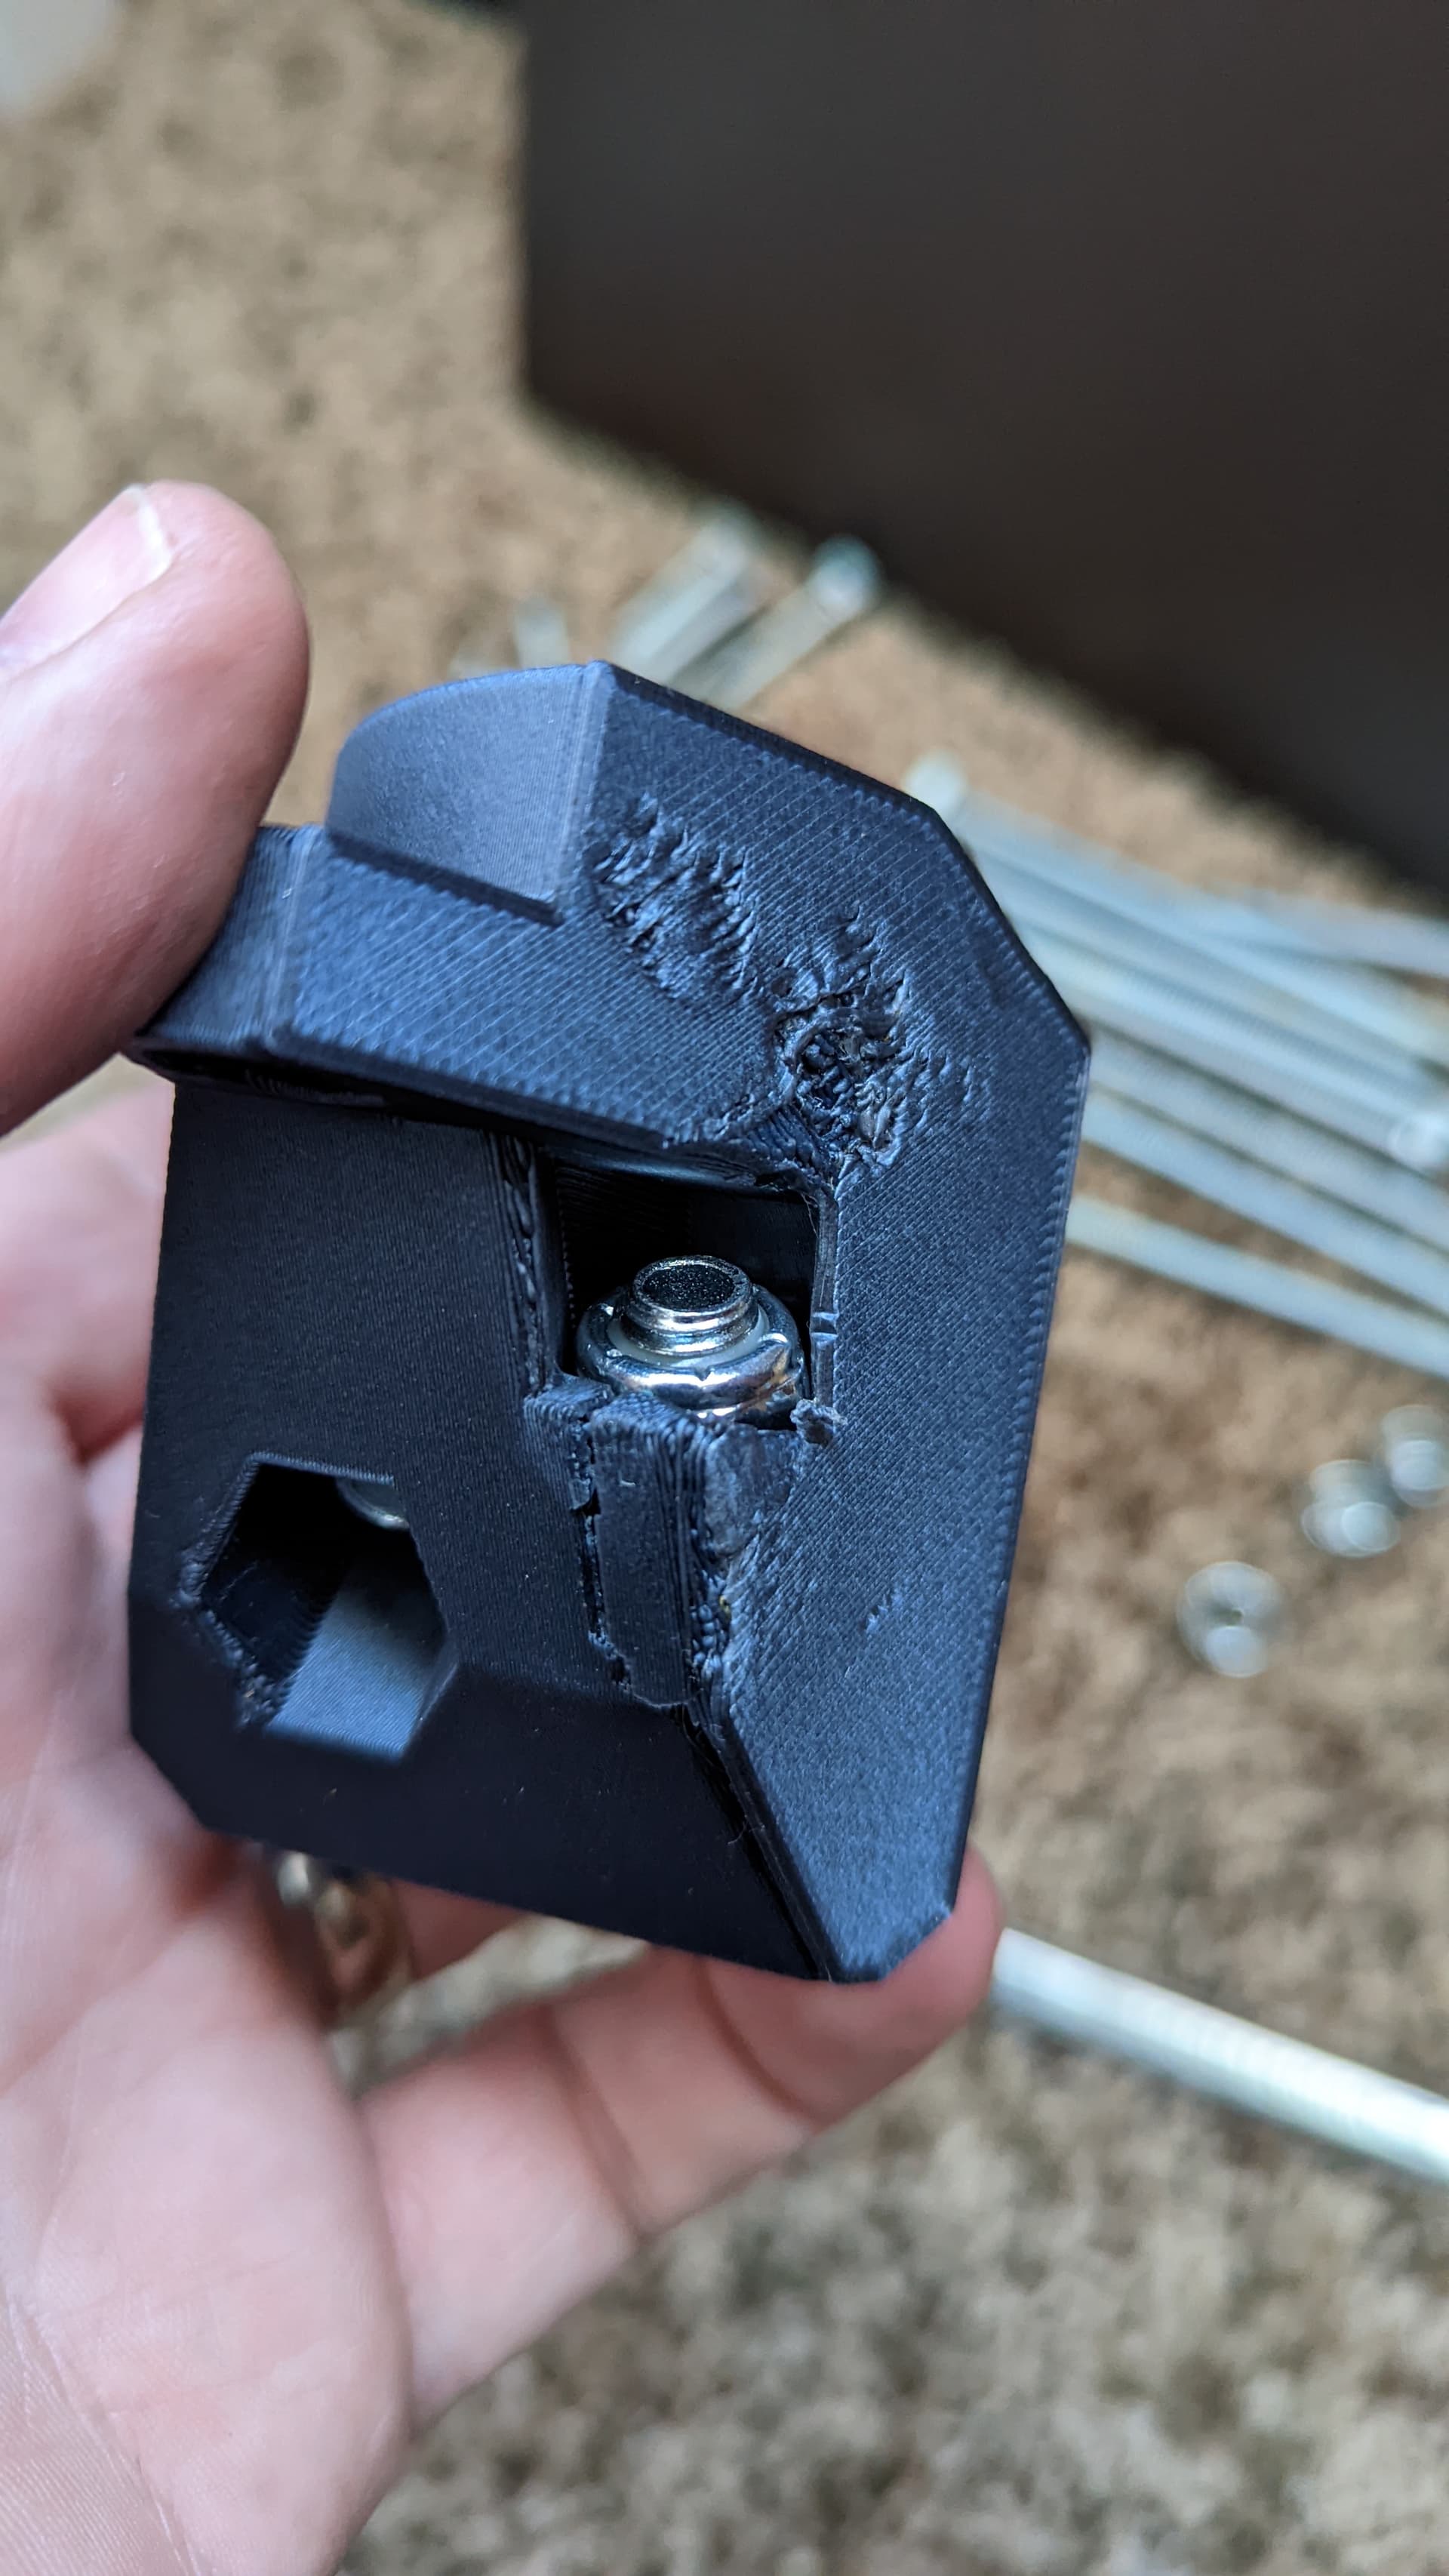
It’s hard to tell from this pic, but the tip was curling into the space of the heat nut and that caused it to not fit until I forced it. And that broke the first few layers off of the print (I used mechanical advantage, I’m not hulk).
1 Like
Here is a sentamental pic of it next to its papa. The gridbot v2. I made cut several parts for the gridbot on the LR V1. And I printed many of the gridbot parts on the MP3DP v2, which was also cut on the V1. And the trail goes on.
5 Likes
I love those colors. I wish I went a bit fancier.
1 Like
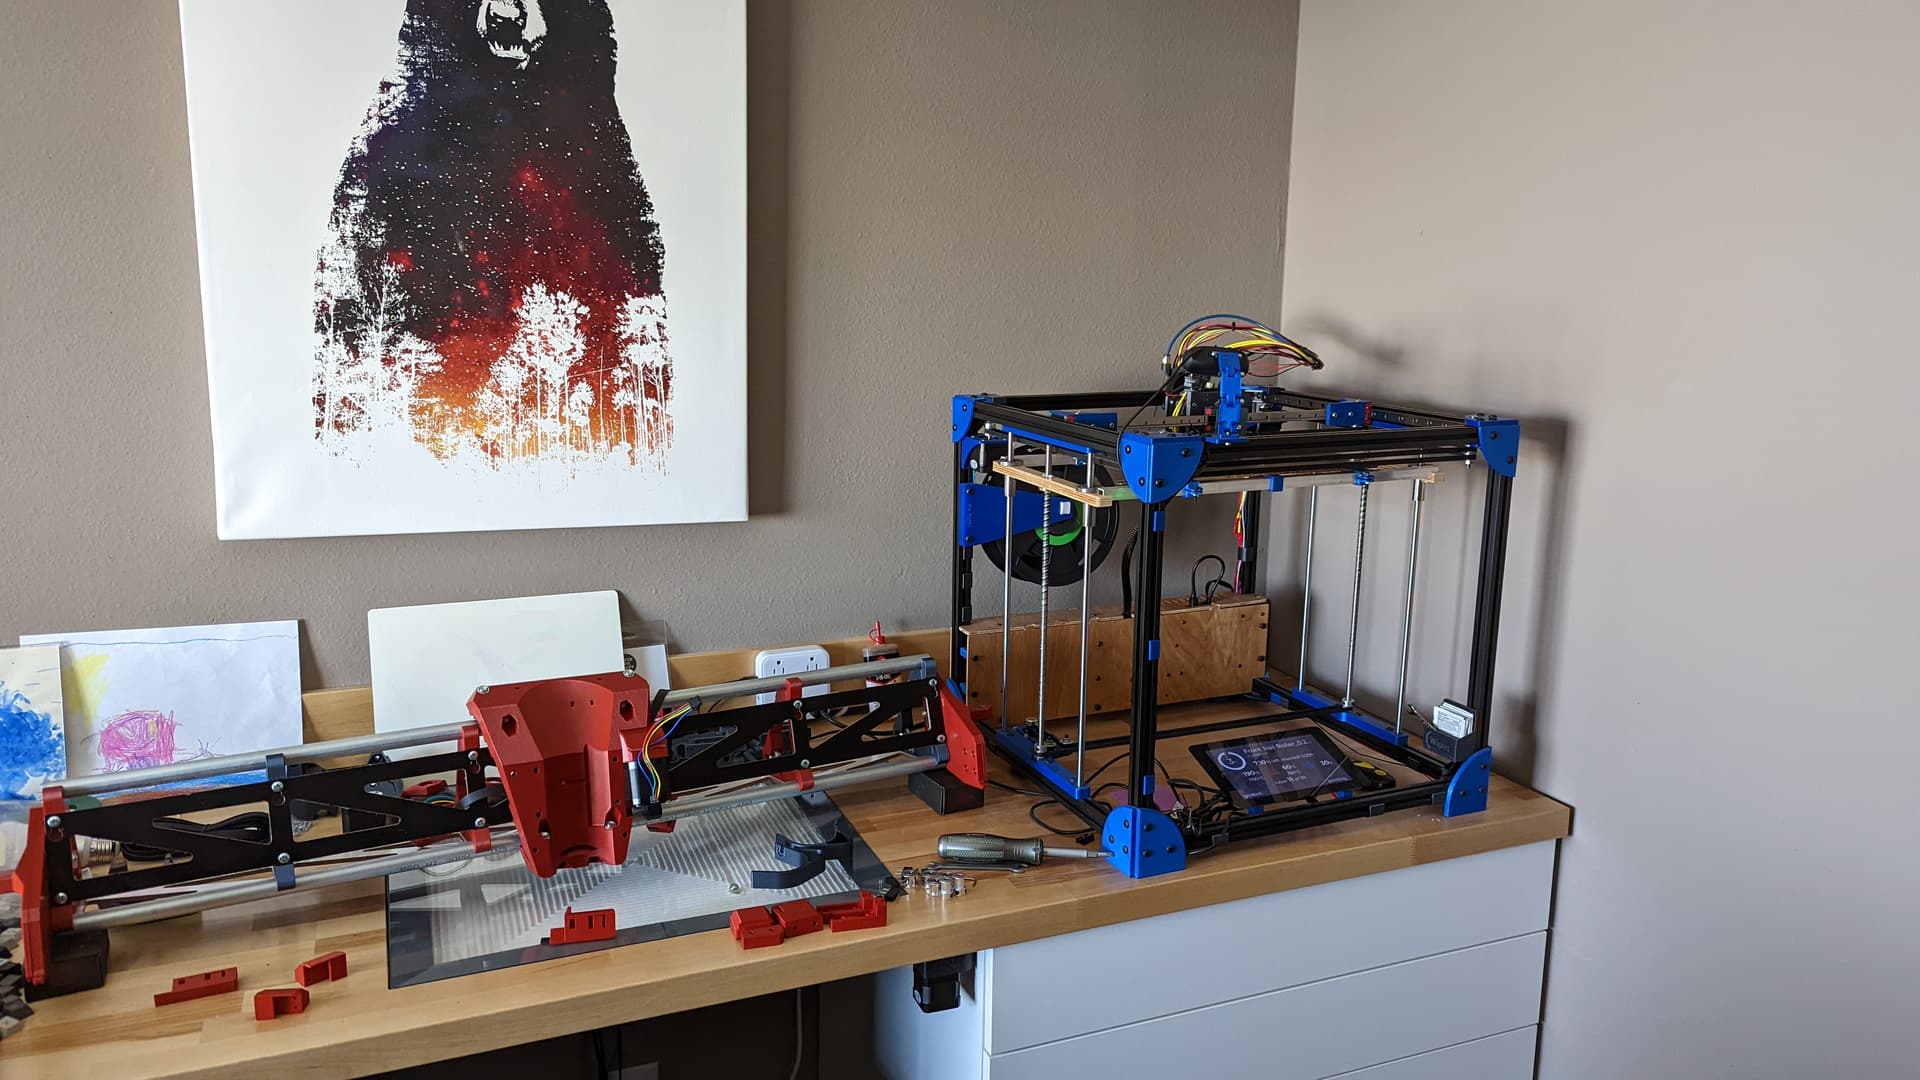
Ok. This was what I have had my sights on for a while. This darn plate with the linear rails attached. I really wanted this done sooner, but I spent too much time painting it black (the really hard way). It looks good though and it runs really smoothly. I only have the end most screws installed, but I feel confident I can get the rest installed and still have smooth movement now.
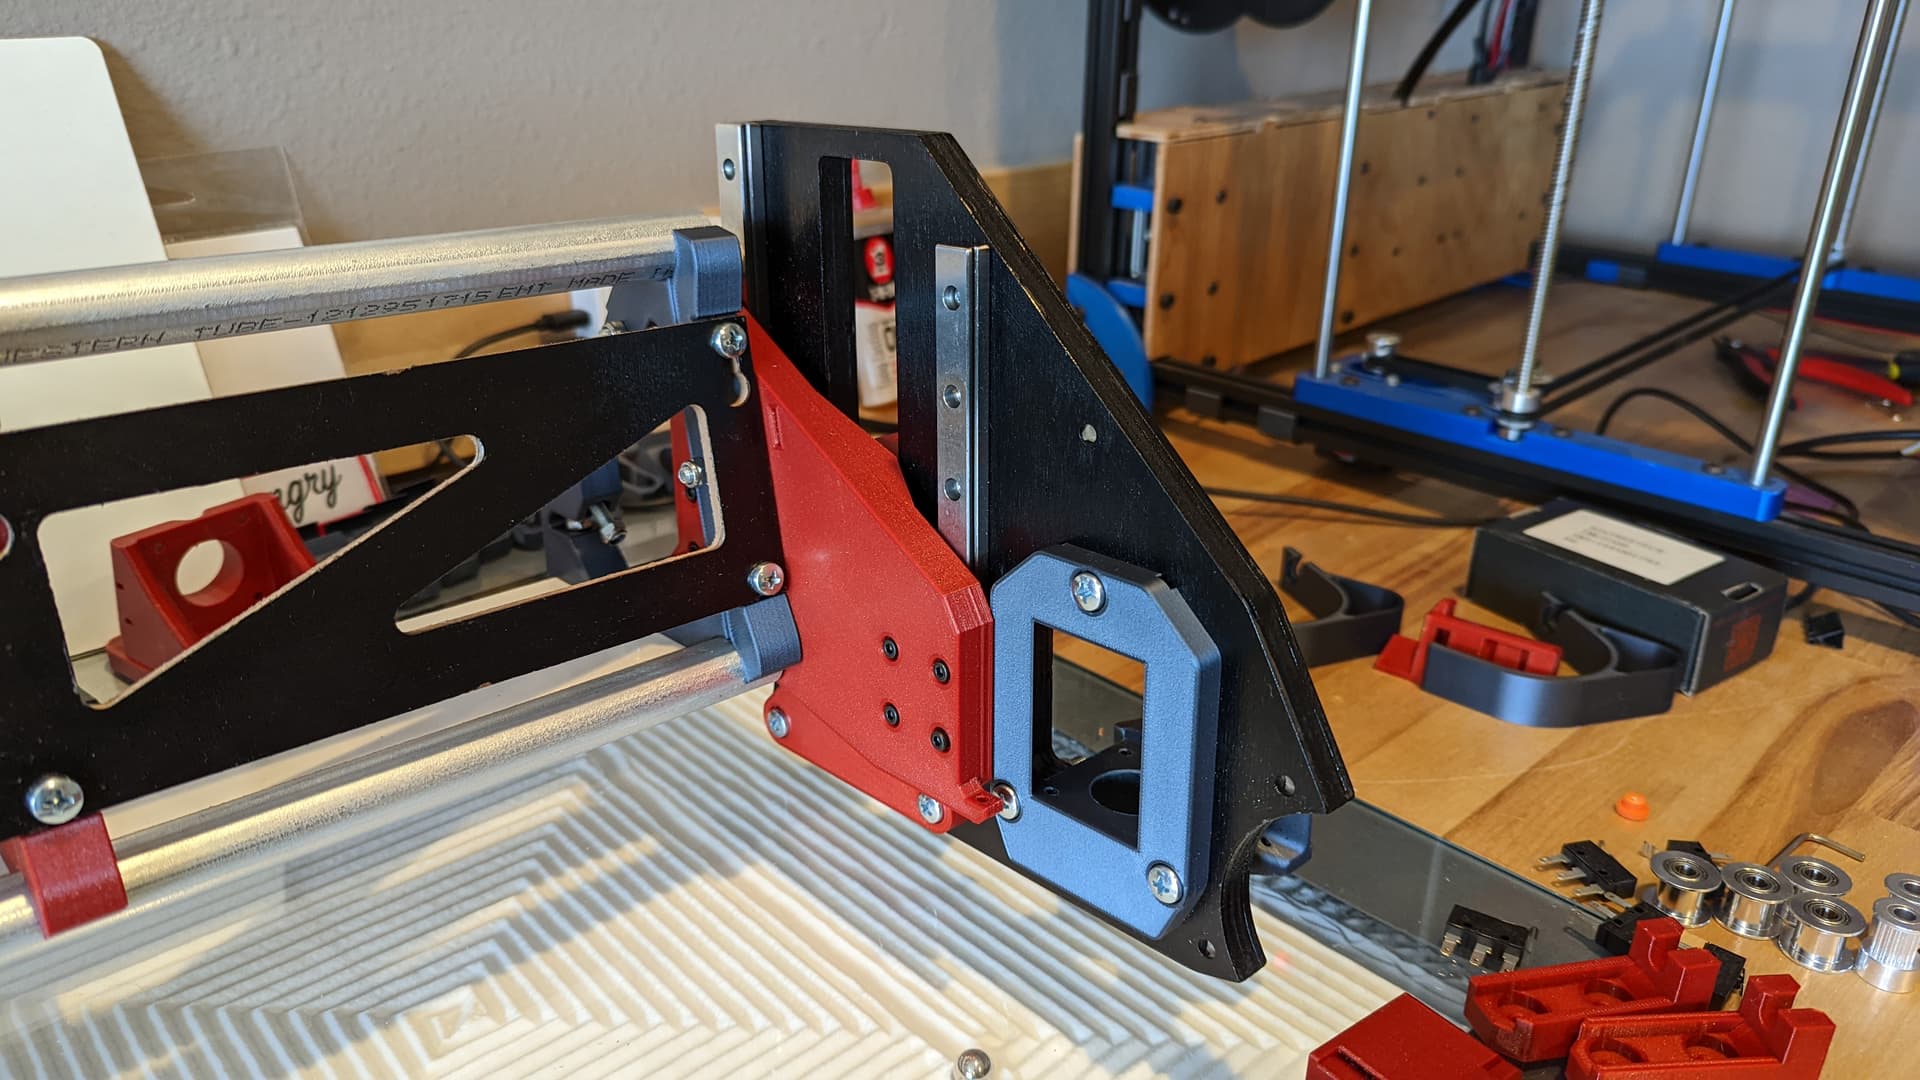
Boy, it made me pretty nervous to remove those little orange stops before I had it screwed down. I still feel like my order of operations is totally backward. I am building this from the outside in somehow. This would have been easier with the two end triangles removed from the strut. How did you all build it?
If seems like I won’t be able to get the Z mount off without removing this plate. That should be ok because I shouldn’t need to take it off.
Feels like a big milestone. It feels like I am close, but I have a busy week ahead of me. So I probably won’t touch it again until next weekend.
3 Likes
Me to I got one of mine stuck in. I could not figure out why it was crooked and would not move…that cap was pressed in.
I did it with the triangle brace on. Rails on the side, then bearings into the XZ plate.
I am pretty sure the Z comes out with it all the way up? Not sure I need to look at that. I think it tips out the bottom.
That keeps looking better and better. So close it is going to be tough to watch it sit there all week I bet. I am finally catching up with my daily stuff and playing with the new build more. I think I am going to try to speed it up, or at least do some speed tests.
4 Likes
Here’s my order of assembly:
- Attach linear rails to printed part.
- Attach end brace to that assembly. (1 and 2 should interchangeable)
- Attach assembly to wood plate. (Made easier by Ryan’s thoughtfully placed hole)
- Repeat for other end.
- Attach gantry rails to assembly at one end.
- Slide on core (with all bearings installed).
- Attach other assembly to gantry rails.
(I think Ryan mentioned in a previous post that the core can be mounted after the fact if you forego installing the bottom rear bearings)
I don’t recall that the rest requires any particular order. (Except for very obvious things) Just be sure to tuck the belts into position in the printed drives BEFORE attaching the motor/gear assembly to the printed drives.
4 Likes