I am looking onto a larger more global release so shipping is not so prohibitive for international users. I just want to make sure the firmware and all the bugs are at a nice safe stable place and the docs have enough information.
Is there a CAD release yet for a basic control box for the Jackpot? If not, maybe I could create something, if you give me a couple of thoughts about where to mount and how etc.
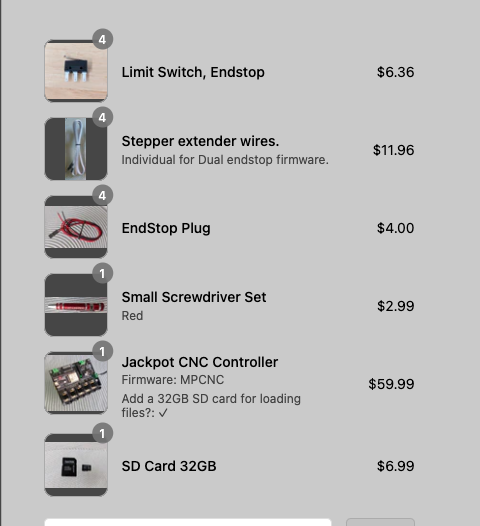
Congratulations @Ryan! It is awesome to see how much you have grown your business in the last few years. My original MPCNC got me started and now I have a Primo. I want to buy the new board and the parts required to add dual endstops. Currently I only have the Z probe. Is this everything I need?
Thank you,
Britt
Thanks, each year has presented new challenges. It has been a crazy ride, I hope to keep it going!!
BTT is willing to give my boards a shot. They can make them, bundle them up, and ship them all over for far less in shipping than I can. The downside is you will need to flash them yourself…probably. Not really a big deal though. Pretty sure we will do a medium quantity initial run and see how the sales go before anything long term.
Waiting for the OSHWA email to make sure my certification is valid so I can add the logo and send the files to BTT.
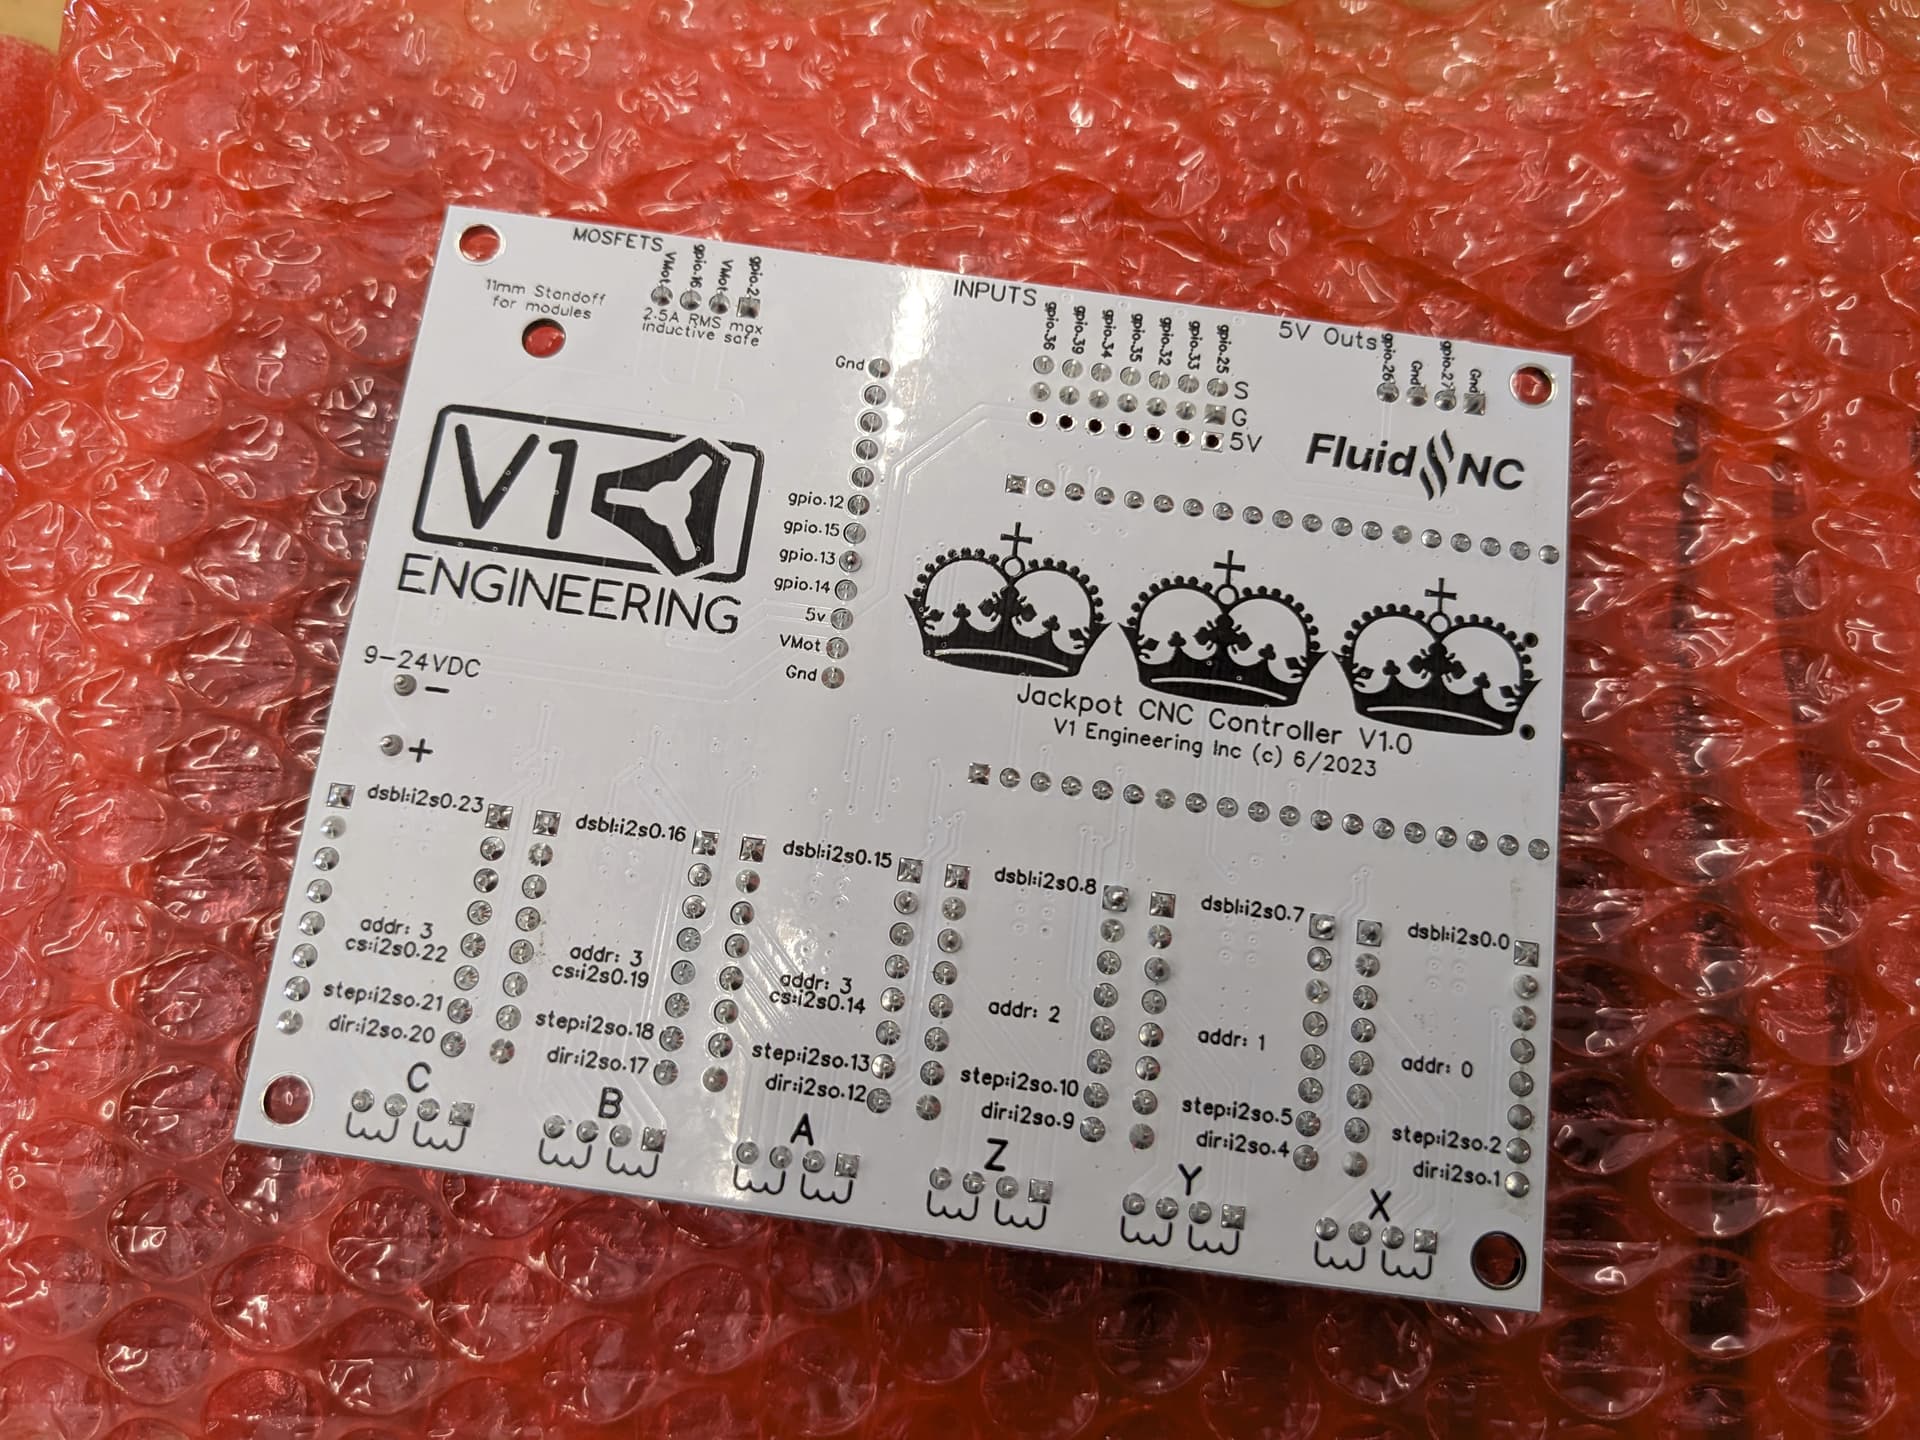
BTW, quick question about the endstop pins, I’m not sure how to read the labelling…
I understand there’s a GND and +5V, and two signals for NC/NO?
Which pin is what?
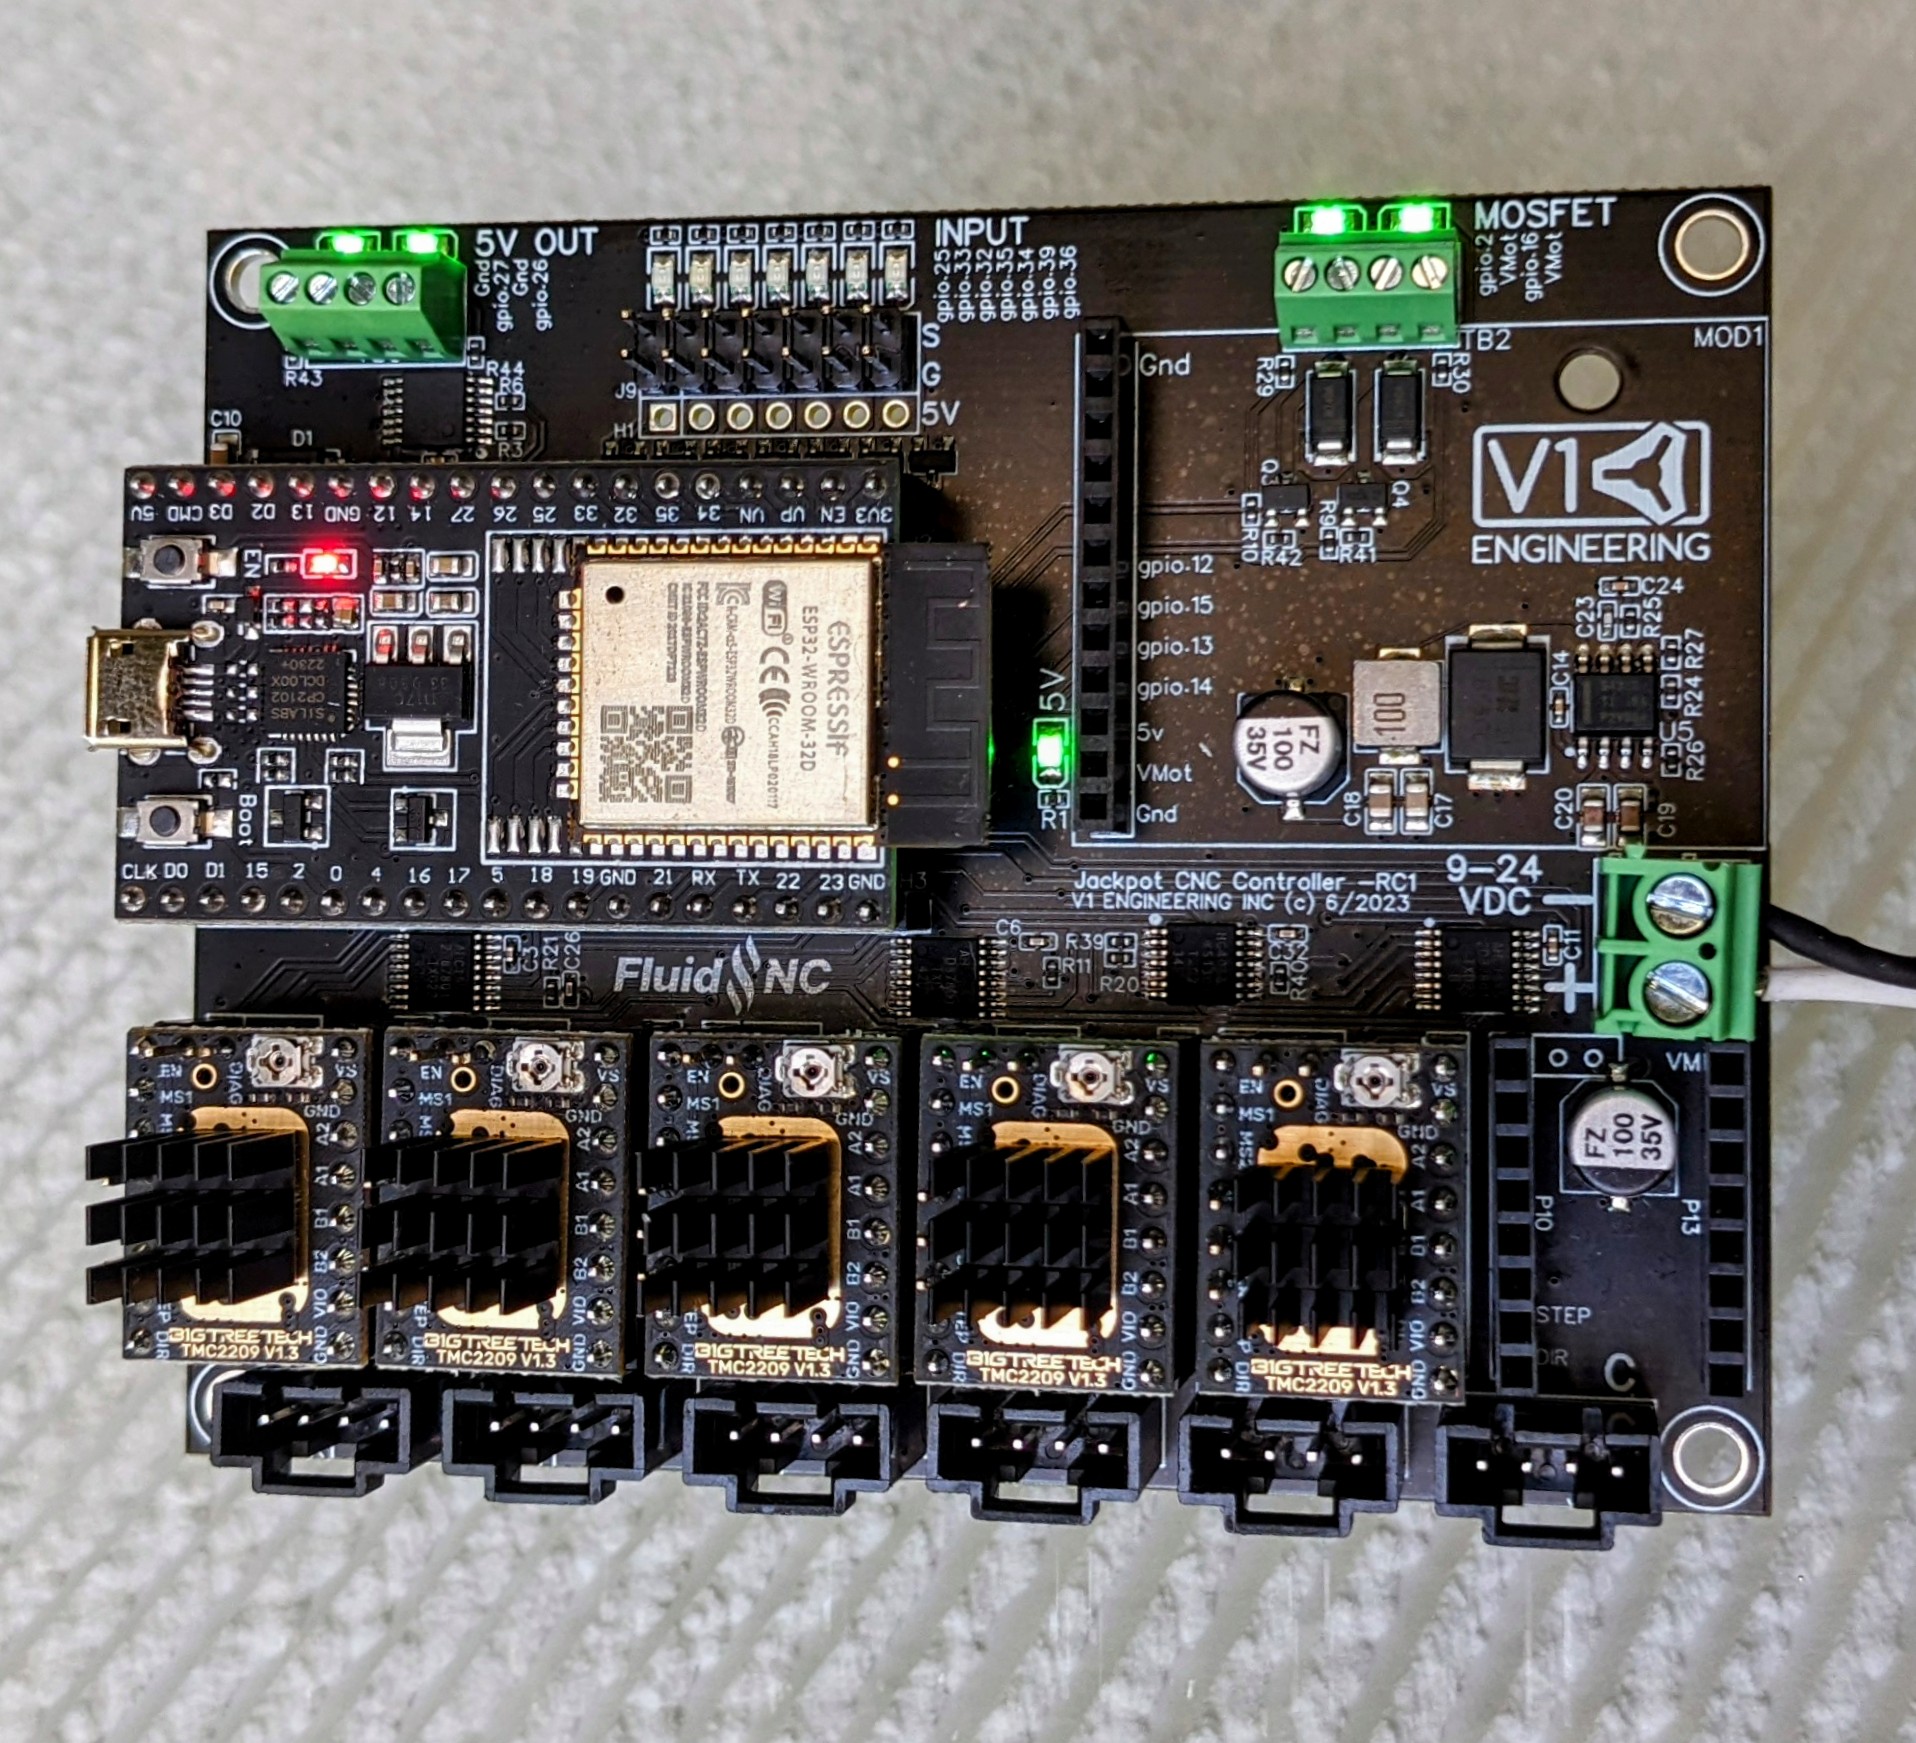
@Ryan, my new Jackpot board is scheduled to arrive Monday. Are you going to post some pictures of where the motors and corresponding endstops plug into the board? Maybe the laser pwn pin and an example of what to change for a laser in the config.yaml?
Also, I have a PLA button in the screen case that I can press to kill my miniRambo if something goes wrong. Is there a button on the Jackpot board or in the web controls I can use in case of an emergency?
Thanks,
Britt
You can also flip the board over and there are silkscreened legends for XYZABC.
The front of the board has silkscreened information as well.
The endstops are configured to start at the side furthest away from the power inlet,
The default configuration also matches the physical layout of the TMC2209s.
I will put some sort of legend in teh docs beyond what is already there but
lr= xyzyz
MPCNC = xyzxy
The board labels are xyzabc The endstops get plugged in, in the same order.
Yes… the ‘EN’ push button on the ESP32 (next to the usb connector) will force a reset on the ESP32… that will kill all processes currently running. Alternatively, you could fit a physical kill switch in the power feed, or setup a reset pin, a door hold pin or a feed hold pin… see here for details.