The green arrow is by far the most important…This single setting will speed up every single pockets by 50-80%. In case you have not thought much about it. We set our feeds and speed to the worst possible conditions. The worst possible conditions are the initial pass that are slotting, then the other 95% of the pocket are a step over that can be significantly faster but usually are set to the slotting speeds.
There is no easy way to do this in most other CAM software it requires a new operation. It is simple here.
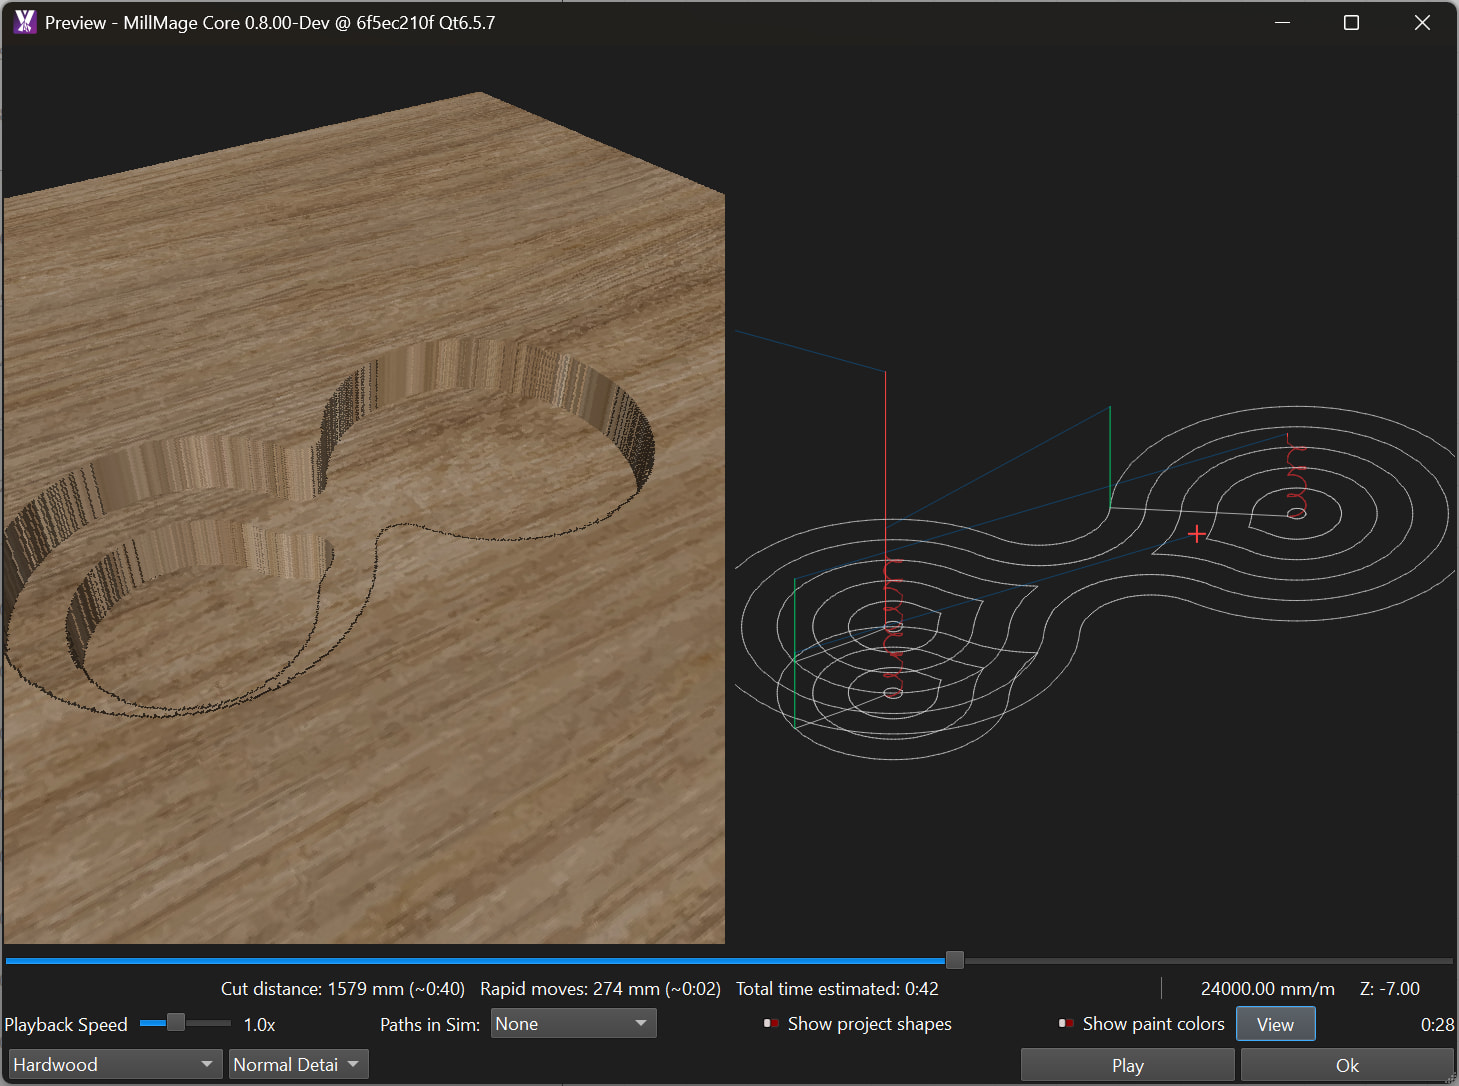
The red arrows are going to help new users the most. Climb versus conventional, no need to go to the docs page and figure out what that is, there is a picture (PS - most of us will use conventional). The other red arrow shows very clearly the way the pocket will get cleared out, when in doubt hit preview. You will very quickly see the paths and a 3D representation of your project.
Yeah, that looks neat. Asked for something similar in EstlCam for the new Miter feature…
Just a quick finger to shafter patent trolls… Would be neat to have a method and system for maintaining target bit load by varying feedrate and/or doc and/or spindle rpm given computed density and bulk of material being removed/added. Optical/lidar sensors and/or computation of remaining material modeling maybe used.
I’m excited you noticed. That was me, and I even got argued with a bit by someone about it, which I thought was funny. To be fair, that user has a very sturdy machine and can basically “full send” whatever he wants. For the rest of us mortals, I added this, and I had set it initially to be automatic (always on, not a switch).
One of my past peeves when running jobs was that I’d have to manually override the feedrate for the initial profile, or just let it take 2x longer than it needed to, because I could stall my spindle doing a full slot.
I’d like to support this for raster pockets too, but doing it for those requires a much heavier lift in the code.
I also put a lot of effort into what I call “pocket lift”, which is something that bugged the heck out of me when I used other software - They’d constantly do full retracts just to plunge all the way back down into the same pocket they just left, when it could’ve just been a lateral move. With Z being the slowest axis on nearly every CNC machine, I’ve tried really hard to make sure we use it sparingly, but with options to allow the full retract if that’s what you want.
Oh sweet, I noted the dual retract settings…nice touch.
Does this recognize odd shaped pockets where it will hit slotting again randomly?
Like the inside of the V1 Logo, each of the three arms get a slot when pocketing from the inside out. Or can I switch to pocketing outside in and have your tweak work?
It basically looks at where the move is starting and where it’s ending, and if that line doesn’t cause a collision with any of the geometry of the shape being pocketed, it’s considered safe for a "pocket retract”.
So it shouldn’t matter whether you run inside out or outside in (though I’m not sure we allow you to choose - inside out is forced, I think).
It’s just finished the 2nd depth pass on the left, and only lifts 1mm above the previous pass because it knows it’s still inside the pocket and can rapid safely to the middle of the next part. If that 2nd depth pass had ended off to the side, instead of near the middle, it might have to lift all the way out of the pocket to avoid hitting the boundary.
Sorry, I was referring to the initial feedrate scale. Does it only slow down the first few lines of the pocket or does it check for any slotting cuts that might happen in an odd shaped pocket.
I can just go out and test this I suppose or look in the gcode.
It doesn’t check for slotting at all - since we know how far apart the offsets are, and their relationships to each other, we use that info to decide if we’re moving within the area of the offset just cut, or to a new area, and use that info to make smart choices about how high to retract. Since I know if a given offset is in a new area (IE, it’s the innermost of a set) I can also determine when to use the lower feed rate.
This has been around for a while, from my experiance it will “slot” the middle of the pocket at the slower feed rate in a single pass first, then it will use step over for the rest. If I am doing something that is a few passes to get to the depth the first “slot” of each pass will be at the slower feed rate.
I think that is what you are asking. If not let us know what you find out when you test it.
When you 1st introduced it , i thought it was a pain as sometimes i would forget to check the setting , and than when running it was like watching paint dry at how slow it would be haha
but now that I’m used to it i really like it , I find a good range is around the 75% with my LR4