All parts printed. Very happy with the result.
I am now printing some extra parts (for cable management, dust collector… and will probably modify the lower corner to put on the table directly without feet, if anyone already did it ?).
I am waiting my MPCNC kit parcel to arrive… but my local carrier made a mistake and the parcel is going back to the sender…
2 Likes
I received the 3D MKS GEN L V1.0 .
I will probably generate gcode ISO 6983 (RS-274) from BlenderCAM that seems supported by the Marlin Firmware (Gcode | Marlin Firmware).
But I observe UGS is not currently supporting Marlin Firmware (Better controller support · GitHub).
How do you send your gcode to run to the 3D MKS GEN L V1.0 from your computer ? Is it mandatory to have a SD Card Reader with autoload on Marlin ?
I now ordered a mini 12864 to have SD card reader with the TFT screen. Let’s see if I can make it work…
Thank you
So to build & send Marlin Firmware to the MKS GEN L V1.0, I will use MarlinBuilder from V1EngineeringInc.
But I need to tweak some settings for my particular setup :
- Add the TFT mini 12864 (will it read the SD card ? or should I add a particular setting in Marlin to add the SD Card support ?)
- Re-use the default MPCNC settings
This is the differences :
If anyone has some experience and take a peek at it, let me know if it seems ok ?
I’ve recompiled and updated Marlin for my customs setup (MKS MINI12864 V3), haven’t tested it yet, will see in the next days.
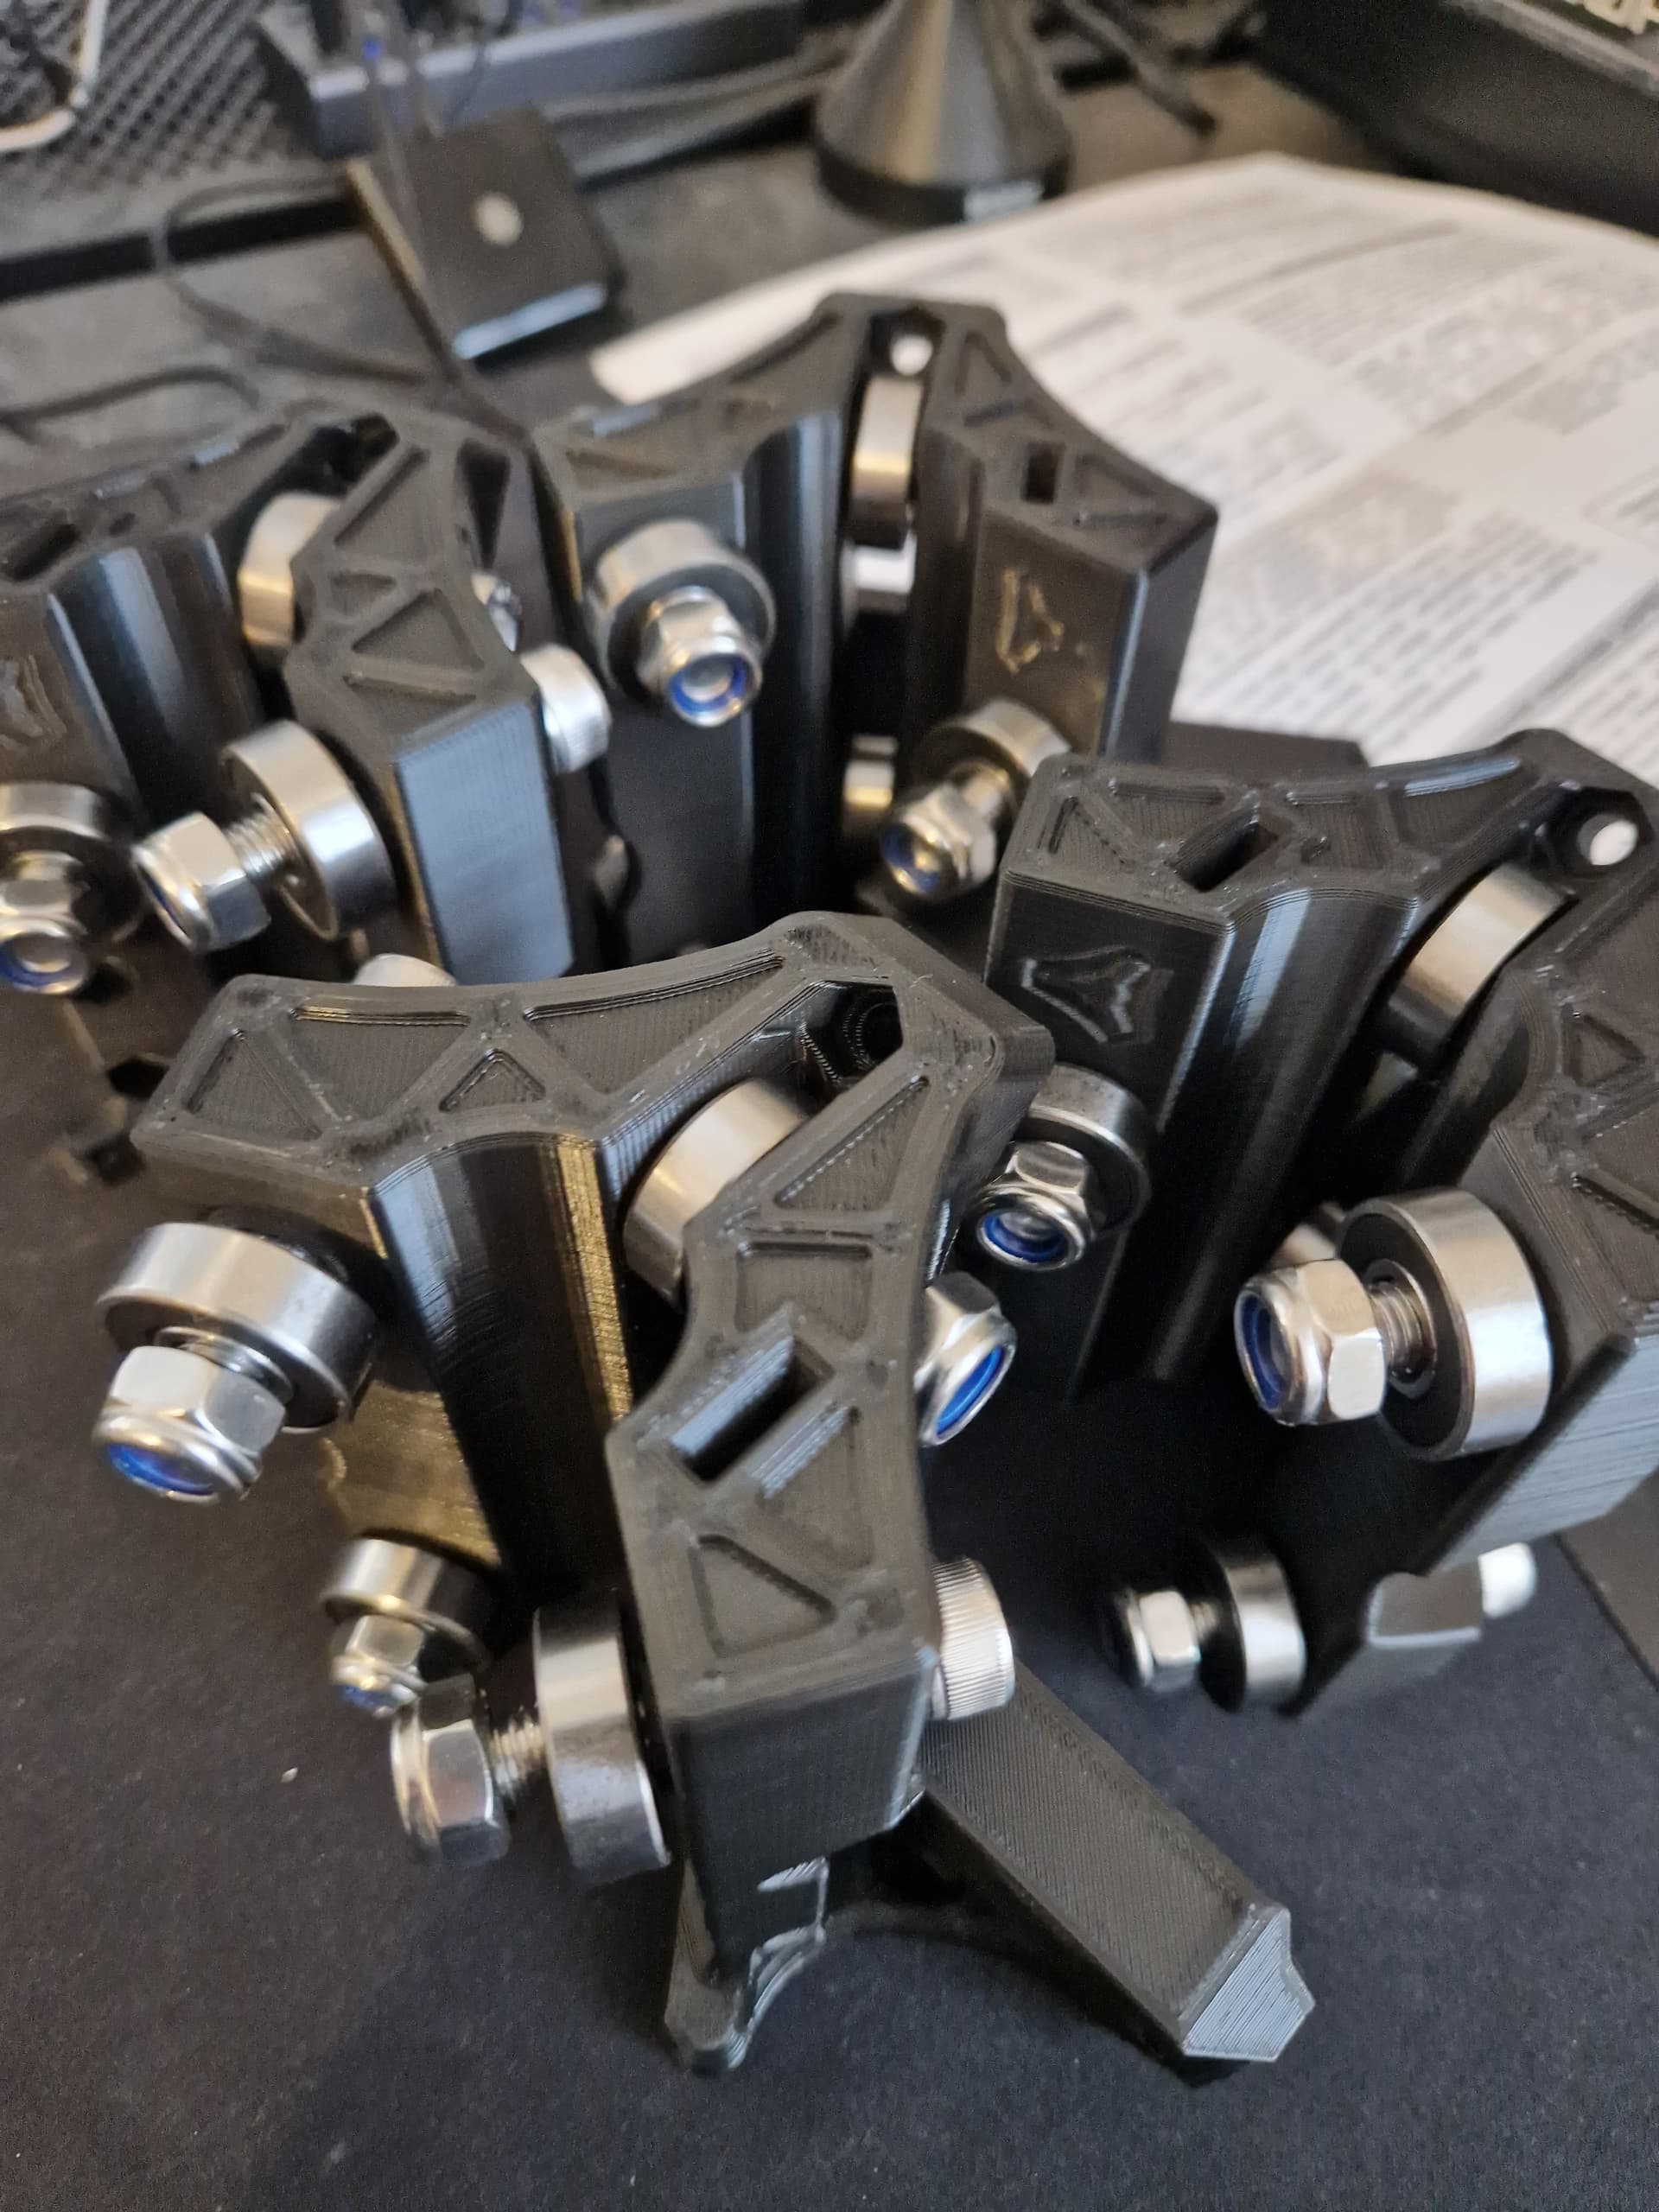
And started to mount the Trucks :
1 Like
I’ve tested the MKS GEN L V1.0, set the Vref for the A4988, the MKS mini 12864, the NEMAs… It’s alive !

I have couple of things to tweak :
- Backlight is not working on the mini 12864
- I will test with a SD Card inside if it reads gcode
I started to think of the frame.
The thing is I have leftover of 3cm x 4cm . I will try to cut, glue, and assemble them with L corner I 3d printed.
I will check if the frame is strong enough, and I can make the wood stronger with fibers - epoxy.
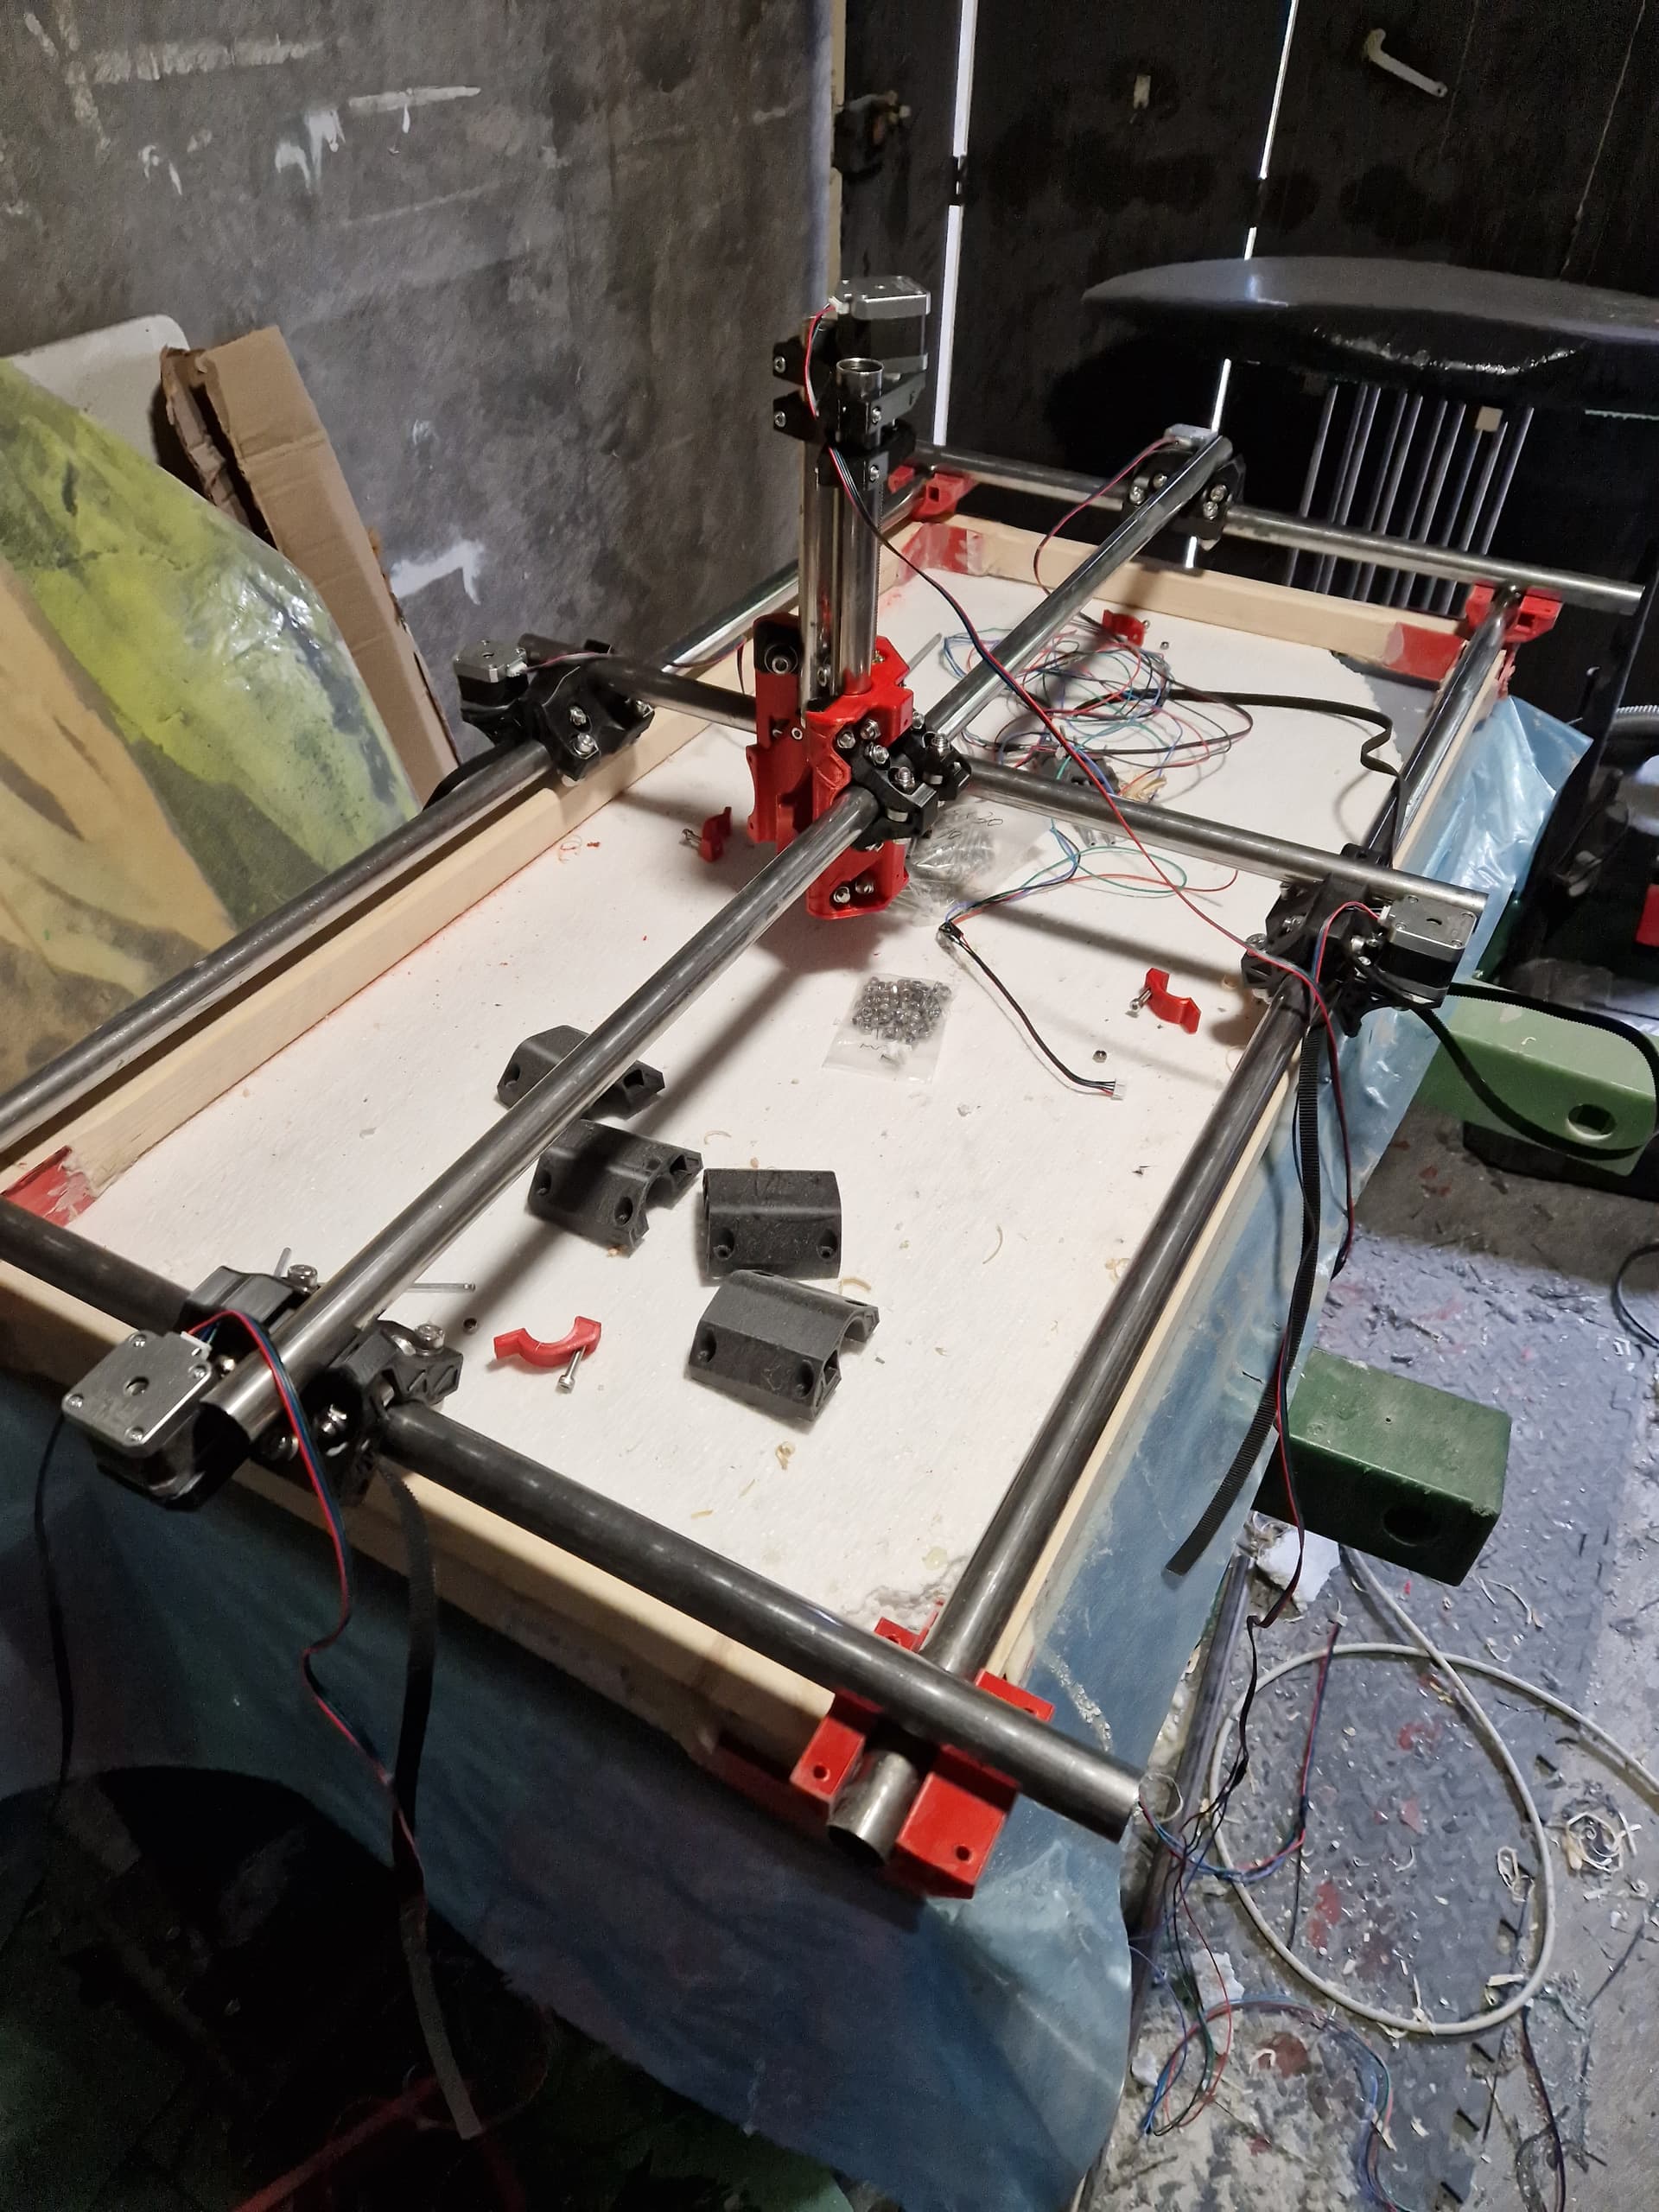
I continued to assemble the Core MPCNC.


All good for the backlight + SD Card reader.

I am now reading and thinking of the endstops for the auto home feature + check what is “auto square”.
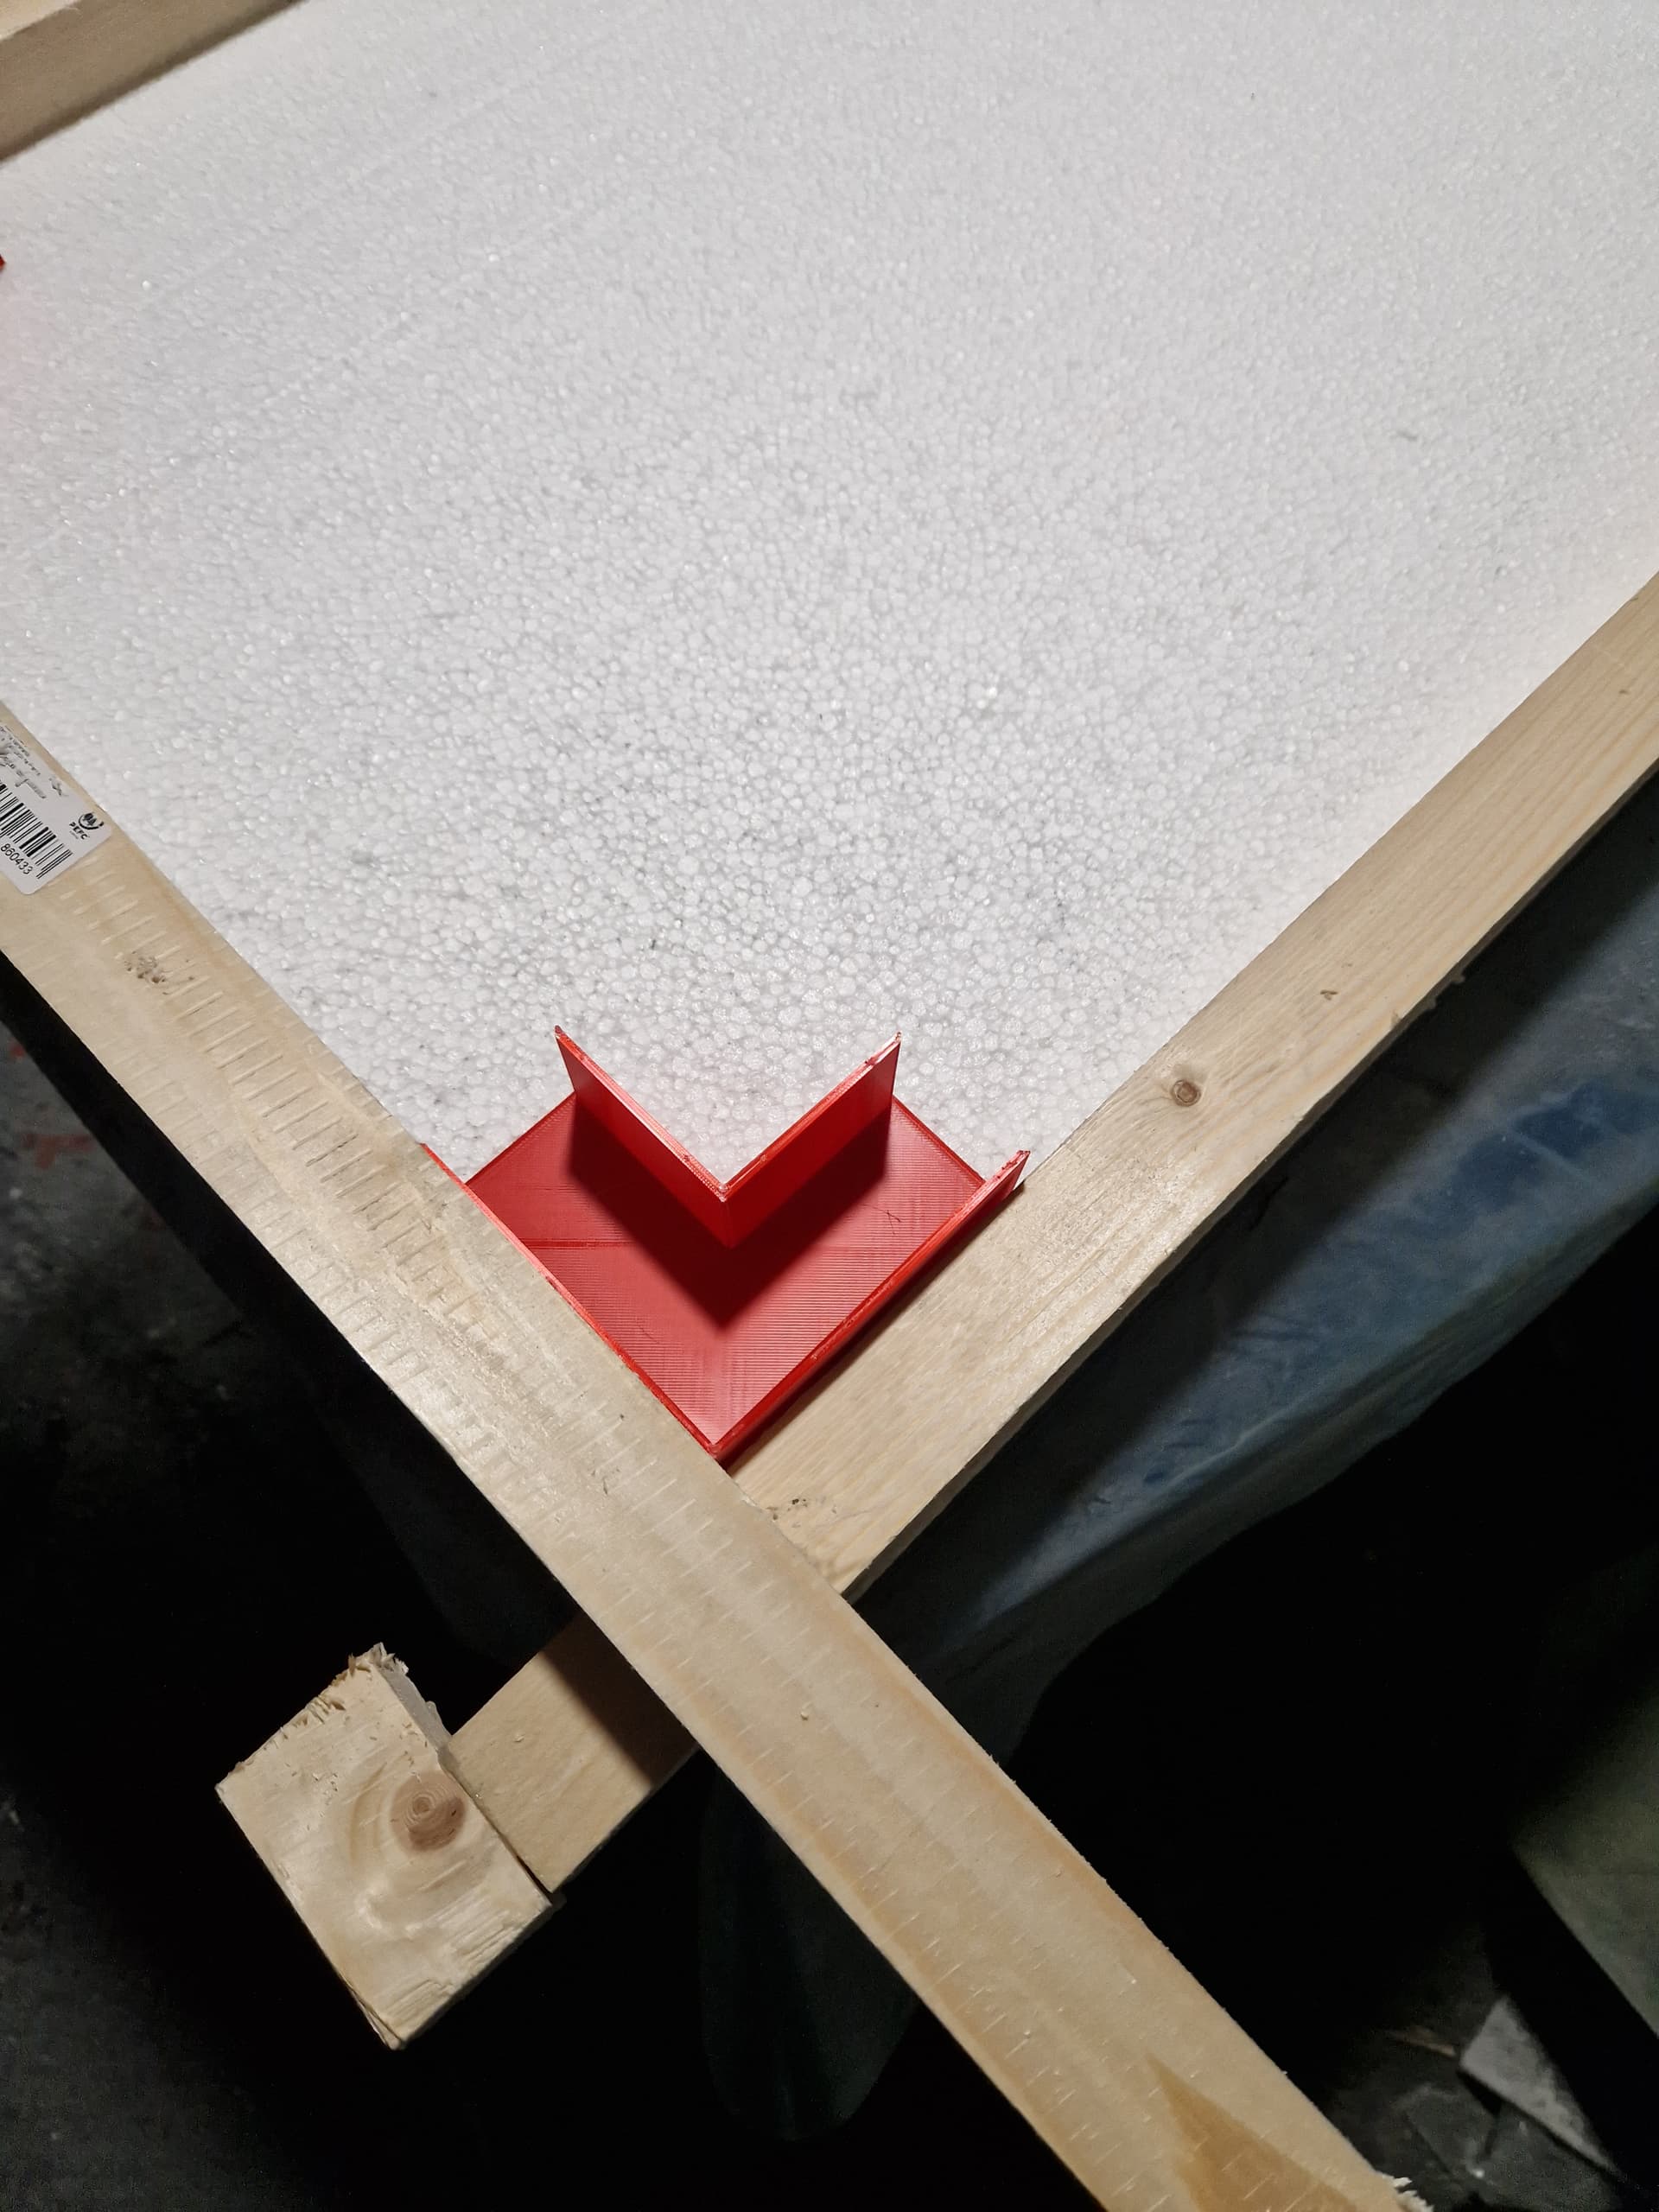
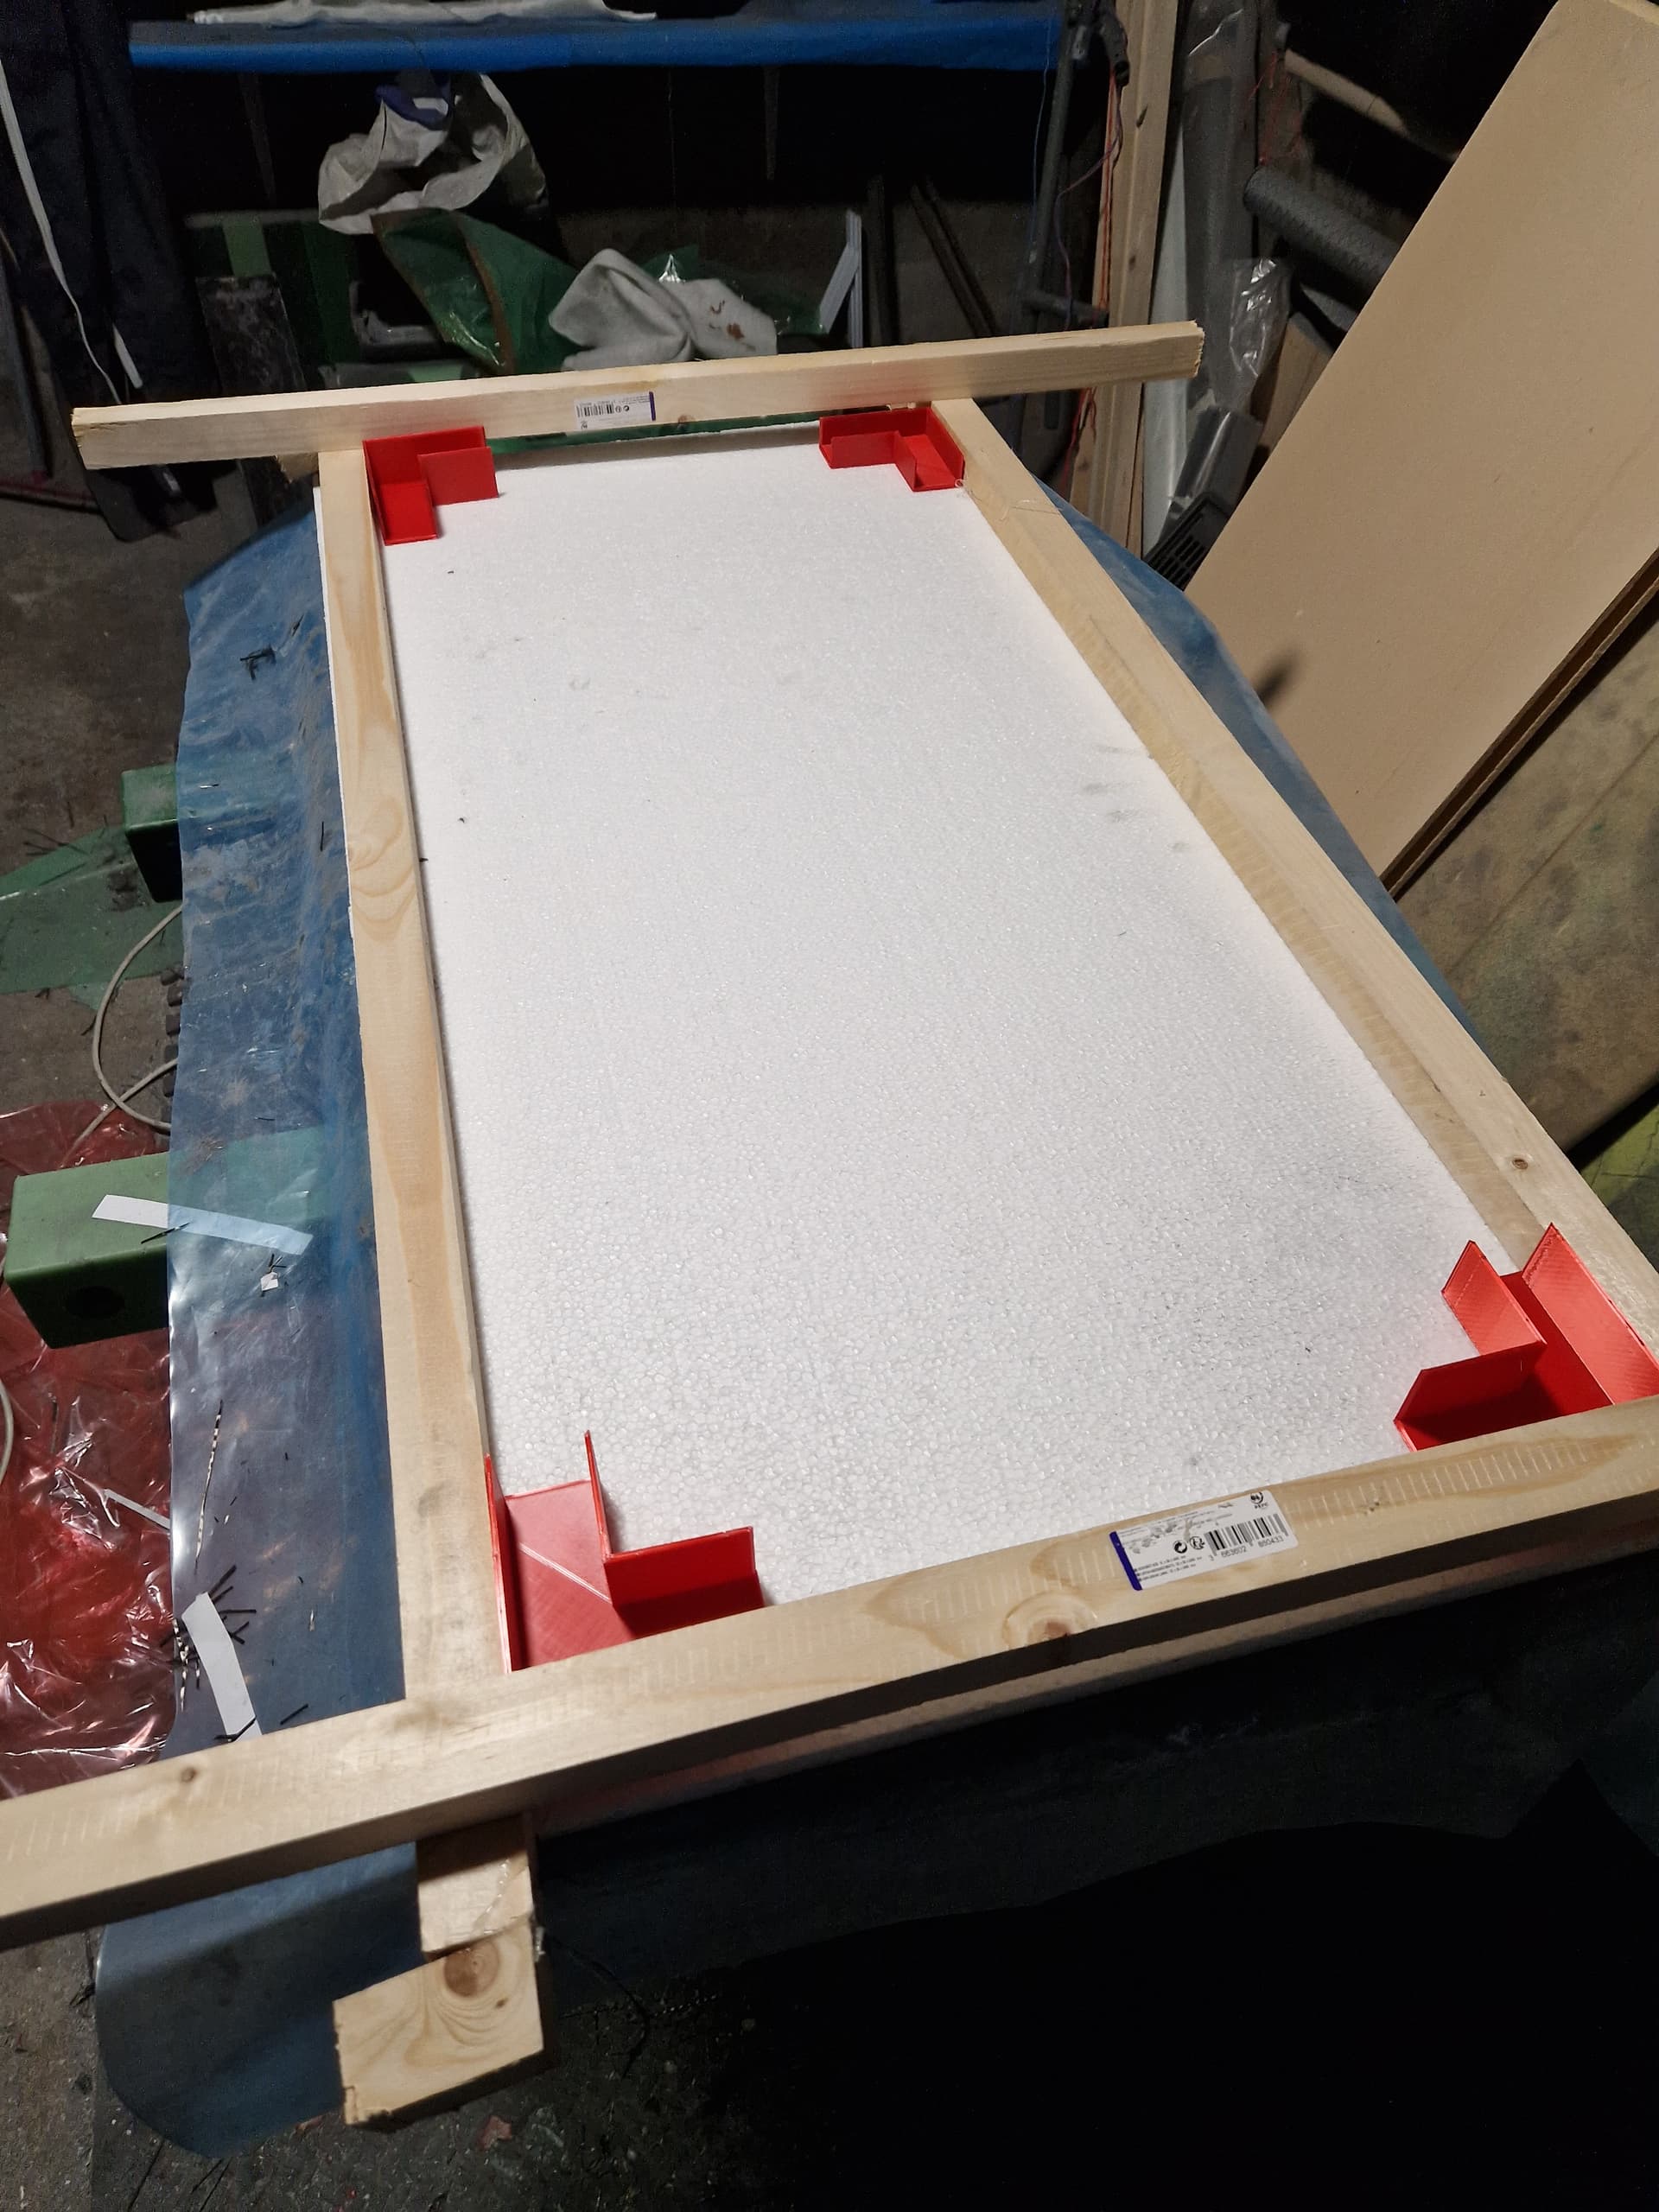
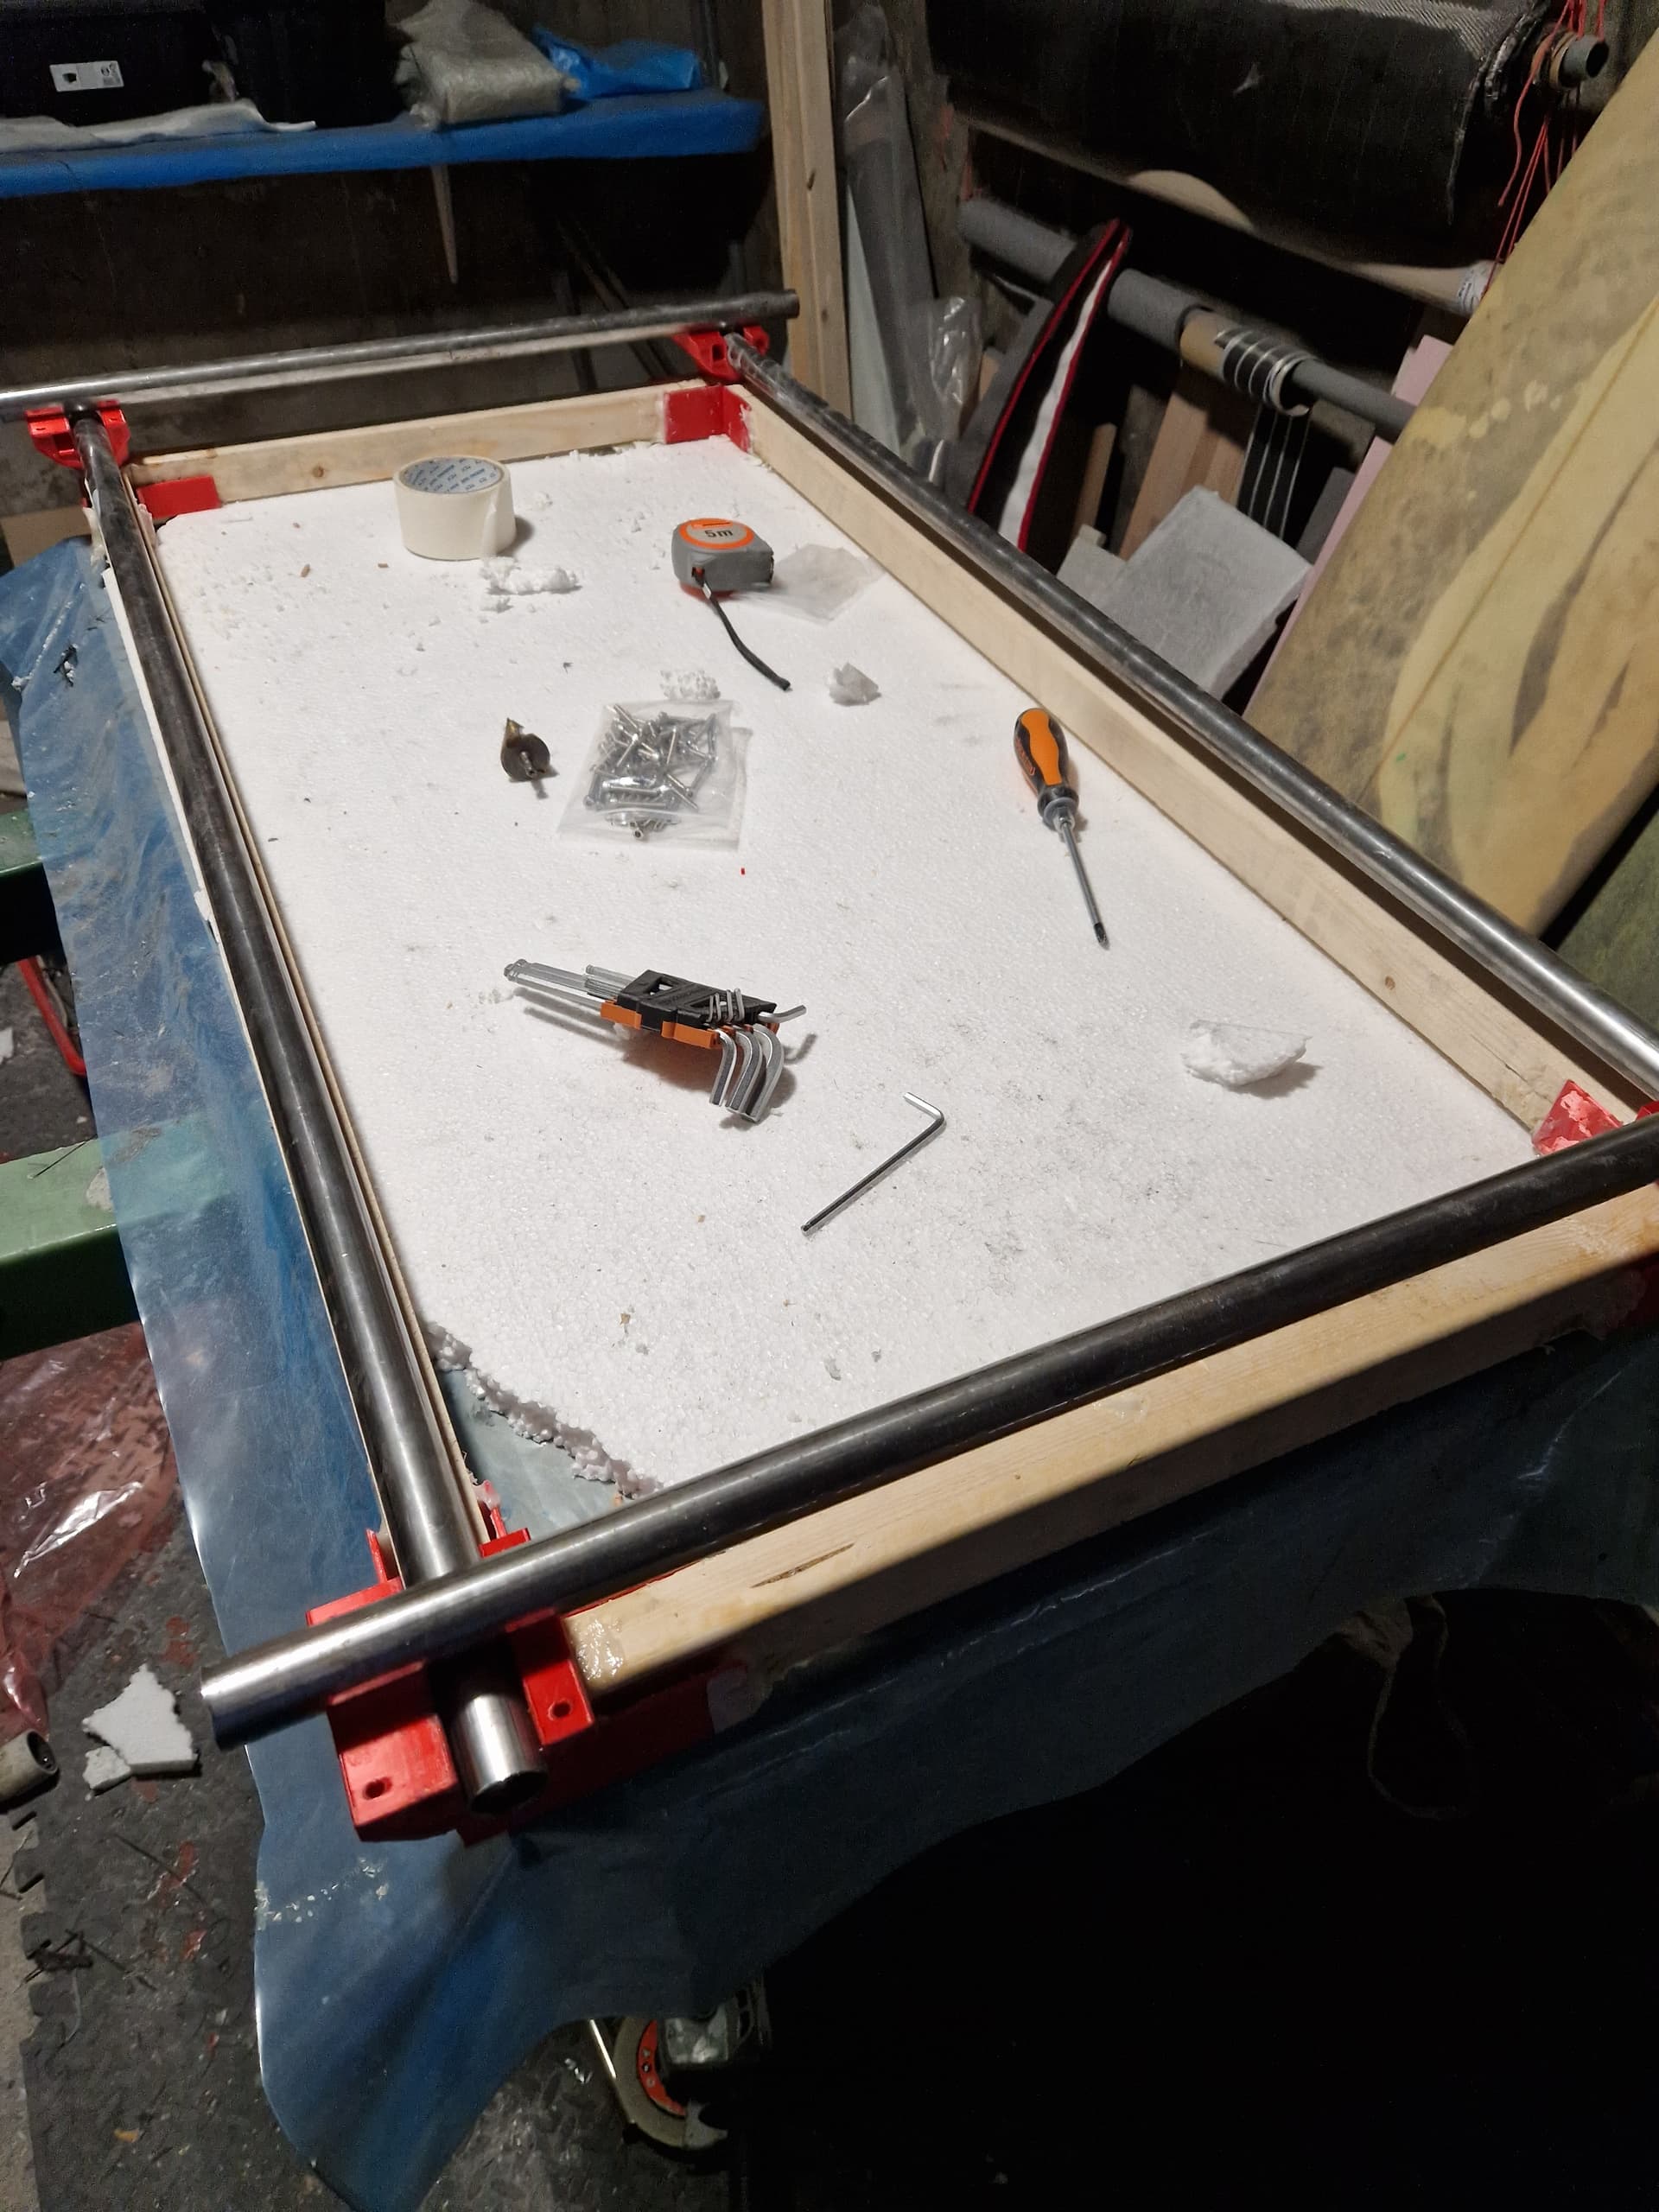
About the table, I started the cut around the smallest Polystyrene block I have (which will be the final dimensions).
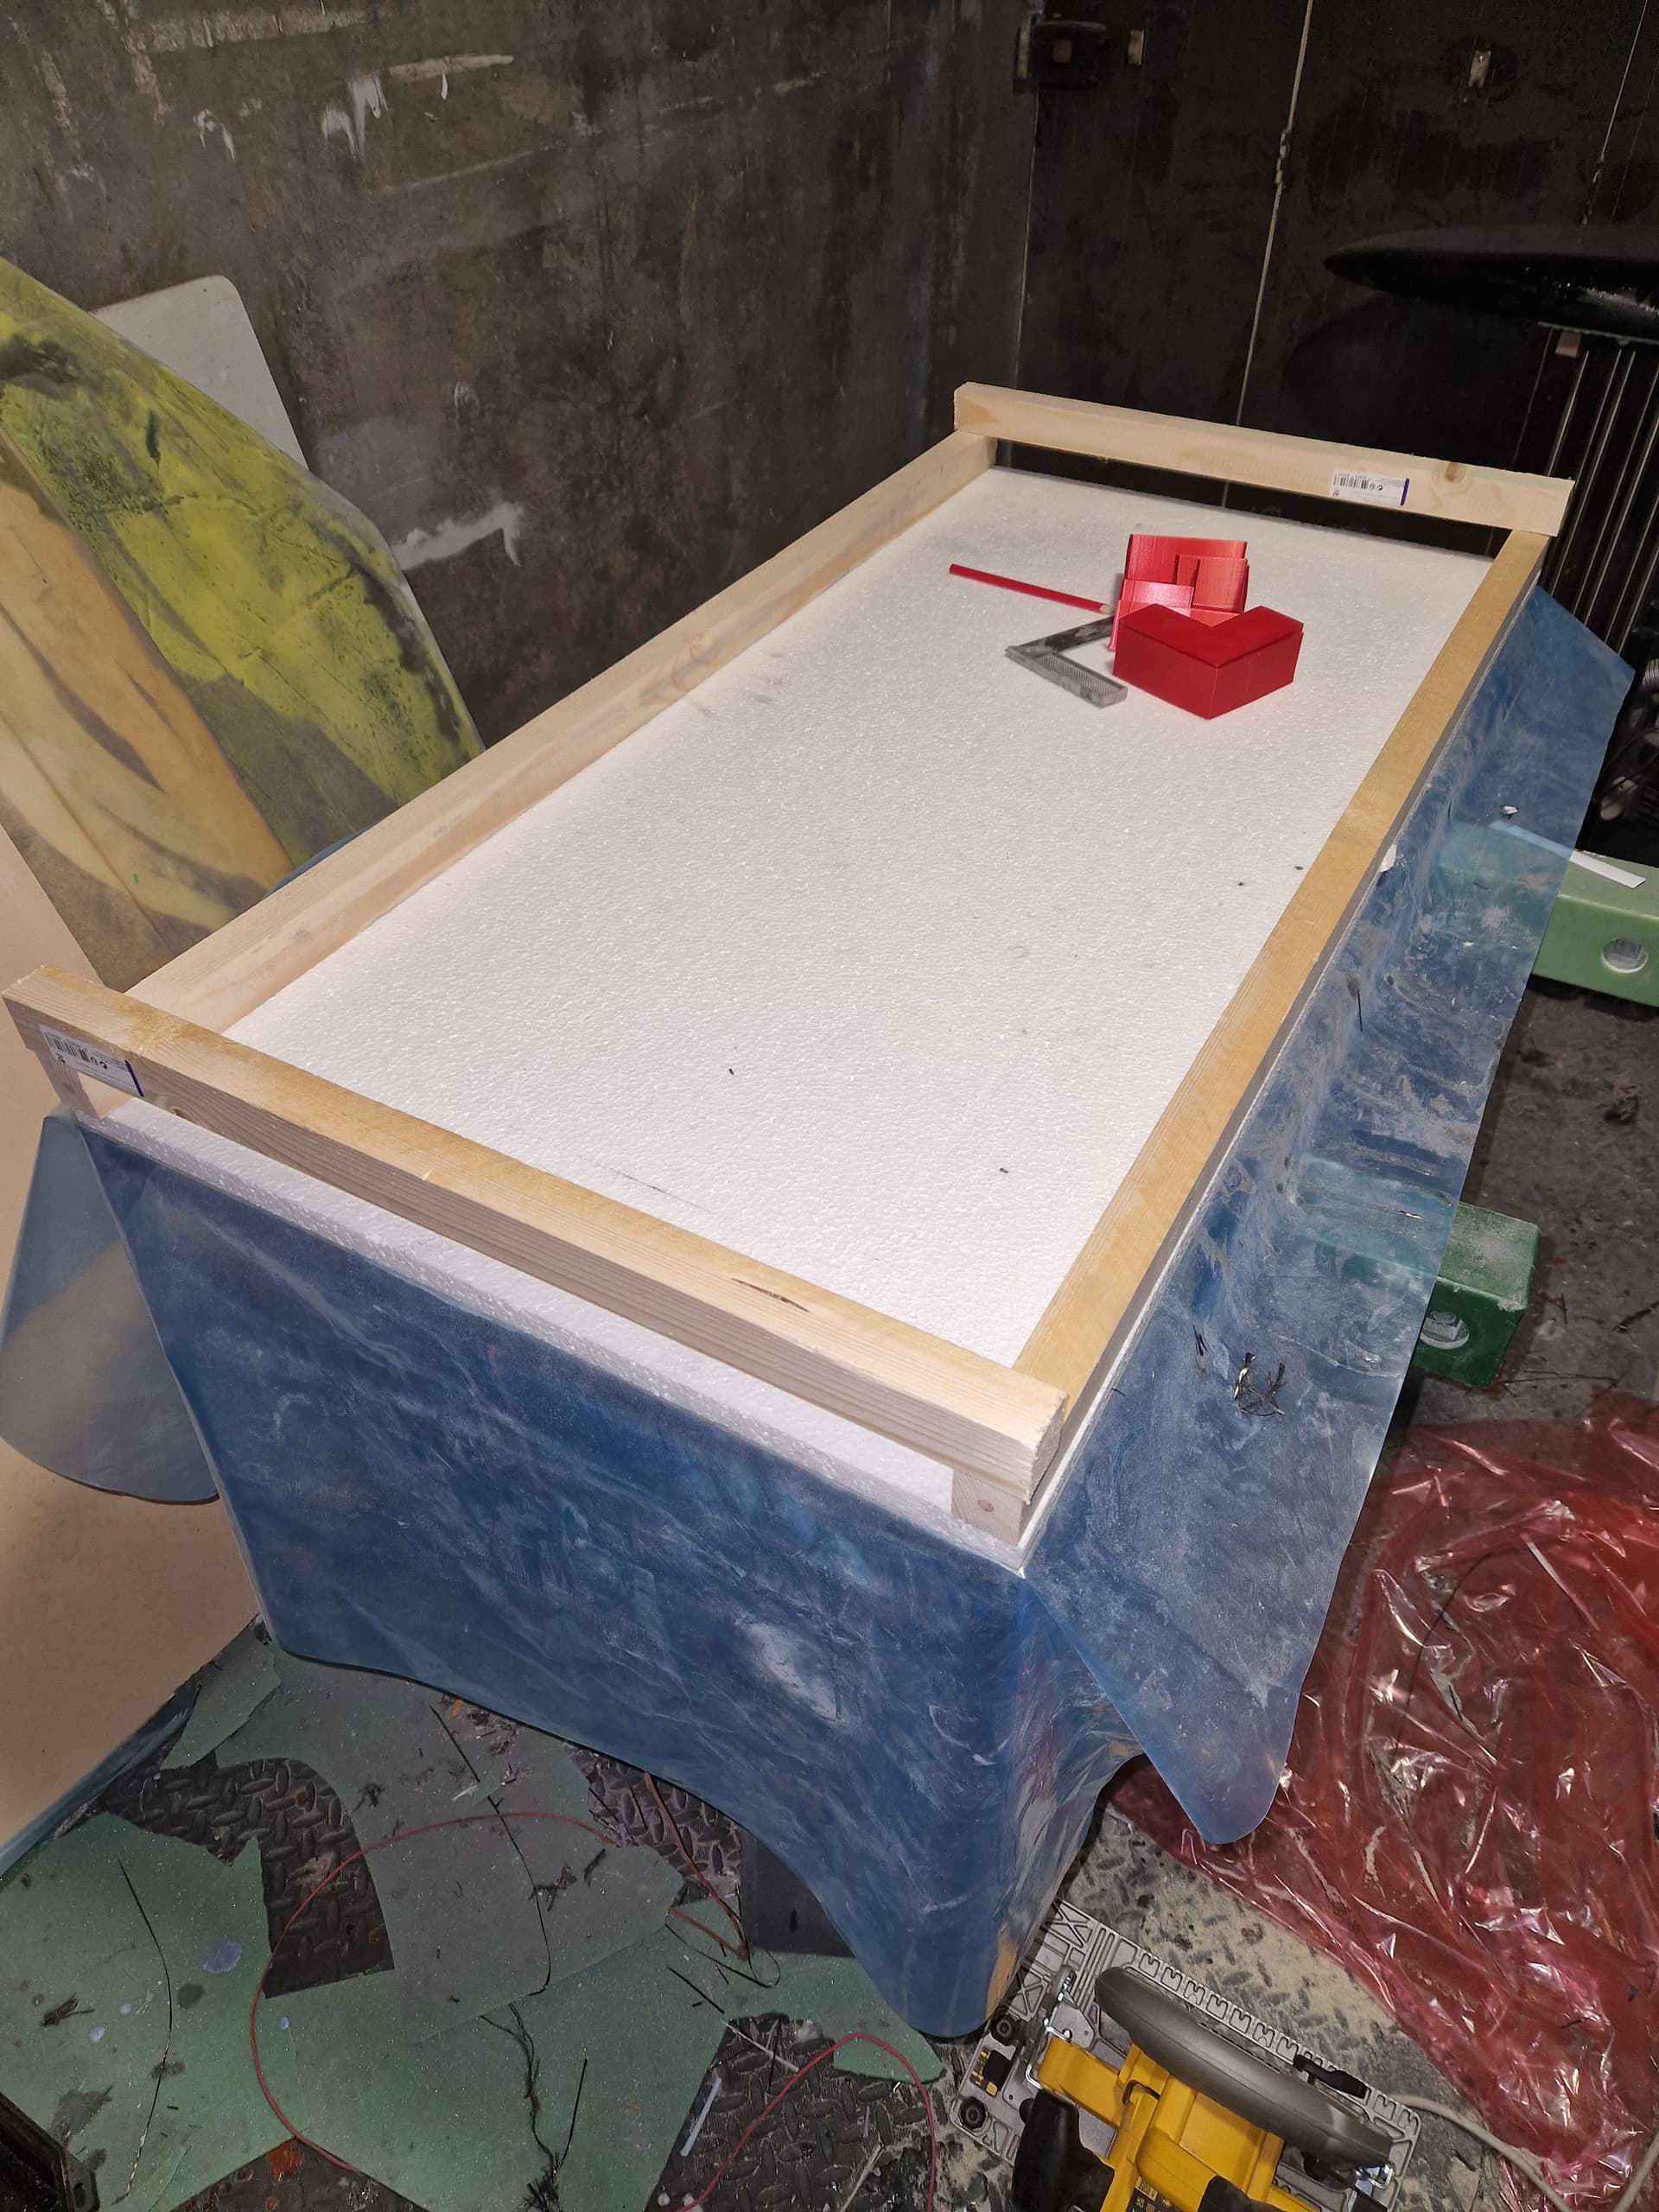

I will screw + glue (epoxy) the bracket into the 3d printed corners (red part) that are perfectly squared.
3 Likes
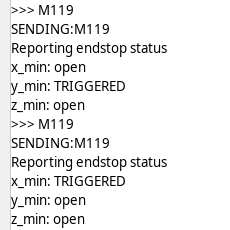
I’m almost done with the Marlin Firmware, electronic etc. One last step : the endstops. I have 4x normally closed micro switch. I’m connecting them to the Xmin Xmax Ymin and Ymax endstops on the board, recompiled and uploaded Marlin, then tested the endstops in Pronterface with the M119 command successfully
I used the src/configs/accessories/dual-drivers-on-xy config for Marlin and added the following options :
opt_set X_MIN_ENDSTOP_HIT_STATE "LOW"
opt_set X2_MIN_ENDSTOP_HIT_STATE "LOW"
opt_set Y_MIN_ENDSTOP_HIT_STATE "LOW"
opt_set Y2_MIN_ENDSTOP_HIT_STATE "LOW"
Unfortunately, when I’m plugin the X motor, and try a “Home X&Y” (G28 X Y), the motor make noise but doesn’t rotate until I click on the X endstop, then does ~2 rotations (this is probably the soft retry feature of Marlin on endstop ?), and then it showed “Homing Failed: Printer Halted Please Reset”.
Edit : I’m plugging the 4x endstops, and run through Pronterface the G28 X Y command, it returns Homing Failed, though I have successful M119 test.
>>> M119
SENDING:M119
Reporting endstop status
x_min: open
y_min: TRIGGERED
z_min: open
ok B:-15.00 /0.00 @:0 B@:0
>>> G28 X Y
SENDING:G28 X Y
echo:Homing Failed
Error:Printer halted. kill() called!
Error:Printer halted. kill() called!
I don’t quite understand why the motor doesn’t run but it makes some electricity / vibration noise until I click the endstop ? It should rotate towards the 0 X axis until I click on the corresponding endstop.
If anyone would guide me on this, it would be really appreciated.
Ok, the Homing is now working ! YEAH !
but only with 2 endstops (X min, and Ymin).
I made 2 mistakes :
- I tried to disable the microstepping thus the DEFAULT_AXIS_STEPS_PER_UNIT was wrong (thus the motors not rotating). I switched to 32 microsteps and put the jumpers back to 1/16 on the MKS GEN L V1.0.
- And I was just clicking on the endstops and not keeping pressure on them…

Any idea on how to make the 4 endstops working for X1 min, X2 min, Y1 min, Y2 min ?
And just for information, after running this test, the stepper drivers are super hot !
1 Like
I have some misconfiguration of Marlin for the dual endstops. I’ve noticed I should see X1 X2 and Y1 Y2 endstops configuration with the M119 command ( [1.1.x] Dual endstops XYZ by jeffeb3 · Pull Request #7648 · MarlinFirmware/Marlin · GitHub ). I will try some changes.
Ok, I’ve found that the following lines cause some errors :
Because USE_XMAX_PLUG and USE_YMAX_PLUG because in Marlin bugfix 2-1-x :
#error "USE_*_PLUG settings are no longer needed and should be removed."
All the electronic is done \o/
1 Like

All core - Z mounted. I need just to add lubricant on the leadscrew. Everything is looking good so far.

3 Likes
I consolidate my frame with a 3d printed corner and filled it with epoxy.
Then I epoxy the corner screw directly to the frame (no base). I squared it as much as I could.
My goal is to be <1mm precise everywhere.

This should be strong enough ?
The table will take place onto my Polystyrene blocks here :

I need to extend all cable and make some cable management logic in order to use the MPCNC.
1 Like
I was assembling everything, it went pretty ok, until I found out I inverted 2 corners bottom on one side (found out looking at the belt attacher…).
I am reprinting the 2 corners bottom as I needed to destroy them to remove them.
1 Like
What size is it? If it says above, i apologize. I looks wide and narrow.
My polystyrene block is 1200 x 600mm so working area should be something like ~1100 x 500mm.
1 Like
It’s alive !
 It's alive")
Couple of things to tweak / fix :
- microstepping / calibrating the axis (should I remove the microsteps in order to have more torque ?)
- The X and Y Axis moves 2x times too much
- The Z Axis moves 0.5x times too little
- squaring everything
- check the screws tightening
- add the endstops for homing
- cable management
1 Like
Added 2x mid span support per Y axis (Y is my longest axis).

Do you have any cable management tips or example for cables to go to the top of the CNC ?
I have some trouble finishing the Marlin Firmware configuration / electronics.
The MKS GEN L V1.0 is max 16 microsteps, and thus the DEFAULT_AXIS_STEPS_PER_UNIT should be { 100, 100, 1600 } and not 200, 200, 800 if I’m using the 16 microsteps. I wanted to try without any microstepping so I want { 6.25, 6.25, 100 }. But even recompiling and uploading the firmware, doesn’t change the M92 result command :
M92
SENDING:M92
M92 X200.00 Y200.00 Z800.00
Also I have this warning during the upload :
Marlin/src/inc/Warnings.cpp:83:6: warning: #warning “Note: Auto-assigned X2 STEP/DIR/ENABLE_PINs to unused En_STEP/DIR/ENABLE_PINs. (Define NO_AUTO_ASSIGN_WARNING to suppress this warning.)” [-Wcpp]
Is X2_PIN something configuration to remove this warning ?
Another problem is on my Y axis, it seems that the INVERT_Y2_VS_Y_DIR conf is not taken into account. I needed to invert physically the stepper driver A4988 in order to invert the 2 Y motors.
And even after inverting physically the stepper driver, the Y1 and Y2 motors and not exactly replicating, I think one is going faster / a bit before the other one, and one of the motor is skipping some steps ( I double checked the pulley).
So I think I have some problems on my Marlin configuration / compilation or upload, but don’t get it right now.
These are my changes :
Ok I didn’t know this :
This is a feature, not a bug. When updating to new firmware & those settings are changed, you need to initialize EEPROM through the LCD or by sending
M502, followed byM500.
For the DEFAULT_AXIS_STEPS_PER_UNIT
I will go back to 16 microsteps and the right calibration steps per unit.