We’ll call this a success. However it was taking forever to move between characters. Not the fluid motion expected with a CNC machine. Used inkscape this morning, created a file for a template for desk signs. Etslcam liked it…HOOORAYY!!!..however, it ran slow as molasses in winter when cutting on CNC. Is set as an engraving and adjusted depth so as to just break the work surface. A severe lag in in plunge once the router moved to a new character. Have checked/double checked settings between MPCNC and Etslcam.
Thanks Ryan, everything I look at is showing mm/s. Wondering if there is a conflict in what is in my controller vs what the gcode is loading. Which take precedence?
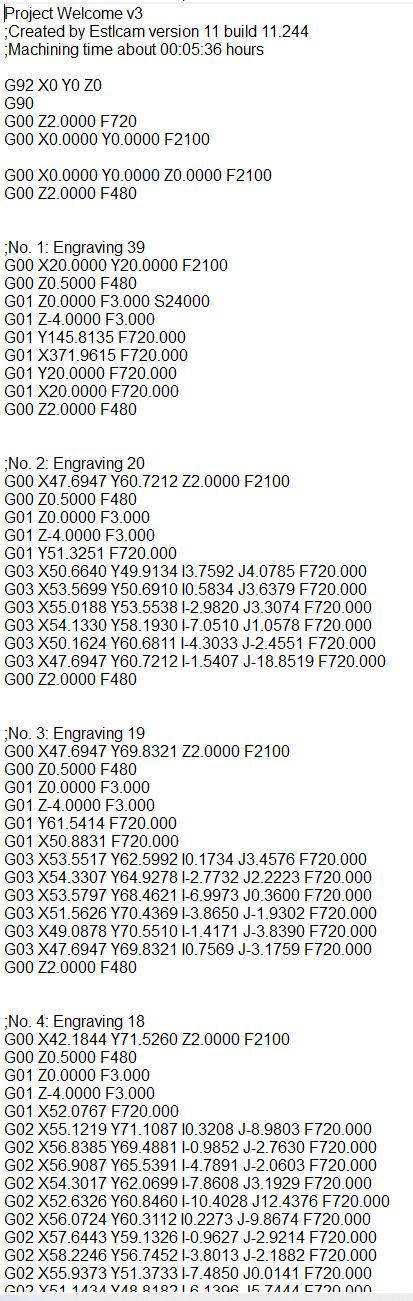
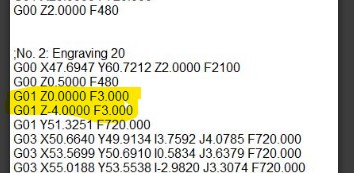
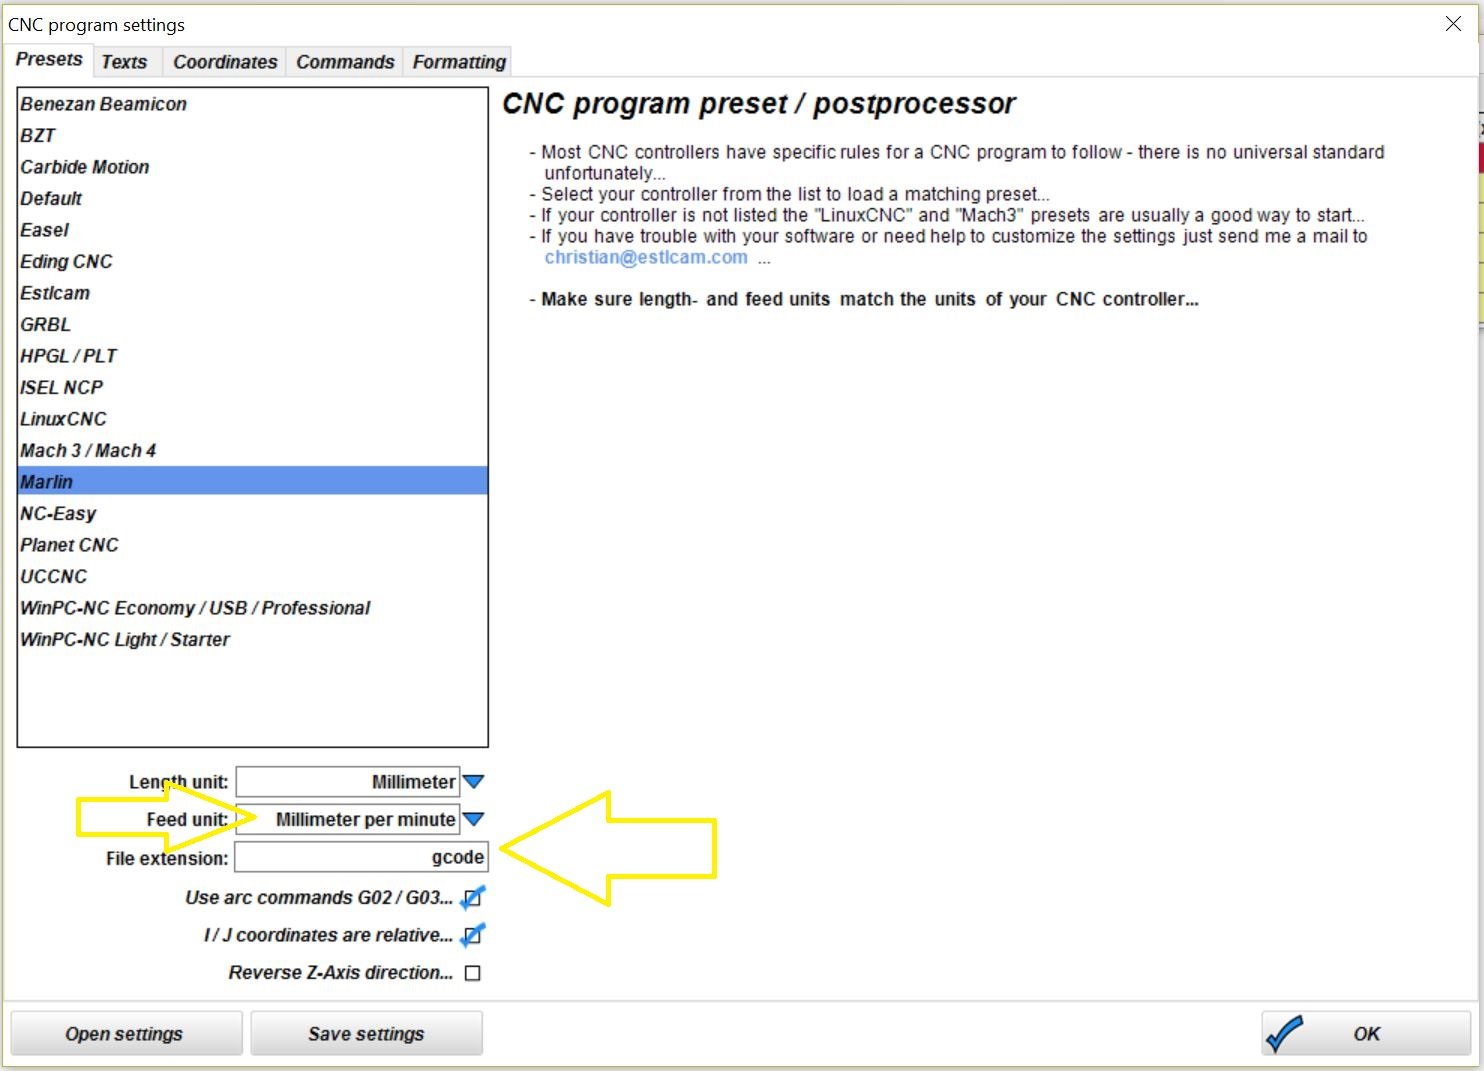
There is a setting for gcode units, it is probably set to mm/s and should be mm/min. The 2100 and 480 are fine, because they don’t have units, they are just plopped straight in. Your XY speed in the tool settings is set to 720mm/s (way too fast) and is actually being inserted as F720, which is being interpreted by marlin as 720mm/min (which is more reasonable).
Deleted Estlcam, reloaded it and redid the configurations as shown on the milling basics page. Did a successful engrave on the insulation board, fine tuned the depth, and did another test engrave successfully. Placed a piece of plywood down and did the engrave. Turned out great. Is now a matter of fine tuning the bit information as my diameter is a bit off. I have been using old router bits in the event a engrave/carve went bad. Thanks everyone for the suggestions and patience with me while I dial this thing in. May be in the market for good bits by Christmas…
Have attached the top portion of the gcode for the last engrave.
Making progress, day by day…Have made a couple signs and am dealing with scalloping. Using a 60 degree v bit. Tool parameters are:
depth per pass = 1.0mm
feedrate = 10.0mm
plunge rate = 8.0 mm
stepover - 20%
The engraving portion is where the bulk of the scalloping is occuring. These letters are 2.10mm deep. The carving portion is all numbers and a map, these are at 1.70mm deep, not many issues here.
Also fighting get sharp crisp edges on the stencil film but it may be the quality of the film.
Enclosed a picture showing the scalloping. This is a new 60 v-bit and the wood is pine.