I just finished my Primo build and thought I would write up a summary of what I did and some lessons learned. I found this community extremely helpful. I was able to complete the entire build with the resources found on the V1 website and this forum. I wanted to create a topic that would answer some of the few questions that I had so that the answers to my questions would hopefully be searchable on this forum for others in future builds.
I am really impressed with this project and tons of credit to Ryan. For around $350 (haven’t bought a router yet) I have a working cnc that has quality I wasn’t expecting with no frustrating build hiccups. Really incredible.
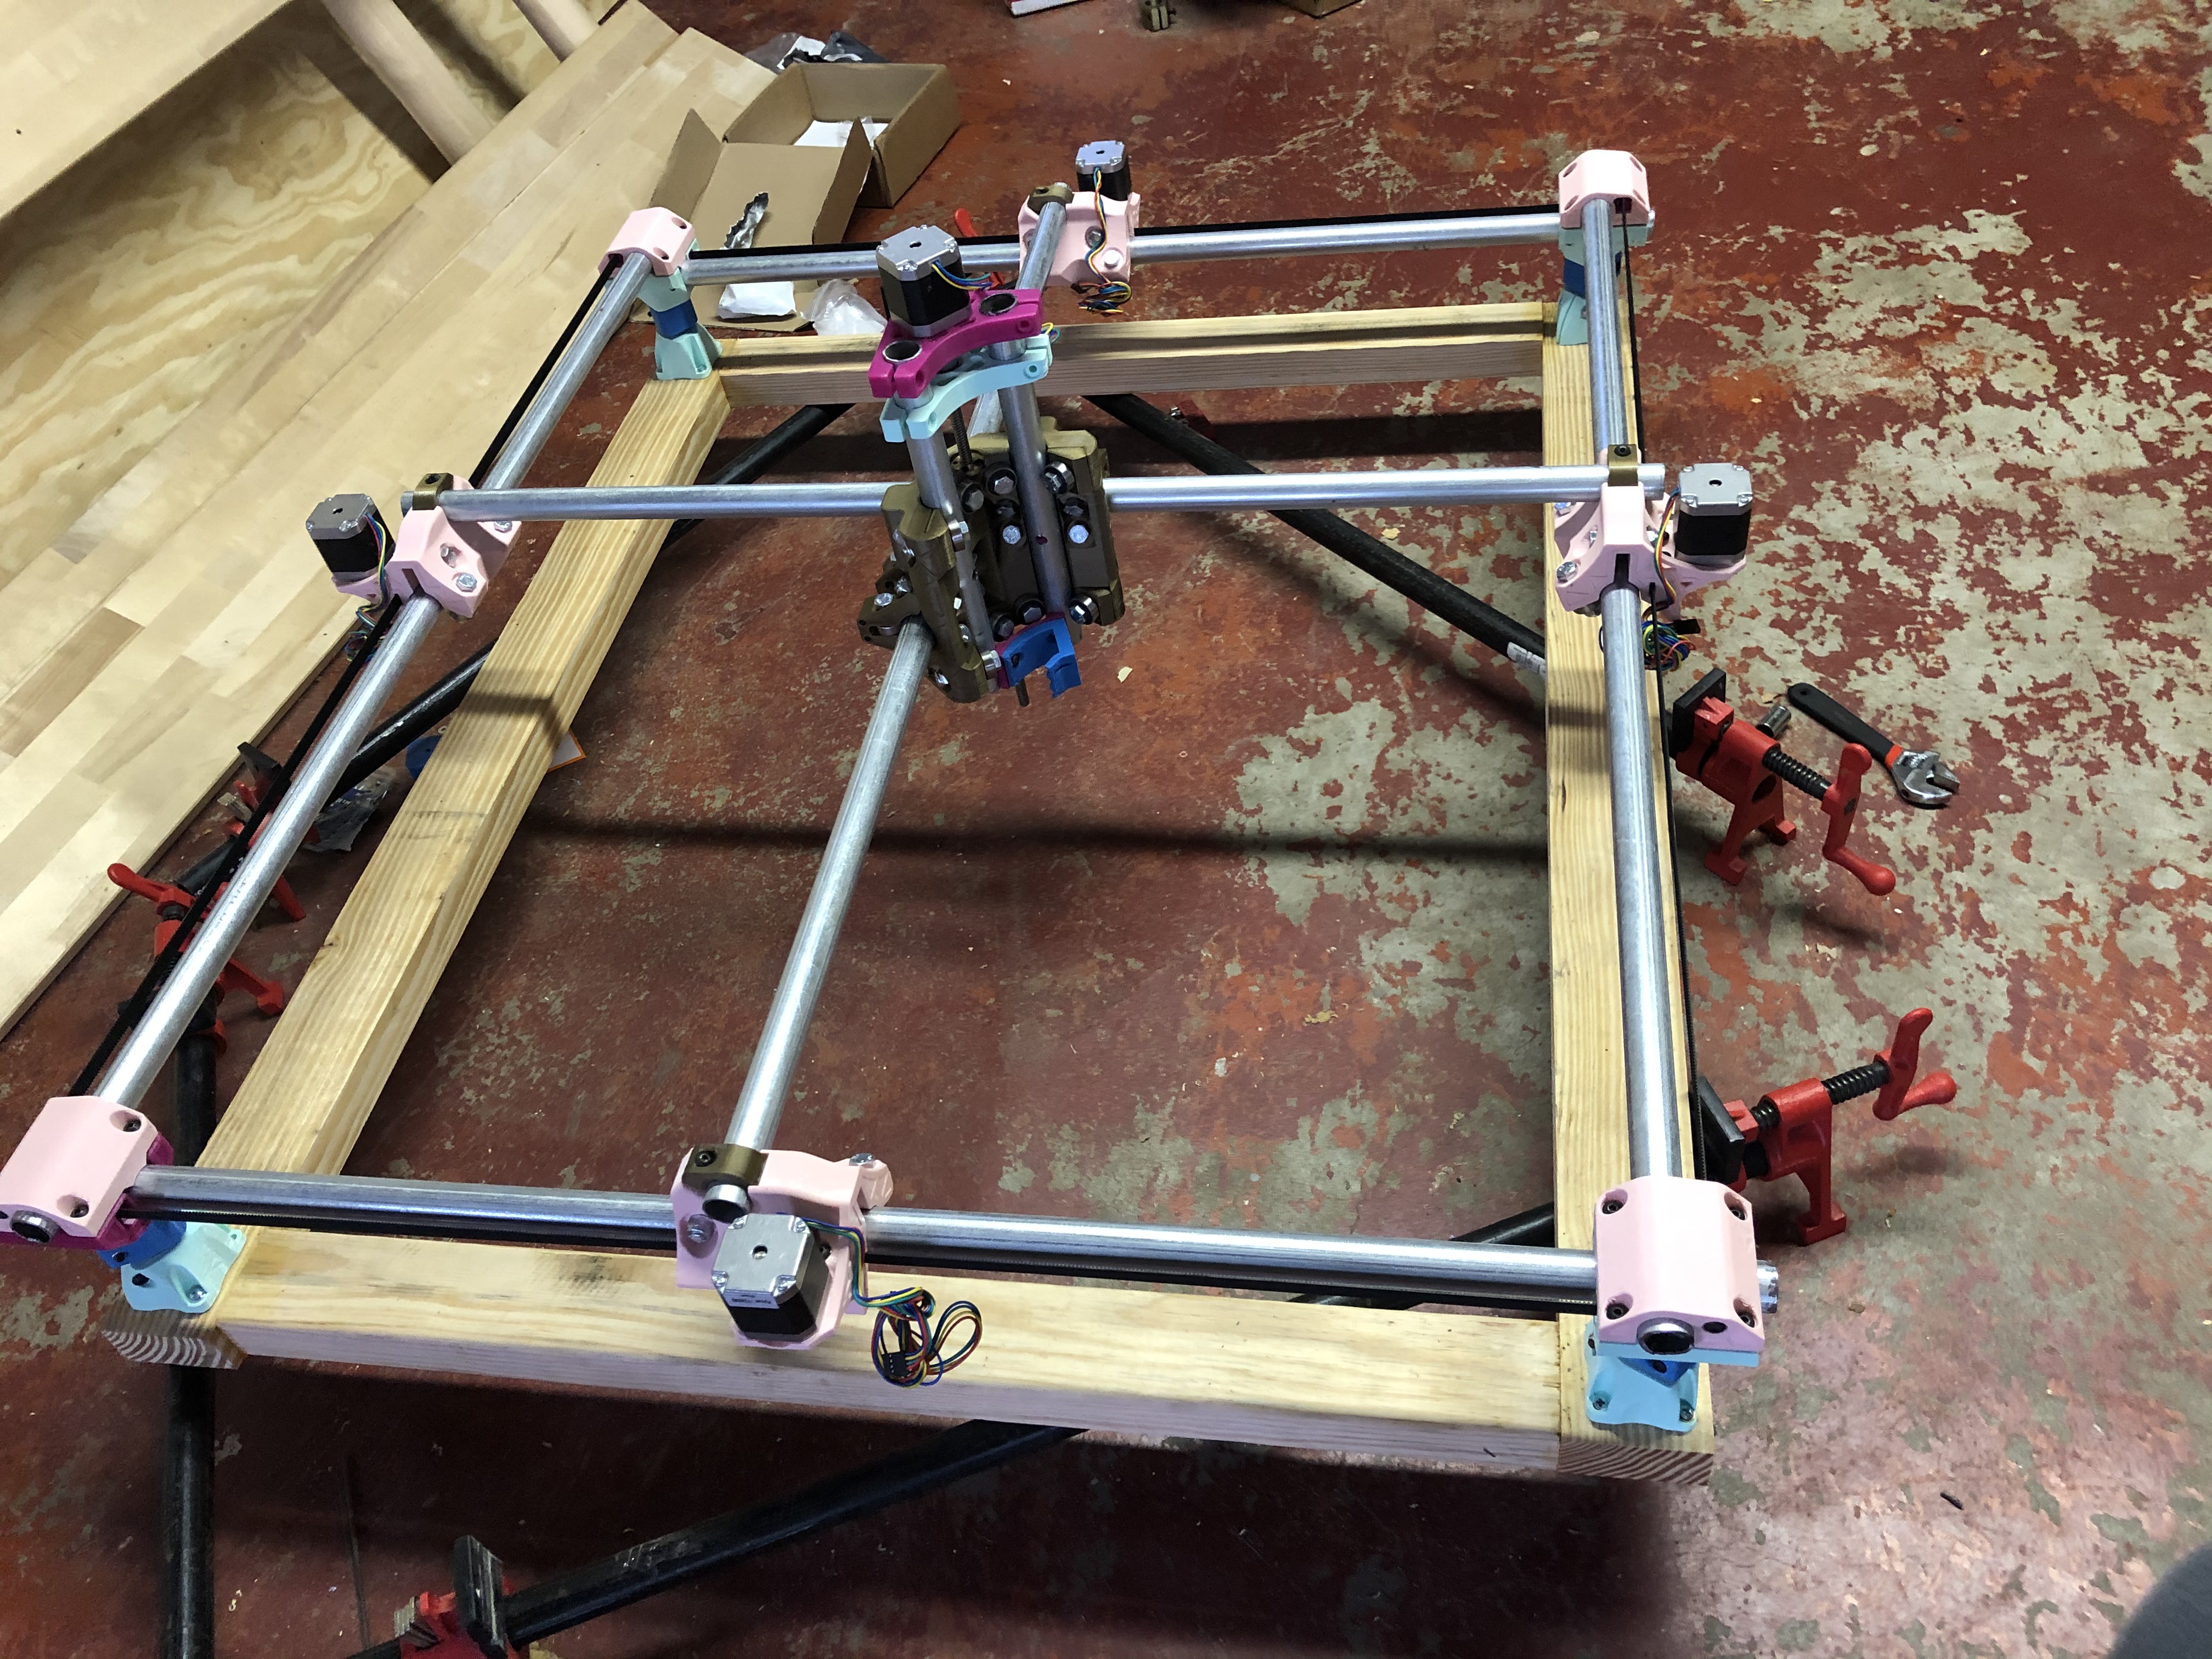
Build: 30in x 24in x 3.25in Cutting Volume
So with that here are some of the minor things I ran into in this build.
1. Methodology / Setup
- Test Fit your 3D Prints early
I 3D printed all of my own parts with the thought process that I would begin printing and have that running in the background while I did research on the rest of the project. The only thing I wish I would have done differently was test fit some of my parts sooner. There was a tiny amount of shrinkage on my prints on every single ID. This resulted in all of my rails and hardware being in what I would call a “press fit” condition. Everything still fit, but I had to force it a little. The hardware would actually thread into the plastic of the prints and the rails I had to tap in with a hammer.
If you are printing your own parts I would recommend you print out a foot first and then do a test fit with that. The foot has the through hole for the rail and for the M5 nut and bolt so you can test most everything on that one piece. I literally took one of my feet into Home Depot and slid some conduit through it to test it.
2. The Build (Squaring The Trucks)
- Don’t worry that much about squaring the trucks
The Primo Build Guide section of the site is very detailed and really needs no further explanation. The only part of it I found confusing was squaring the trucks. I spent a really long time trying to get them square and it just wasn’t happening unless I got them super tight. It was because there is a good amount of play where the gantry rails clamp into the trucks.

This is the one section of the build where I went to the forums for help. The general response I got was don’t worry about this that much it should all square itself up once you get everything together. This was the correct advice because that is exactly what happened. It was slightly confusing because I followed the guide to a T with the exception of squaring the trucks.
3. The Build (Wiring The Steppers)
- Buy the Wiring Kit from the V1 Shop
-I recommend removing the steppers from the Trucks for the initial wiring test
I bought my steppers and the Rambo 1.4 board from the V1 shop, but at the time I didn’t realize I needed the wiring kit (even just for the fact that I needed longer wires). I ended up buying 22GA wire from Frys to extend everything which was basically the same price as the wiring kit. The end result is that the wiring is a lot messier.
If you are wiring everything yourself there is a good section of the website which was kind of hard to find but I did eventually find that covers it. Wiring-the-Steppers.
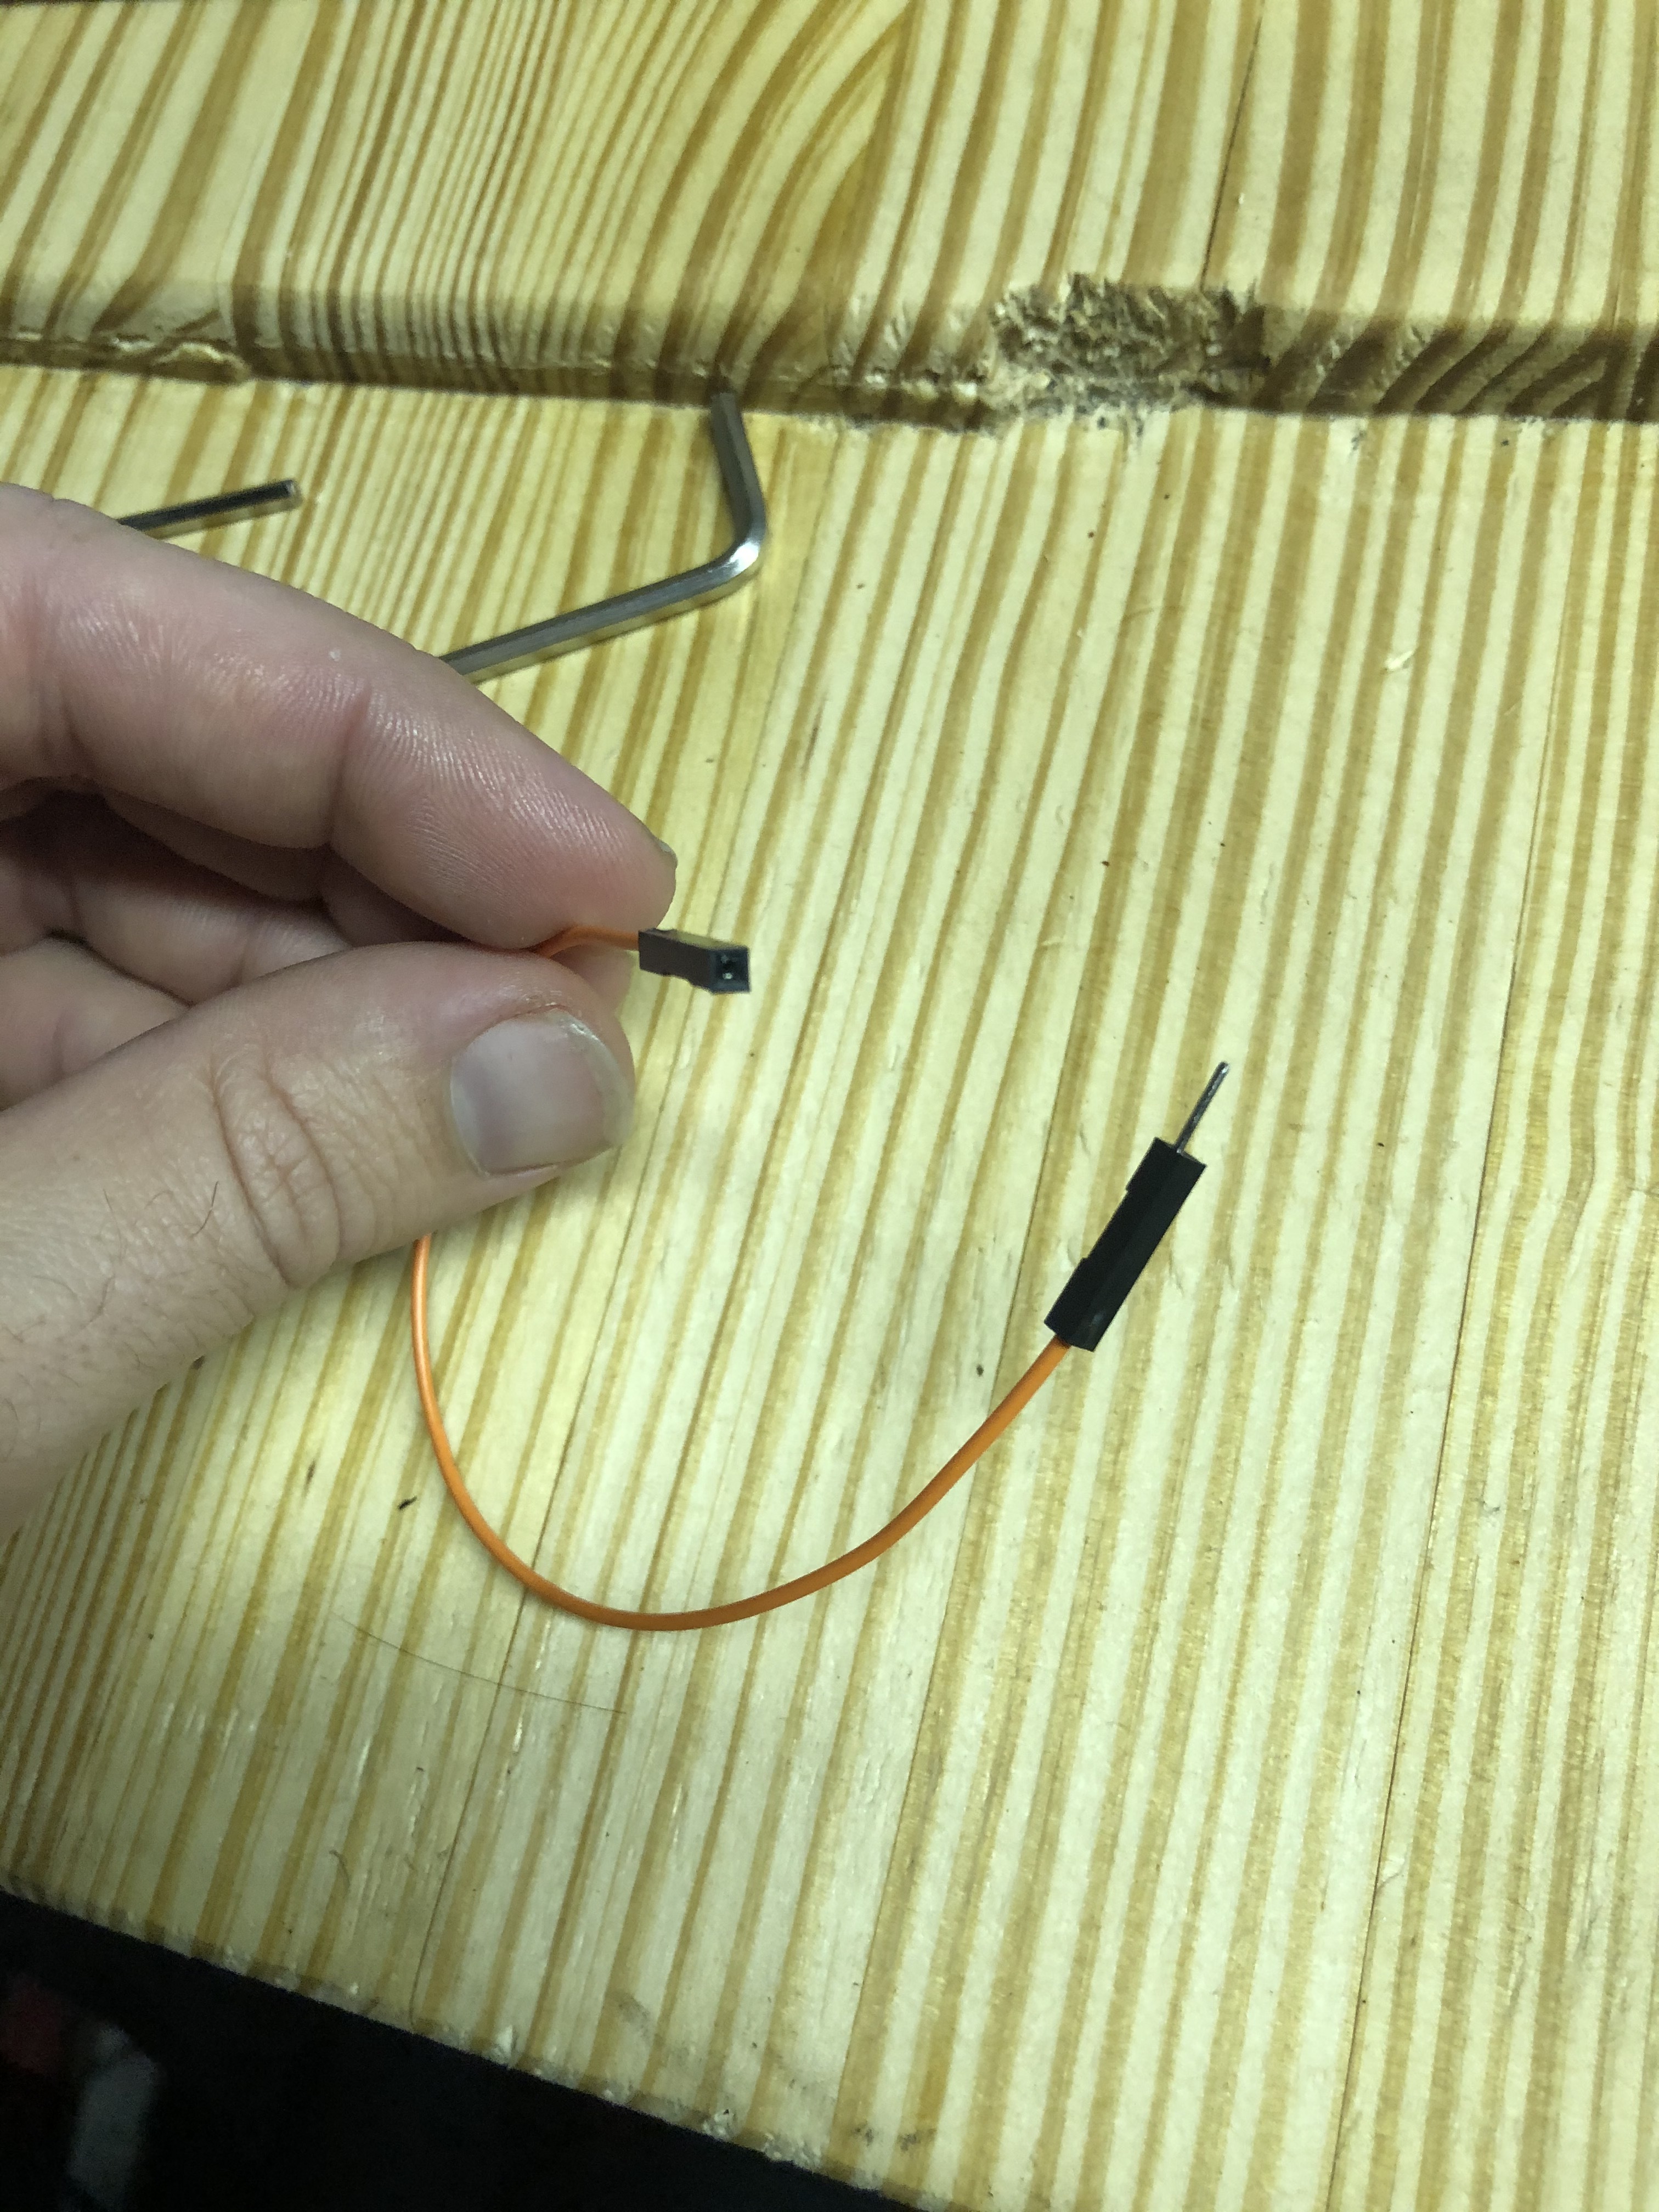
The only thing tricky about this that I learned from the forum is that stepper wiring color coding isn’t necessarily a standard so you have to look at the connection that the steppers come with to figure out which wires go where. My first try was bad, but once I figured out I needed to look at the connection they came with I was able to re-wire it correctly. I made this image to help.
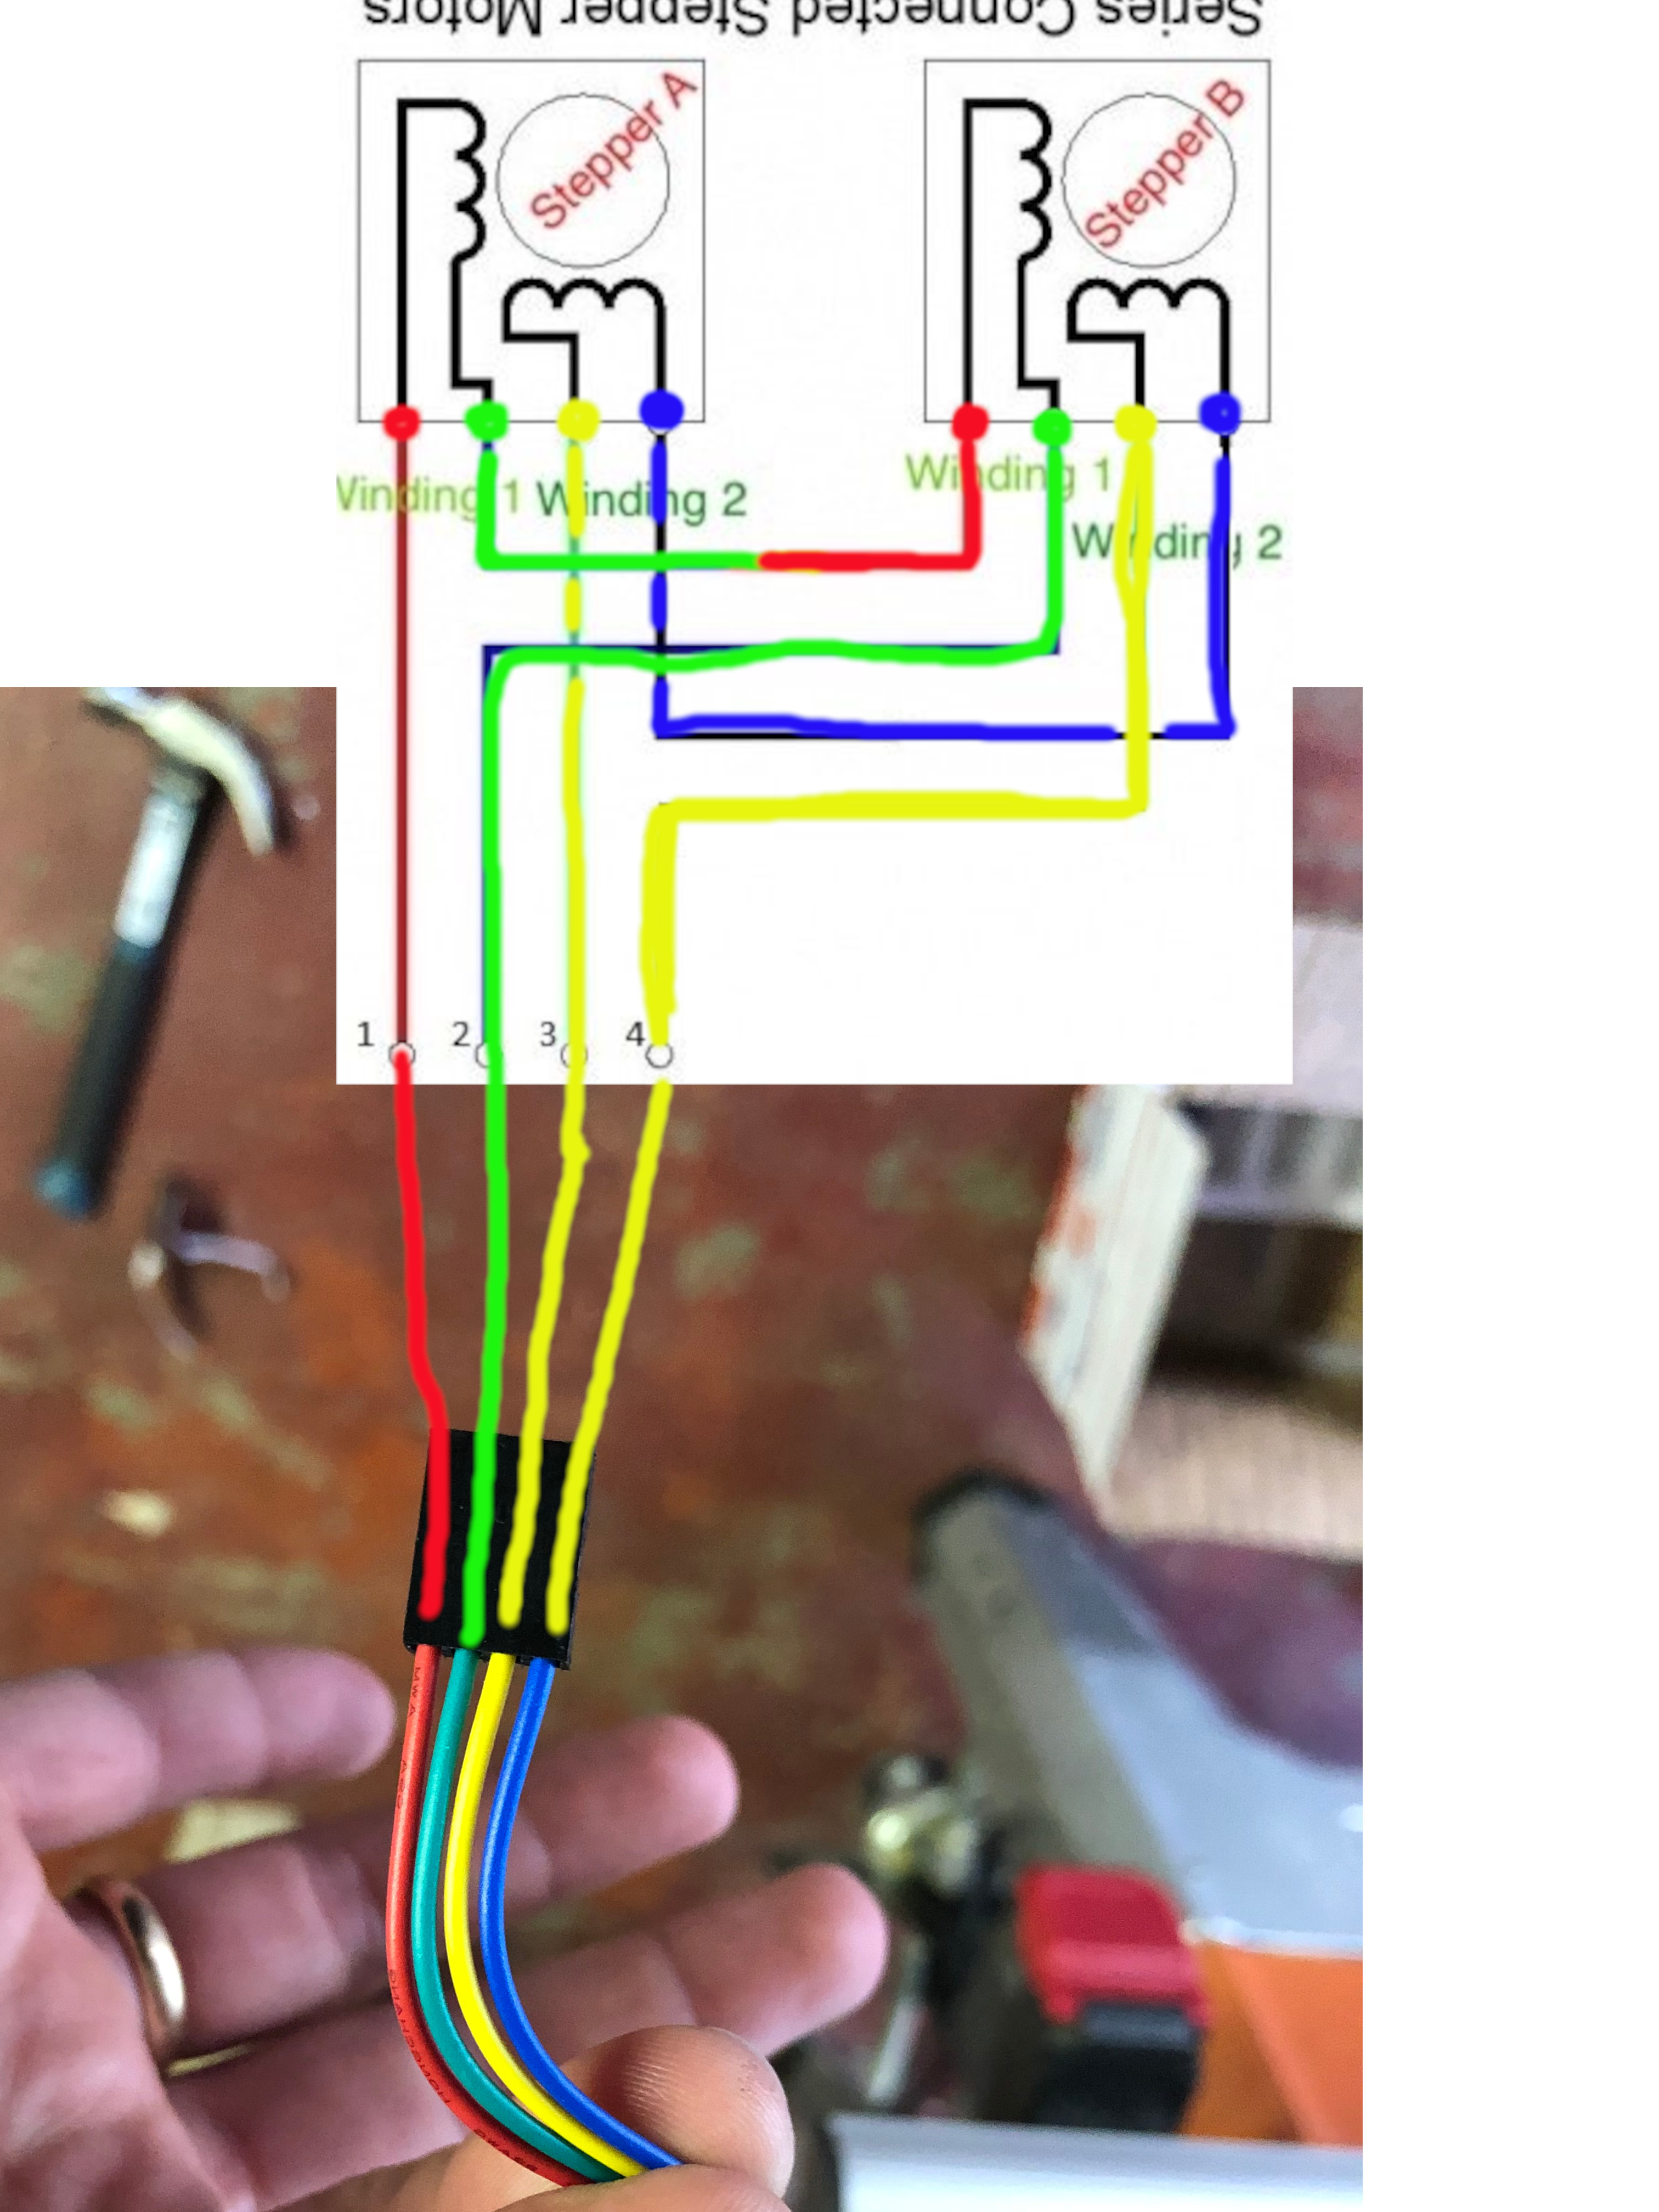
This is pretty clear on the site but for the record the motors on the same axis should spin in opposite directions. I.e. X1/X2 should spin CW/CCW.
One thing I found helpful was taking the motors off of the trucks to test them. It was a lot easier to see what was going on. If you leave them on the trucks and you have problems with motion you might incorrectly think your truck bearings are too tight, or there is a problem with your pully/idler assembly. Another thing is that I tested my motors before I taped up all of my splice connections with electrical tape. If you are testing your motors and your splice connections are open to the air make sure they aren’t touching each other or something metallic. I once thought my wiring was wrong and wasn’t working when really two of my splice connections happened to be touching each other and were shorting everything out.
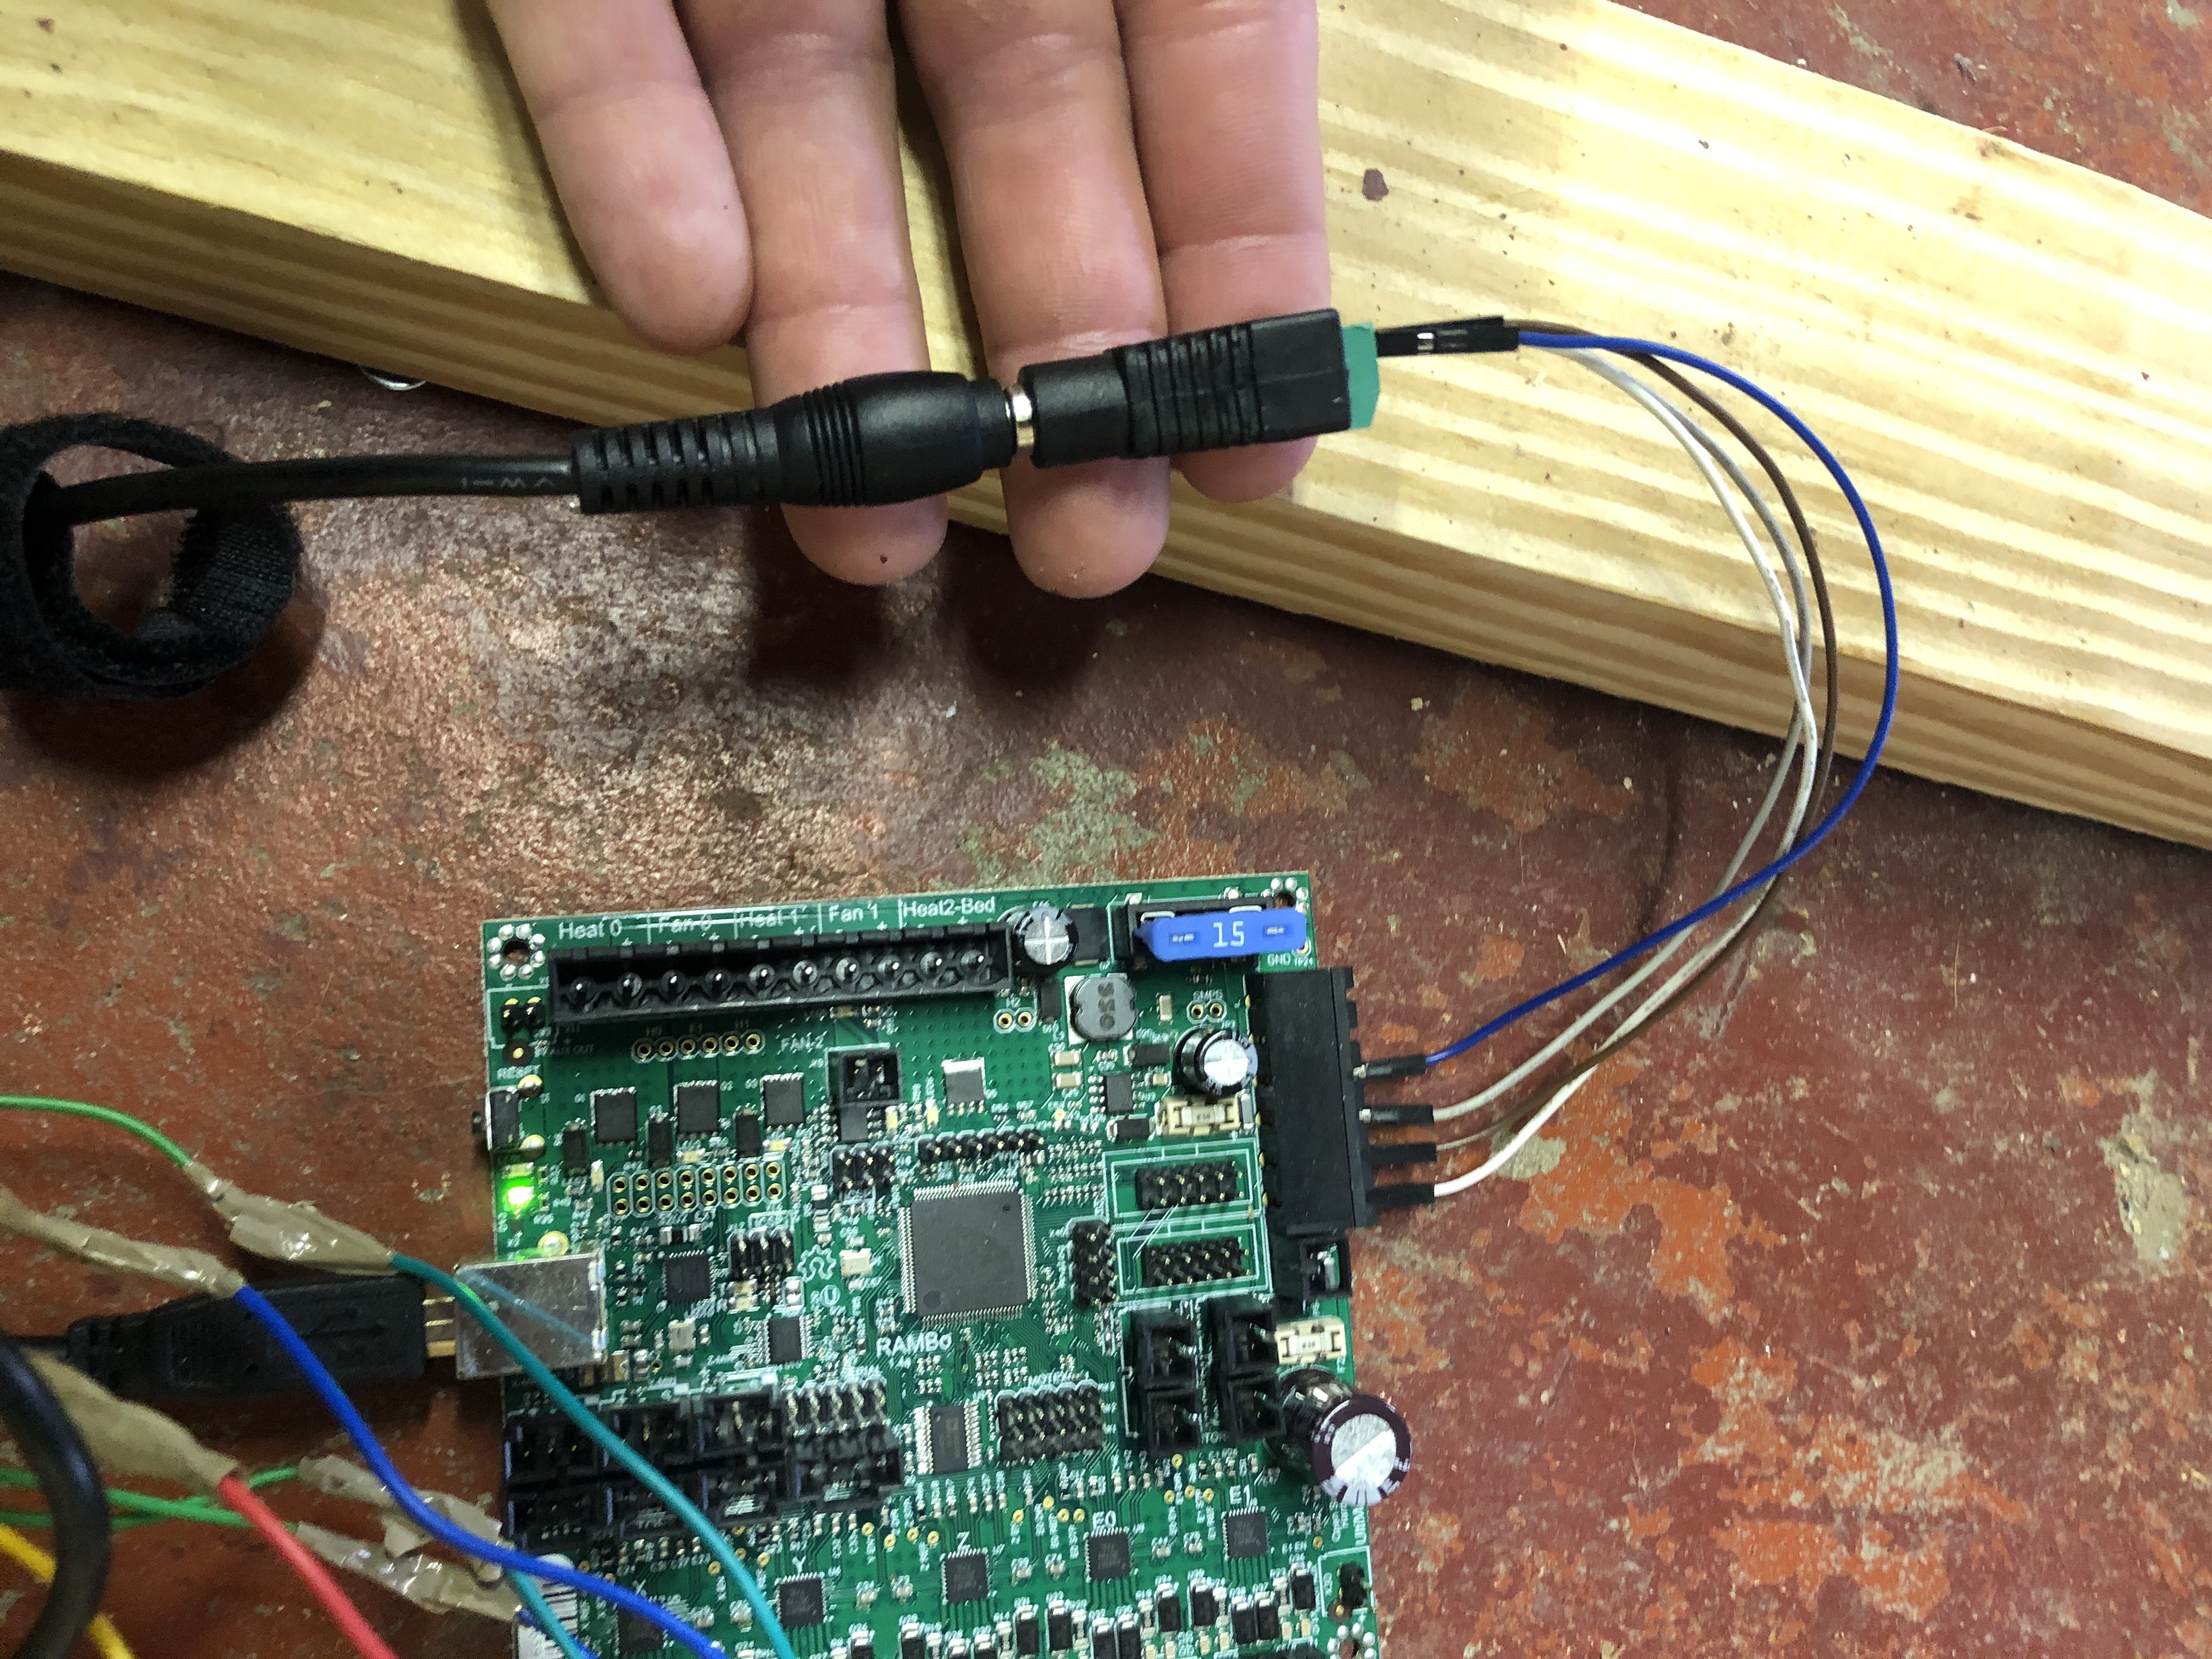
4. Powering the Rambo Board
This is specific to the Rambo board, but I did have a question about how exactly it was supposed to get power from the power supply. I found the answer on the forums but wanted to leave this here so more answers would come up in search. I bought my power supply from the V1 store and it had a cool barrel adapter that allowed me to just use some jumper cables to power it and have an easy quick disconnect.
This is the picture I found on the forums
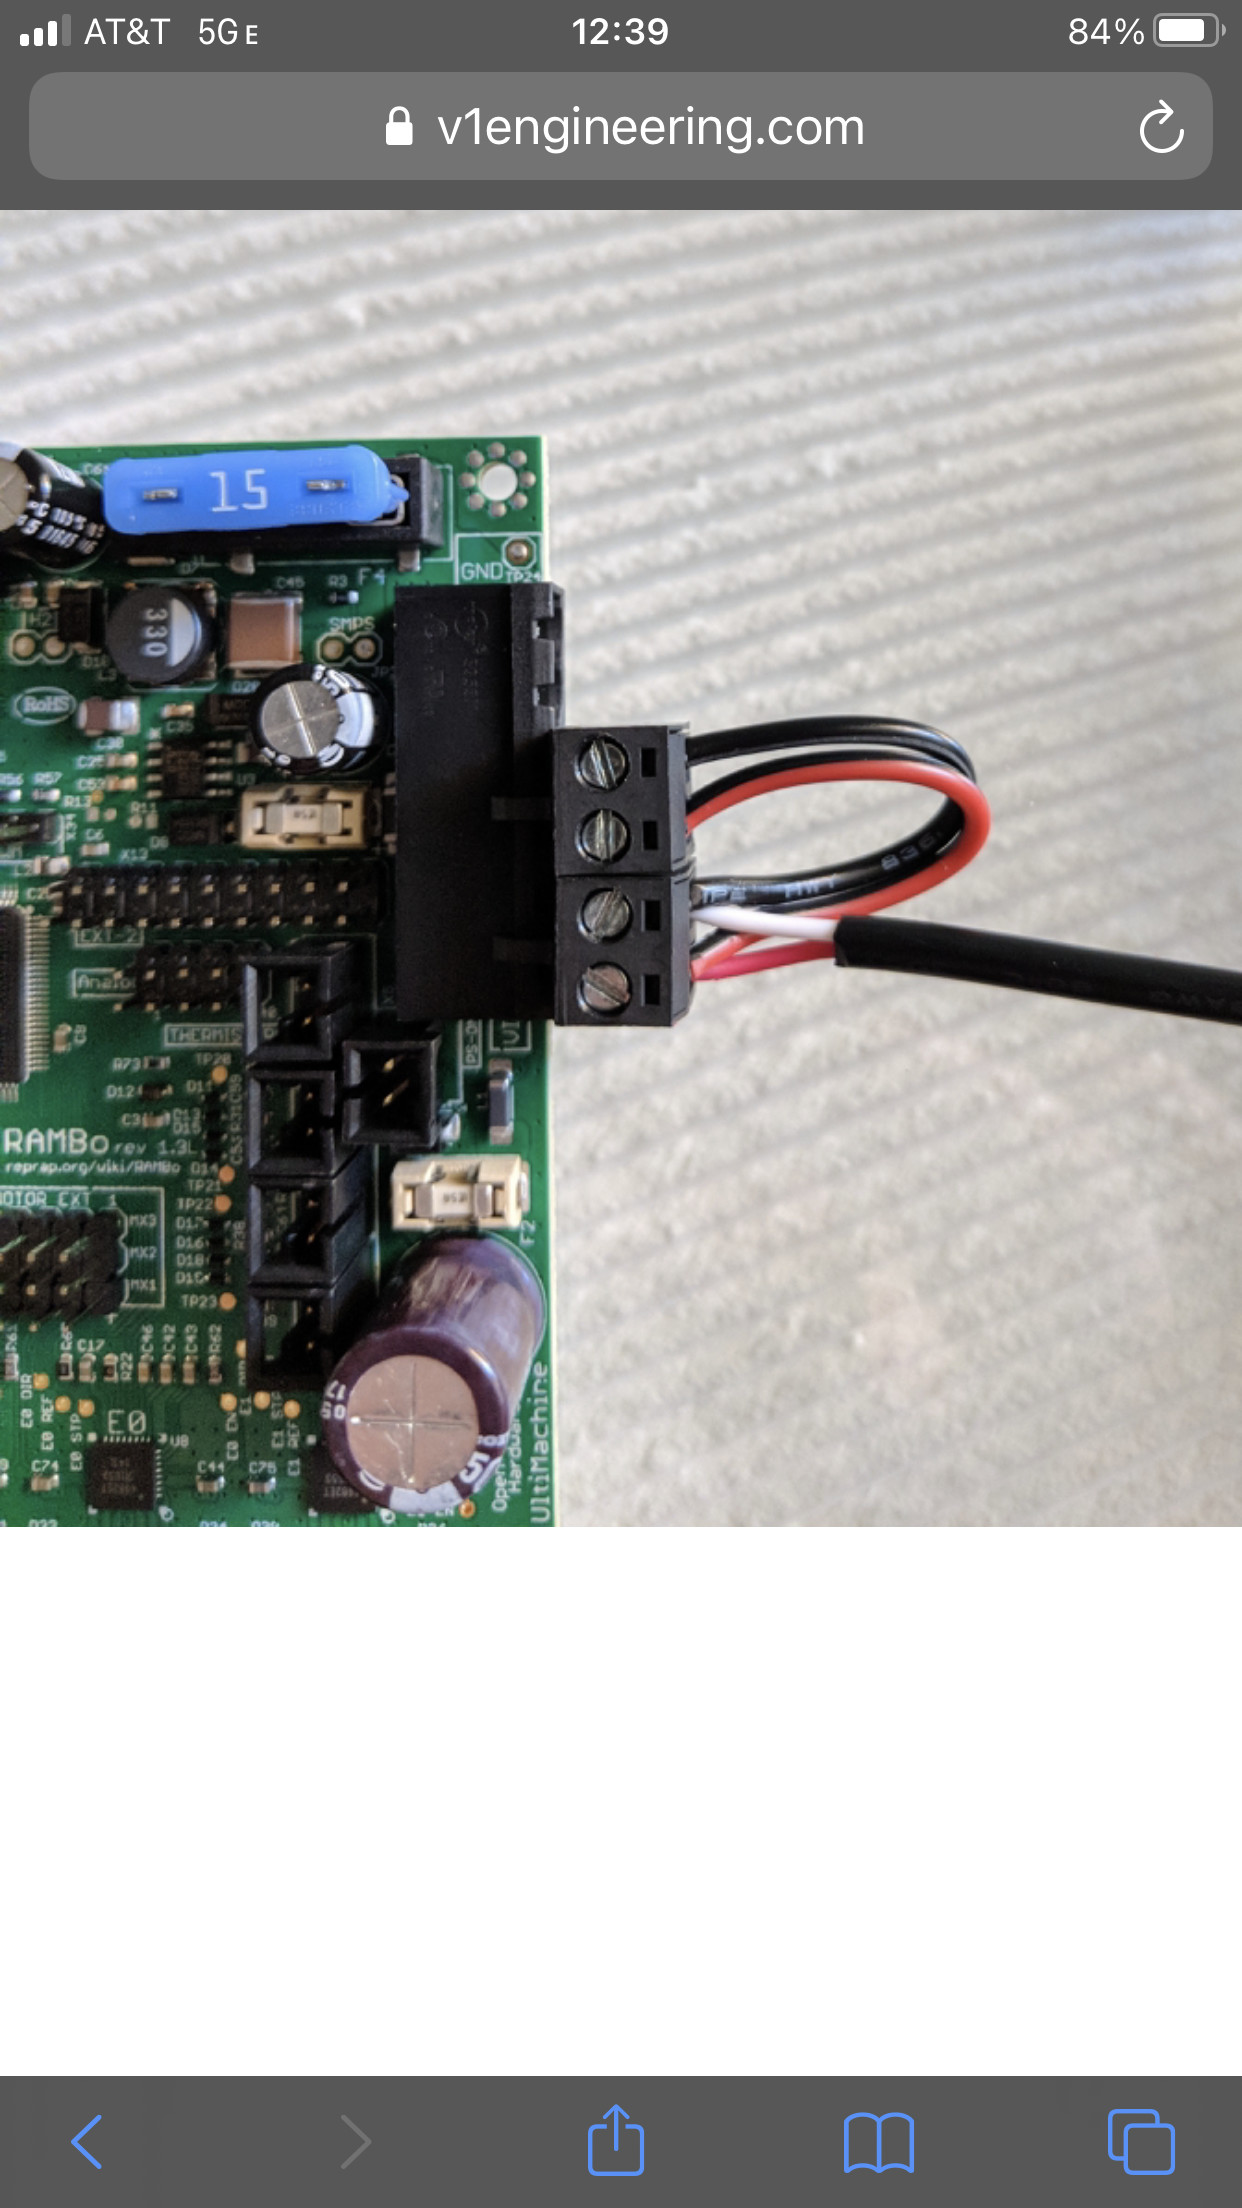
Pretty much explains it, but here are some more pictures I took to make it a little more clear.

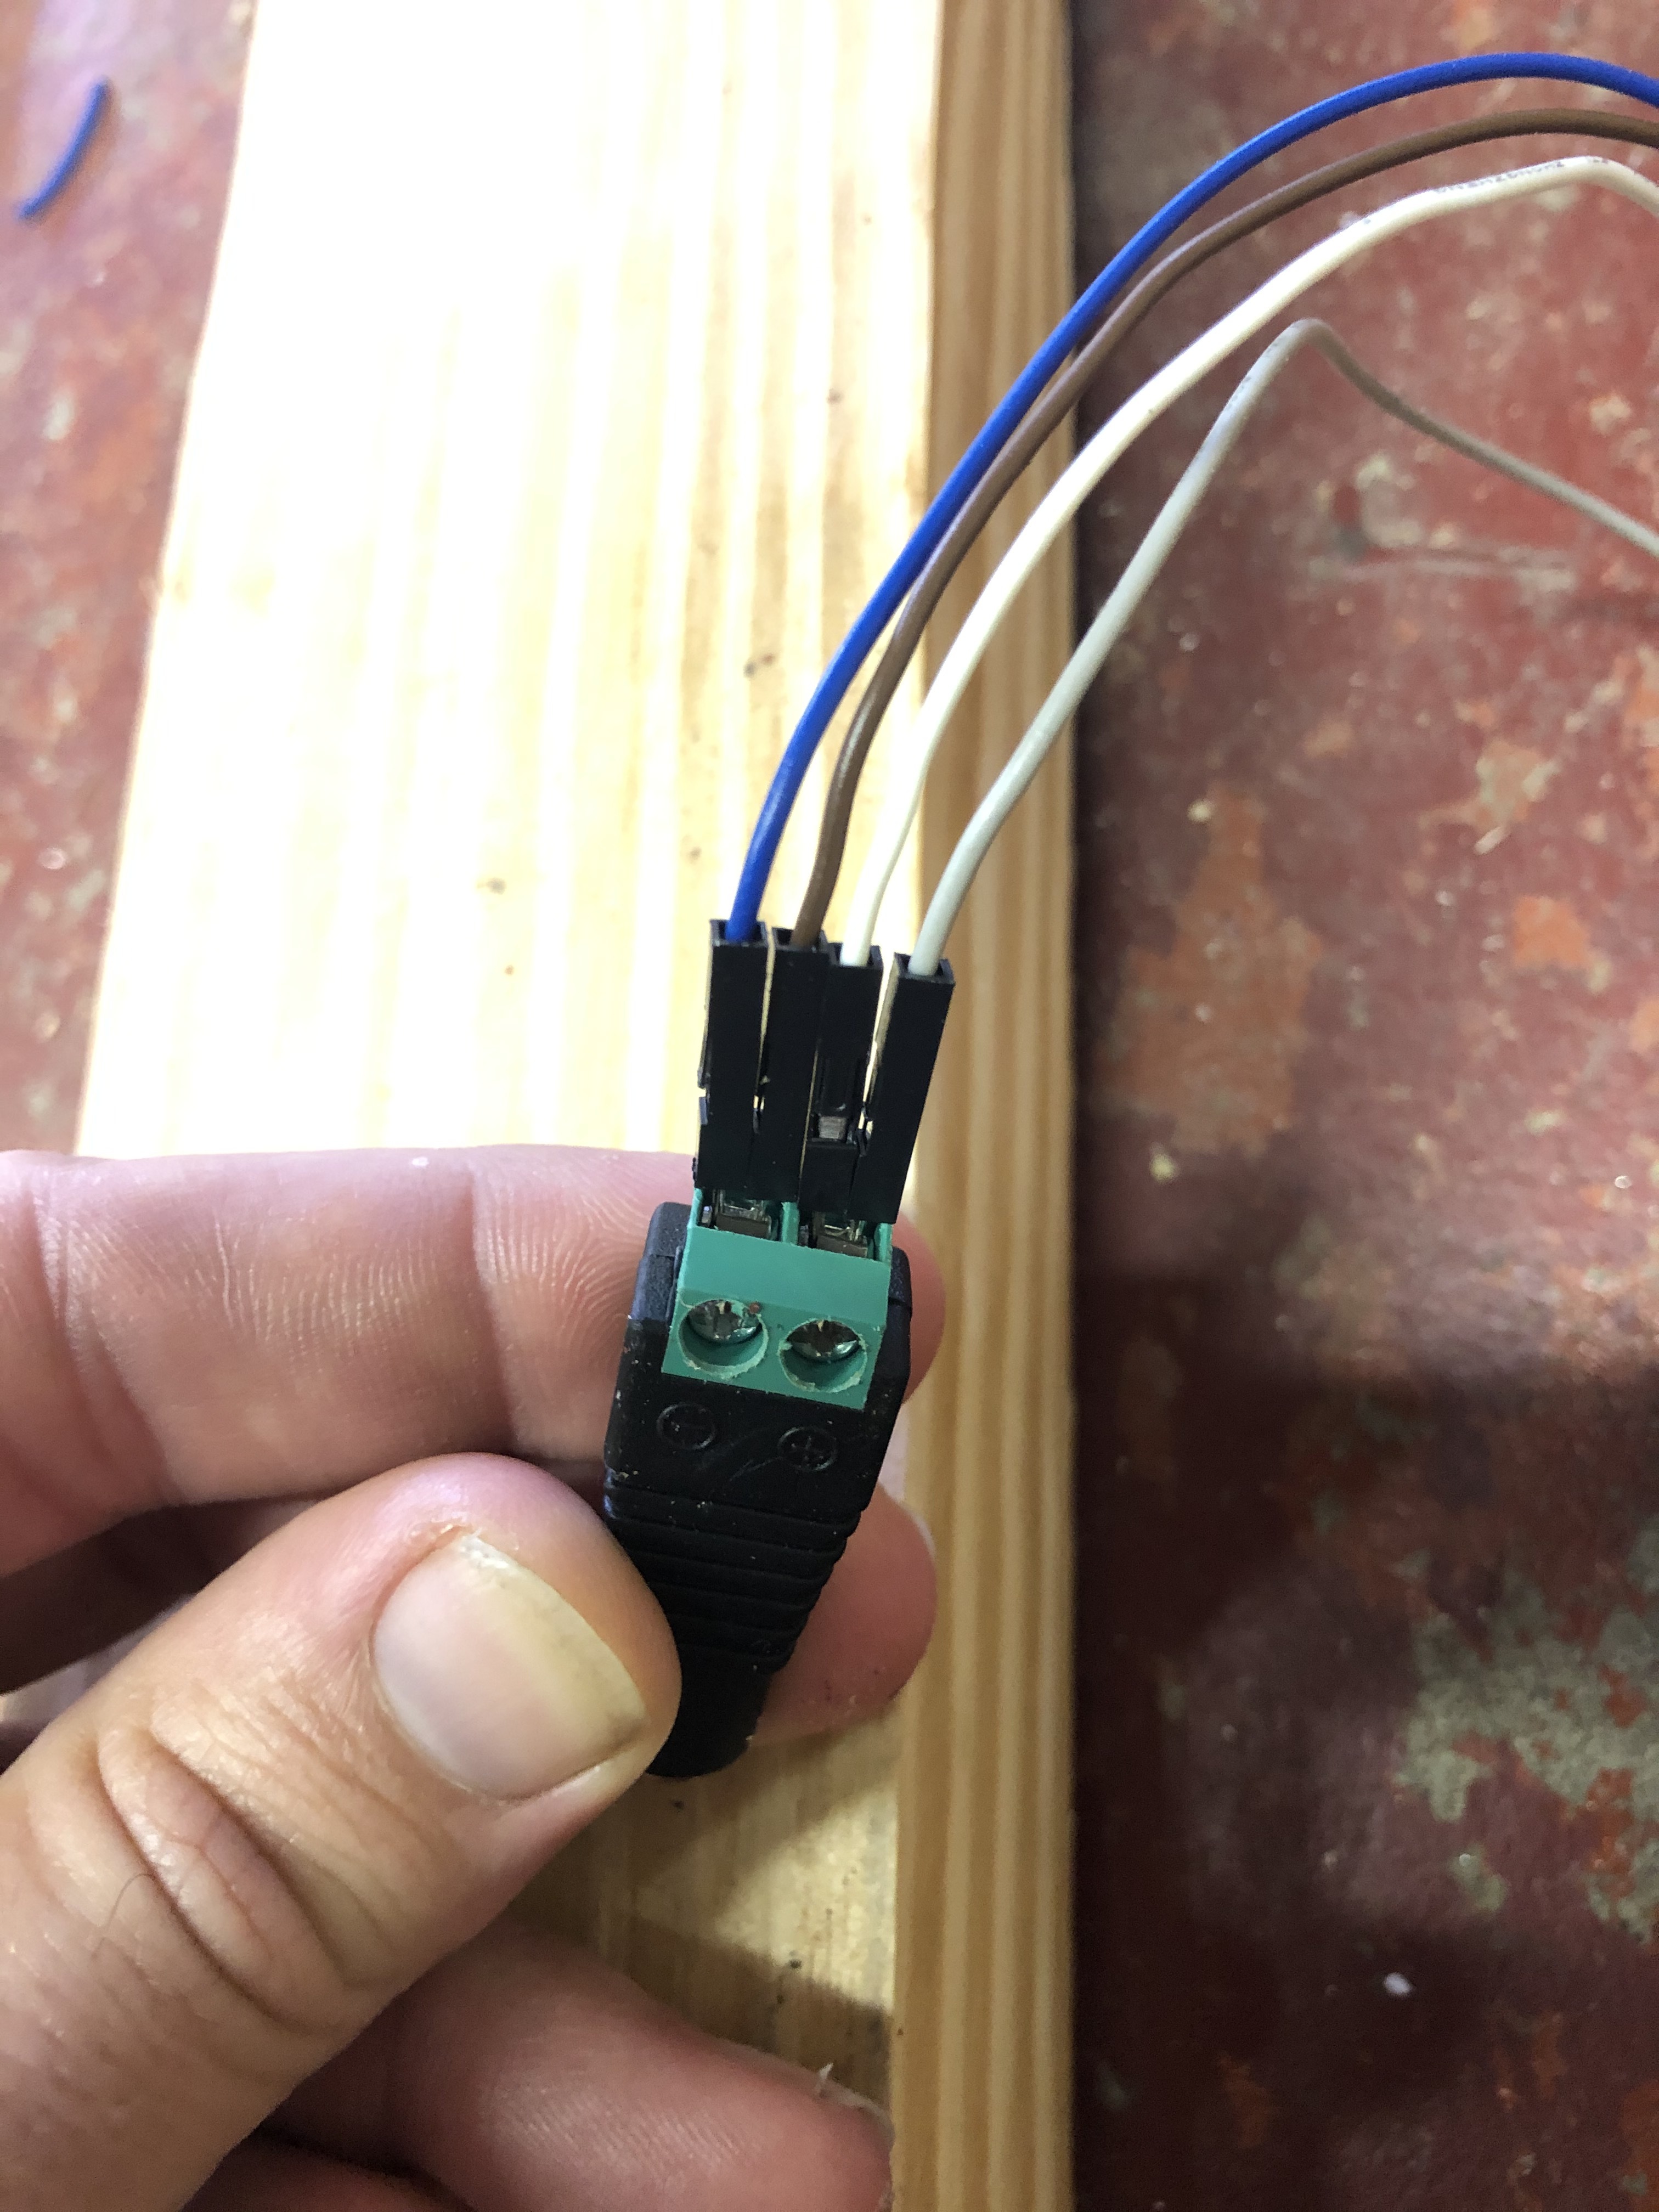
The colored cables are the negative ^
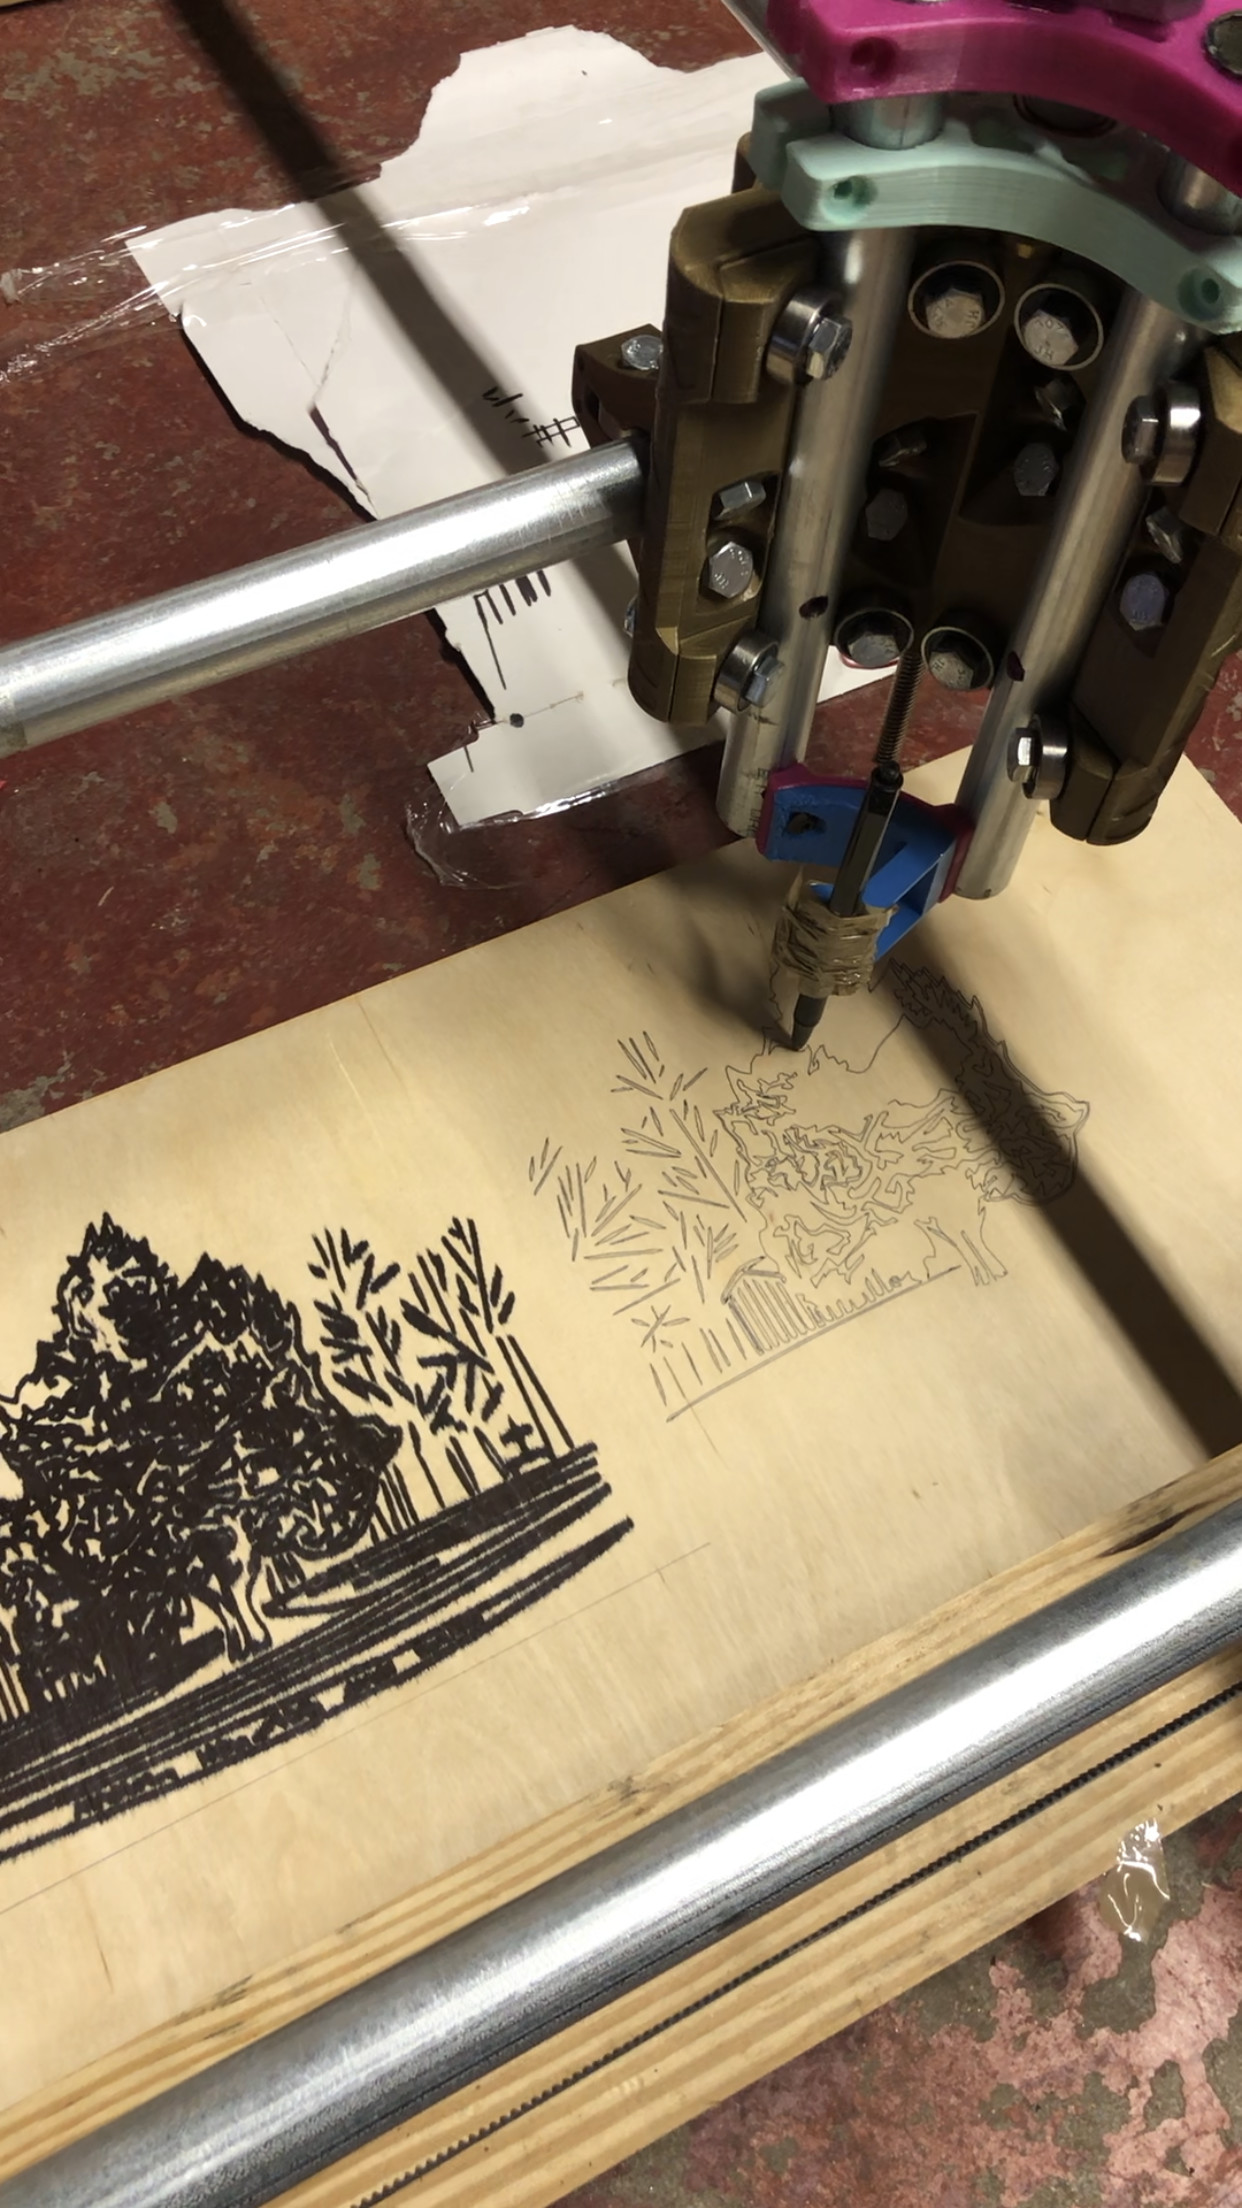
That is pretty much it. My end goal is to start making guitars with this so I might update when I get the router working. Thanks again to this community this build has been a very pleasurable experience.