
2 Likes
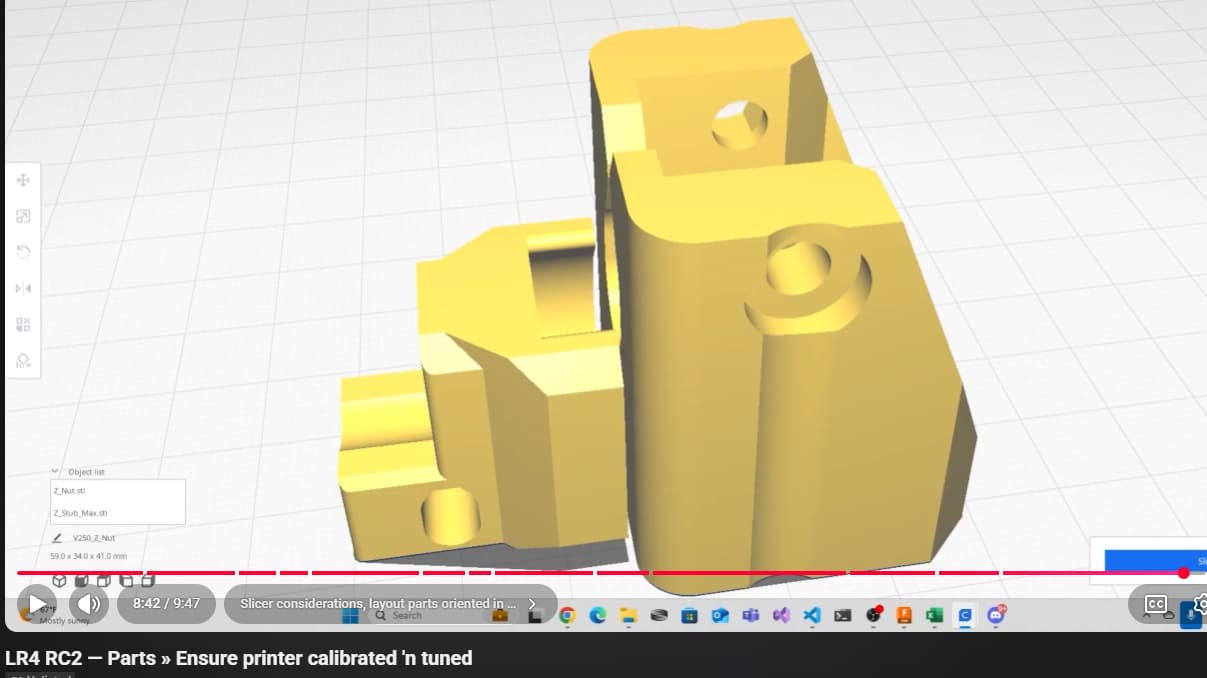
Cool! Minor thing, but consider laying out parts with mating faces to be oriented outwards to reduce risk of stringing artifacts interfering with fit. Still orientate same axis incase X and Y calibration is slightly off. For example…
1 Like
Will research. I just use the auto-orient feature in the slicer (Elegoo/Orca). Should I do otherwise?
2 Likes
As long as its not auto rotating them you should be good. Ryan specifically says in the docs to keep default orientation.

Intentional layout can help reduce clean-up needed, and, avoid ending up with an unhealthy collection of Z Stubs and Nuts.

Agree. I’m not using my best words today, kinda bummed out. Am suggesting how to layout parts in (default recommended orientation like docs and Jonathan says) positioned and rotated around the Z axis such that stringing artifacts on mating surfaces are minimized.
1 Like
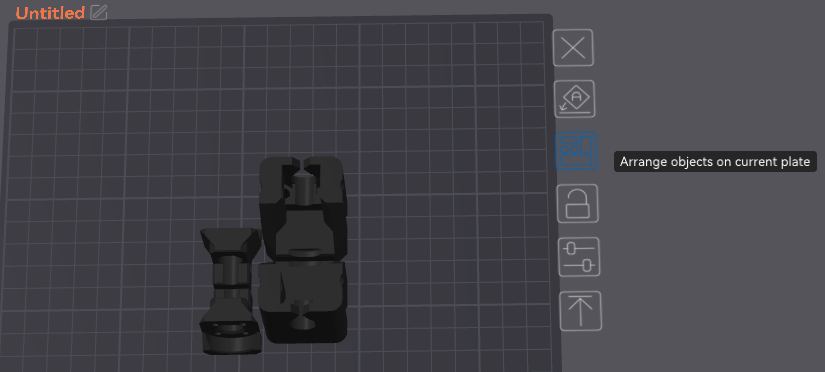
So then my question would be; do you recommend printing every part individually, one per plate? If not, how do I for instance add a z_nut, then clone it, while maintaining orientation? From what I understand, the only change in orientation the slicer software does is a horizontal rotation. It has never for instance rotated along the Z axis. I figured the slicer was optimizing the distance between objects for the printer…
1 Like
Not at all. I put several parts on a plate
Make sure Auto rotate for arrangement is not selected

If you don’t have Auto Rotate selected then you are correct ![]()
3 Likes
Ya got me with that image. Spent 30 seconds trying to get the video to play…
2 Likes
if this simply means what I assume, then my nuts slide pretty freely in and out of the stubs.. so far the highest quality print yet.
So, if my nuts and stubs are gucci, is there a suggested print order for getting the rest of the parts printing?
Not really. I just put like parts together on the plate and let it go. Just make sure you get the infill for the different parts correct.
Core and both YZ plates I would print by them selves
Braces just put as many as you can comfortably fit on the build plate. Don’t forget one normal brace and the max brace get printed with higher infill.
Noted. For the braces, the various sizes have to do with the rail OD size, yes? For standard EMT, this would be the 29.5 brace, correct? (I know it outlines here, just triple-checking) I likely have a lot of available options locally - is there a ‘best’ for rails?
1 Like
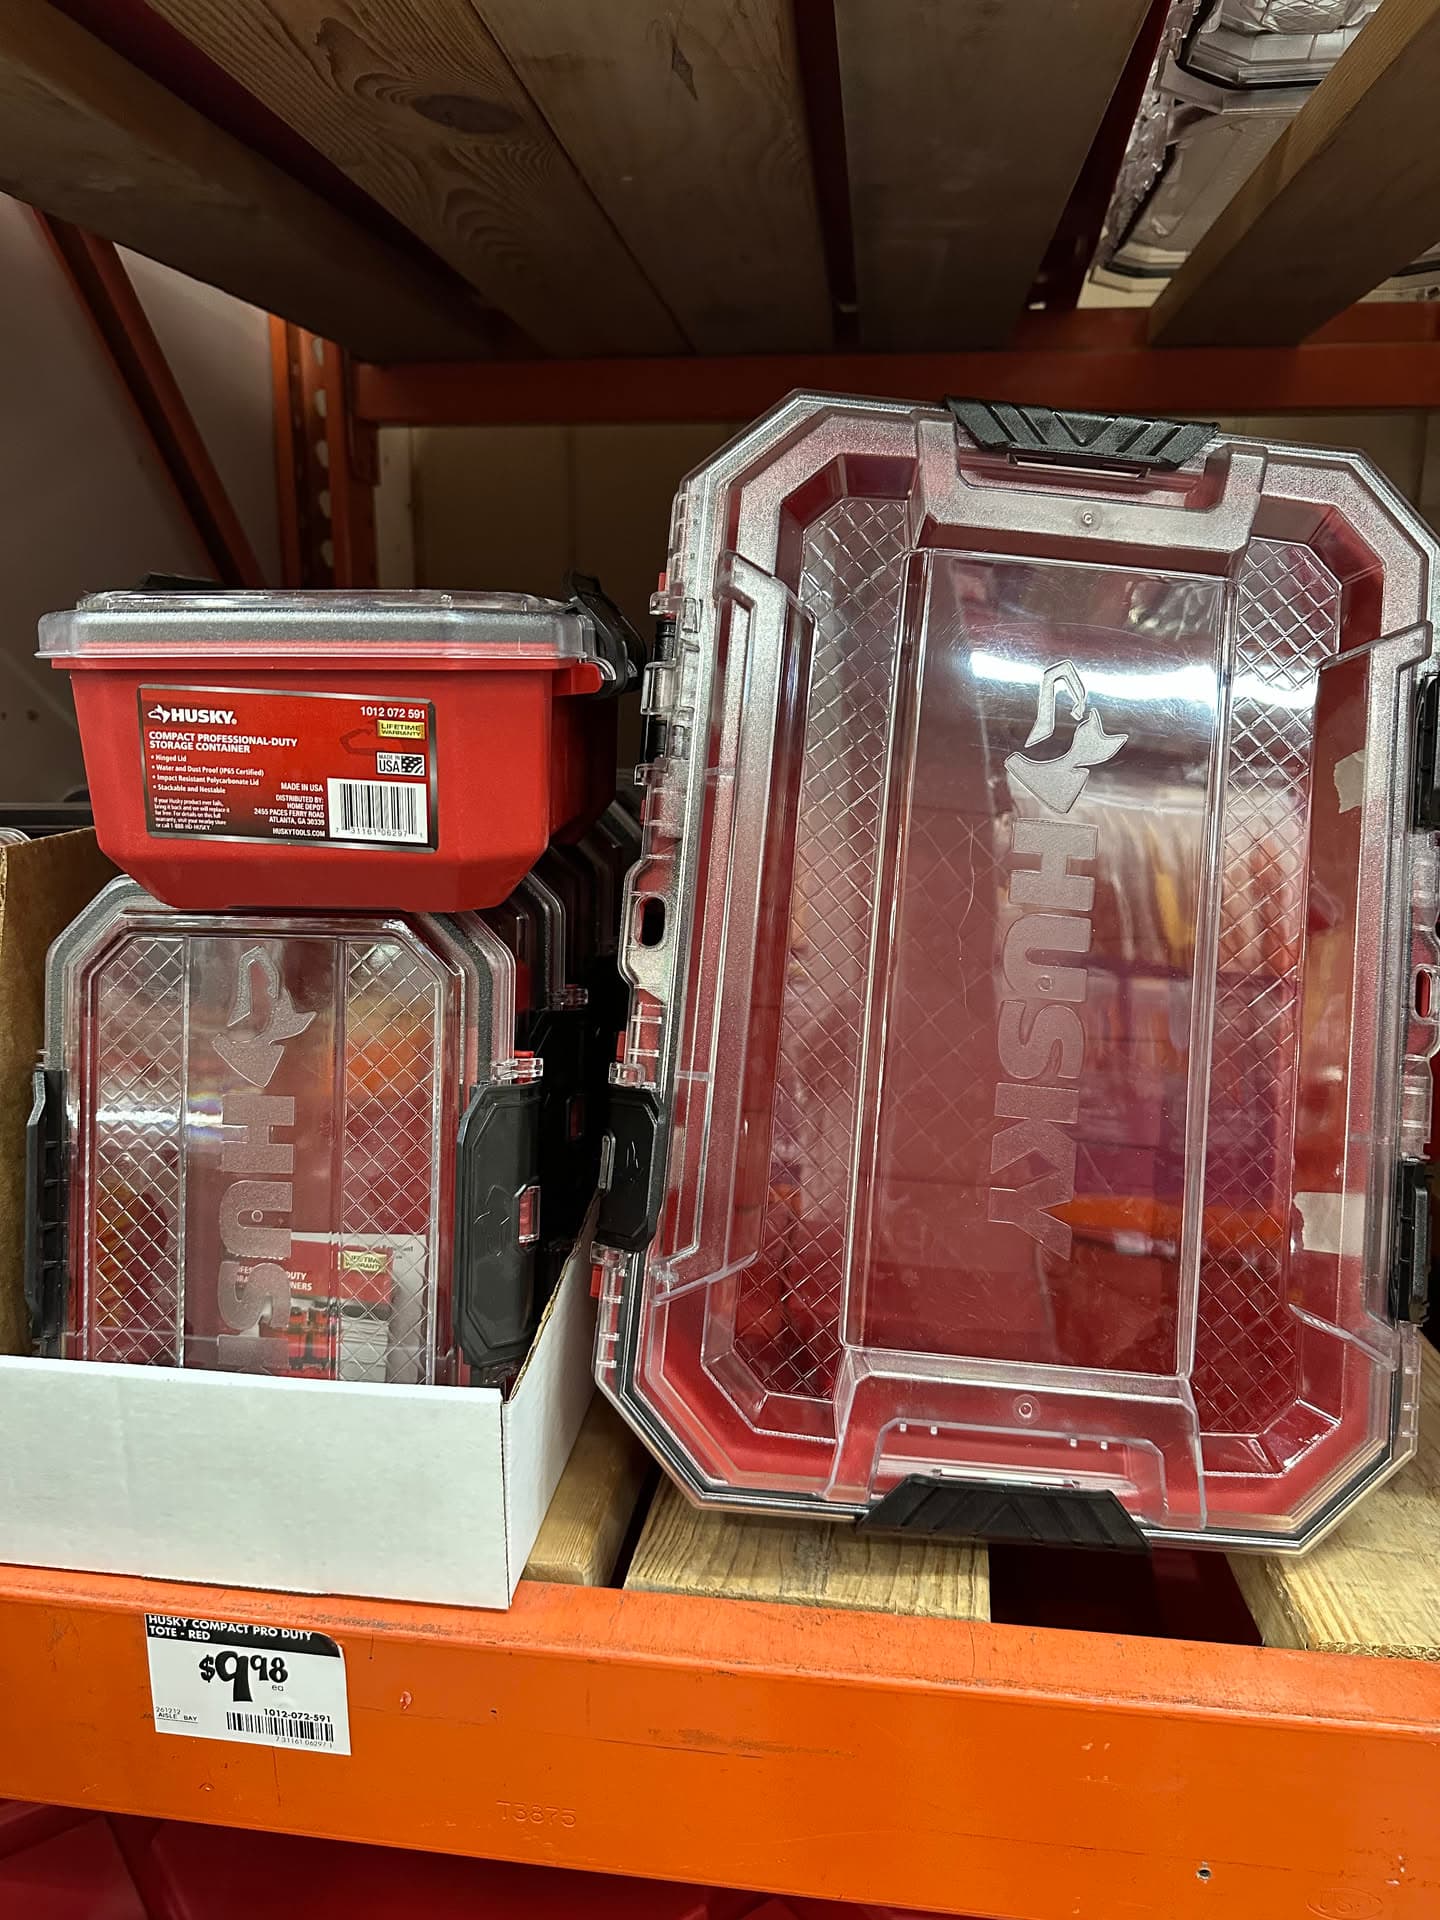
![]()
1" EMT. The other options are for International users that don’t have the option for EMT. $19.93 a stick yesterday at Home Depot. Depending on what size machine you are building you’ll need 1 or 2 sticks.
2 Likes
Same for the Y rail clips btw
1 Like
For the hygrometer holders, what kind of screw did you use?
M3x10 I believe. Might have been an 8
1 Like
Just had this delivered, so having fun assembling my first dry box. Thanks again for the recs!

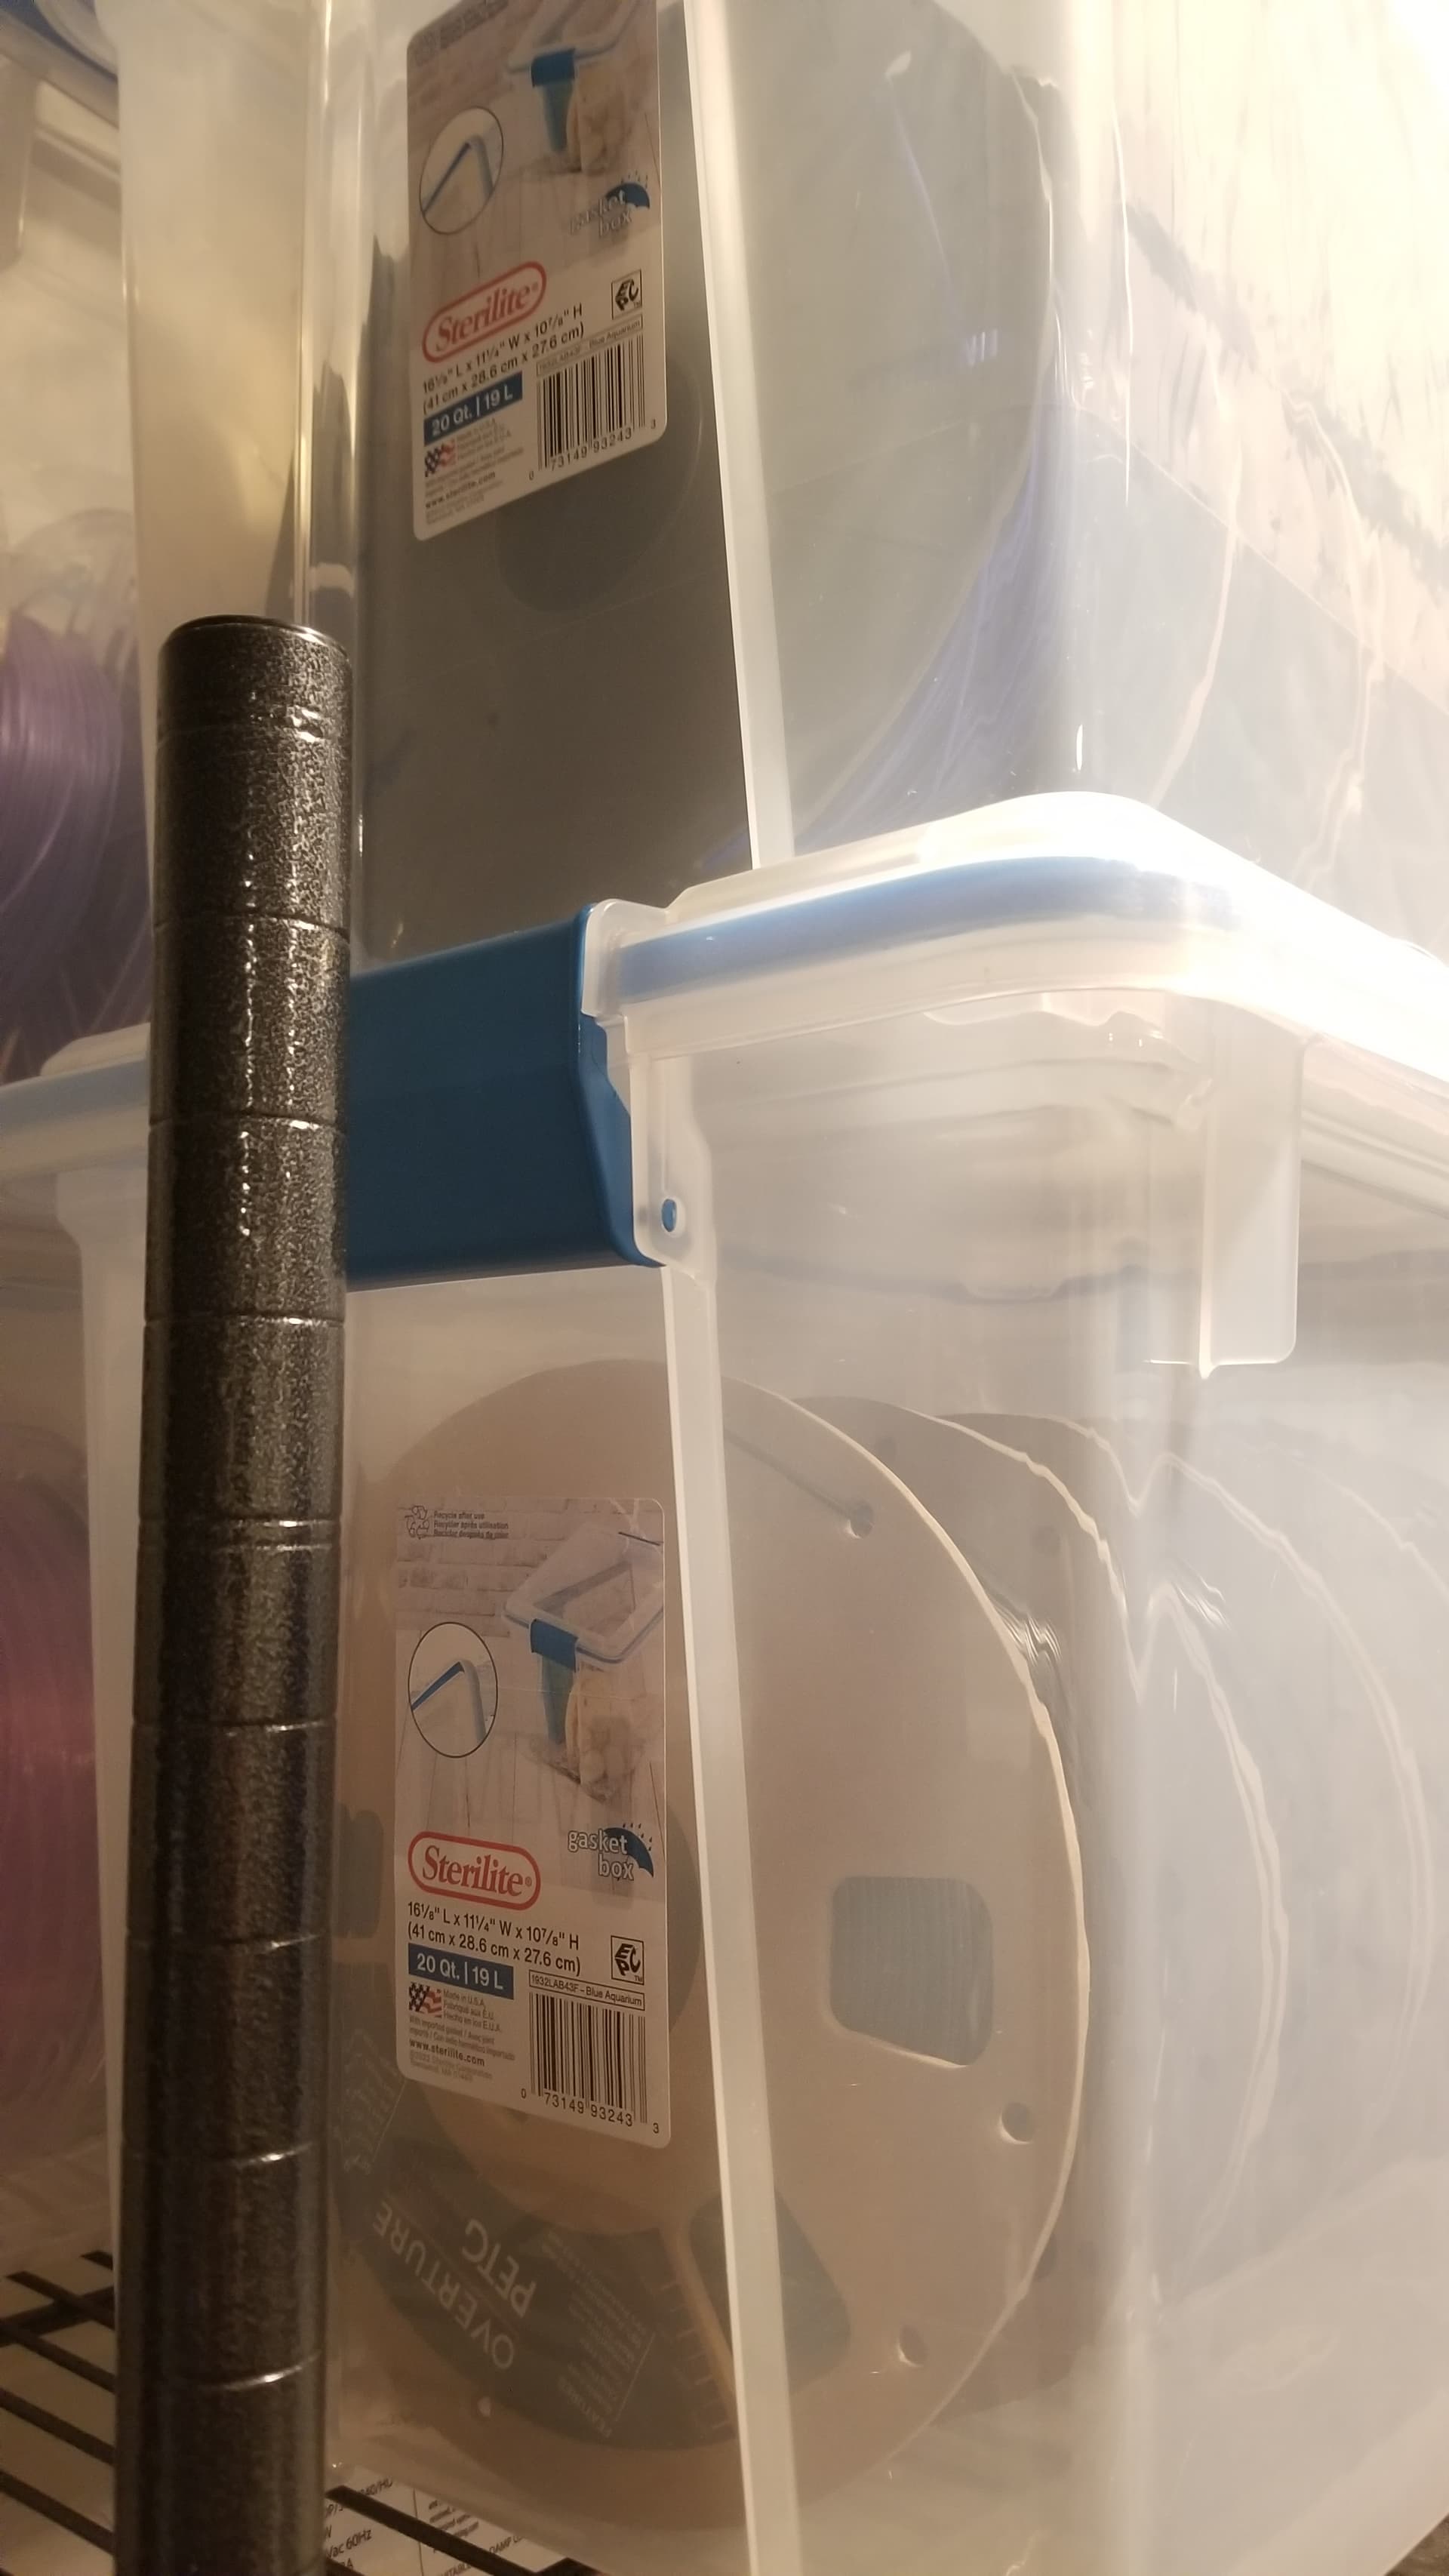
BTW, picked this up at the orange big-box. Turns out to be perfect for 4 spools. Looking into designing & printing rollers.


I also came by these - anyone seen these and considered/measured for spools?
3 Likes
Nice! Personally like the gasket boxes too, picked up from Walmart online for $7. Can fit 4 and a bit spools. I leave “Rechargeable” desiccant in containers with hydro sensitive filaments. They’re not vapor proof, so still useful to have a spool dehydrator.
1 Like
More deets? What containers do you use for your desiccant?
1 Like
I am waiting for the Prusa Drybox to replace some of my IKEA dryboxes, at least the 8 to go with the INDX. ![]()
1 Like