Post up a screen shot of your calilantern excel sheet if you don’t mind. Curious to see how far off it was.

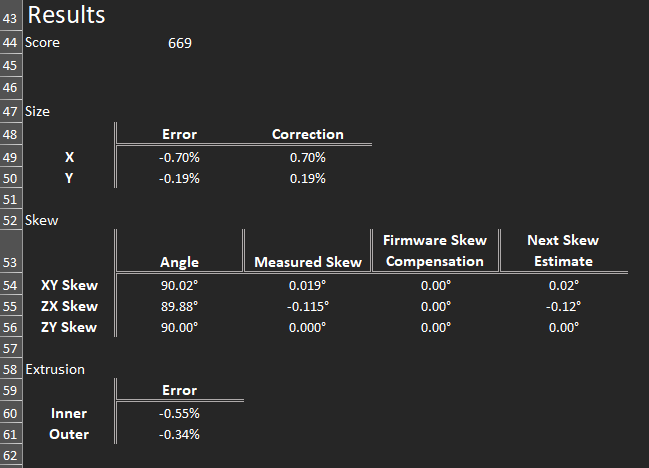
Not at all! And I have seen WAY worse than that before that’s for sure! I bet your next one is way better.
Don’t forget to get the numbers from the bottom of your printer.cfg and put in at the top of a new blank calilantern excel sheet so when you do the second measurements it knows what skew correction is already input.
No, we’re not about ridicule here. We’re about sharing and learning.
It’s OK here to say “I screwed this up.” or “My printer was really screwed up.”
We encourage that because then we can all learn together and we are better able to help each other.
 For sure! I asked because I we all get somewhat invested in helping here and like to see the results.
..it was really just my predisposition towards self-deprecating humor.
I just put in an order for some supplies, so should have at least one dry-box setup by next week.
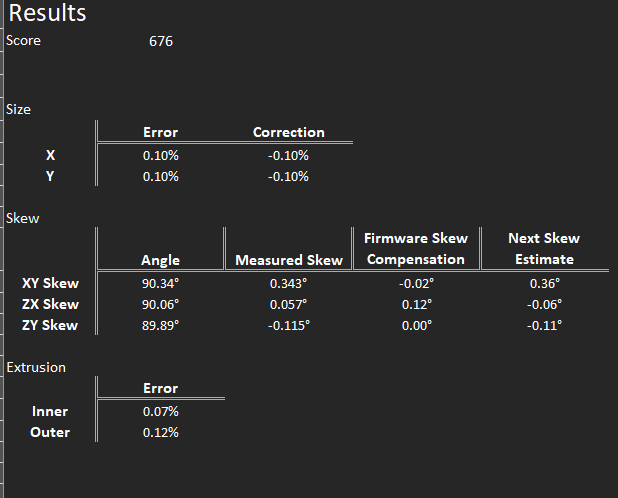
Yeah something isnt right there. You should have seen much more of an improvement. Instead it looks like the problem just moved
In your first test your YZ was perfect, now its out just as much as the XZ was in the first run.
Make sure that you were taking all your measurements from the correct spot on the print. And that you didn’t miss a - or something when you entered in what klipper had for the skew correction at the start of your second run
it’s possible there’s enough inaccuracy in my calipers, as well as the fact that I had to de-burr the base more than I thought would be necessary. Is it normal for a printer to add a thin ‘skirt’ around the base of a print, and if so should I configure it?
Here is some examples from a new printer I just ran this on so you can see exacly what I am doing with my numbers and all. Just to clear up anything I am explaining wrong 
Here are the results from my first run…
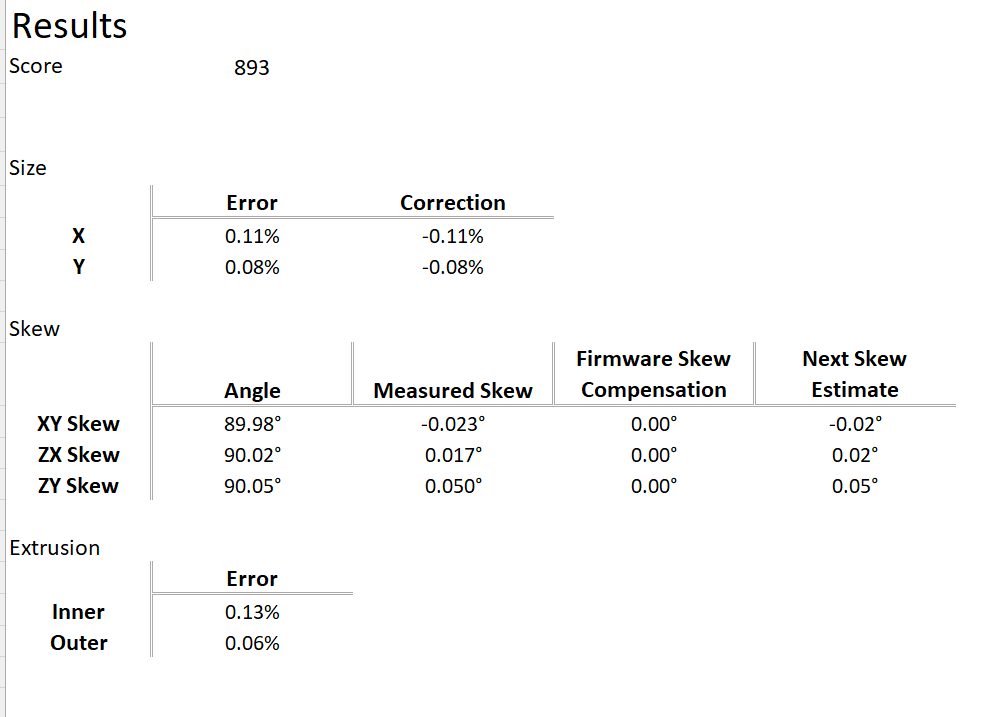
After getting the results done… I then enabled [skew_correction] in my printer.cfg
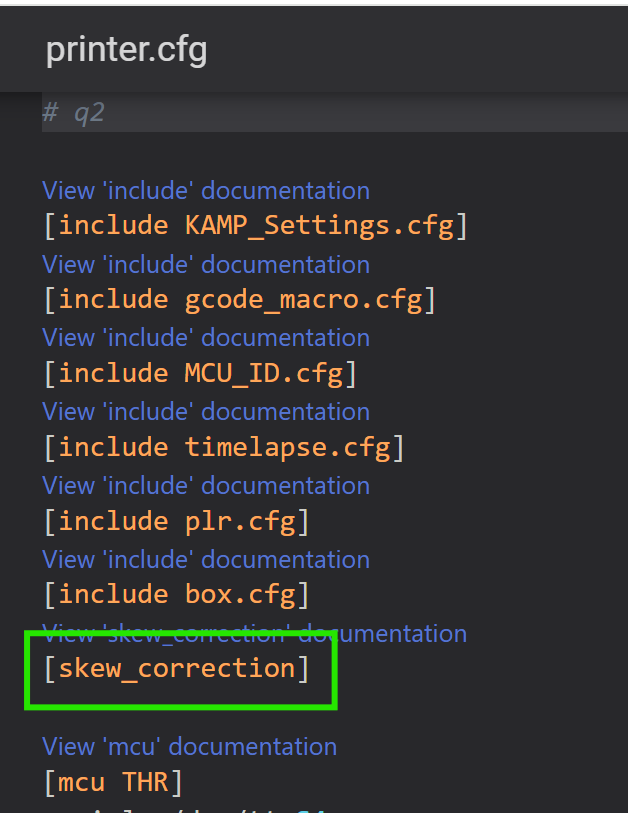
Restarted klipper…
Then I ran the code from the excel sheet…

Then I went to where my print_start macro is (yours may be in a different spot, usually either in the printer.cfg or in another macro file)
I put this at the very end of my PRINT_START macro…

And I put this at the end of my PRINT_END macro…
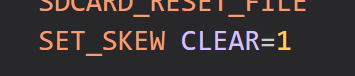
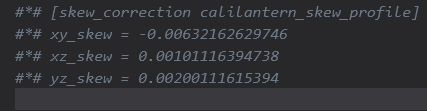
Also you can verify that all the skew info you put in the console worked by checking the very bottom of your printer.cfg file. You should see something like this, but your numbers will be different.
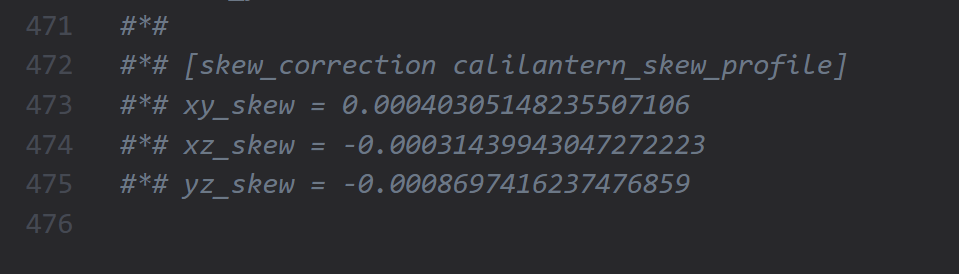
Ok you should have done all of that before you printed the second one. If you did then great your on the right track.
When you open up a fresh calilantern excell sheet at the very top is where you need to tell it what your skew correction is…
Should look like this when you open it fresh…
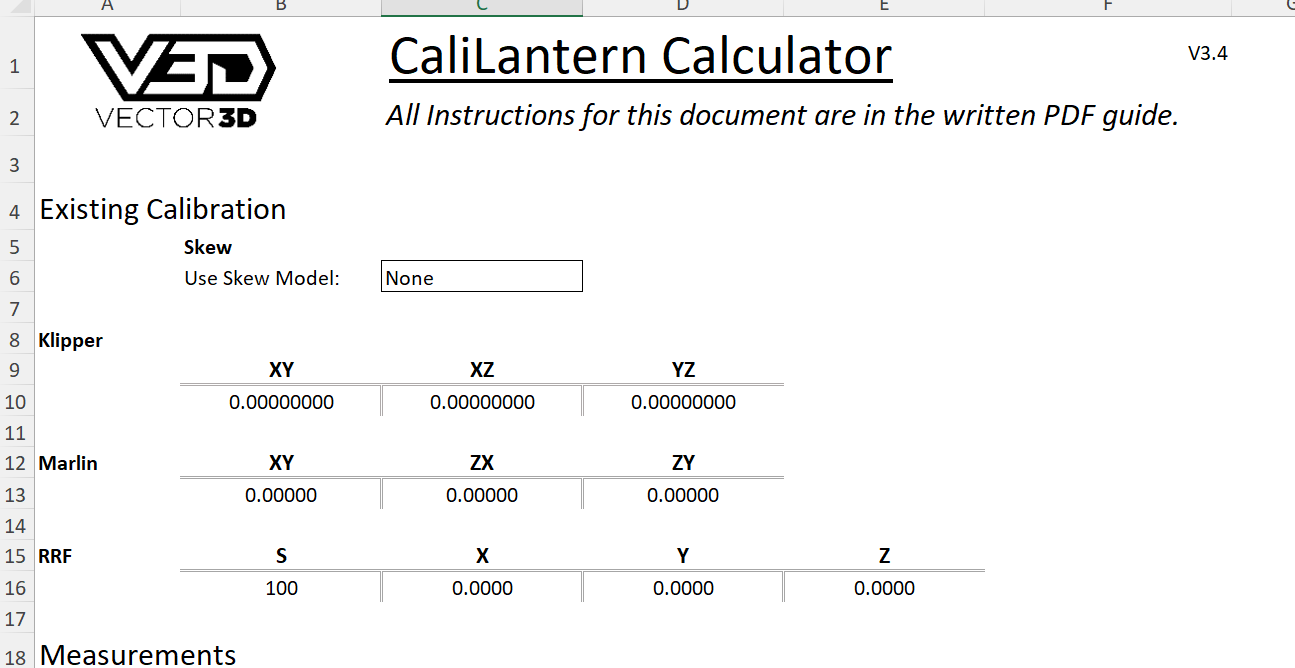
And like this after you put your info in…
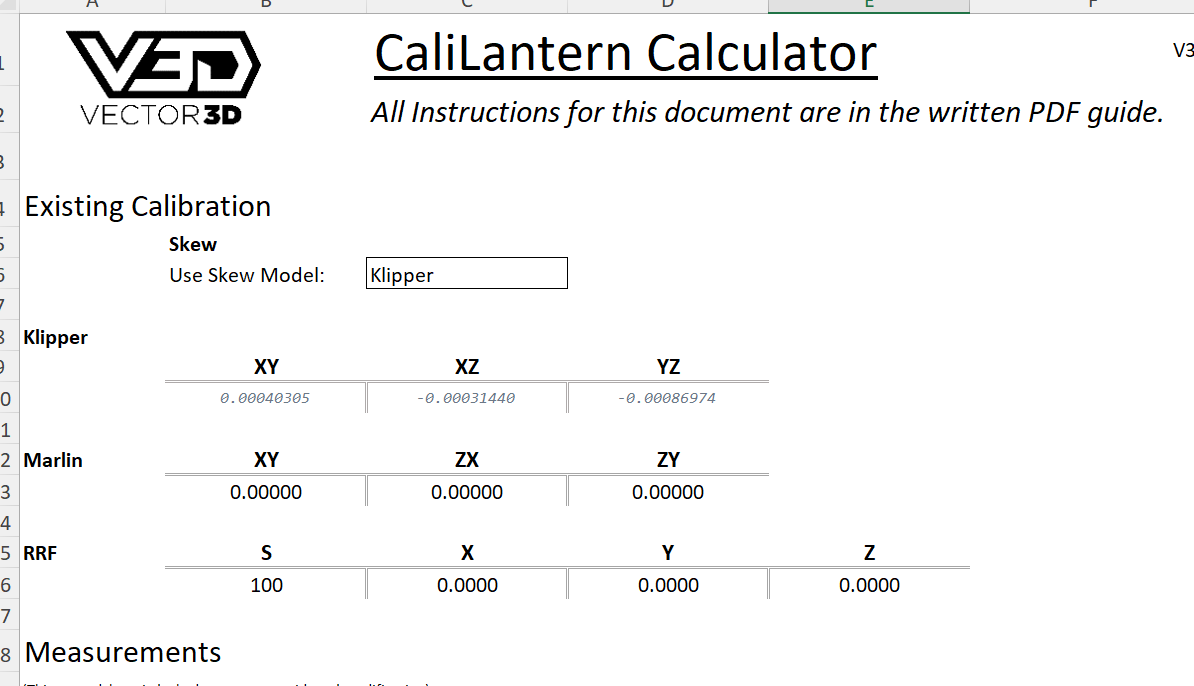
Then your measurements like you did the first time, again making sure you have your model orientated the correct way.
Then your numbers SHOULD be a lot better.
This could be an issue. Depending on how and where you deburred. It could throw the measurements off
Well, I definitely went through all that, as outlined in the PDF that comes with the stl. And just for context, I’m a software engineer, so mucking about in config files is kinda second nature… I’ll likely go through another iteration of print and measure, maybe come up with something closer to a passing grade. I do think I need to dry my filament out even more - I had it heating on the bed for about 4 hours today before reprinting the lantern.
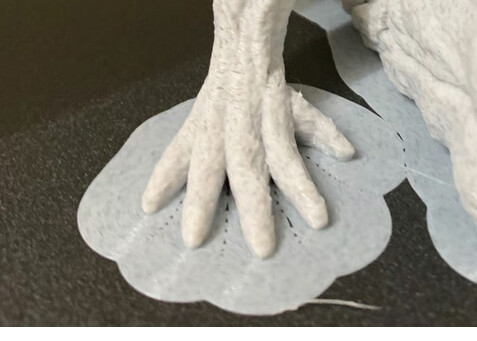
Is there a way to, if appropriate, turn off the base-layer ‘skirting’?
(ETA: I also don’t have anything like a proper deburring tool, just the back side of a knife blade)
I wasnt trying to make it come across like you didnt know what you were doing. I was more putting that there to help others that come along.
In other settings, turn brim to off. Assuming that is what you are talking about. Do you have a pic?
No absolutely, 100%. I think the more you enforce the essentials to newbs, the fewer of them will make rookie mistakes like I did. I was merely providing context.
I doubt you took off any of the actual print to matter doing that. If it was in fact a brim then you should be good
I’m really hoping you just some how got the model turned and your measurements are 90° off 
wait…
Yep that’s a brim. Turn that off. You shouldn’t need it for any V1 print I wouldn’t think.