Screwup on my part lobotomized the ESP32 and lost FluidNC while attempting to switch my one year old MPCNC mill to a laser, doing my first attempt at a change to my config.sys.
Using a USB to Serial to USB link the Installer connected and loaded and advised there was no FluidNC. Clicked on Fresh Install, no extra options (default to webUI-2 I believe.)
When received ‘Bootloader not active’ the first couple of times I found the button and tried again. New message “Error! Was not able to flash device. Failed to connect with device.” Aside from going manual, any further suggestions at this point. I have not pulled the ESP32 yet…
Looked at attempting to go ‘manual’ but not seeing ‘…instructions above’ referenced in the Jackpot documentation.
Made my way to Github/FluidNC but don’t know how to download from there, nor how to install whatever file I get. Do I need to sign in to Github to retrieve a file? Having said that I did find the green <>Code button with a drop down allowing a download. I downloaded the entire zip FluidNC zipped folder.
Now what… really green here. Help please?!
Thanks,
Cleve
Hi, thx for replying. Yes, used those instructions exactly…except didnt see/follow the purple box update link, which does have more detail in it. I’ll give it a go. Thanks
When I get a tough to handle ESP-32, I follow this set of steps:
Pull the ESP-32 dev board from the Jackpot.
Plug the ESP-32 into your computer over USB.
Using the native tools (.bat files on Windows or .sh files on *X systems) you’ll do the following:
Run erase (erase.bat, or erase.sh)
Run install-wifi
Run install-fs
Unplug and re-plug the ESP-32 to your USB. See if it comes up.
From there, you would follow the normal process.
Pay careful attention to orientation when re-installing it; the USB cable connector goes to the edge of the jackpot.
If this doesn’t work, we’ll need to see output cut/pasted from the terminal window so we can help diagnose it.
It may be necessary to use the button combo with this, as you’ve already seen.
Ok, after heading down the manual install read where Windows 11 could be a problem. Broke out the Windows 10 and finally got Fluid Installer talking with the ESP32 after removing it from the Jackpot.
Now get as far as ‘Restarting’ 'Waiting for controller to restart… with the arrow going round and round.
If I leave the window, reconnect and bring up the Terminal window to hit Restart that doest work. I’ve tried Ctrl+R during the Restarting wait and it just drops out.
Thanks Jim. You may see my post having moved forward just a bit with Windows 10 and the Installer, but if I can get no joy getting past the Restarting screen, your reply will be really helpful. Thanks.
Thanks for your interest in my specific problem Ryan. Still a deer in the headlights here but trying. I don’t think the installer is a problem. I’ve switched to attempting the bat files and after thinking I made progress swithed to window 11, and of course that sent me backwards.
Now in Windows 10, couble clicked the erase.bat file and received the following:en
Now even further outside my wheelhouse. Your thoughts please?
win64\esptool.exe --chip esp32 --baud 921600 dump_mem 0x3ff5a018 4 SecurityFuses.bin
esptool.py v3.1
Found 2 serial ports
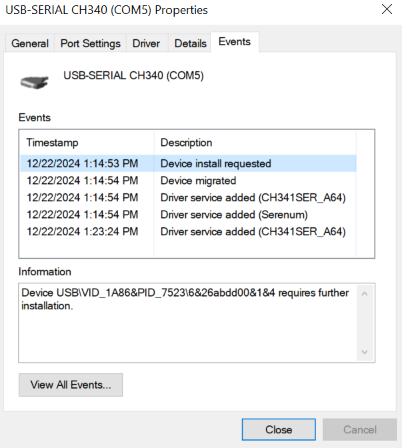
Serial port COM5
COM5 failed to connect: could not open port ‘COM5’: PermissionError(13, ‘Access is denied.’, None, 5)
Serial port COM3
COM3 failed to connect: could not open port ‘COM3’: OSError(22, ‘The semaphore timeout period has expired.’, None, 121)
A fatal error occurred: Could not connect to an Espressif device on any of the 2 available serial ports.
esptool failed
Press any key to continue . . .
Thanks Ryan
PS. My 26" x 38" MPCNC using my 3D printed parts and your kit of hardware/electronics has worked a treat here in the UK for the past year. Two thumbs up on the design
Last message today. I’m using two usb to serial port adaptors between my computer and the ESP32. I did not specific setup before using these. Are they needed. (I received another communication timeout error when I tried without. I’m starting to realise my problem is not with the FluidNC nor tools. If you could point me towards a resouce to resolve this I can go away, lick my wounds and come back when I’m proplerly connected and share what the fix was. Thanks.
You guys have been a really great resource/help. In a nutshell the root cause of the bad Com port communication was assuming my USB cable(s) were data cables and they were charging cables. Once identified the Web Installer is one hell of a fine/simple piece of software.
I’ll go over my lack of understanding and resolutions as I spent a good 6 hours over a couple of days learning. (But that’s the fun.)
Most this is stated elsewhere.
A) Windows 10 worked. I had problems with Windows 11 but that was before I switched to the correct cable. If you have Windows 10 don’t waste time trying Windows 11.
B) Use a USB to Micro data cable. A charging cable looks the same but only has two wires inside the cable, the data cable has four. Not sure? Carefully cut a shallow cut around just the cable insulation and bend the wire to open the space to see if there are four wires there (Red, Black, Blue, White most likely) Tape is closed after you find out.
C) On the ESP32 that Ryan supplied on the Jackpot I did not need to press the Boot button (opposite pin D0) to have the Web Installer find the chip and load the works.
D) There is information out there that says you need to convert the USP port to a serial port. I had purchased two usb to ttl boards which were sold as a pair and when connected with wires supplied converted it to a serial port. My error messages shared above were at lease, in part I think, caused by the computer seeing the serial port, but not being able to get through the wrong cable between the port adapter and the controller.
E) Which brings us to why people were asking why I didn’t just do USB to USB. Skip the serial port misinformation for this application and use a single wire. In my case male USB 2.0 to male Micro USB on the controller.
F) Should you have to load manually, don’t be afraid to double click on and run the ‘Erase’ batch file. It won’t Erase your Windows system or any other fies, it will find the ESP32 and do the correct thing.
I am more than please to say all is working well, even with the laser set up on gpio27 (not yet externally powered nor Configlasr.sys installed) Just back to working as it has been for the past year. Big thanks for the help!
C) This is not true for all of them, I do not know why.
D) It is not listed in our instructions, sorry you went down that one.
F) It is suggested in the instructions to run the erase when flashing in either way.
Reading this I suppose I need to try and refresh the instructions since I think all of this would have been avoided if you found our instructions first instead of whatever you found.
Glad you figured it out.
I listed my rebuttal to your points so others do not take them as fact and get mislead again, trying to keep everything crystal clear.
No problem with you correcting me to keep the info straight. The documentation was my first port of call and ultimately it was it’s comment about the cable that struck home after I was reporting the communication failure. (I never would have figured it out otherwise.)
I think I fell into an AI trap with the serial port. Here’s Gemini’s response as to whether I need a serial port with an ESP32:
AI Overview Learn more
Yes, you need a serial port to connect with an ESP32 controller:
USB-to-UART bridge
You can use a USB-to-UART bridge to connect an ESP32 to a PC. The bridge can be installed on the development board or be external.
Drivers
You’ll need to install drivers for the USB-to-UART bridge chip. You can find drivers on the internet.
Subsequently I see info where it’s not necessary.
The documentation/instructions were good, I am just really green and running a batch file (for example) that says erase, I just needed that extra bit of hand holding which I got from a video.