Trying to mill some Seadek which is a popular Marine deck covering made from eva foam. The stuff Mills far better than I expected but I am having trouble securing it to my wasteboard. It has an adhesive backing which is pretty much impossible to stick anything to. It laughs at super glue and painters tape.
I made a quick vacuum table out of my wasteboard and it kinda holds until I made the thru cut around the perimeter.
The center section milled nicely as it was still flat on my wasteboard, but things went bad when chamfering the perimeter
The material is shipped in a roll so it has some memory and the backing kinda bunches up.
Any thoughts? Should I rethink my vac table? The big holes were already in the wasteboard so I kept them. The table holds rigid material like sheets of ply incredibly well…can’t even budge them.
Have you tried to cut the piece bigger and use wood strips to secure it down? Tapes and glue aren’t going to work very well. Rubber cement works better than other stuff. And you can easily remove it by rolling fingers over it until the glue balls up.
They use rubber cement to make leather shoes for this reason. It remains tacky if you apply as directed. I would use wood strips screwed down along the edges and use the rubber cement in the middle of the underside. It ain’t gonna move nowhere. I would also cover the top with blue painter’s tape to assist in preventing that fiber fuzzy stuff along your cuts. Use the tape when cutting paneling and plywood too to prevent splintering when the saw cuts the wood.
I will try the rubber cent and wood strips, though I will likely need a lot of rubber cement to do larger pieces. This was just my first cut for testing purposes. The real work will be pieces close to the full size of the wasteboard which would prob require a lot of glue!
I’m wondering if maybe an extra set of grooves cut into the wasteboard might spread the vacuum more evenly around the part? I did the perimeter cutout with 1/4" end mill. Maybe try an 1/8" next time so that I loose less vacuum when cutting into the wasteboard?
Also I have the material I am cutting laying flat to try and take some of the set out of it. That was a cutoff from the end of the roll, the center looks to be flattening a bit better and does not have as many creases in the wax paper on the back.
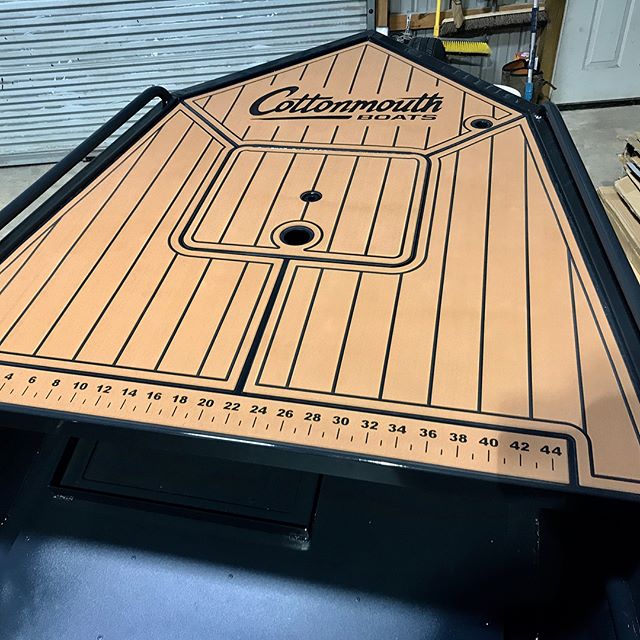
Trying to achieve something like the picture below
So you’re making custom covering for the decks of boats? Pretty cool. The rubber cement is just for the middle to prevent lifting You can do a bunch of splotches instead of the whole thing.
I agree with Barry about the vacuum and covering but I think I’d try saran wrap to cover the cut-through holes. It’s going to pull down better. Just don’t get it near your bit. The paper should work fine too. Just some thoughts to try and see what works best. Are you cutting one big sheet to lie on a boat deck (single piece floor) or are you cutting square panels that are then glued down like floor tile? The strips of wood can be screwed down directly in multiple places to your wasteboard along the edges. Run the crews through the material. When you get to the opposite side, pull your material tight and screw dow. That should help the vacuum keep it down. I would do the cut-through parts last by generating the cutting paths separate from all the other cuts. I have Aspire 9.5 and I can create that and rearrange which paths are last.
I think there is a spray paint type of rubber cement too for large areas.
This is really cool looking for a boat. I have to replace my deck with new plywood and carpeting too. What you’re doing looks really nice.
Neat! I used to work for a boat company and did a lot of hydroturf designs for our supplier to make us to fit all of our boat floor plans. There is a lot of money in this stuff. Our supplier used a vacuum table and it seemed relatively easy for them to make it work. But they had biiiiig vacuums that I believe they got from a cereal factory. Like this:
I use this stuff at my current job called Seklema, it’s like a double sided sticky pad that sticks to the table on one side and the bottom of the material to hold it down on the other. All of the stuff I use with the pad has 3m adhesive and thus the “wax” type paper to protect the adhesive. Sticks well to the mat. With how stiff the hydroturf is I’m not sure if it would work though given the memory the stuff has.
You could also try “engravers tape”. It, in my experience, sticks to the adhesive protective layer pretty well.
Failing these, I’d try screwing the material to your wasteboard under tension like Mike is suggesting.
That’s a big sucker, uh vacuum. That would hold the material down really well. I’d like that material in my old boat. I have a 1977 Grady White 19.5’ Angler with a Ford 302 (Mercruiser 888) in it. I’m restoring it after I finish the house restoration (someday).
Looking at the vacuum holes on your table, those are way too big. A lot of small ones would keep the suction better when a cut-thru gets near.
On yours, the holes are so big the vacuum suction is lost the moment a cut-thru hits one. You could use 1/2" plywood and drill a 1/8" hole every 1/2".
That would increase the suction across the table even if you lost a little due to cuts. The more holes, the better the suction power. It’s reversed for air hockey tables but the same principles apply.
Barry, I did the through cut last, but still need to run the chamfer operation on the perimeter. I am hoping that an 1/8" endmill for the cutout might help not let as much vacuum through…
Mike, the Grady White sounds like a cool project. You must be on fresh water, I am a Merc tech and I’ve never seen a Ford 302 mercruiser still running here in the salt! Restoring an old boat with good bones is super gratifying. Last year I finished a restoration on an old beat up 1980 31’ lobster boat (Pic below). 2 years of nights and weekends but totally worth it. I’m actually out on a mooring in it for the weekend so I can’t try any of these suggestions until Monday! The wasteboard holes I was attempting to keep as they are the holes that I use for cam clamps and whatnot. (3/4 copper tubing as stops and centers of clamps). I may have to take your suggestion and make a separate top or something for the vacuum table.
Tim, the foam material I am cutting is really cool. I believe it is softer than hydroturf (which I think I remember being a rubber type of mat?). A lot of people are using the seadek now, super comfortable to walk on barefoot and it usually gets engraved to look like faux teak and Holly. I will check out the seklema and engravers tape on Monday.
Hydroturf is almost exactly the same as seadek, it’s just available in different patterns and significantly cheaper–like 1/3rd the price. I designed duck hunting boats, and Hydroturf is available in a cool swamp camo pattern that basically all of our customers wanted so those two reasons are why we used it. Also not sure if seadek uses the 3m adhesive, but hydroturf does.
Not my pic or the company I worked for, but this is Hydroturf, just like Seadek as you can see. Foamy gold $$$
Yes, all freshwater up here but the boat was designed for salt or freshwater. I bought my Grady for a bottle of Crown Royal. My big problem is it needs an impeller and a tune-up. I haven’t got any idea how to do that and no one knows how to work on the old boat motor. I have a manual but I can’t tell what drive it has. Alpha/ numeric or anything else (lol sarcasm) Lucky you to have that mechanical experience.
That boat is sweet looking. I like that decking. I ought to do that here in Louisiana. It’s the Sportsman’s Paradise. Too bad about the wasteboard. I get why you have that way. I saw someone on YouTube make an air hockey table with the underside having a sealed box. This permitted the air to flow through. I think it had like 15 small fans connect to 15 chambers. This created a constant velocity. Using this idea in reverse, if you could do that. each chamber only has a small area of suction while the one next to it has full suction. And the more small holes, the stronger the holding power. I’m old fashioned. Some 1x 1/4" thick wood strips screwed down (predrilled holes on the strips) and nothing moves.
Plug the holes where you’ll cut through the material. I think you can find caulk backing foam that diameter. Cut some plugs and jam them into the holes that get a cut over them. Should still be enough vac elsewhere to keep everything down.
Or cover the holes with painters paper tape and poke a bunch of nail holes in the tape to allow the suction. KISS rule and me being a cheap ass bastard. lol
Tim, I always think of old jetskis with that rubber hydroturf stuff (maybe it was foam back then too and I’m just oblivious?). I had no idea they made the foam now. I will look into it as an alternative. Foamy gold, I like it! A good friend of mine does granite and has a laser template system that happens to output in DXF… I bet the two of us could turn a few bucks on this stuff!
Mike, your water pump impeller is in your outdrive. 1977 should be either a 233 or a 260 drive. Pretty close to the same as an alpha gen 1. Follow any tutorial for the alpha gen 1. If you can build a mpcnc, you can definitely do an impeller in it…and you are in freshwater so it will actually come apart! Drain and split the drive in half. If memory serves me right the water pump kit is part # 96148T8. Get her fixed up and in the water, there’s still plenty of summer left!
Anyways, I flattened the hell out of the stuff over the weekend and took the creases out of the “waxed” paper backing. Plugged the holes where I was working per Barry and Mike, changed the cutout tool to 1/8", ran the same gcode again and it went pretty well!
I think I will be upgrading to the lowrider sooner than later! My mpcnc just got small all of a sudden!
Wow, that’s much better. You might get several new bits so they cut sharp edges. My only concern is how the bit cutting edges will hold up when cutting rubber and synthetic cloth material. Get a good magnifying glass to inspect your bits after every cut to determine how long they are useful for - consider it my quality control advice for your business.
Using a Lowrider sounds like an excellent idea considering how big your pieces are and that they have an extremely low Z height. The best of two worlds.
Alpha 1 is in my manual. I’ll buy the impeller and gasket. I think I have to put new fluid in it too. This is my first boat. I can do the points, plugs, and the condenser, set the dwell and all that. Adjust the timing is easy too. I think I’ll upgrade to electronic ignition on it instead. The problem I’m worried about is whether the electronic ignition will work on a boat? A car, heck yes, but a boat? I guess a good can of silicone waterproofing spray won’t hurt either. Now that I know what drive I have, I think I can do that work like I have a choice.
Stay in touch friend. Anxious to follow your journey w the LR.
This is a legit business for someone here. If you’re in an area with a lot of outdoor activity, you can use this stuff to cut pads for the top of yeti coolers:
or if you build your machine big enough, entire sets of pads for boats. Customized stuff is $$$. And you can give customers template kits (large sheets of paper and a sharpie, lol), have them template their boat with the paper, then you digitize the templates, add designs, and cut them out. You could EASILY pay off your entire machine investment in a single job.
Tim is right, custom stuff like this (for the boat/outdoor crowd anyway) is in huge demand. I stuck that quick test piece that I cut last night on the front counter of the shop this morning and I already have people inquiring. I like Tim’s idea of giving people a “template kit”. What is the best way to digitize a physical template?
This is why I decided to build the MPCNC; I needed a way to professionally fabricate custom things for my customers that would be otherwise impossible with hand/power tools. HDPE (King Starboard) had been my main focus, as we are always fabricating custom bezels/dashboards/etc. I have even made some custom hatches that came out fantastic. HDPE cuts like a dream on this machine, and apparently so does Seadek. This was my way of inexpensively dipping my toe into CNC to decide whether I could justify a more expensive machine. Turns out the MPCNC has done everything i wanted. I have not found the need to upgrade, other than needing a larger cutting area…hence the possible move to the lowrider. I am hoping I can keep the same accuracy with the lowrider as I have seen with the MPCNC, though the MPCNC is not going anywhere…its built into my workbench now lol.


 Our supplier used a vacuum table and it seemed relatively easy for them to make it work. But they had biiiiig vacuums that I believe they got from a cereal factory. Like this:
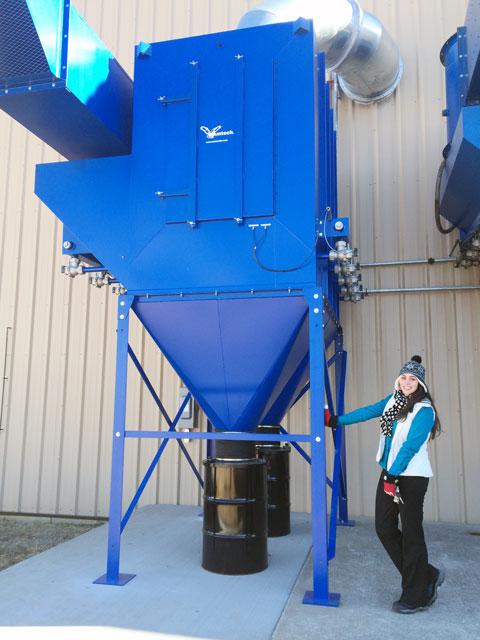

 lol
lol

