Hi James, and thanks for your comments. Always good to hear from you.
It will take me a while to digest all that you had to say, but I certainly appreciate your insights and suggestions, especially about the centerboard and centerboard case system. Of all the items on the Hadron, this one worries me the most --and precisely for the reason you mention. Mush indeed! I think it needs a lot more thought and design work to avoid serious damage over the long haul.
I will definitely visit the site you suggested from the Moth Association. If anybody has good design ideas about centerboard and rudder hardware, these guys would.
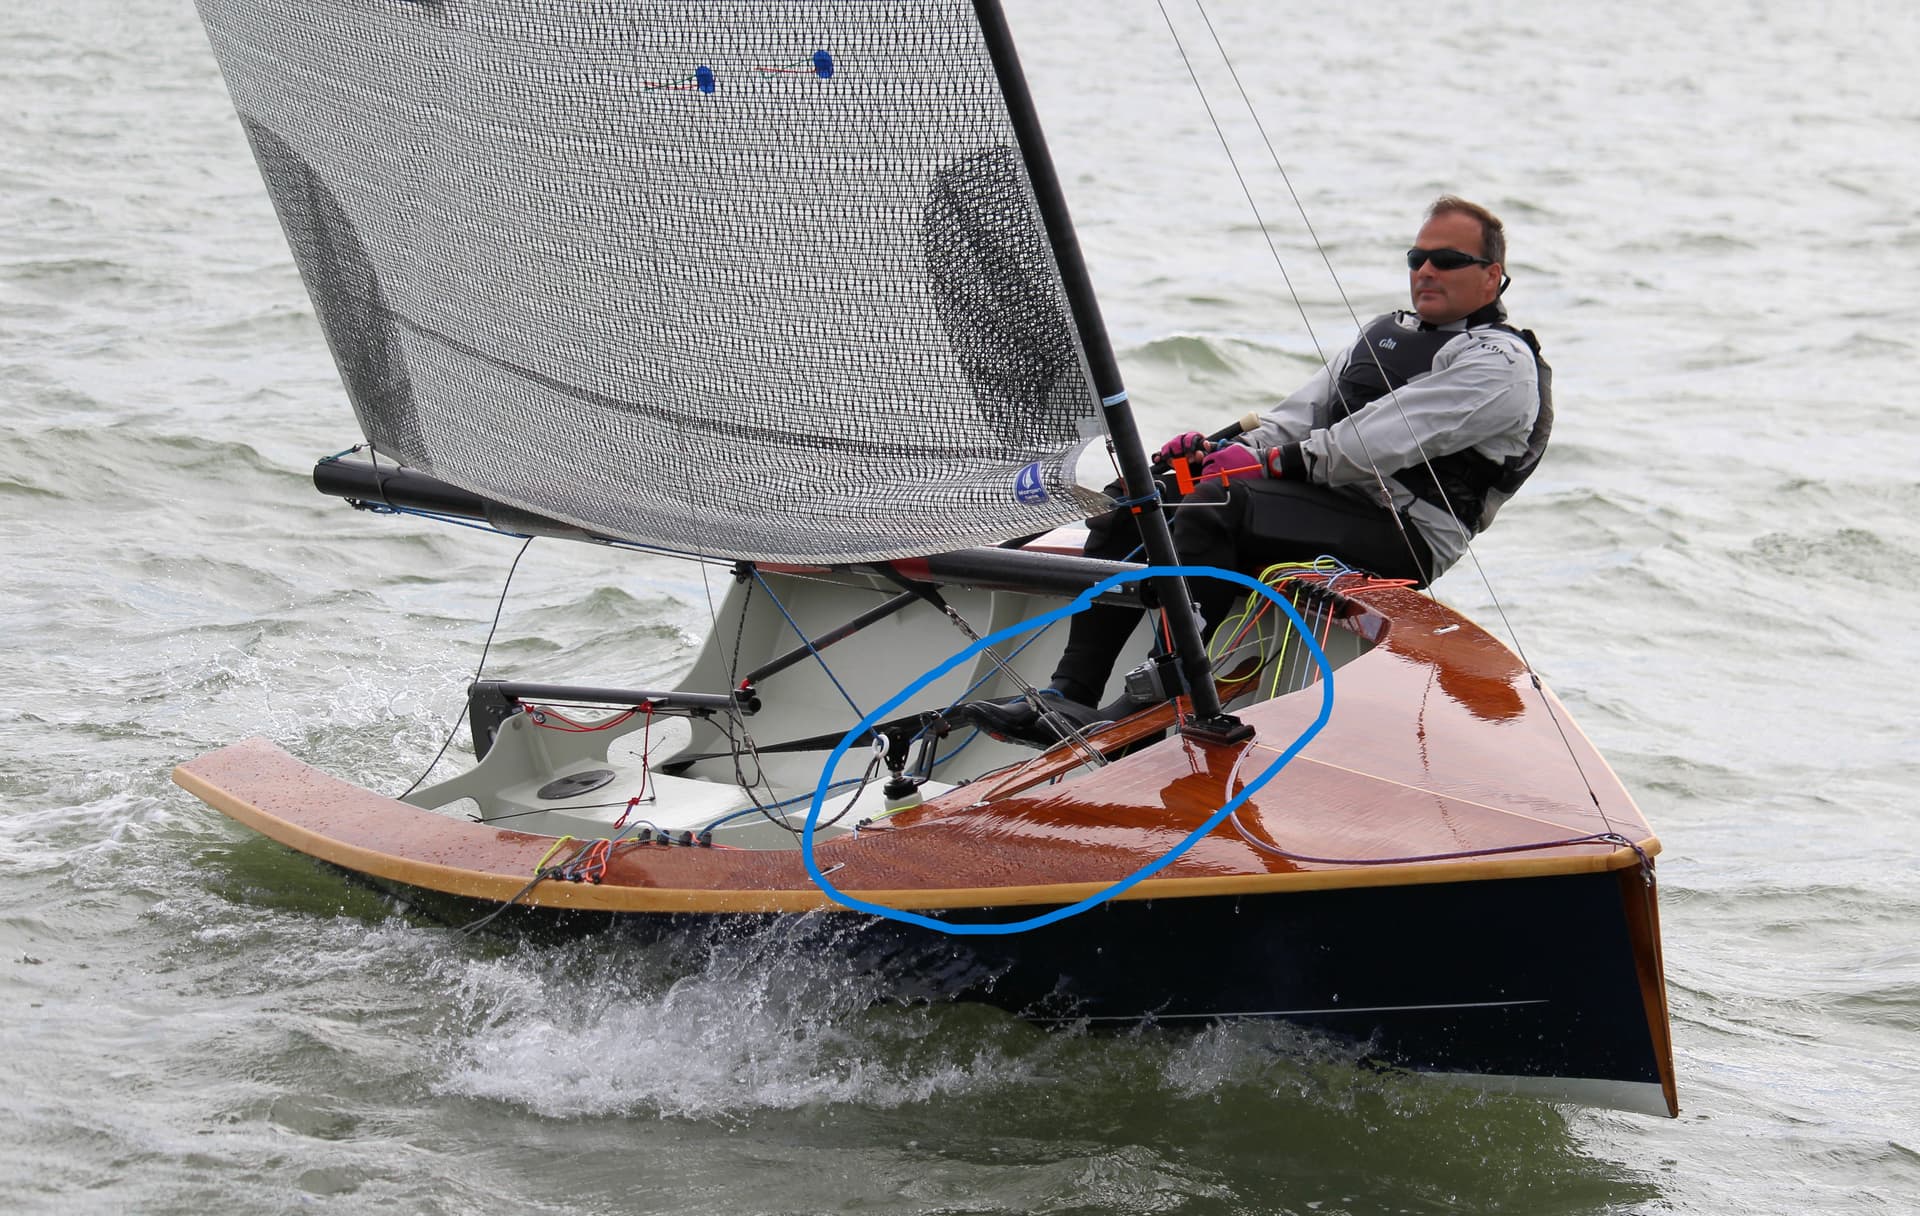
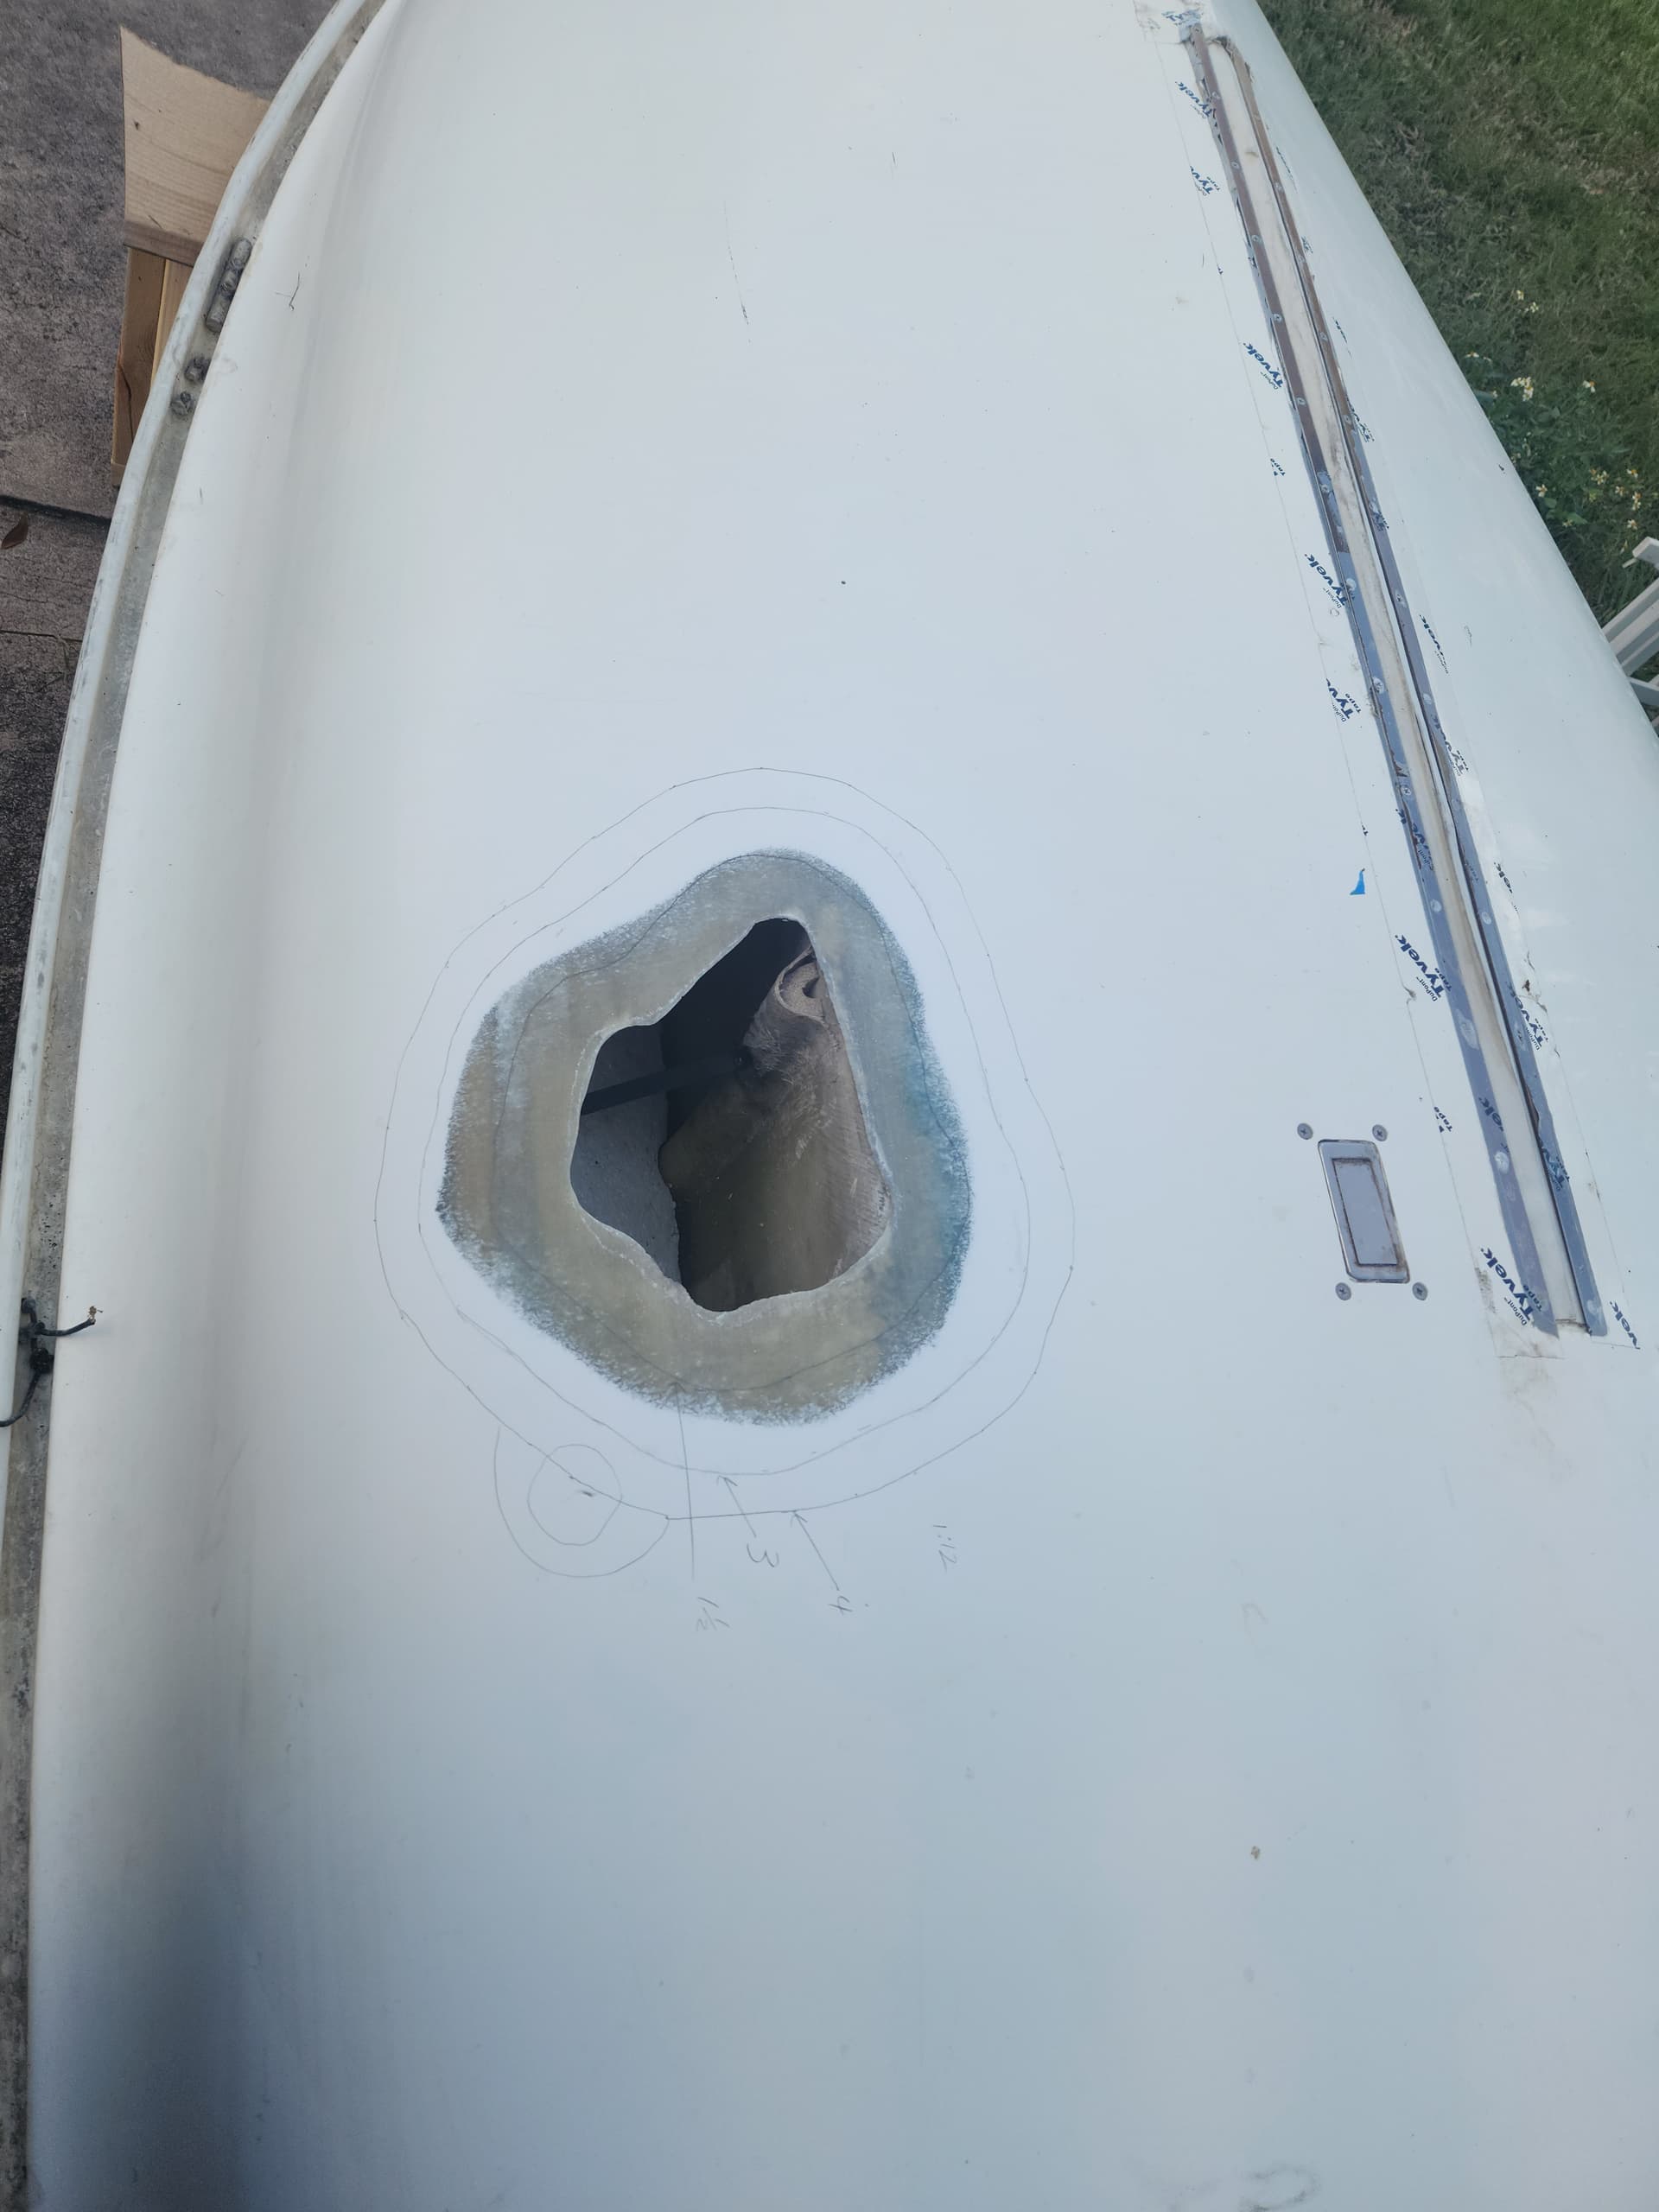
You’re very observant, but not to worry about the transom pad. That little half-moon thingy was kind of done on impulse after I glued up the keel band and hog. I didn’t like the way it just butted into the transom without further support. Knowing what I now know, I regret installing it. But I will definitely beef this up with a full pad of some kind before installing the rudder.
Thanks again for your generous sharing. Helps me a lot, as I am kind of insecure about all this, being my first boat and all. In my mind, it doesn’t matter that thousands of boats have been built with thin plywood and epoxy; mine will be the first one to completely dissolve five minutes after I launch it!
I think that is the optional shin cracker. As you move around in the boat, you have the option to smash your shin and release expletives in rapid succession.
Lol. Come on guys! It’s the charcuterie and cheeseboard.
Steve - It seems to appear on some H1s and on H2. I suppose it can be used to sit on downwind, add more strength to hull on the beam, or for the cam cleats. It could be a better place to put the cam cleats to allow crew to sit further forward in light wind. Also, if you have a strong boom you can mount the mainsheet forward in this area.
I wouldn’t call the H1 hull flimsy, but, at nearly two meters wide, there’s an awful lot of leverage working against 6 mm plywood when the sailor is hiked out. I’ll bet the hull has a bit of wobble to it underway. Any kind of athwartship structure would dampen that and be most welcomed, especially with the mounting options you mentioned. I’ll give all this some serious consideration.
Hey, thanks for doing a bit of research. The photo of the H2 is much appreciated. I never really noticed the cockpit arrangement in an H2 until this came up.
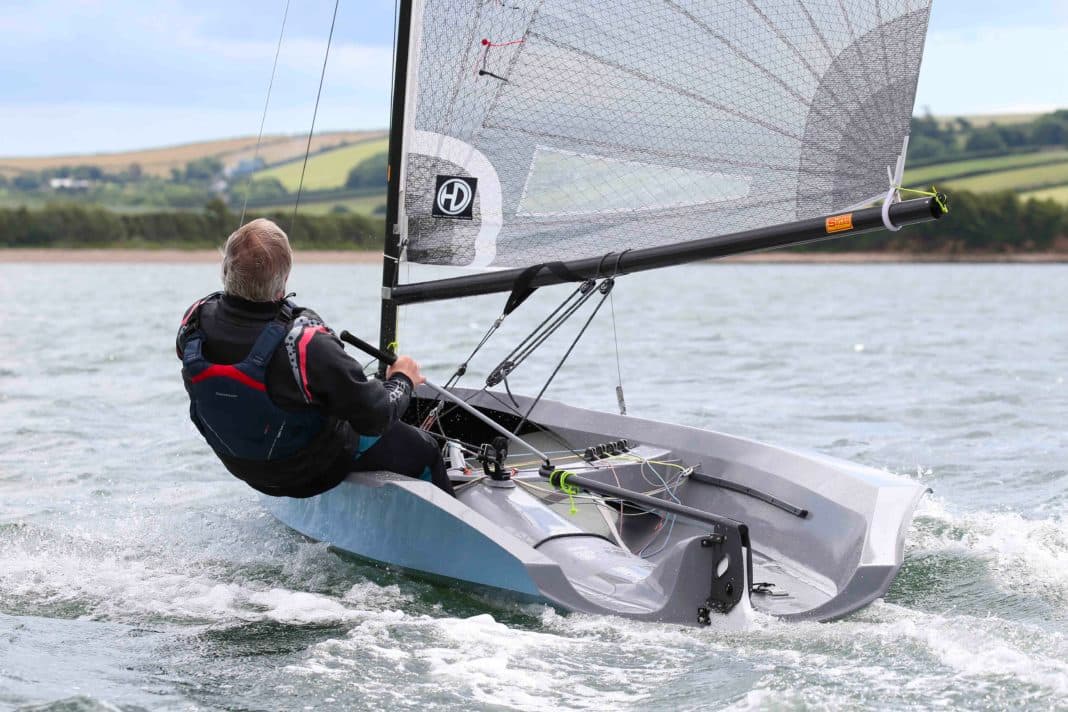
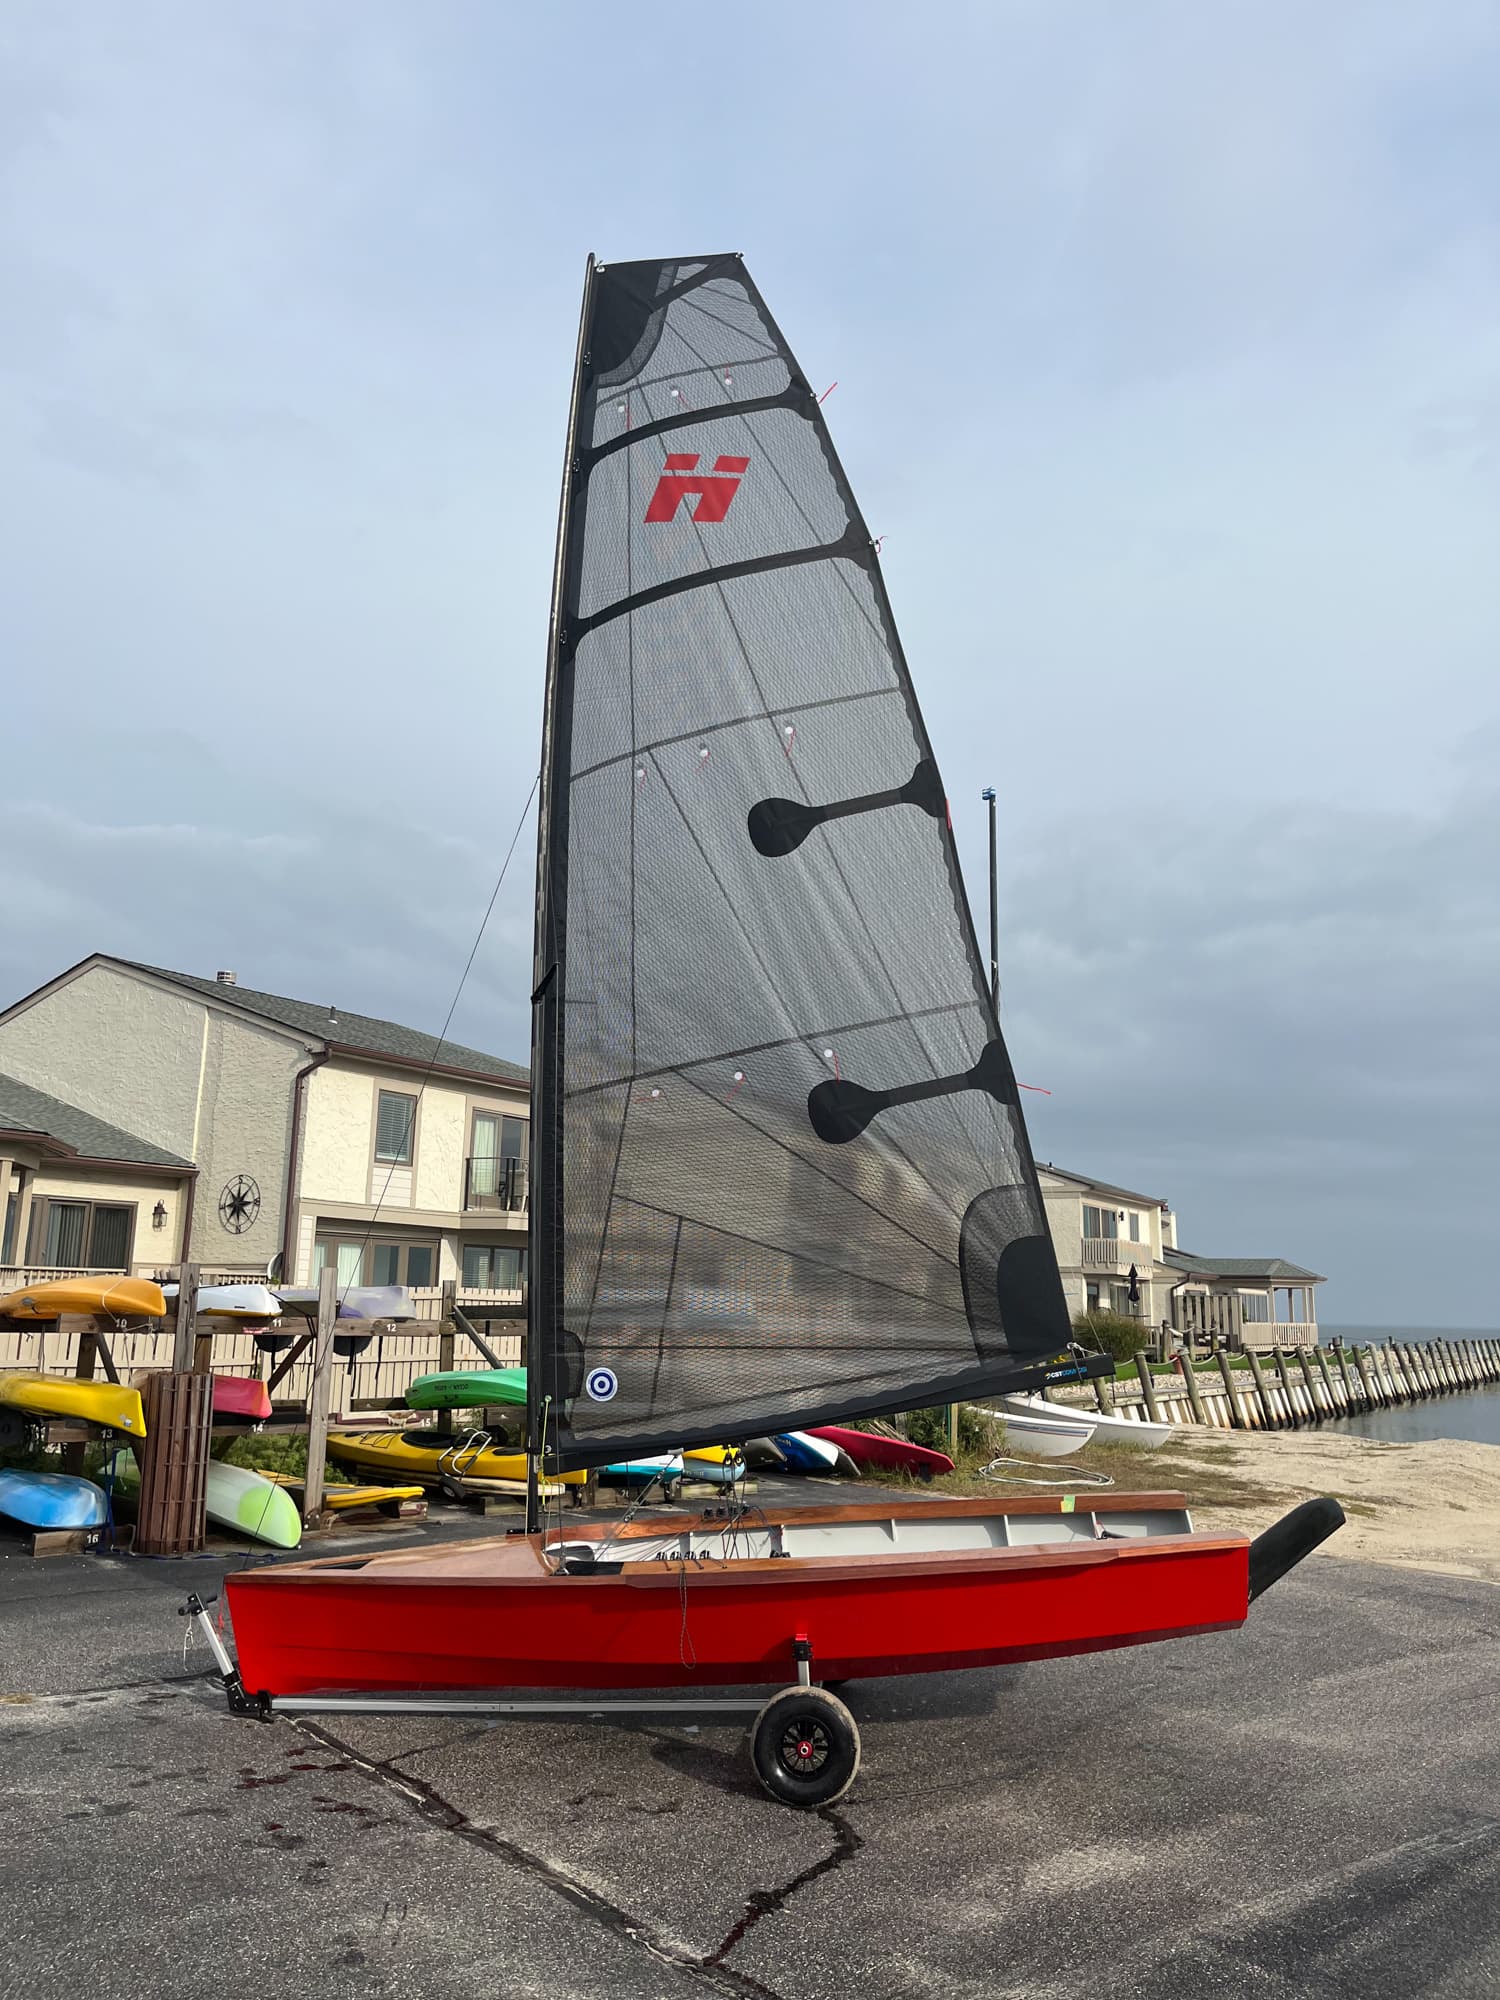
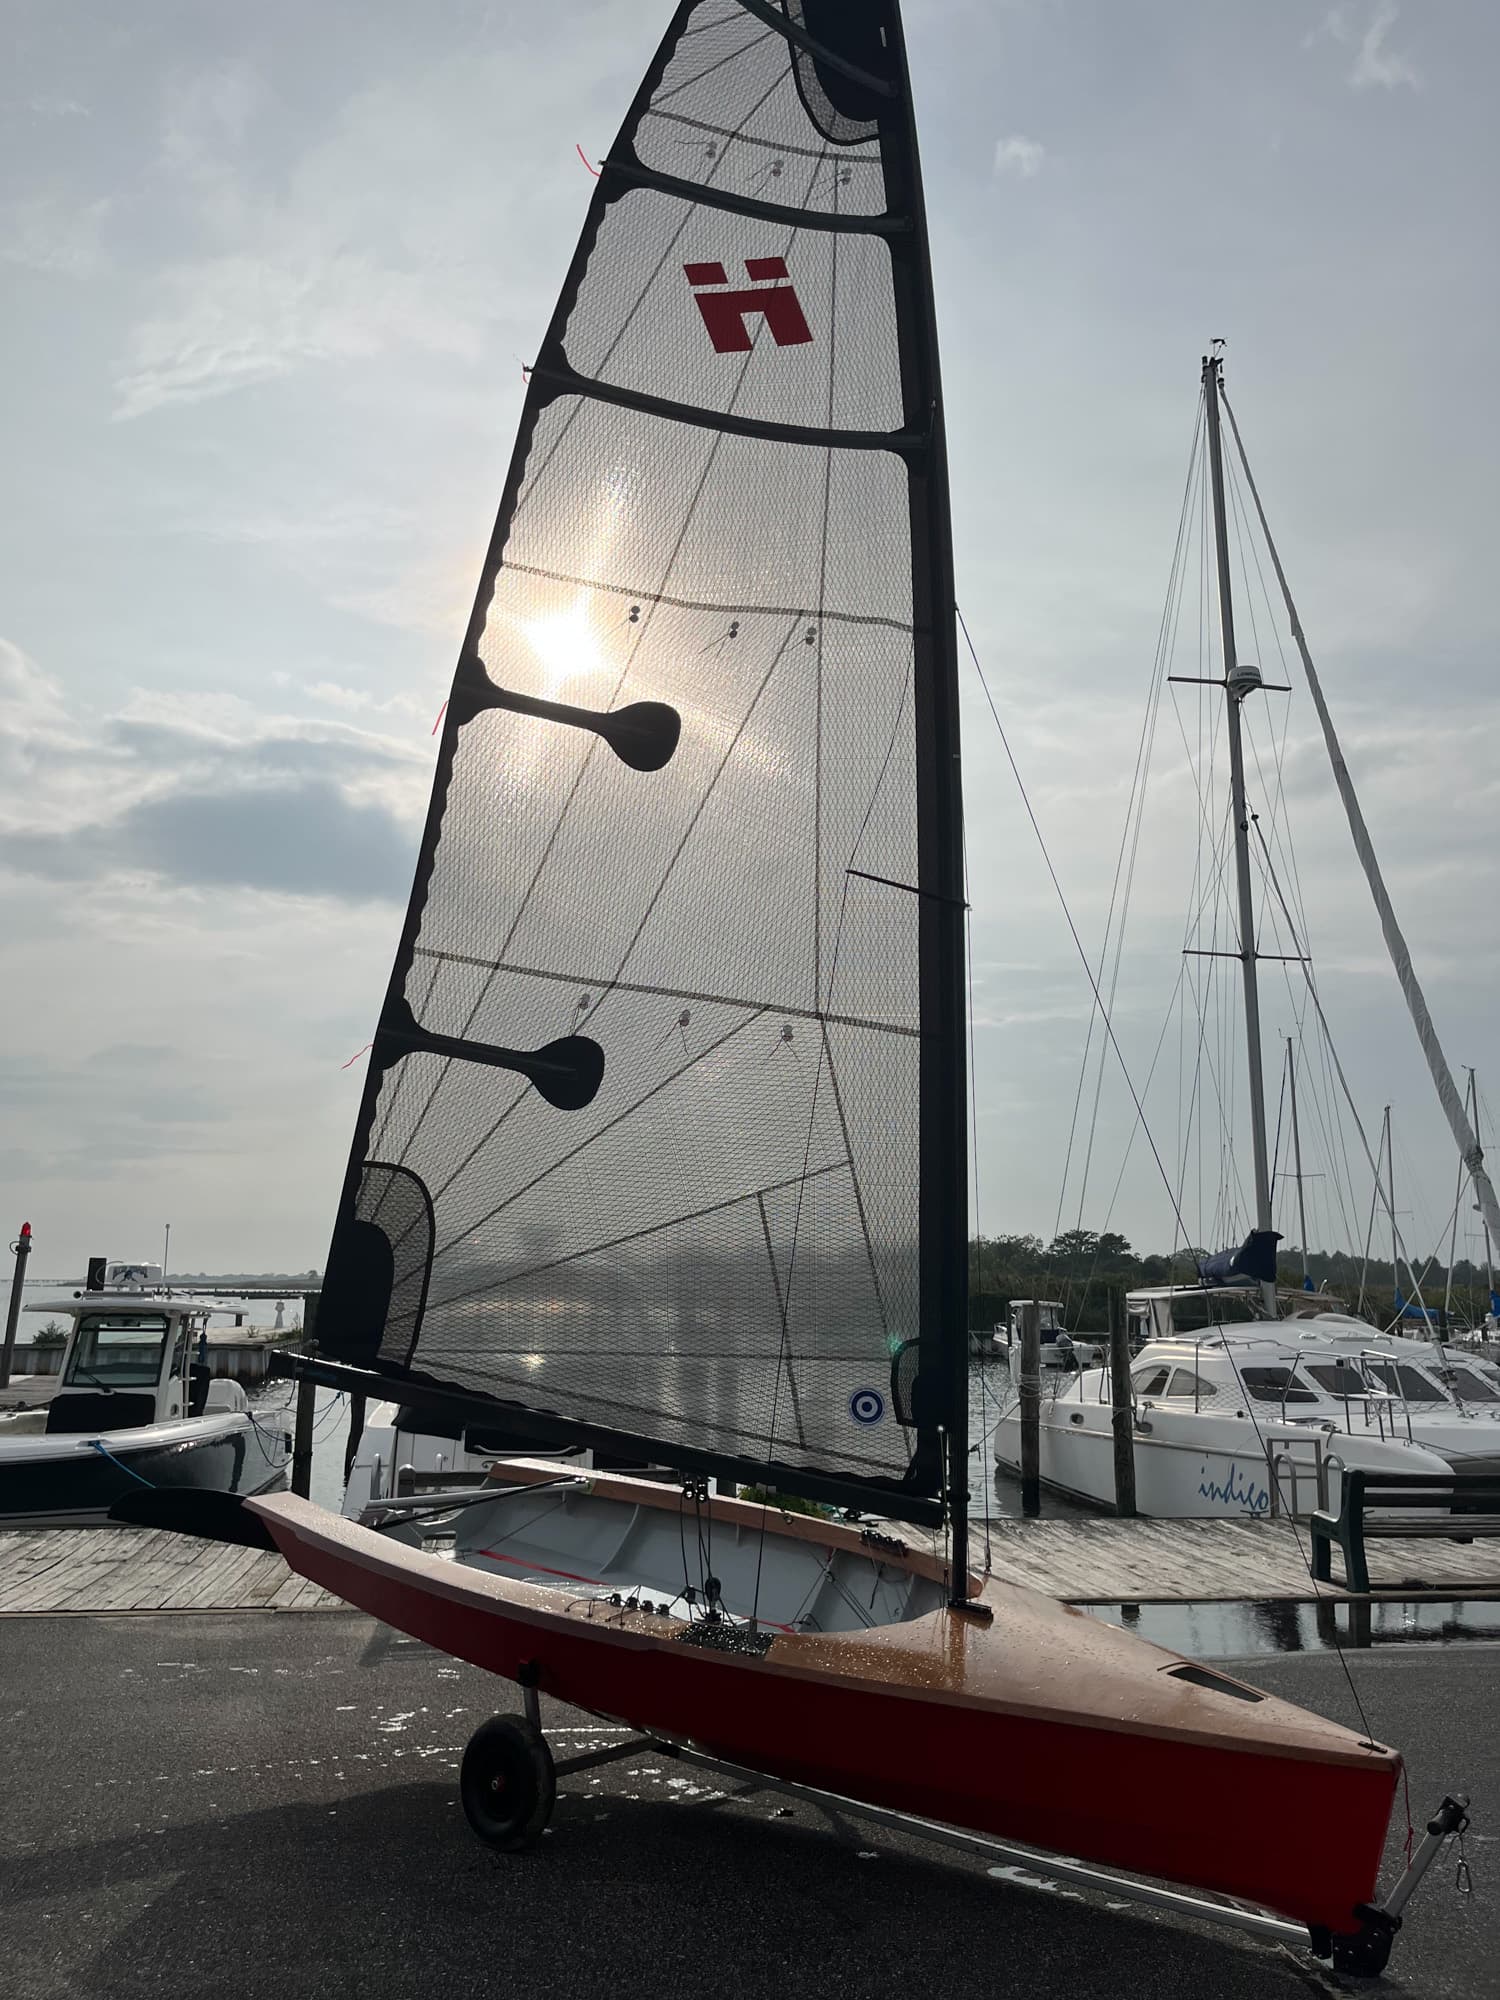
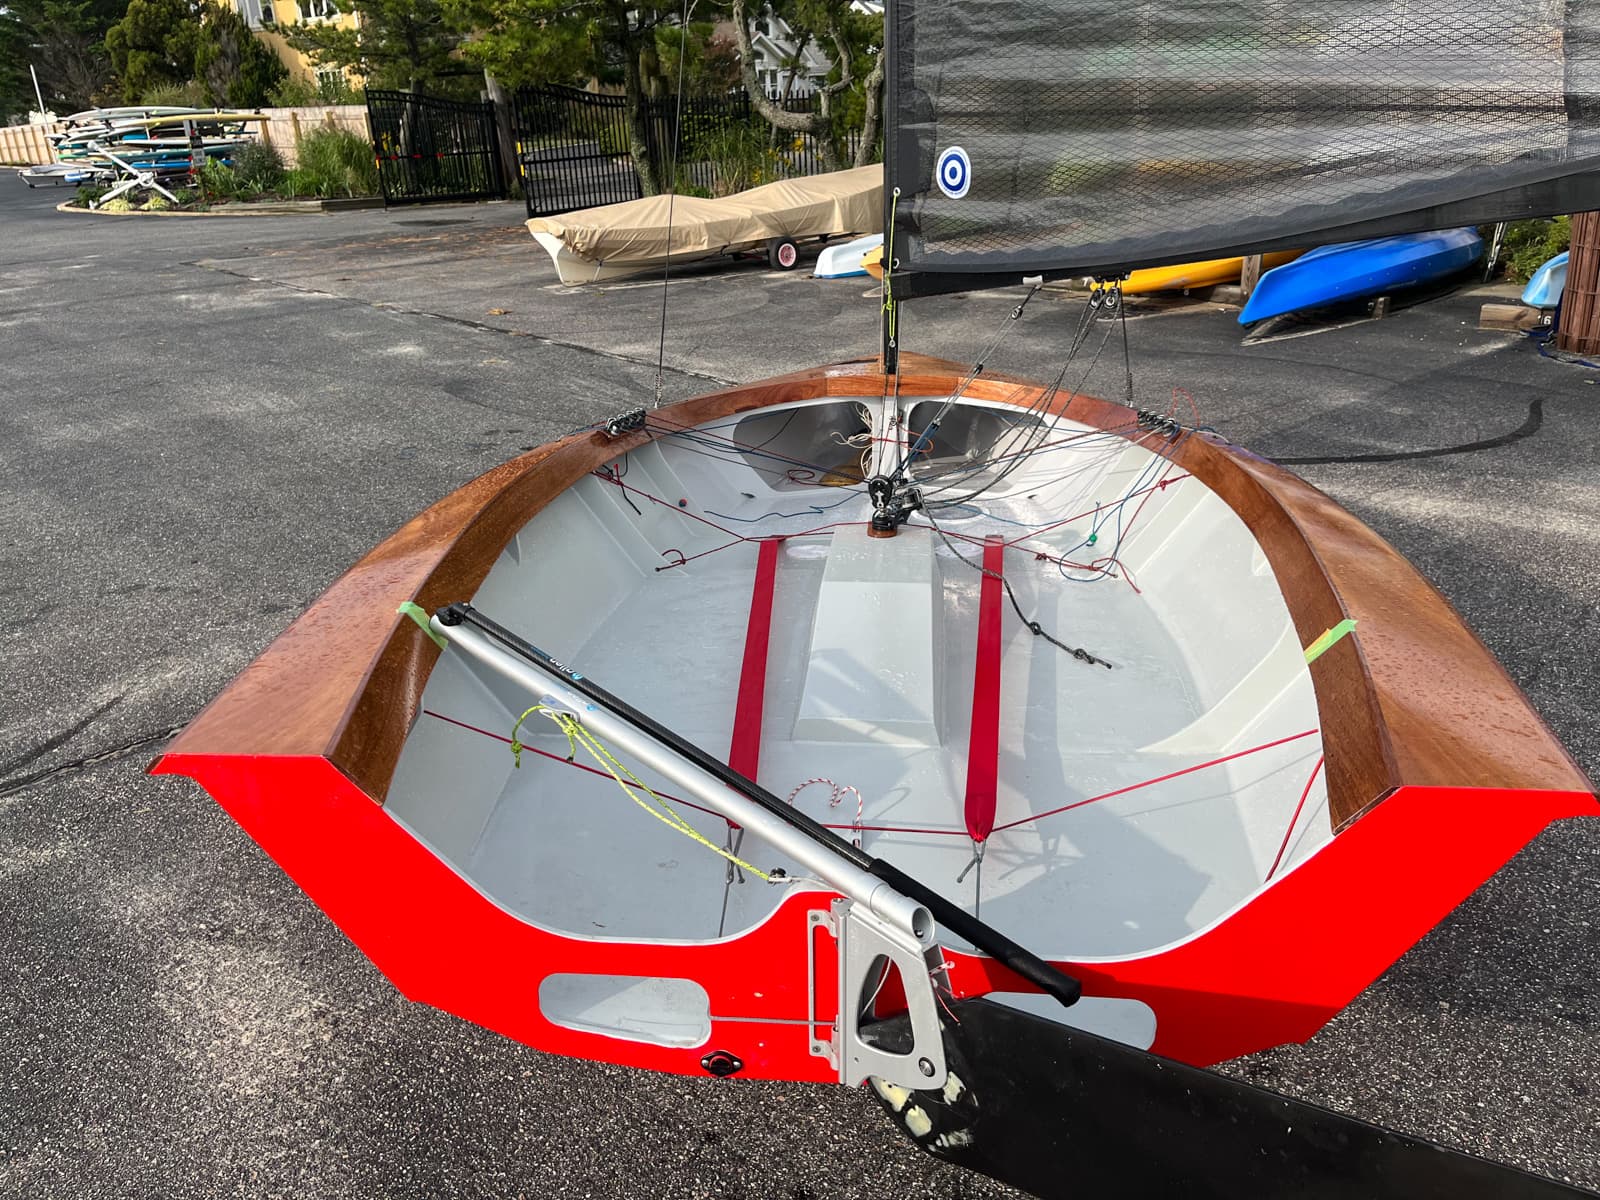
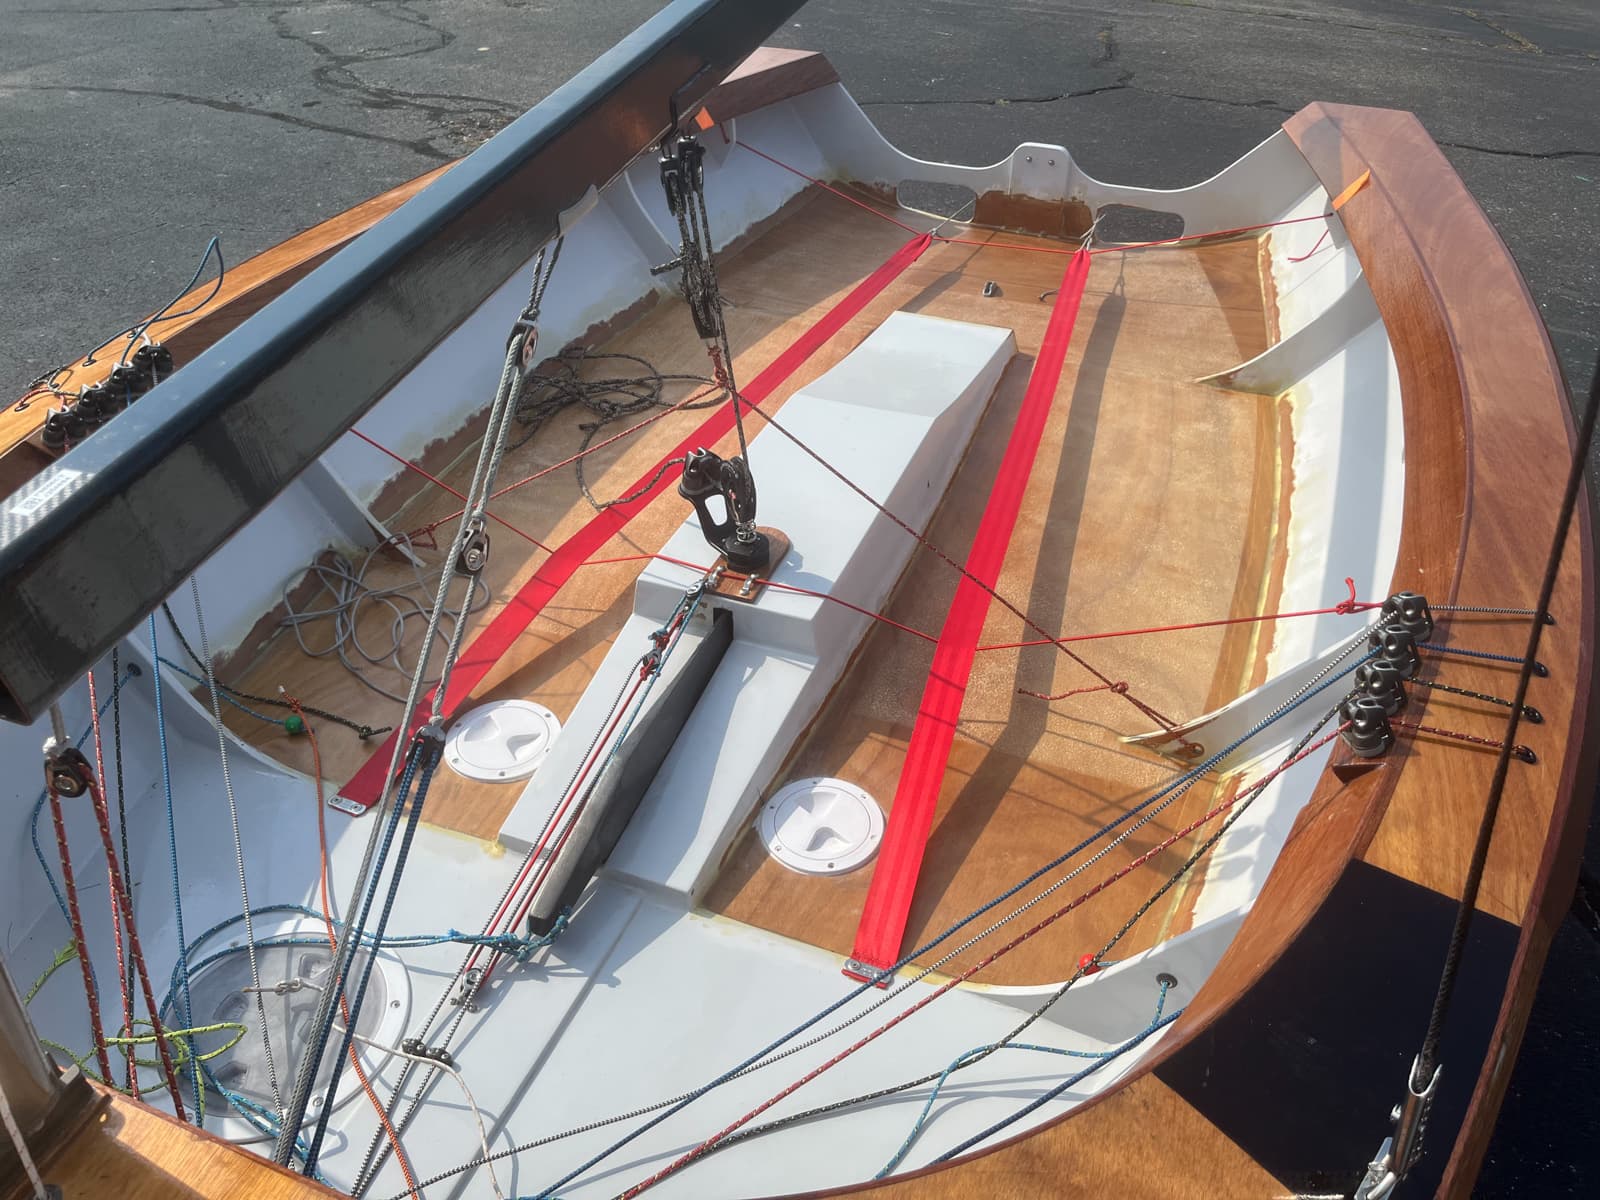
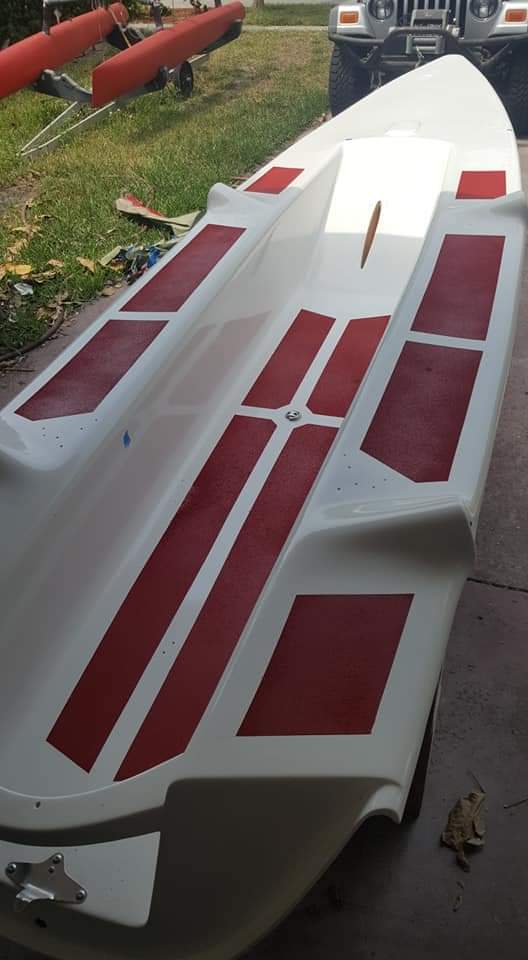
Finally, some photos. Been sailing the H1 about the Great South Bay in Long Island. I added a false bottom because frankly I found the old system unsafe and awfully cumbersome. After a capsize the stern sat below the water and emptying the boat on a reach was too slow.
So with the false bottom it empties instantaneously. All water flows out the back. Capsizing has to be fun and easy.
Overall, I like the boat a lot. It is good in heavy weather – the rig de-powers nicely. I am still getting used to aspects.
My biggest issue right now is the weight, I feel this could be a lot lighter…so I may return to the hull with a simpler design. Less mahogany and more composites. Obviously it won’t look as nice. We’ll see.
Very nice! I see you left the hatch in the deck for the bag of charcoal…! Lol. I grew up in Babylon and used to know every inch of great south bay. Haven’t been back in years.
Hi I have just stumbled across this thread almost exactly two years into my H1 build.
I thought I was the only one but apparently not?
Great source of information - only wish I’d found it sooner!
Aiming for launch in a couple of months.
Jon
James… awesome work!! And great working around using puzzle joints. i Enjoyed the link to the tolences of wood joints, will help on future project limmited by my cnc. Iv been looking at my next project and had my eye on the hadron h1 for a few months as i finish up another project… Sadly iv tried contacting keith with a handfull question before ordering the plans with no responce. Regardless got one of two question about your build I’m particular!
How is the false floor working out for you? How much does it affect Capsize recovery as its one of the biggest reasonsi m looking at the hadron.
Great idea adding an asym. Something i really have not seen on any hadron. Do you have any regrets and and or handeling issues with it. i like my weta with main/jib/spin single handed boat with a furrling spin… just capsize recover is quite Intensive and getting to long in the tooth for it.
What would have you changed now that you sailed it… even if you where not worried about it in class rules… i know im concerned about the weight and the small total sail area and maybe the width of the rail…
If you get a chance to answer or contact that would be very much Appreciated.
False floor is great. Water empties immediately vs trying to empty out gallons (and not capsize with inboard weight!) on a reach. The current design with center console is a real shin breaker – I can see it working better with a rounded fiberglass mold that has more give and is smooth.
Haven’t got round to asym because…
The boat is way too heavy, if you are physically equipped to sail a Finn than maybe. I am in good shape but launching off a sandy beach or dealing with a capsize is quite an exertion and a little scary if you are on your own. Capsizing should be easy and fun – part of the experience of getting the most out of your boat and skills.
This brings me to:
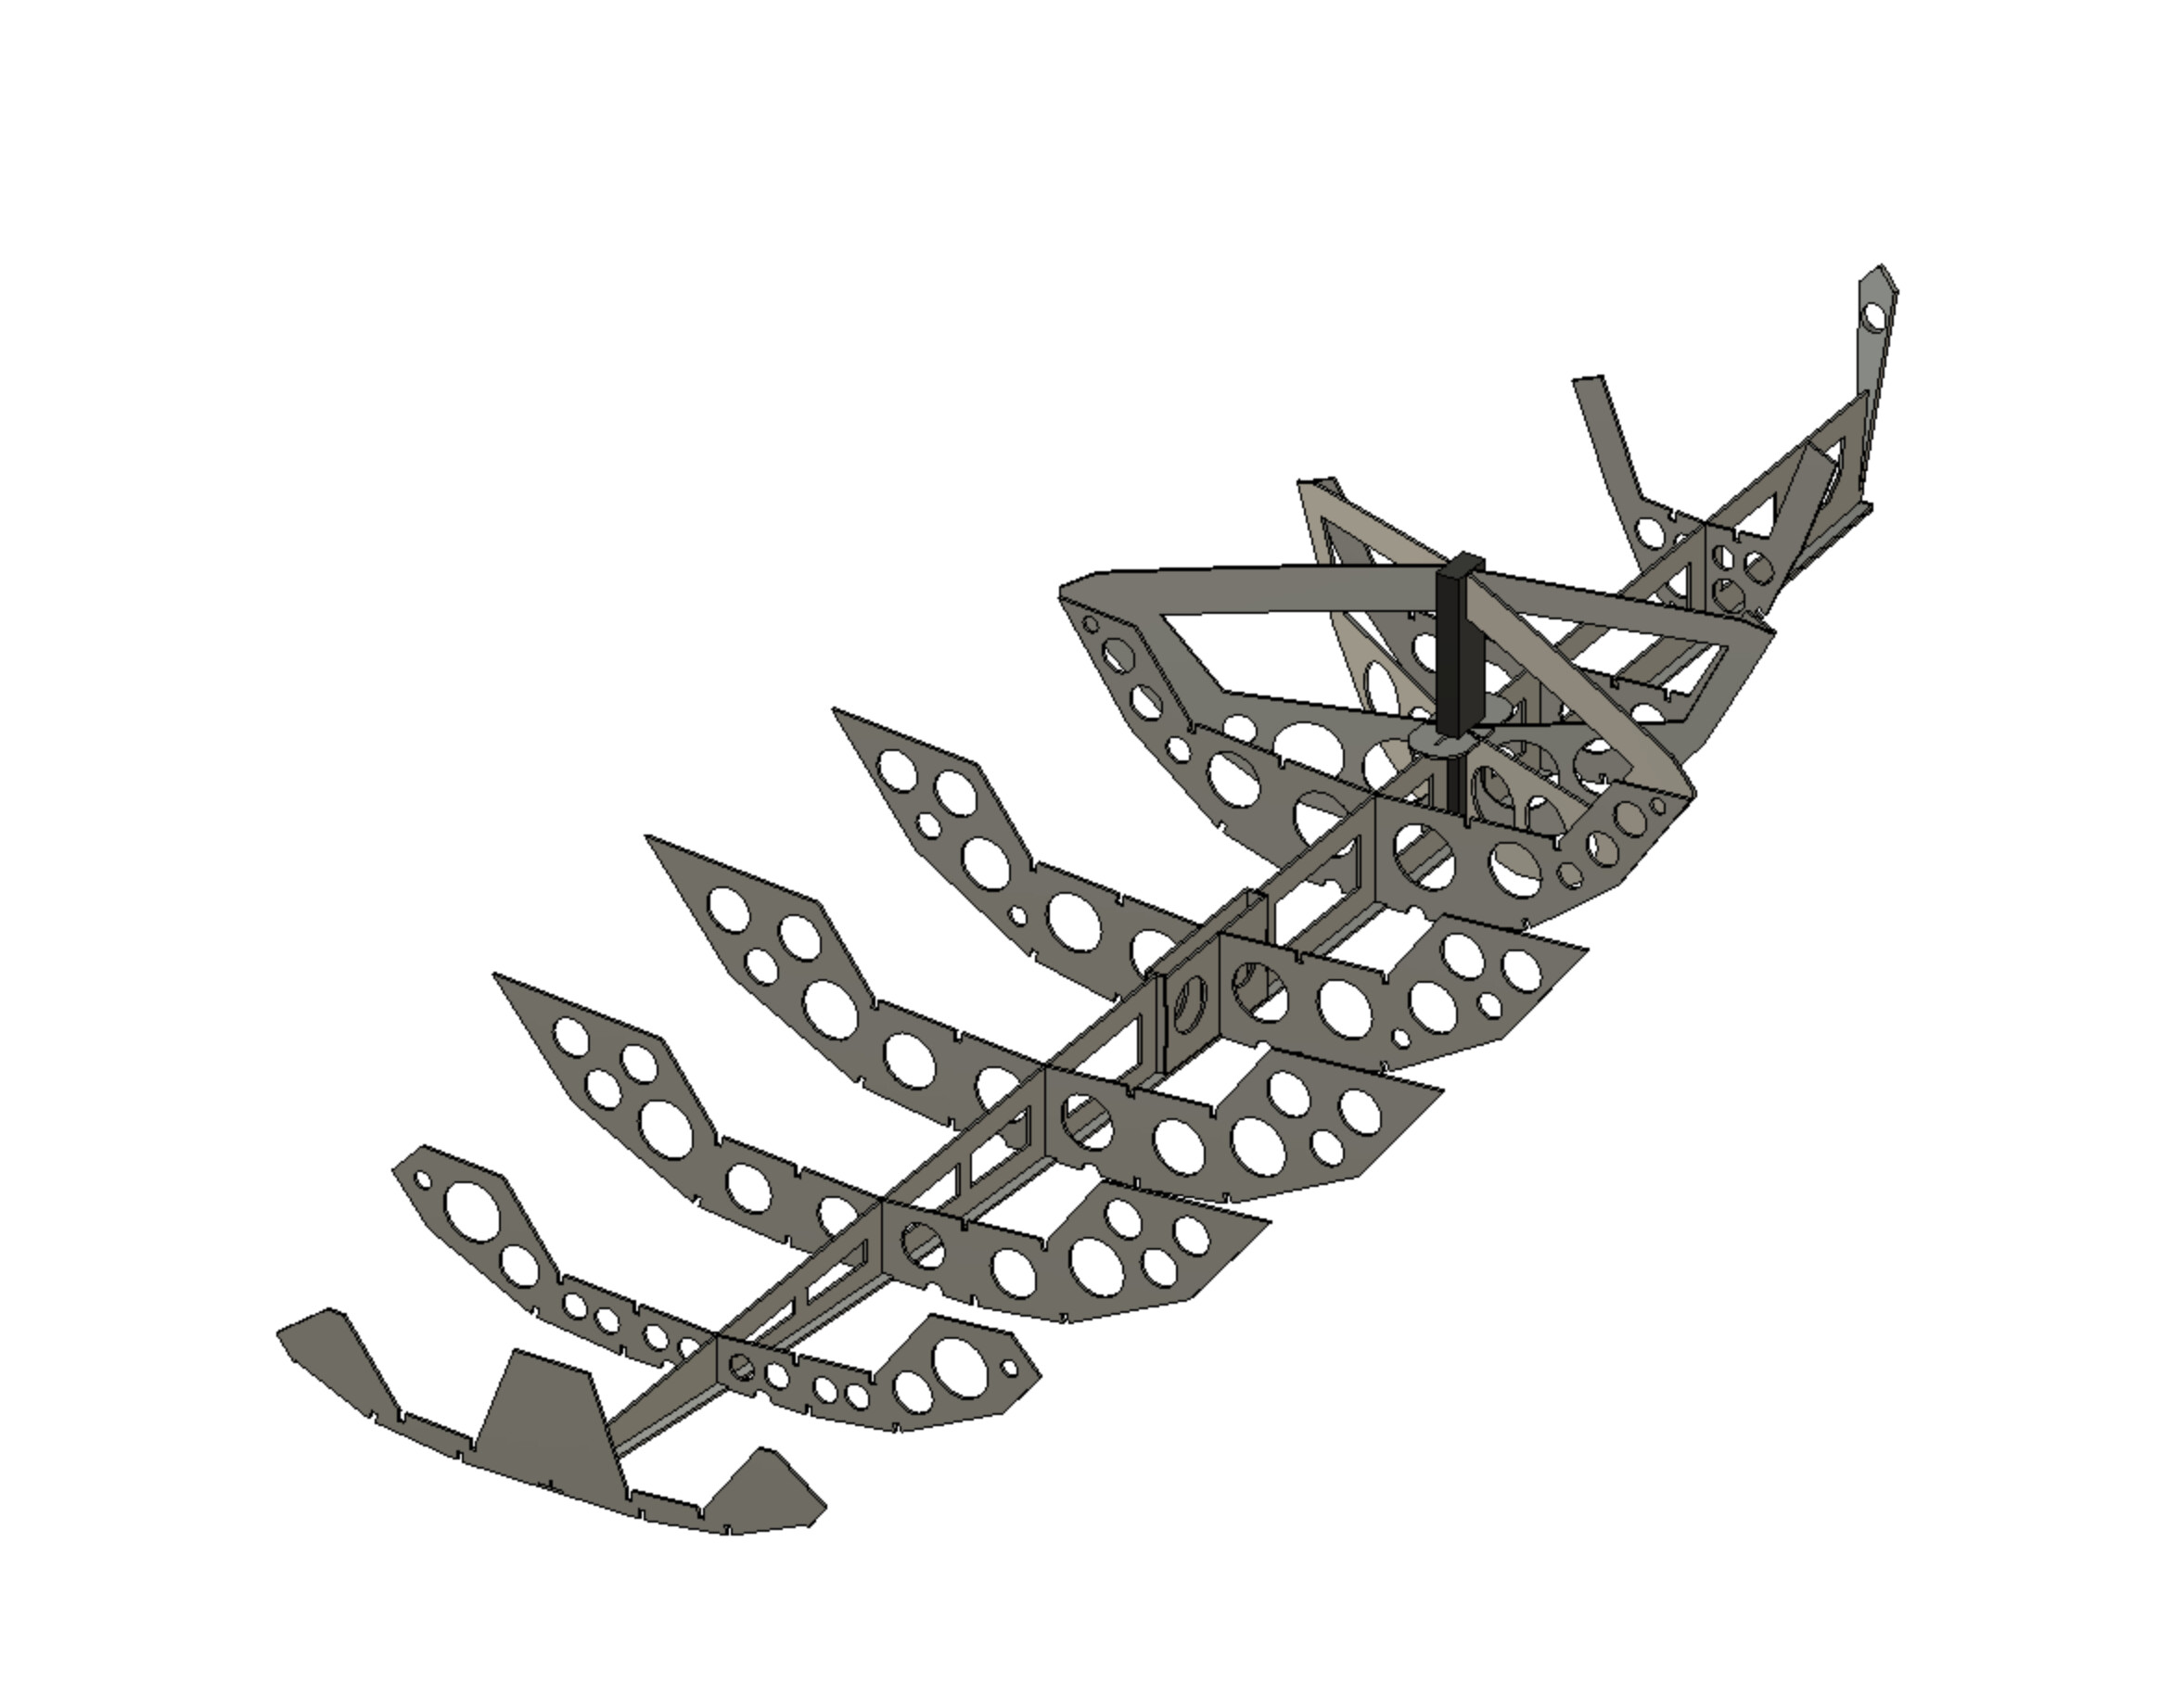
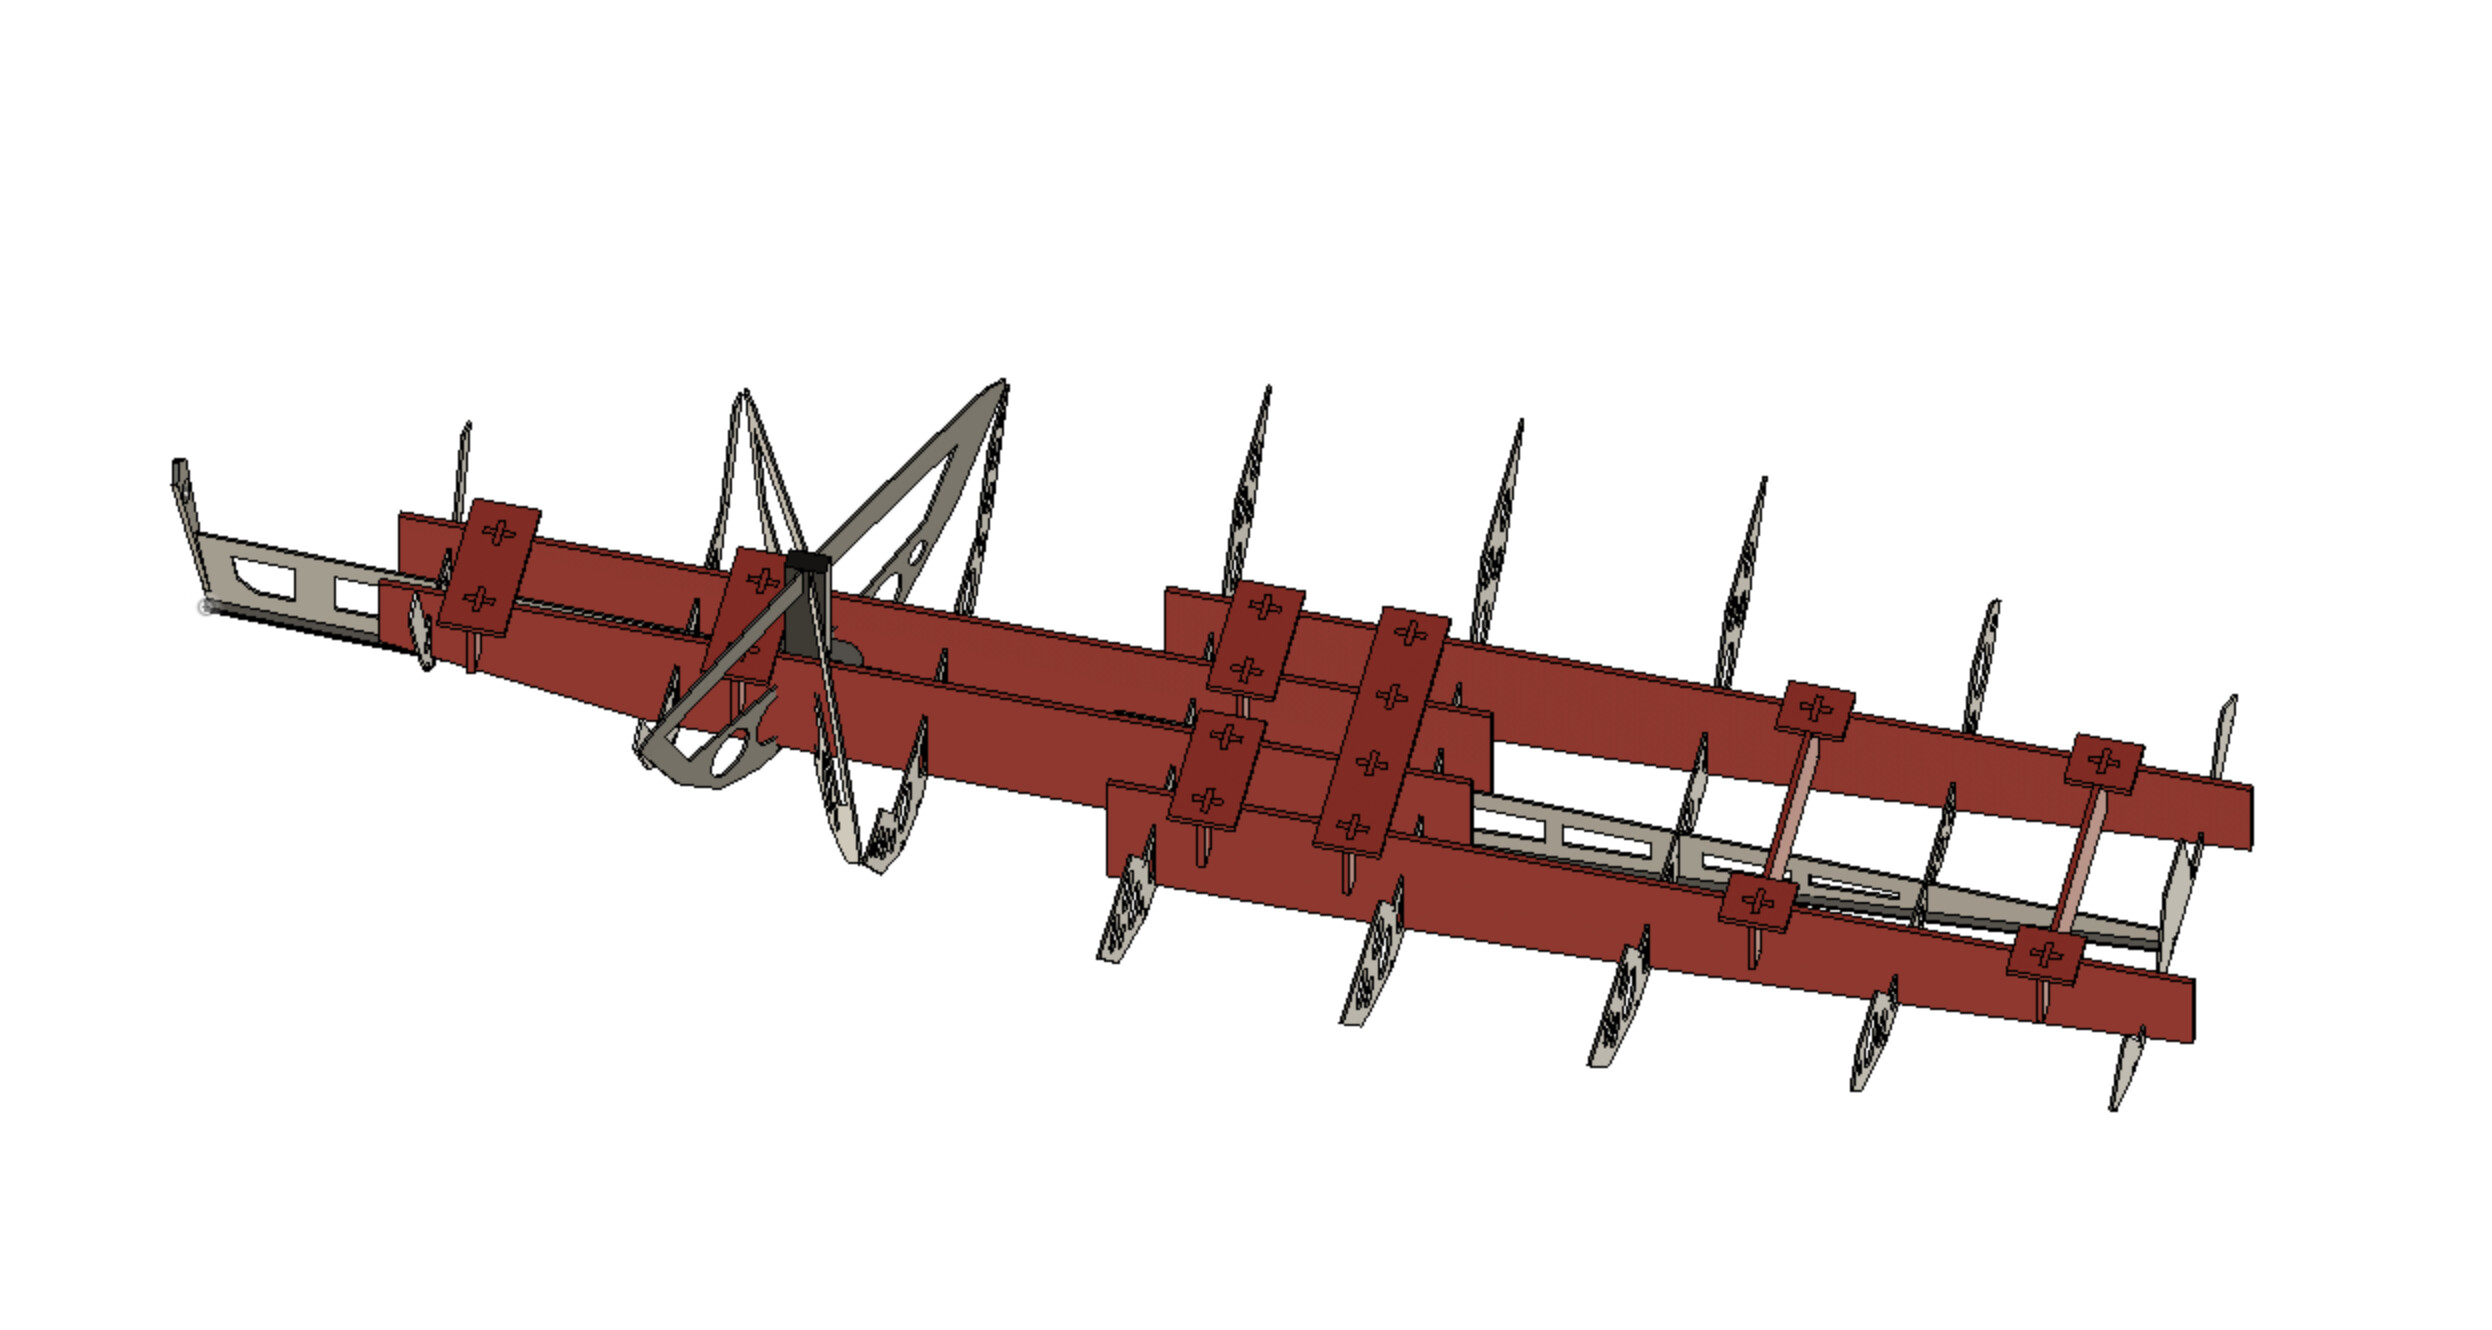
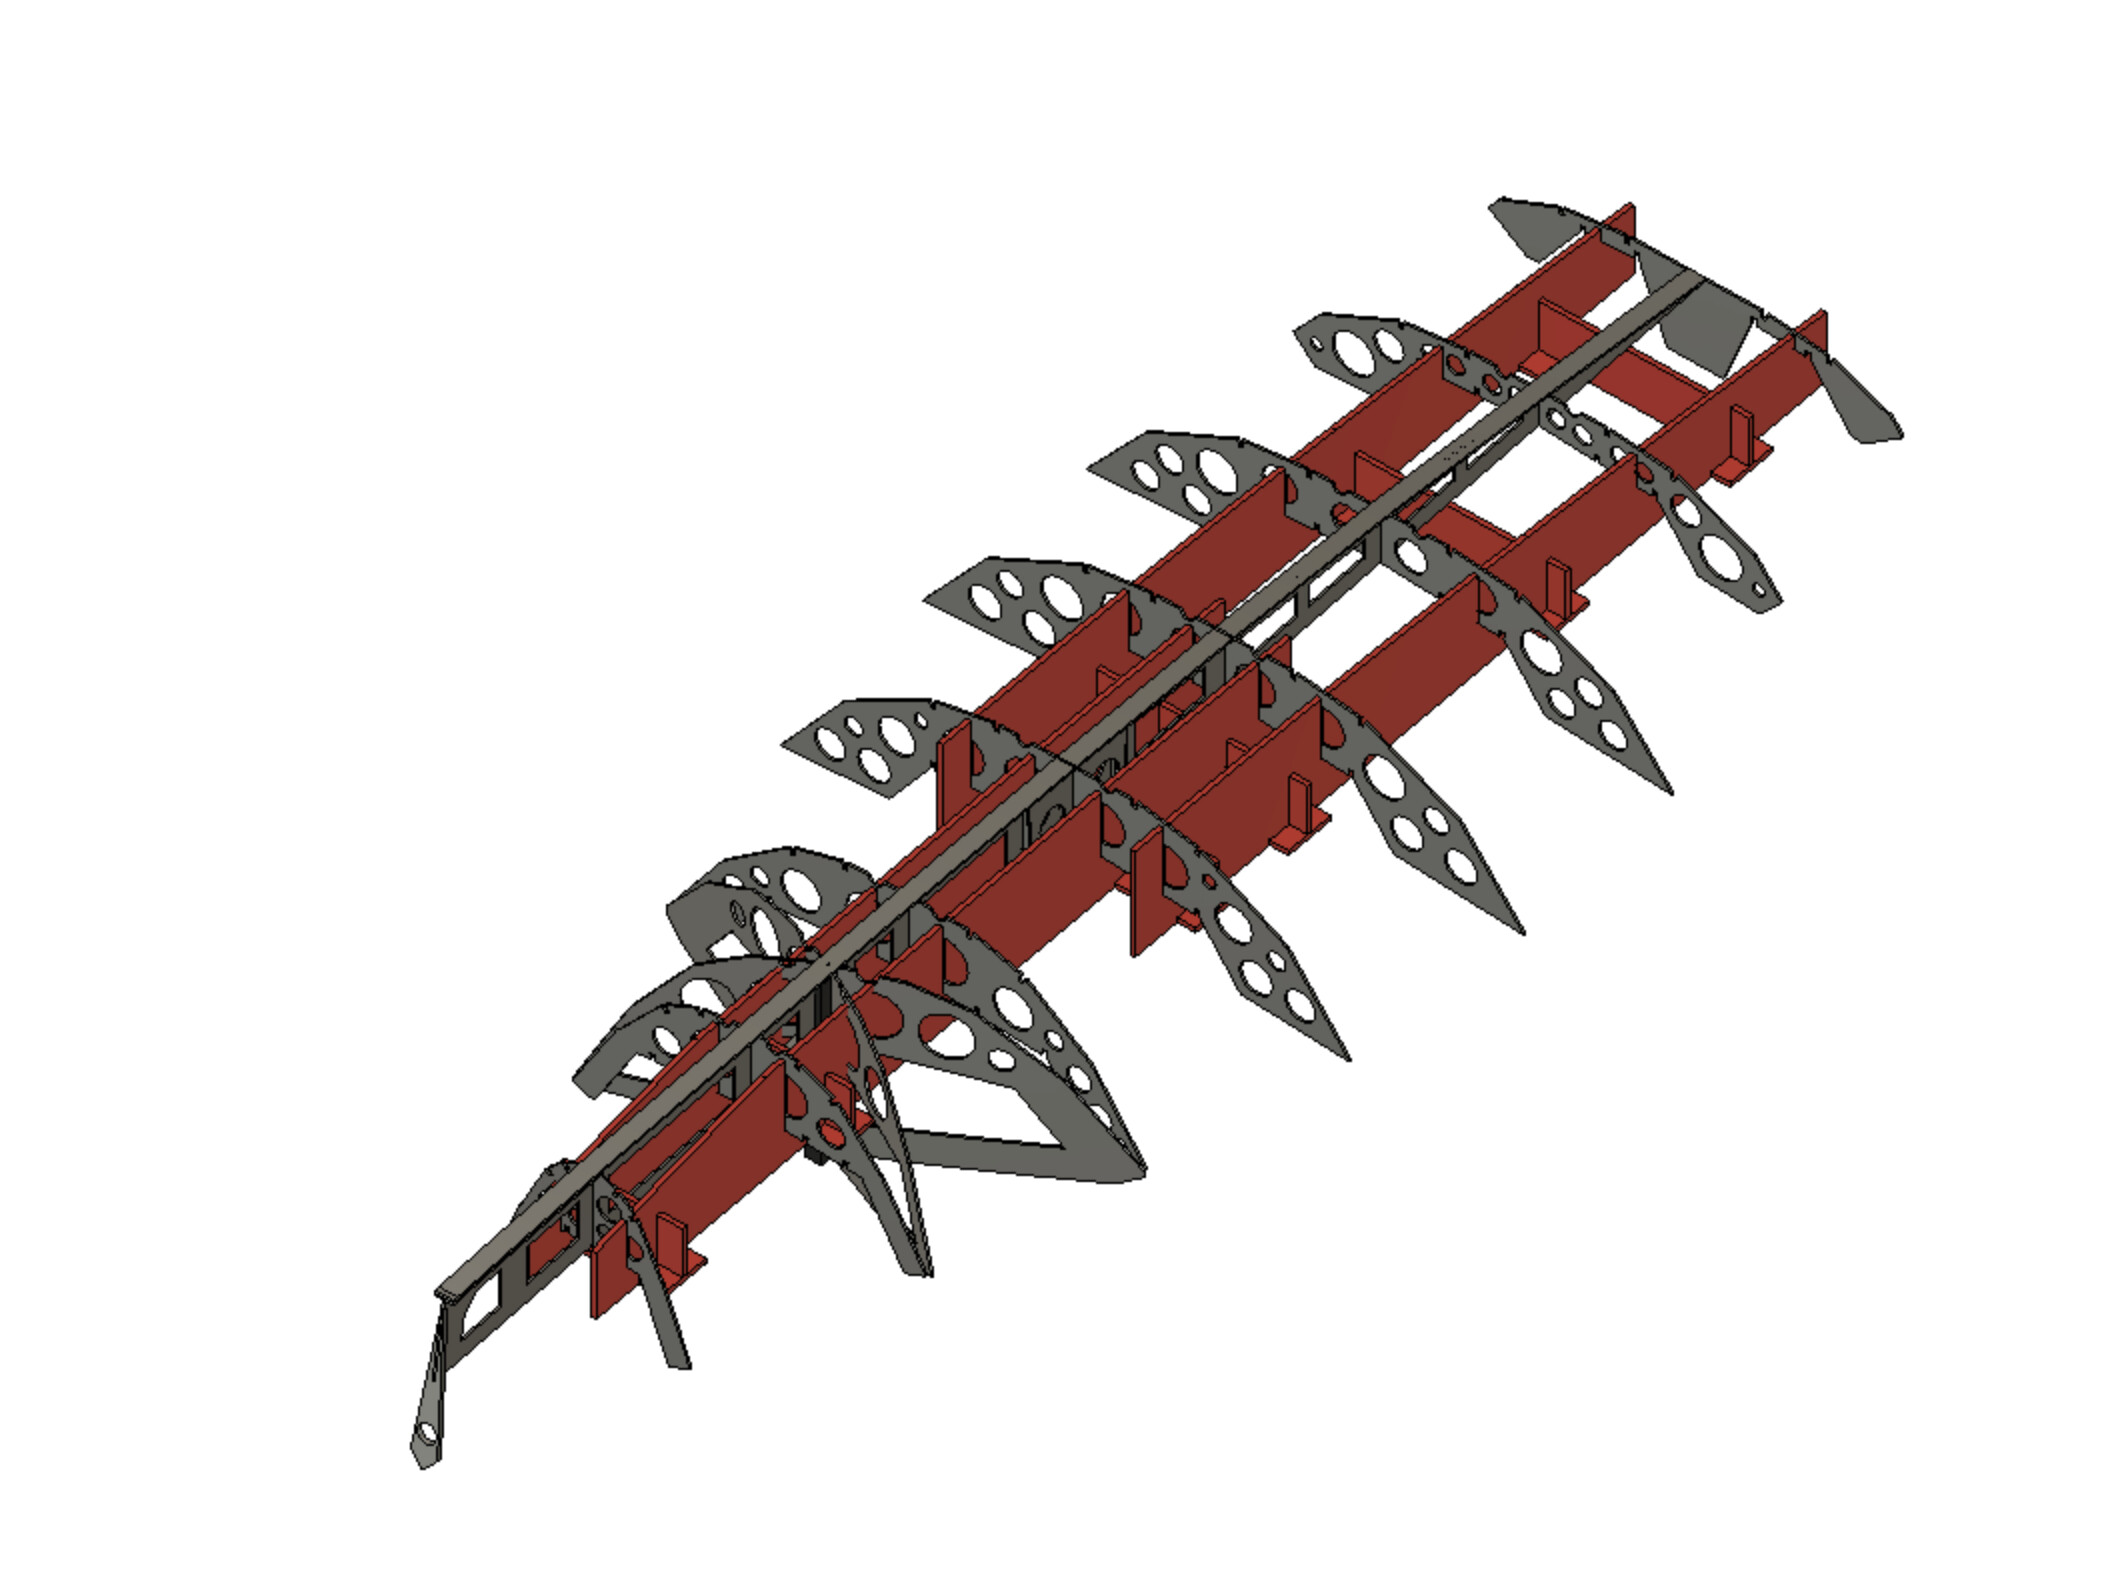
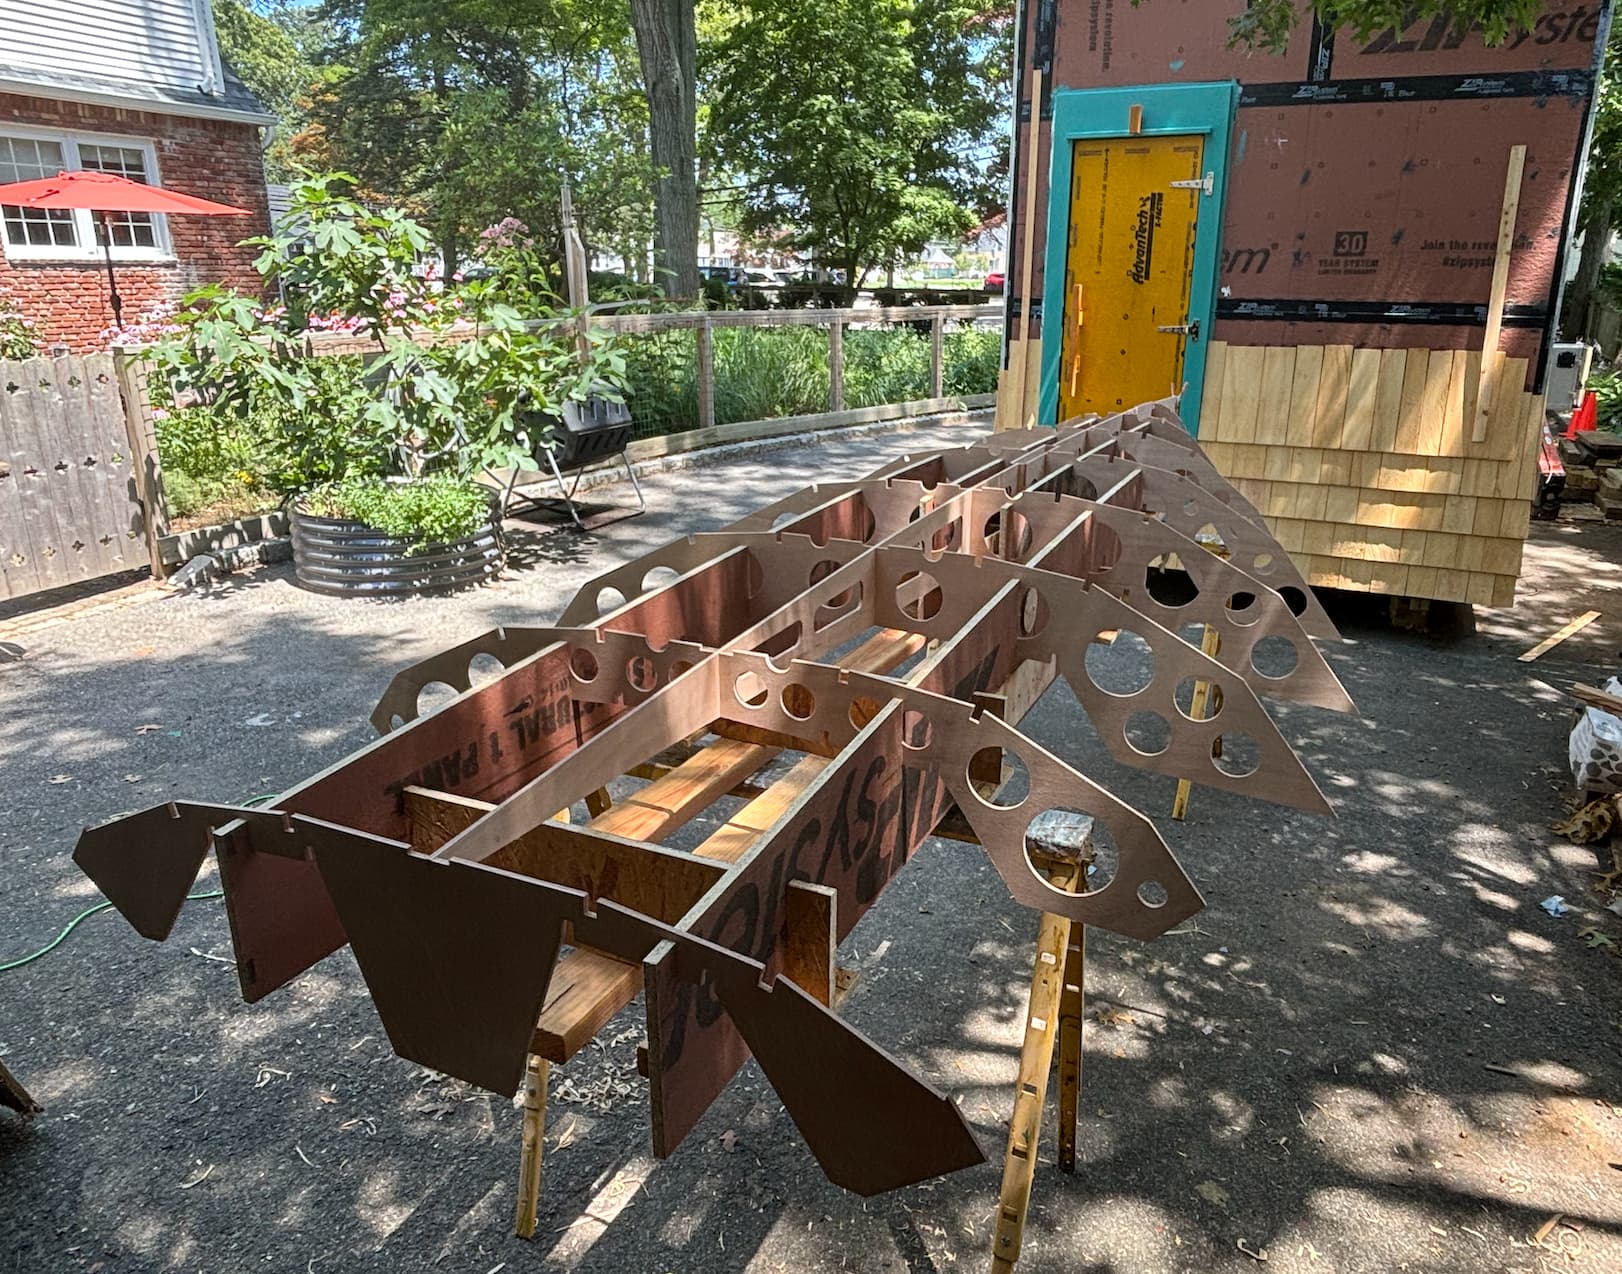
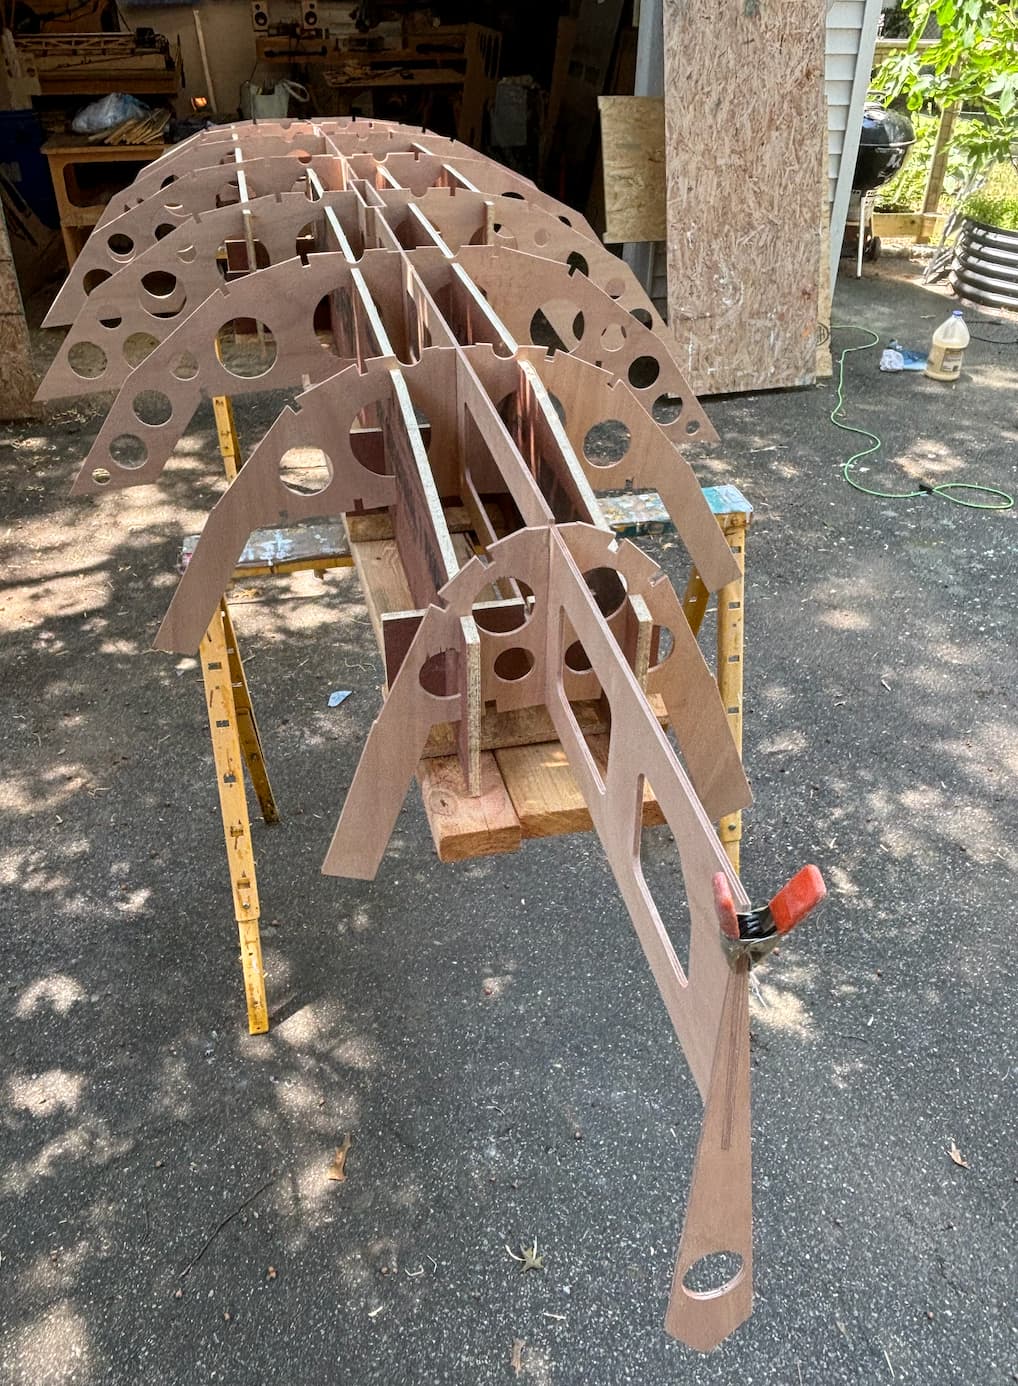
I am redesigning the whole interior - reducing the weight and overall material. With the help of carbon/fiberglass in strategic areas – 4mm hull instead of 6mm, 3mm deck, laminating foam wings (trying some vacuum bagging). Bringing the overall outer deck closer to the water, daggerboard instead of centerboard, simplifying the fittings and using as much soft rigging as possible. I should probably put this build on another thread so people can follow but it will go something like this:
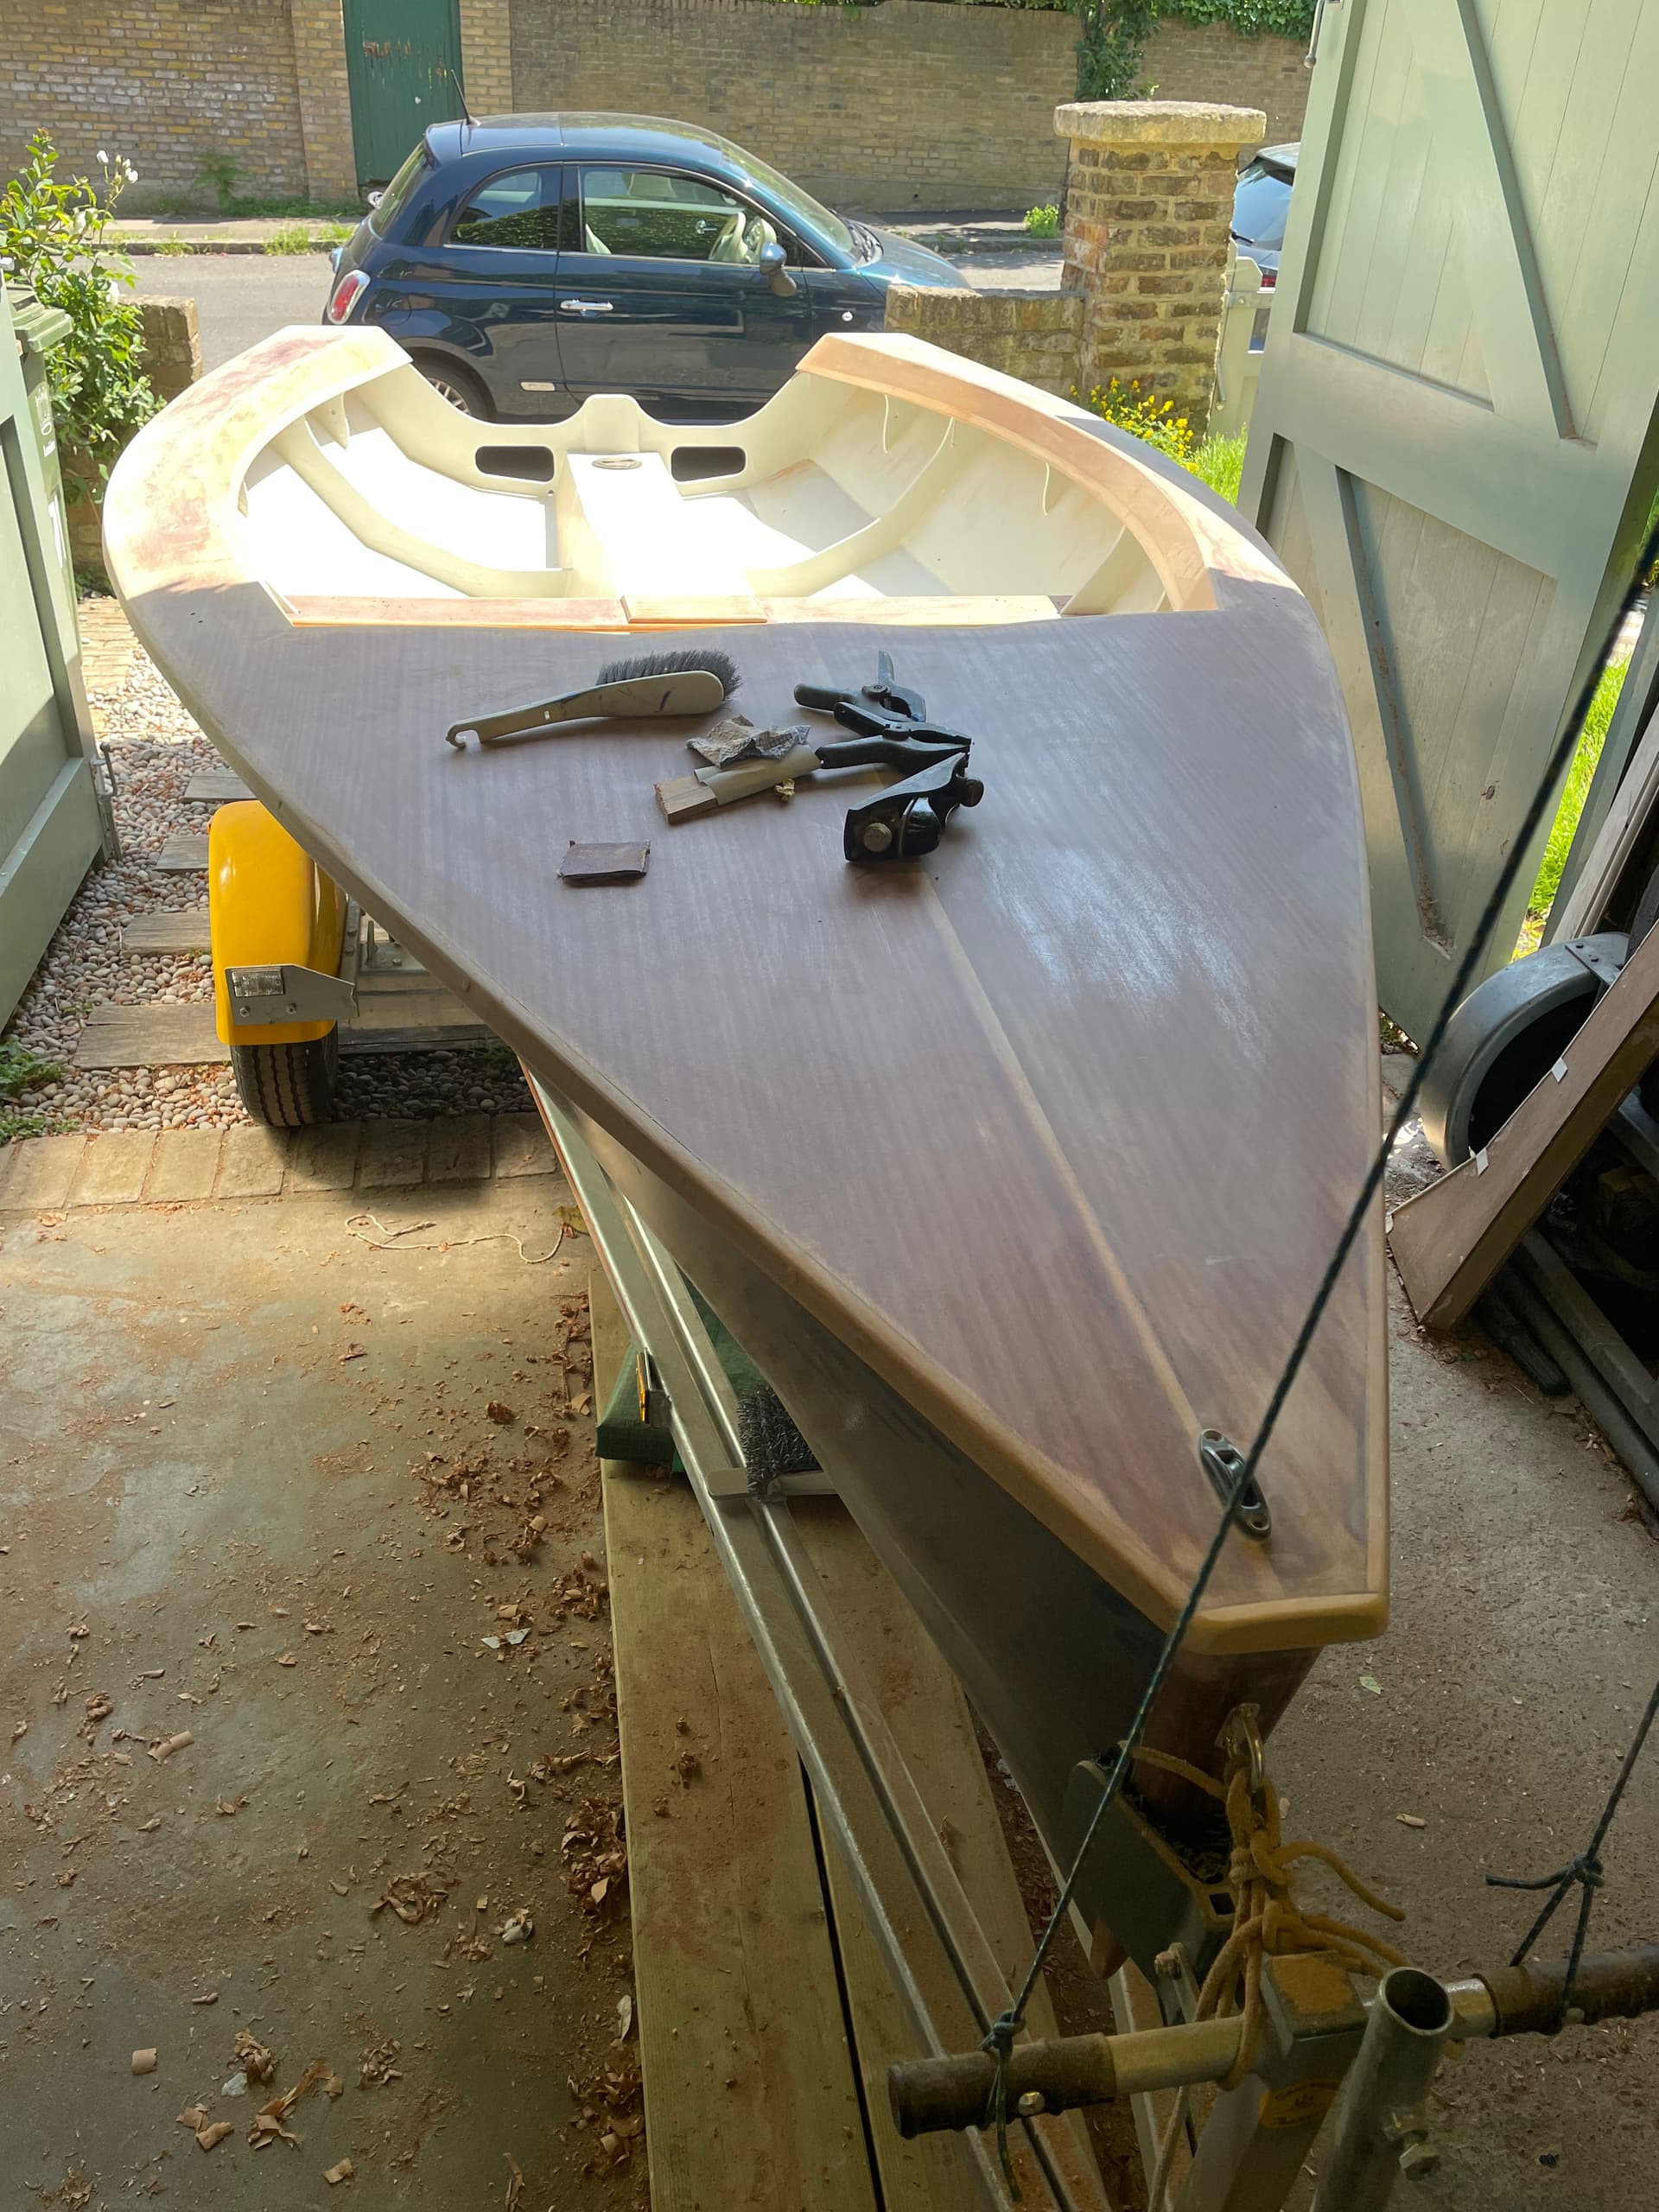
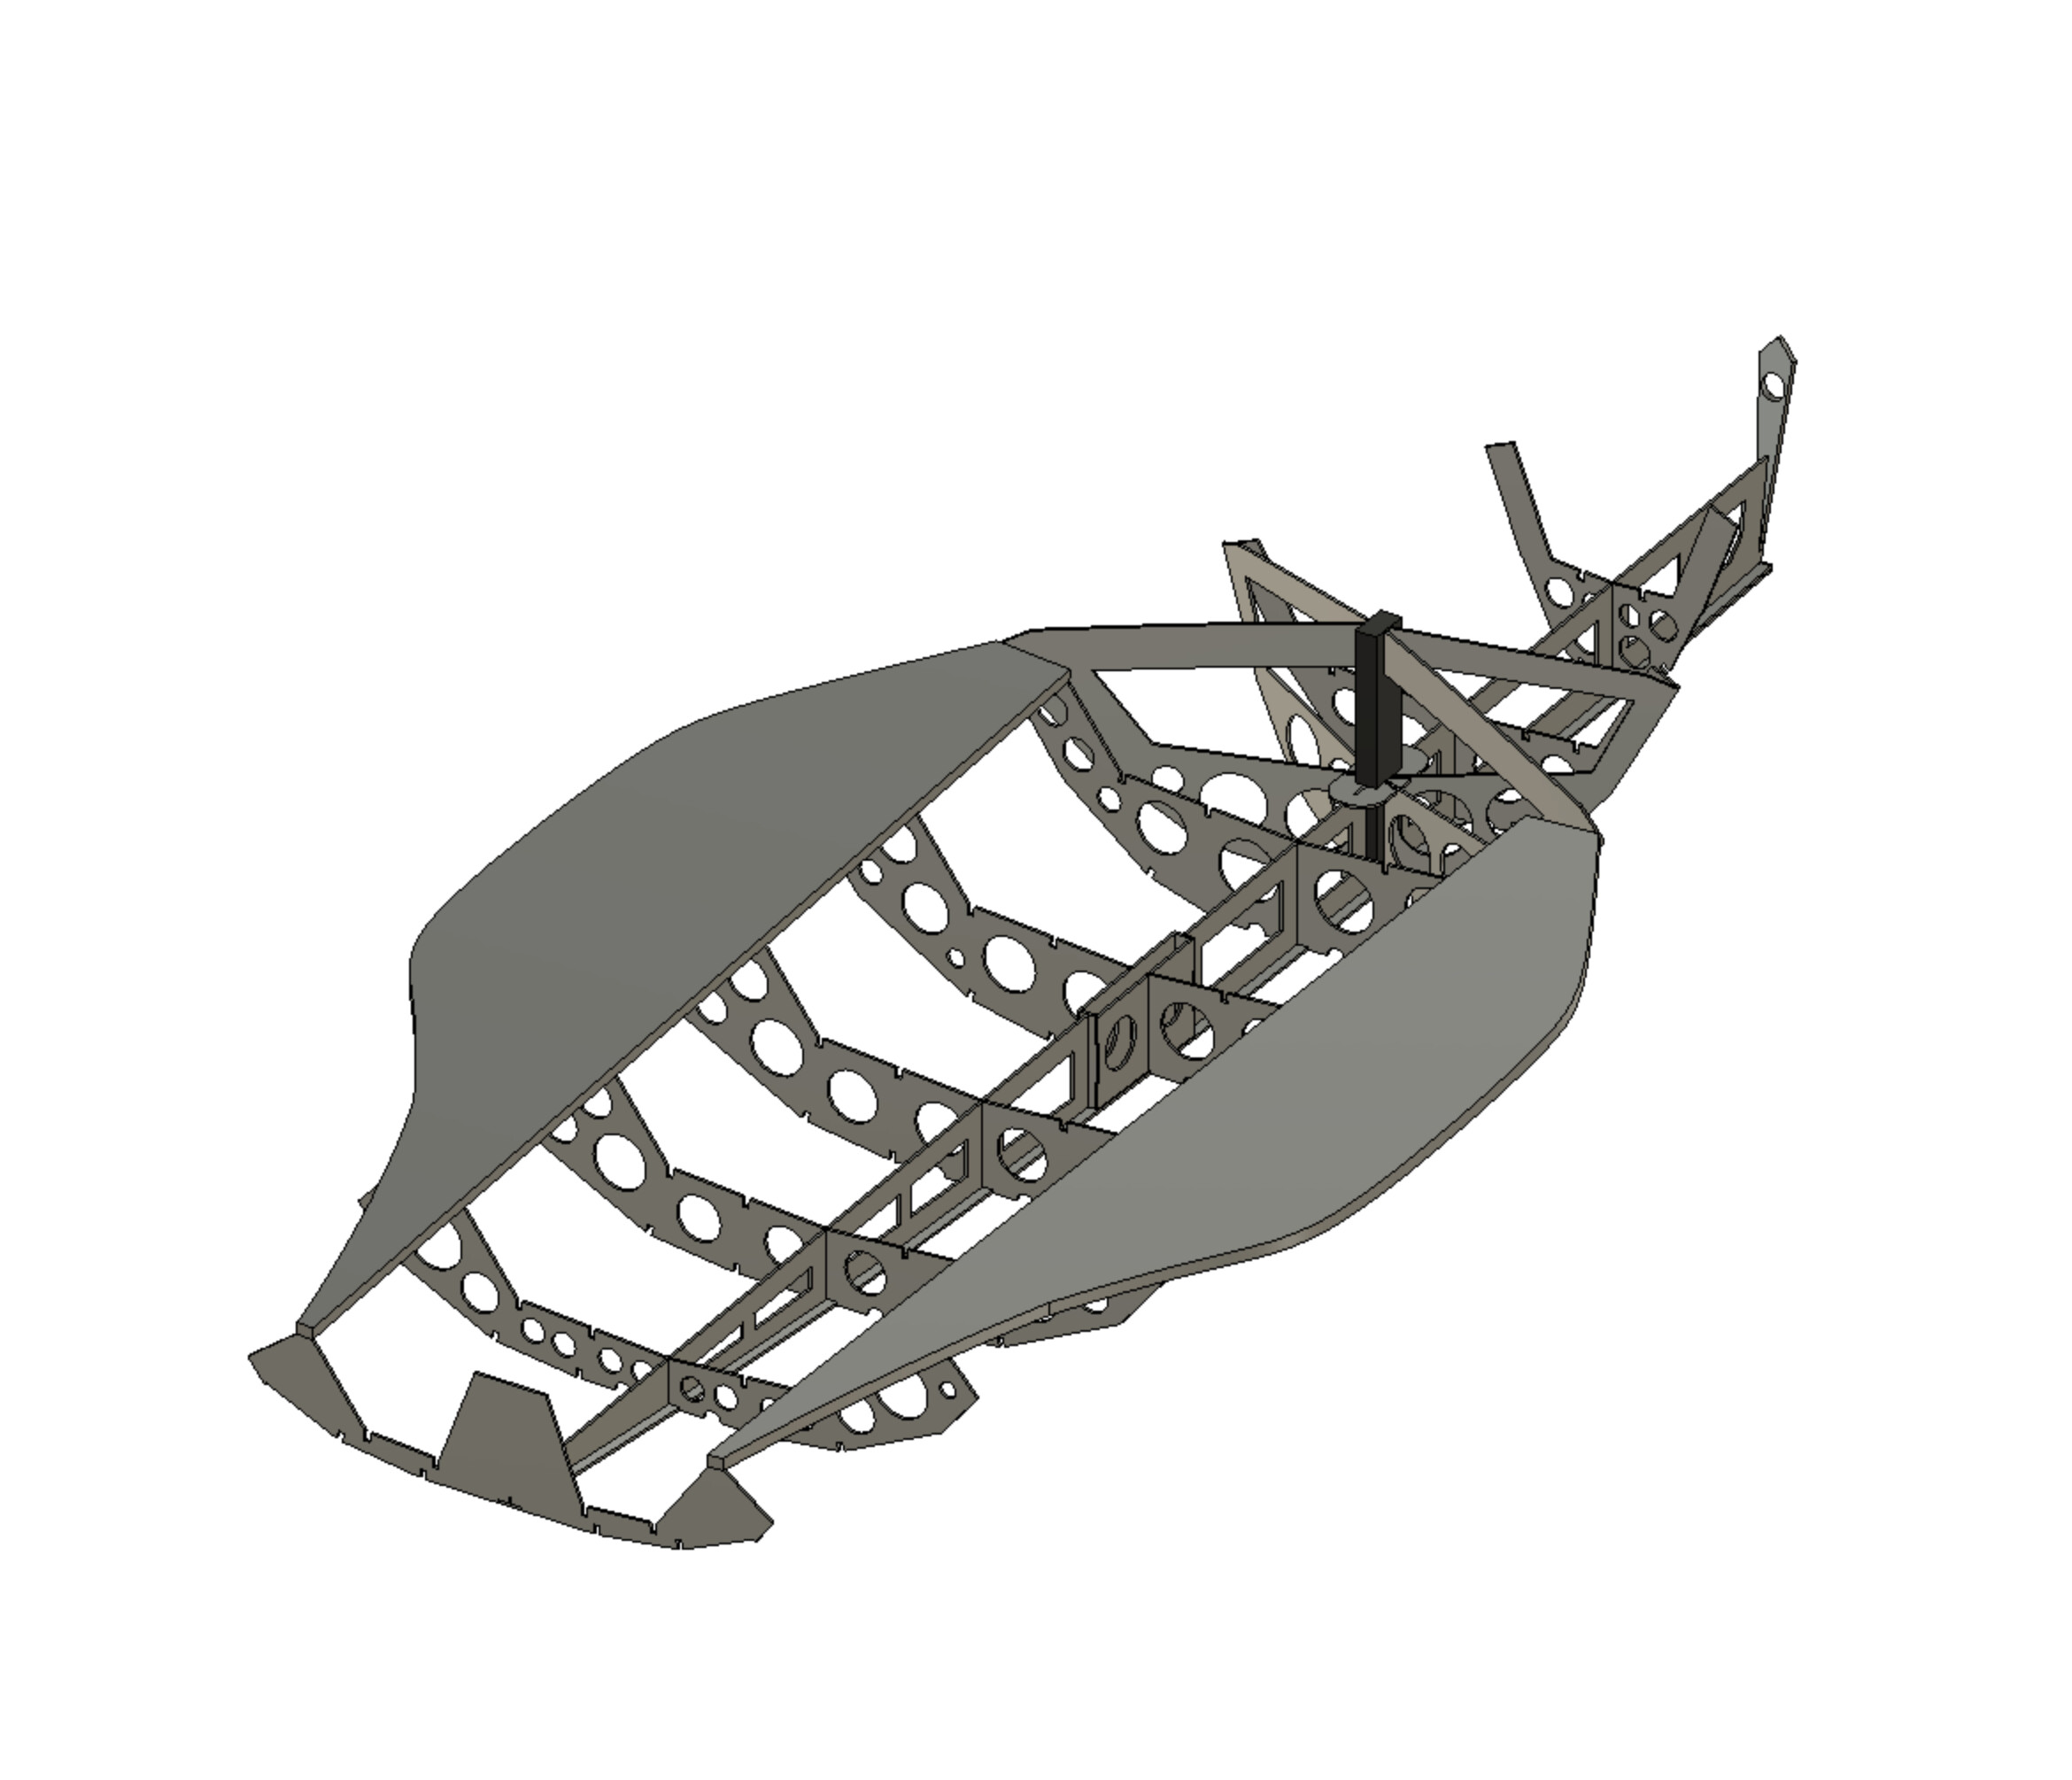
Red structure is the saddle it will sit on while I am making it.
The hull would fold in on itself at the back.
The bow would be uncovered giving more room for spinnaker bag. Forestay would go down on station 1 deck.
Overall, I do love sailing the boat – it is very responsive and adaptable and I see it has great potential. I just want to be in control of it more physically and not be at its mercy. I appreciate Keith’s design framework but I think in wood it makes more sense for a more small scale boat like the Moth. My redesign is really just based on the typical tried and tested plywood build with stringers that has been around for decades. I guess another potential design direction would be like the OK Dinghy route. Carve out a center area and leave plenty of buoyancy all around…
Wow awesome work… since I started looking at the design a few months back… iv question that so called 168lb total wight with their building material… my c420 is 235lb and my weta trimaran which has Honeycomb core hull with carbonfiber spas, rudder, dagger board, spin pole ect… is still sitting at 260lb. But i could be wrong just seems to look much Heavier.
This would be my first full boat from “scratch”.
I was looking at changing the design to a foam core carbon fiber ribs/false floor/rail and Honeycomb fiberglass hull which would produce a much lighter and slightly strong finish with a lower center of gravity. Increasing the length to Incorporate a Detachable spinn pole w/ furrling spinnaker. Possibly move mass location with wider rails for my fat a$$ to sit on. With all that said, I have a lot of Respect and admiration for keith design, im just tailoring to my wants and need.
As you mention vacuum bagging the way to go for both light weight and strength what im wanting to do. Iv only done maybe two dozen+ parts and repairs… but nothing bigger then a 3’ part… iv done limited (large scale over 10’) Infusing with other but never on my own, but it seems to be the way to go on larger parts, but there also risk because small mistake and calculations can scrap the whole thing
Are those your CAD files?..im retired Mechanical designer but i still keep my solidworks Professional License active… bit pricey, but it nice to have ability to design and make my toys. Now i think of it… maybe asking about the cnc format and if there an 3d files or cad files is the reason he did not answer by hand full of Questions.
What your thinking between switching from centerboard to dagger board… is it to cut some weight or reduce the trunk… Just curious…
Was going to post pic of my most recent full rebuild… but not allow as a new user… keep me informed… your work and Customizations and redesign… no…more of a new design Inspired by the orginal.
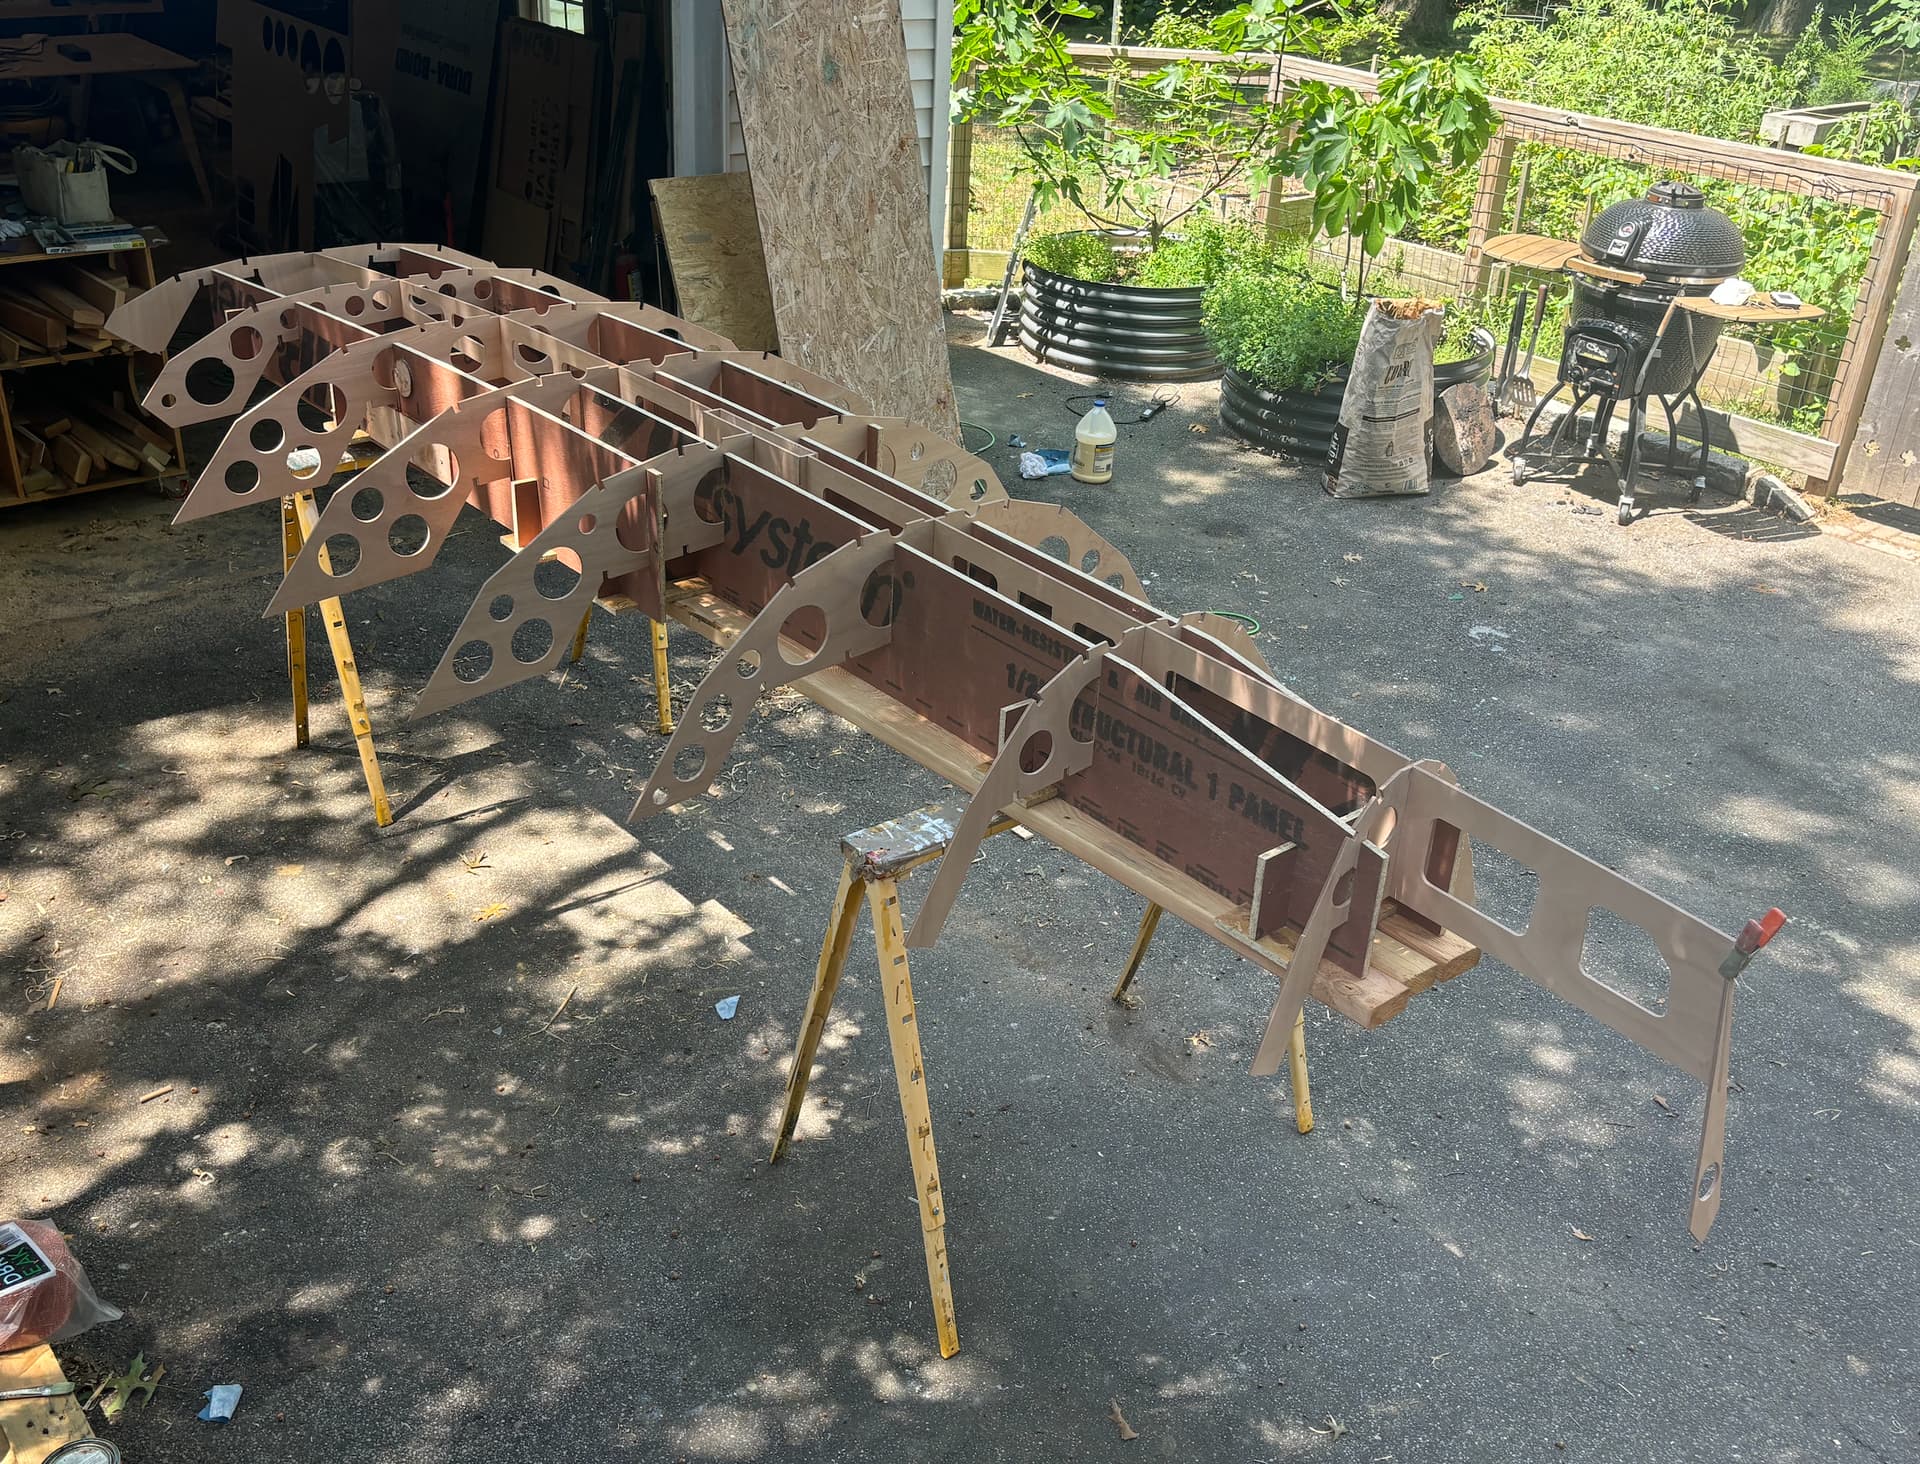
Save quite a bit of weight with the ribs. Looking good! And the stern looks much better your way… that should allow for an easier capsize recover and faster self bailing. On your orginal h1 did i see of suction bailer on the floor next to the center board trunk… was that orginal or did you add that to speed up bailing.
yep, i am a little scared of making massive errors in the vacuum process - i was going to keep it simple and just do two things – foils and deck area for hiking (about 7’X2.5’) - basic shape, keep it flat + do it on flat surface etc.
i think a large part of the weight in the original is the high deck, the mahogany bits and bobs. all stuff that adds to the charm but has got to go. in my instance i used some old growth southern pine for king post which was a big mistake. I’m sure I went too heavy on epoxy and paint as well.
part of the consideration here is the workflow. i would like to be assemble this fast and keep it all simple. that way someone else can use my plans if it works. i just want it a bit more manageable (20-30 lbs less?) and then i will be happy.
keep in mind that the hull is really only 30-40 percent of the cost.
the self-bailers that were in the original (and plans) but were expensive, heavy…they collect sand and dirt after a while. not worth it!
yep, the daggerboard is to reduce all the drag and commotion in the slot. i also think it’s easier to shape a daggerboard and prolly vacuum.
i guess if you pay the fee to keith i can share all my files? he probably won’t be happy - but at the end of the day i think his current wood design is fundamentally unsafe/unsound to anyone under 230lbs even in peak condition.
Also here is an interesting mod of a contender that inspired me: Bonezzi Sailing
Im not 100% sure I’m going to build a true hadron but more of a hybrid. but I still plan on buying the plans to study this week, so i might take you up on that as study plans after I buy his plans. The plans I wish I could get a hold of is a Truc12 and SV14… sadly truc is a production boat or was one… and the sv14 used to be DIY plans now its a production kit. Im looking at other plans from other designers like a Naut 350 or 395 or a 2.4h, even the BM550 from keith…
Big fan of the 2.4 and the sv14 since one of my brothers Disable, but our intercoastal has some crazy sand bars and spoil islands and they are fix keel is a bad mix.
Its so easy to go heavy with epoxy/resin and gelcoat ending up with over weighted parts. Vacuming and infusing it way to easy to go too thin and starving the part, and the amount of waste from vaccuming is massive. If your plan to add a gelcoat or a finish fiber layer definitely worth adding a textured peal ply to your bag.
Do you have a slot gasket on your centerboard/dagger board. Helps reduce most of the turbulence and drag within the slot. They using a more rigid material now then the old heavy sailcloth just repalced it on our c420 along with a big hole…
One of the question i had for kieth was the Minimum safe crew weight and maxium crew weight which as i said there was no responce… so you saying unsafe under 230… is that because you have to toss your weight around to keep it up… or just that much to right it after capsize. Wich I can see as the c420 min safe crew weight is 120lb per crew so 240lb total.
My goal is this summer to rework the design and start figure sourcing hardware and rigging as we both know pound for pound the bare hull is really one of the lowest price section and everything else eats the budget quickly. Maybe even 3d print and or buld a 1:10 scale if I looking something to do with kids… between june we have highs in up 90s and lows in the upper 80s and Relative humidity 60% -100% with rain chances every day almost… not best for dealing with Composite/thin word or gelcoat… but our fall-spring means sailing and build is at its best.
I belatedly routed a rebate around the slot and put in a mylar gasket affixed with VHB tape. I think it works ok? but still collects debris etc. I’ve never seen a 420 gasket in good shape!
Love the look of the 2.4 and the sv14. What about the i550?? https://i550sailboat.com/
Has a real following but outside my budget - it really leans into easy forms for the DIY builder that could be vacuumed.
With soft shackles and other dyneema solutions plus building your own rudder stock i think you cut out 20-30 percent of the hardware on Hadron.
Paint wise - i will just stick to Epifanes or maybe Kirby. I know gelcoat is better in some ways but it such a nightmare to work with outside a mold.
In terms of weight - yes - bit tippy/uncontrollable when sailing - not terrible because the rig is so versatile with ability to de power but my primary concern is the capsize. I’m 170lbs/6’ 2”…
I love working with wood because it is easy to repair and mod. Perhaps you could do a prototype quickly in wood and then use higher end materials for something more refined down the line?
Thinks for the heads up on the i550… pleans are Definitely cheaper but build cost has to be up there. Definitely with 600sqft of sails. But 10" of draft is a plus for launch and trailer but to lift a nearly 6’ 150+ lb deck mount keel each time is crazzy. I was reading they did the Everglades Challenge with it… one of these years im going to do it… but i say that every year.
The slot gasskets have a short life for racing, as soon as it forms that bend, its done. we repace ours every season… the pic in my last post was the old one i replaced few months ago… I only do fun “races” so it does not bother me much, but my daughter does ~10-14 regattas a year, including multiple practices a week so we keep our c420 in race ready Condition. This year the joke at our club was she broke about every part and the boat itself that its pretty much a new boat now.
Dinghy full assemblies ruddets are getting crazy over price, when you looking at $800-$1800+ is nutz i have a few spares from a few different boats and even more assemblies without rudders so I definitely would modify to fit the assembly i have…
Same goes with mast/boom and standing rigging and sails. If i can get away with it. Ill attempt to use something off my shelf… have a 100sqft sail with carbon mast boom that might fit perfect.
Im sitting little over 6’6" so moving around under booms is always challange… weight… yea haha.
Iv always done everything in gel-coat as i have all the gear needed to spray it… but it adds quite a bit of weight about ~8.5lb a gallon and the last 14’ boat i did used over 3+ gal. But out of the mold gelcoat process uses a lot more gelcoat then in-mold. Not including Chemicals like wax, duratec ect… and way thicker too. Iv never used paint with a boat, so going to try out Epifanes, got to be lighter and cheaper gelcoat… and faster too.
Last gelcoat i did was out of the mold…more time removing old gelcoat, that was the hard part… the grip is my own design. I spray slow cure mix gelcoat with extra bonding agent, then I load a ton of small composit texture grip. Before it curred and still safe to do another wet layer… I blew off the extra texture grip … then spray a layer with almost a 1:1 duratect gloss and gelcoat with bonding agent. thin layer… it came out perfect… loved it… holding up better then i could ever Imagine. (Think im limmit to one try again