Yeah I saw that. This project has been on the table for WAY TOO LONG. Every time I go to pick it up something else comes up. That’s why I decided to put it in a test table so I would have another reason to move it back up the list. I am excited to see it working! I have ideas for a dinning room table version, but that was more than I wanted to bite off my first time building one lol.
Just went back and looked to see when I ordered the ZEN Kit from Ryan…
I have 3 of those still. I had a couple of ZenXY projects on the board thst have been on hold now for far too long, and need to jet bumped up to the top.of the pile… i have parts printed for 4 tables, actual cut parts for 2 and raw materials for 2. You’d think I’d at least not let the materials go to waste…
I did finally make a little bit of progress today, but only a little bit.
Found the LR4 in the garage, its like any flat place around here, somewhere to set things. Got a sheet of MDF loaded up and started the cut. Got the “window” cut out for the acrylic in the top and bottom sections, started cutting the outside of the lower section but the wire hung up and unplugged the router Came inside to fix the gcode but the AC feels so good that I got lazy real quick lol. Tomorrow morning hopefully I can get out there before the garage is 2000° and get that cut finished and the 1/2" plywood parts cut.
Well… I didn’t make it out there earlier like I wanted to. But I did get the MDF parts finished as far as the LR4 is concerned. Got pulled away for a side project then hopefully I will be back out to cut the 1/2 plywood parts.
Once all the parts are cut and cleaned up, I will be able to assemble the ZEN on the table top and make sure I built in enough clearance for everything. Then it will be time to cut up some 3/4" plywood for the base cabinet.
One thing I am worried about is if I made the “sides” too big. Meaning too much larger than the “working area”. Is it able to leave that area to home and then go back and grab the steel ball? or should the core always be inside the working area??
Finally got the last parts for the table top cut out. Some quick sanding done. Tomorrow I will start temporarily assembling it to see how things will fit together. Once I know all my sizes and everything will work as planned I will take it apart and do proper cleanup and coat everything in some kind of varnish so it stays looking good.
Once I get things put together tomorrow I will try and take some pics.
Got it all put together and mounted to the bottom. All the belts run. Now I am on to wiring.
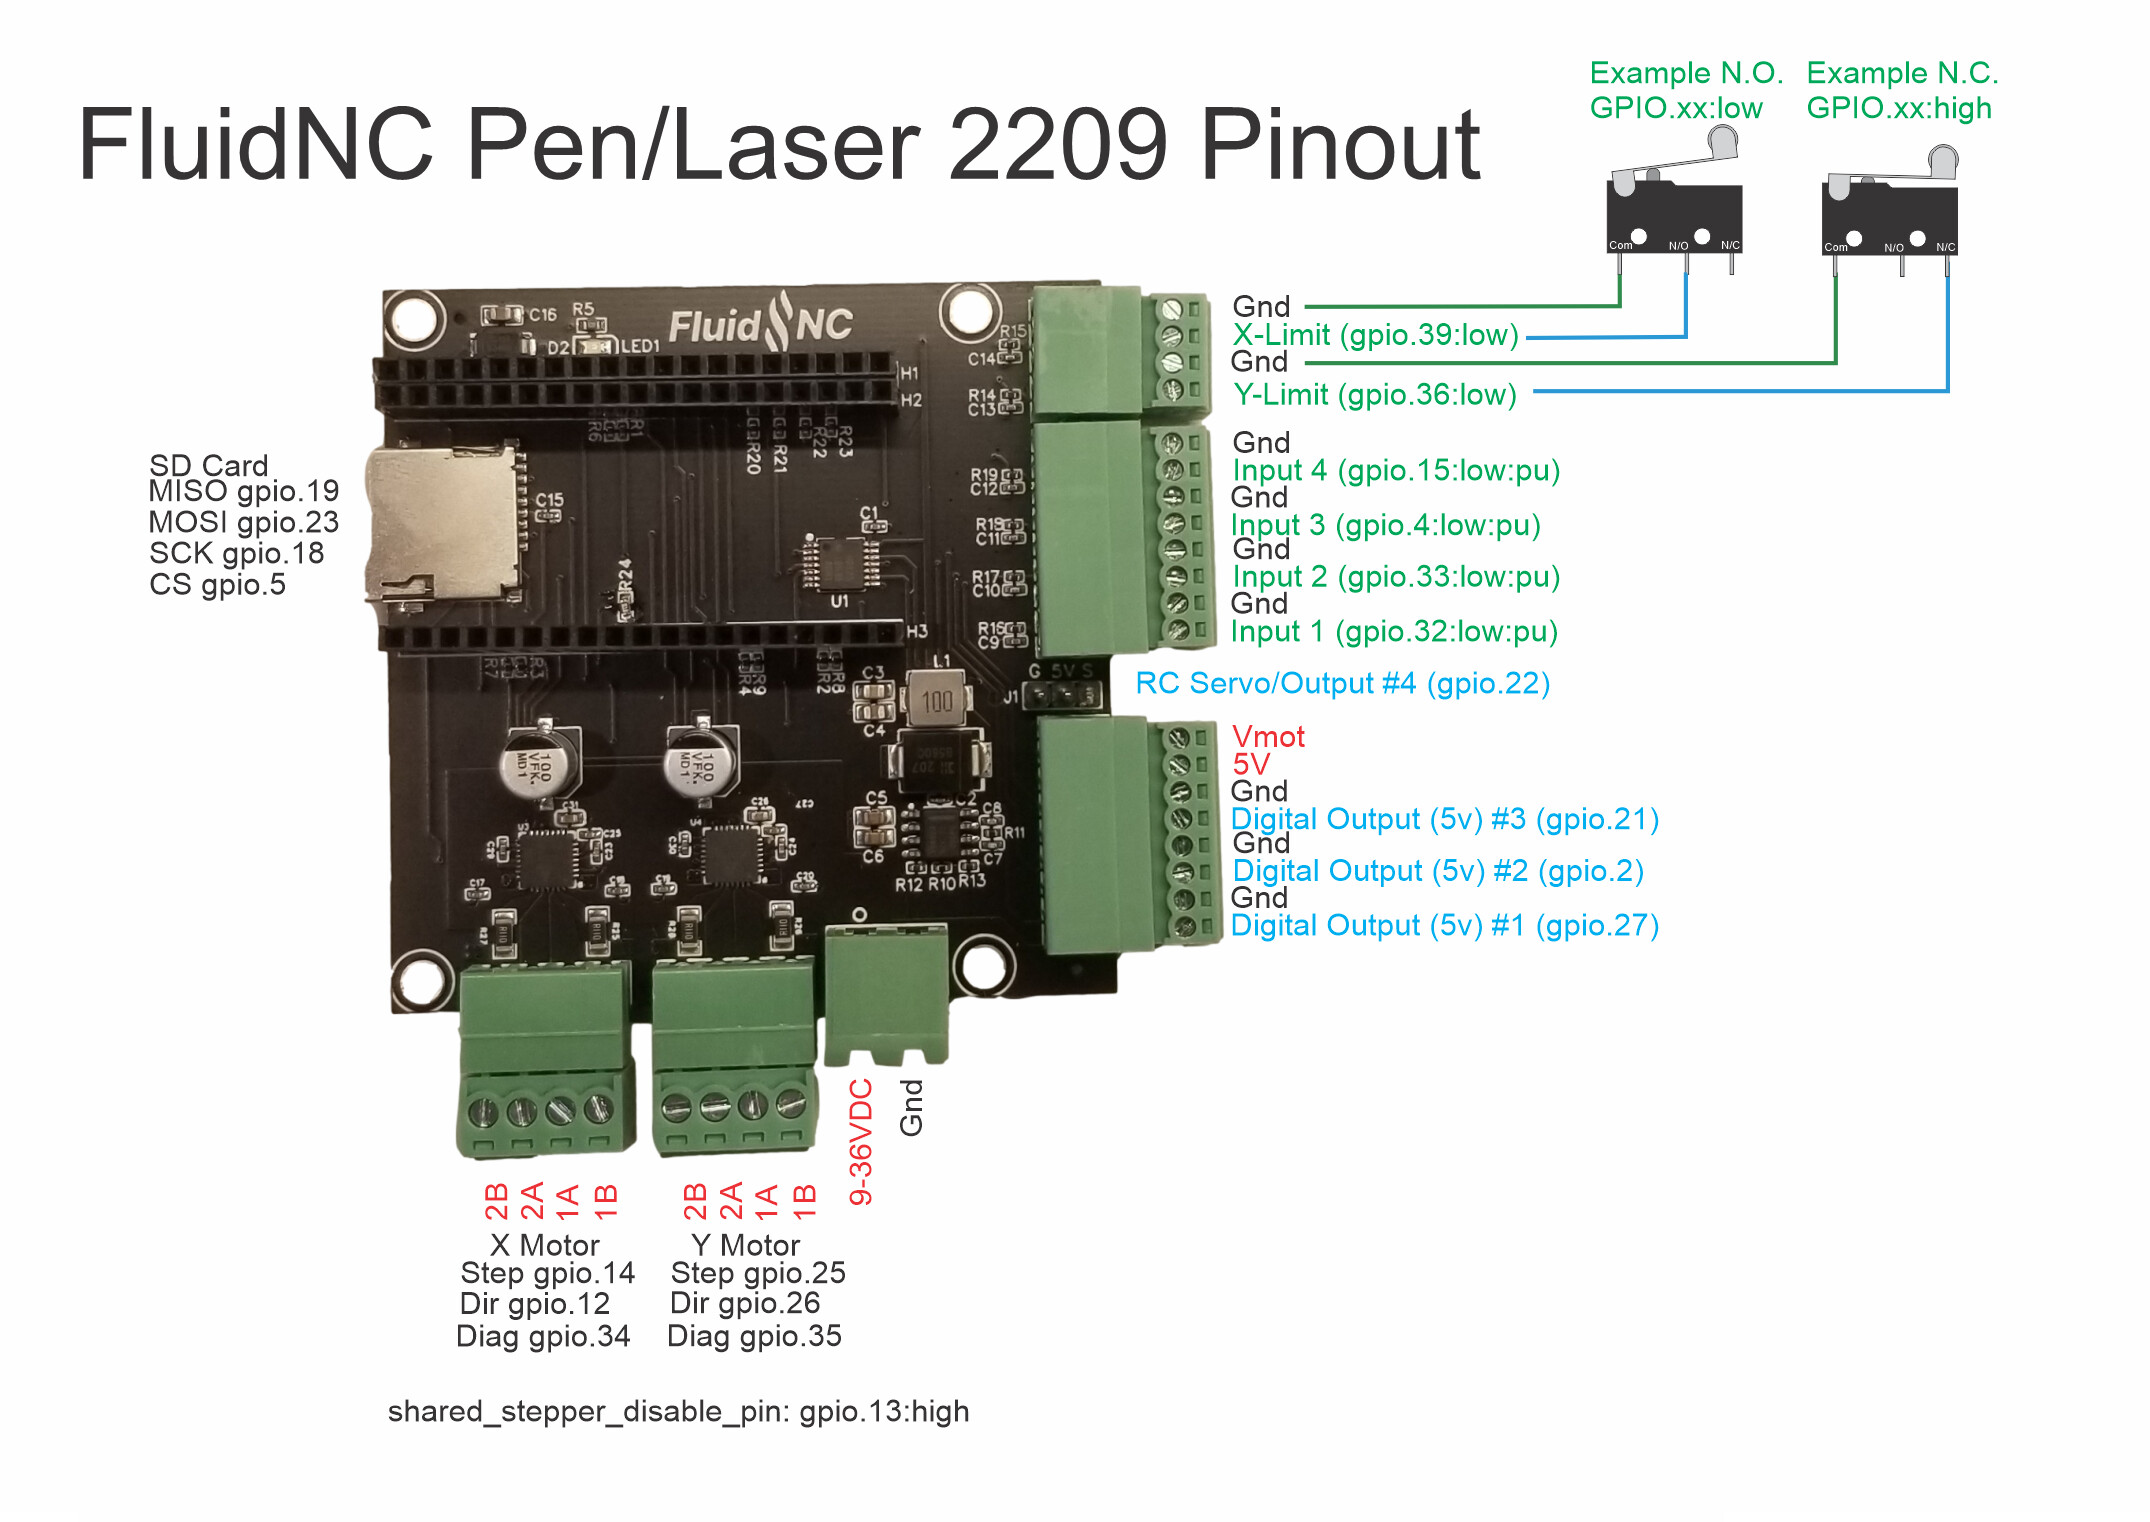
These optical endstops need 5v to work right? If so am I looking at this pinout right? There is one 5v out (just below the Vmot) and I guess I can split from that and go to each of the 2 endstops?
That’s even better. I had no idea how to figure out how much lol. Didn’t want to have to go back to the store multiple times. But that makes me worry a lot less lol
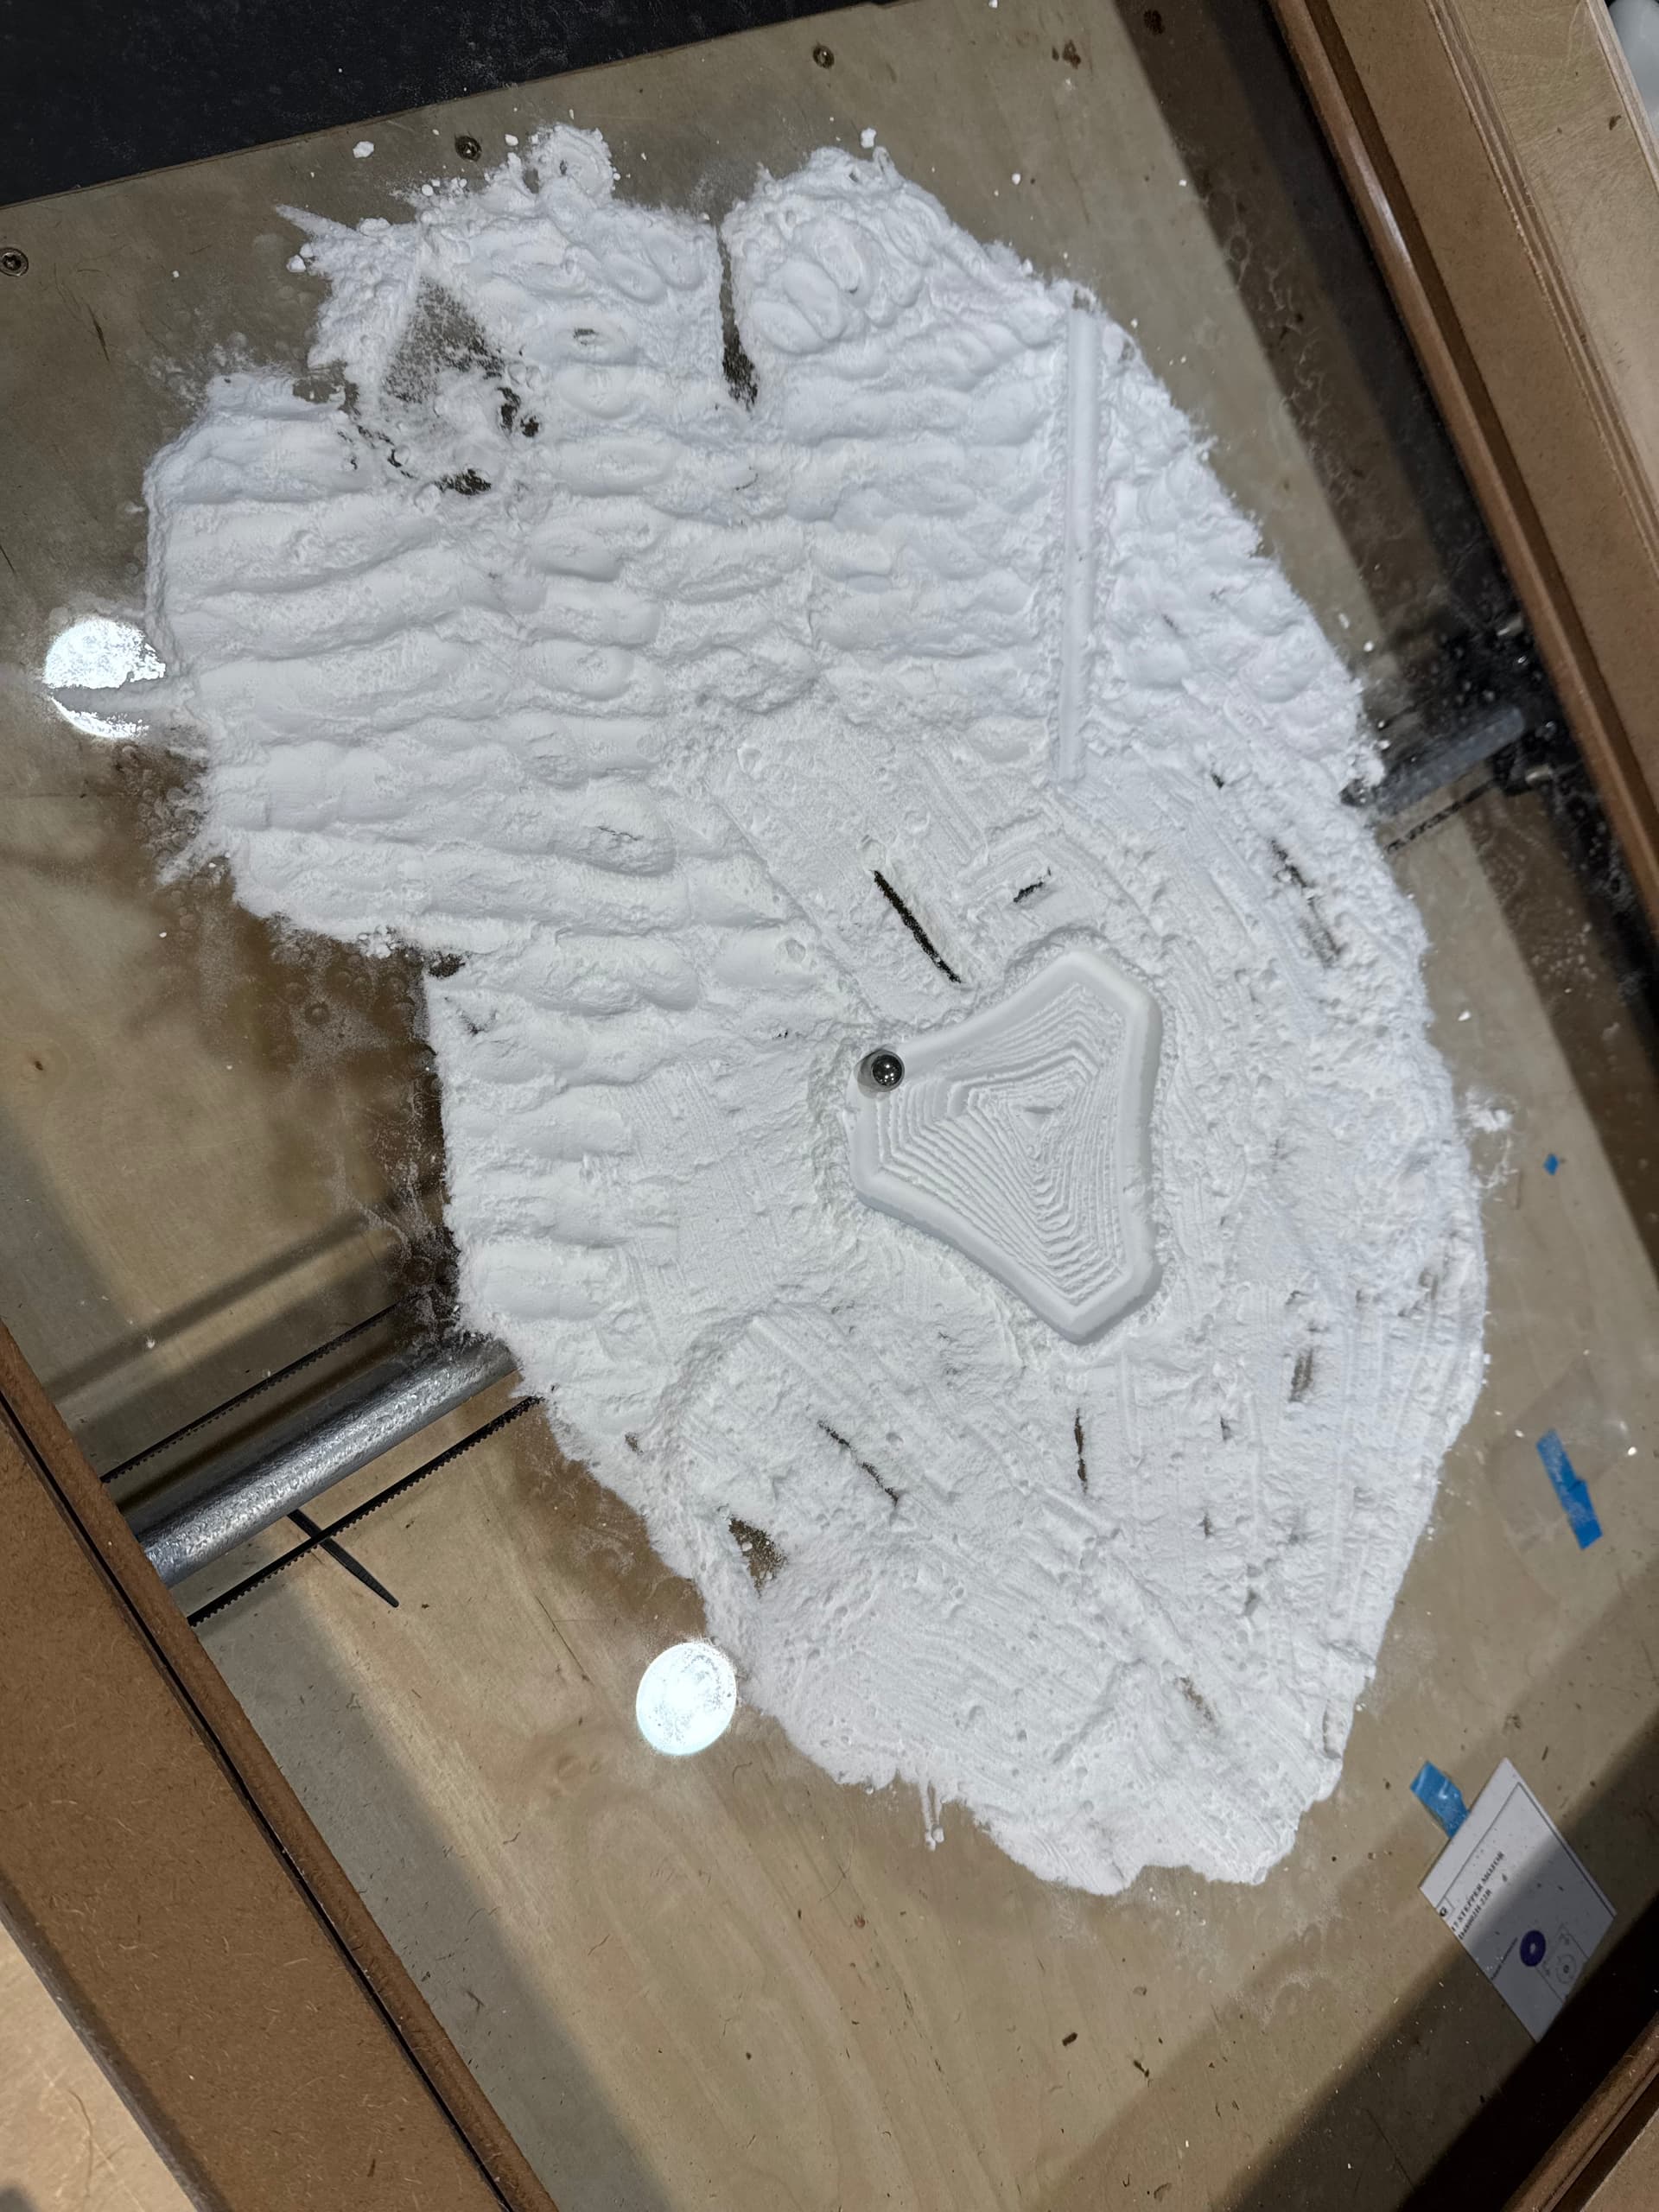
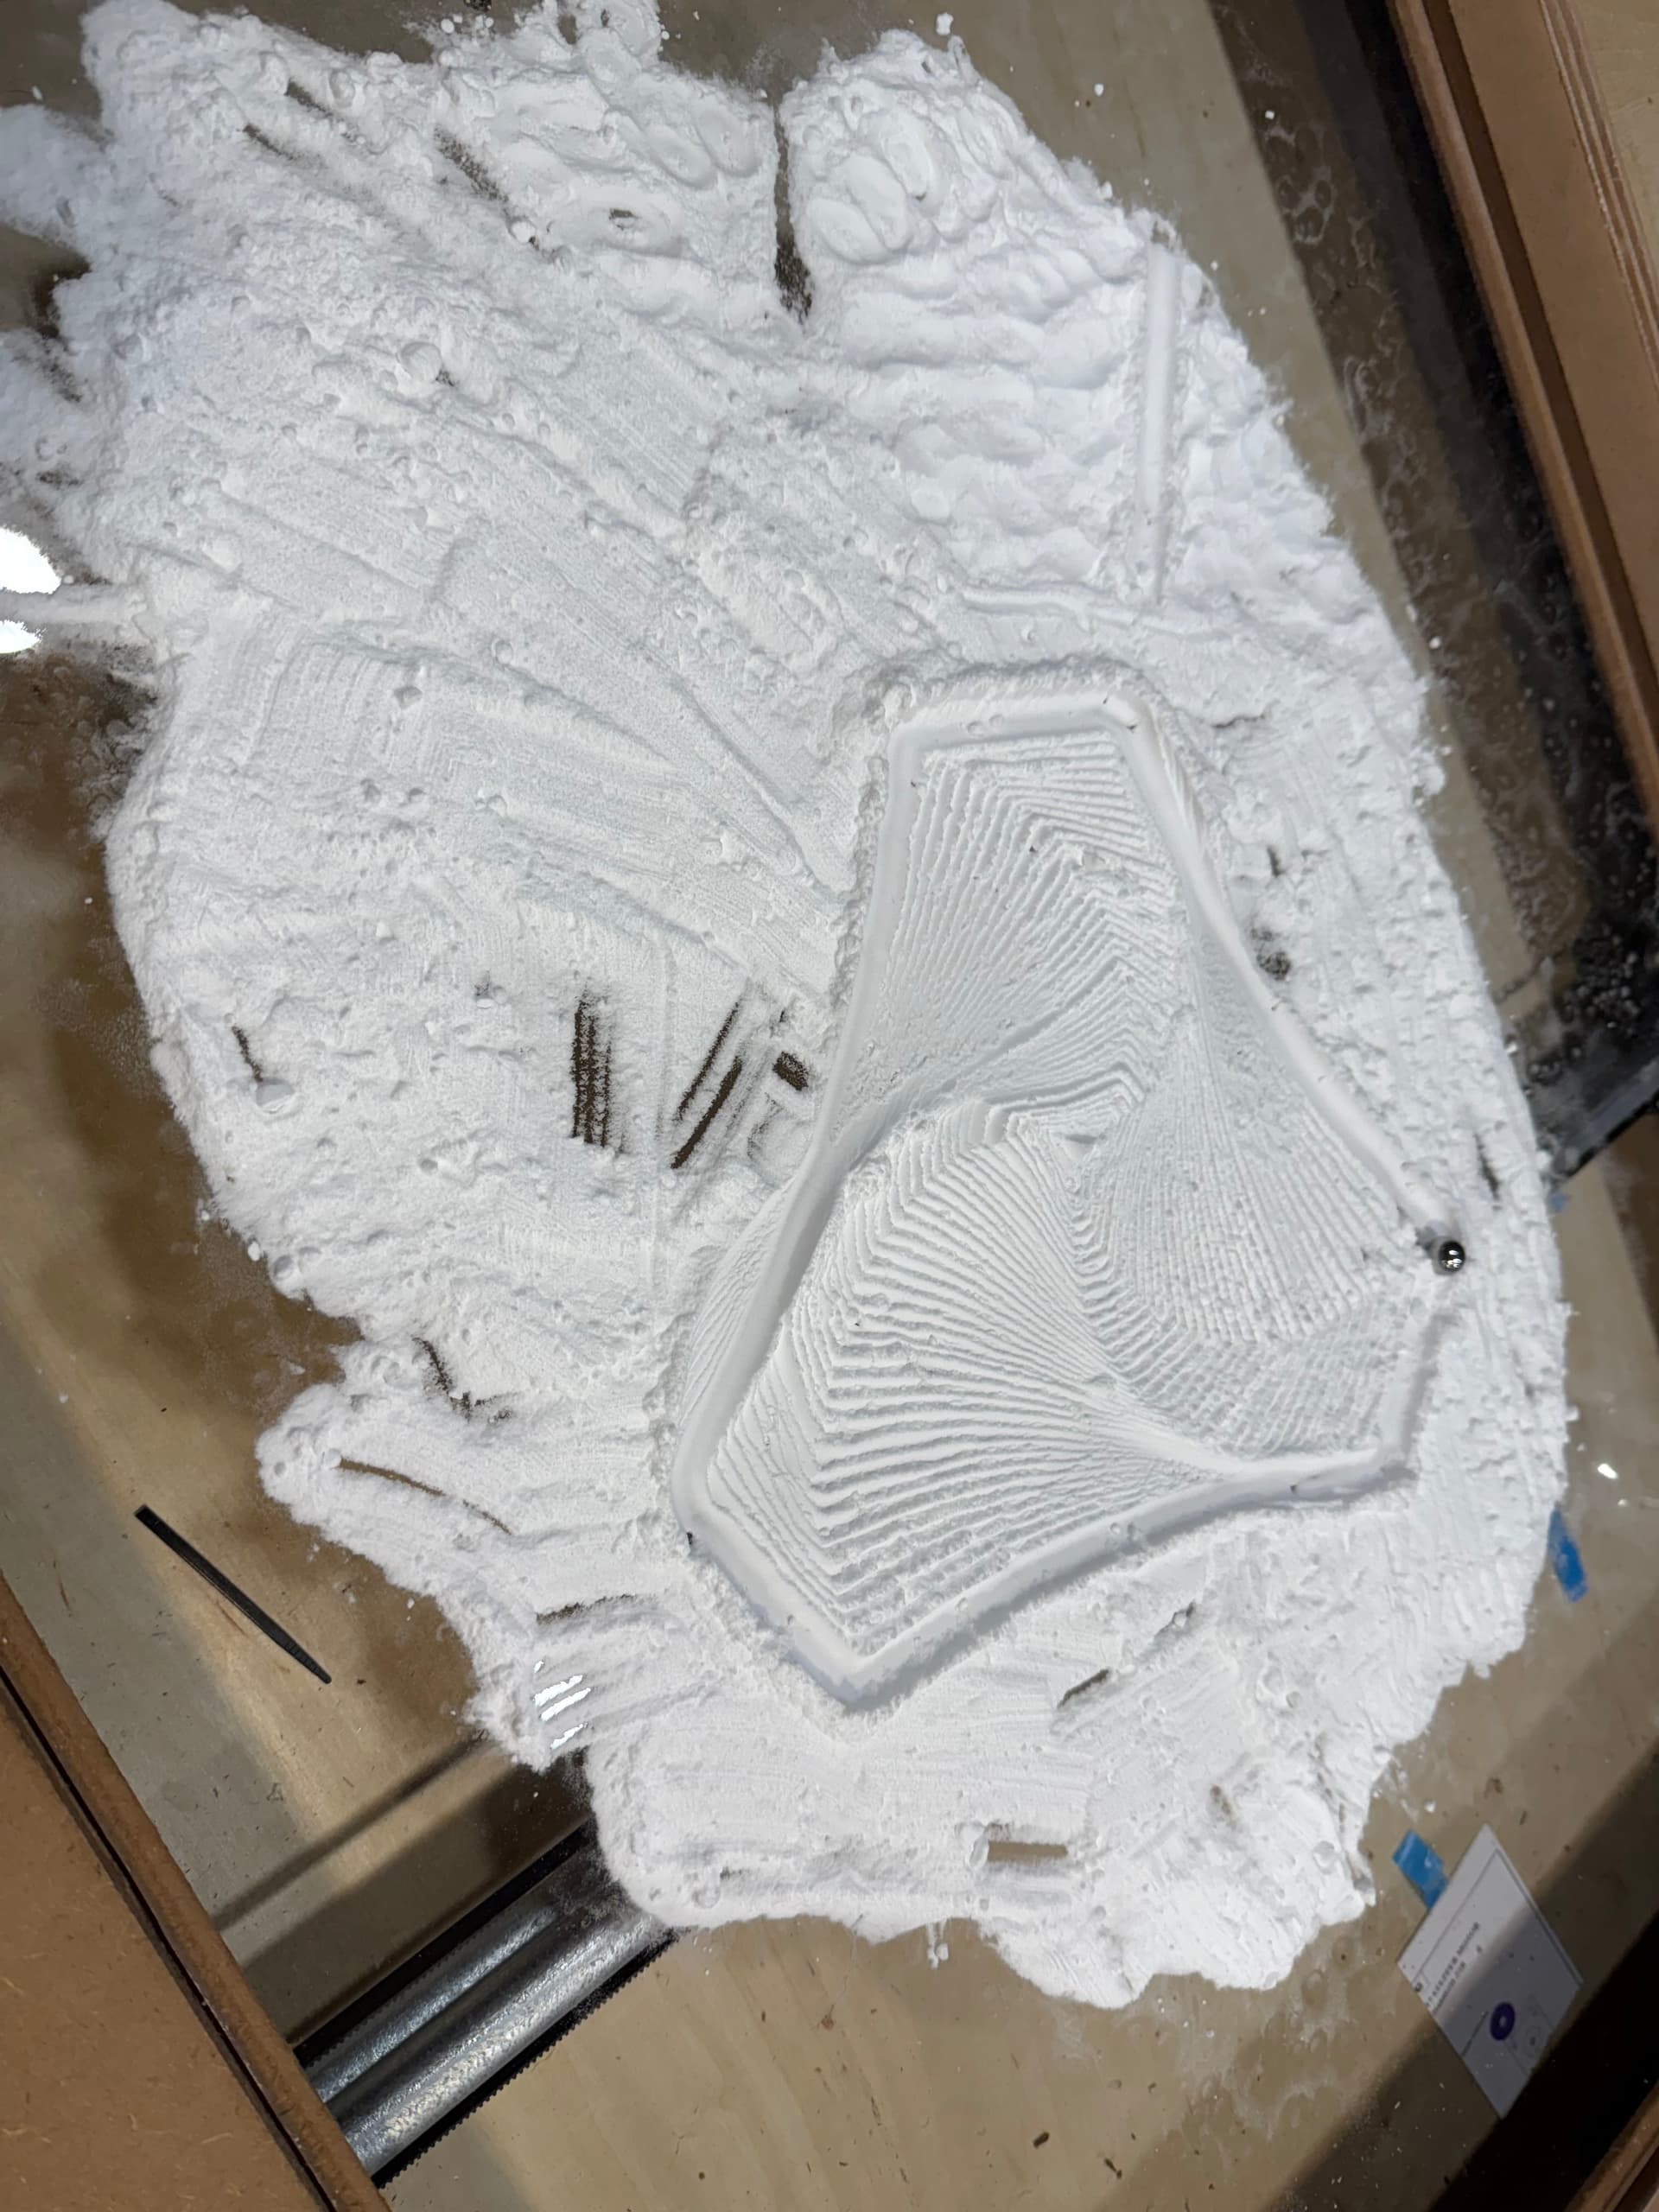
I said I wasn’t going to do it but I just had to see it lol…
Boss lady had one small box of baking soda so we dumped that in, got as many clumps out as we could and spread it around some. Loaded up the V1 logo in Sandify and sent it off and running…
I still need to do some work on it of course. Its not wanting to home X correctly. And I need to figure out the start up gcode stuff but for this temp run it was easy to just send it.
But…FWIW I ordered 3lbs off amazon for $2.91…only to find out that the standard “little” boxes are 1lb each (Doh…should have looked at the box in my fridge before ordering…could have just picked a box up at the corner store for the same price quicker!)
And while my table is fairly small…I used FAR less than I expected. In fact I gave 2 of the boxes to my girlfriend for baking and have only used maybe 1/3rd of the box I kept. And that includes spilling quite a bit and refilling once
Yeah I thought it was going to be a LOT more. I need 1/2 a box or less to finish filling this one. Headed out the door to the boat for 2 weeks right now. So next time home I will finish filling it and get the rest of the table built.