The yz lift i called “wheelies” and it got really bad with a dull bit when i was cutting flooring with a ball nose for marble divots. I like your rail and bearing solution. What material did you use for that bearing rail?
My lr4 is in the basement because the garage is not workable in the winter in MN.
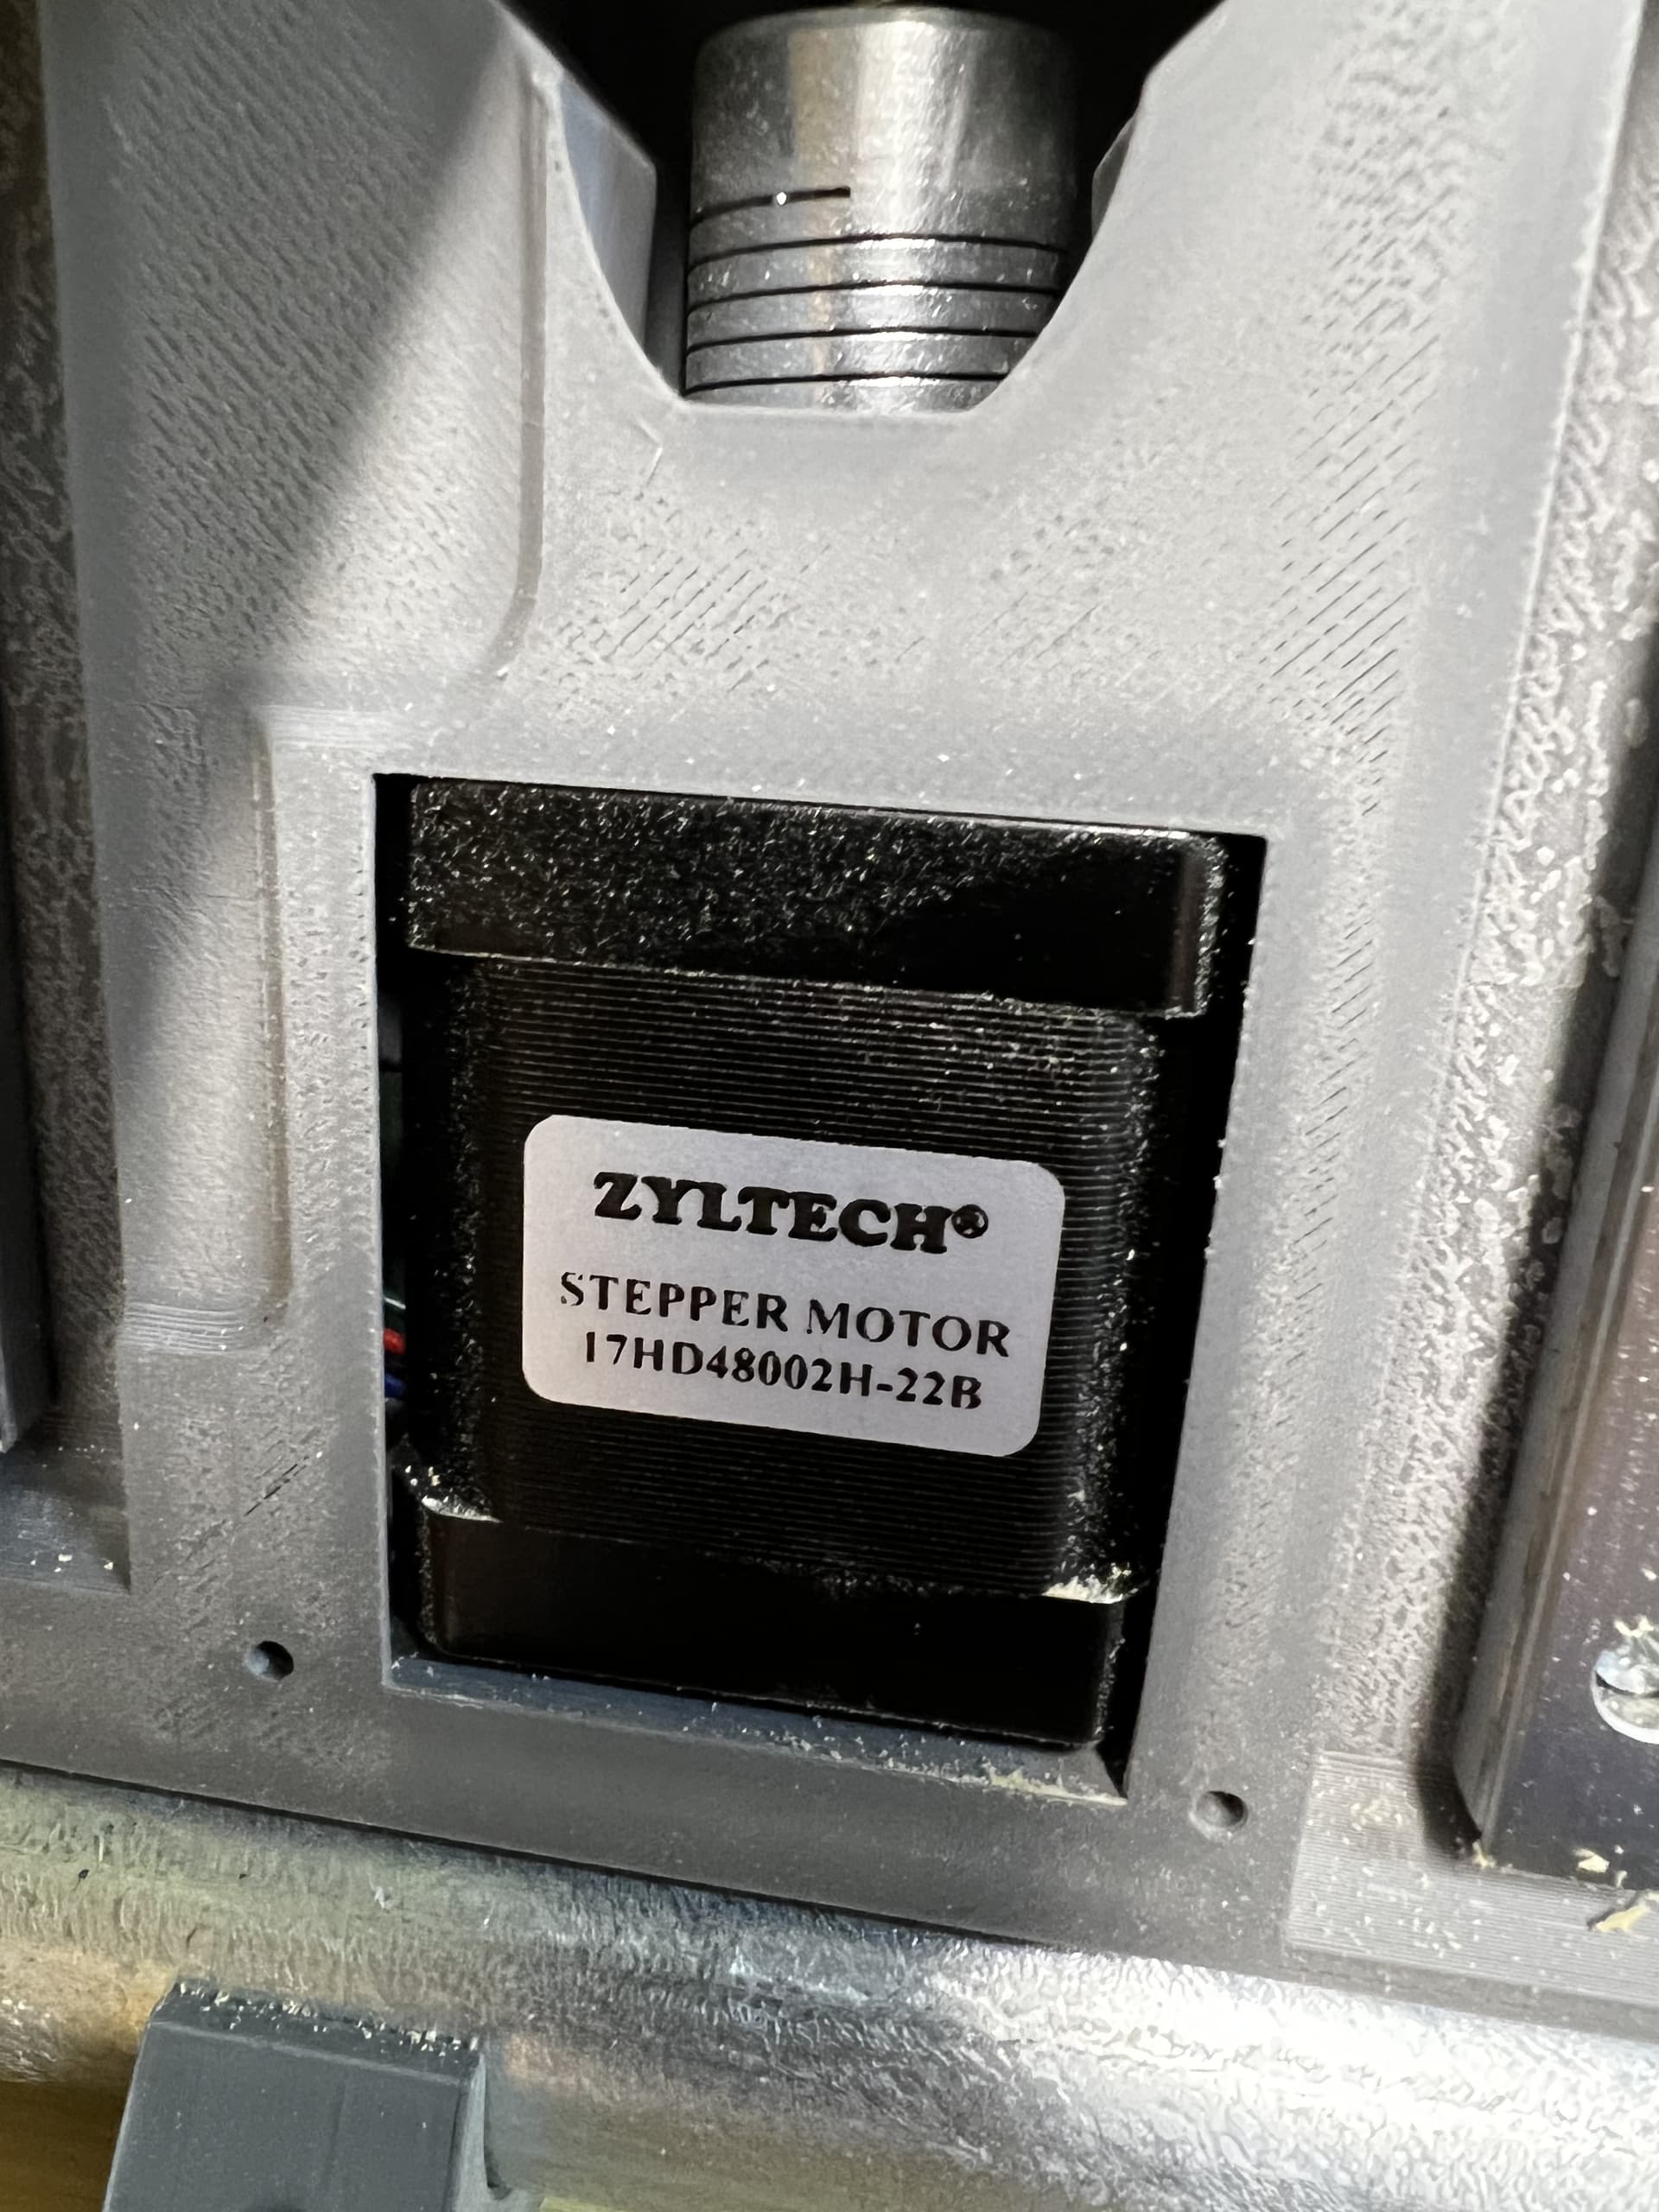
What’s the run current set to in your config.yaml, and which motors do you have?
The TMCs will disable themselves if they overheat or if there is intermittent connections to the motor.
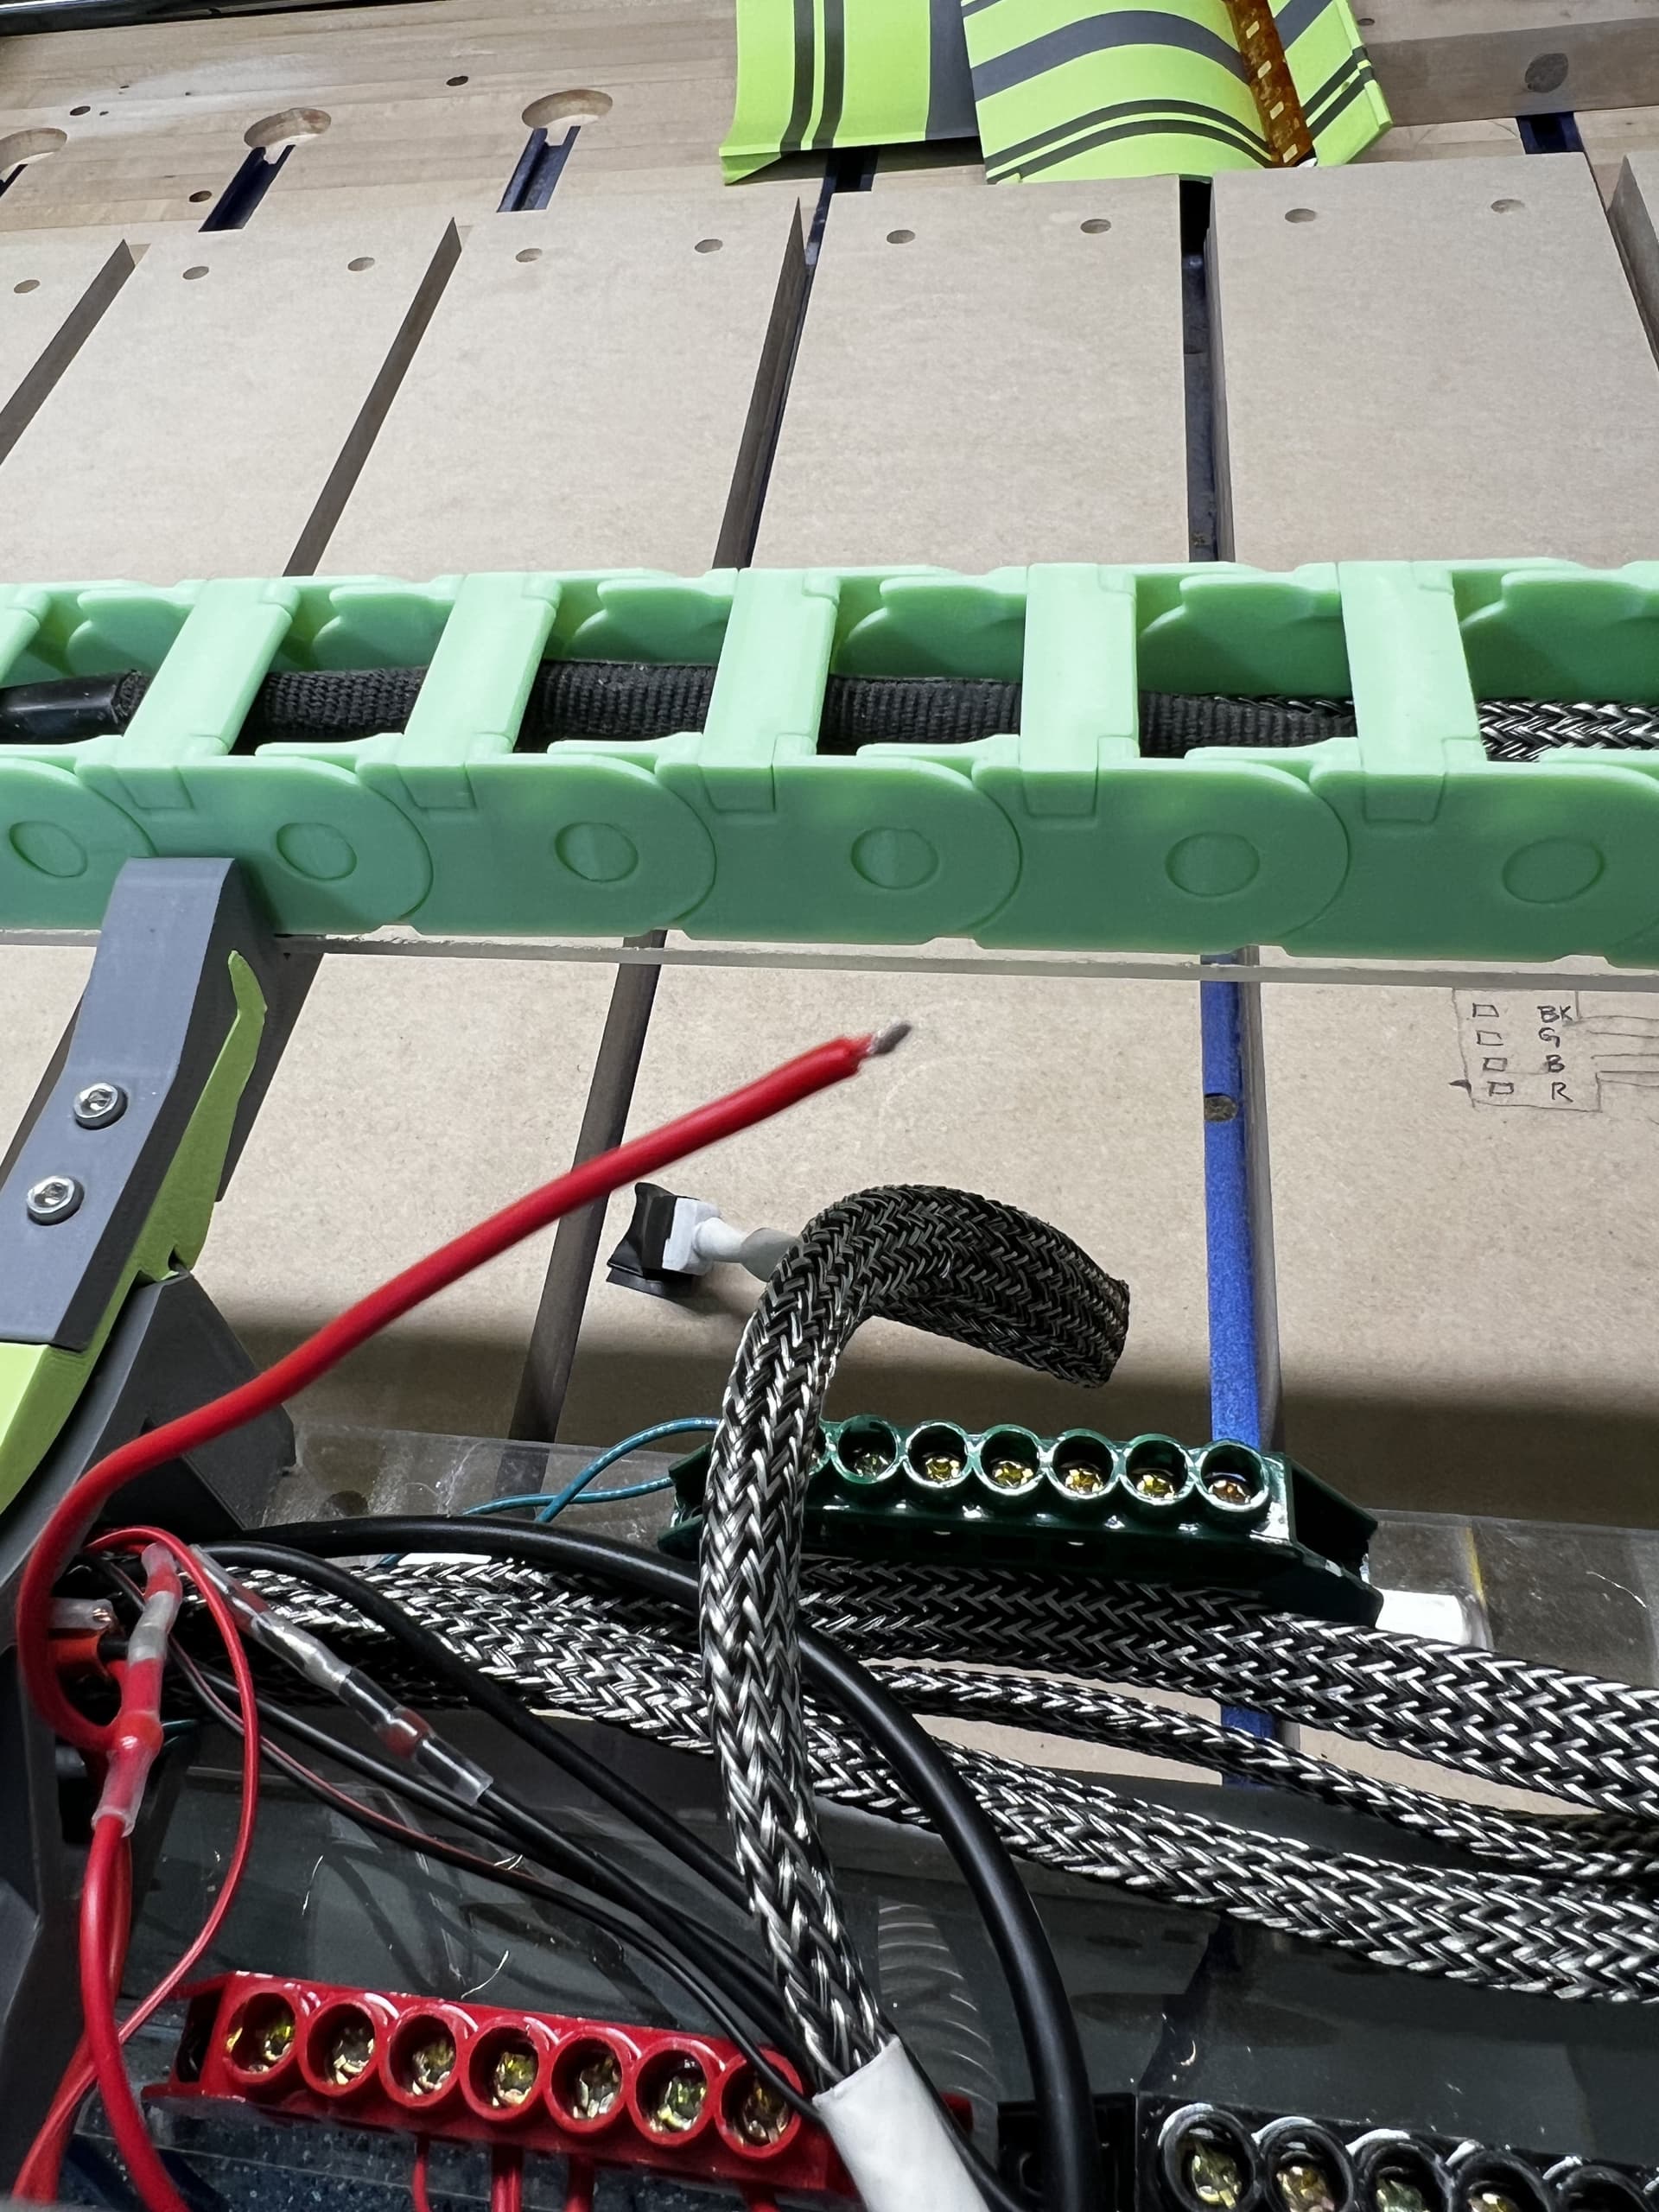
Intermittent electrical connections to the motor can risk damaging the driver so we need to be really rigorous in making sure any extension cables are not flakey.
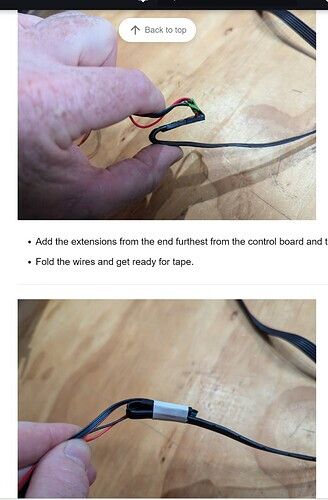
Now I need to revamp all the wiring since this is my weak point. Have I told you all that I hate electronics and wiring. (I always find a way to make a mistake here)
I think the Intermittent connection was the 24v line in. It probably was shorting out or spotty and was “off” just long enough for the x motor driver to disable but not long enough for the entire machine to go dark.
Until I jiggled it and severed the connection completely.
This explains the “random” nature of the x-motor being disabled since a loose connected wire will “randomly” be fully connected or “randomly” be not connected and everywhere in between.
Let’s hope the issues I am having are entirely self inflicted wounds and I don’t fry too many boards.
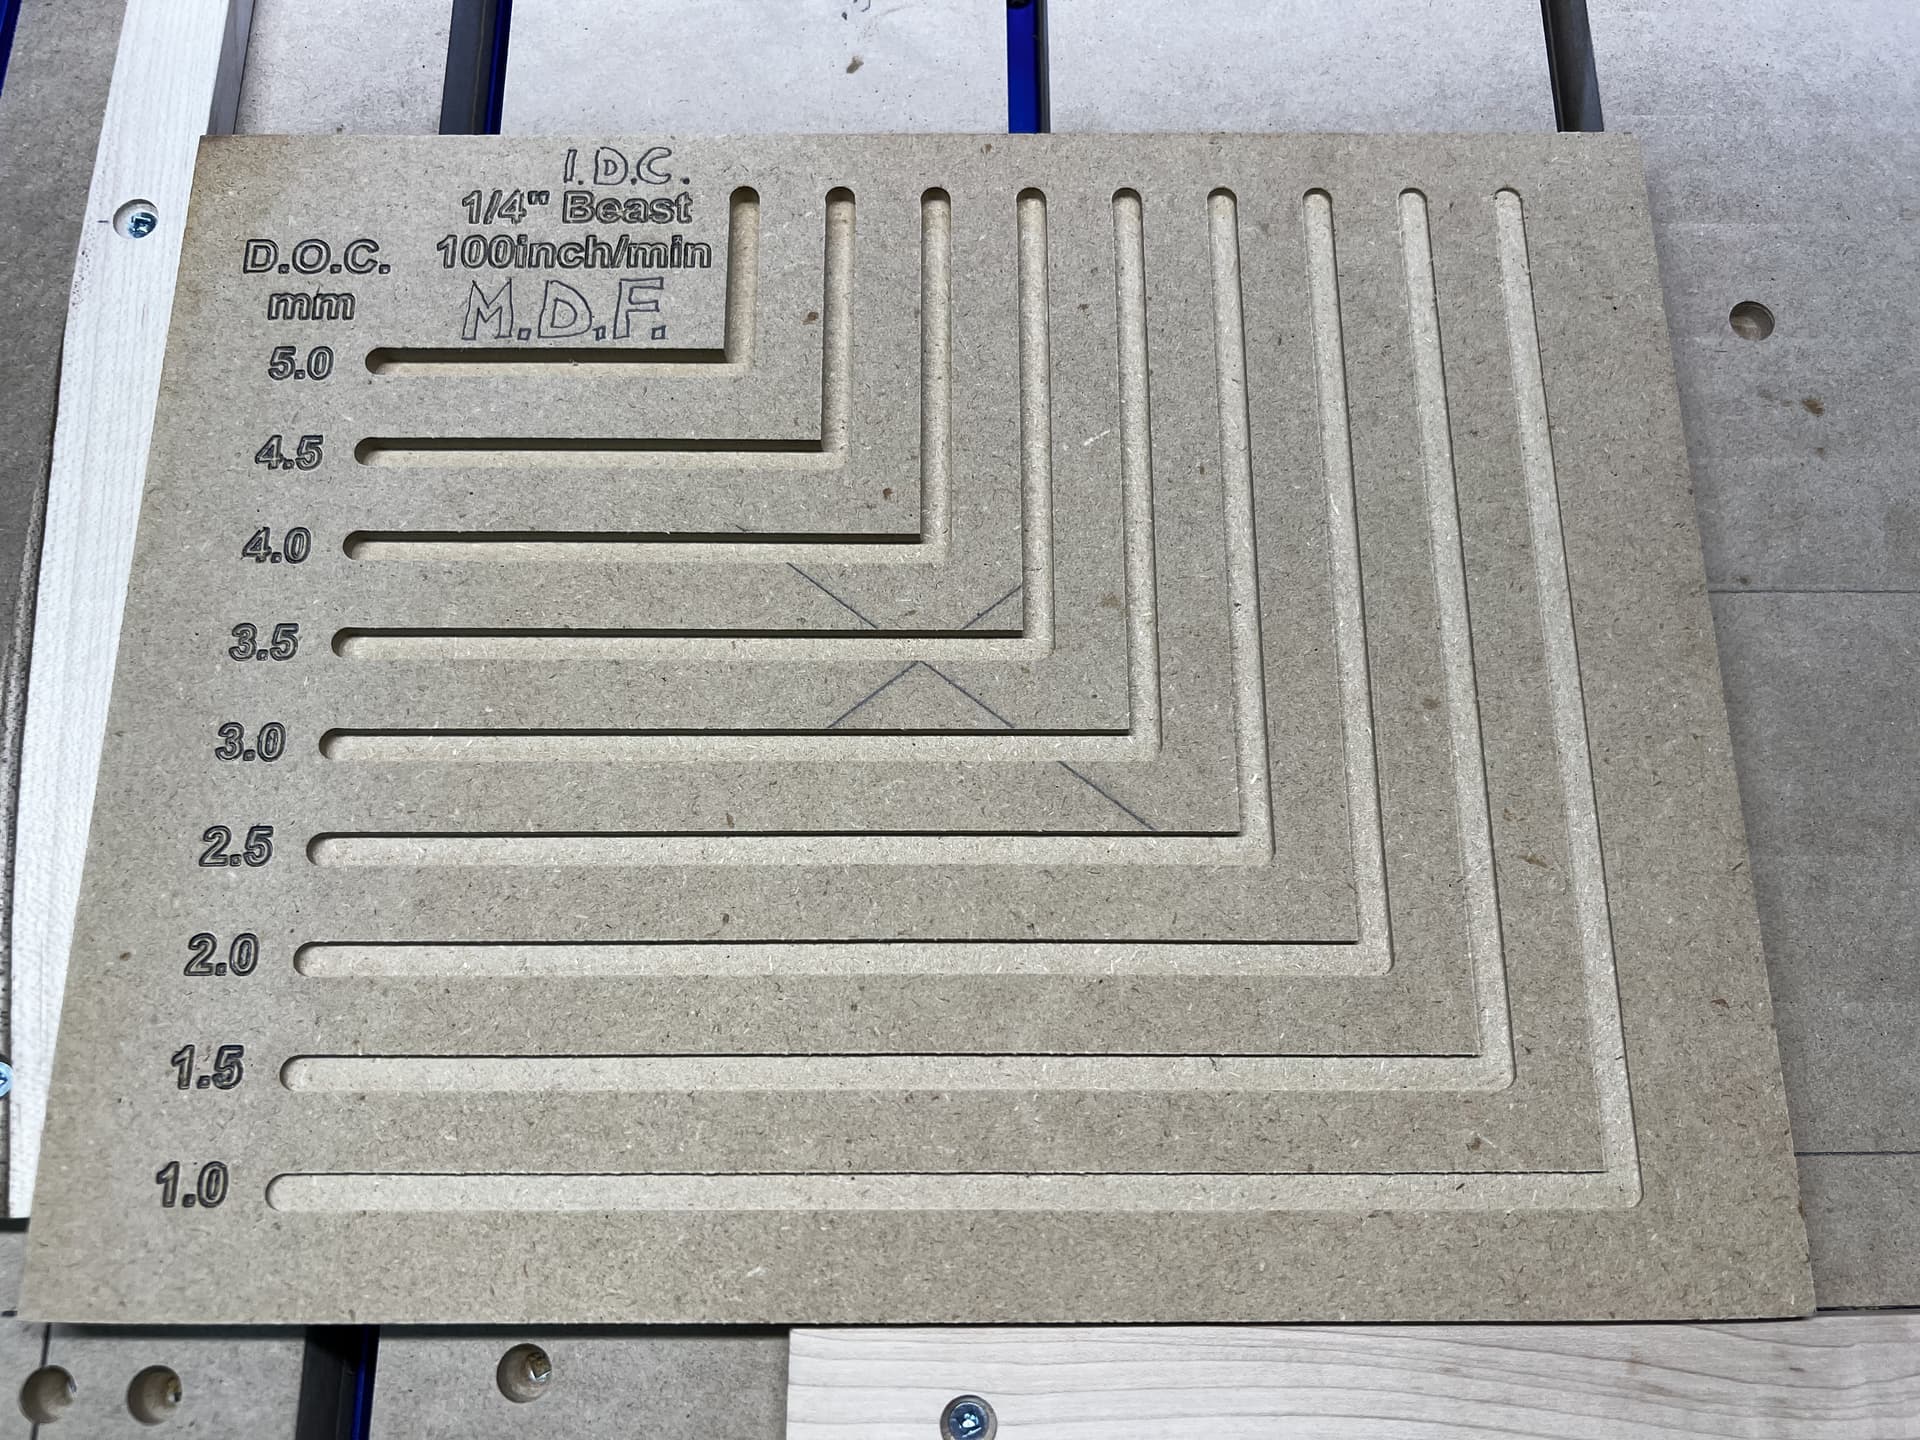
Based on this, I could probably cut 1/2” MDF in two passes.
For me, spindle travel speed is not as big an issue as depth of cut. Most of the Inlay cutting is in short “jerky” cuts, i.e., lots of little x and y jogs, so spindle travel speed is not as big of an issue, and in general, I would rather keep that lower than the machine is capable of to avoid tearout in the wood.
For Spindle speed (R.P.M.) I try to stay at the endmill recommendations:
This little test will help me make “informed” decisions for future cuts. In general, I think I can cut twice as deep as I was cutting on the Primo IE: jobs should take 1/2 the time to complete because my number of cut passes will be in half.
So the “variable” that I can adjust is the depth of cut.
For Inlays, the Z travel is the most crucial one. If you can ramp up the speeds there, it will save you a lot of time. X/Y aren’t that big of a change.