so is the cleat just a 45degree angle?
1 Like
Yes. 
2 Likes
Awesome. I cut my first cut the other night, so maybe this weekend I can try this!!!
1 Like
I created a holder for drilling bits as well, haven’t had time to cut it myself, maybe someone wants to try. Also, I had to test the possibility to upload dxf-files directly.
Bohrerhalter.dxf (144.5 KB) WOO, it works. 
4 Likes
Finally made it, like 4 months later… ![]()

A modified version of the drill bit holder with 0.2mm bigger holes: Bohrerhalter.dxf (144.2 KB)
6 Likes
Looks great, wall is awesome!!
2 Likes
@Tokoloshe thank you for this topic, looks great, and very helpful!
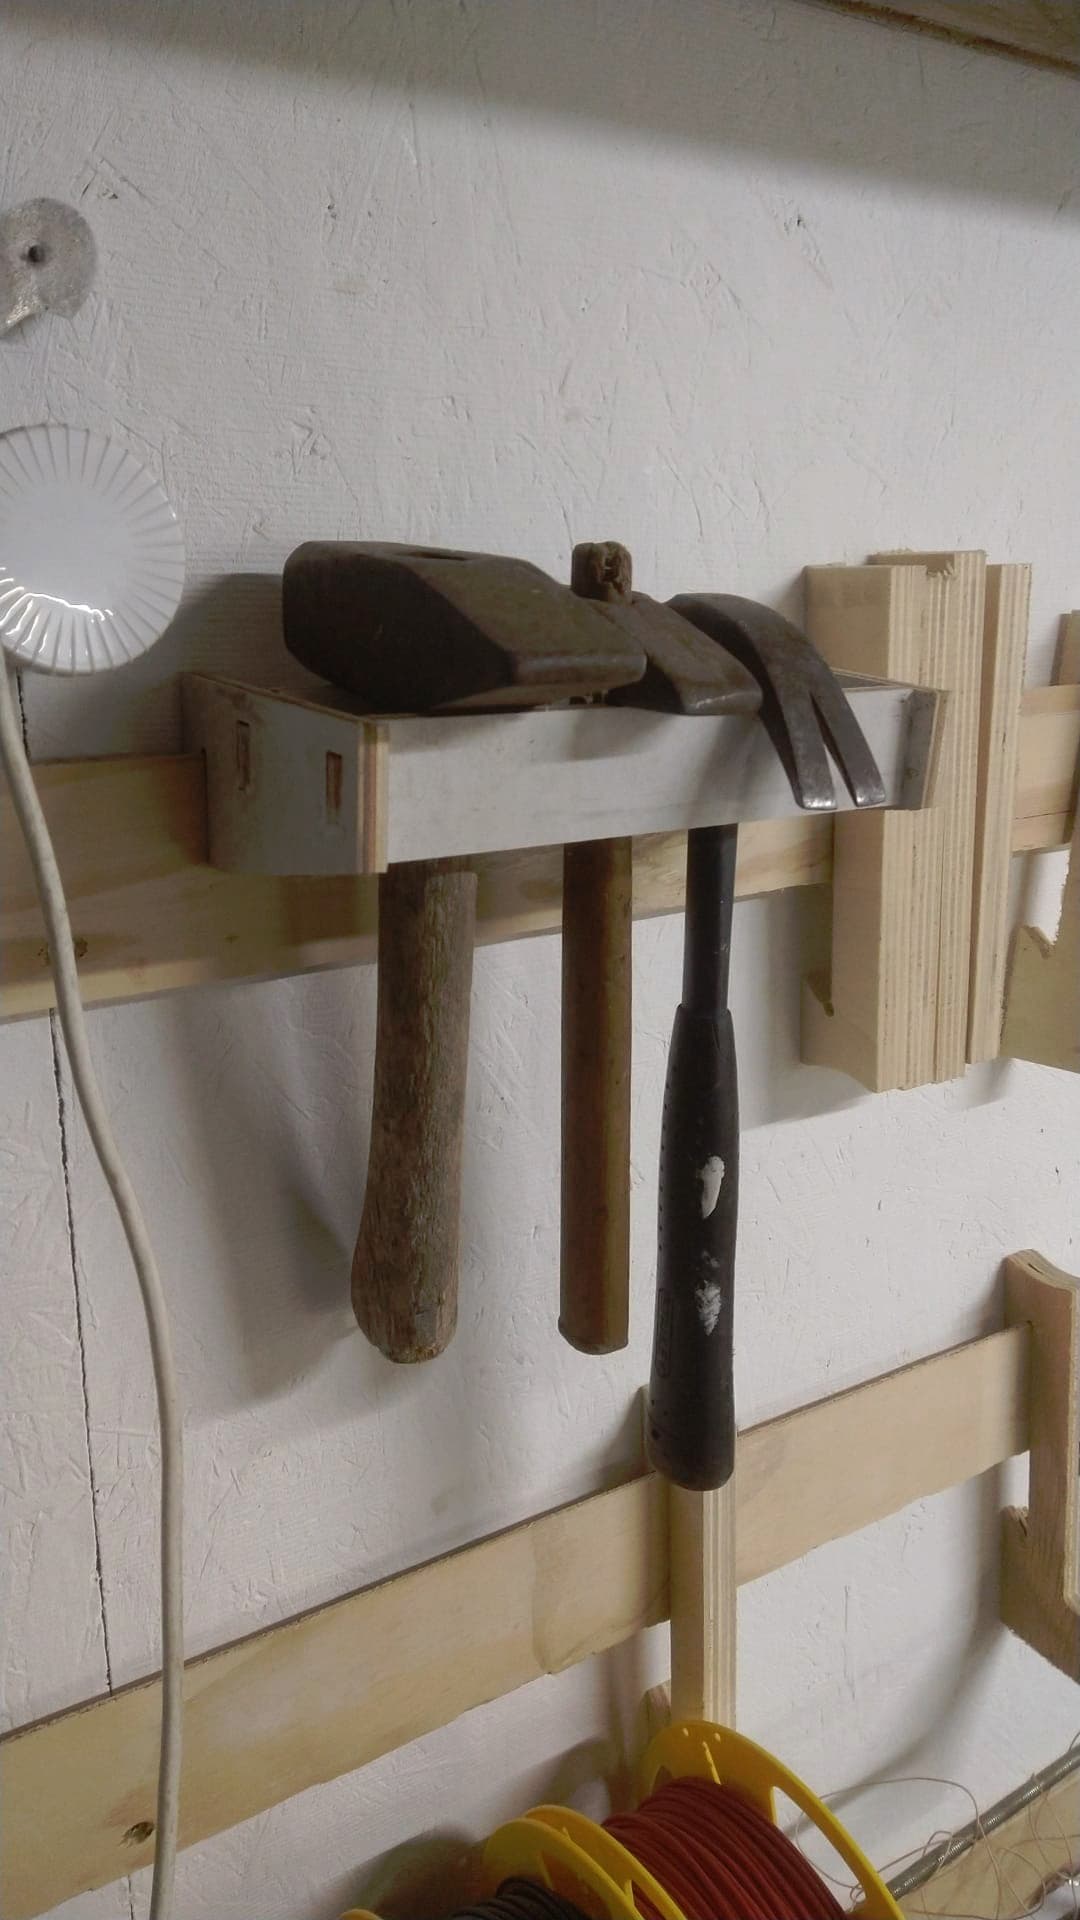
Been wanting to organize my maker space better, for example hang a bunch of filaments today, and who knows what tomorrow.
Was digging through a bunch of 3D printed shelf bracket options (3D printing Nerd has a series, others like CNC kitchen analyzed and improved). However, seems faster to cut and mount ply brackets for cleats.
Have bunch of pegboards, but cleats seems like a great way to go for wall mounting CNC’d storage. Would love to know if there’s some other newer/better CNC’able method for wall mounted storage?
Not that I know of (and I really like wood and French Cleat :D), I have been wanting to make some organizers for my endmills for ages. 
I don’t want to start a debate in Philipp’s thread, but I just hung a 3/4" sheet on the wall, and I can mount anything with any resolution with just some short screws. I tried pegboard and I very much dislike it. It is hard to criticize Philipp’s cleats though. It looks great.
2 Likes
Added files buried in the comments to top post. The Wiki is a great idea Ryan. ![]() Thanks.
Thanks.
3 Likes
Wiki?? ![]()
The first entry can be edited as often as one likes. As I plan on adding stuff it makes sense. ![]()
1 Like


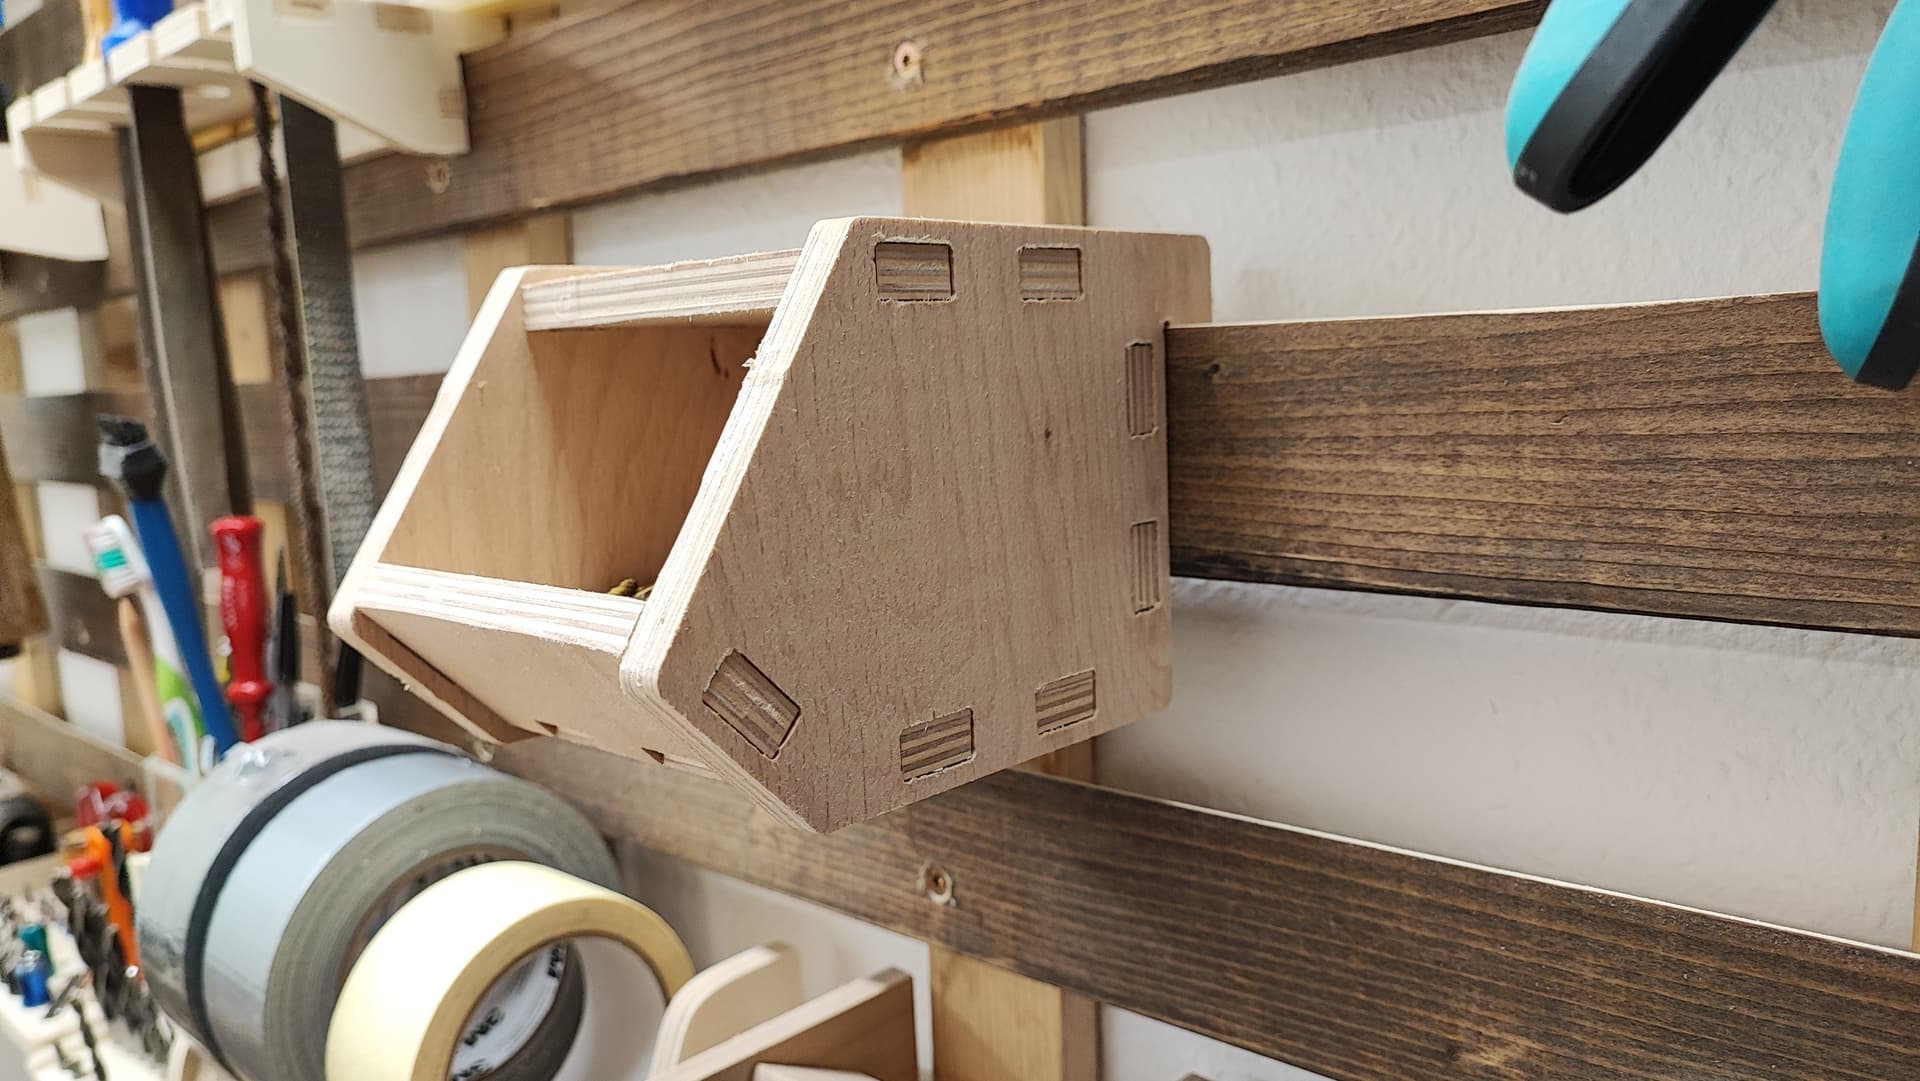
The first 3 were made, after some tweaking in my bit settings (had the wrong bit diameter in estlcam) it is a press fit!
Thank you @Tokoloshe !
7 Likes
This is so cool, made my day. ![]() Thanks for making these.
Thanks for making these.
4 Likes
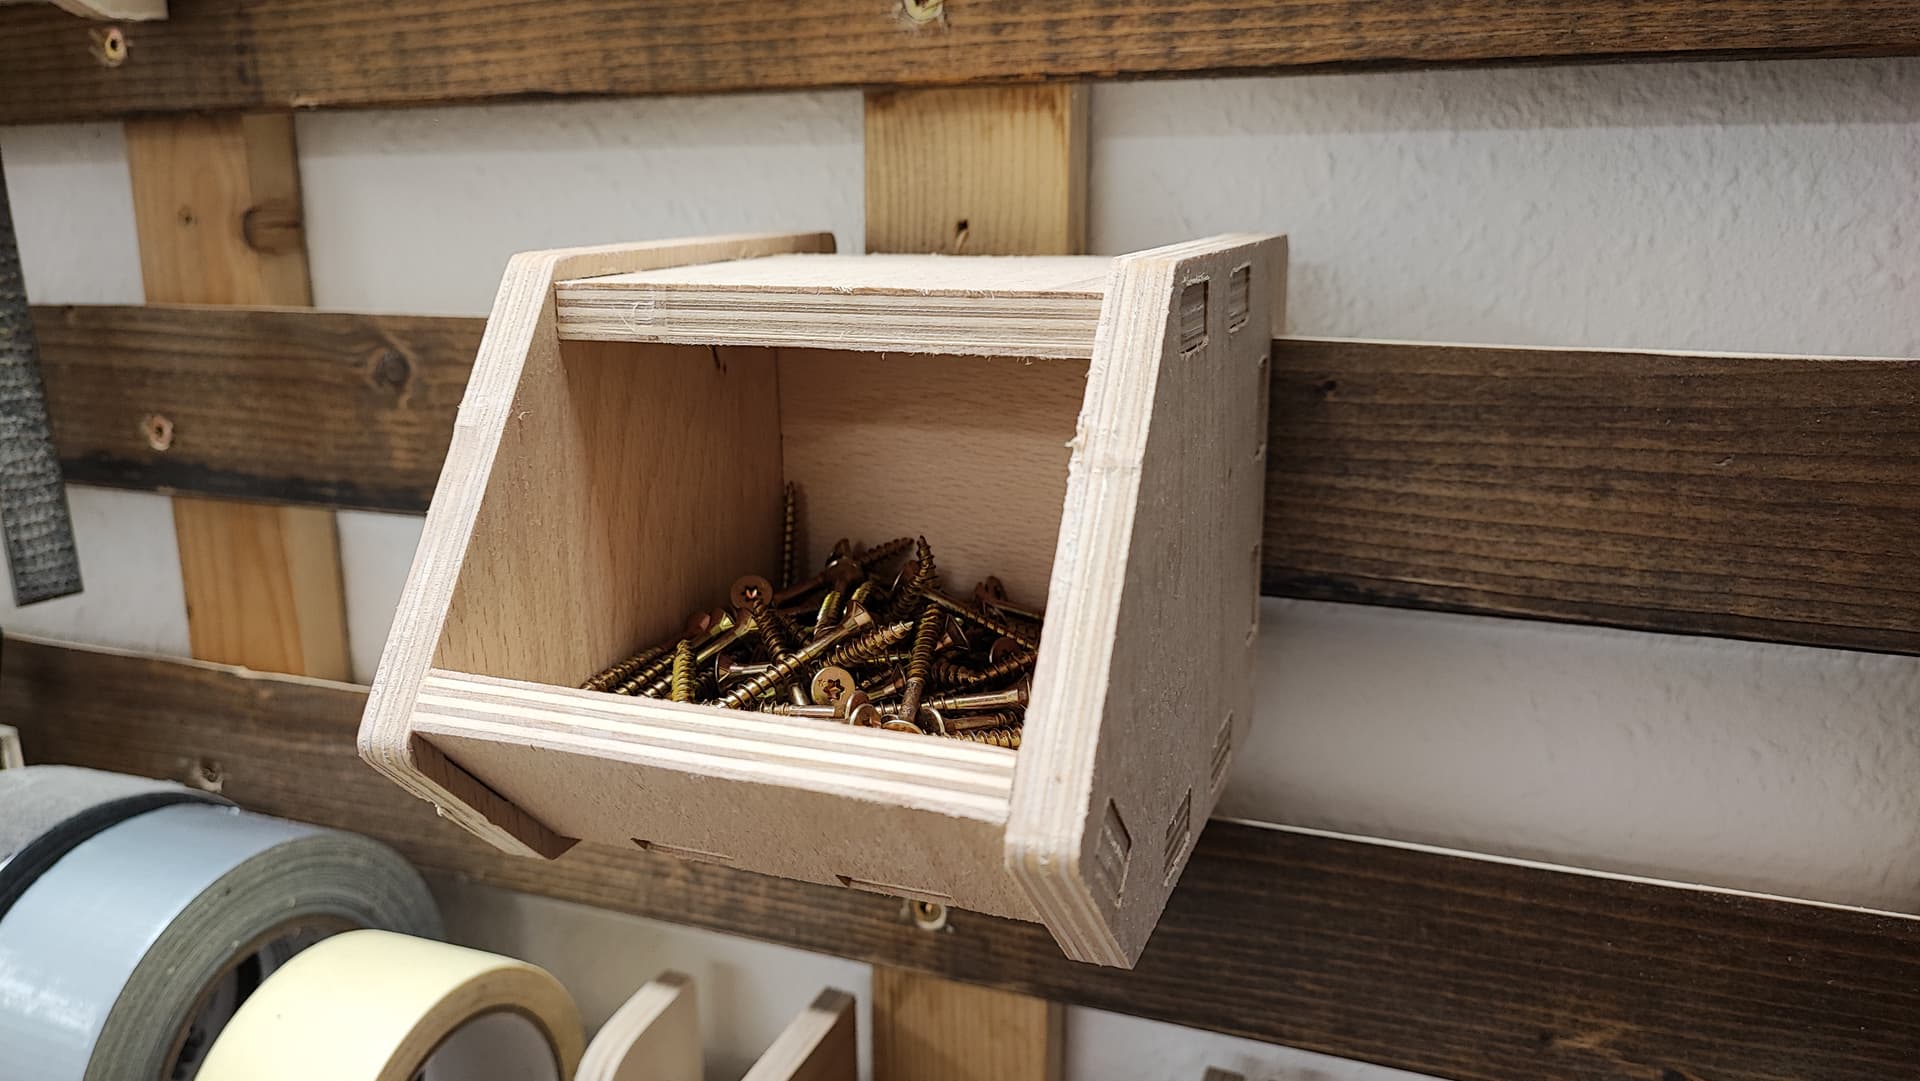
Video for the screw storage:

5 Likes
so I saw that box, and I am thinking about 3d printing it. See how it comes out.
that way it all prints flat
Sure, you could do that, why not? ![]() I’d be interested to see the result.
I’d be interested to see the result.
@Tokoloshe , do you still need the tabs if you are using your vacuum table? Seems like you could save some time by not using them.
Yeah, I kind of do. I did try without and I maybe should again, but as soon as you cut through the wood at the bottom there is not enough suction any more around those parts (which actually should not matter, but I am scared of them moving at the last second). Think of it as air getting under the cracks at the edges, so it does not have any more hold down power when the parts are smaller. I can try with the new version again, would really be interested how that works out. ![]()
3 Likes