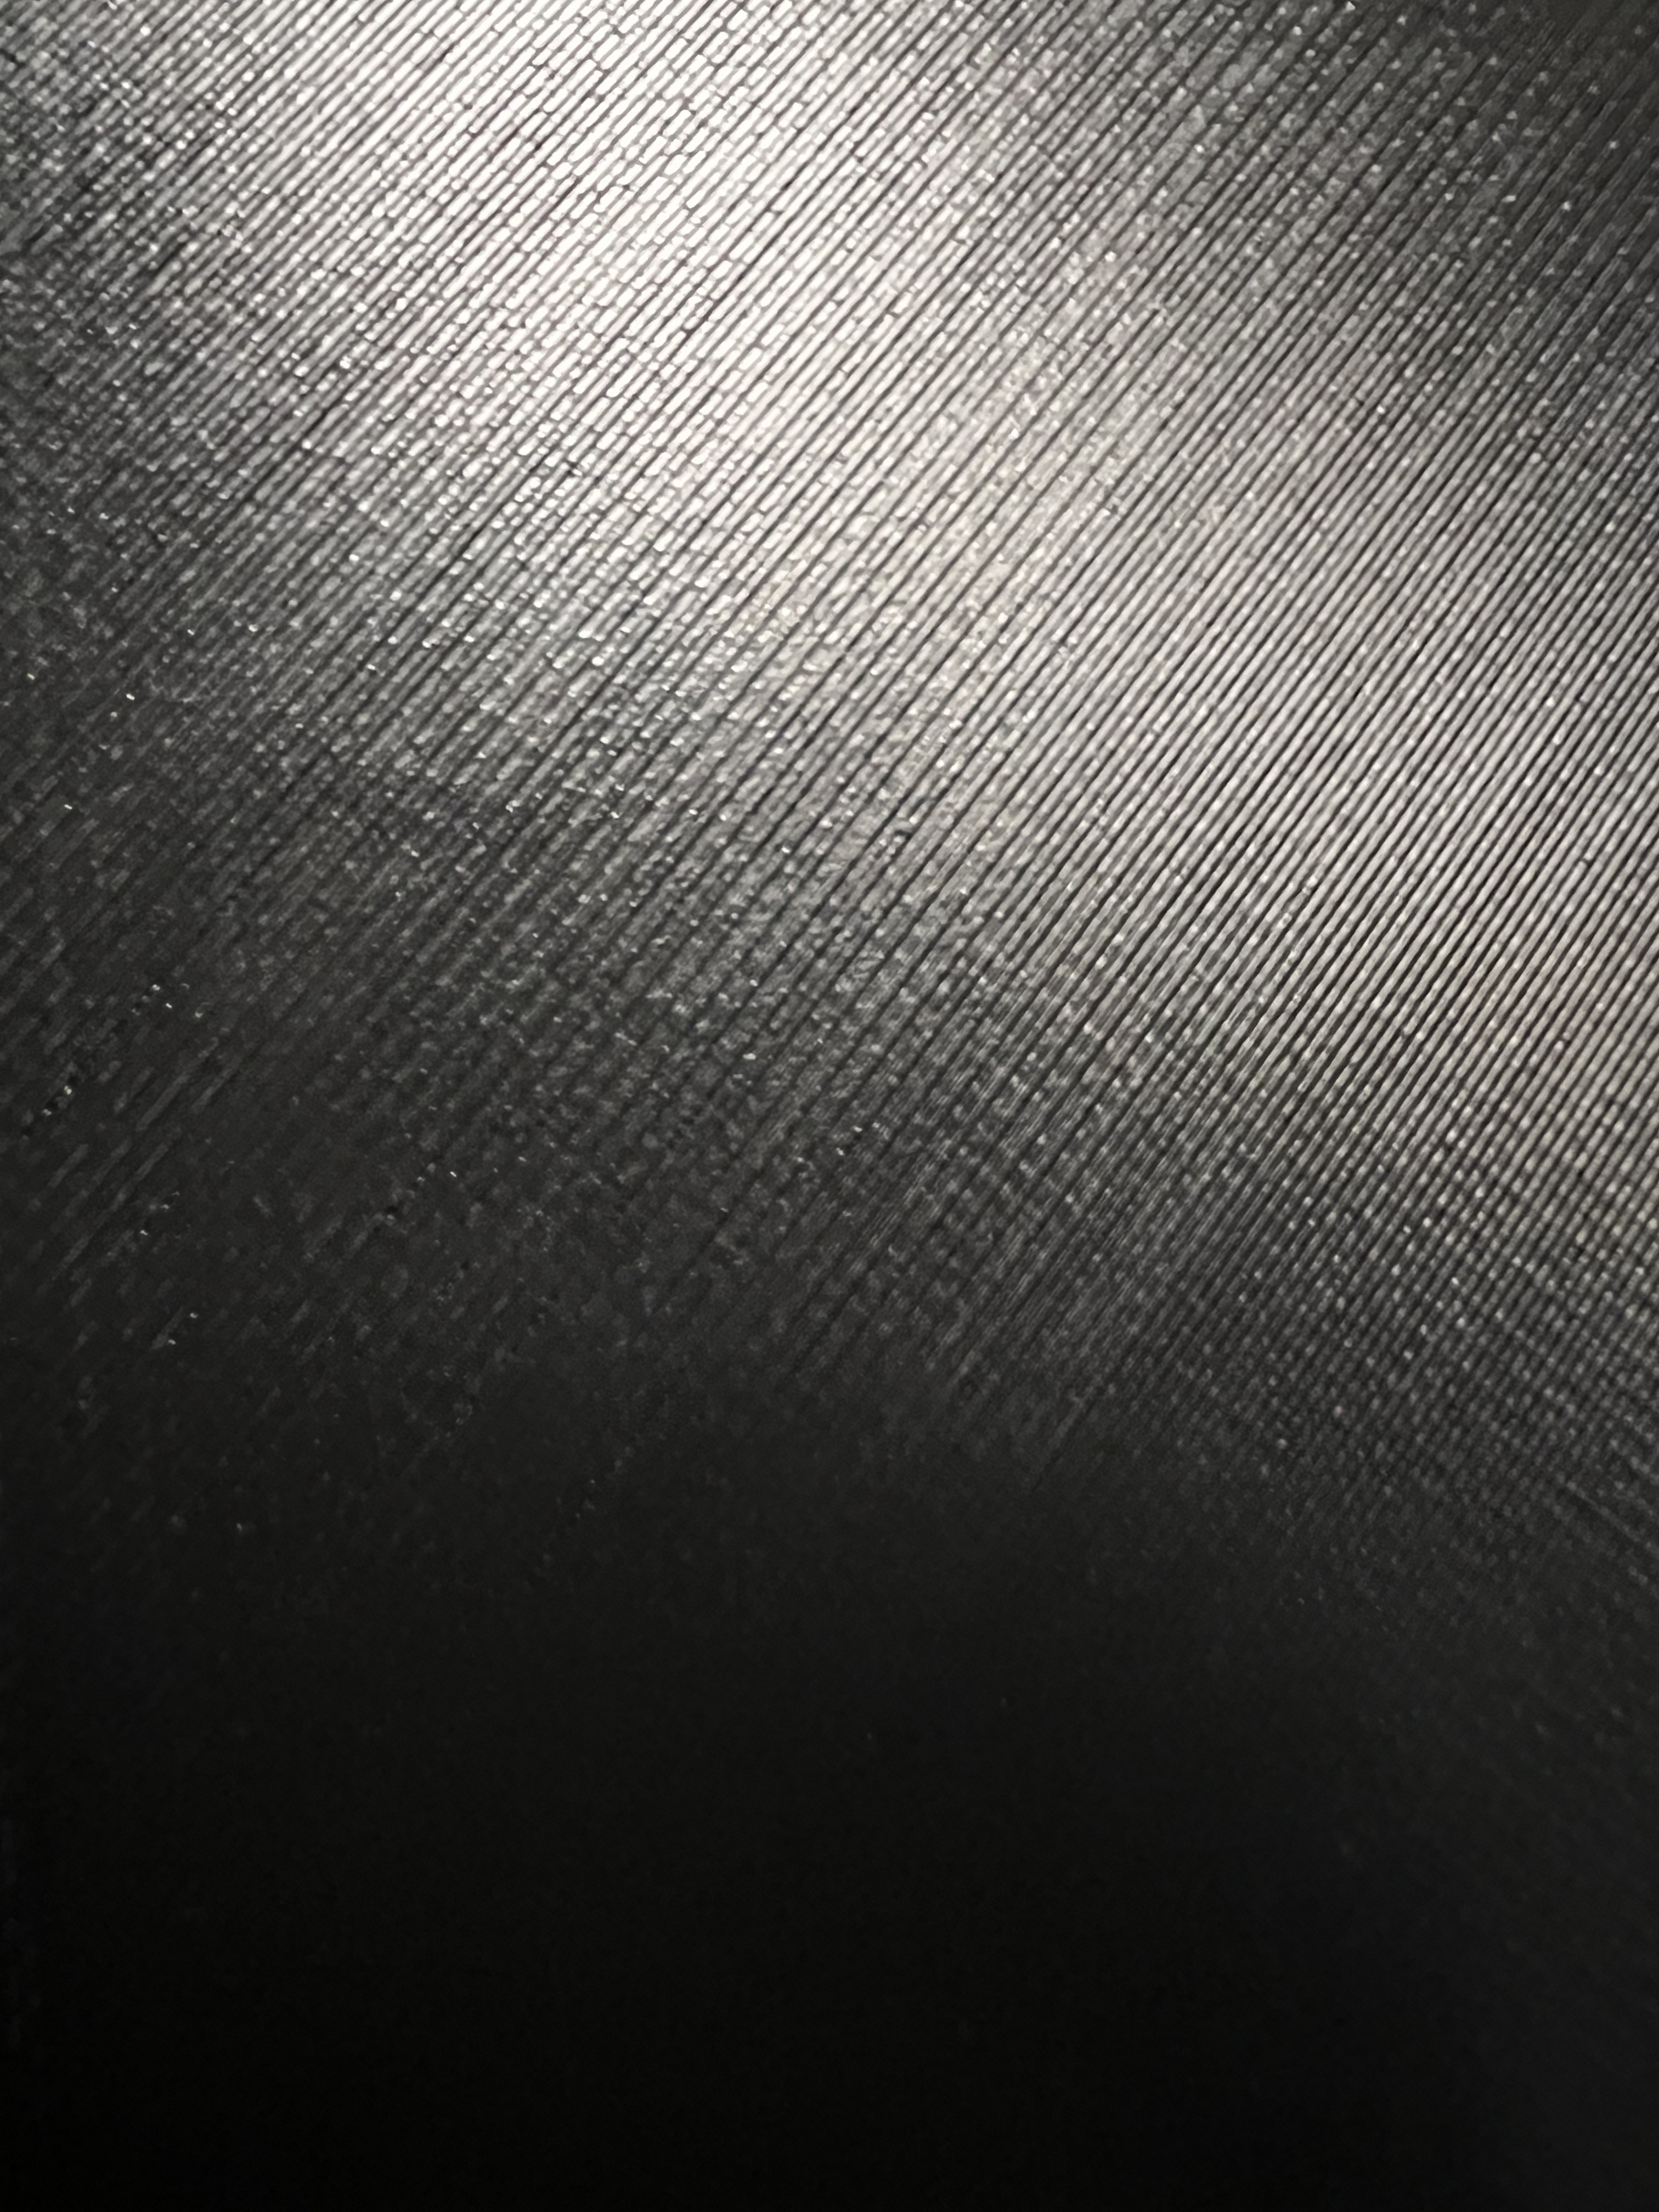
Not sure if this will come through after compression but this is what you should be shooting for. You can see (hopefully) the lines in between the extrusions. But if I glide my finger over it it’s completely smooth.
Ignore the kind of bumpy look. That’s some compression weirdness. Doesn’t look like that in the actual photo.
Does this change anyone’s thoughts on my z offset? I sliced the same exact part for my Ender 3 using Cura Slicer instead of PrusaSlicer and it resulted in a much better first layer. The slicer shouldn’t have anything to do with how close the nozzle is to the bed right? That is all EEPROM and BLTouch functionality.
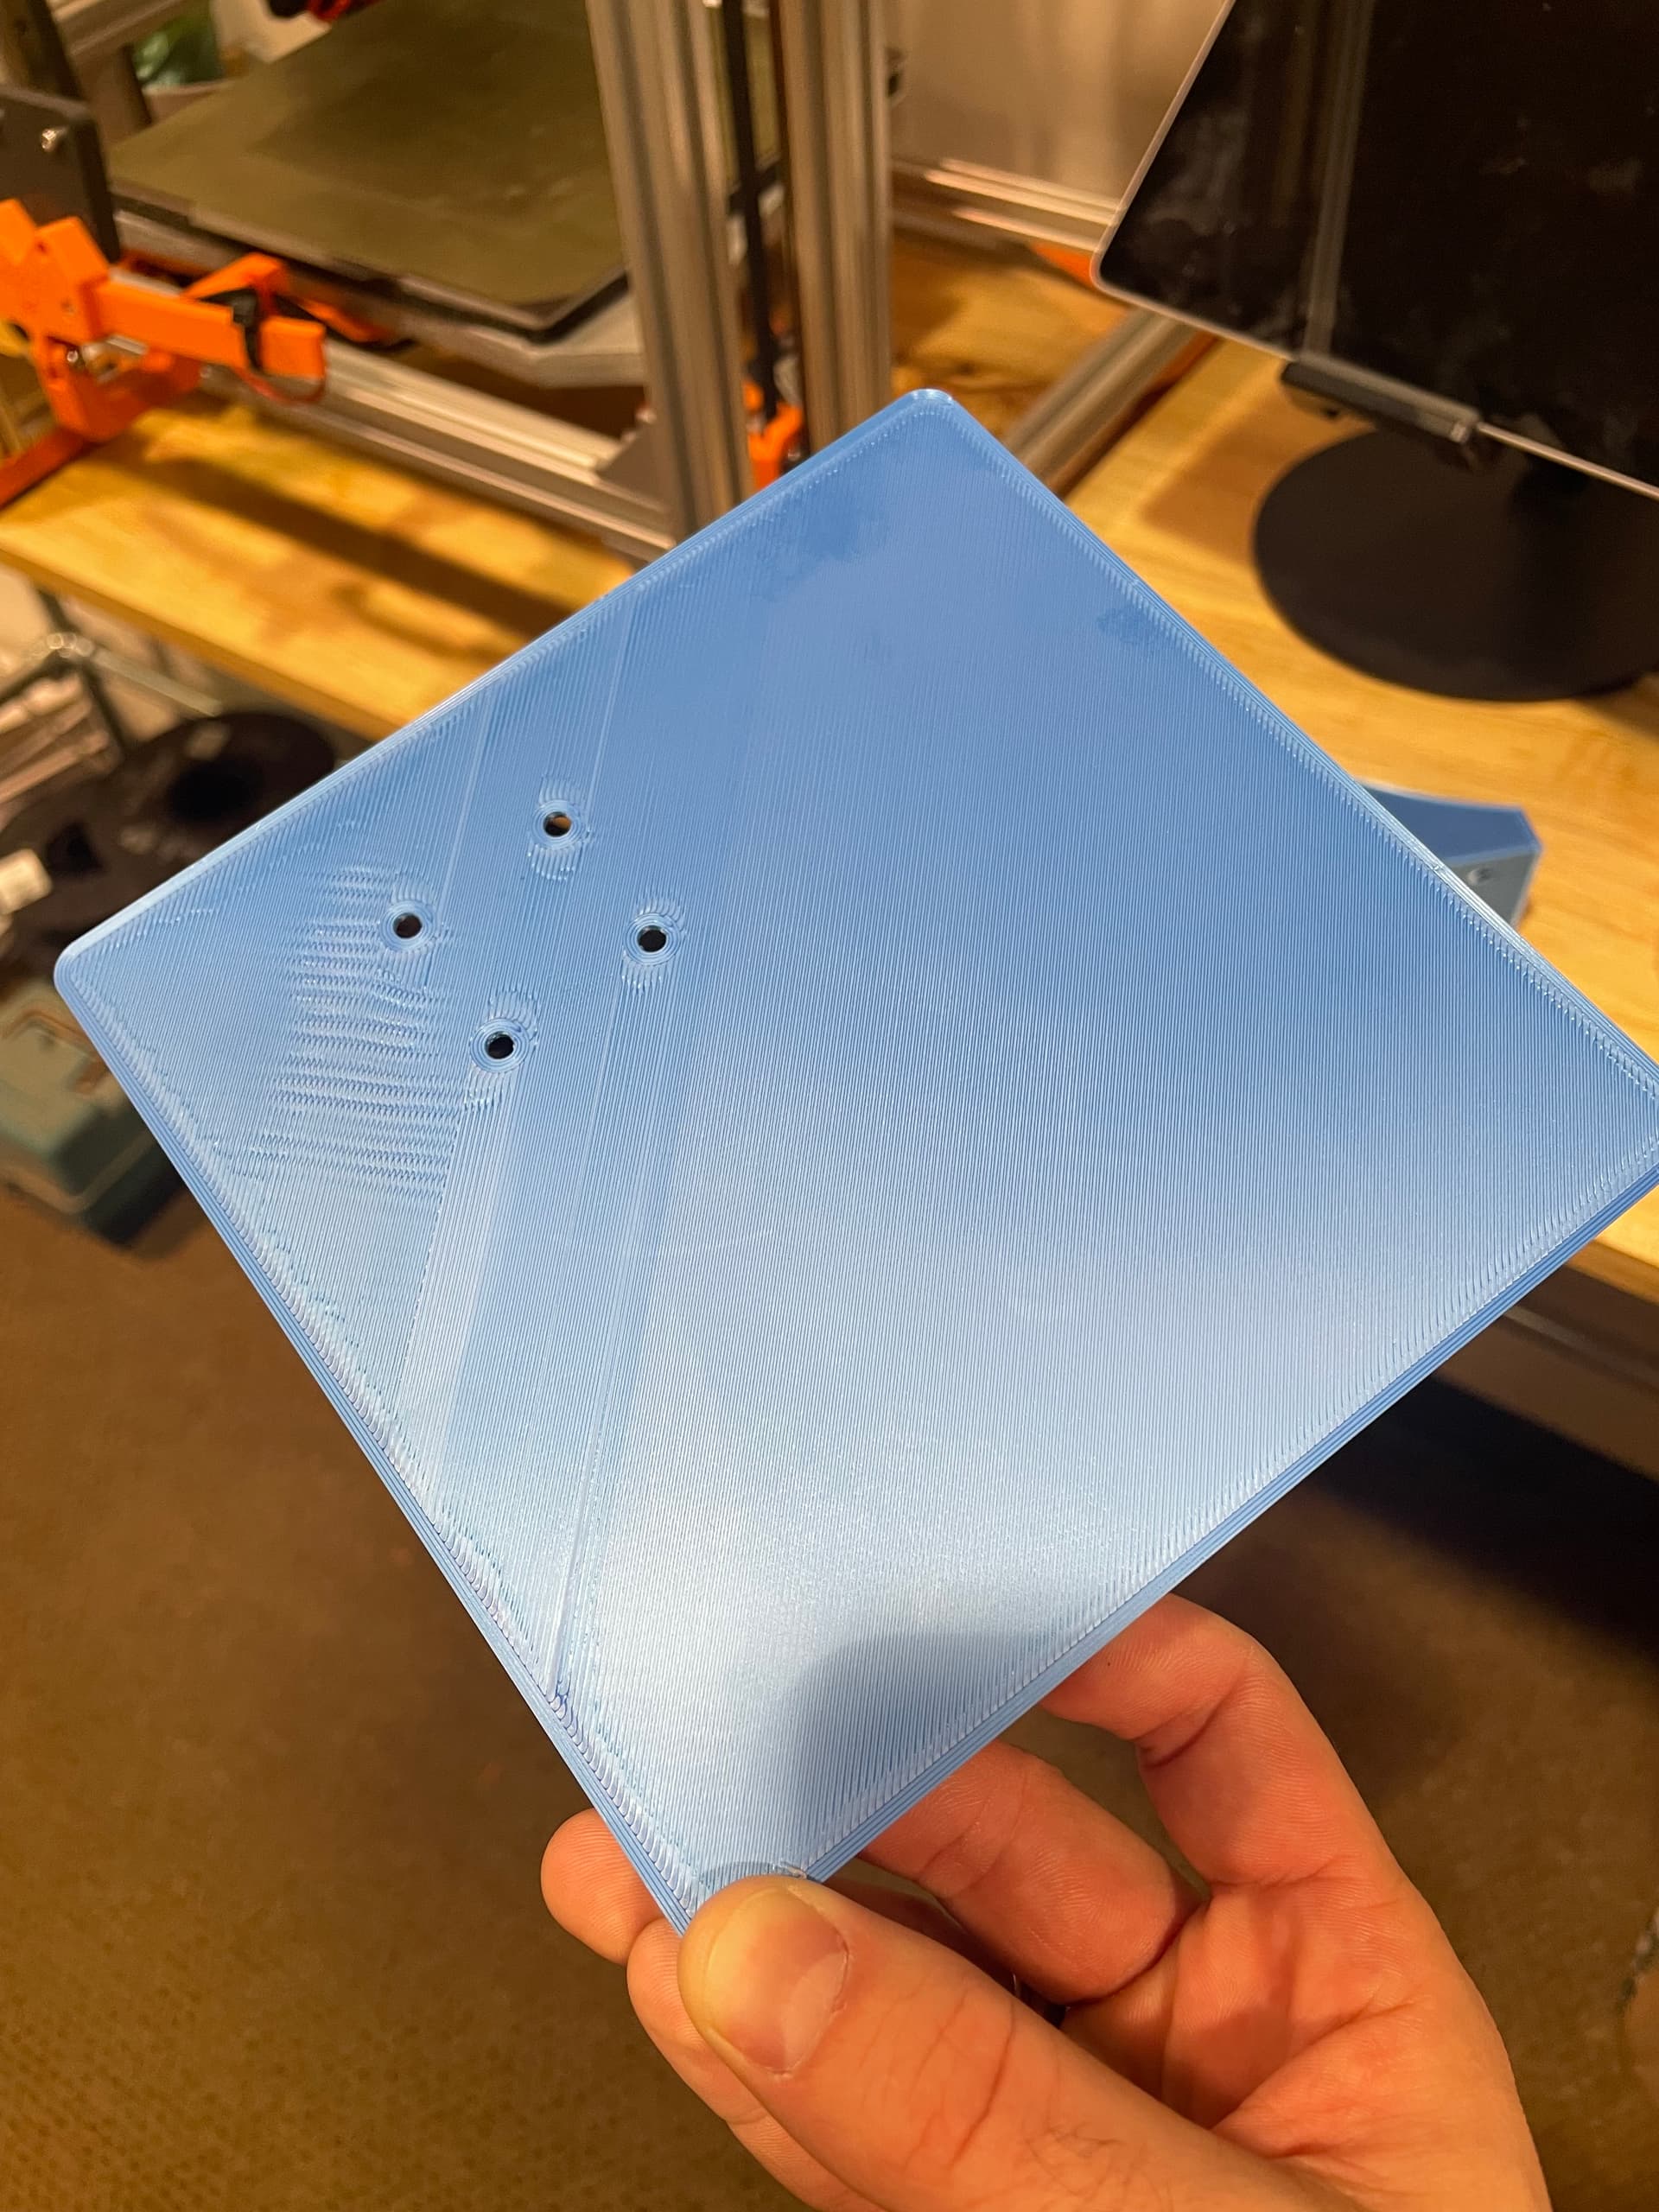
This is the bottom of the part. A few ripples in that left corner but other than that is perfectly smooth. This was using the smooth side Fula-Flex PEI magnetic bed again.
Do you have a different first layer height in either one? Both can set a different thickness for the first layer. I used to use a thicker first layer to accommodate more error.
If your meshing and probing when the bed is fully heated and you’re sure the offset is correct and is being stored and applied correctly then there could be some sort of mechanical issue.
If it were me I’d just shut off any automatic leveling and meshes and do it manually with bed screws and babystepping. Then once that’s right go back to automatic leveling and see if it effs anything up and go from there.
Do people generate new meshes for every print job? I run the full G29 process when I make changes, but otherwise I just “tilt the mesh” in my start gcode.
My Z leadscrews are connected via a looped belt. I leave the mesh stored. The current one is only a few weeks old, but the one before that was probably a year.
Should I be using linear advance? I think this was discussed elsewhere before but I still haven’t fully understood this. I get how it works, but not sure how to know if I am using it or if I can enable it. I cannot find it within PrusaSlicer, but I see you can set it using M900 maybe?
Chapter and verse on Marlin implementation of linear advance is here. Note that the K factor values are much different between Marlin version 1 and version 2.
Based on my reading of this, you can set the K factor value in the firmware but probably don’t want to. I have the K factor set in the Filament start gcode section, as it may vary by filament type/temp/viscosity, with the M900 command. I used the Teaching Tech web site to tune particular settings for my printer/filament combination.
Sorry - been away for a week travelling on college visits. The linear advance K factor can be set at any time using the M900 command. Since (in my limited experience) the K factor is dependent on filament behavior (primarily viscosity, driven by temperature) I choose to set it in the Filament profile start gcode section. Then I have a “reset to zero” M900 command in my machine start gcode so that I don’t end up with an old setting that was left in place accidentally.
I believe I may have found the culprit to the issue I was having here:
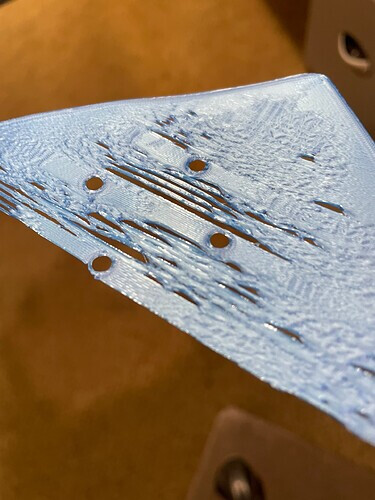
In addition to the Z-offset calibrating, which has definitely helped some, I wanted to keep looking around in the slicer settings for things that may be causing it. What I notice when watching it lay down the first layer is that it lays down one line in one direction quite smooth but then as the adjacent line is laid next to it it seems to be so close, if not right on top of, the previous line that the nozzle and new line is causing the previous line to be pulled up and moved.
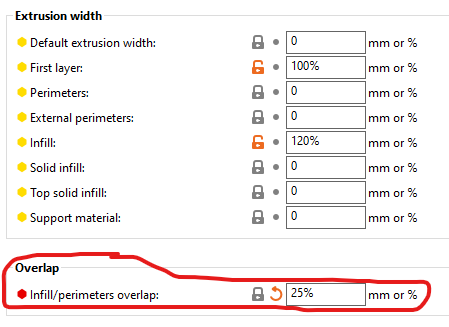
So I found that the setting below was set to 25%.
I can’t believe I didn’t notice this sooner. I think this is what is causing it. I have reduced it to 10% on my current print running right now and the first layer was definitely better.
I will continue to test it down to 0% overlap and see if it keeps improving.