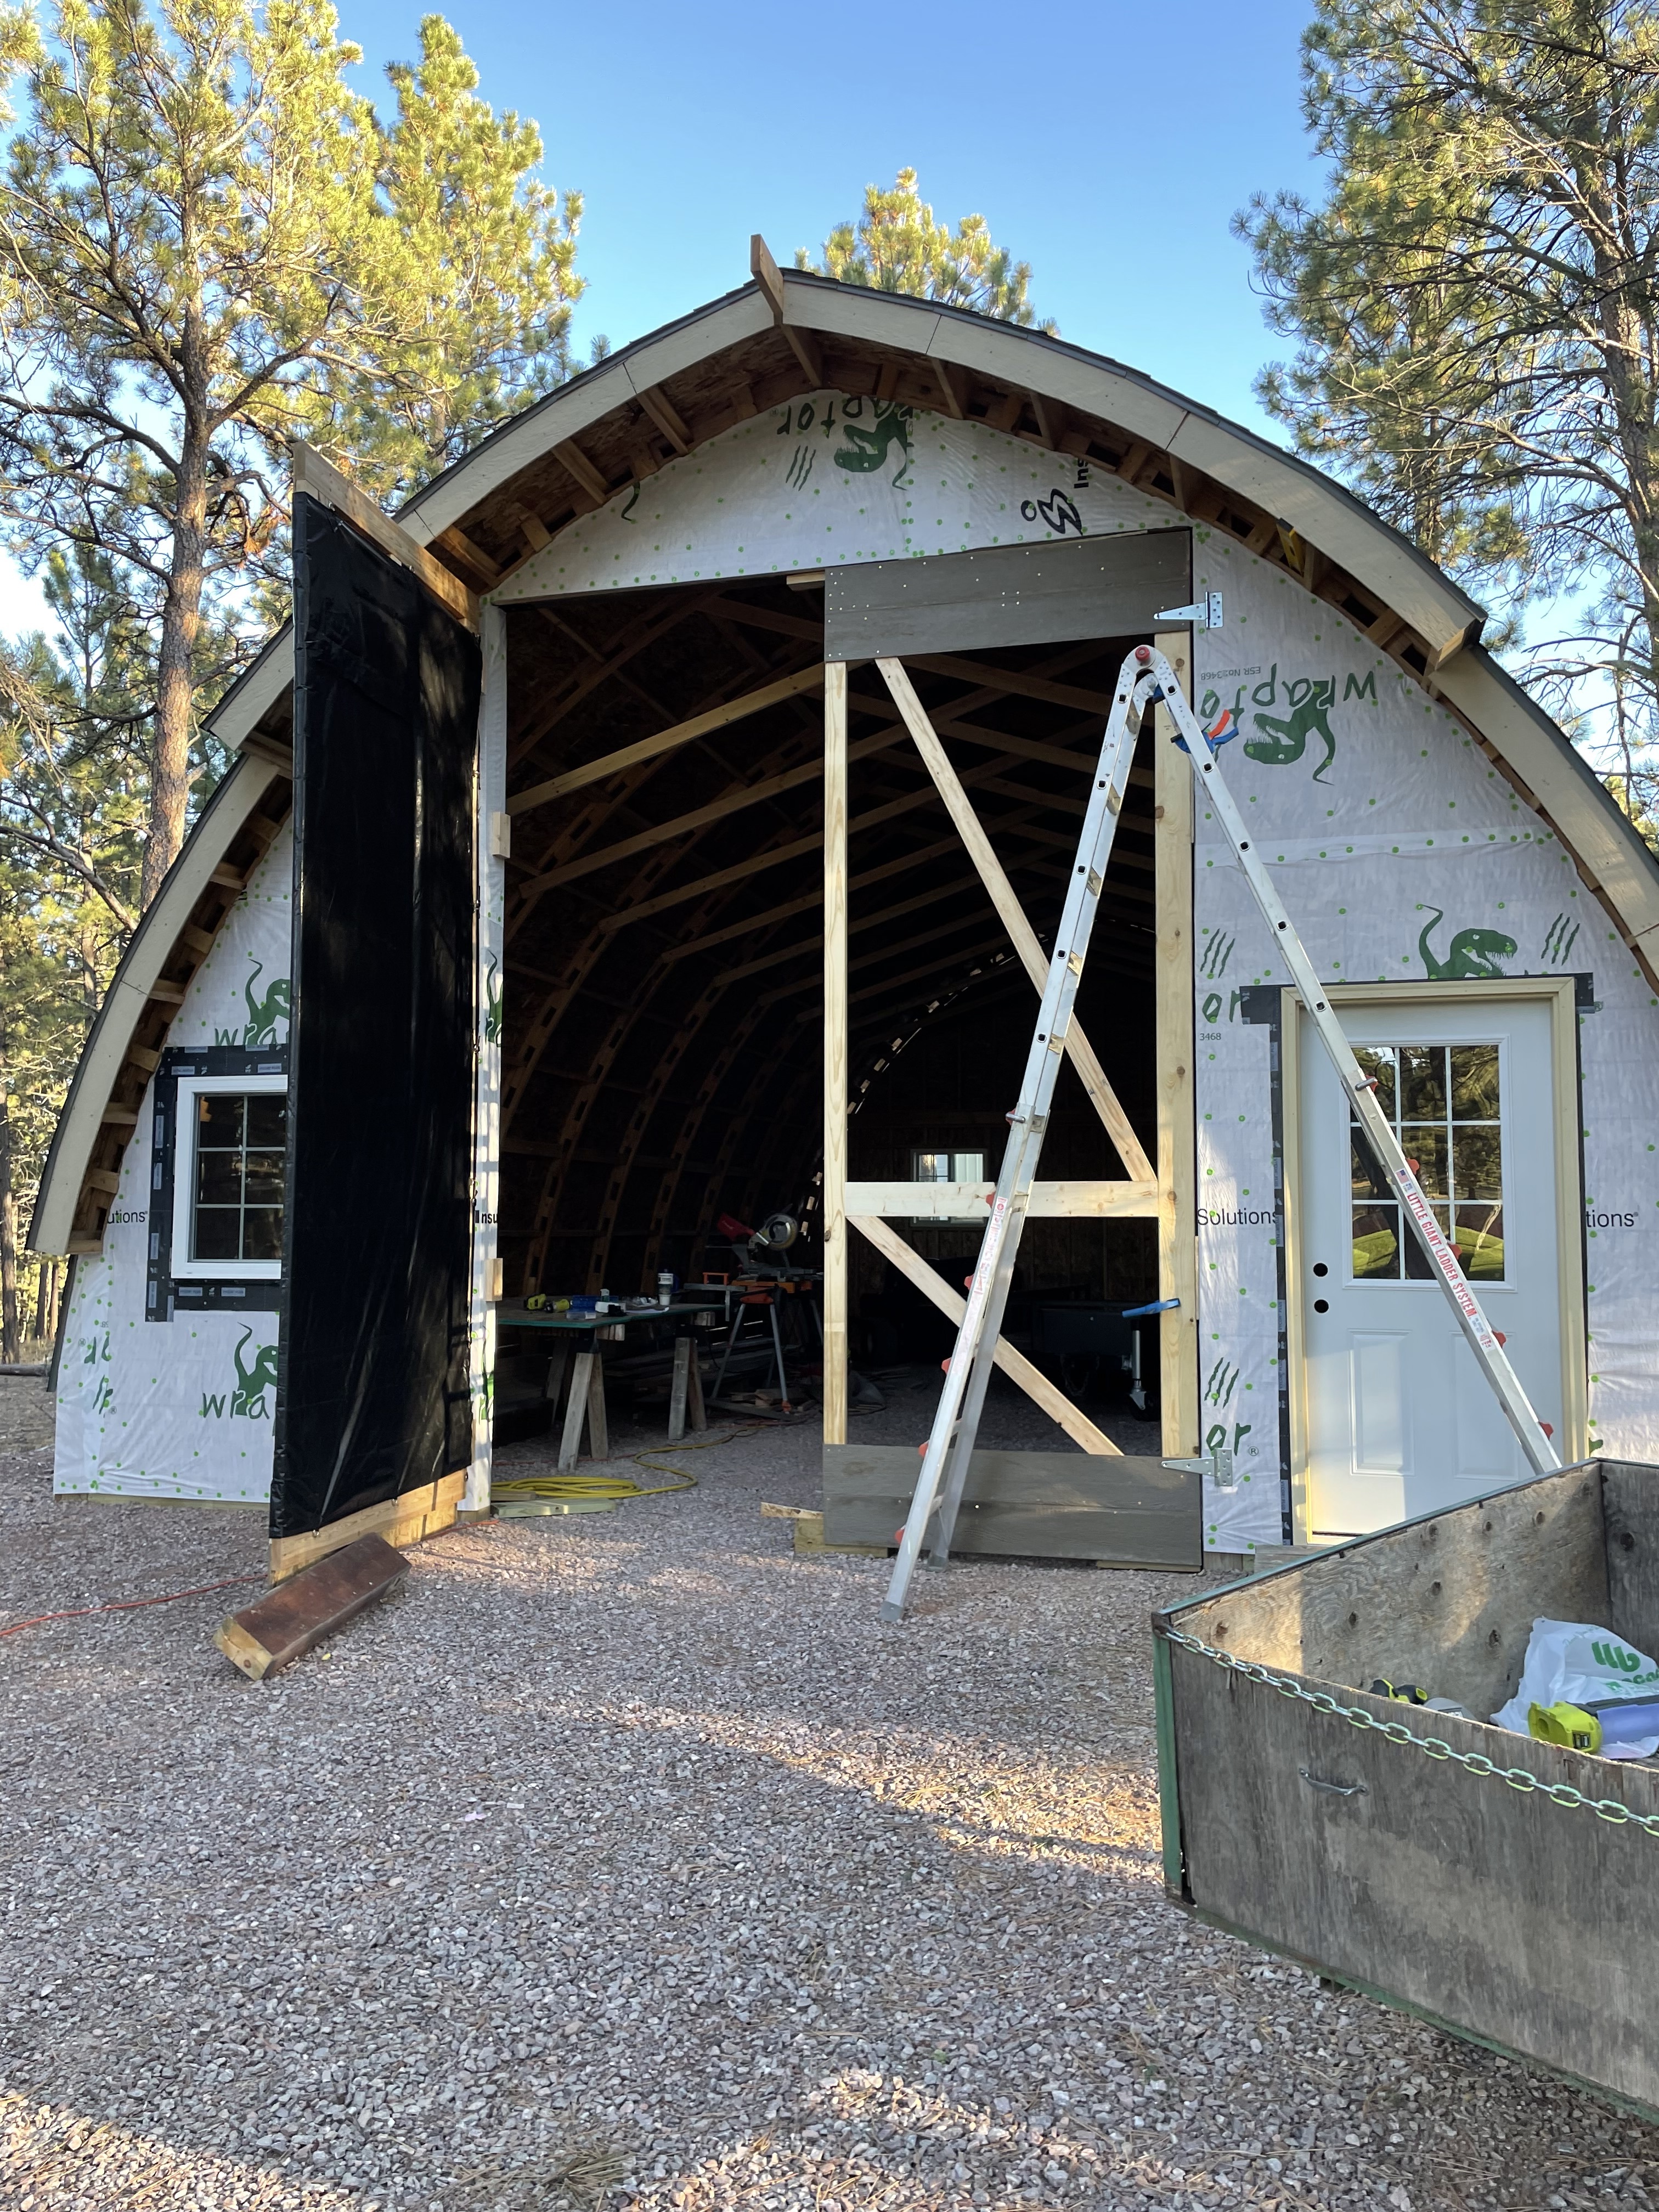
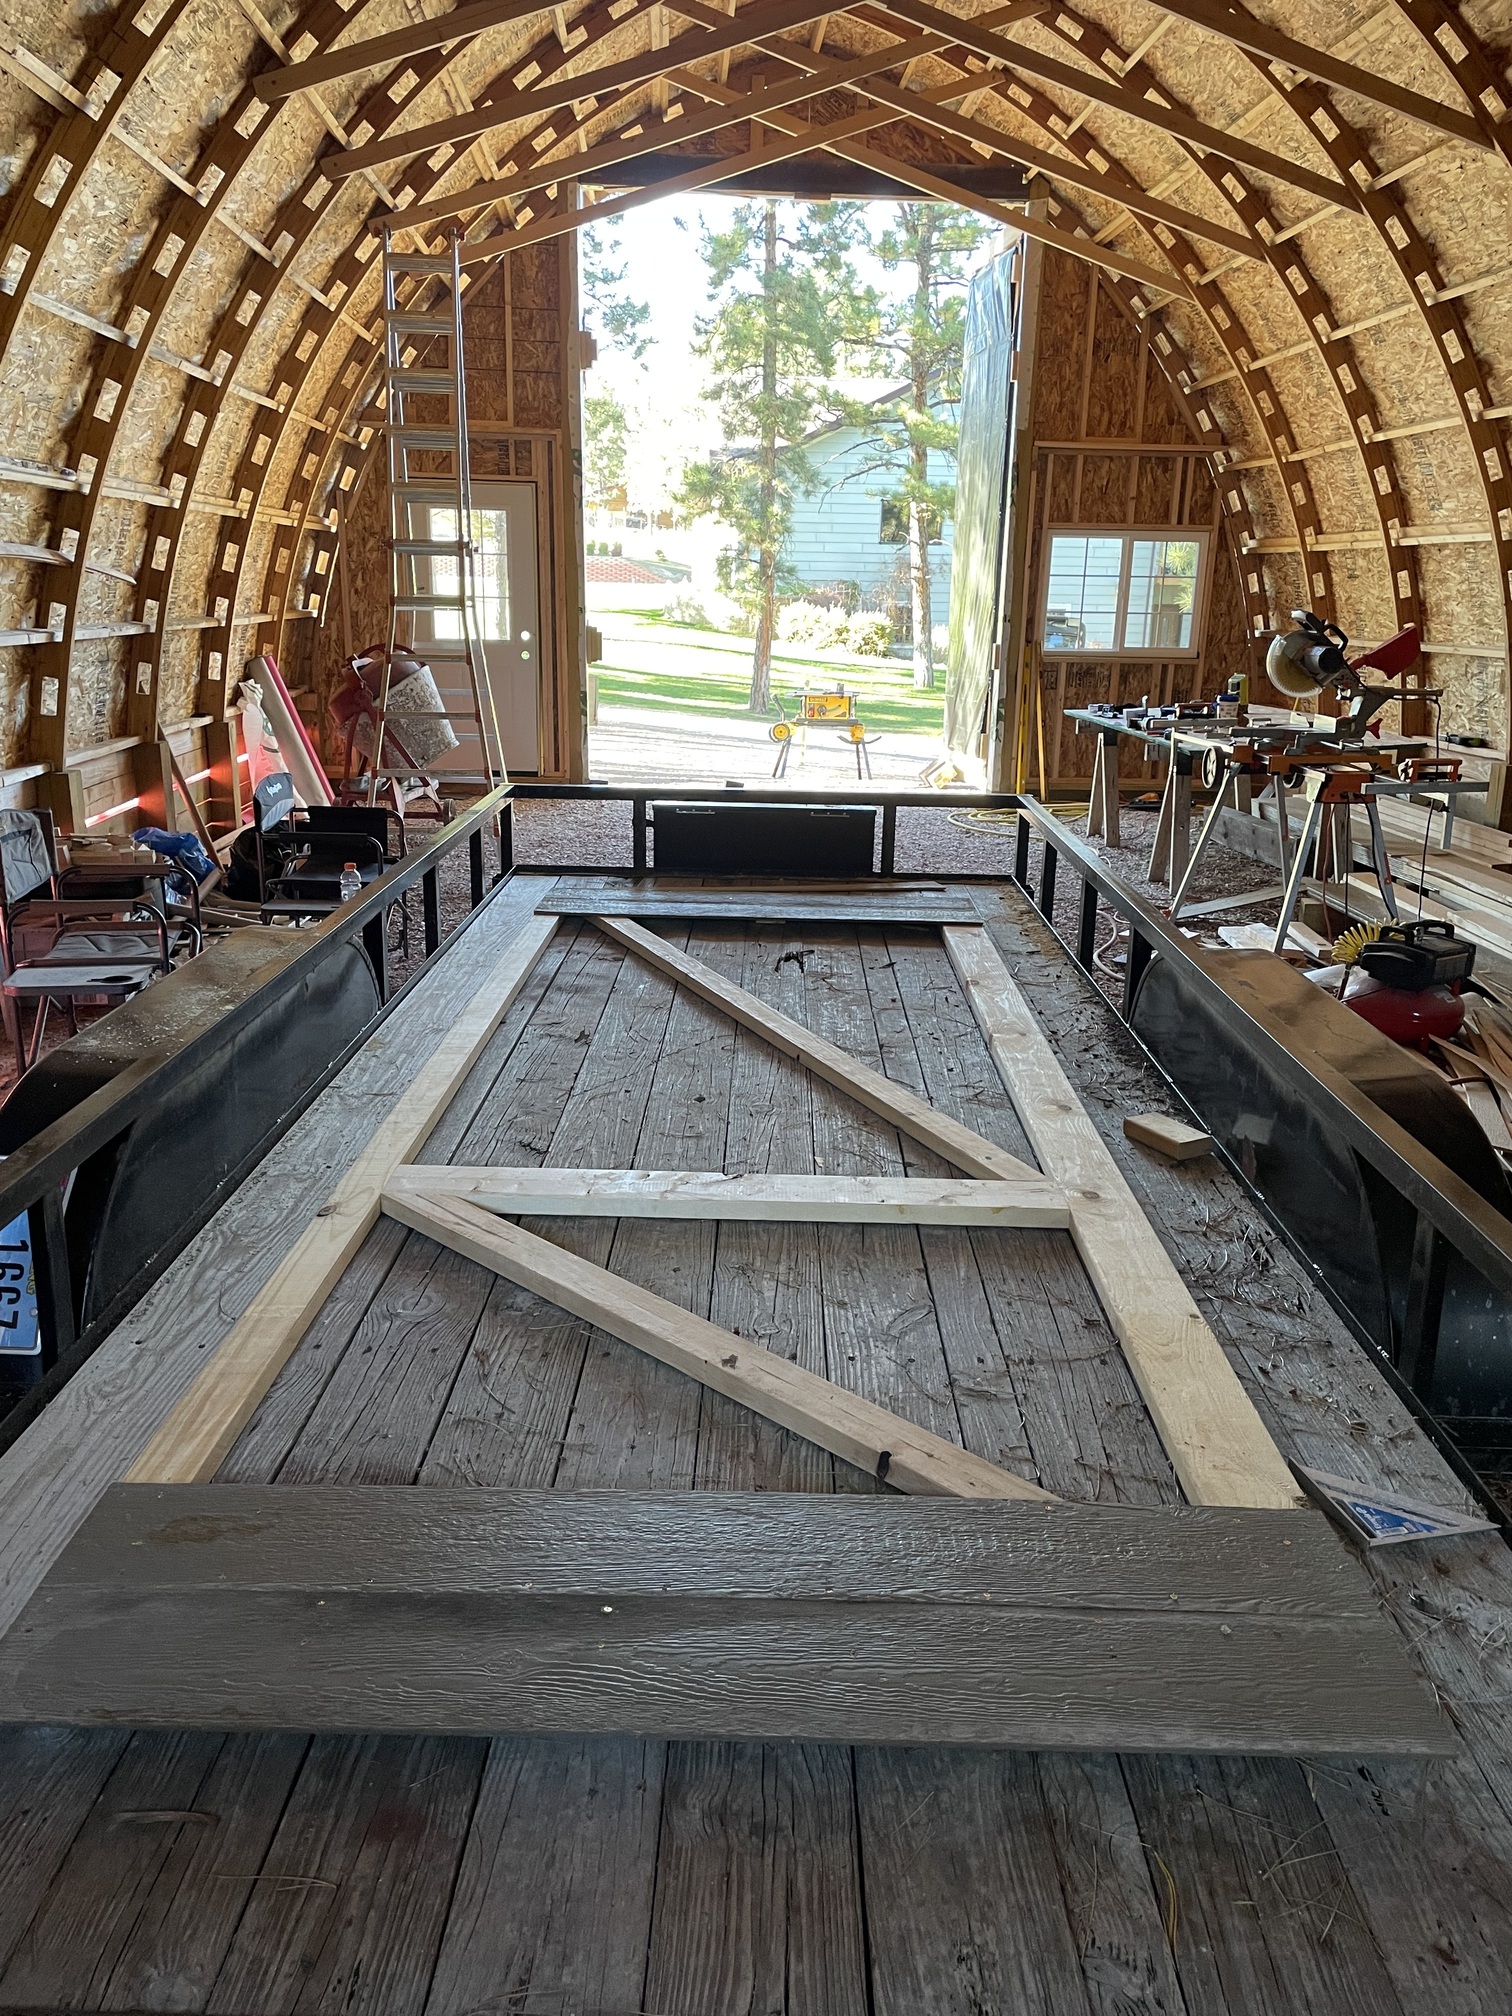
Wanted to share these pictures of the doors I built for an arch building I made. You can share these pics with your father if you like.
Wanted to share these pictures of the doors I built for an arch building I made. You can share these pics with your father if you like.
4 Likes
![]() Very cool building! And I will share it with him - He build all new cabinets for his old house before selling it and they were all pocket screws. And he raved about them. So I really don’t get his distrust of them on larger wood. I’m guessing he used the wrong size screws at some point and didn’t realize it
Very cool building! And I will share it with him - He build all new cabinets for his old house before selling it and they were all pocket screws. And he raved about them. So I really don’t get his distrust of them on larger wood. I’m guessing he used the wrong size screws at some point and didn’t realize it ![]()
This evening started off with exciting news…USPS went from a day late to on time with my package from Ryan. So I’ve got a shiny new jackpot, plates and a few other goodies…which combined with the Carbide ER11 router that arrived slightly earlier means all of my parts should be here now!
The aluminum plates kind of surprised me - for some reason they looked bigger in pictures to me so at first I wondered if Ryan forgot them since the boxes didn’t look big enough. I had even set them up in ESTLcam to cut out of MDF on my old machine as a temporary way to assemble things so I should have known…but I guess that was before I cut my plates and realized they were also smaller than I thought they were.
So after digging through my boxes of goodies we ran up to the store for some wood to finish the table. And I was reminded of why I hate living in Yuma. Lowes had nothing in a manufactured sheet good when I went there on Monday - and it wasn’t that they were out…they just flat out didn’t have anything. They have 2x4 sheets but no 4x8…their store in Lake Havasu has it for some reason…but I’m not driving a few hours to get a sheet of particle board. They don’t even list MDF and didn’t have it in store either.
So home depot. They had both 1/2" and 5/8" MDF - at the same price ?!? great…I’ll get a sheet of 5/8…but the top one looked really chewed up and warped. So off to the side it goes and I grab what looks like a fresh sheet…um…no…it’s…cracked through the middle almost all the way through ![]() Ok, next sheet…same…there’s one more sheet and…it’s even worse. Crud.
Ok, next sheet…same…there’s one more sheet and…it’s even worse. Crud.
Ok…they’ve got 5/8" particle board at least which is what my last table was made from so it will do. And I only had to move two sheets to get to one that wasn’t mangled.
On the way home we stopped by the old house to take my old MPCNC apart. My daughter went to town with an electric screwdriver undoing every screw she could find…she proved able to reach some of the ones I wasn’t able to:

As I tore it apart I remembered a few hidden sins from when I built it:
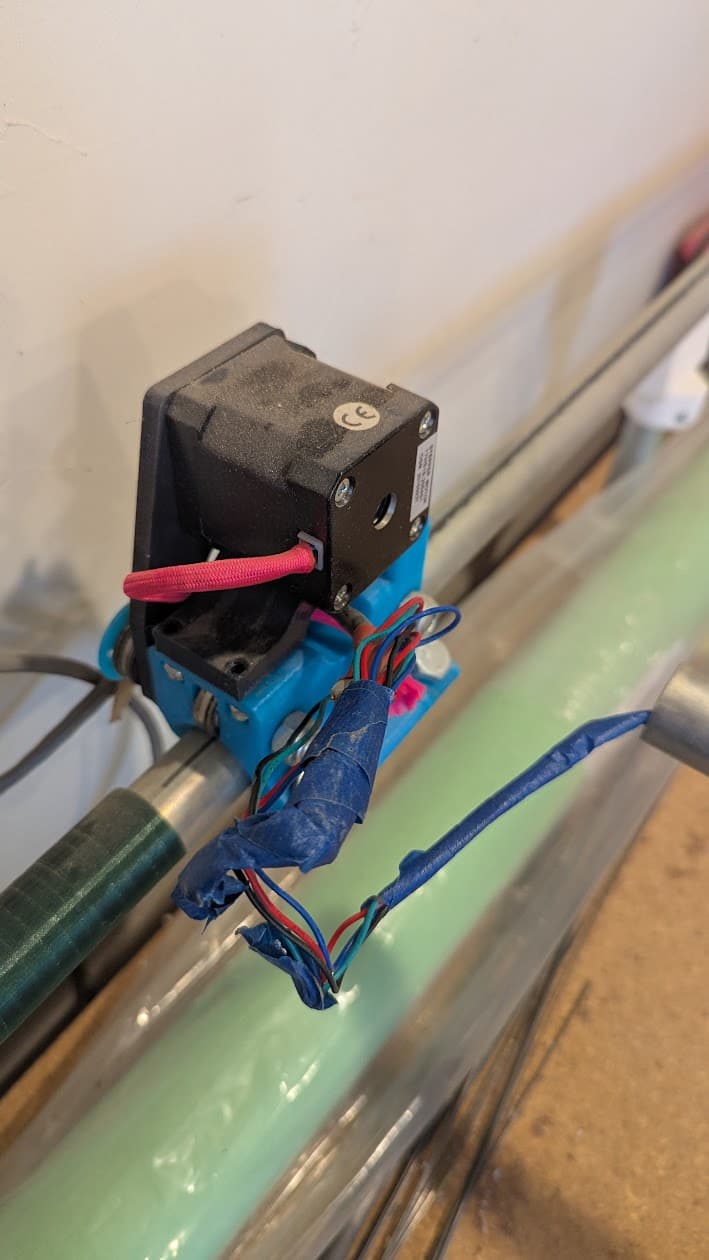
No - the blue tape is not holding the wires together. It was just what was at hand at 11PM when I was trying to clean up the routing of some of the wiring…under it was proper heat shrink.
I also forgot that 2 of my steppers have really short wires on them. One only has 9" of wire and the other only has 15. So I’ll have to see if there’s anywhere those can work without having to lengthen the wires. Still getting my head around how the LR4 goes together…but overall it seems like it wont’ need as long of wires as my old machine had.
While she unscrewed things I found the box with my original LR parts:
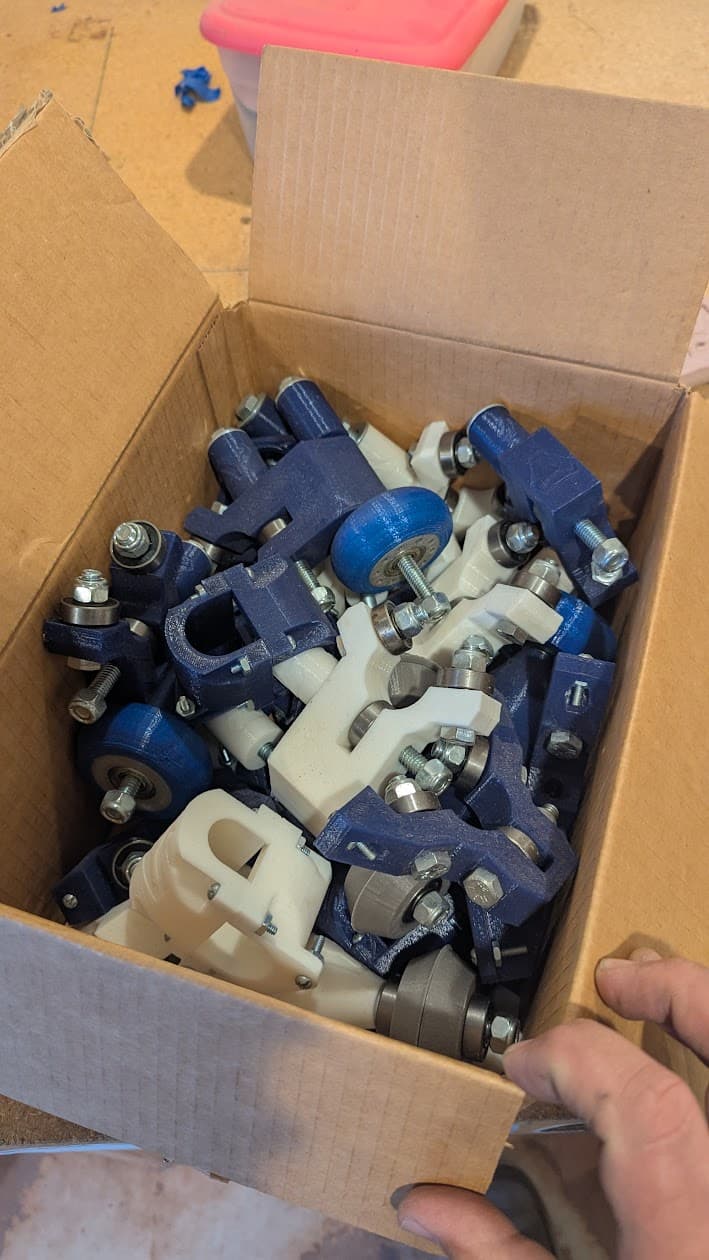
Still can’t bring myself to part with them…but I should probably take the hardware and bearings off and scrap the plastic at this point…unless someone wants them for a v1 museum ![]()
And…a bittersweet sight:
I am without a CNC machine for the first time in 9 years ![]() And this old table will get disassembled for parts later this weekend.
And this old table will get disassembled for parts later this weekend.
After that we decided not to make more progress on the new bench tonight. My girlfriend is coming back from a conference tonight so I’ve got some house cleaning to take care of. And my daughter is tired anyway. So a night off from woodworking.
But - she’s now also interested in helping to build the new machine! So…I may not get things built quite as quickly as I had been expecting to…but I’ll get to share the build with her which is worth slowing down for!
3 Likes
Funny, I thought the aluminum plates would be bigger also. One modification I added that I find very useful is the Fluid NC pendant. I wouldn’t usually mention that to someone just starting their build however you have 9 years with the MPCNC. Doug Joseph has a good post on this forum with all the info. Enjoy the build.
I’ve had to stop myself from ordering parts for a pendant already ![]() I had messed around with a few ways to try and do one under Marlin with my old MPCNC but never got anything to work where it was usable. Had a bit more luck with a GRBL shield…but didn’t like that for other reasons. So I’m really looking forward to trying FluidNC as it looks like it scratches all my itches.
I had messed around with a few ways to try and do one under Marlin with my old MPCNC but never got anything to work where it was usable. Had a bit more luck with a GRBL shield…but didn’t like that for other reasons. So I’m really looking forward to trying FluidNC as it looks like it scratches all my itches.
So the combination of deciding I should walk before I run (I almost installed Fluid on a random ESP32 I had laying around just to start messing with it) and trying to keep the budget in check since I’m paying two mortgages until I get my old house cleaned out and rented…I’m holding off on the pendant until I have the LR4 up and running.
Extracting steppers from the old machine I learned a few things about my previous build:
- I do have the “missing” wire from the steppers with short wires. I spliced it onto the others to make them extra long

So I’ll be doing a bit of wire stretching/shrinking again it looks like.
- When I was at the old house I forgot to grab the box my waxed wire went into…I’m planning on doing some cable lacing instead of wrap to keep things organized this time. I did that on some of my synthesizer projects and really liked it for keeping wires organized. On the old machine I had used paracord to shield the stepper wires but I don’t think that will be necessary on the LR4:

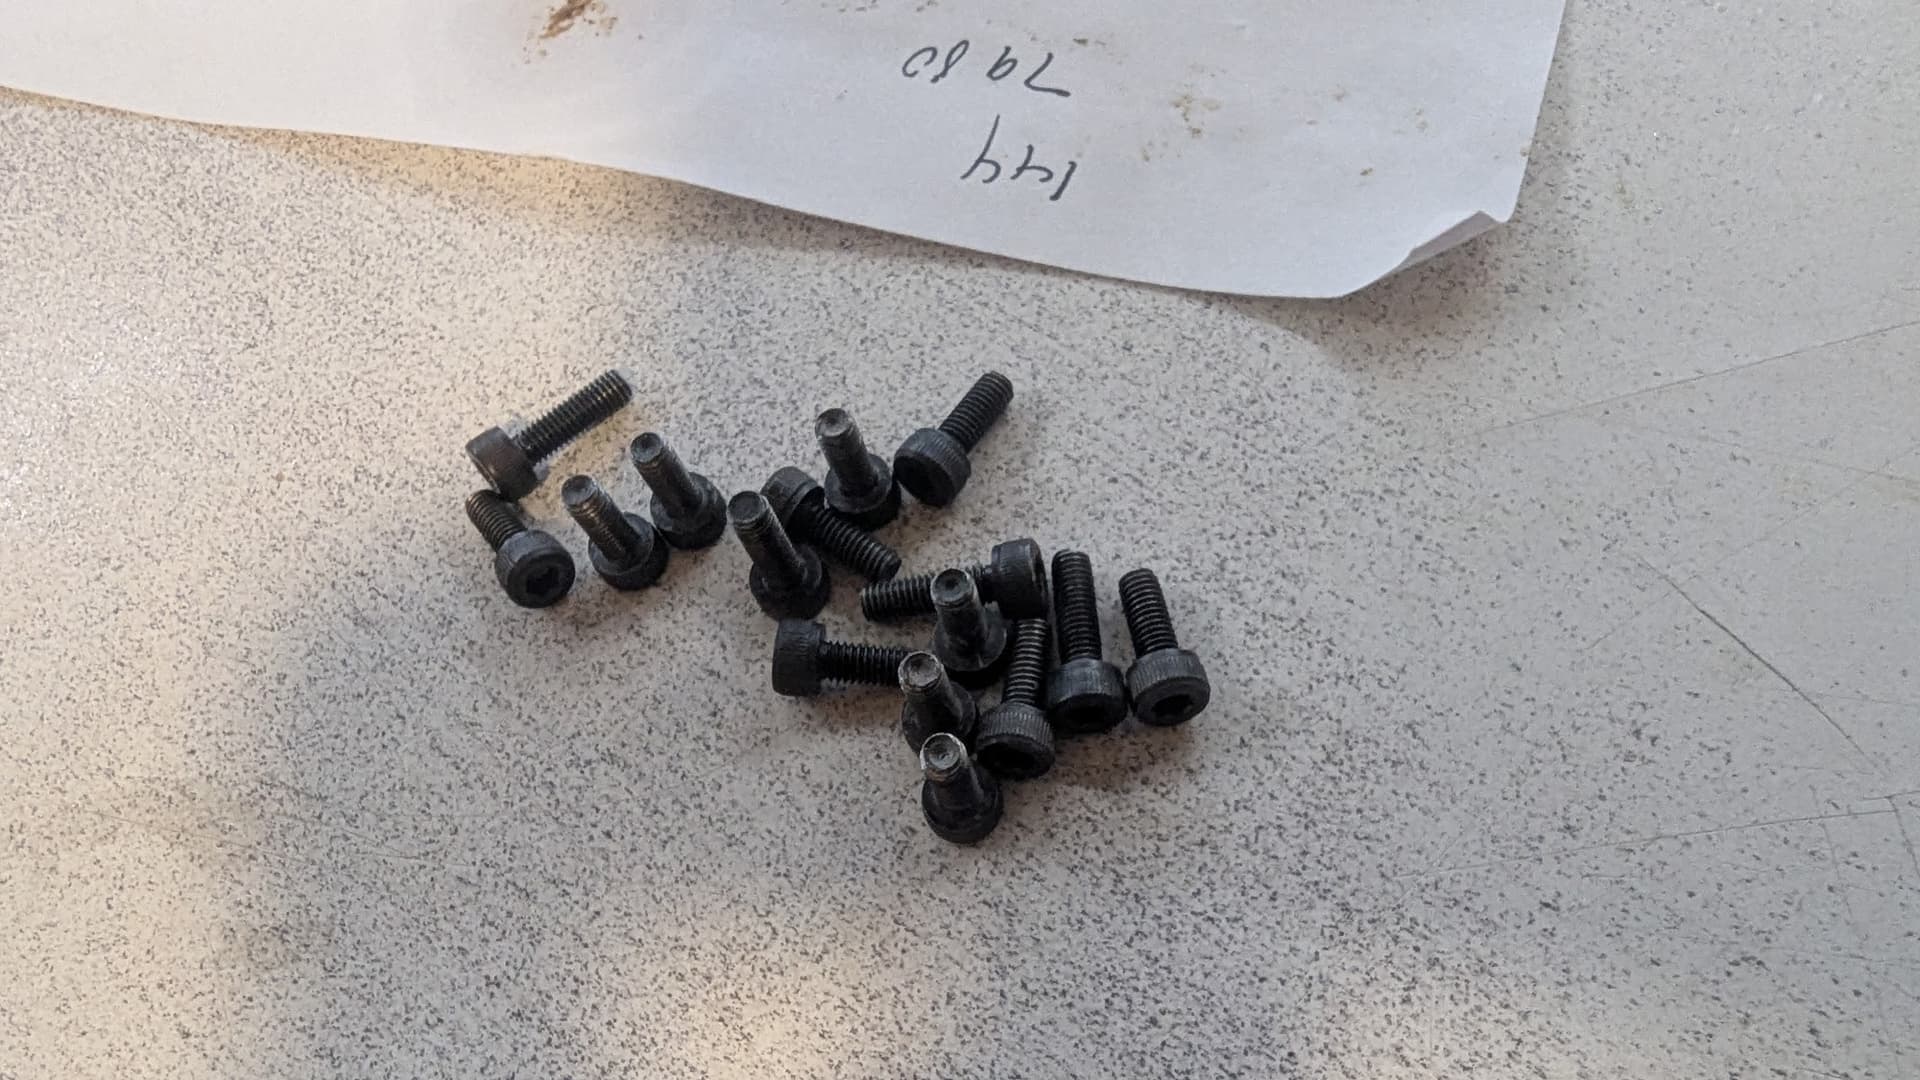
- When I installed the steppers on the old machine I ran out of the correct size screws and used some shorter ones in a few places that were just barely long enough to engage…I had meant to go back and replace them but forgot all about them:
- This assembly on the old machine was…really jacked up:
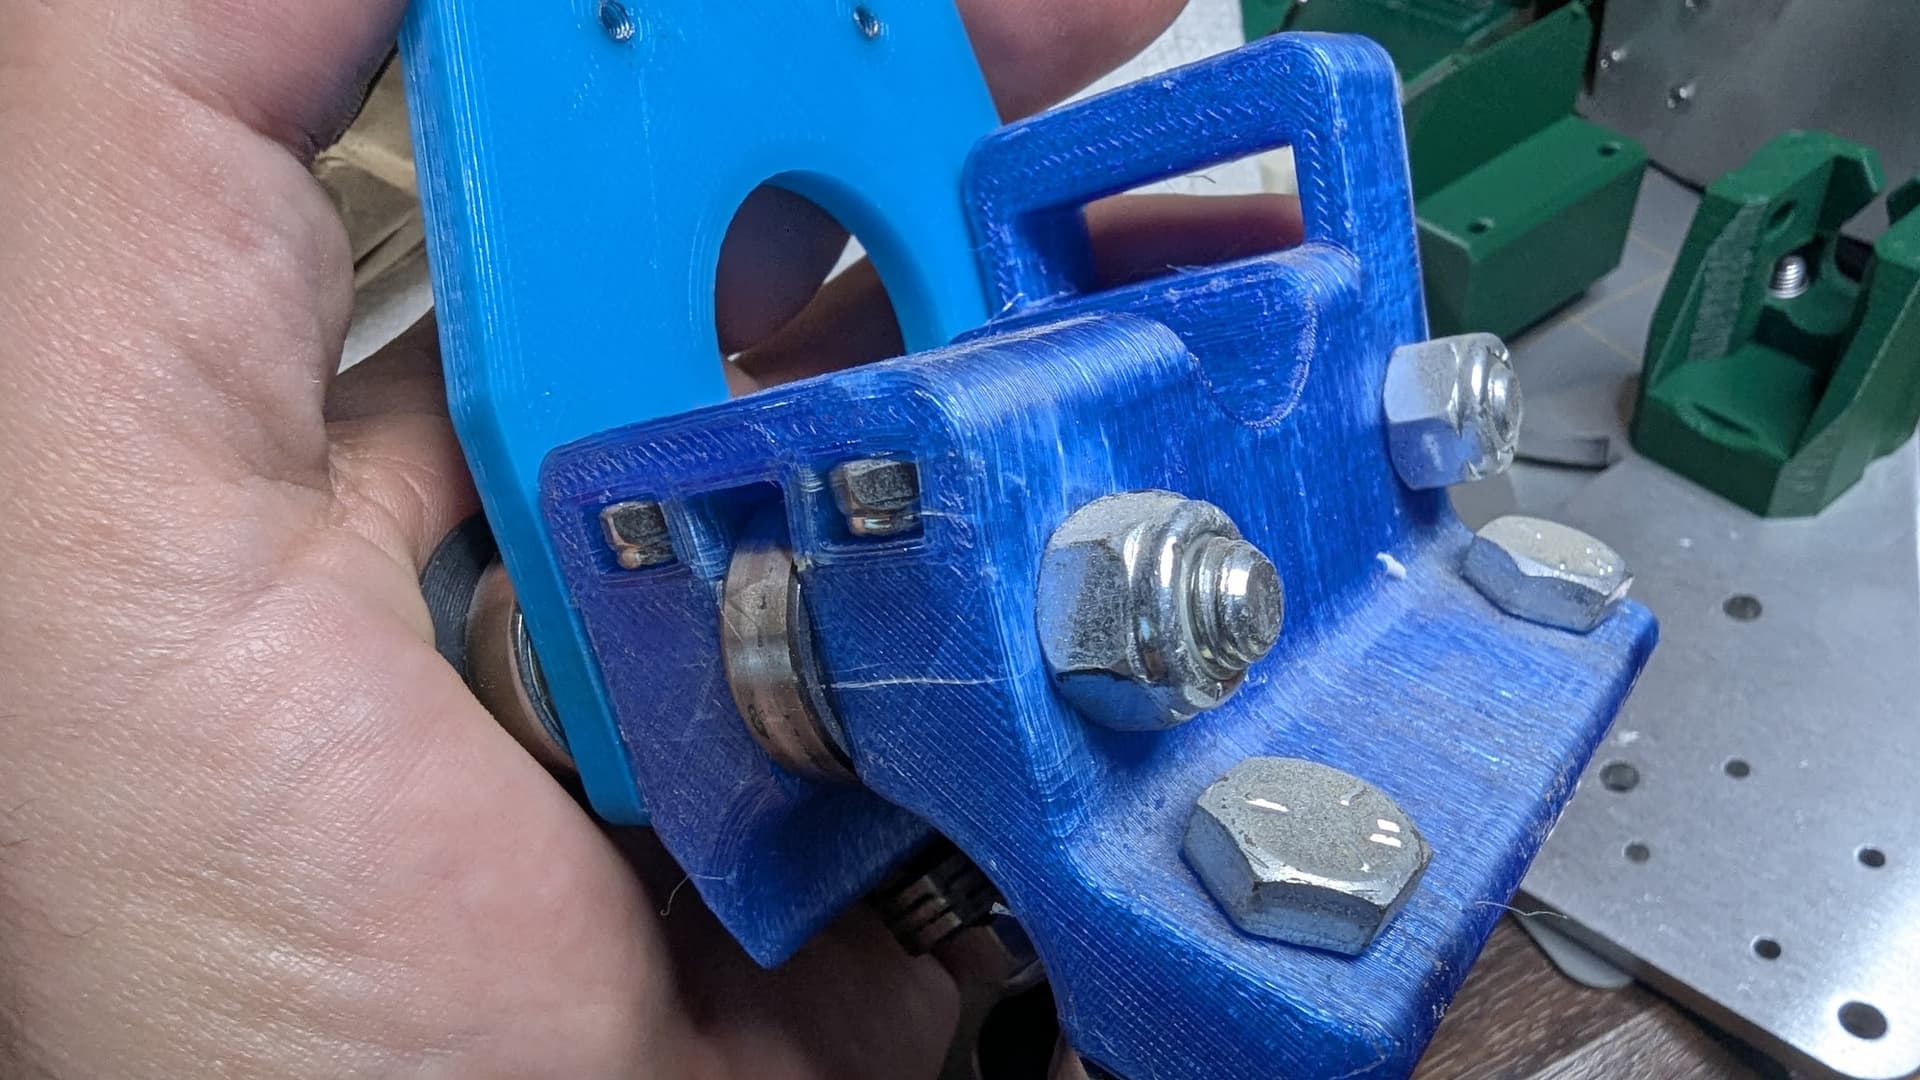
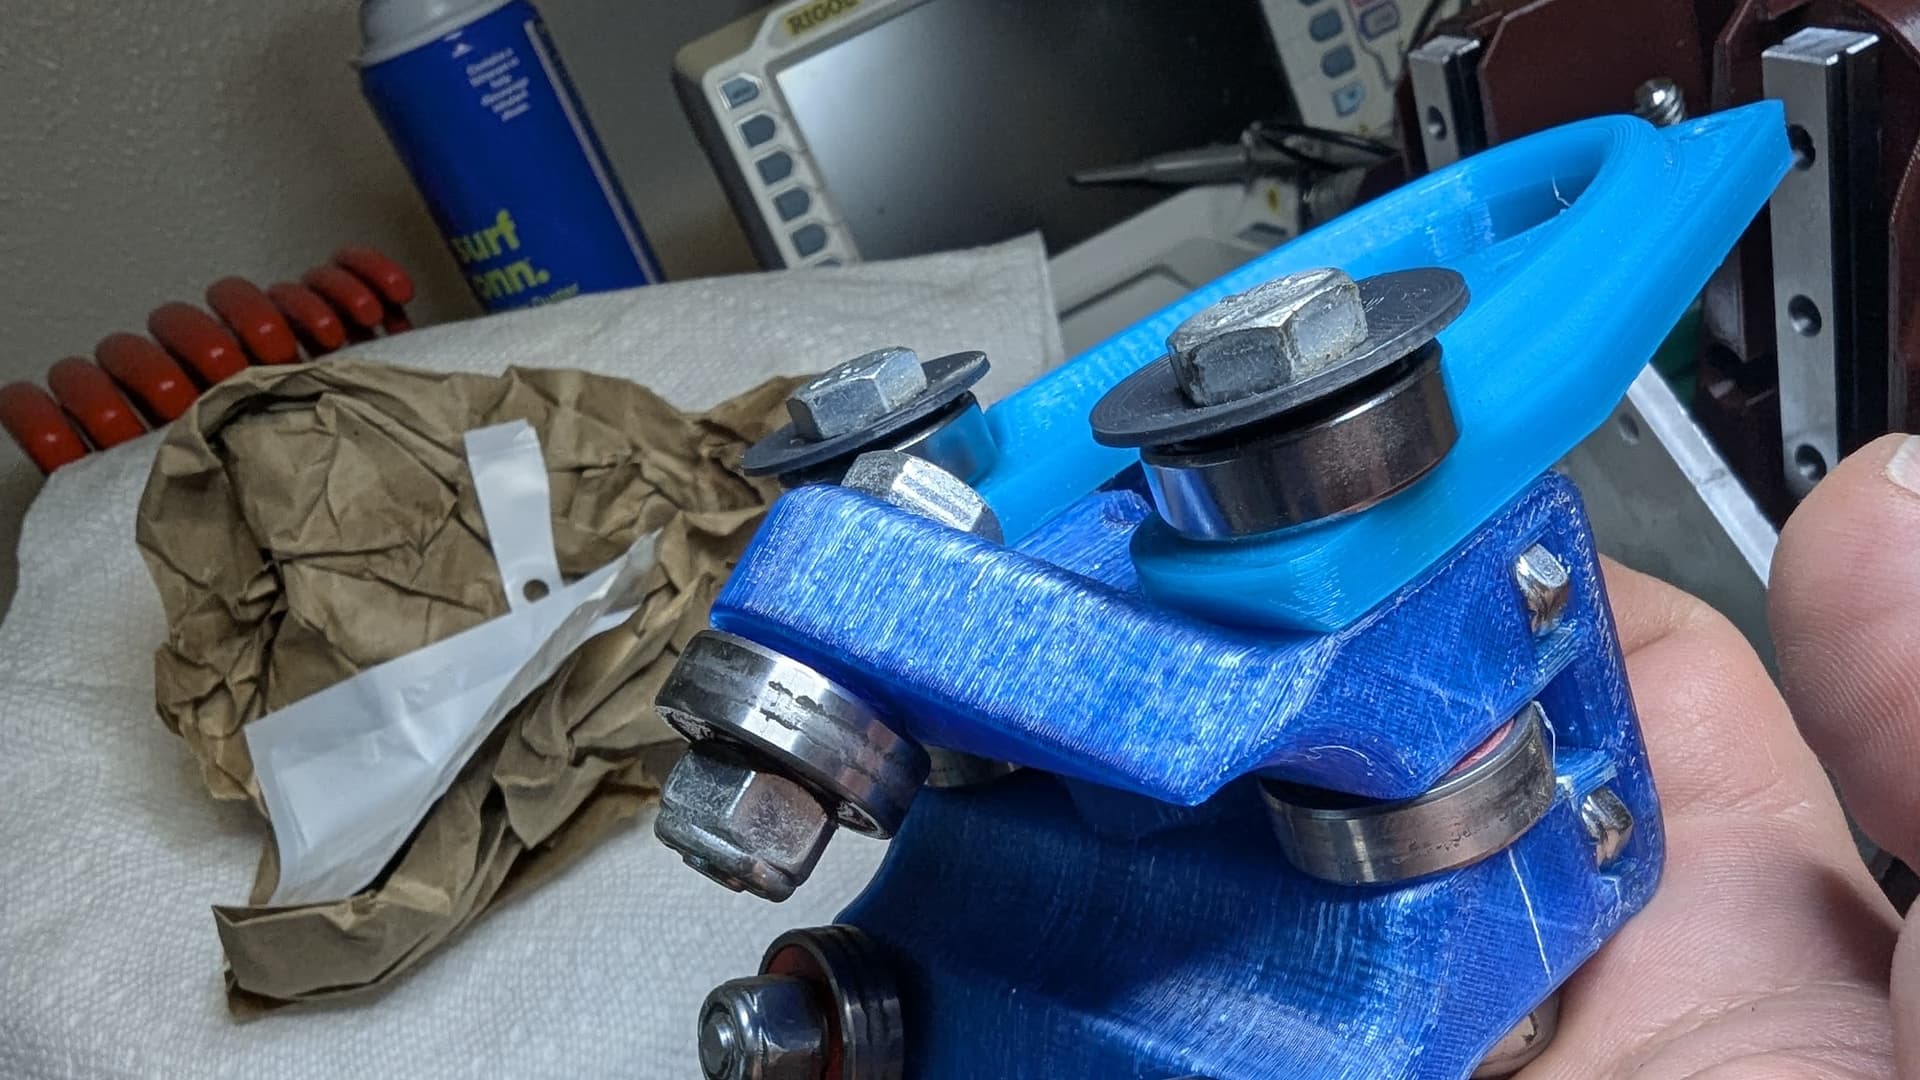
The adjuster bolts were so tight they had cracked the body (but it was still holding together) and cupped the washers that held the GT2 belt in place. It also meant those two bearings the belt was supposed to ride on were jammed and the belt had just been sliding across them. That probably explains why one axis always looked a little “jerky” - I had jut assumed it was due to an overly tall Z that was acting as a lever…and while I’m sure that played a part…this was really not great.
On the upside…those vertical plates from the ancient design never warped which was something I had always worried about.
It’s impressive just how far the designs have come from when I build this old machine!
2 Likes
Oh yeah…one other mistake I discovered tonight.
I missed that the LR4 uses 10mm GT2 belt. My old MPCNC used 5mm…and I have a LOT of 5mm on hand. So just had to place an amazon order for some belt. And since I’m not in a big city it won’t be here until Sunday ![]() So…there’s a chance we could potentially make some chips Sunday evening if everything goes perfect. But…I’m expecting late next week or the weekend after will be more likely.
So…there’s a chance we could potentially make some chips Sunday evening if everything goes perfect. But…I’m expecting late next week or the weekend after will be more likely.
3 Likes
Dream scenario!
OMG, that stepper plate is the second version. I think that might have been the very first update I ever made to add that extra ridge for strength. The original mpcnc was designed for that to be a metal plate, and injection mold most of the rest of the parts.
You are using the washers so that was before the printed washer plate, you also do not have the “built in wiring terminals”. What a trip you have a machine from a very very short window of time. I was updating parts nearly daily at that point. WOW that is crazy to think about.
You can still use the small stuff in a pinch, no worries.
2 Likes
Yeah - I seem to remember that the first set I printed didn’t have the ridge and you released the updated design with the ridge right after my first set of parts started breaking while sitting on my desk and I decided to switch to PETG if I had to reprint everything anyway. (I still curse that terrible roll of eSun PLA Amazon sent me! How the heck to parts break across layer lines when just sitting on a desk unassembled under no stress!)
I think the printed washers I used were also an update - I want to say originally you were saying to use fender washers of some size but then offered the printed washers as an experiment and I decided to try them. I think the washer plate came out after I printed the washers but before I assembled the machine…but I was too lazy/impatient to print them ![]()
It’s more “had” than “have” now as it’s just a box of pretty worn out prints at this point ![]()
And yeah - you were iterating quick at that point. I seem to remember a lot of little changes and updates without official releases since they were coming so quickly.
I want to say my Z assembly is also unique to a short window of time. I know you mentioned earlier it looked like the “Better middle Z” but I seem to remember another update to the Z assembly that came out just after I printed mine (but before the 525 release?) I never updated because I had had such a hard time getting the Z I used to print successfully. (mostly due to issues with the support slic3r was generating at the time which always seemed to fail on my printer for any parts that needed support.)
I’m pretty sure it was pre-525 and I wanted to update to 525…but then you started designing Burly and I wanted to wait for that. And then I started thinking if I was going to print new parts I should also upgrade from 3/4" EMT to 1" SS…then the LR started looking like a better option for my size of machine…
And since my machine “just worked” for my primary need of cutting foam…I just stuck with it instead. Which - is kind of a testament to how good your initial early design was despite it’s limitations. Even built out of the “wrong” plastic and considerably larger and taller than recommended it still served me very well for almost a decade! The biggest flaws with it are probably entirely due to print issues caused by my first not entirely reliable printed. I know the Z is a bit wonky because of that…and that one truck never rode quite right (which is why it was overtightened which I now see caused some belt issues.)
Good to know…but seems like it would be easier to just do it right the first time. And the short screws I found yesterday are a testament to how bad I am about remembering to go back and fix those little shortcuts when I take them ![]() So I don’t really mind waiting until Sunday for belt. Especially now that I have to slow down and can only work on it when my daughter is available to work on it with me.
So I don’t really mind waiting until Sunday for belt. Especially now that I have to slow down and can only work on it when my daughter is available to work on it with me.
BTW - she loved your little “Welcome back” note on the back of the sticker. A sticker which she can’t wait to apply as the ceremonial first on the new bench ![]()
4 Likes
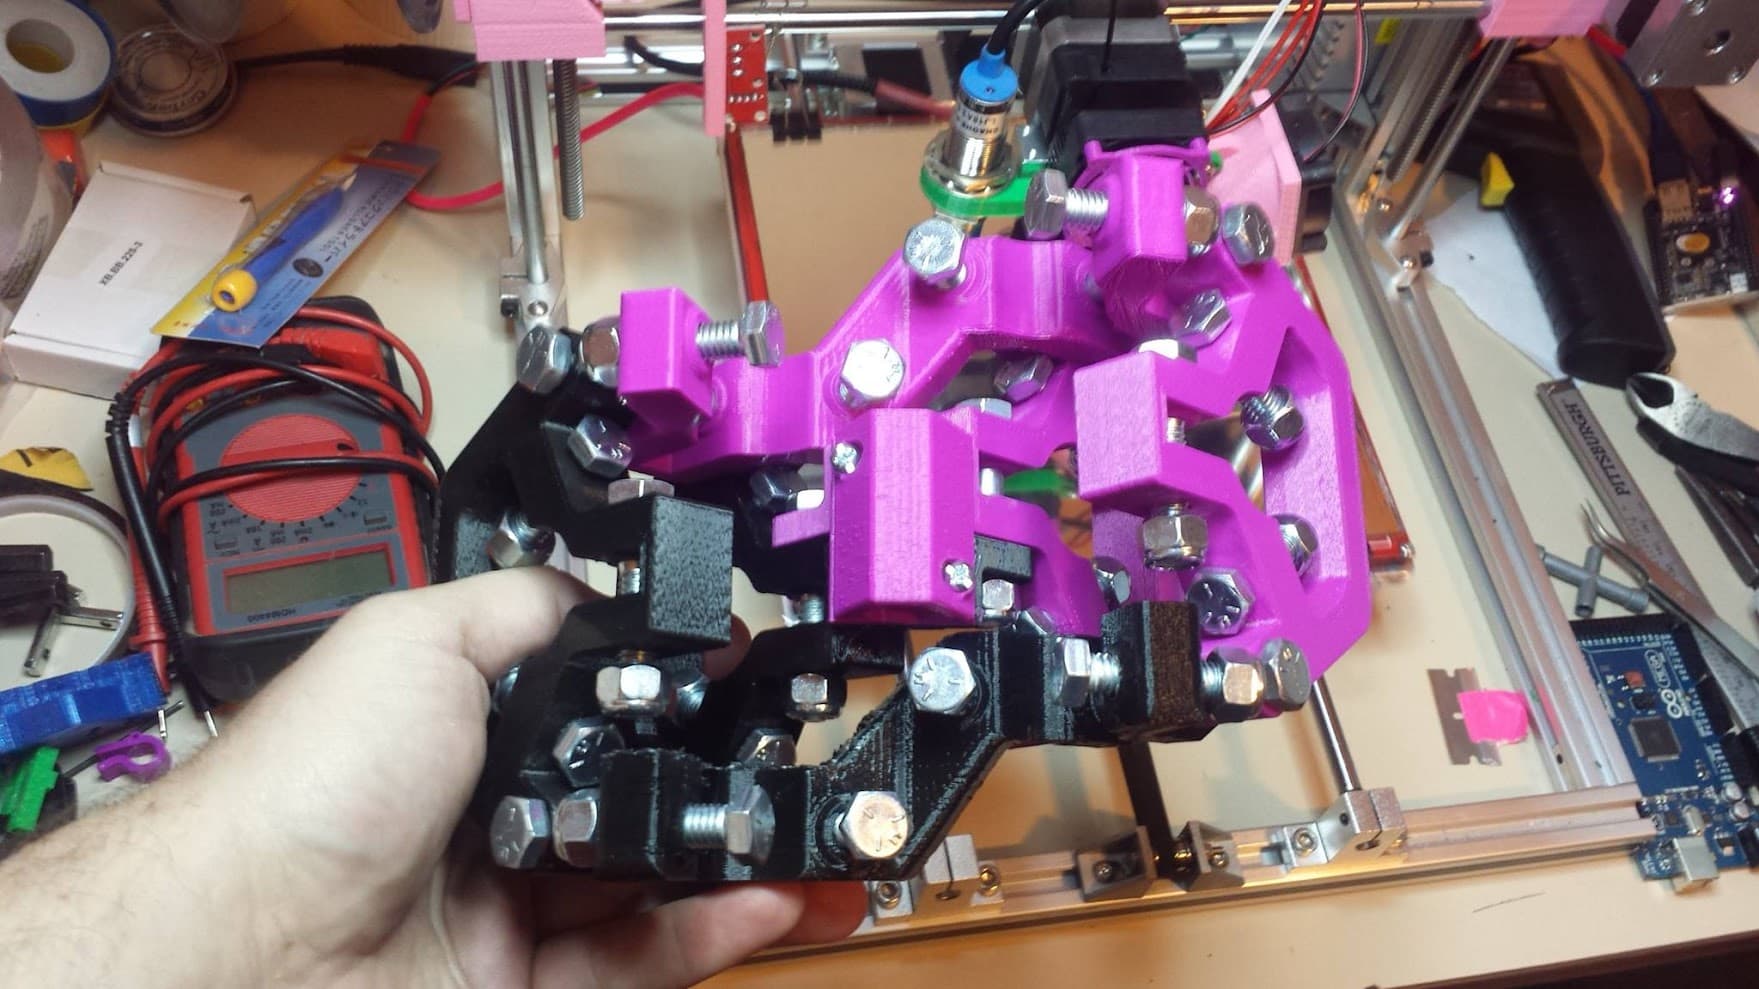
Oh…one other thought on the age of my machine…I seem to remember the mounting feet may have also changed between when I printed them and when I had it finished.
I know the feet that mount to the table were from my initial set of prints and I was always nervous about them since they were from that terrible black filament:
I think there were some minor changes between when I printed those and when I printed the top parts (in blue PETG) due to the screw tabs breaking on people. Maybe I’m remembering wrong though…I just know those are probably the oldest parts on the machine since they were from the original set of prints I did in Feb 2016
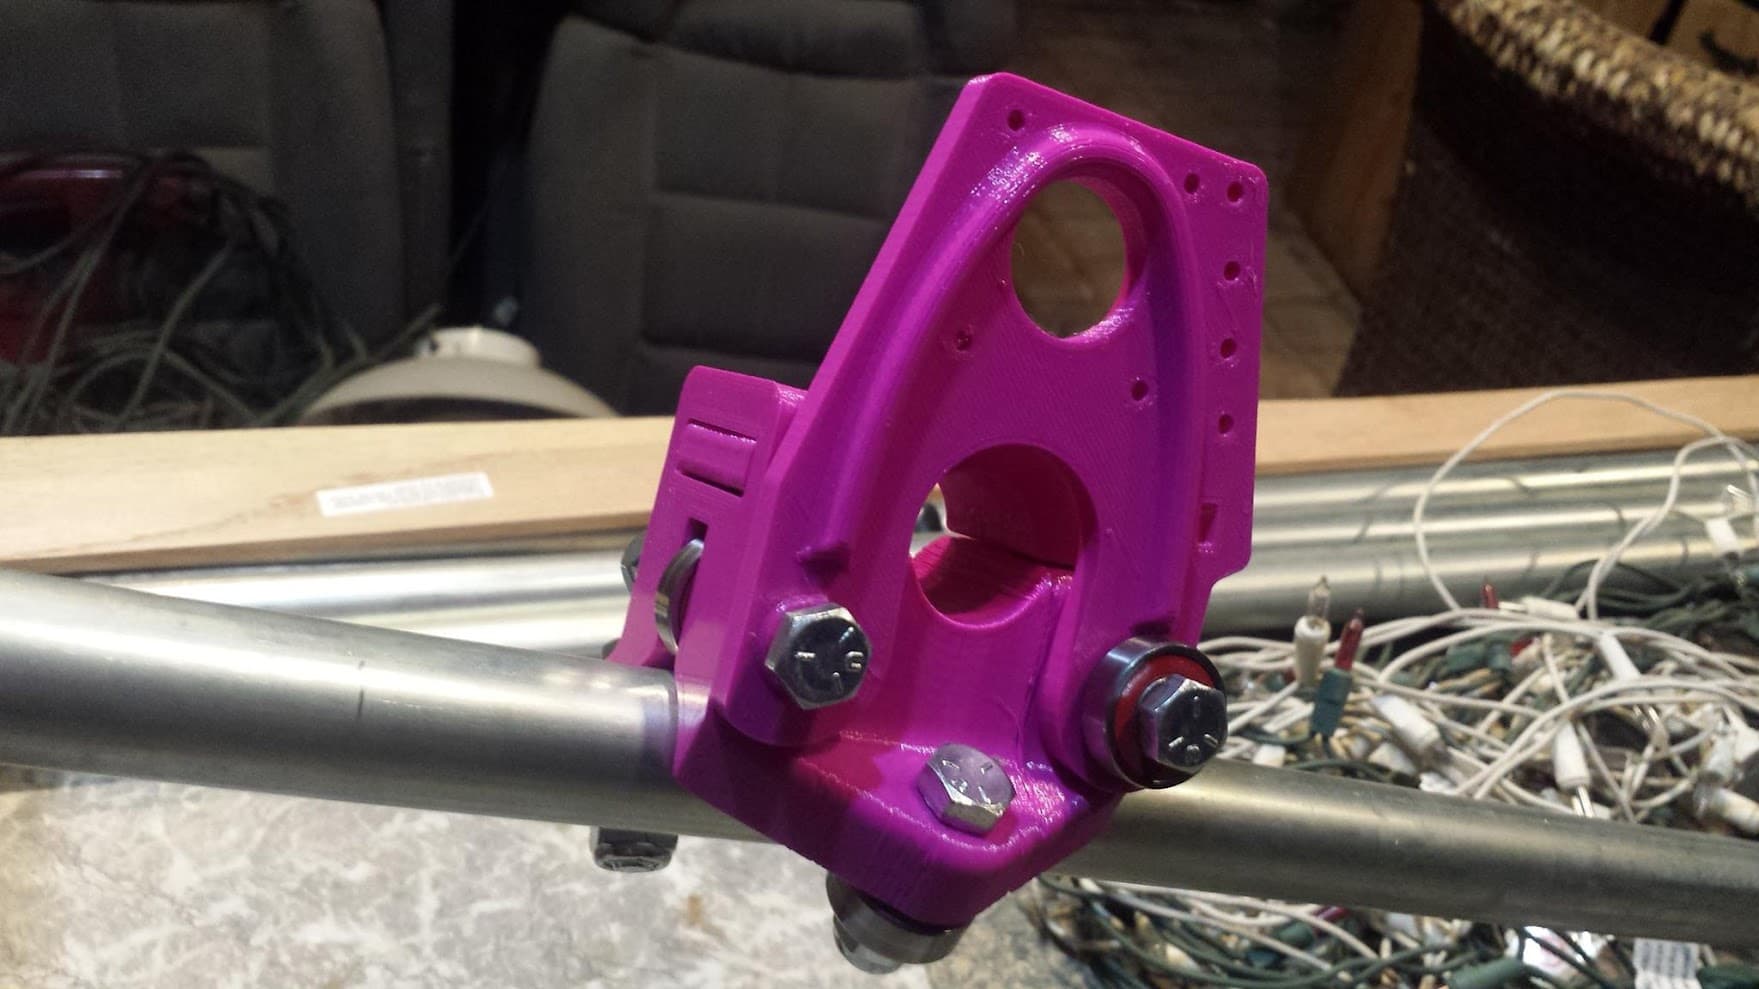
I may have remembered wrong about the rib on the plates though - looks like my first parts did have the rib:
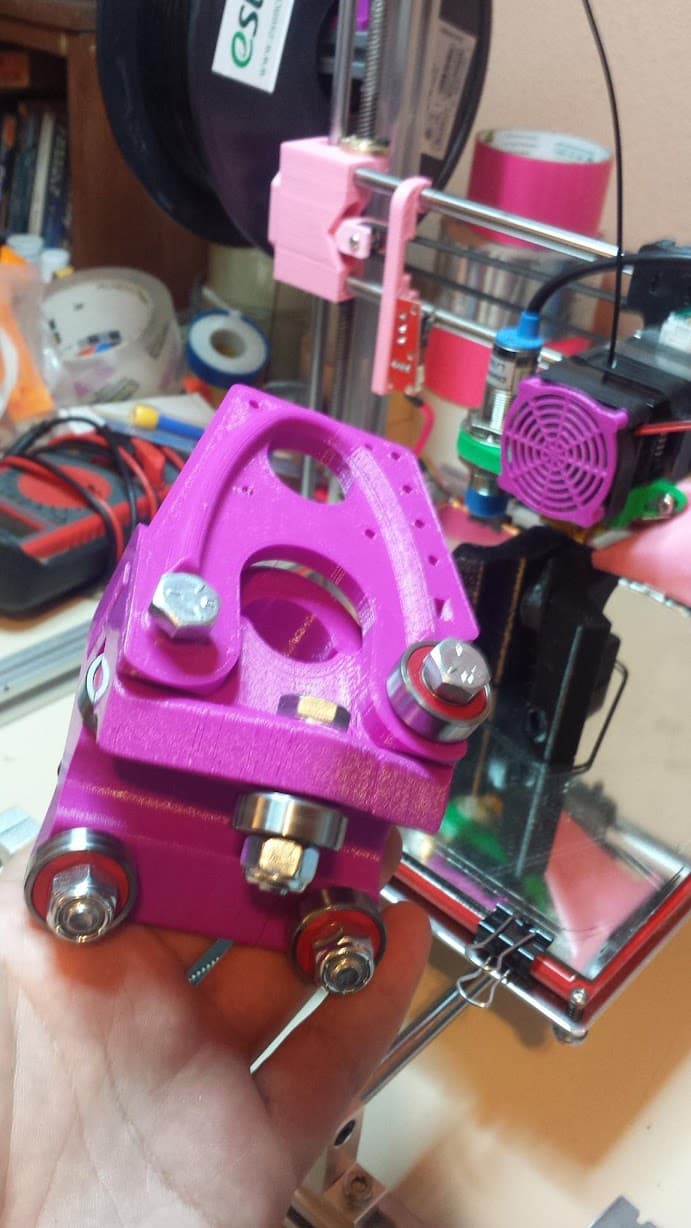
My comment on this photo was “One bearing and 4 washers short of finishing”
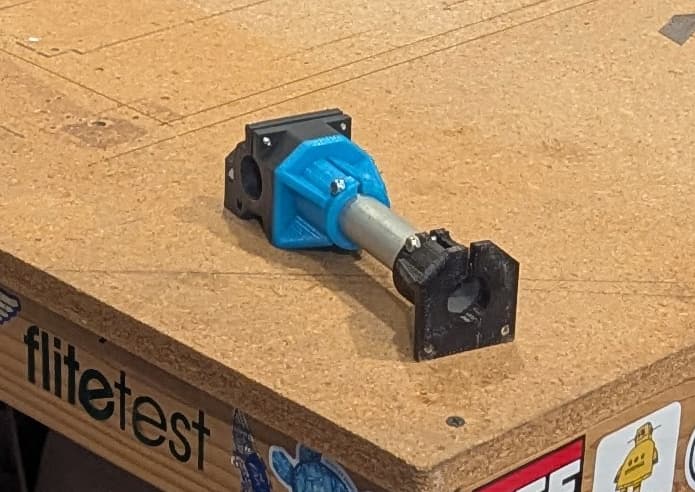
And my first try at the Z - which didn’t work right because the black parts had so many issues:
5 Likes
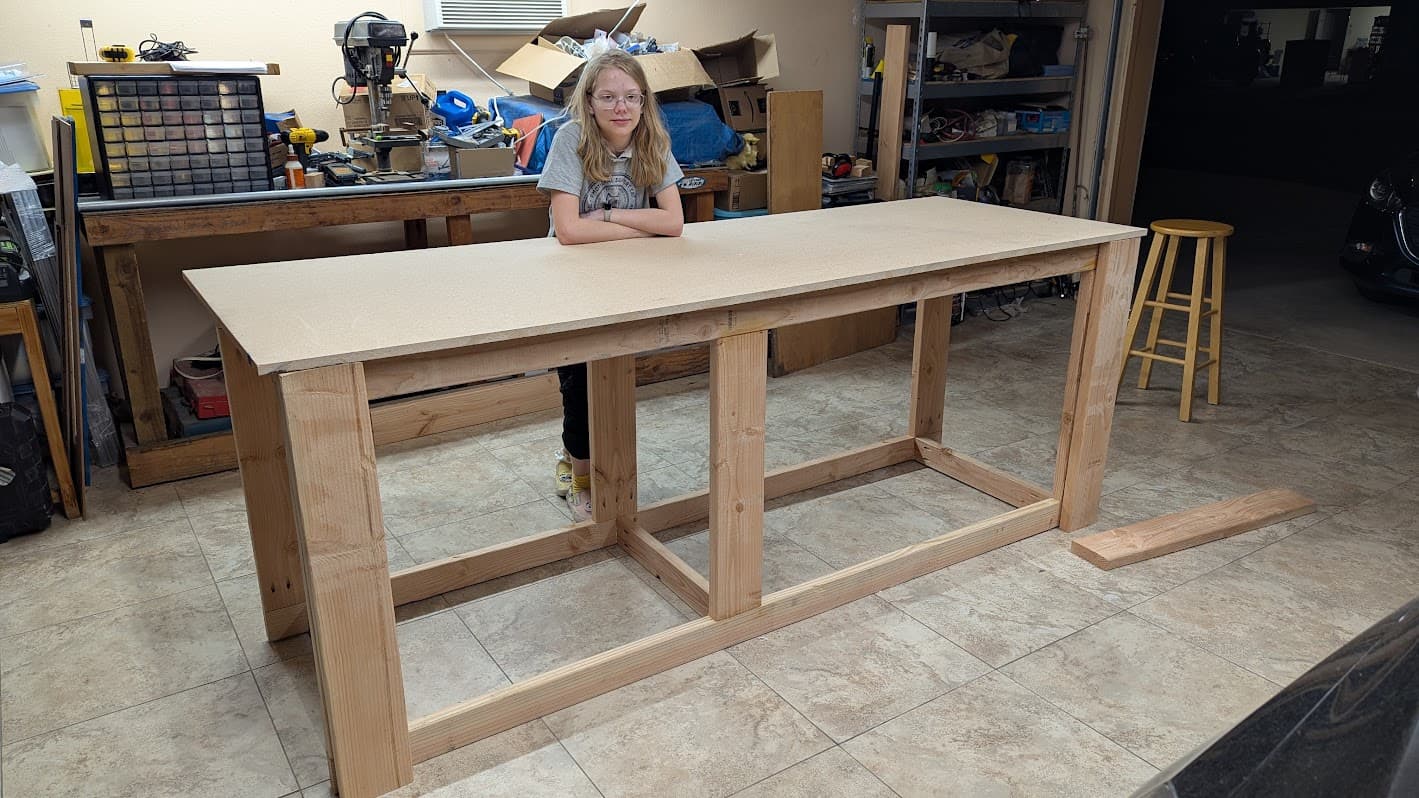
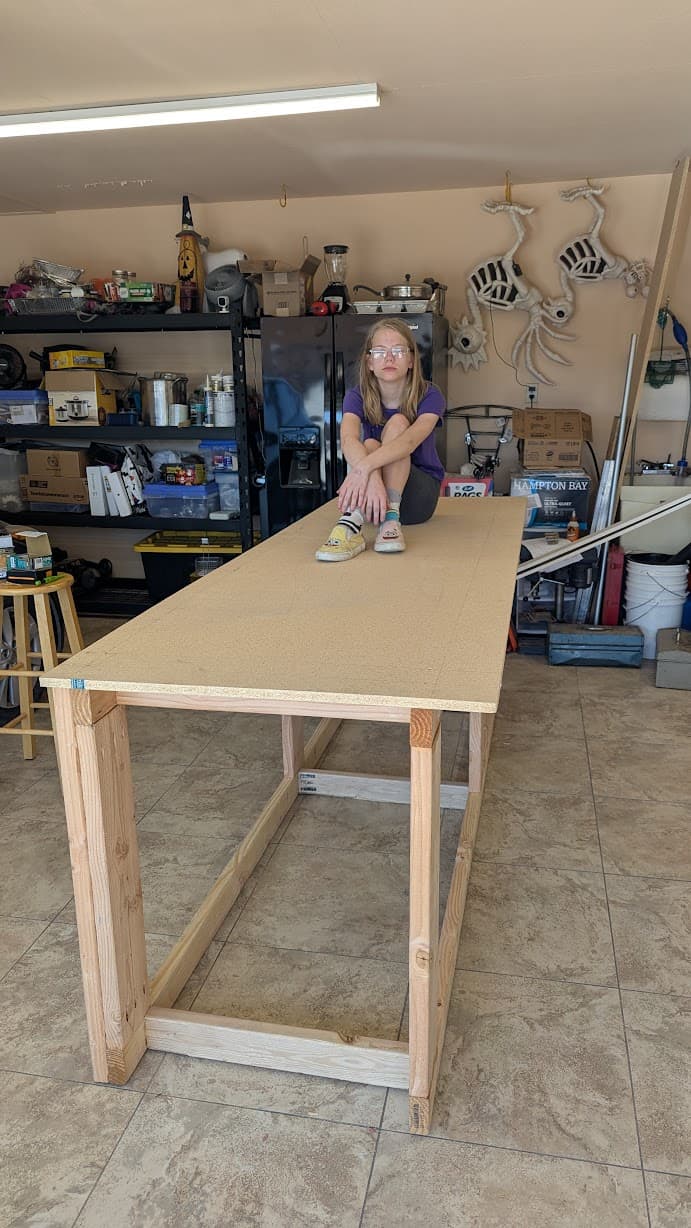
Productive evening in the garage with my daughter tonight.
Didn’t stop to take many photos - we wanted to get this bench together. And we did…though I was so excited to get a photo I accidentally left her hanging:
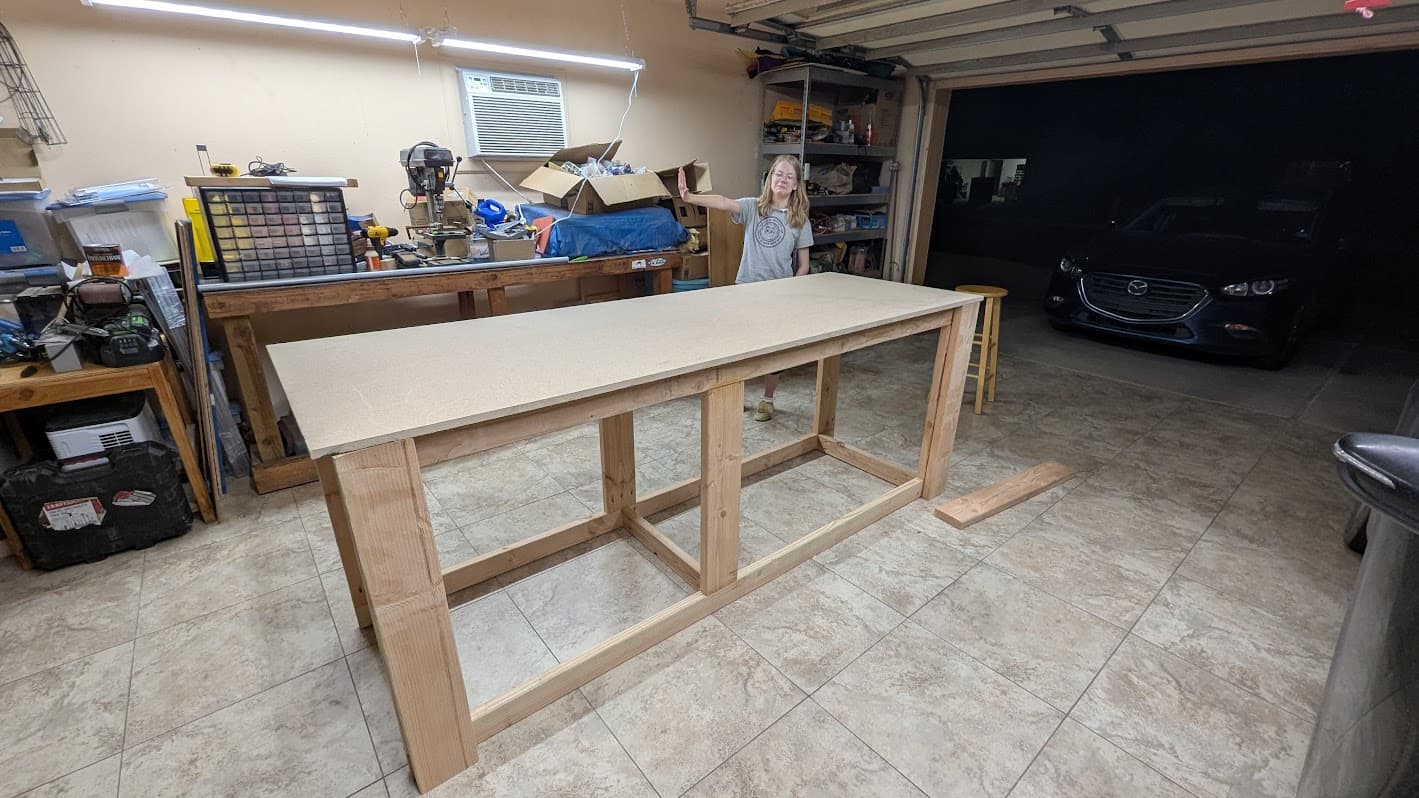
She was still happy to pose with it though:
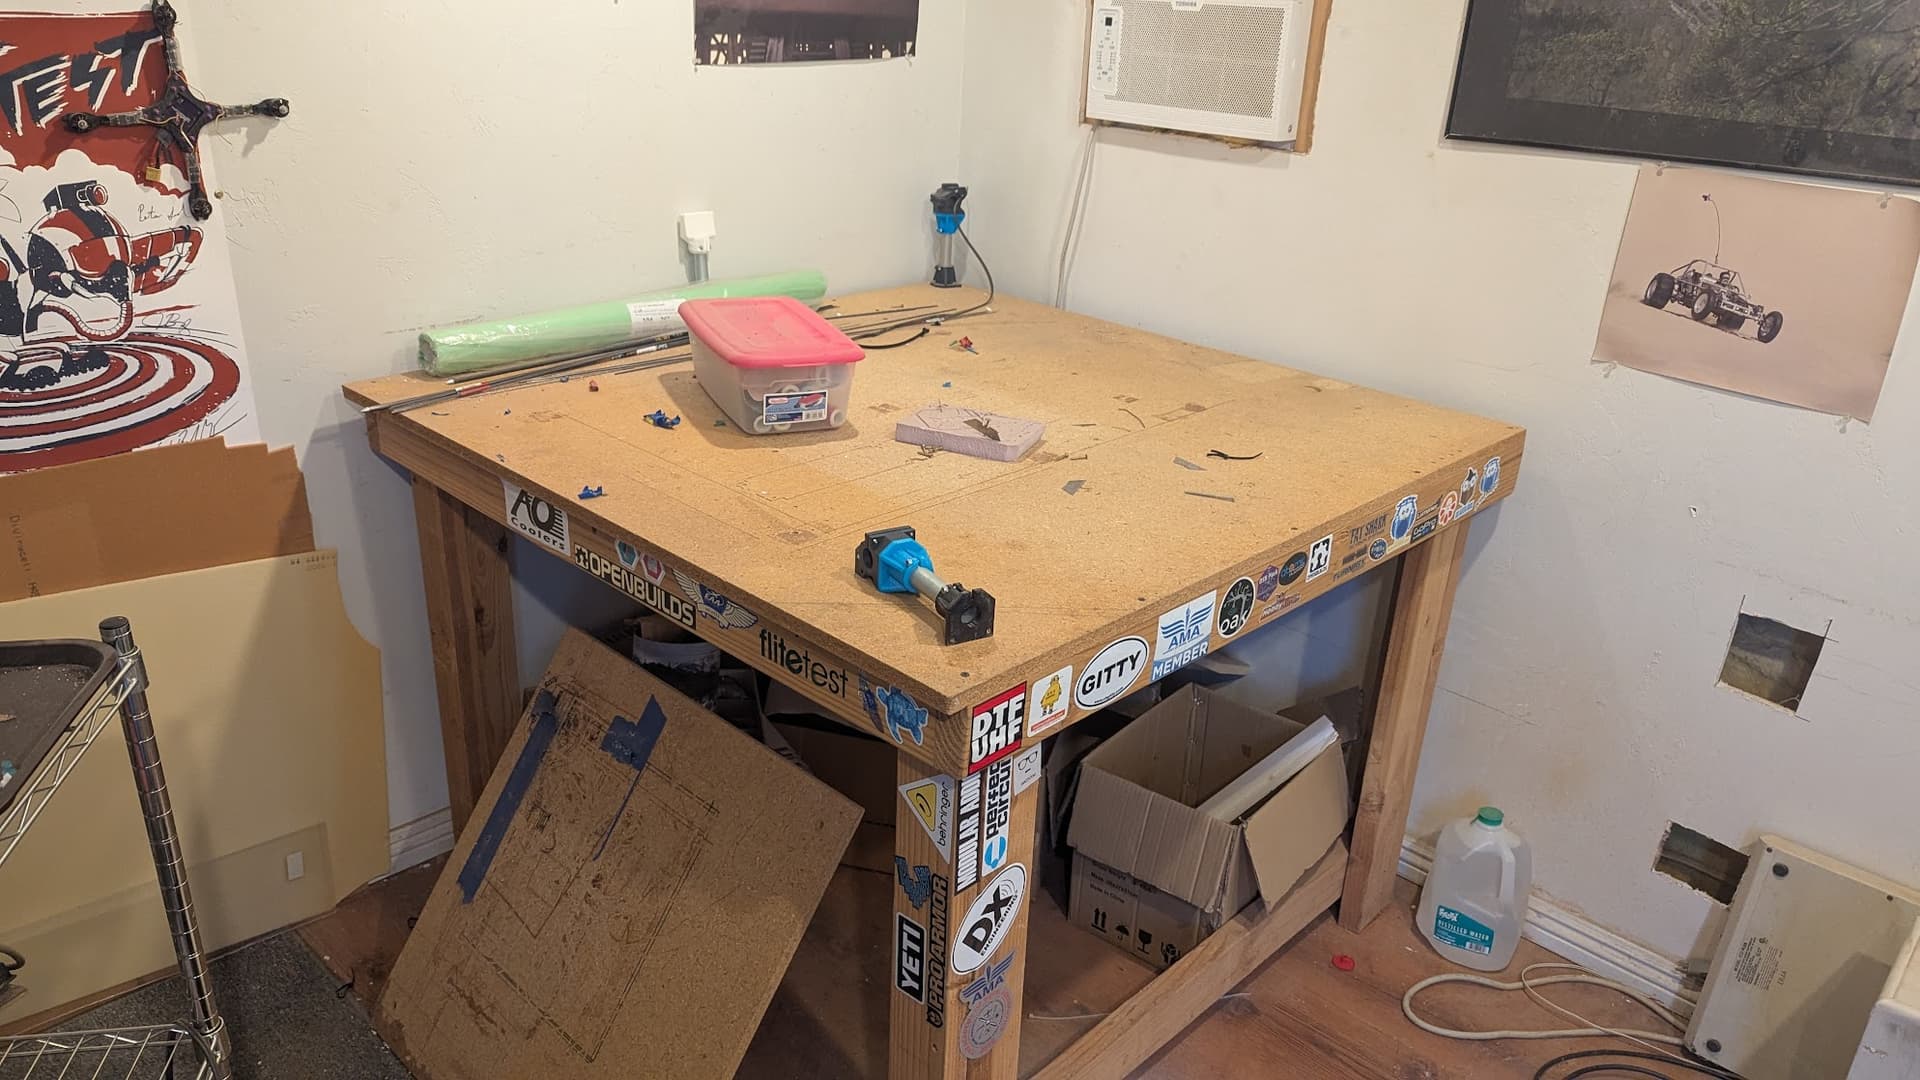
It’s not quite done yet…those 2x6 doublers for the corners aren’t attached - I thought I had suitable screws but turns out the ones I had were a bit too short. I also need to add a grid to keep it from sagging, and the top is just sitting there not attached yet. I’m also probably going to add a 1" strip of hardwood around the edges to protect the particle board.
I also want to support the back a bit better:
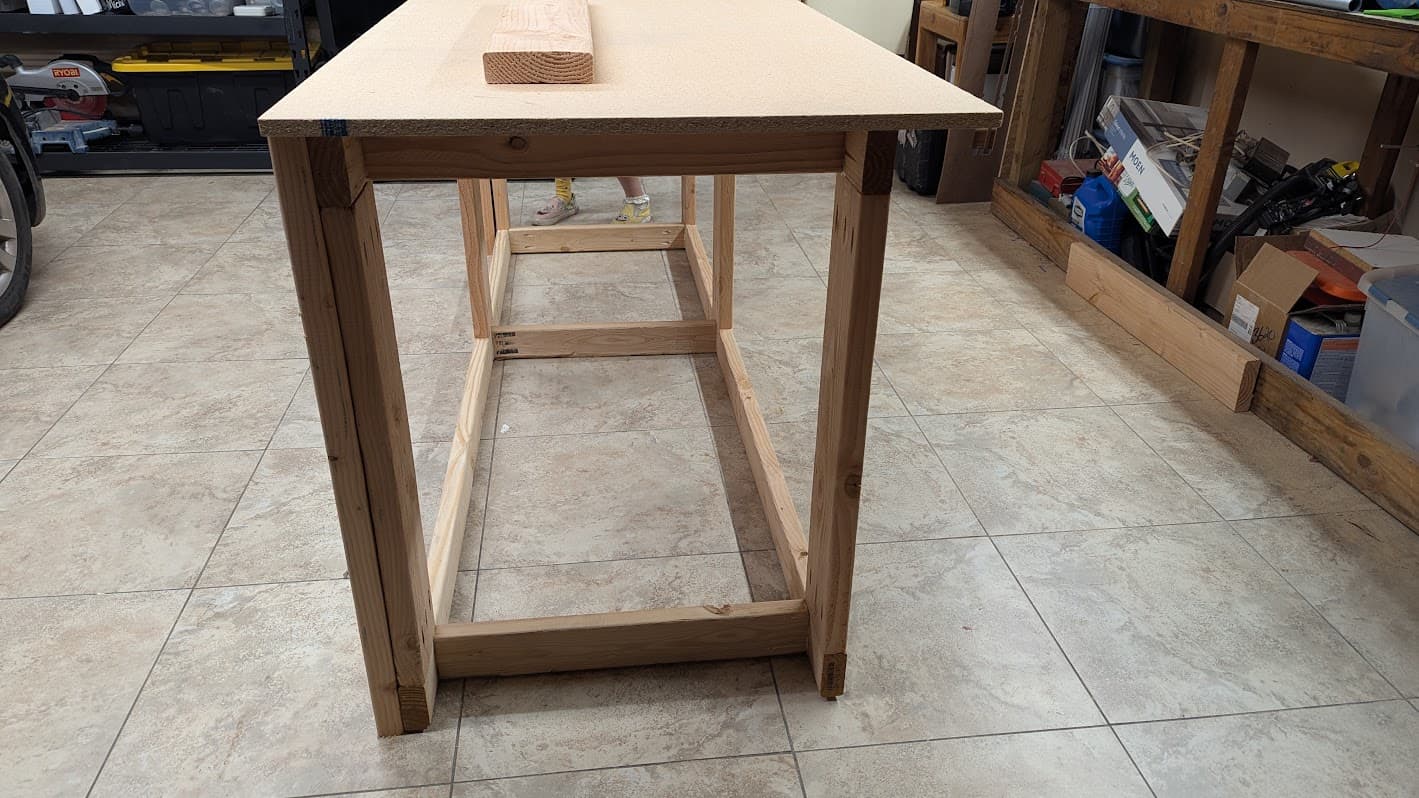
It had to overhang like this because the outside walls of my garage have a 4" “foot” at the base. I’ll probably add a cut down 2x6 under there for some extra support.
Really happy with it overall though. It’s within 1/16" of square measuring corner to corner on the top and bottom, and 1/8" on the front and back. And it’s already WAY sturdier than my old bench which wobbles if you look at it funny. Once I add a grid under the top and some ply or MDF on the sides and some shelves between the side legs it should be even sturdier. But I’d already be willing to give it a “Woodgears” test - if the top was attached and I had the physical skills to jump that high ![]()
So - quick trip to the store tomorrow for some suitable screws. Then I’ll probably have to spend the rest of the day emptying the shed. Cutting down the old bench. Moving it into the shed. Organizing the shed…and then getting this table situated.
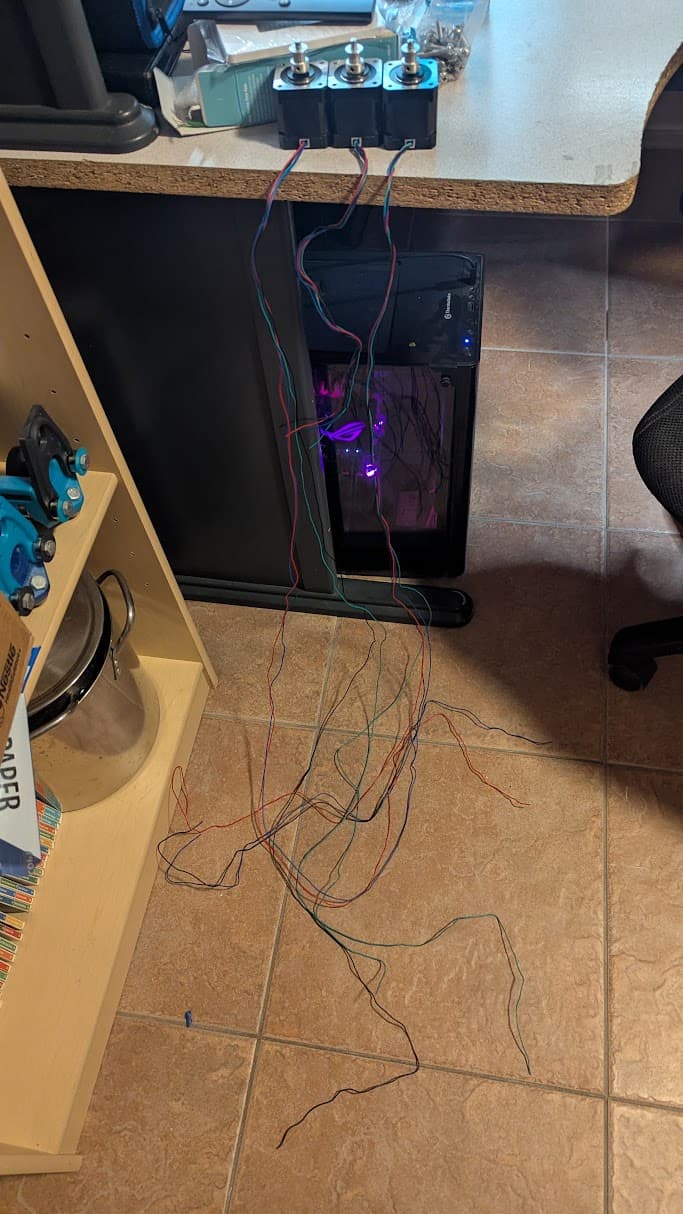
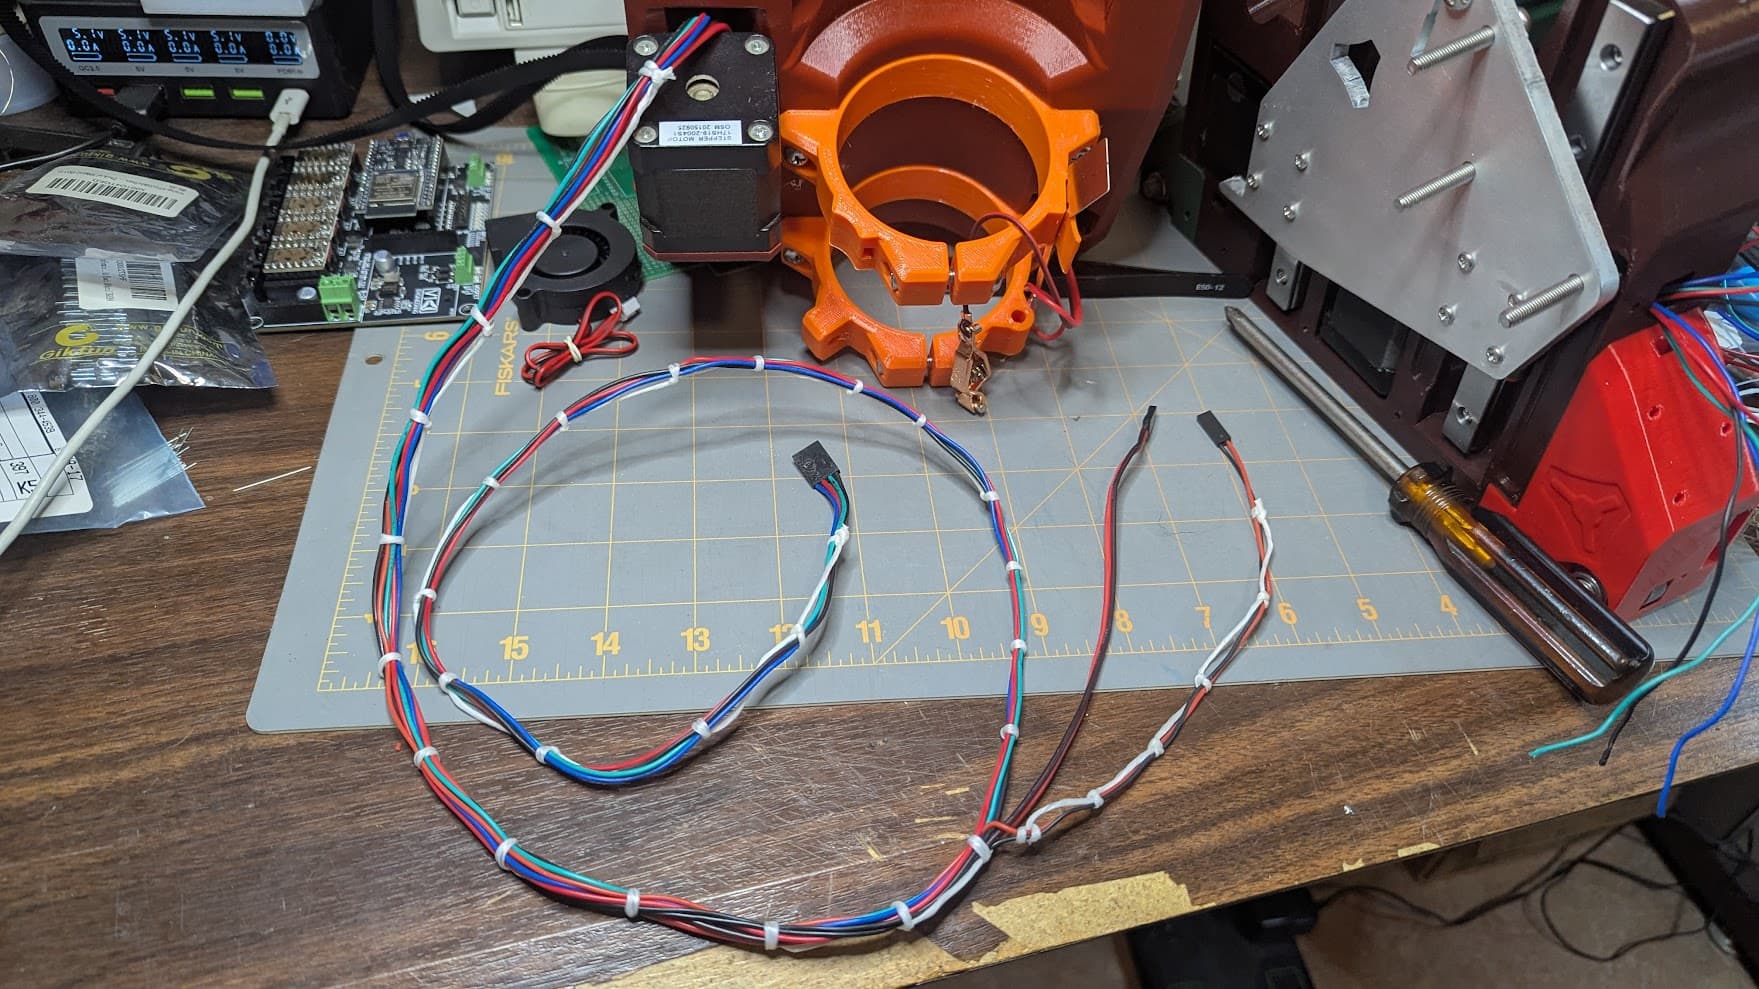
I did also do a bit more test fitting to get a feel for how long the stepper wires need to be:
Looks like less to deal with than I thought - but I’ll still have to cut extensions off on one motor and add extensions back to two motors. Which unfortunately means I’ll have to dig some wire out for the last motor. Oh well. I had to dig some out anyway for the endstops. But at least I have a feel for which ones will work best where and know which ones I can go ahead and finish installing now.
7 Likes
I absolutely love what you and your daughter are accomplishing together, Jason.
Kudos to you for being a great dad and your daughter for being the lovely young lady she’s become. I’m thrilled to see her willingness to show interest in spending quality time with you… and also get her hands dirty! How fantastic!
![]()
4 Likes
We made some good progress over the weekend. Though temps have started going up so we had to take some time to setup some fans in the garage and still had to take quite a few water and A/C breaks. The garage is already hovering around 95f even without having moved the cars on a day when the temps were just touching 95…looks like my new garage is going to run hotter than I expected. It does have a water heater in there as well was a freezer and a fridge. There’s also an A/C in the garage but I’m hesitant to turn it on until I get a feel for how much the main A/C costs me to run in this house. (Trying to get some baseline electrical numbers this year - a lot of houses in the neighborhood have solar and we’ve got enough roof to do a decent system…but need some numbers to decide if it will be worth it or not…and honestly I’d probably want to replace the roof before I do solar.)
But…back to the projects at hand.
Saturday morning we emptied out the shed then cut a foot off the old workbench so it would fit into the shed. Moved it back there and found that while yes it will fit in the shed…it won’t actually fit through the shed door. Whoops. I had been afriad that may be the case but forgot to double check the door opening size. So…moved it back to the garage and cut a foot off the other end as well.
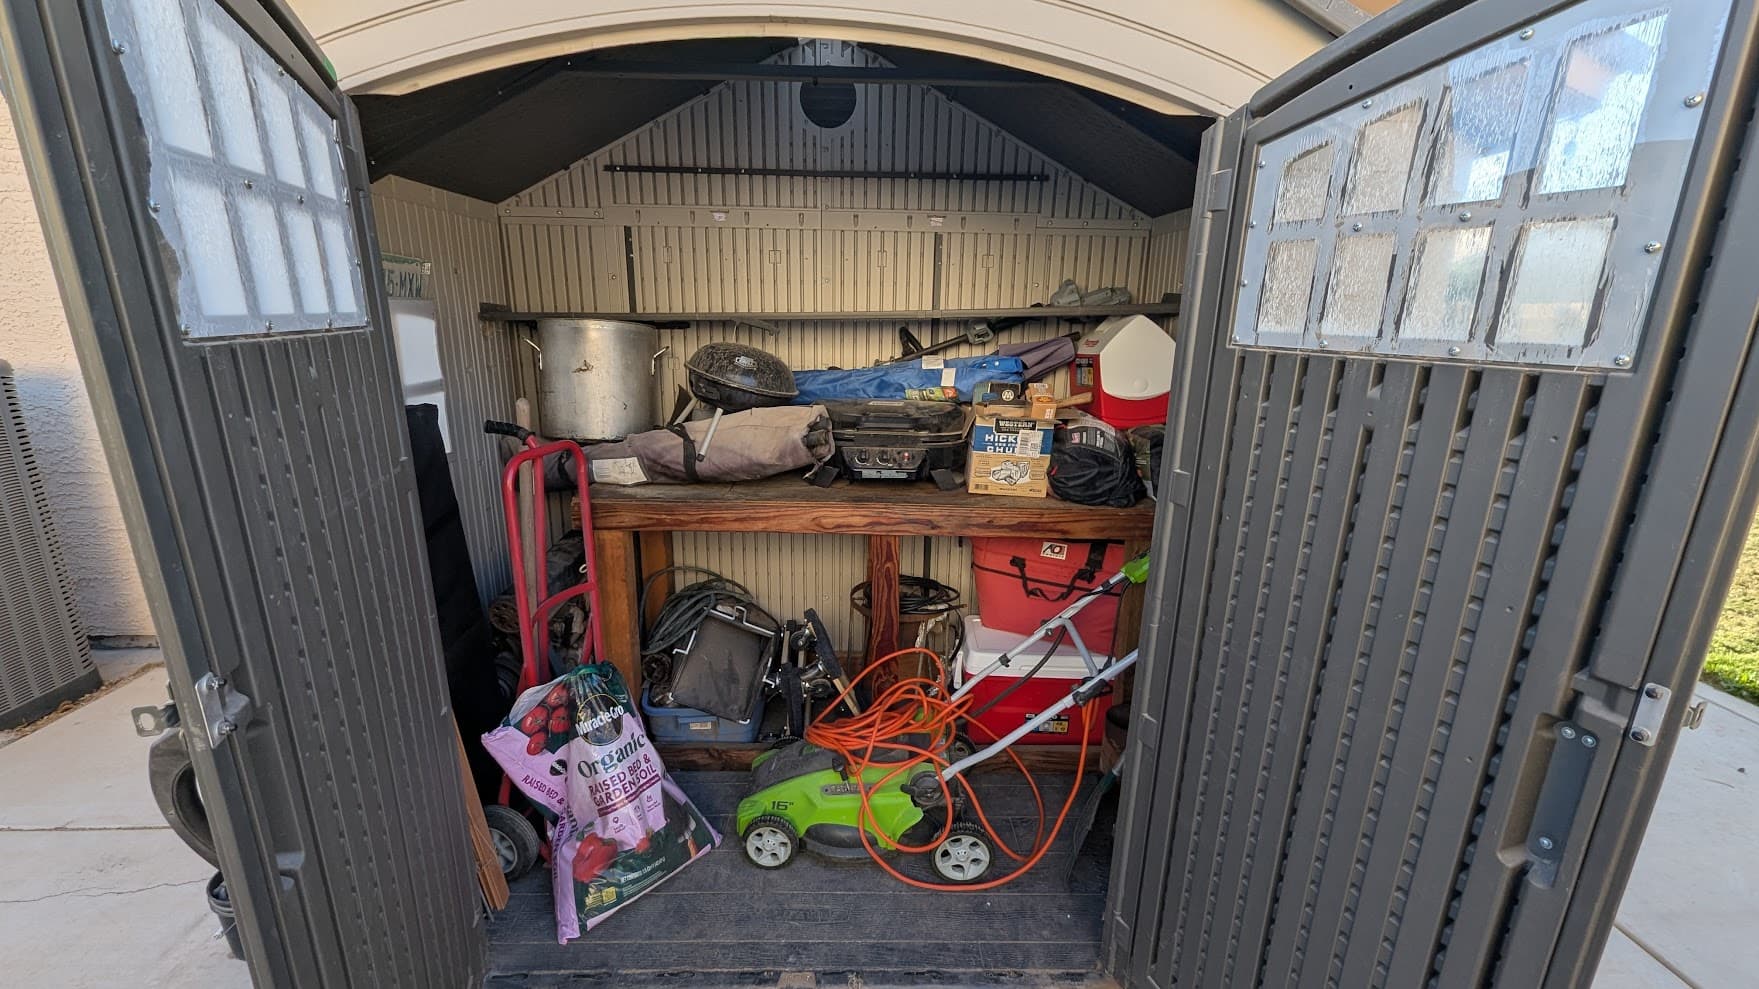
With the old bench moved to the shed we then re-organized the shed. It’s still a mess…but at least it’s not completely full now and we can get things in/out of it much easier:
And with both ends being cut off and re-attached the old bench is quite a bit sturdier than it had been. Still nowhere near as nice as the new bench…but still a big improvement.
But we didn’t really get much more done on Saturday after that. Ran to the store to get some screws we needed to finish the bench and some 1/2"x4" MDF strips to reinforce the top with, oh and picked up my waxed lacing cord from the old house…I did get things re-organized enough I could get my car back into the garage (only one night of parking in the driveway!) but mostly took it easy.
I did take some time to hang my new parts organizer, power strip, and battery charger on the wall so they could get up off the bench finally. And I unwrapped the laser since it’s no longer stored outside:
Sunday we added the planned leg doublers to the front of the workbench and then attached the top.
And I’m reminded of a favorite tool I keep meaning to share but forgetting about. Pica’s long mechanical pencil:

This thing is hands down my favorite shop pencil. The lead is soft and marks well, but still strong enough it doesn’t break easily and lasts fairly long. And the long thin design makes it great for marking inside deep holes:
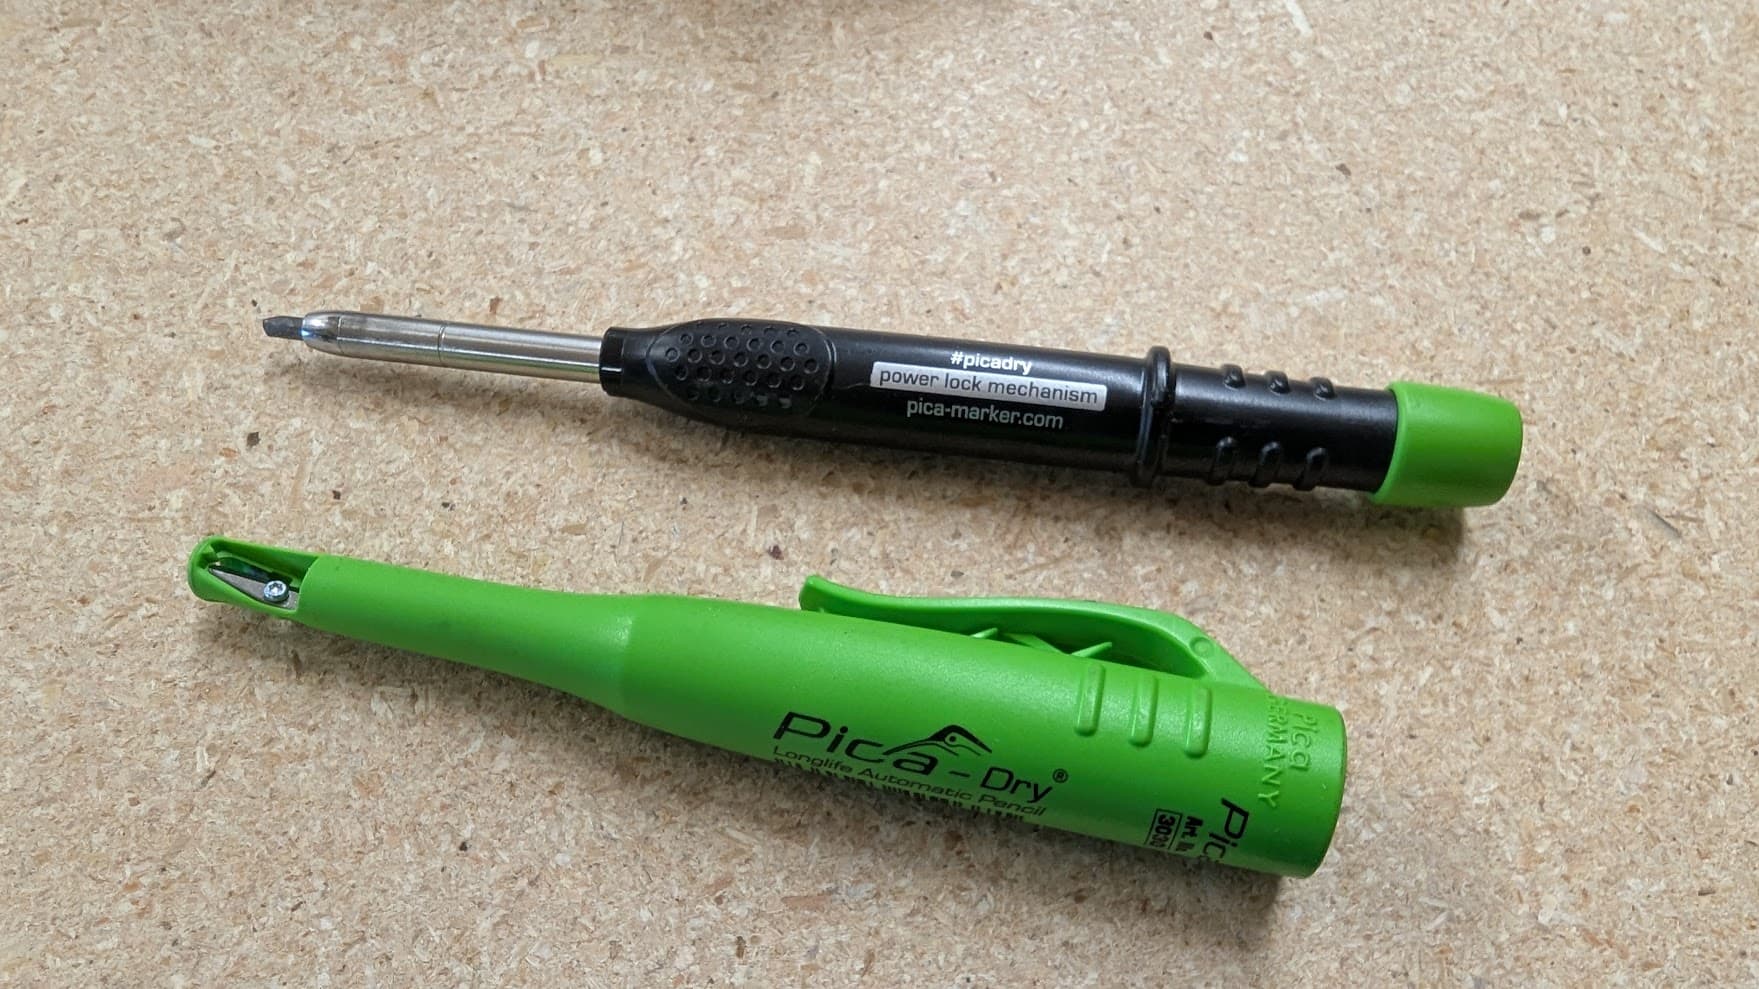
I actually learned about their markers first - Adam Savage (the Mythbuster) raved about them on his YT channel a few years back and I had to try one. They’re actually even better at getting into really deep holes (which is why he loved them) but I generally prefer pencils for most things:
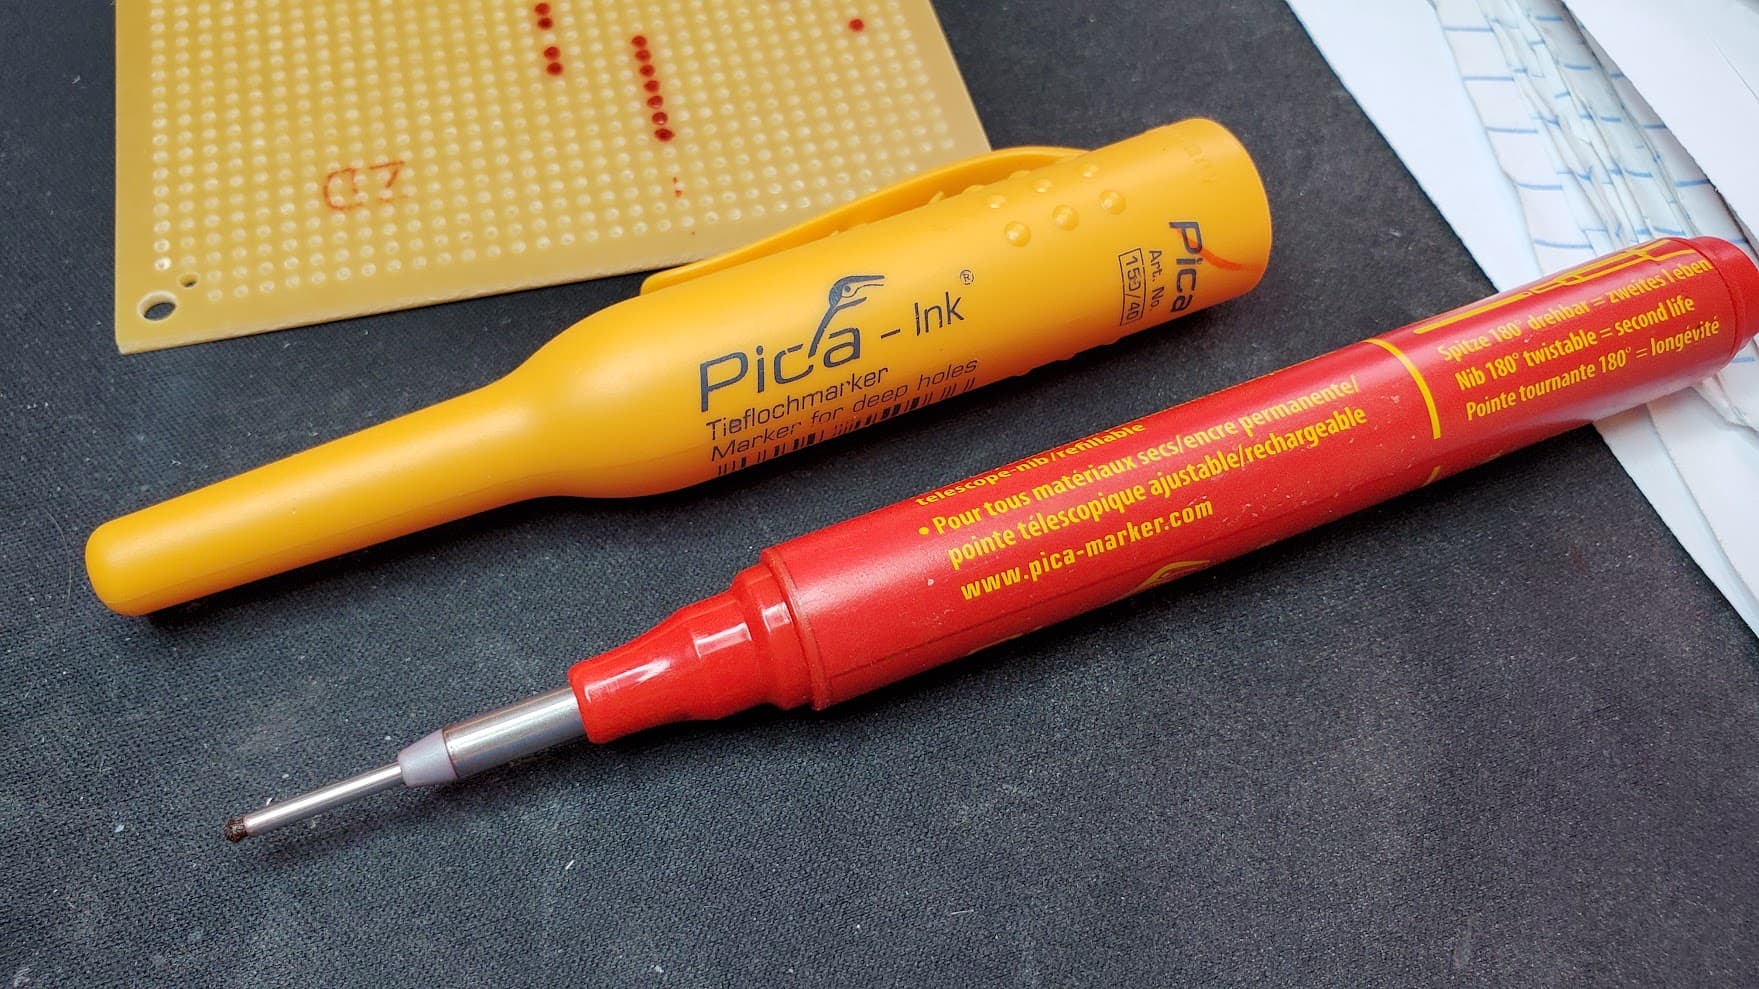
I suspect one or both of these will be helpful when I attach the belts to the bench…so figured they’re tools with sharing about.
With the top mounted my daughter gave it a final strength test:
We did try adding some wheels I had on hand. They’re a nice set of retractable wheels that only add 1/2" of height and can be retracted to drop what’s on them solidly to the ground. They were nice, but they stuck out way too much and I know I’d trip on them. So gave up on that. With the tile floor it slides decently anyway.
We still need to install the MDF supports inside it - and I want to do something to support that rear overhang better…but it’s enough to test organizing things:

Much better - and most of that stuff under it will still be going away once I sort through it. The two toolboxes on the left are hard to deal with - one was my grandfathers and the other is one he gave me when I was about 5 to start my own tool collection. The tools in both are in really rough condition and not much usable in them…and the toolboxes themselves have been beat up to the point they’re very hard to open/close…but they’re still hard to part with.
The drill press will probably also get moved to the small table to the left of the bench…but I need to re-organize that table still as well.
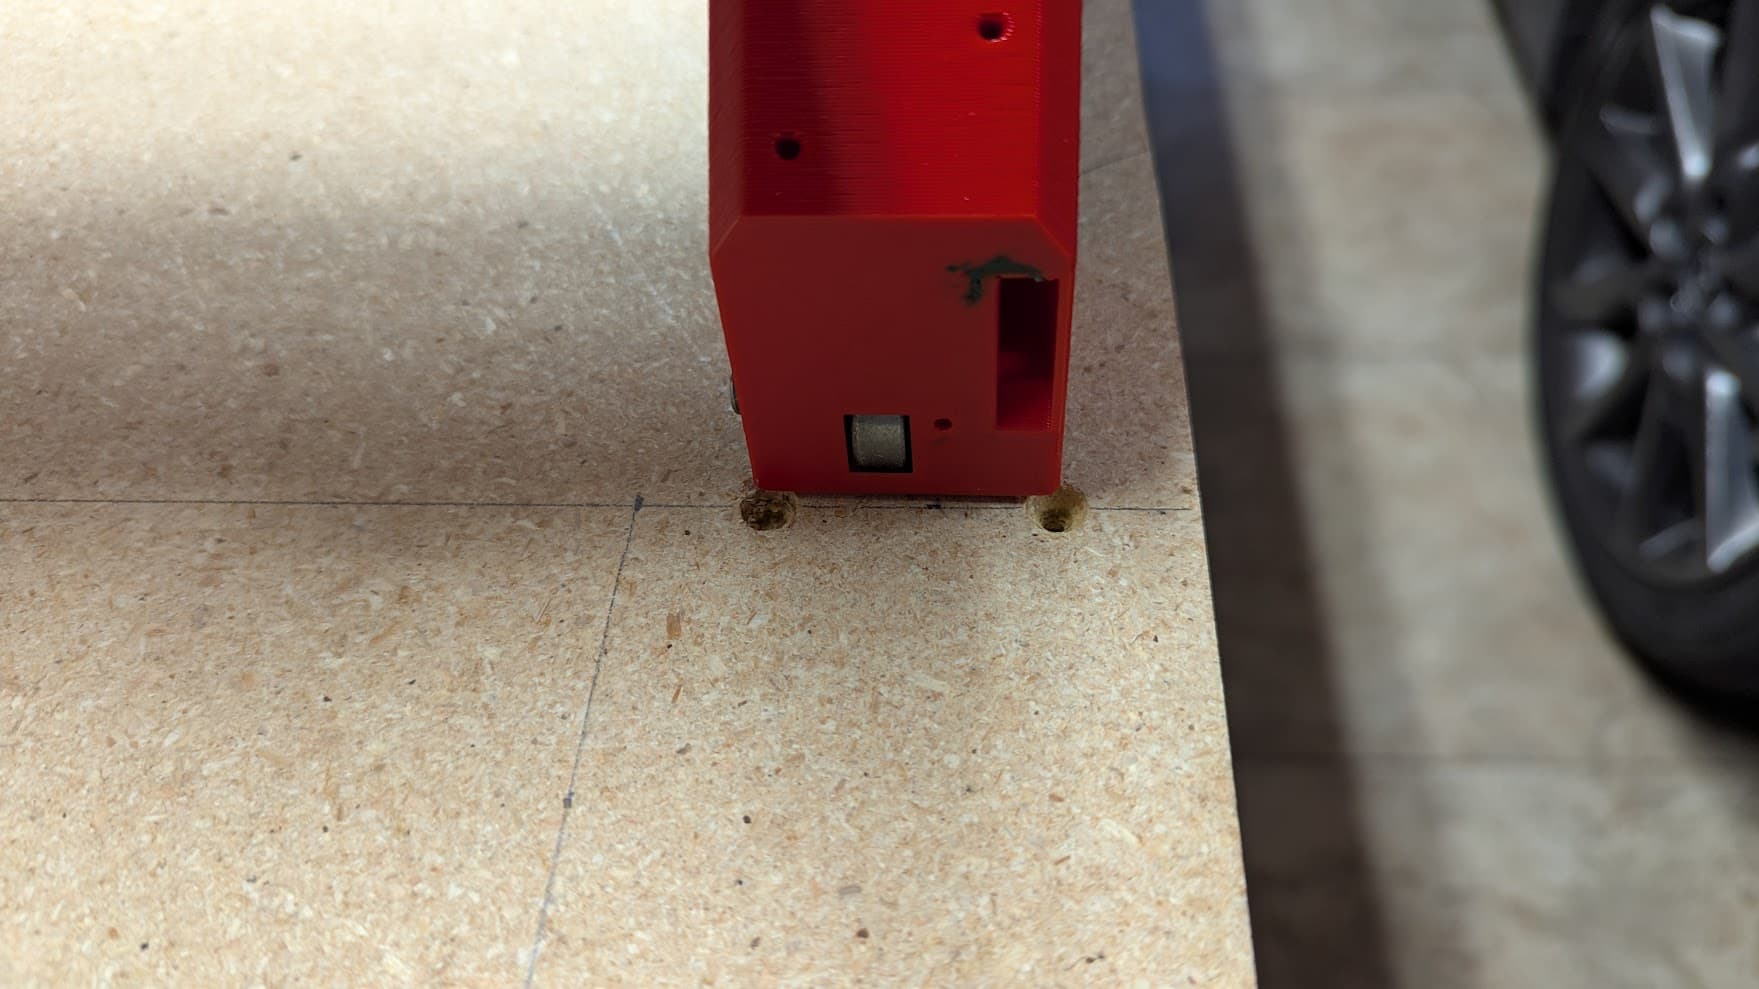
But…it’s enough I can test fit the new LR4 and make sure I didn’t mess up any measurements:

Like a glove!
I hadn’t planned on mounting the top with screws through the top…but…ended up deciding it was the least bad option since I couldn’t find the right size pocket screws to mount it from underneath…I figured it wouldn’t interfere with the LR since I thought they were out of the way…well…they’re less out of the way than I expected…but still worked out almost perfectly:
So…back inside to continue with finishing the LR itself just as the belt I ordered arrived.
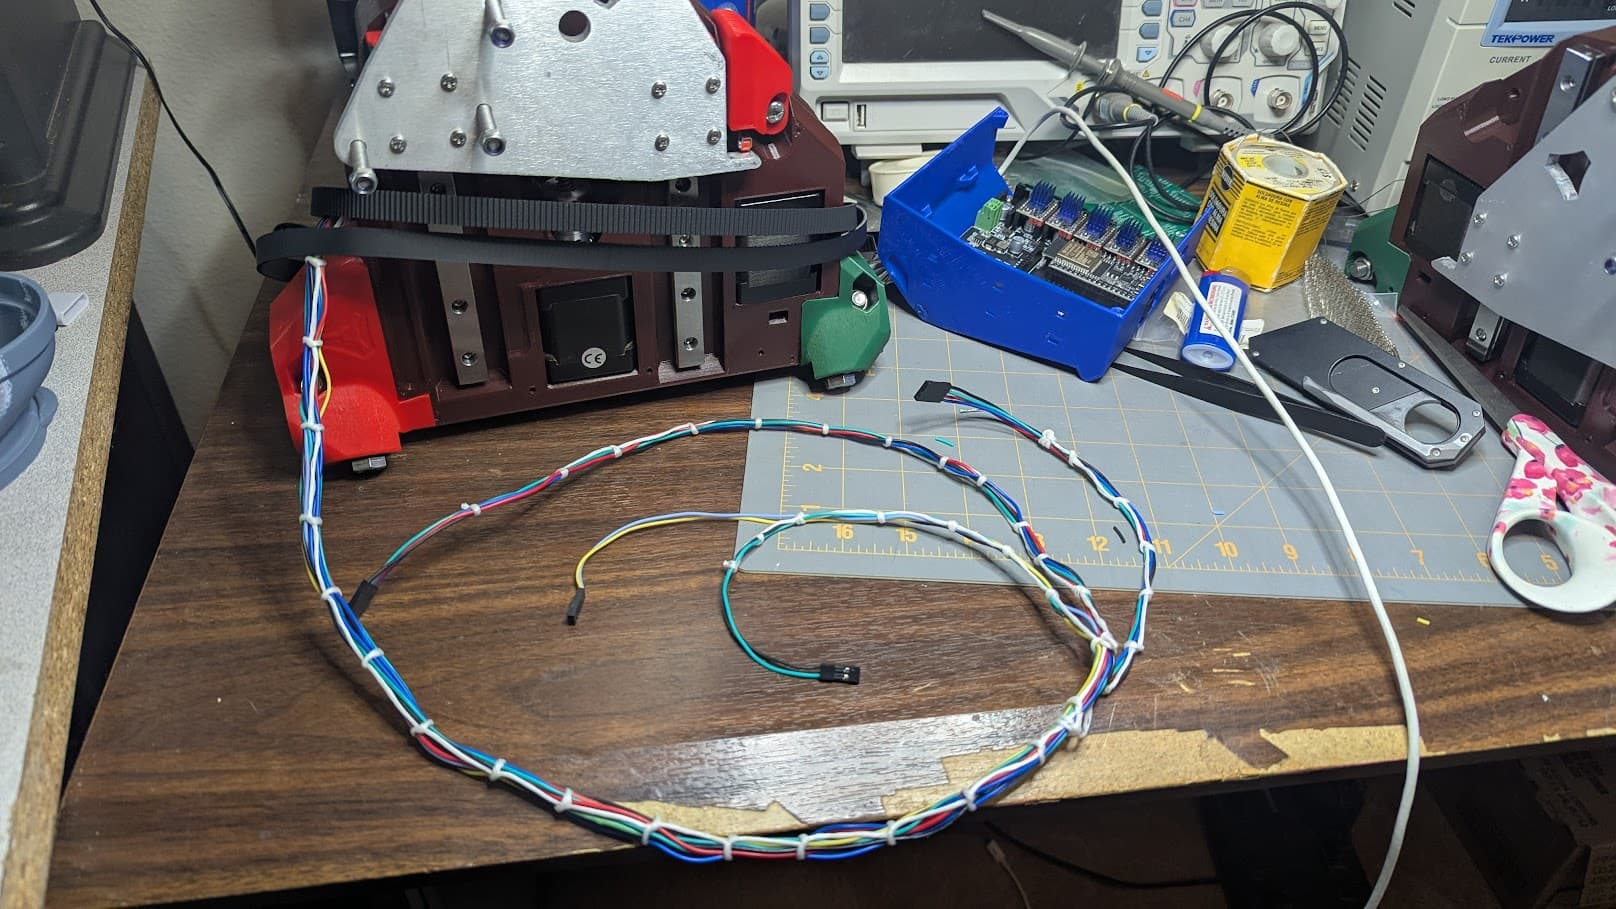
Finished assembling the core and with my waxed line dusted off my cable lacing skills:
I’ll take it! Cables long enough without too much extra - and the lacing makes them nicely organized and stiff enough but not too stiff.
Almost have the Max plate done…but still have one last end stop to install and lace the cables on it. The Min plate will follow. Also realized I hadn’t printed a box for the jackpot yet so got that printing last night. And realized I ordered the jackpot with the MPCNC setup - so dug in on how to update the Jackpot.
I seemed to be able to update the Jackpot and in the config it now shows as lowrider…but I did the v3 UI and decided I’d rather stick with v2…so re-uploaded the v2 files and…it’s still looking like v3…not sure what happened there. Tried re-upoading v2 again and it still looks like v3 so I need to do a bit more reading and figure out what I’m doing wrong there.
Great progress though and looking like we may be making chips later this week!
5 Likes
You have to change all the files at the same time. The different configs will error out.
That’s what I thought I was doing - uploading all the files from the v2/v3 folders in the git repo.
The update to v3 seemed to work just fine…just going back to v2 I keep getting the v3 interface when I reboot and re-connect. Not getting any errors…but doesn’t seem to be going back to v2 either.
I only spent a few minutes on it this morning while eating breakfast…so I could easily be missing something obvious or have made a silly mistake. I’ll take a closer look tonight.
1 Like
I’d make sure you are adding the files to Flash and not SD. The v3 files panel defaults to SD but there’s a dropdown to switch to Flash.
2 Likes
Thanks for the reminder - I knew I had heard something about that before but forgot the details.
But…doesn’t seem to be what’s happening. Went home over lunch and messed with it a bit while eating…
I was using the fluidNC web installer to upload, not the upload directly in the fluidNC interface. I tried the upload in the interface and didn’t have luck with that either.
I’m not familiar enough with fluidNC to know all the setup files…but I noticed the v3 folder as a theme-FluidNC.gz and index.html.gz which the v2 doesn’t…and I wasn’t sure if I should delete those or if there were v2 equivilents that were missing…so I just went the path of using the web installer to reflash the filesystem with v2 and then re-uploaded the v2 config files from the v1e repo.
Looks good now…back to the v2 interface and configs look sane. I’d like to try v3 at some point…but for now it feels like sticking with v2 is probably the safer bet until I’ve got things up and running. (Much like the pendant…better to get up and going before starting to experiment!)
3 Likes
You’re way more organized than me. I’m lazy and a slob, so nothing ever gets put back where it belongs… if it ever had a place to begin with. Been fighting that all my life… ![]()
Another great weakness of mine – and I’m facing it right now with the MPR&P machine – is cable management. I never thought of cable lacing… though I certainly saw it on some of the ancient equipment I worked on in the Navy. Maybe that’s what I need to do for my machine… ![]()
Anxious to see you get the LR4 running… looks like it fits the space like a glove.
– David
Don’t be fooled. I’m just good at staging photos ![]() Well, I am good at organizing things…just terrible about keeping them organized. And the garage has to stay more organized than I’d like because my girlfriend parks her car in there too and she’s REALLY neat and organized. She won’t even set foot into my “office”:
Well, I am good at organizing things…just terrible about keeping them organized. And the garage has to stay more organized than I’d like because my girlfriend parks her car in there too and she’s REALLY neat and organized. She won’t even set foot into my “office”:
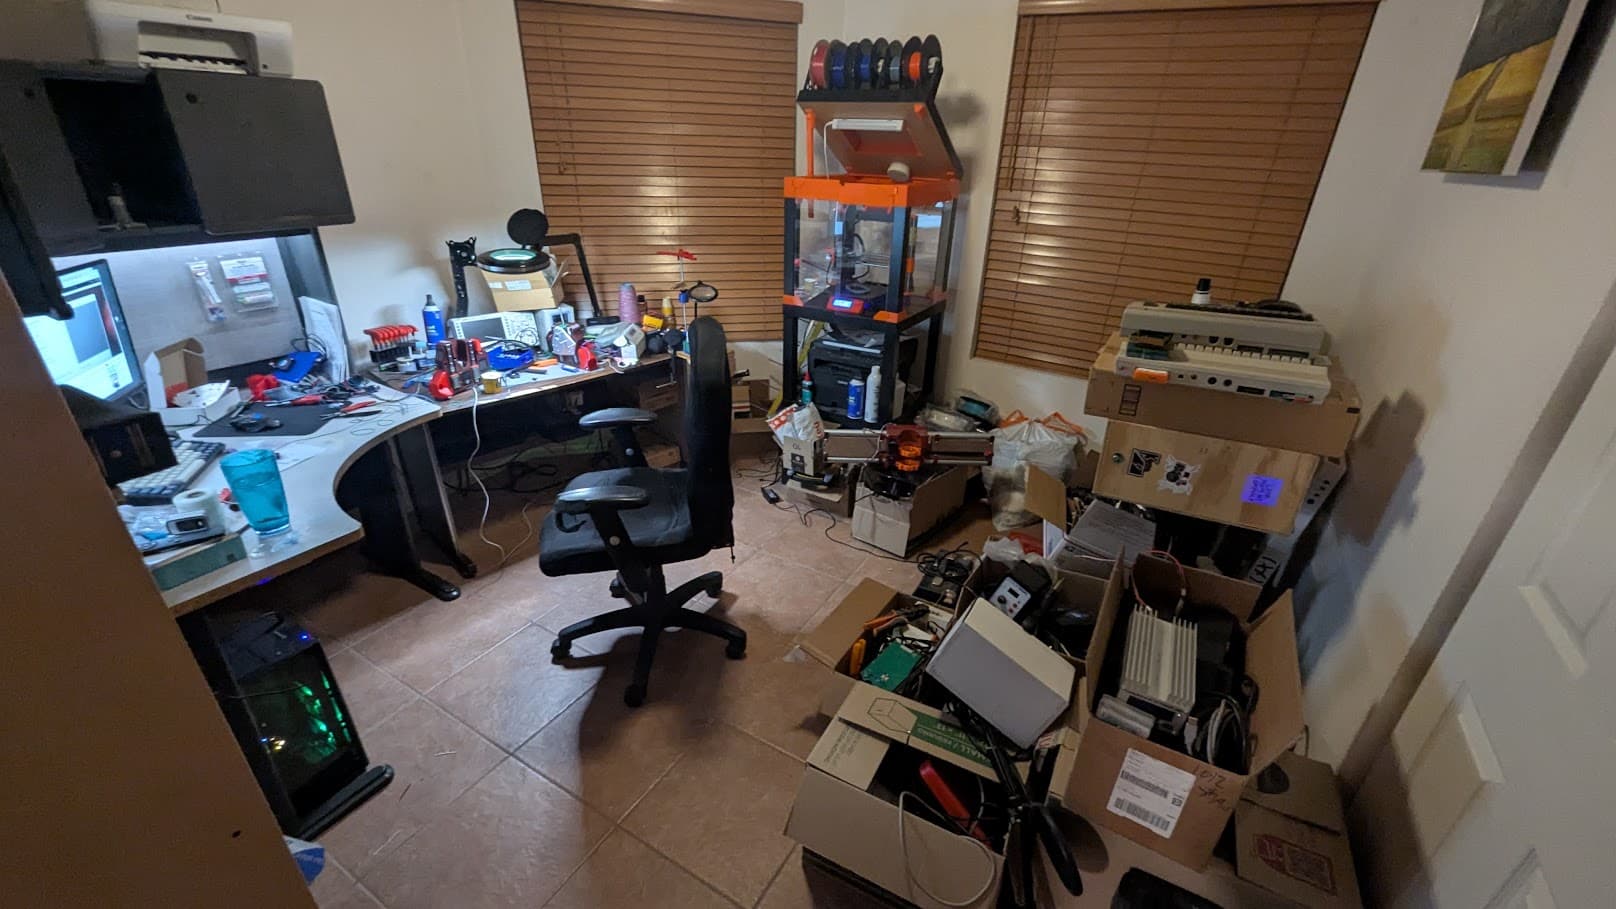
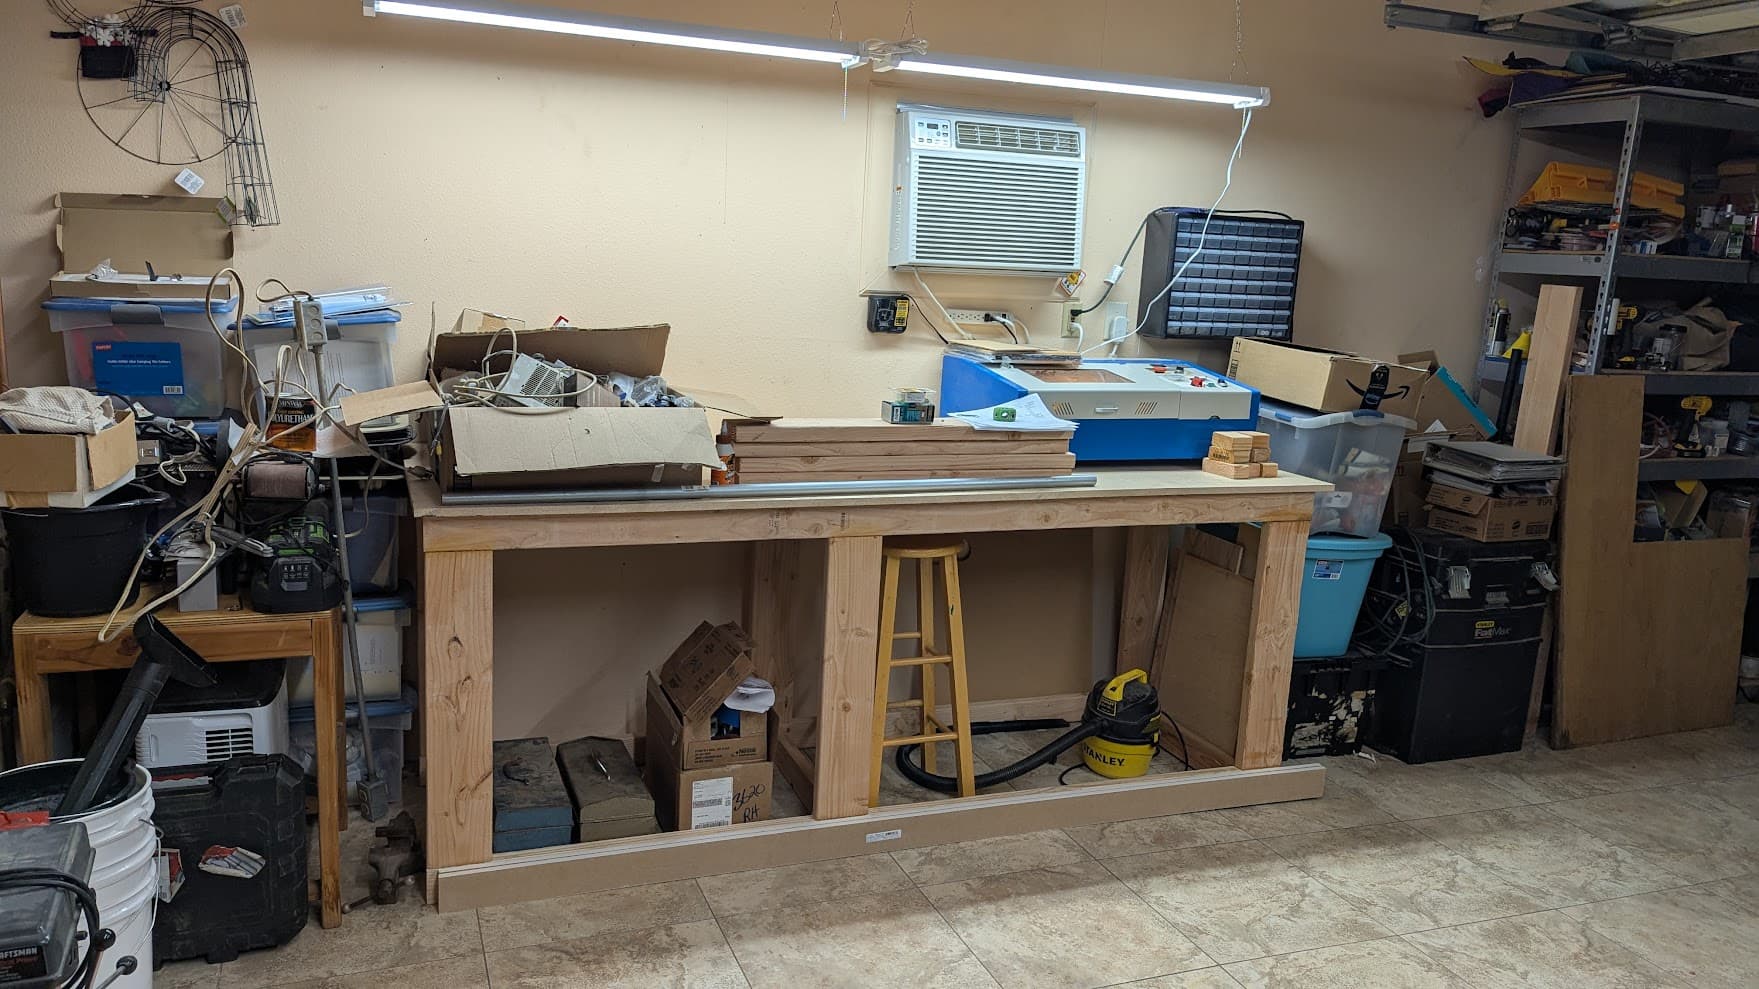
This is a big step up from what I had at my old house though. There I had the “electronics bench” and it doubled as my computer table. The big grey computer desk was out in my shop but was too covered with junk and projects to actually use for anything.
These are the conditions I’m doing most of my work in:
The spools of yarn scattered around my desks are for a 3D printed sock knitting machine just out of frame in that last shot. I made it about two years ago and have been having way too much fun with it - I only wear socks I knit on it now and most of my friends have custom socks as well. One interesting thing about the sock machine - a few of the parts get a lot of friction and tend to wear. I noticed that jlcpcb has really affordable sintered metal printing so I ordered some of the parts in metal to try (I also ordered them in a sintered nylon and a high strength resin.)

I was really impressed with both the quality and the price - the metal was more expensive than plastic…but far more affordable than I expected.
That triangular cam was $16 in metal, $3.83 in sintered nylon (the black one), and $0.66 in resin (the white one) And these little lift cams were $8 each - I didn’t think they’d come out well due to their geometry but they came out perfect:

I’ve been using the metal uplift cams and the resin main cam…so far the resin cam has shown less wear than my PLA version had so I haven’t had to swap over to the metal one yet.
Ok…off track…well…kind of. I mean…there could be parts on a MPCNC that may benefit from these advanced printing techniques…but…paying for a metal core or side plate would be ridiculous!
Back to cable management.
I’ve always loved the look of cable lacing when I saw it on old equipment but never knew what it was or how to do it. So when I was working on the synth and had some cables to deal wtih and didn’t want to use zip ties or sleeving I did some research. I watched a few videos and ordered some waxed cord off amazon. I was hoping to find this spool in black: Amazon.com but I’m not sure where it got to in the move. The big white spool I have isn’t available on amazon anymore. But either of them is basically a lifetime supply.
And it is necessary. I tried it with some normal threads/yarns and it doesnt’ really work well. The stiff waxed line makes a huge difference. The technique is pretty easy…you can get crazy with it but the basics are here and really simple:

This video gets into more advanced methods showing NASA, Navy, and other official spec methods:

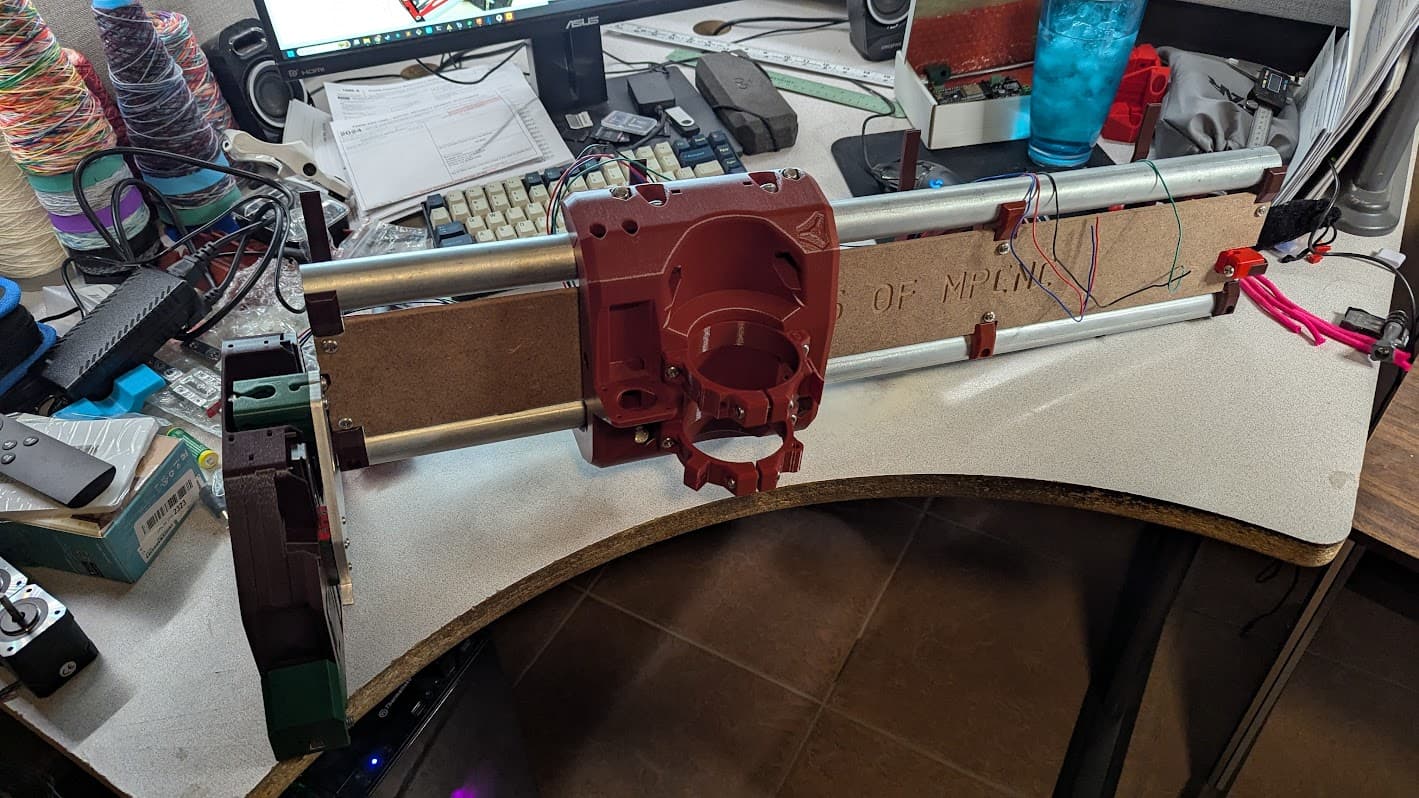
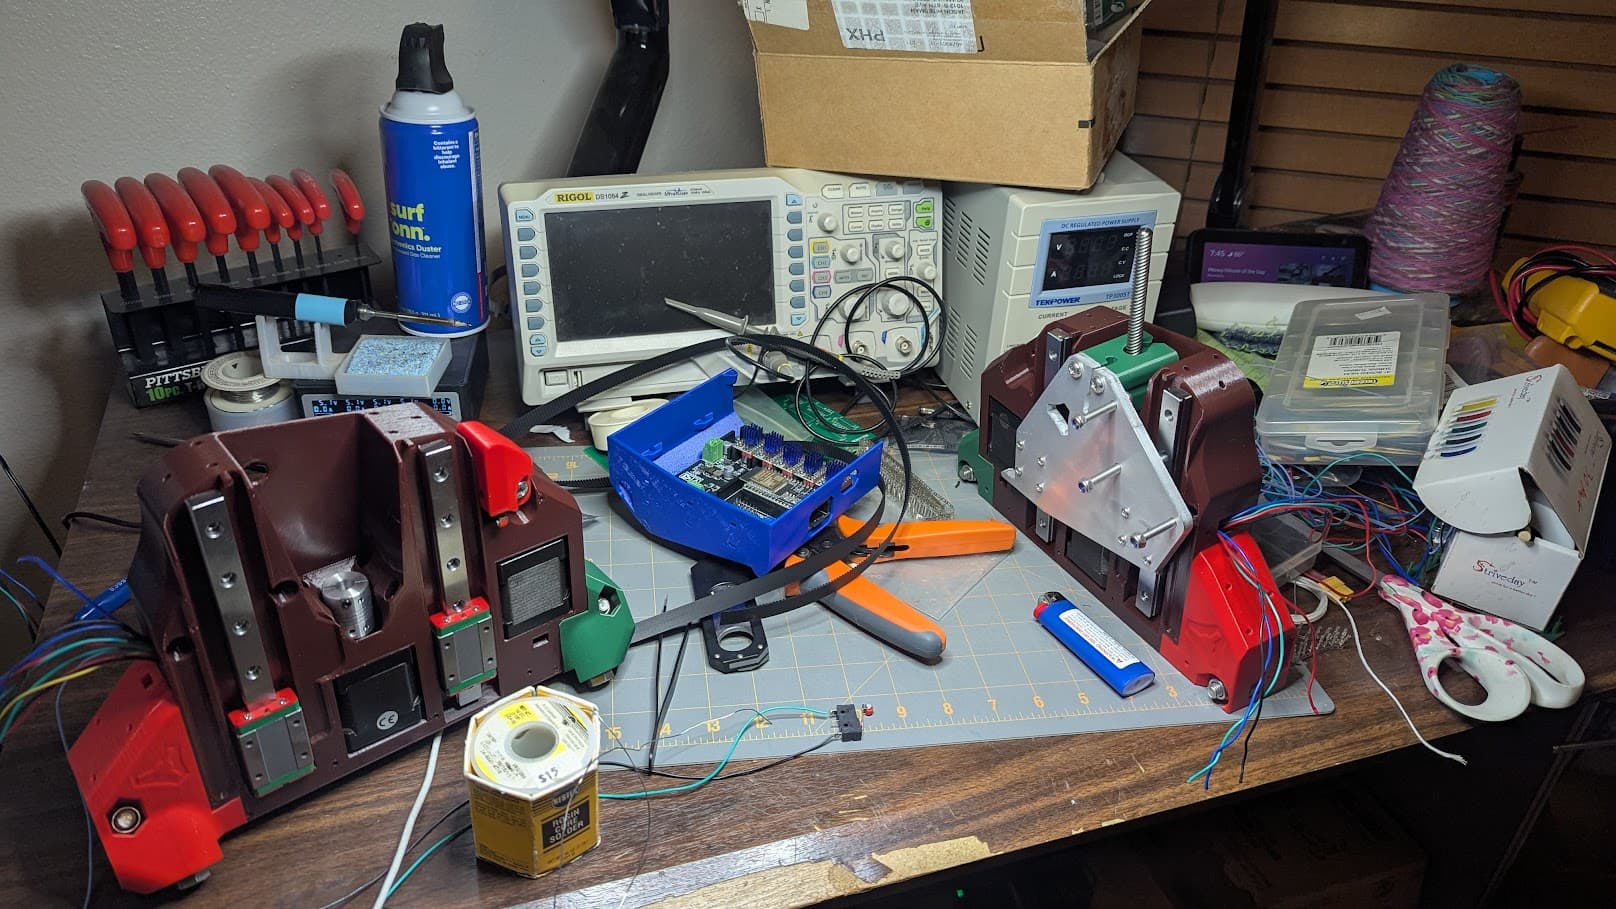
Got the Y max fully assembled and wires laced tonight. Definitely doing this the hard way wiring my own end stops and extending/shortening my stepper wires then re-terminating them. But building the synth gave me a LOT of practice with the crimper so it could be worse:
New dust shoe for the Carbide Er11 router I picked up is printed…and TPU brushes are printing now.
Tomorrow hopefully I’ll get the Y min plate finished.
Then I can focus on final assembly/wiring and getting it on the bench!
Of course…I also just stumbled across my eggbot while looking for my connector crimper so I have to fight the risk of being distracted by that with Easter coming up ![]()
4 Likes
I know this experience! ![]()
Cable lacing is such an elegent method for cable management. One trick is…
Using a good lacing cord- as you already know.
That’s looking pretty darn good to me.
What a fun distraction. The sessions that community members put on with those at the local makerspace were always well attended this time of year.
3 Likes
Thanks, Jason, for the videos on cable lacing. I put a couple of spools of that waxed lacing cord on order last night. It looks as though you should be able to lace up a cable as fast or faster than fumbling with those silly spiral cable wrap thingies. We’ll see…
I also received some of those lever wire connectors that @MakerJim recommended a few days ago. Since I already had enough Wago connectors to extend the stepper leads on hand, I used them of course to do the MPR&P build and rightfully call it a junkbox build. These other lever wire connectors are about the same size as the Wago’s actually but have the advantage of being able to tightly gang together with molded-in sliding connections rather than having to wrap tape around them. They are a little on the bulky side they are definitely time-savers (Thanks, @MakerJim!)… and much easier to switch around when you need to correct wiring errors!
![]()
1 Like
wow, that is killer! I like it!
1 Like