I’ve seen it mentioned a few times around but I’ve not seen any code posted or documentation on it. How do I set up EstlCAM to use one of these corner probes so that I can probe all 3 axis and find the precise corner of a workpiece? NOTE: not looking to correct for skew as I have a grid CNC’ed into my spoil board (though I’ve EstlCAM can do this)
I’m not certain, but I would think that you would have to run a probe command for each axis separately (G38.2 Xn then zero X, G38.2 Yn then zero Y, G38.2 Zn then zero Z)
For EstlCAM you might be able to include all of this in your starting code, but you would need to include some moves to line up the mill with the edge you want to probe between each axis probe.
Might be easier to just do it manually at the start of each job.
Easier in some ways maybe but would be nice to automate. I didn’t realize I could “probe” X and Y with G38.2 so I thinks that a good idea. Just have it pull off a set amount and then lift or something like that. I’ll see what I can work out.
I have an engraving project coming up where I’ll need to do batches and it would be highly beneficial to have a repeatable way to zero the stock
You will definitely want to use workspaces for that, and probably softstops.
Probe | Wiki.js, does not have any X or Y info but, it is the same as Z. you will need to make a macro or a starting gcode to set your workspace. I would guess you will need to home all axis, move to a rough location, then start your gcode or macro. Probe Z, have it move over, down, probe X, move up, over, down, probe Y.
Honestly, after thinking about all the different ways that can fail. I would set up three macros, one for each axis. That way you can make a rough position and just probe each axis.
I am curious, what is the use case for knowing the corner? I am not doubting you or anything I just have not run into that myself and maybe I am missing out?
I use the feature when I have a piece of stock that barely fits or if I have to redrill holes into an already finished piece where I have to be absolutely sure that they will be in the right location.
It’s native to Estlcam as the controller, for the Jackpot there does not seem to be a way yet (though I vaguely remember that there was someone who got it working).
Probing any axis is available in fluidnc. The issue I am thinking about is the macro that would let you probe all three without taking forever. You can home all three axis, but you can not probe Z without being positioned over Z roughly. Probing Z has to be first. With a known Z of your probe, you can home each axis move down and slowly probe away from home but what if your probe is at y2000, that would take a long time, I think separate macros would make this much faster.
The best way would be to have softlimits on, roughly position XY (within 40mm or so of an edge), probe Z. With a known edge finder block size (or the touch plate), you have your macro move over 50mmand down and probe each axis. Softlimits are needed so you don’t try to move past machine Zero if you are close to an edge. Otherwise this can not be automated.
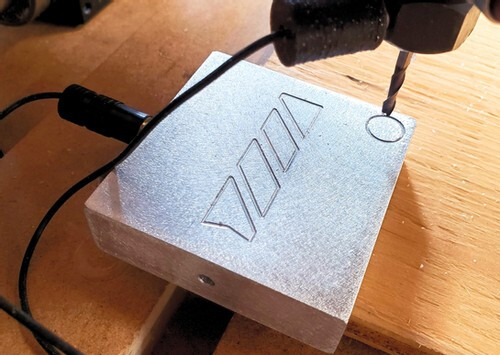
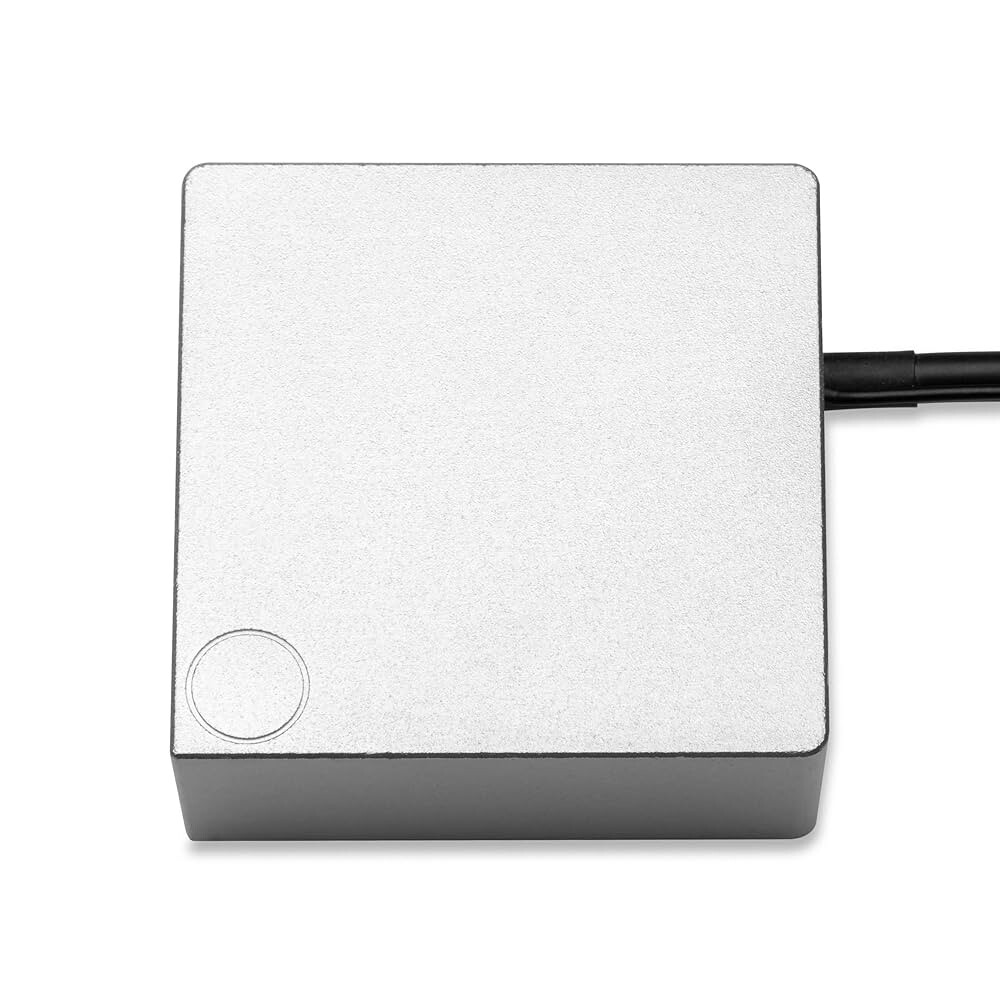
The way I would see this used in my workflow is quickly jog it over to my workpiece and get within 20mm or so of the corner which is easy enough. (I think the circle on the touch plate is actually a tolerance guide so that as long as your tool is within the circle, you know that your macro will move over enough to clear it and probe the sides) which is what I think your describing in your second paragraph
Once positioned, the sequence would look something like:
G91 ; relative positioning
G38.2 Z-110 F200 P5.0 ; probe Z
G1 Z5 F500 ; lift 5mm
G92 Z5 ; store position as work Z origin +5mm
G1 X-20 F500 ; move 20mm to clear plate
G1 Z-10 F500 ; lower 10mm
G38.2 X20 F200 P5.0 ; probe X
G1 X-5 F500 ; pull off 5mm
G92 X-5 ; store position as work X origin -5mm
G1 Y-20 F500 ; move 20mm to clear plate
G1 X20 F500 ; move 20mm to probe position
G38.2 Y20 F200 P5.0 ; probe Y
G1 Y-5 F500 ; pull off 5mm
G92 Y-5 ; store position as work Y origin -5mm
Or something like that. As Ryan mentioned, this assumes that the “pull offs” are within the bounds of the machine. Now I just need to figure out how to turn this into a macro I can call out in my gcode. I know how to do this on Klipper for my 3D printer, no idea on FluidNC