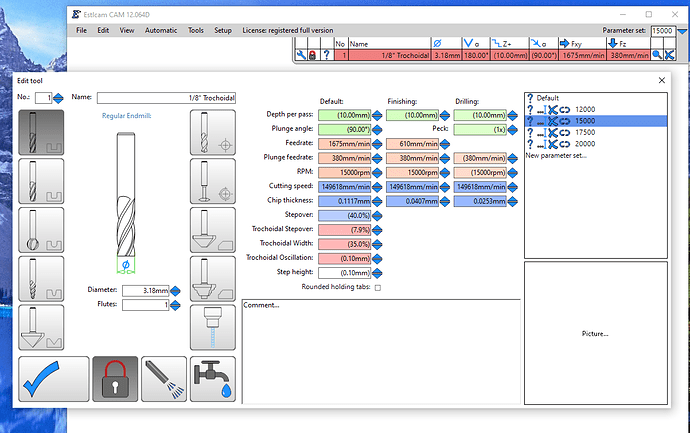
Now that I understand the Tool Lists and Parameter Sets a little better, I found a way to accomplish my goal, even if it isn’t exactly how the system was meant to be used.
For background, I am using EstlCAM 12 to create the CAM (gcode) to mill my permanent LR3 struts from 2mm Aluminum. I will be using a 1/8" single flute end mill.
I planned to use Trochoidal Milling for all of the cuts, but I found that the hole size for some smaller text on the front strut prevented the tool from being able to use Trochoidal. Estlcam used the finishing pass for the smaller sections, but it ends up slotting those sections (3.175mm) at a feedrate meant for only 0.35mm, and I worried about possible tool breakage or welding the aluminum to the tool.
I originally tried to use parameter sets for the different feedrate requirements, with one set of parameters for the Trochoidal cuts, and a different set of parameters for the Non-Trochoidal cuts (with suitable feedrates for each set of parameters), but that’s not how Parameter Sets work. As mentioned above, you can only have one parameter set in use per project.
Another objective was to test out different router speeds on the aluminum. I used G-Wizard CNC Calculator from CNC Kitchen to come up with suggested feedrates for Trochoidal and Non-Trochoidal slotting, at a variety of speeds (ranging from 12000 - 20000 RPM). Initially I was going to create a separate tool for each speed setting, but the inability to use both Trochoidal and Non-Trochoidal parameter sets in the same project meant that approach wouldn’t work.
So I kind of reversed the process, and created two tools in the tool list, one for Trochoidal and a second tool (using the same physical end mill) for Non-Trochoidal. I then created a parameter set for each individual speed setting, and saved them to both tools. Each tool has it’s own feedrate setting for the common speeds, and I can assign multiple tools to the project as long as each one is using the same parameter set.
A bonus was that it was super easy to save the individual CNC Programs (gcode files) for each speed. Once the toolpaths were assigned to both tools for the first speed setting, all I had to do was change the parameter set on the top right corner, save the project under a different name (with the speed setting as the variable in the name) and then save the CNC Program using the same name as the newly saved project.
Cutting time ranged from over 4 hours at 12000 RPM to less than 2.5 hours at 20000 RPM. I plan to do an “air cut” at each speed first to see how much shaking and vibration there is at the higher speeds, and whether the LR3 can handle it.
I’ll post the feeds and speeds on my build page in the next few hours, along with the results once I do the air cuts and the actual cuts.
