So I have the original design with threaded rod for the Z and still using RAMPS 1.4 and use to be active here on the forum but life gets busy. So yeah, mines been built a while and still going strong. I never felt the need to tear it apart and update it. I’ve replaced the threaded rod in the past because of wear. I think I only need to print a couple parts to change to the lead screw and get somewhat back into the 21st century. Im not really wanting to do a complete rebuild with the latest parts unless I’m really convinced.
*Is there an old thread I could be directed to from folks upgrading to the leadscrew design back then so I know what all to buy and change in the software?
6 Likes
Once the hardware change to the leadscrew is in place, you should only need to change the steps-per-mm for the Z axis, but what to change it to may depend on what driver you’re using and what level of micro stepping you have selected.
You may also want to consider “upgrading” to firmware that supports auto-squaring, but that could very well be an “if it ain’t broke, don’t fix it” situation.
2 Likes
Welcome back!
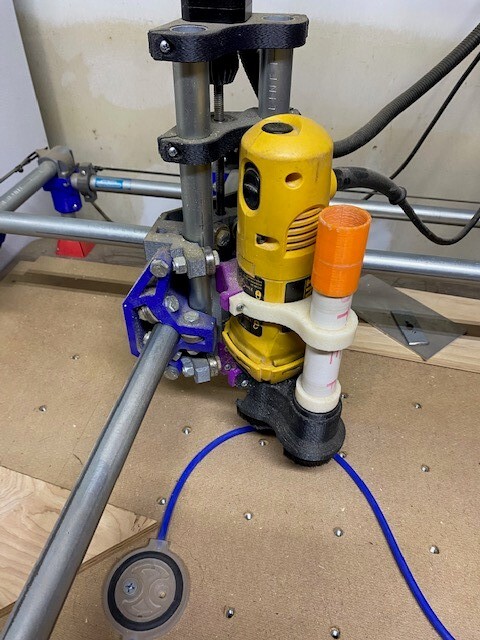
Can you share a picture of you Z axis. There were a couple of versions before the leadscrew.
1 Like
Oh, a early version still going strong, I like it!

That seems like yesterday and a lifetime ago!
1 Like
Just curious how many mpcnc do you think are out there ?
Thanks again for all your hard work man.
I think that is the “525” version. That version supported a leadscrew. I think you need a leadscrew (4 start 2mm pitch), a matching brass nut, a 5/8mm coupler, and some smaller screws to keep the nut from spinning. All the recent parts in the shop should work, if you want to buy them there, or get more specific.
You remove the “pineapple” that connected the allthread to the motor shaft. You add a coupler there. Bring the lower, black support up, so the coupler can’t stretch. You would install the leadscrew nut in that very dirty piece that has the allthread poking through it. I think it is grey/silver, but I can’t tell.
2 Likes
Shoot who knows. The thingiverse analytics stopped working a few years ago and printables just started to use them so wild guess couple hundred thousand?
4 Likes
Quite the legacy man nice work wow.
1 Like
Ive printed the parts for the lead screw but yet to tear it apart / change firmware. The miles on this machine is impressive. There’s no shortage of home built CNC’s today but the MPCNC is underrated in my opinion…
6 Likes
Cheers to that buddy!
1 Like
Well chit…. I took it apart to do the upgrade but apparently I don’t have everything. I have two of the black part I thought that’s all I needed. But it won’t fit , it’s a different size than the one I removed. Do I need to print the entire z assembly? Hope not.
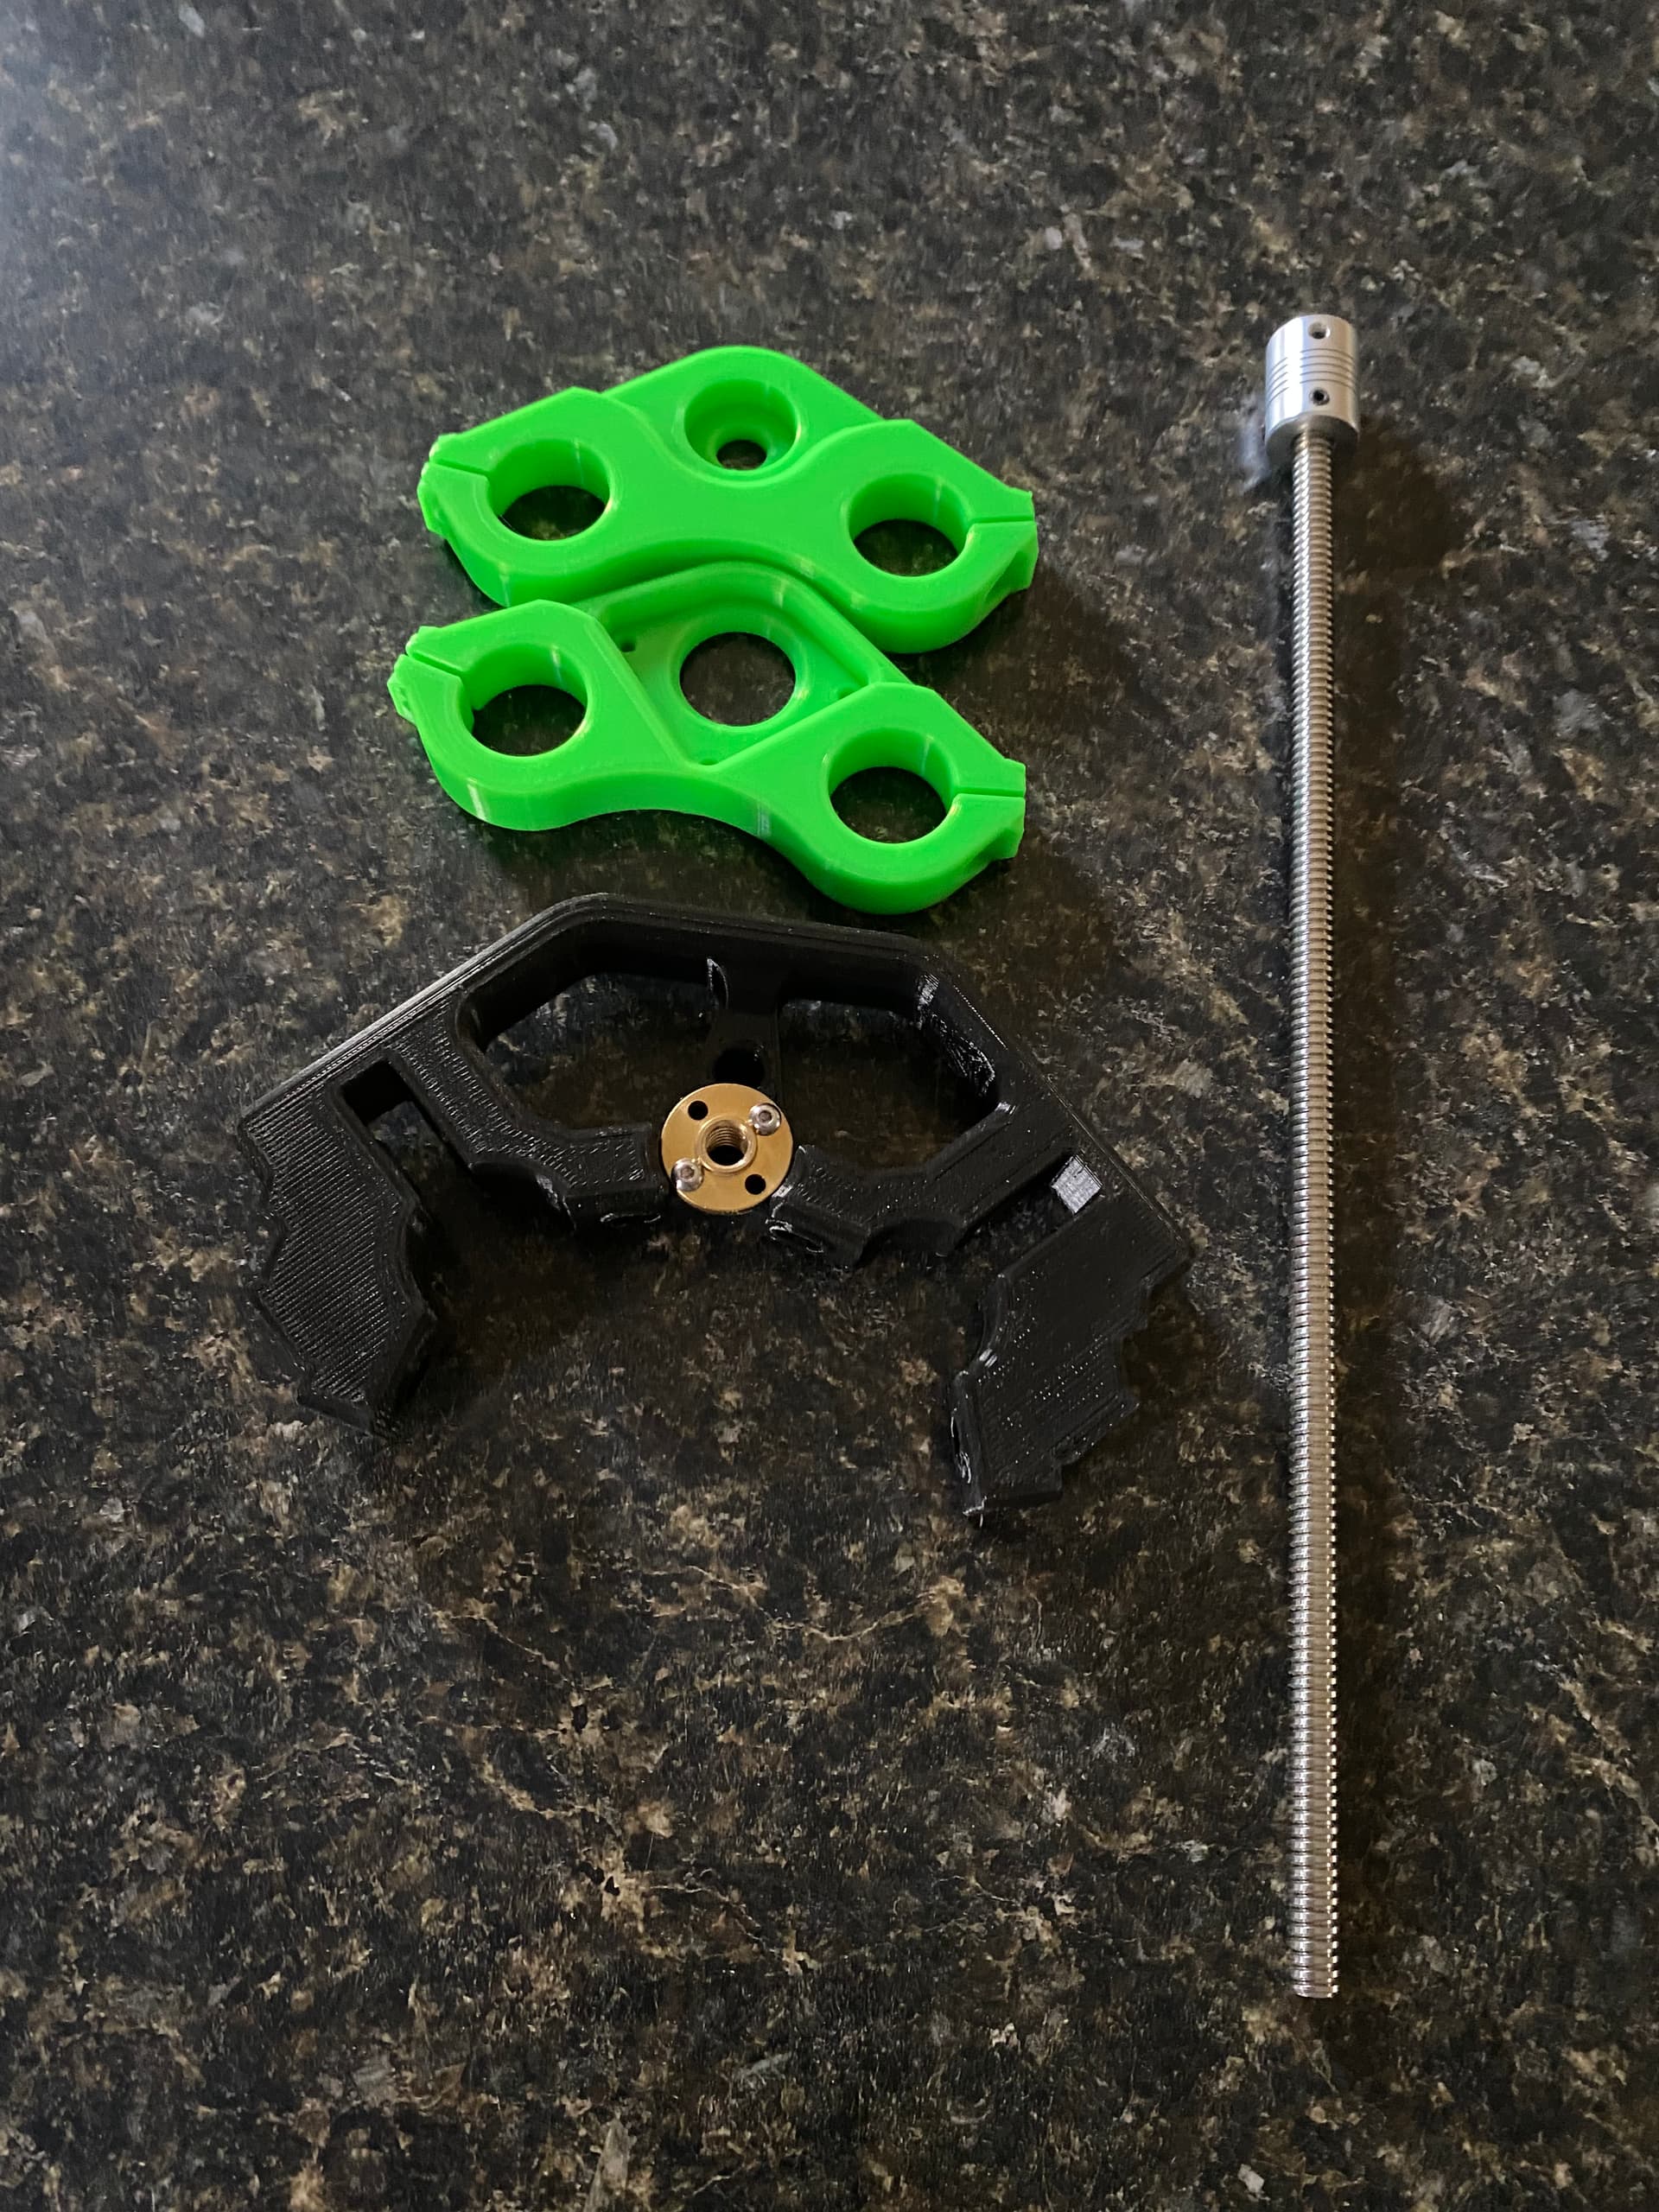
Yes the 525 to Burly is the whole center.
Crap! Thanks for the reply tho.
1 Like
Can I just print the entire z core assy for the primo? Seems like I read thats been done but figured Id ask.
No.
If you want the primo, you should do it all. Swapping in the burly core is fine, but The primo stuff is a matched set.
2 Likes
Ive replaced all the parts to the Burly (skipped the primo, Its just easier for me now). Replaced the threaded rod with lead screw and ran several hours of “air prints” to break everything in again. This evening is when I ran into issues with firmware. All I need to do is change the Z steps, but Ive had nothing but issues getting firmware to load. Keep in mind mine is old school with RAMPS 1.4 and NO endstops ( I like it that way). Is there a firmware someone could share for this setup? Ive tried several but keep getting various errors in marlin. My machine is now cleared with eprom clear so its a braindead machine at this point. Almost wishing Id left well enough alone
Clearing the EEProm should leave you with a functioning machine, it resets the setting back to factory, it does not erase anything.
The current firmware should work just fine with your board and without endstops.
You can use platform.io or x loader to flash your board. The firmwre is linked here, marlin firmware.
Specifically you want this link, https://github.com/V1EngineeringInc/MarlinBuilder/releases/download/515/V1CNC_Ramps-2.1.1.zip
1 Like
You can change the steps per mm with M92:
Something like M92 Z200
If you like the changes, save them with M500.