Has anyone come up with a drag chain that works together with a side mounted vac hose on their lowrider 4?
I’d love to see some pictures if you have.
Has anyone come up with a drag chain that works together with a side mounted vac hose on their lowrider 4?
I’d love to see some pictures if you have.
Funny I was thinking about that yesterday. I love the tape measure trick, so I was trying to find something simple like that but nothing stood out…yet. I am putting the strut plates on my full sheeter later so I will be poking at it again.
That would be great.
I had a laser job fail today - I think (hope) because of fatigue breaking the signal wire - though the laser module never lost power so I’m going to have to strip and replace the wiring loom to the core. So I’m thinking over how I could do it better.
I have a drag chain in the back, but my vac hose comes from the top.
This is probably a bad idea, but I’ll put it out there anyways, how about use the vacuum hose as a drag chain? I.e., run the wires inside the hose or just zip tie the wires to the outside of the hose.
If you only mill wood that will work but HDPE makes spaghetti and it will stick and clog on any internal wires.
I know - and others do too. It’s specifically managing cables and vac hose off to the side I’m interested in a solution to.
I put a Y-axis drag chain mount on Printables here Lowrider 4 CNC Y axis drag chain mount by Alan Lowery | Download free STL model | Printables.com .
There’s an x-axis drag chain mount here Lowrider 4 Drag Chain by Tigger09 | Download free STL model | Printables.com and here Drag Chain Mount/Supports by Ovalworks | Download free STL model | Printables.com .
I have both x and y drag chains fitted, as I have extended all controls/pendant and touch probe offboard, but I don’t have the vac hose running in/on the drag chain, as it hangs from above.
I should have posted this a while back but I figured others had found even better solutions.
Unlike many LR4 installations, my dust collection MUST come from the side. My ceiling is 12’ high but my central dust collection is under my raised floor, so, together with the need for pretty high static pressure for the router, a dedicated shop vac is the only practical solution.
The problem that I had is that the dust hose and the cabling are not actually aligned for part of the path, so I initially had lots of problems with wiring getting caught or it causing the vac hose to lift out of the tray. But, in the end my modifications work pretty well (>90% without issues.)
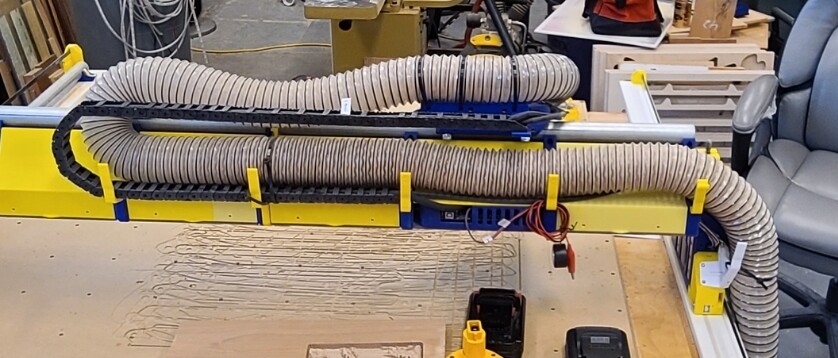
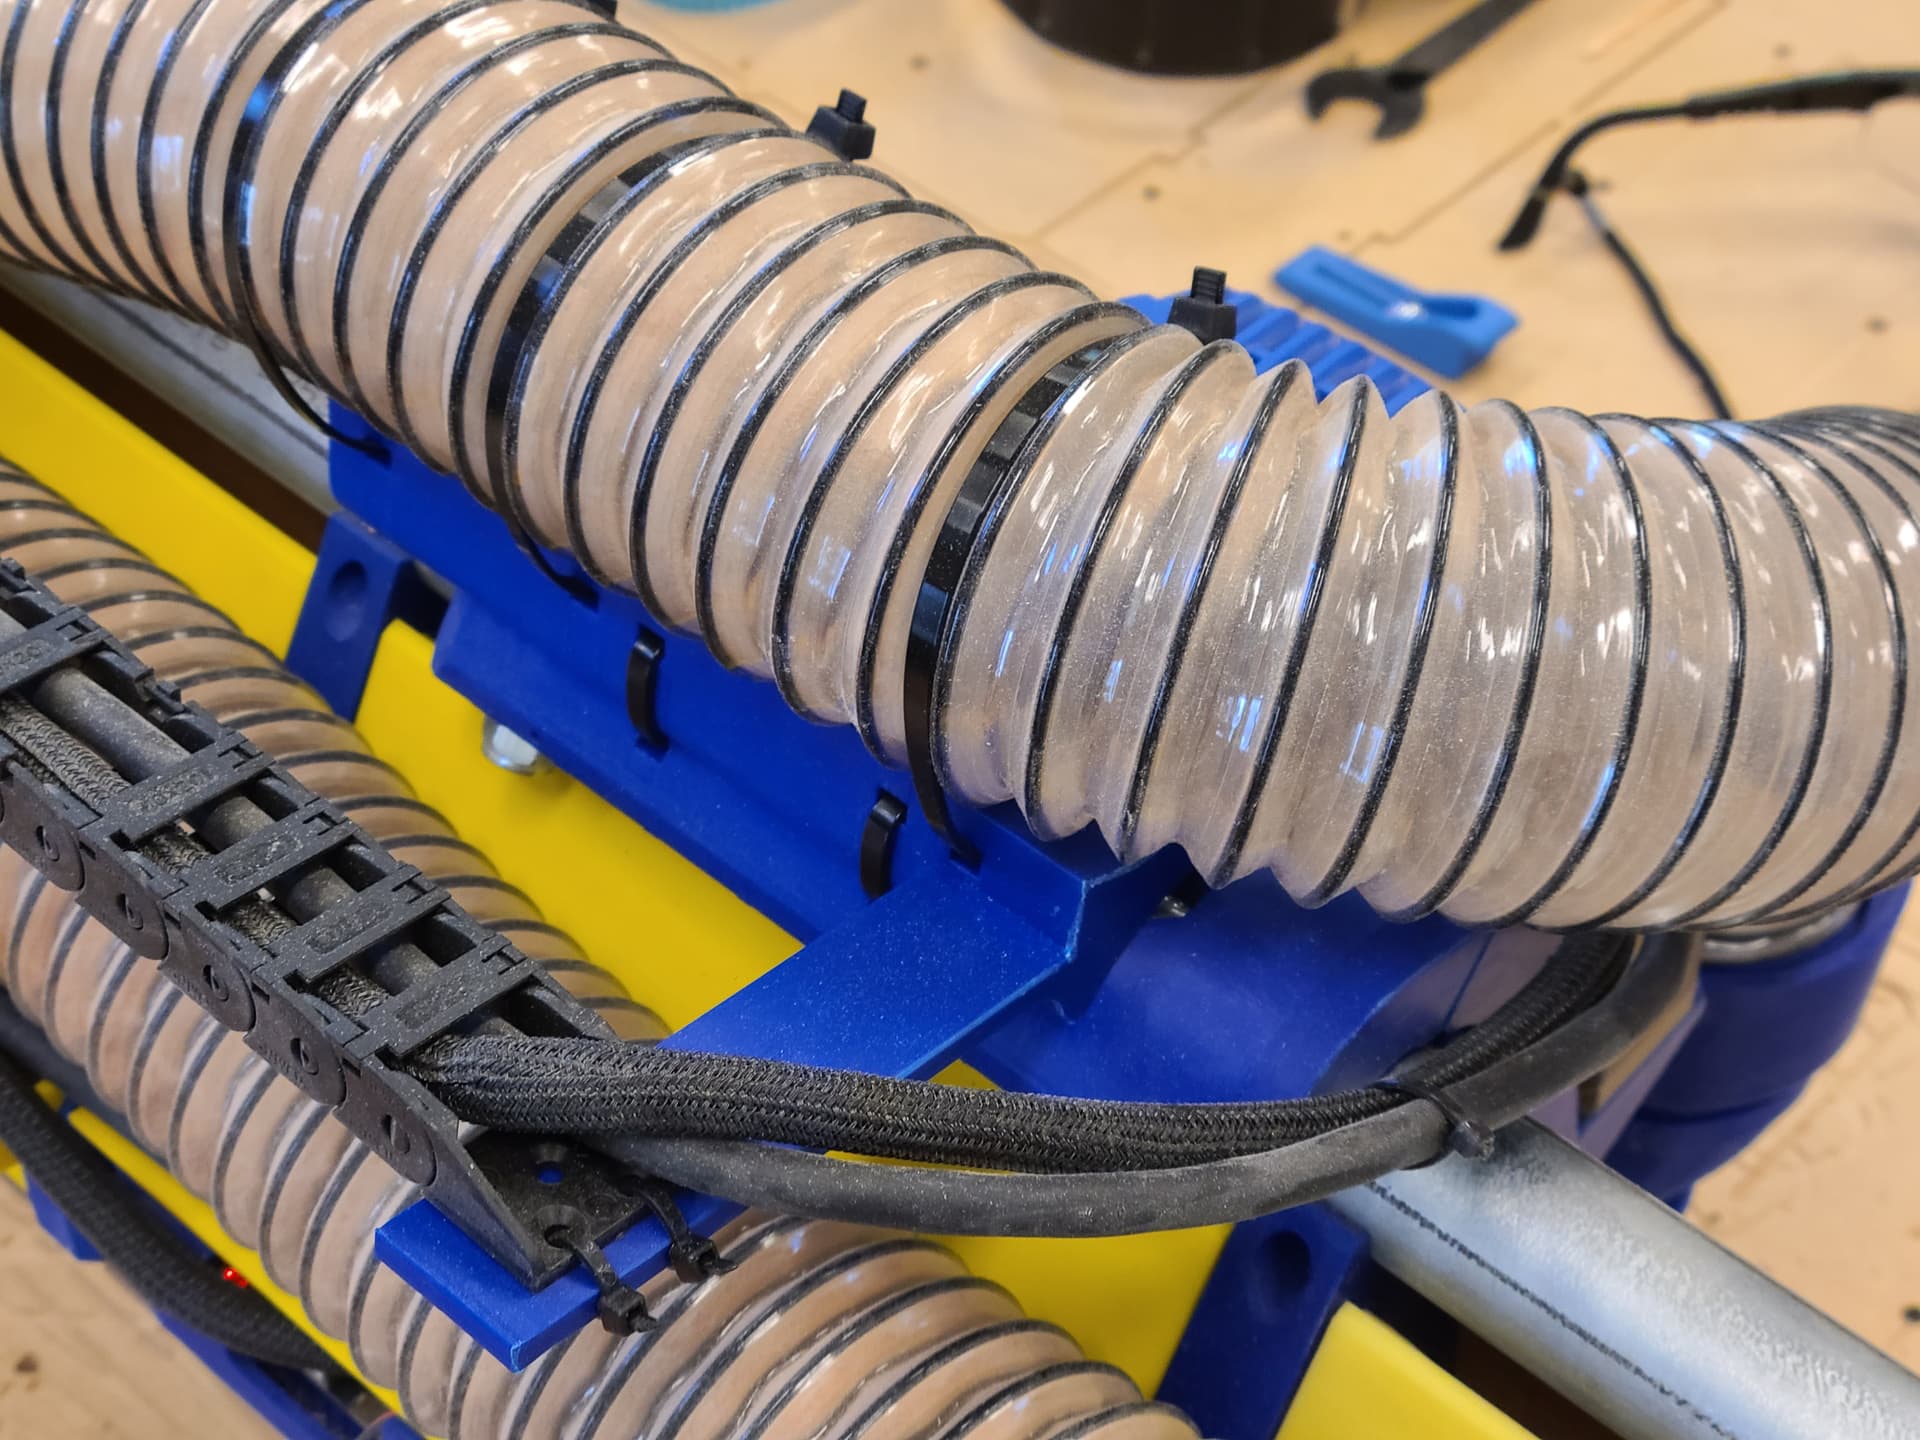
Here are some pictures.
Note that the cabling and drag chain are on a separate path almost immediately…they are never attached to the vac hose. This allows nearly complete independence of the two motions.
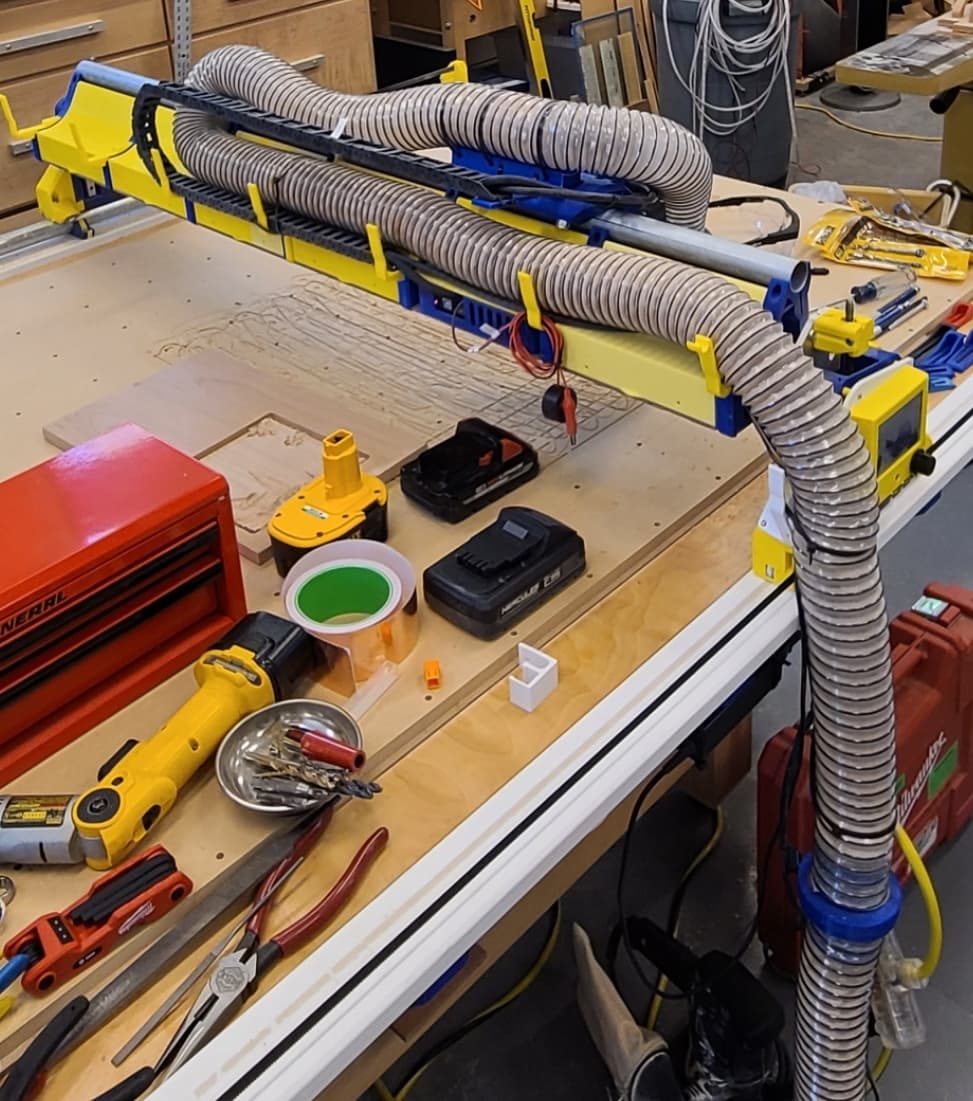
This shows a slightly different angle. (Please ignore the clutter!) You can also see the magnetic disconnect for the vac house as well as the LCD display for the SKR 1.3 control board that rides on the end of the LR4.
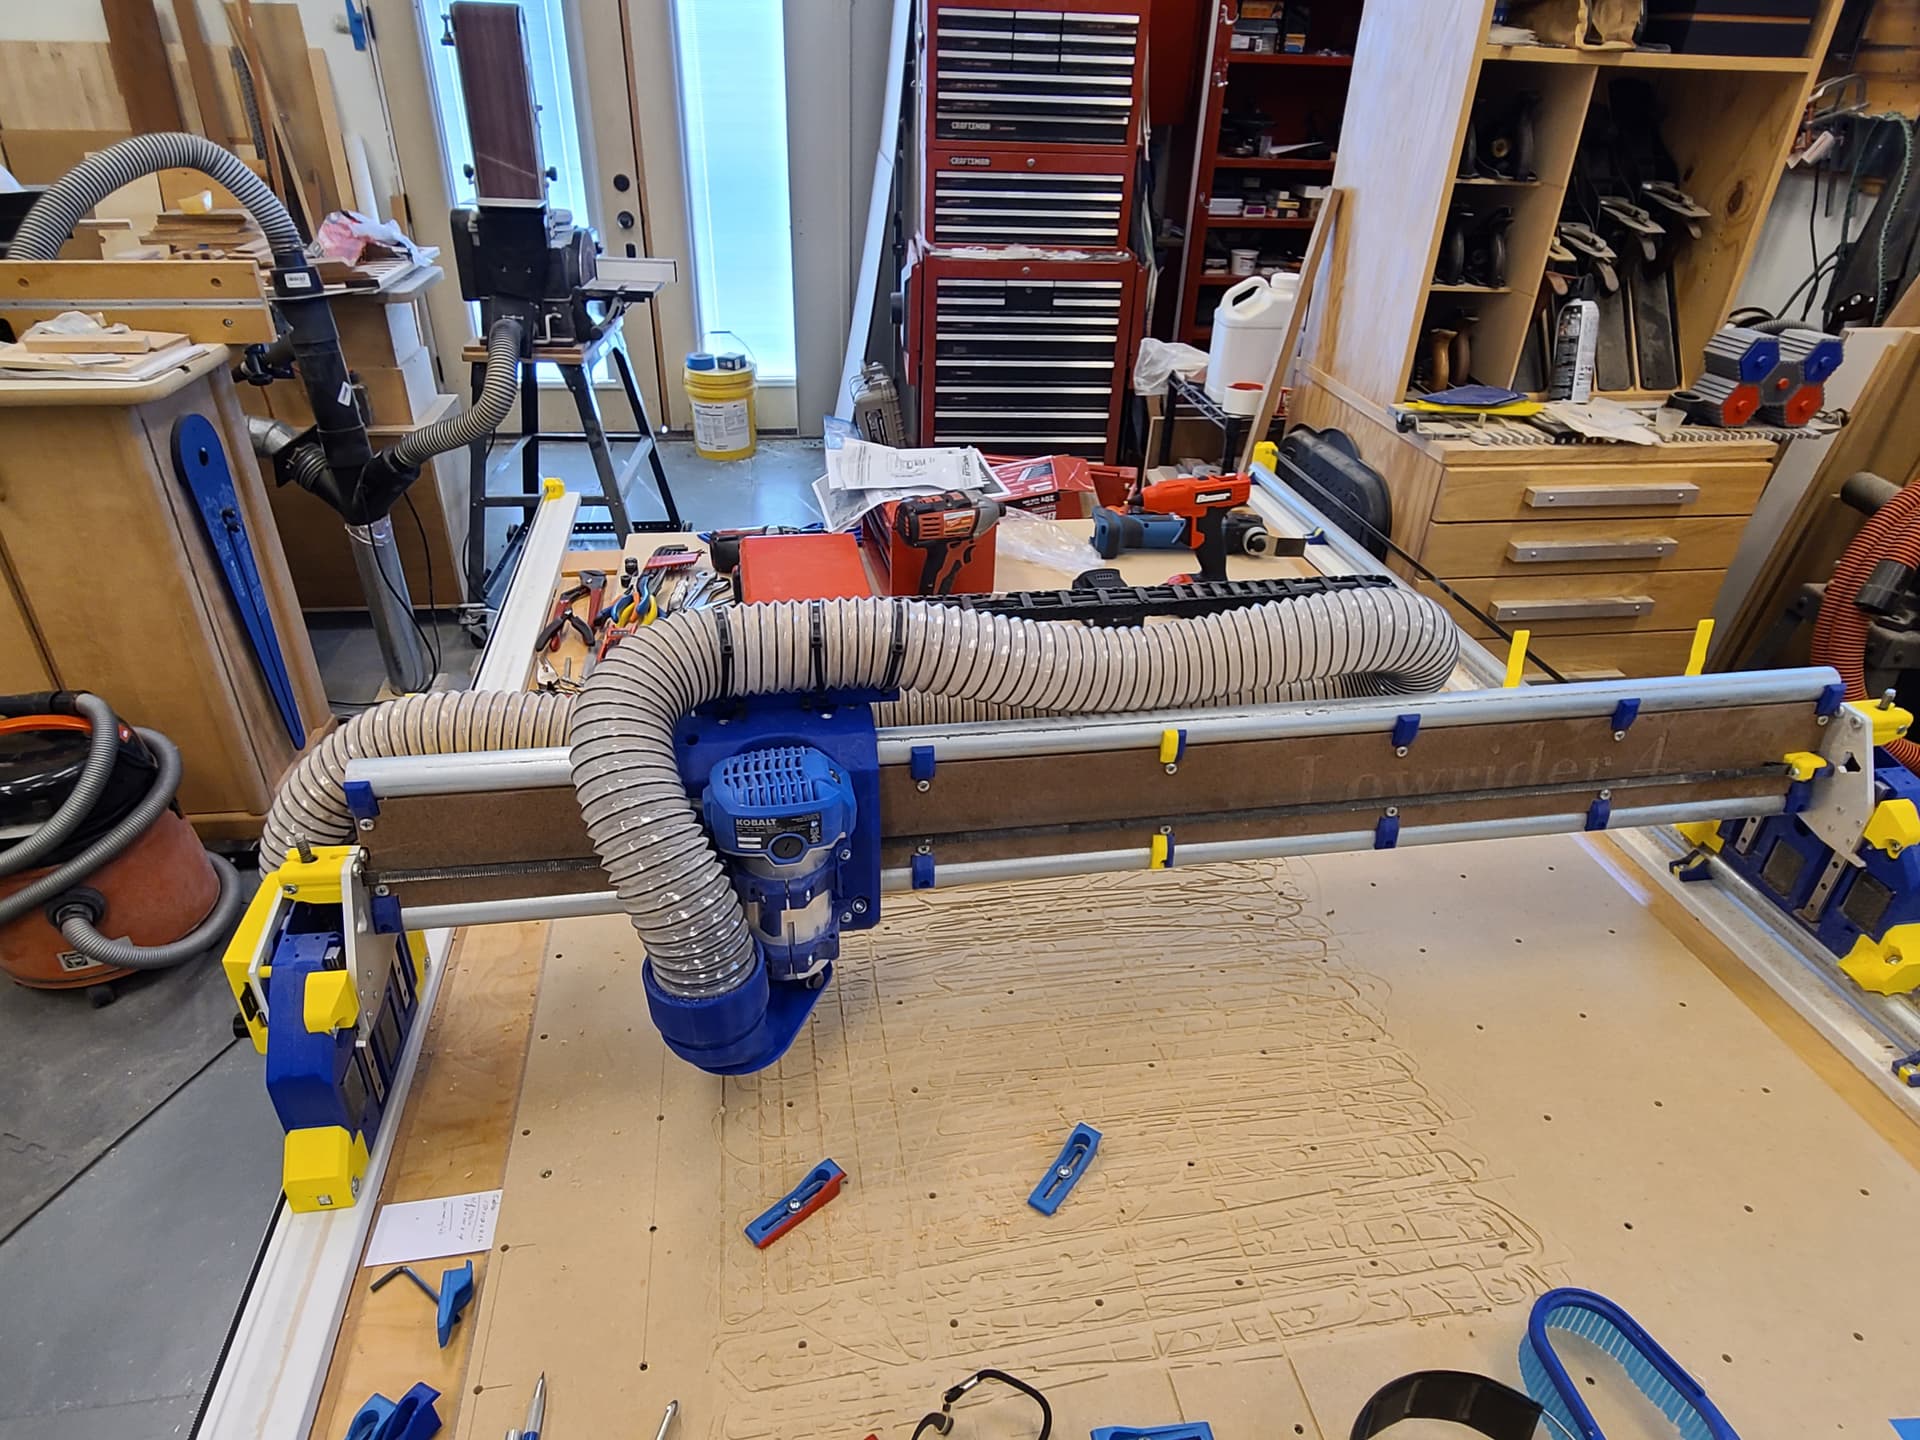
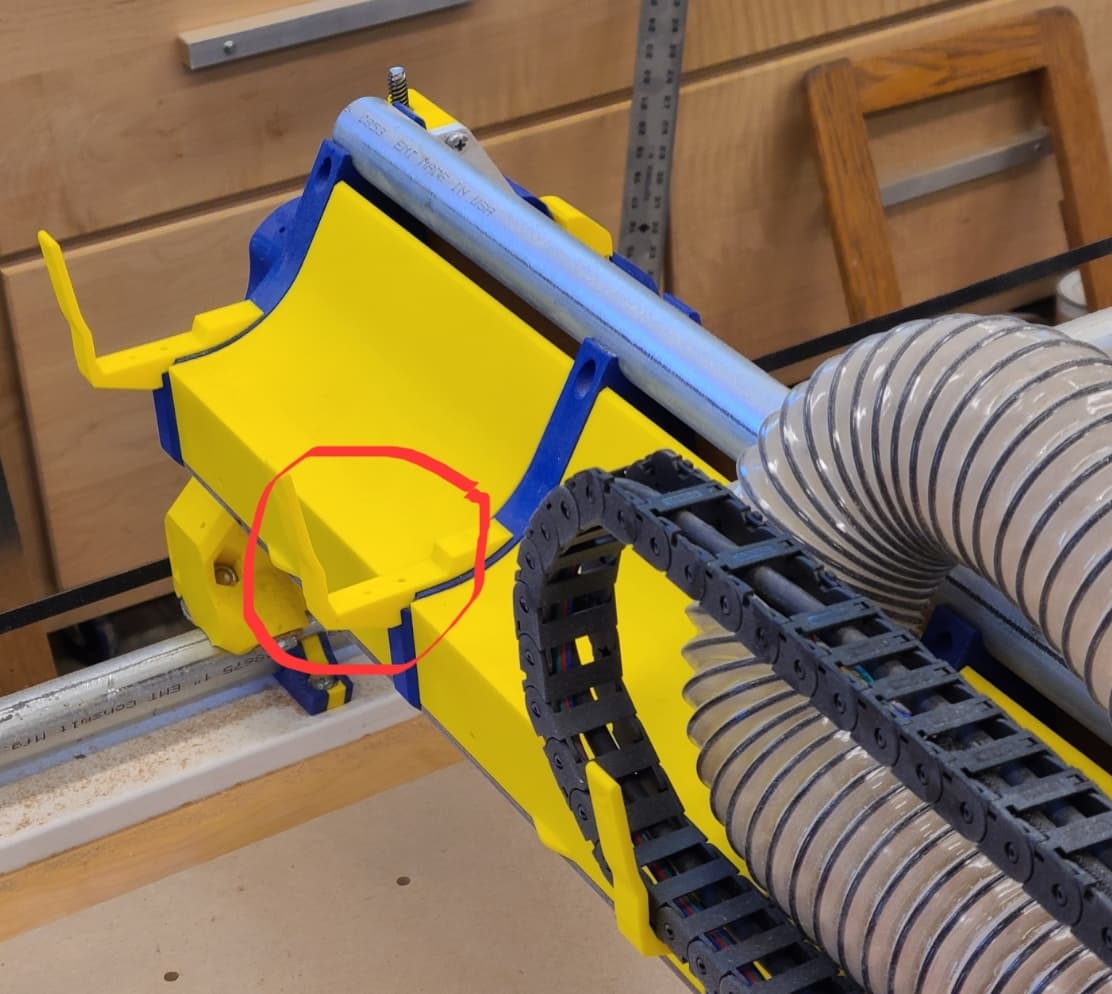
Front view. It may be possible to see the “core extender” that I added to keep the two paths separate.
The extender does two things. First it provides a location to attach the drag chain so that the cables can be fed into it. Second, it extends beyond the end of the core so that the vac hose has a couple of inches more surface to which it can be attached.
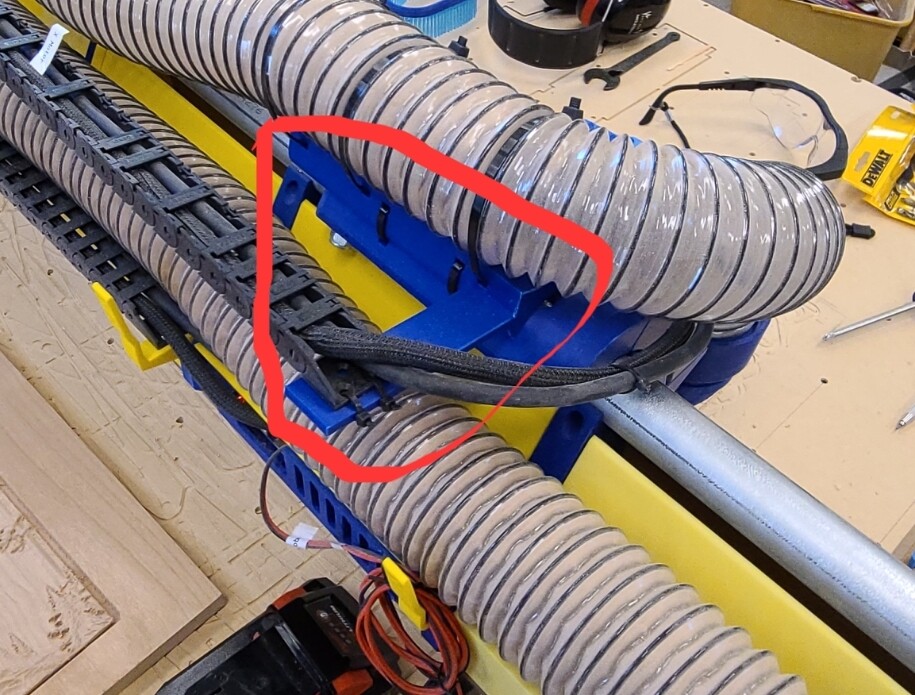
And, a closeup of the extender:
The extender is my own design and is just cable tied to the core. There are some tweaks that could be done, but so far have not been critically needed.
Finally, I have slightly modified the braces that hold the vac hose in place. They also provide a location to attach the drag chain.
Hopefully this is fairly clear without being unnecessarily detailed. At some point, I’ll try to post the ”extender" design on Printables, but that may take a while. The design is in Onshape, so if someone needs it, I can post a link here or something. (I also plan to post a video but that will be even longer… ![]() )
)
Really really interesting, Thankyou for sharing those.
That is a great design! I am dealing with a similar issue I am in the final steps of my build and I am having trouble with the cable/dust hose. I have built my dust management to be under my table since it is in my garage and I am limited on space since I went for a full size table. I have big plans lol. Could you please share the files that you printed or the modifications you made to the makers files that you used. I have the drag chain and would like to try this setup to see if it solves my issue before I start reinventing the wheel. Thank you Dustin
Sure. It will take me a little while to put it together, but essentially, there are 3 pieces. The first is the “core extender” that allows the hose to be attached to the core independent of the cables, and also allows the cable (electronics and router) to be routed to the drag chain independently. The second are the “braces” that attach to the back side of the gantry. There is some flexibility here, but the essential task is to provide sort of a track and mounting points for the drag chain, again independent of the hose. The third element which is somewhat of a convenience, is the magnetic coupling of the hose. The two pieces are threaded directly into the hose so don’t require any clamps if you get a good fit. I actually posted this a few weeks ago so I’ll try to find the link. I think it’s up on Printables as well.
One issue that you’ll have to cope with is the fact that for a full size table you’ll quite a bit of clearance so the hose can travel end to end. My table is 72” x 42” so it’s not quite the maximum. Also since I use the SKR 1.3 control board, and have its display mounted on the end of the gantry, the only two cables that must leave the gantry are the router power and the control board power. All other electronics are completely contained within the gantry itself.
Let me find some links for you.
By the way, are you familiar with Onshape? If so, you can use my design and modify as needed.
Here’s the post about the magnetic hose connector
I am somewhat familiar with onshape. We have a love hate relationship. The only cable coming out of my Gantry is a single power cable I have everything else housed within the Gantry. So just have to manage the hose and One power cable and I am going to try and manage those with another drag chain. I am using 2.5 hose for the whole system as well so your system sounds perfect. I am not sure I will need the coupler as I have a Y split with a seperate clean up hose attached at the side of the table so that I can also not run the dust collection and do it manually if I am cutting something that I need to remove the dust shoe for some reason.
Here is the 3MF file for the hose hook and drag chain attachment bracket. I replaced all the default hose hooks with these.
Apparently, this is not my design since the figure which is imported into Onshape was clearly an STL file. It’s possible that I combined a couple designs the get this one, but I don’t remember and right now can’t find the original Onshape design which probably means that I combined the STL files…
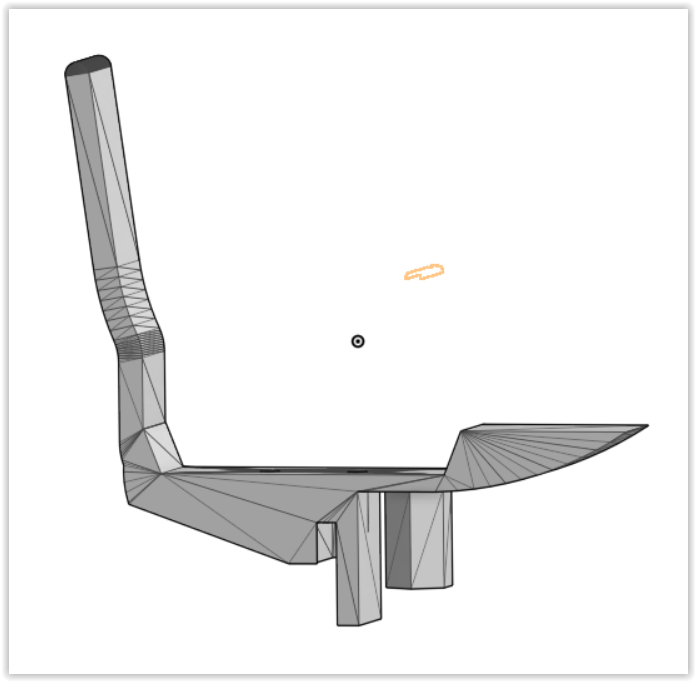
Anyway, here’s an image:
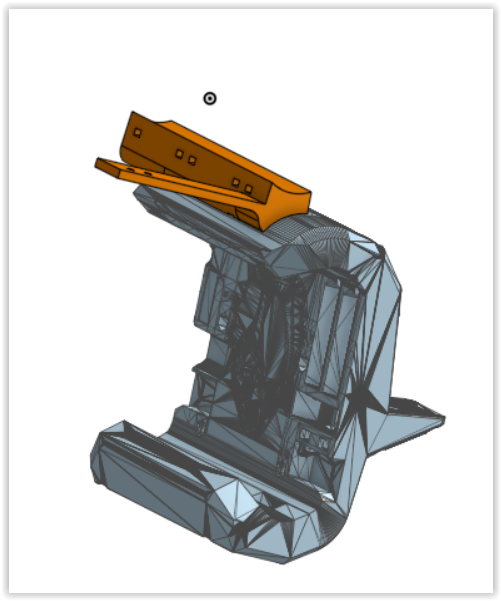
And, here are a couple of images of the core extender, one installed onto the core.
And, the core extender file:
Extended Dust hose core bracket.zip (46.5 KB)
Hose bracket file:
hose hook and drag chain parts.zip (99.4 KB)
I must alert you to the fact that in the interest of doing this quickly, I wasn’t able to find the design file for the hose bracket. The core extender is in Onshape, but, the version that I found seems to be slightly different from the one that I finally used. (Sorry for this sloppiness…. )
If you try these pieces and they don’t seem to work properly, I can spend more time on this. But, hopefully, you’ll get the idea easily. (And, yes, I really DO need to fix the core extender model. It’s not anything special, but, may be useful for others so it belongs on Printables…)
Thank you I really appreciate it they are already on the printer I will update with pics as to my progress!!
In case it’s not obvious, to mount the core extender, you will use two cables ties to attach it firmly to the core using the two holes that are in the core, normally used to attach the hose to the core. The other three holes are used to attach the hose.
I think that the photos and images should make this clear, but if you have questions, let me know.
Good afternoon,
What size drag chain did you use ? I am having trouble getting the drag chain and the hose to fit also how long of a drag chain are you using? Do you happen to have a picture of what it looks like at X max and X min ? I am just trying to get a picture of what it should look like. I appreciate all your help and it is no rush. I am working on making the clips fit my 15-40 mm drag chain now.
Thank you,
Dustin
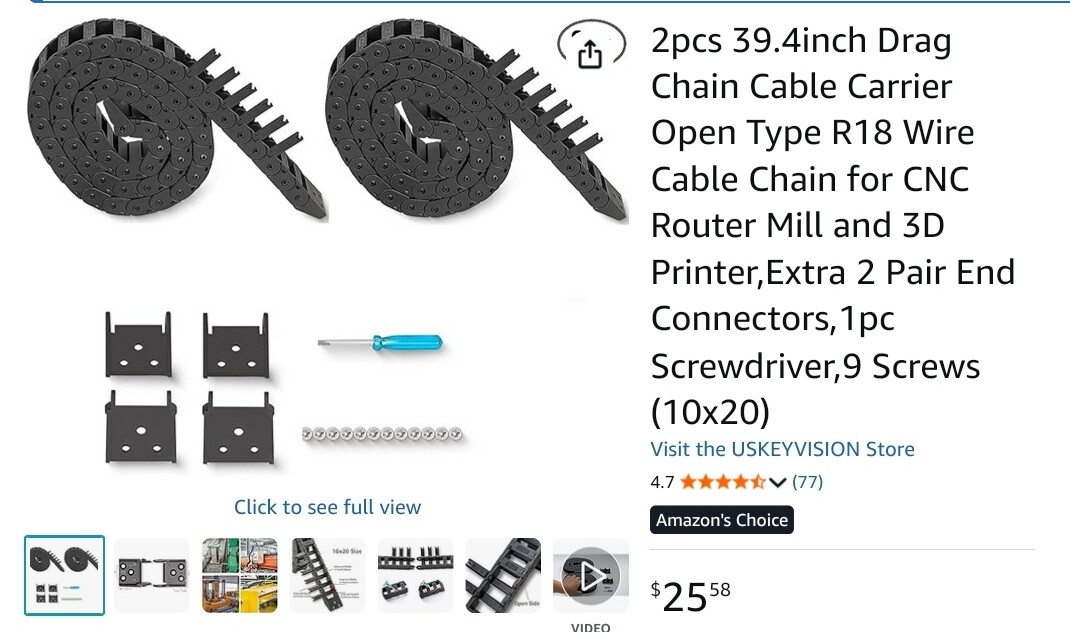
I’m pretty sure this is the drag chain that I used.
I didn’t use all of it.
I’ll get photos of the Xmax and Xmin positions.
It seems like your drag chain is wider than mine. I think there is another, wider drag chain holder on Printables. It would be pretty easy to modify, I think, but let me check and see if it could handle your drag chain width. Or, it might be easier to modify the existing. If I understand the problem, you would just need to widen the recess for the drag chain slightly, right?
Good evening,
That is correct I am attempting to modify the gap the drag chain sits in. It’s around 12mm bigger than the current model. I am still learning CAD so I’m slow going. I am printing a version now to see if it will work.
Thank you.