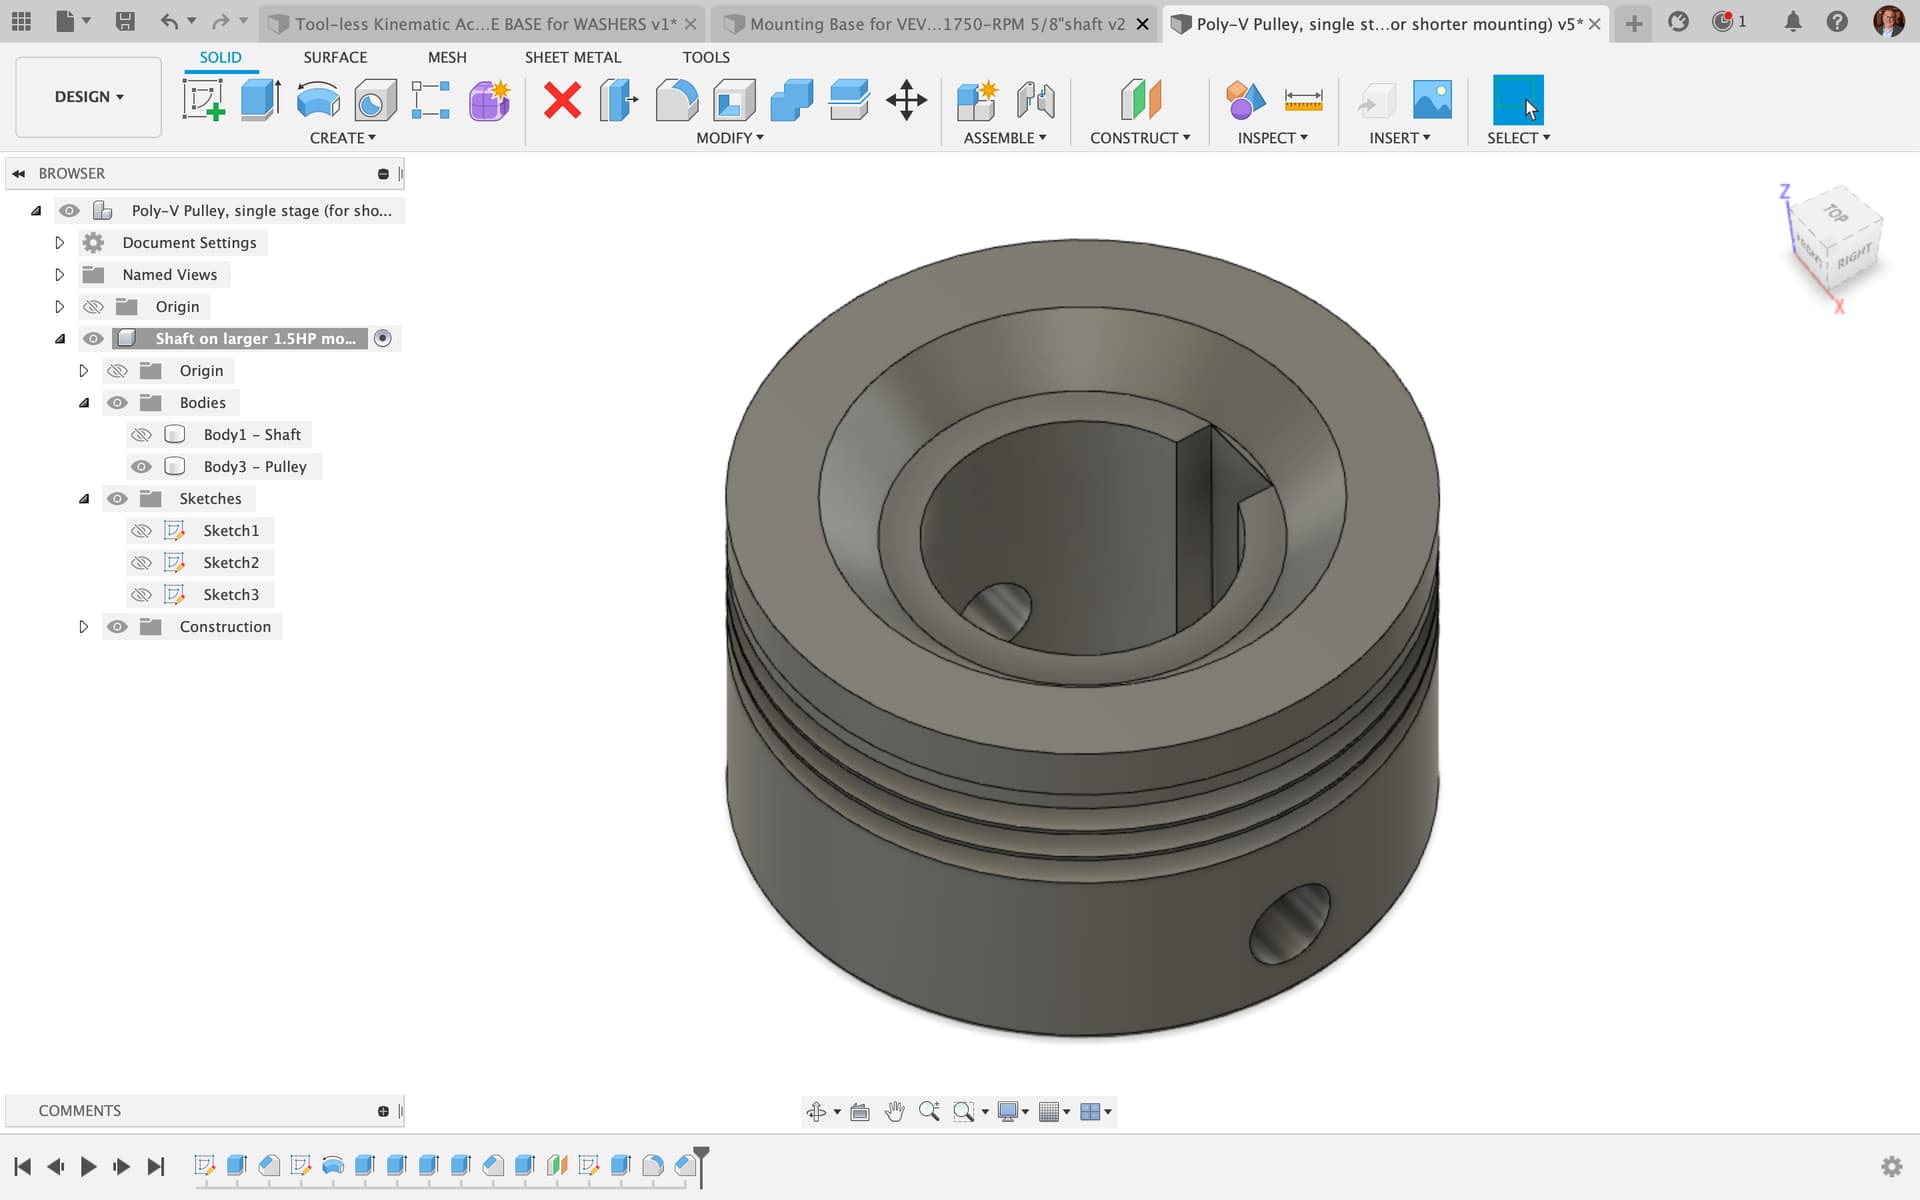
Updated single stage pulley design:
UPDATE:
While working to install, I realized that the differences between old motor and new, old shaft and new, and old pulley and new, meant the new pulley must be single stage only, one speed instead of two, and the smaller of the two new stages has to be the one to keep (which is about as large as the larger of the two stages on the old one), and in revising the pulley to that new design, I decided to print with enough perimeter walls as to make the thing solid (no infill at all).
So that is currently printing.
Attached are STLs of the two stage (unused) and the one stage (used) as well as DXF and SVG of the mounting plate template.
Poly-V Pulley for 1.5 HP Motor for Bandsaw, 5:8" shaft, 3:16" key.zip (272.7 KB)
Mounting Plate Template for VEVOR Electric Motor 1.5-HP.dxf (314.6 KB)


Cool, thanks for posting,
I did something similar with a cheapo bandsaw to turn it into a belt sander. I used 2 grubscrews mirrored to help with balance.
Great idea! Now why didn’t I think of that? Not too late!
Above, the zip file of STLs in the second post, has been updated to have two grub screw holes, for balance.
How did the pulley fail? I was thinking that the tension from the belt would be likely to split the pulley in half.
If that’s the case then you could try replacing both sides together and using a toothed belt instead of a V-belt. That would make the forces involved more in-line with the strongest part of the print. Alternatively, you could also try making a couple of metal plates/washers and using screws between them to ‘sandwich’ the pulley together?
As soon as the blade got any resistance, the force required to spin the belt was more than the grip of the plastic pulley on the belt. This allowed the belt to not turn while the pulley still turned. This resulted in friction, which caused heat that softened the plastic. It did not last long after that. I should have seen it coming.
Right, that makes sense. You could always try printing the pulley with the ‘fuzzy skin’ option or gluing something to it to increase the friction?
I was just wondering about this today, I wonder if you could use a single point tapping tool or a slitting saw in a 1/4 inch arbor mounted in a LR to cut the grooves in an aluminium pulley
Or go full Matthias Wandel and make it all out of wood?
Or use the 3D print as a positive for a melt-away mold for metal casting! — Just going with the joke flow. I am not set up for that! I have a friend in another state who is, but too far away.
This is so typical of the DIY creator’s thought process. I need a couple of metal pulleys. Instead of spending a few bucks buying a couple a metal pulleys, why not spend hundreds or thousands on a metalworking lathe and some raw steel so I can make my own? LOL.
Casting aluminium is remarkably easy! I’ve never gotten around to doing the whole PLA print to investment cast to aluminium cast but I’ve cast a bunch of stuff in open face molds and cast a bunch of lead/tin which isn’t much harder.
And absolutely, that’s definitely the trade-off. It’s a conversation I’ve had with a bunch of friends and colleagues over the year. I think it comes down to being honest with yourself about what your goals are. If you just need a working bandsaw so you can get some stuff done then buying a pulley is clearly the way to go. Tying that whole process to working the kinks out of an entirely new and unfamiliar workflow is unlikely to be a positive result. On the other hand, if you’re less worried about the bandsaw and were looking for an excuse to try your hand at a new fabrication process, creating a pulley is a very fundamental and ‘standard’ item to get started on!
Do it like @forcerouge: metalplating. Hmm don’t think that makes sense with a hollow pulley.
In an interesting development in the effort to upgrade this VEVOR 10" band saw from 0.5 HP to 1.5 HP, is that once I resolved to buy a new belt and new pulleys, I then had to remove the bottom wheel, whereupon I discovered that the pulley attached to it, is injection molded plastic!!!
This set me to thinking that if I were to obtain a toothed belt, I could design and print toothed gear pulleys, or perhaps mill them using my LowRider CNC router or perhaps even cut them with my LowRider CNC plasma.
More soon.
There can be a bit of a “chicken and the egg” issue with replacing both the belt and pulleys: You don’t know which pulleys to get before you get the belt, and you don’t know which belt to get before you get the pulleys. I went round and round, and finally decided to just order a toothed drive belt and see if I can either generate or obtain pulleys for it. I ordered this one: Toothed Drive Belt for Central Machinery Harbor Freight Belt Sander Model 38123 | eBay
Well shoot I guess they all can’t be wins haha. Thanks for posting I need to get a pulley for my swan gas powered air compressor and it’s a odd tapered shaft size. So I feel your pain.
It may well be that a printed pulley can work, especially by reorienting the angle of how the stress is related to the layers of the print. A switch from a “grooved” belt to a “toothed” belt would accomplish just such a reorientation. Also, while a “grooved” belt “kinda” requires lathe work to make a pulley for it, a “toothed” belt can use a pulley that was milled by a router instead of a lathe! More soon.