Back in December, @kd2018 asked if anyone had built an Etch-A-Sketch bot. His question reminded me of the This Old Tony Videos concerning doing that very thing, and my thoughts when I watched his videos is that I should try and build my own…and I promptly forgot the idea. With the impetus of Kyle’s question, I decided to make it a low-level project. Here is the result:
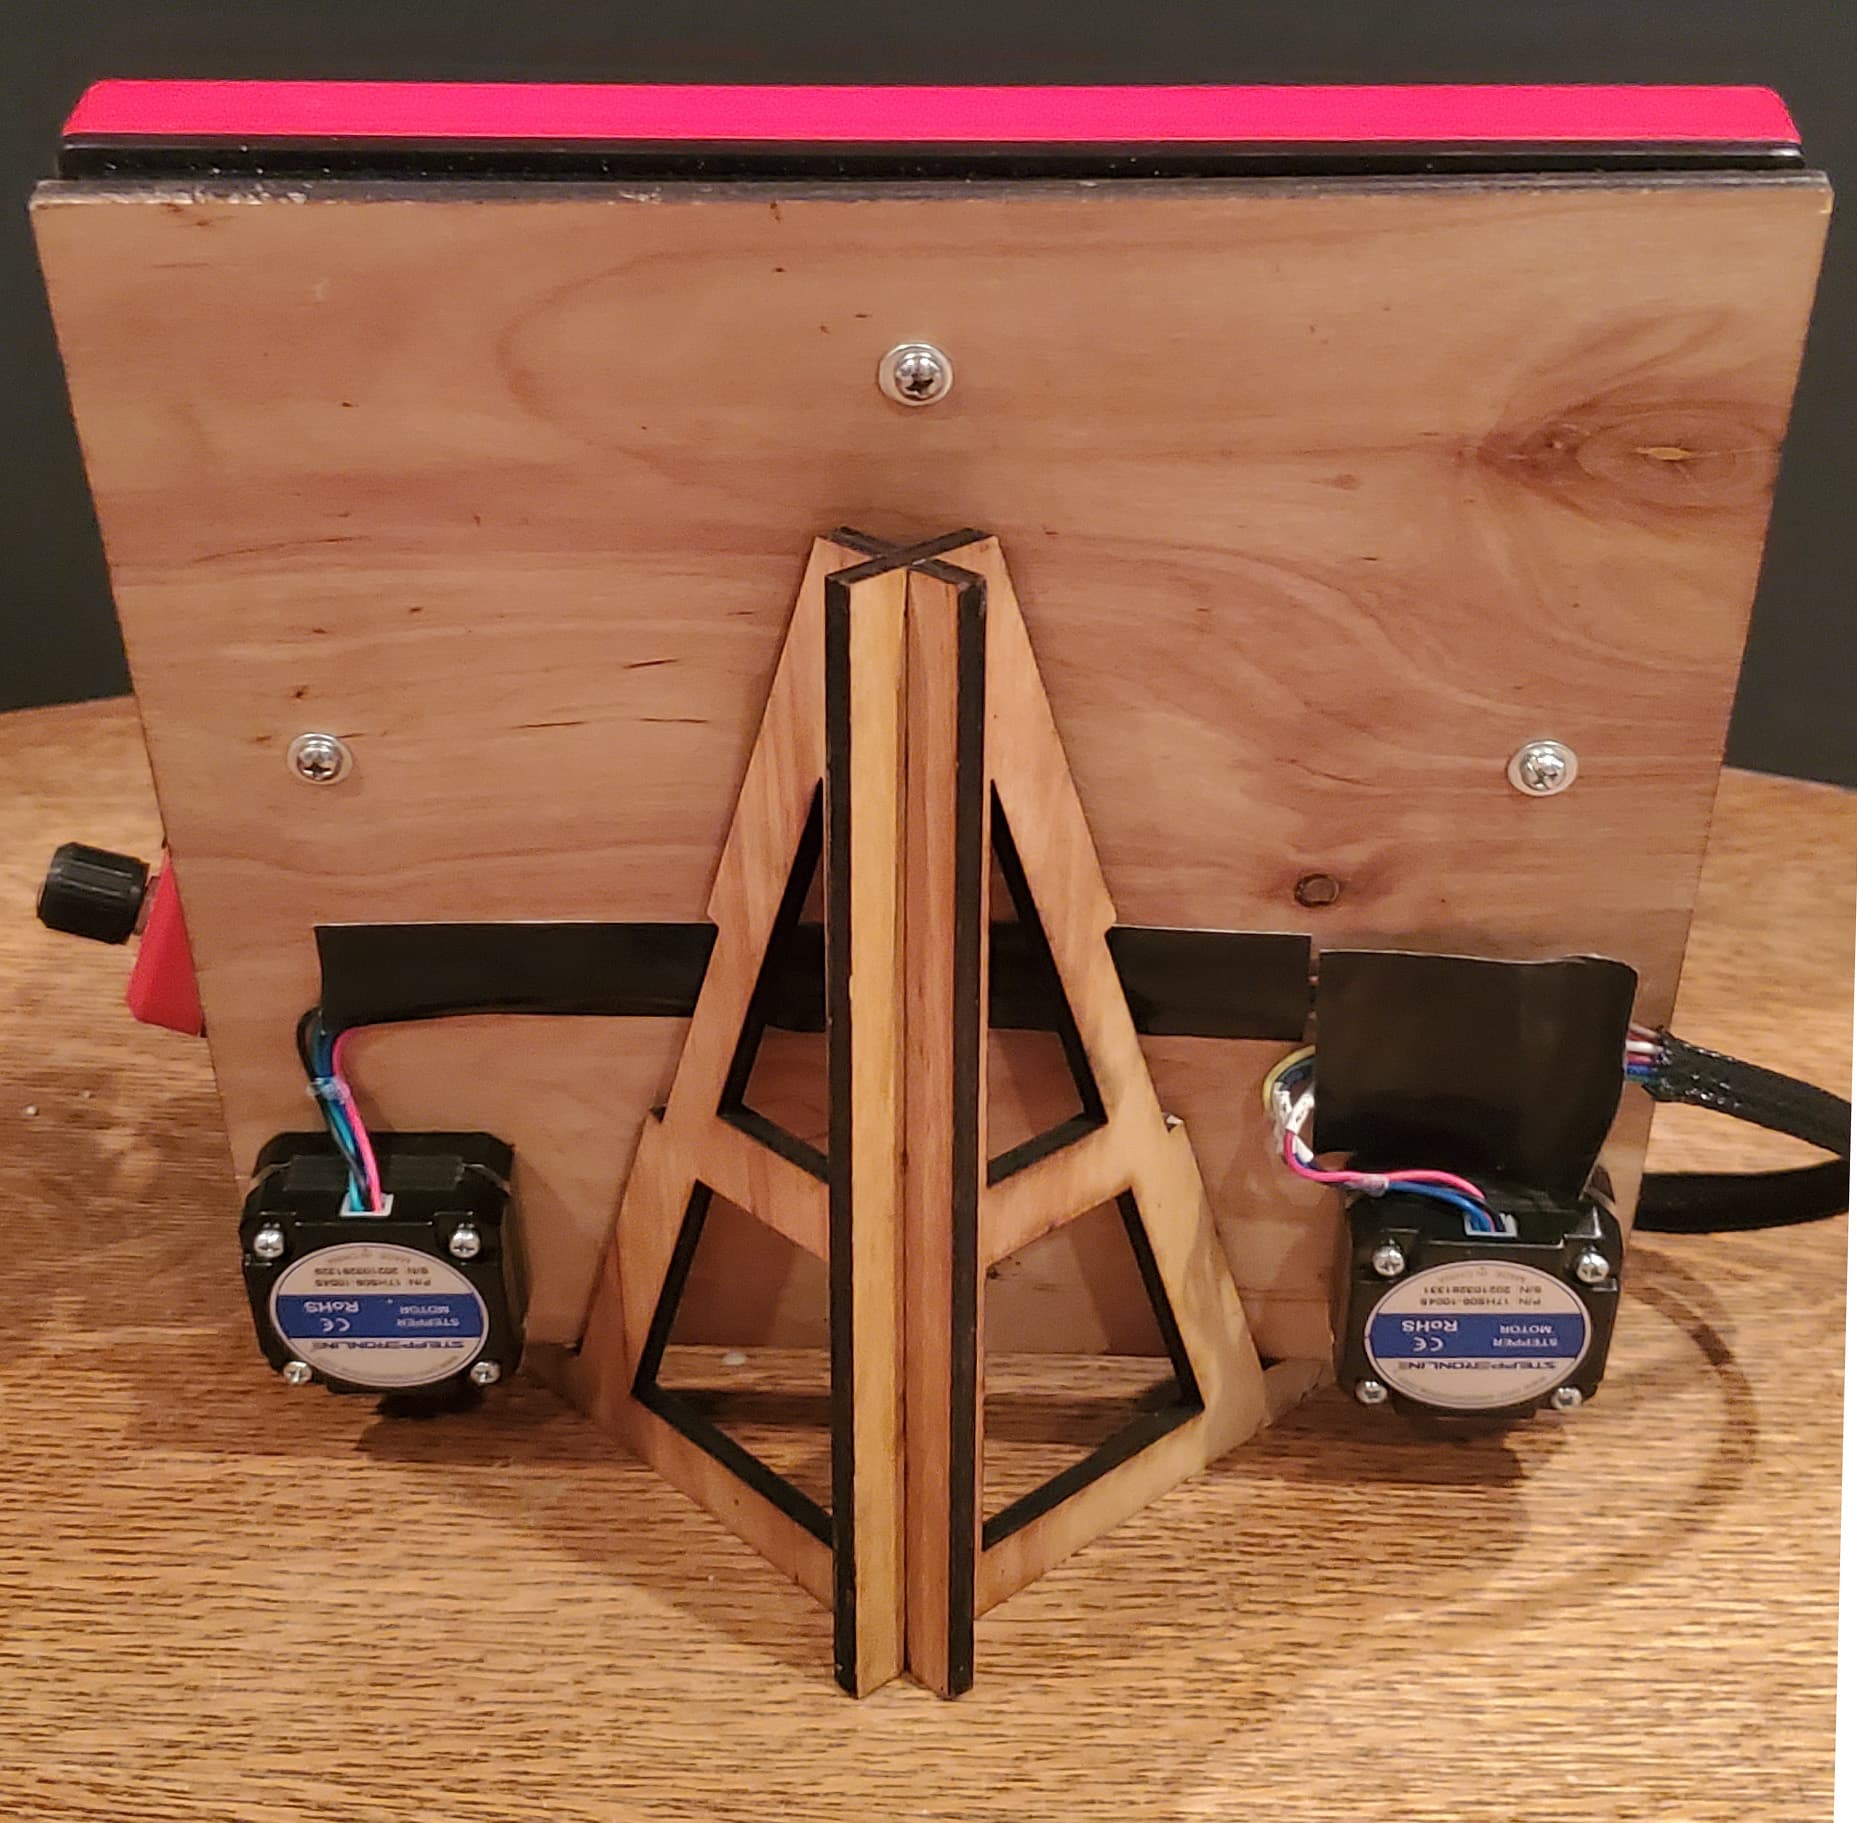
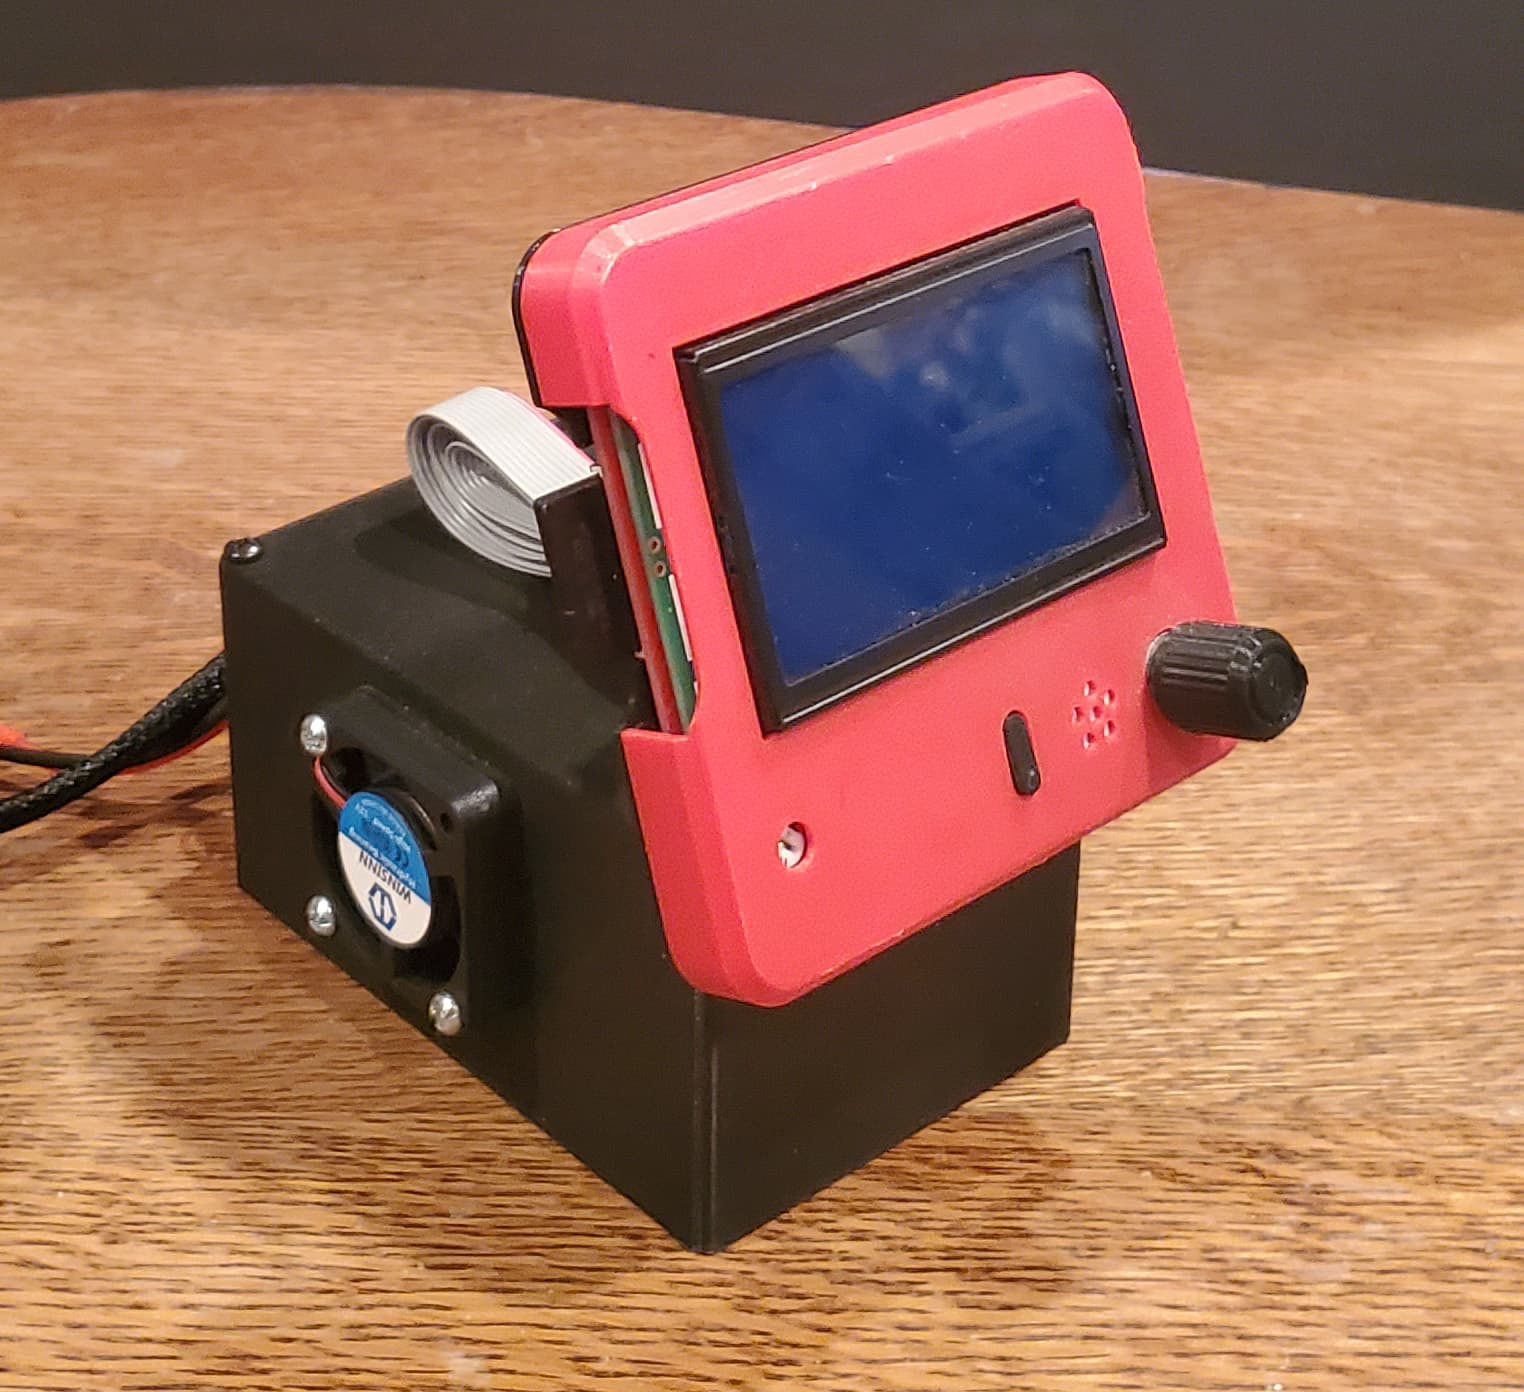
I used short Nema17 motors and coupled them directly to the knobs using 3D printed gears. Originally, I was going to mount the control board on the back of the Etch-A-Sketch, but later decided I had other experiments I wanted to try, so instead put the electronics in their own housing, so I could swap the control board between projects. I use a Ramps 1.4 board with DRV8825 drivers.
I put the MPCNC Ramps Dual firmware on the board to test the board and connections to the stepper motors. When I got around to firing up the Etch-A-Sketch bot, no firmware changes were required to get it working. I only had to use the display to change the steps per mm.
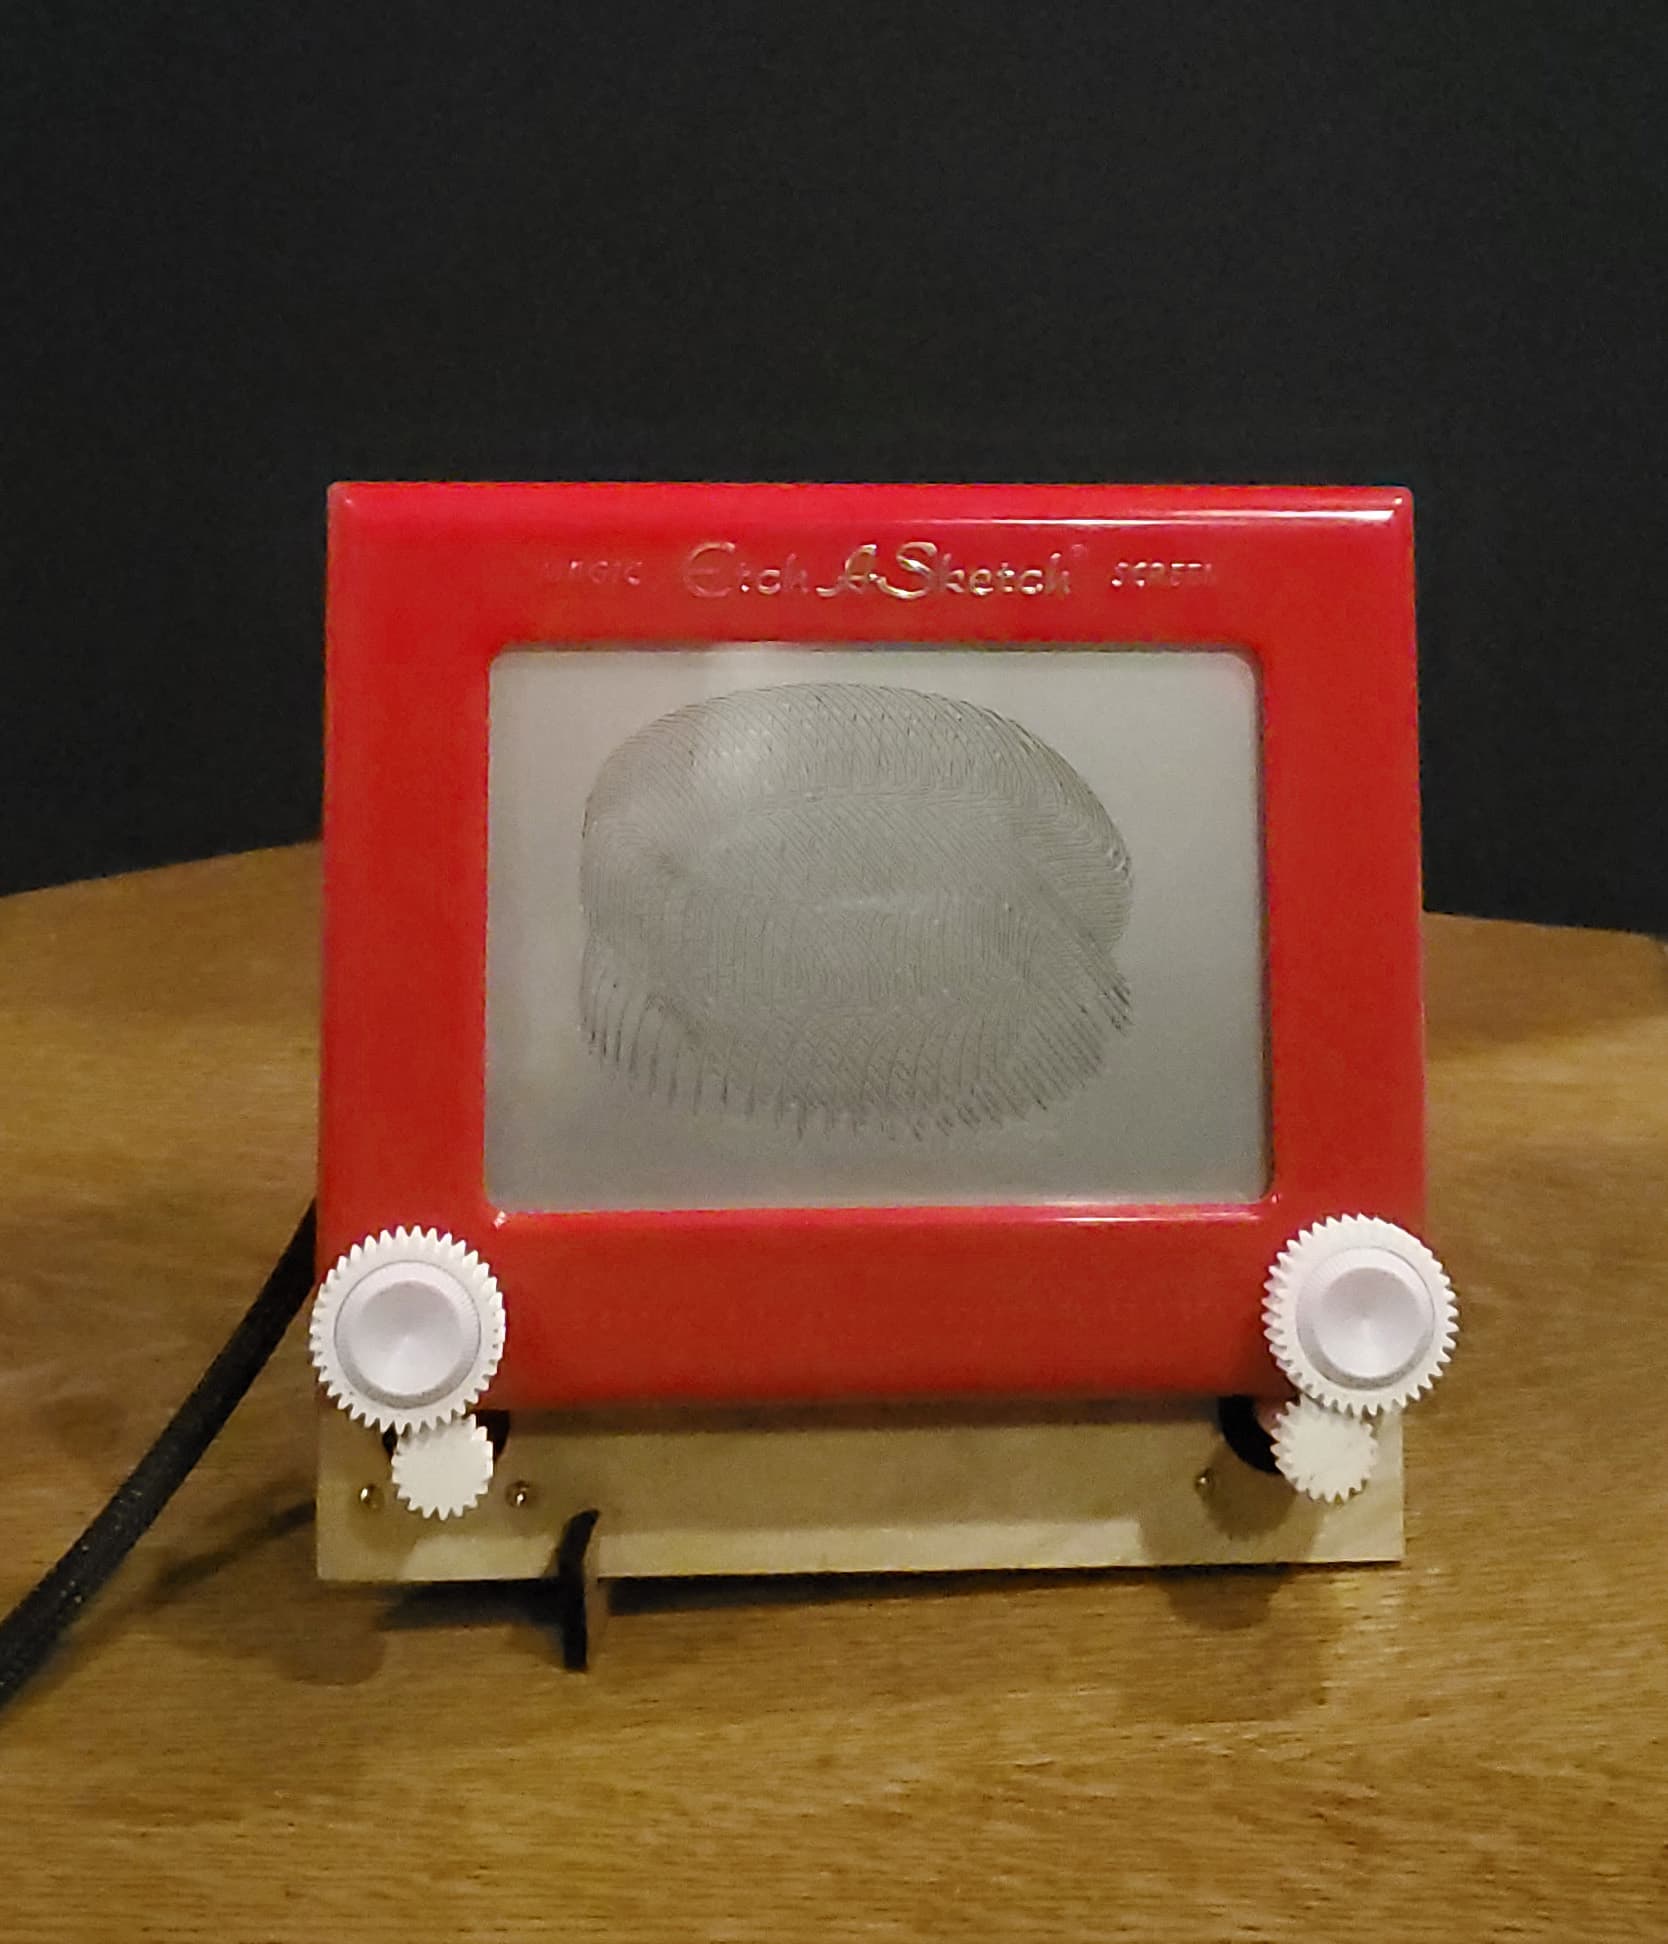
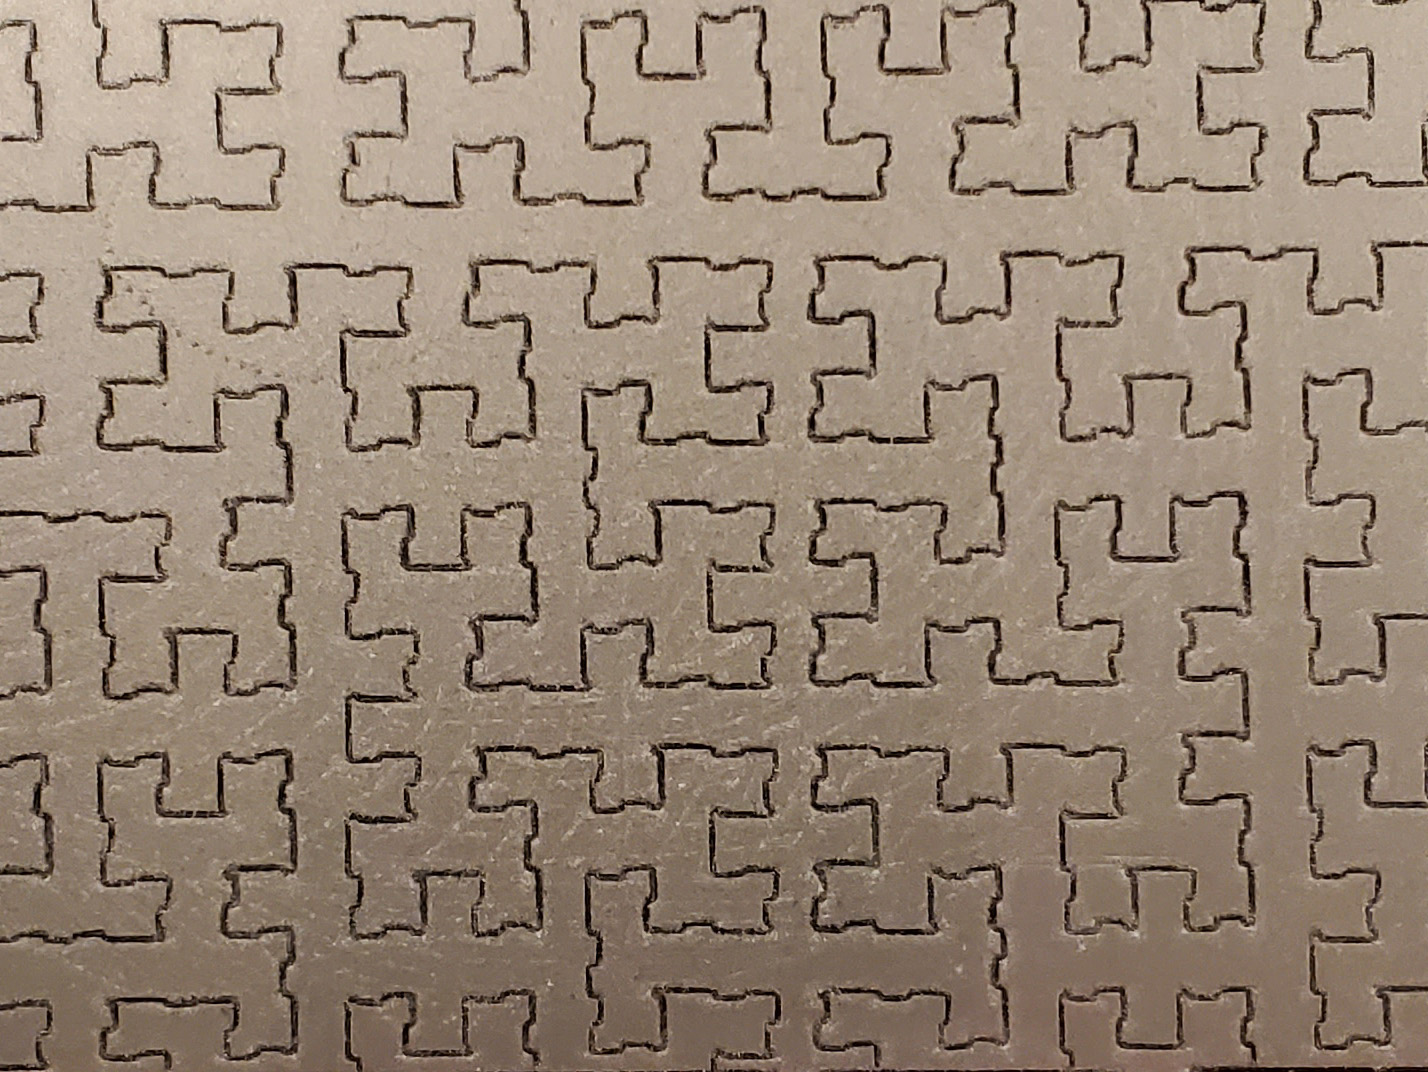
The one surprise I had was blacklash. If I had bothered to re-watch the This Old Tony video before building the bot, I wouldn’t have been surprised, since he covers it in detail, and according to him, it is going to get worse the more I use the Etch-A-Sketch. Here is a Hibert curve. This is about 1/2 screen high (roughly 50 mm), and you can see all the wiggles on what should be straight lines:
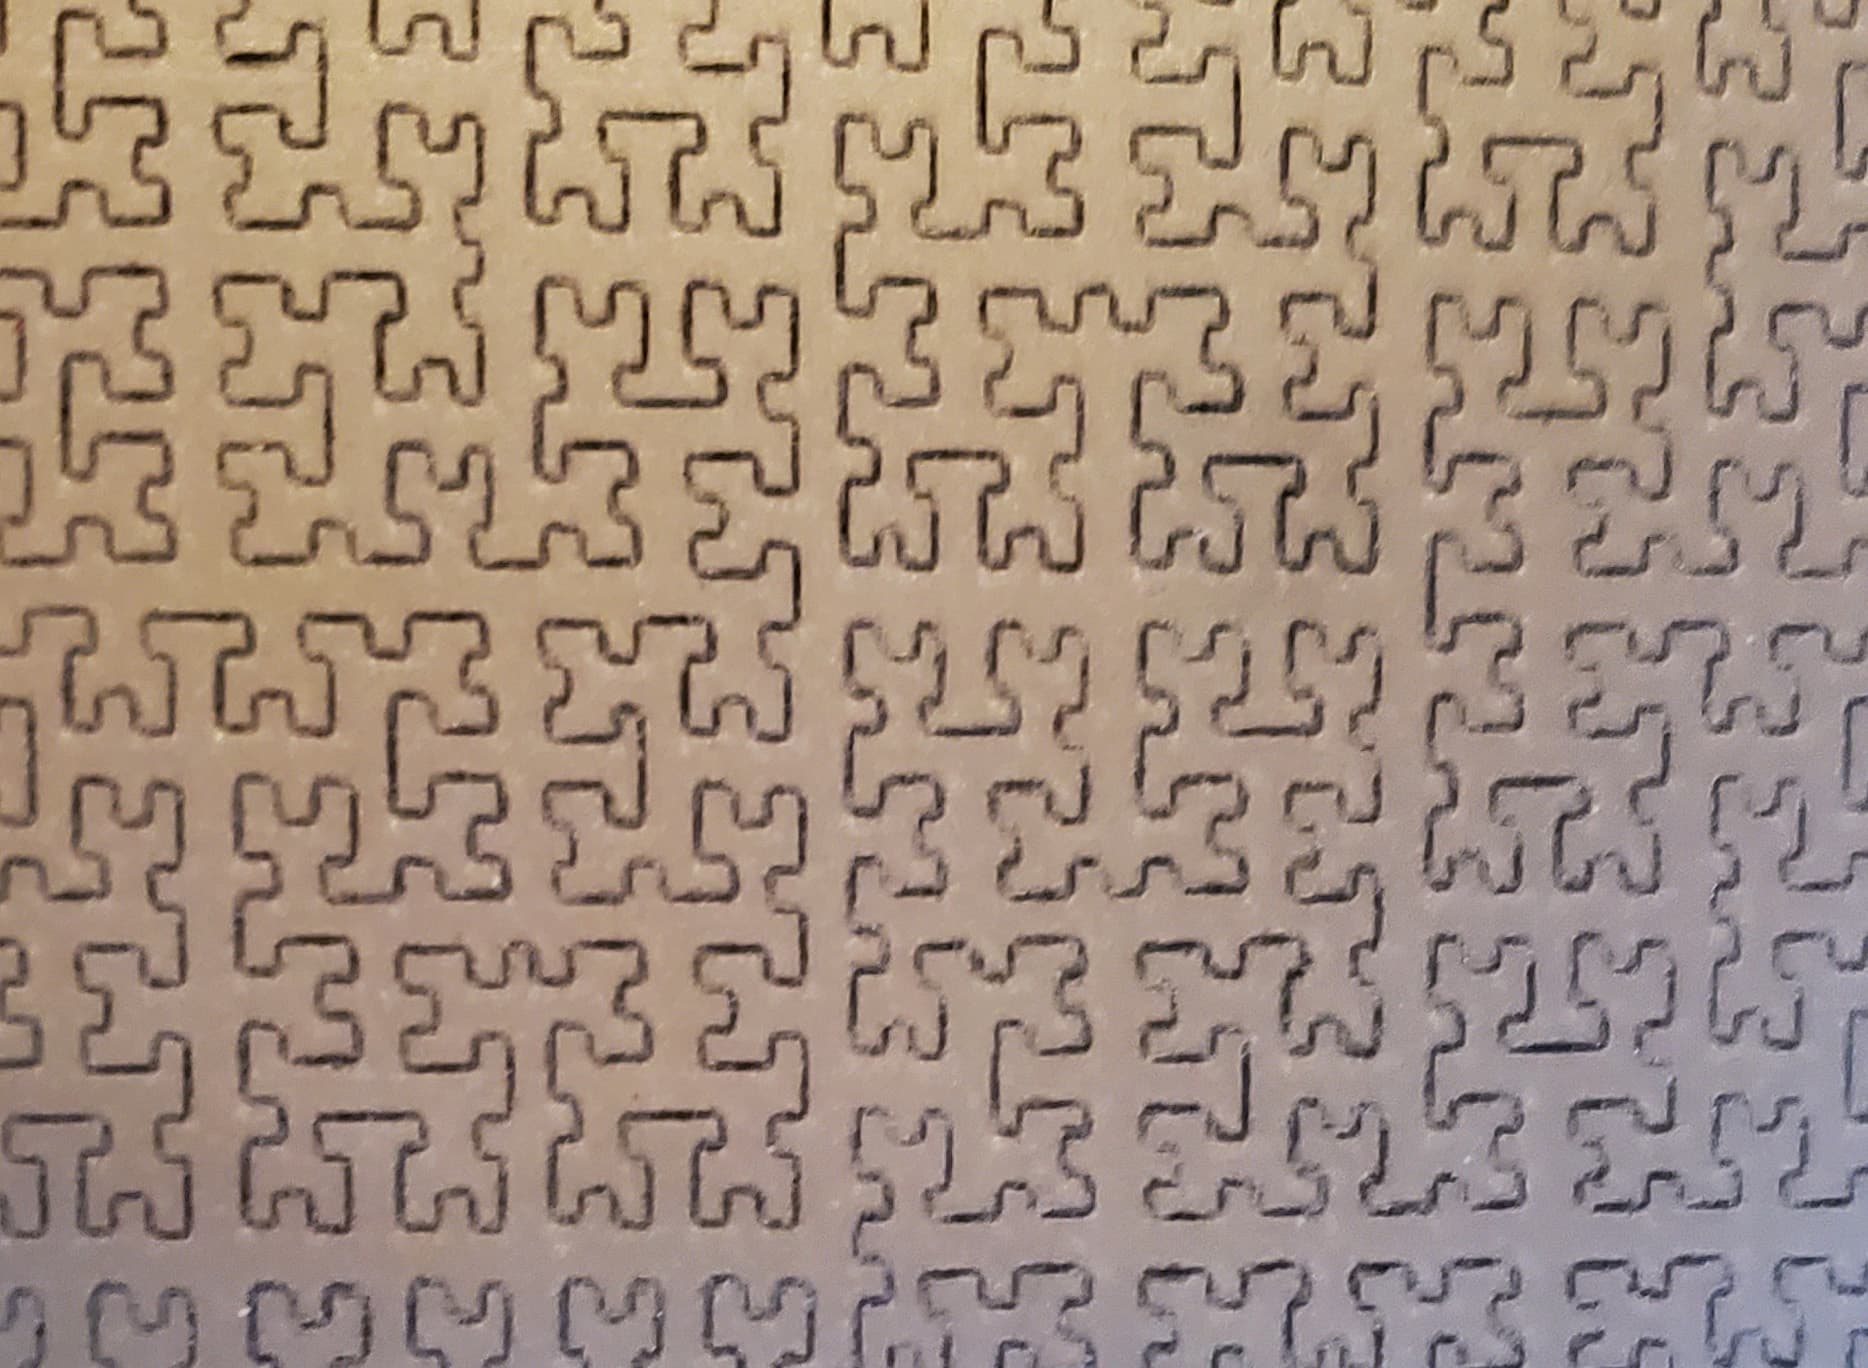
This second Hibert curve plot is also around 50mm high, but there is more geometry plotted in that space, so the lines are smaller than the previous Hibert curve.
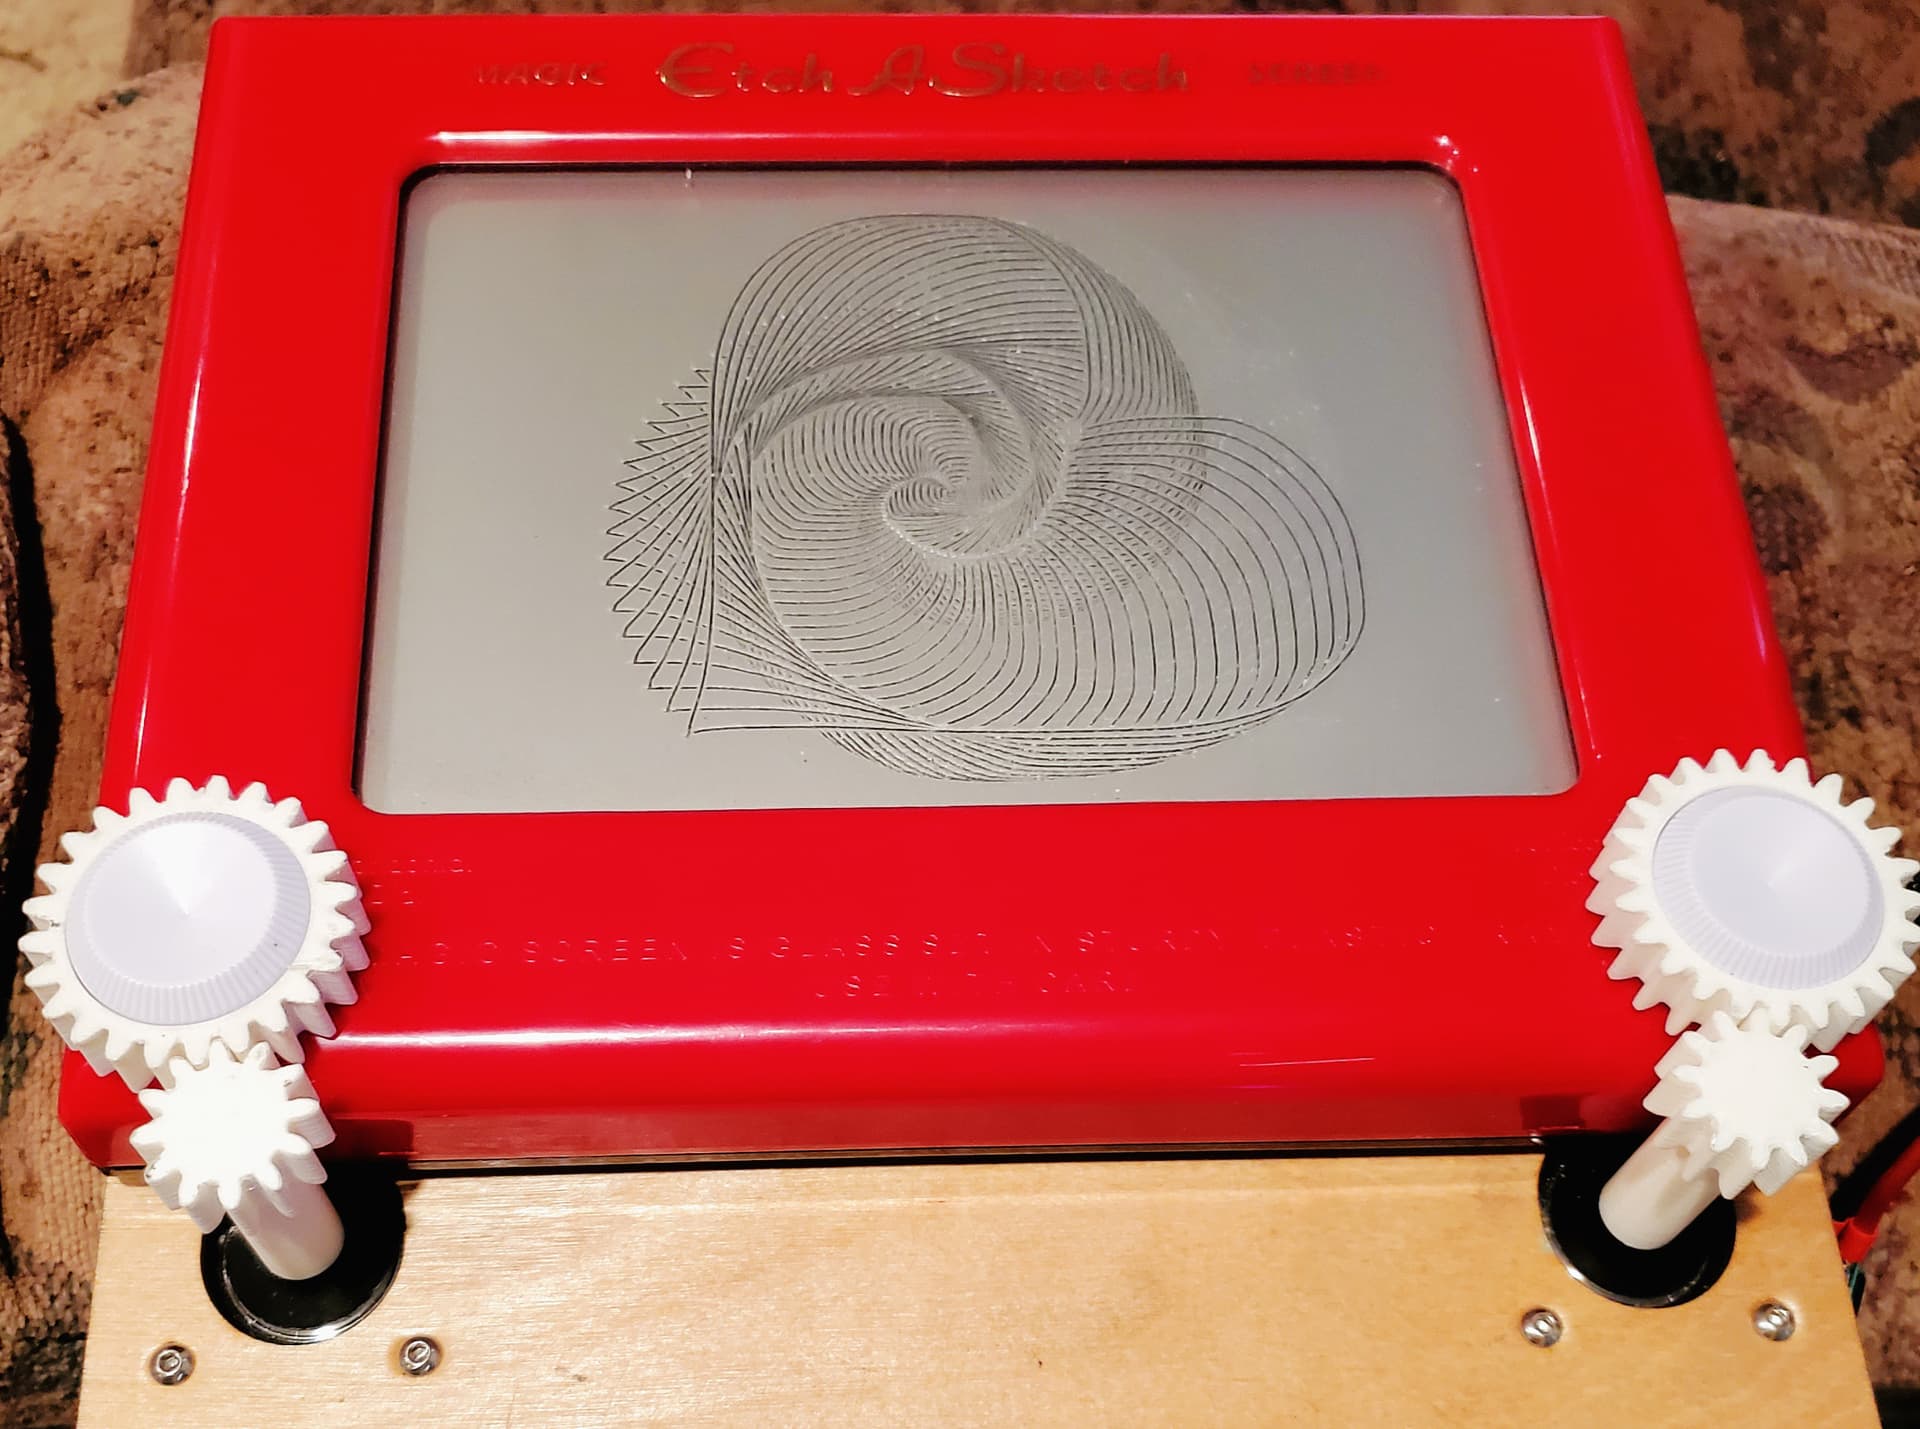
Having mitigated the backlash, I wanted to play with plotting curves from four sources: LightBurn, Sandify, Fusion 360, and parametric equations. Though I used other programs to create the curves, I primarily used LightBurn to generate the g-code. LightBurn just makes it easy to set the origin and scale the curve so I was sure I would not extend beyond the bounds of my Etch A Sketch.
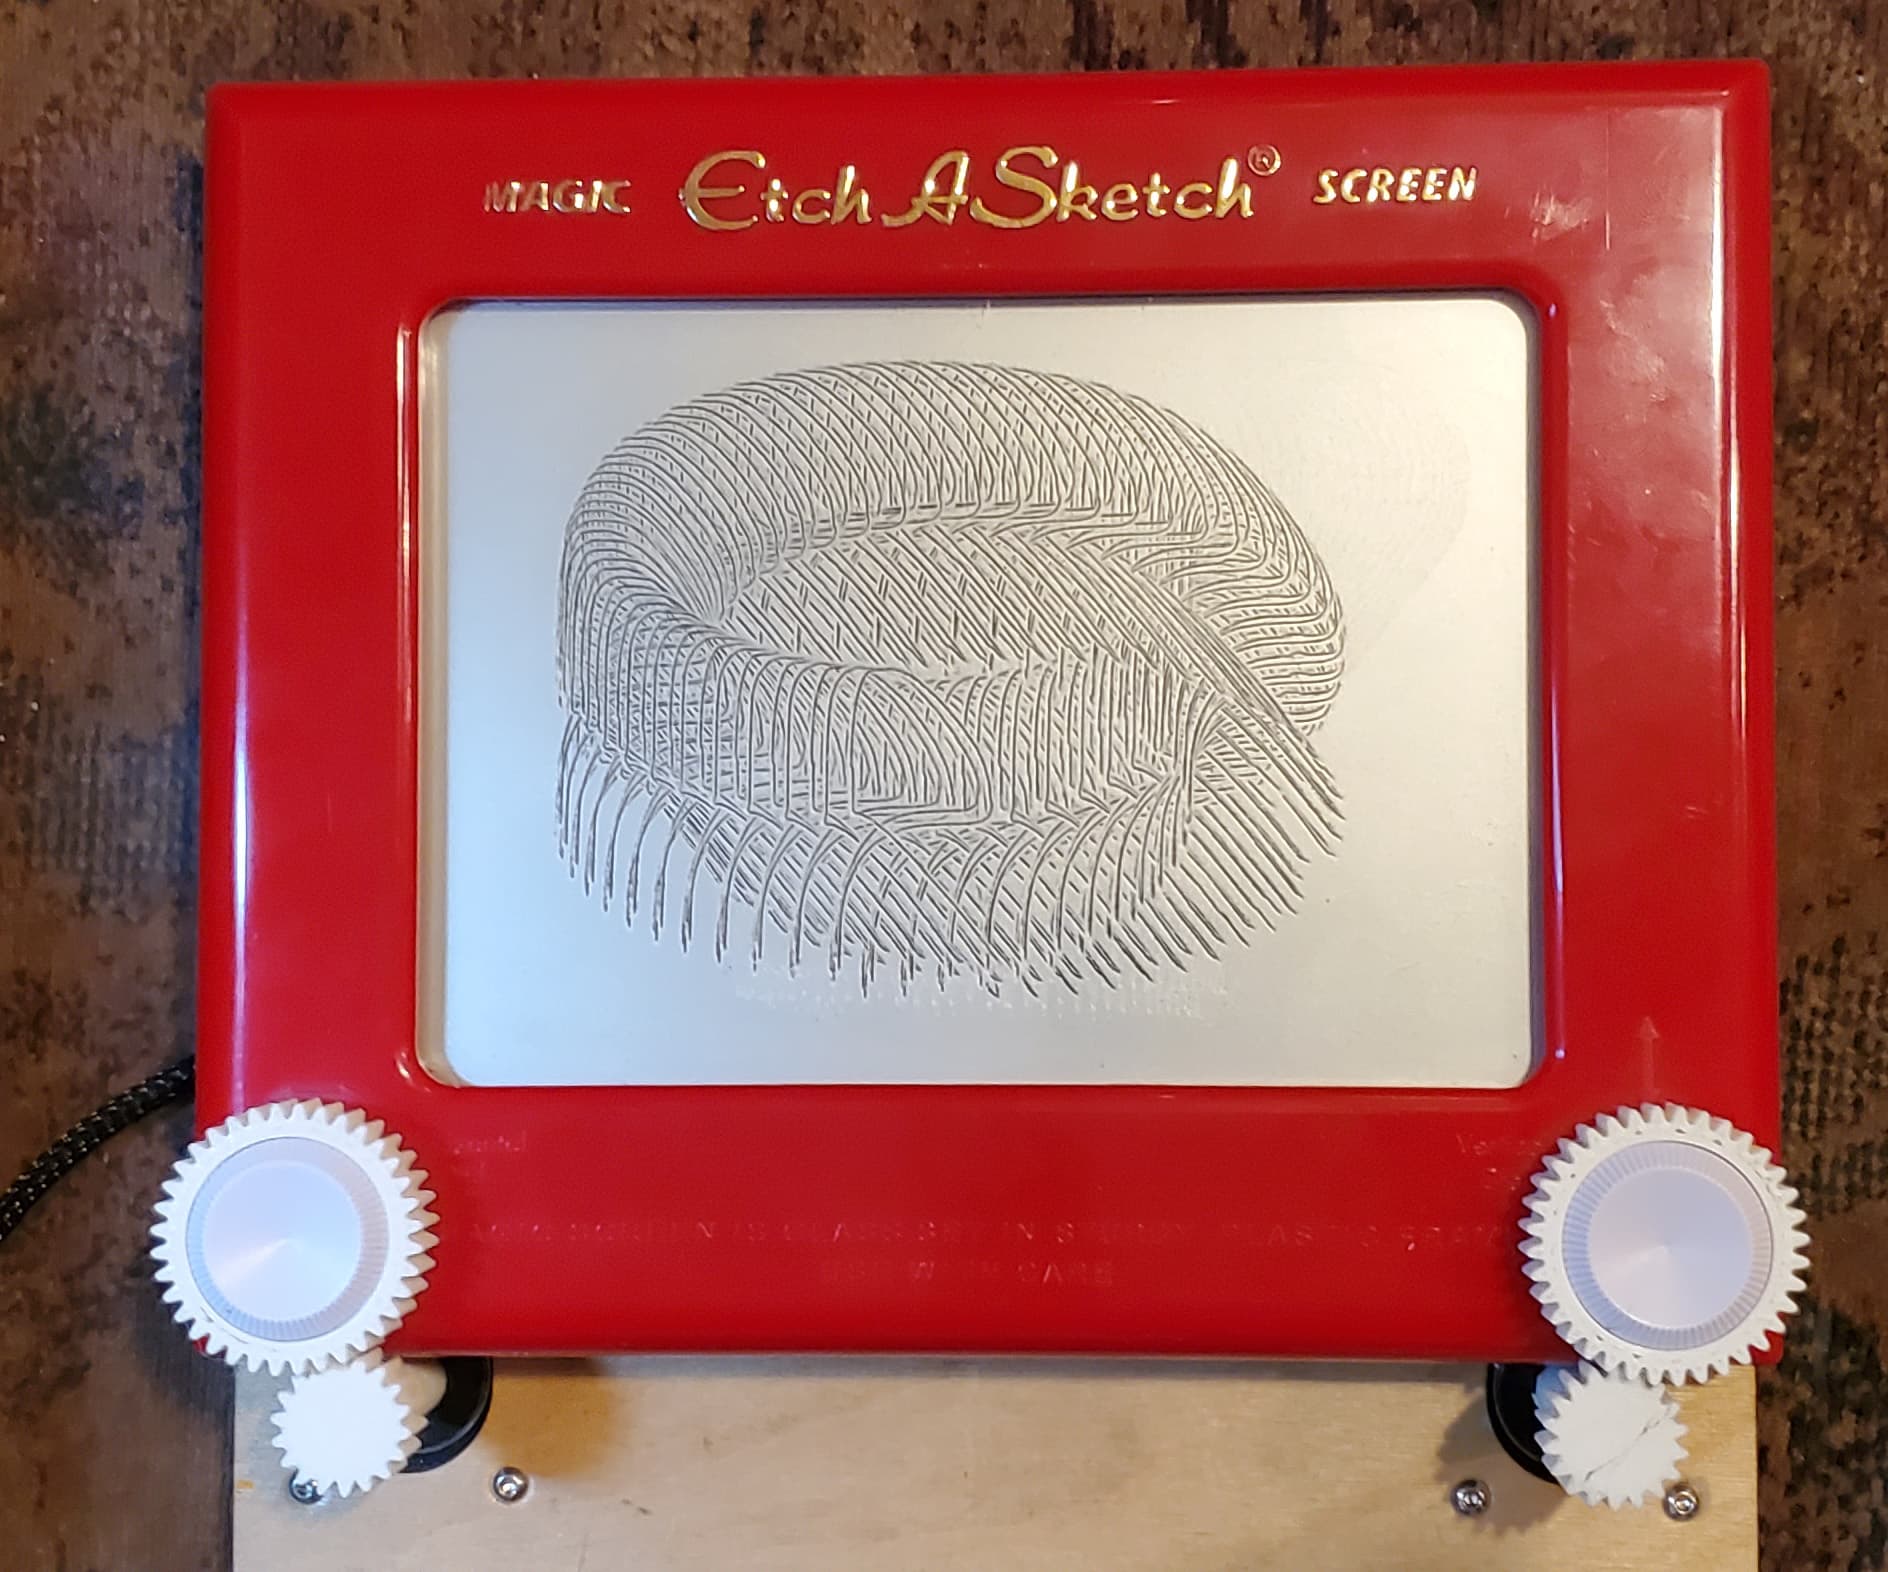
Here is one from LightBurn of a tribal cat. I used fill with a low line count. I modified the curves a bit so that the results would be less impacted by travel moves:

Next up was Sandify (thank you Jeff and others). Overall, it produced some of the best results:
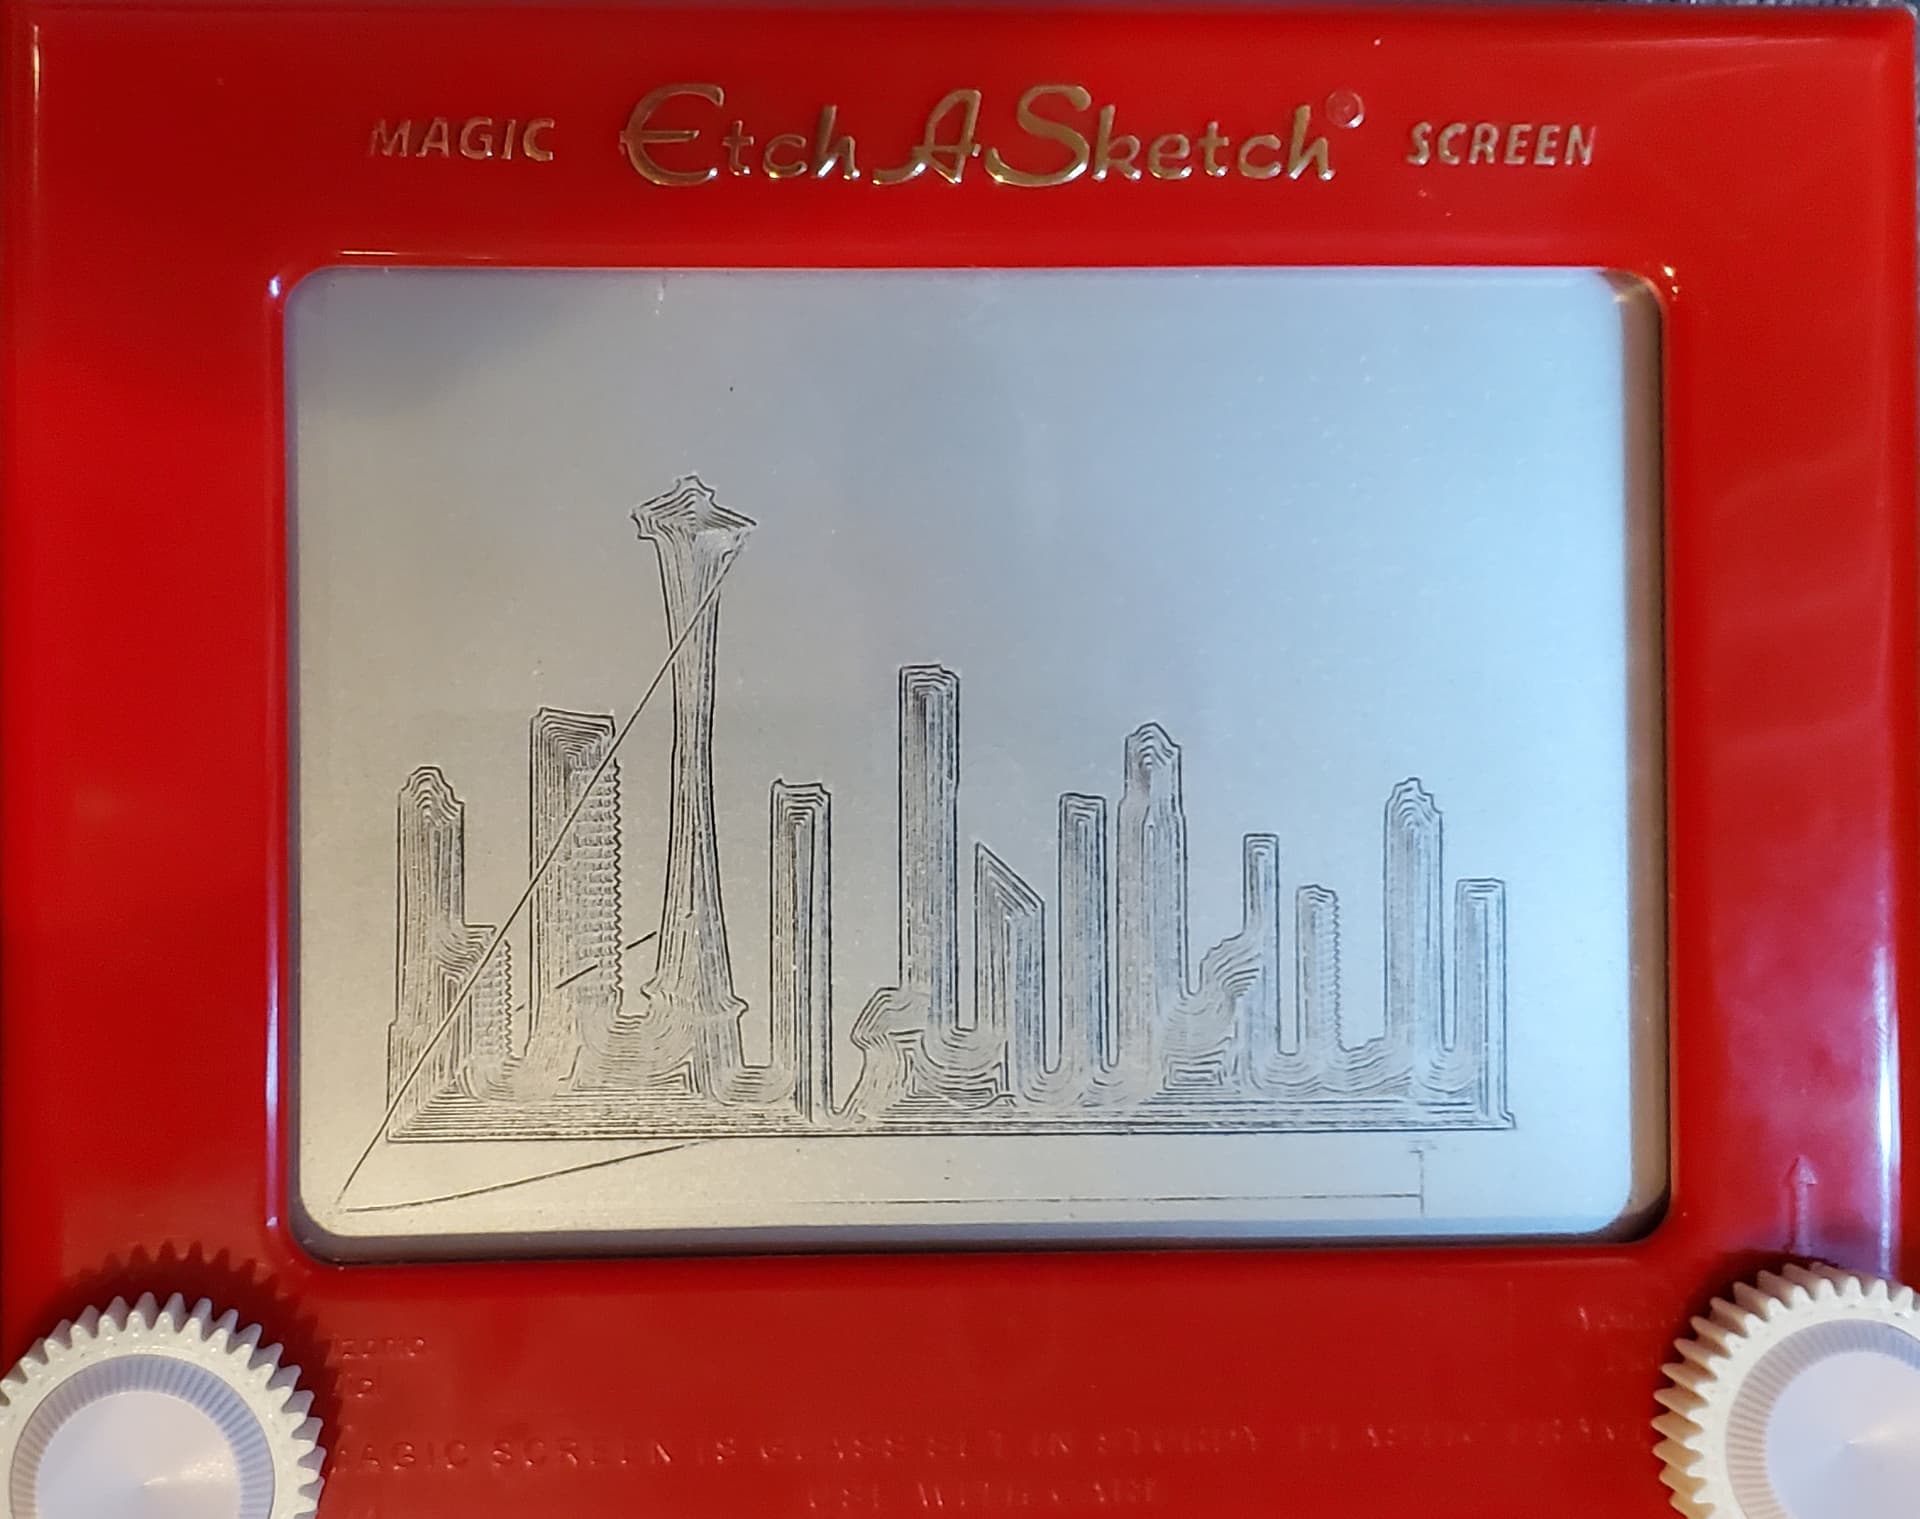
This was created in Fusion 360. It was produced by the Guffy/Don post processor and is a pocketing toolpath of a city silhouette.
In the process of exploring these kinds of paths in Fusion 360, I can across something I think is really cool, and something I’ve never even considered. There are DXF post processors for Fusion 360. If you go out to this web page, and search for ‘DXF’ a couple will appear. So, if I cared enough, I could have exported the skyline as a DXF and edited the travel moves to make them less apparent, or removed them so that I could engrave the toolpath with a laser and avoid the travel moves.
I did experiment with one of the DXF post processors with this skyline. The results opened just fine in InkScape, but LightBurn struggled, but if I saved the skyline from InkScape as SVG, LightBurn was able to open the SVG just fine.
Since this topic was started, I’ve wanted to play with parametric equations and a CNC. My though for the Etch-A-Sketch was to first use any of the online graphing calculators to find an equation I liked, and then to write a bit of code to generate an SVG. But just before I embarked on that path, I thought to search to see if any existing online calculators output SVG files…and I found one.. Here is a bit of text you can paste in if you want to try it:
a=Curve((cos(1 t)-cos^(3)(80 t),1 sin(80 t)-sin^(4)(80 t)),t,0, PI/2)
In addition, this calculator allows you to define variables that include sliders and custom ranges. You can then use these variables to replace both implicit and explicit constants in the parametric equation, providing the ability to quickly explore many graphs from one base equation.
The “Download As” item provides the mechanism for downloading an SVG. By default, the downloaded SVG file will include the background graph and the axes, but these can be easily removed in LightBurn (since they are rendered in different colors), or they can be turned off in the graphing calculator prior to exporting the SVG. Here is one plot from a parametric equation:
My original idea of where I thought this project might end up was an Etch-A-Sketch in a wooden frame that hung on the wall and would quietly plot interesting things much of the time. Between This Old Tony’s warnings about backlash increasing with use, and how loud it is (and I know I could quiet it some with TMC drivers), I think my experiment stops here…but I’m glad I went this far with the project.