Yup. You are correct, I stated the wrong thing above.
I indicated that the bit was 20mm wide vs 6.35 or whatever we use for quarter inch, and max depth of 15mm…
Yup. You are correct, I stated the wrong thing above.
I indicated that the bit was 20mm wide vs 6.35 or whatever we use for quarter inch, and max depth of 15mm…
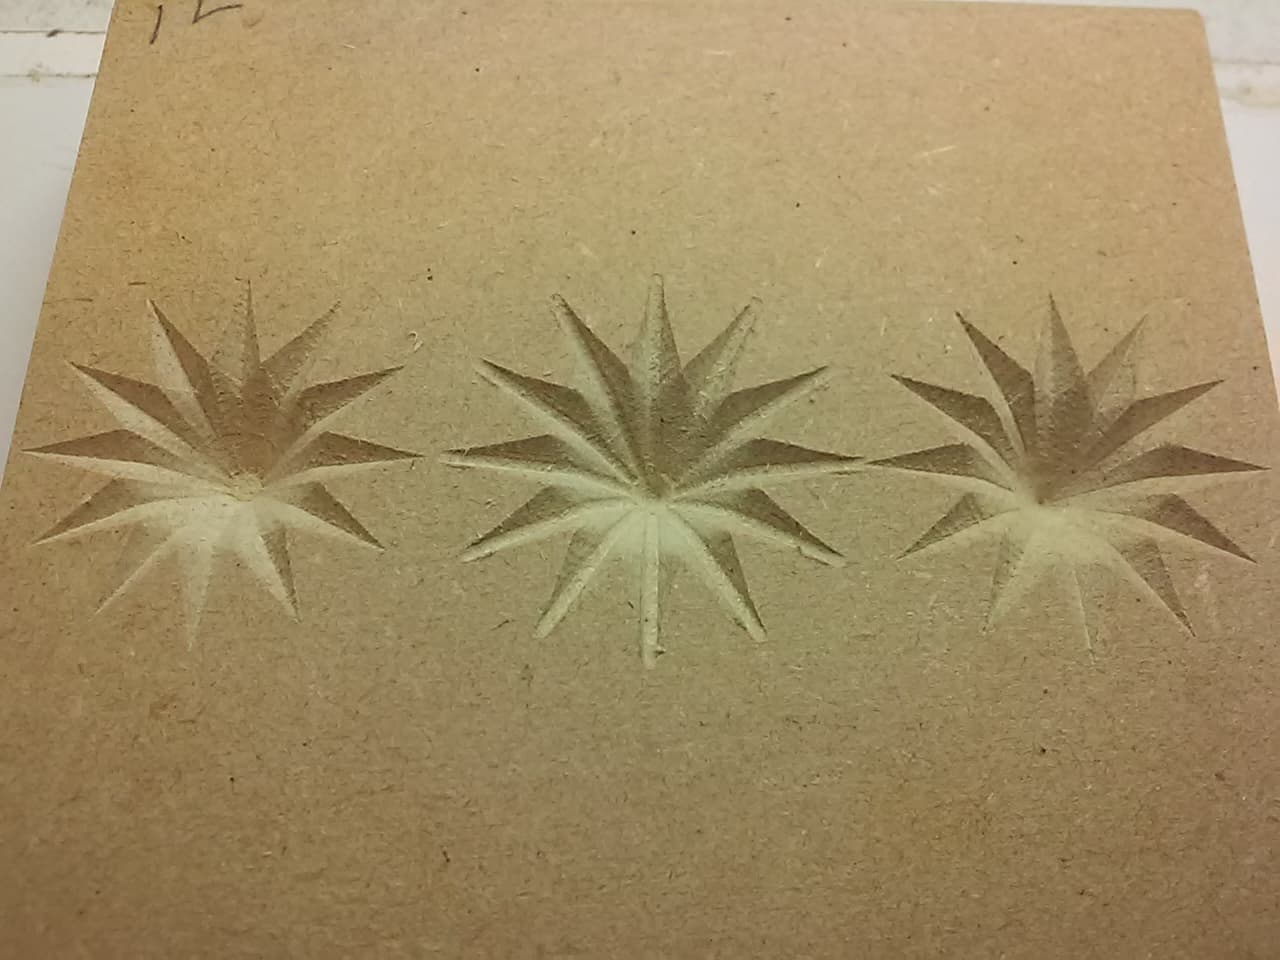
Thanks for posting this, what I’ve learned is that lying about the tool diameter can be a valid option when the distance between the perimeter cut lines never exceeds the real tool diameter. In this case the maximum distance is across the base of the star points, 3.68 for my example. Re-cutting it with a 4mm 90deg V-bit, with the tool diameter and max carve width set to 16 (right, 12 dia left), worked fine. The 4mm ones are crisper because they were done with a higher quality V-bit (solid VS brazed carbide).
I’m waiting for my new bits to arrive today…..various widths of the 90-degree v-bit plus a 1” carbide insert v-bit. Should be here by the time I return from dinner meeting… I’m postulating that finding the correct width to carve the star will give me more control over the depth in the center, thinking the widest bit will leave behind the most shallow carve.
Had to brush up on some trig. Initially I thought I’d end up with roughly a 3/8 deep center, then recalculating correctly ends up being more like 5/8” deep when using a 1/2 inch wide 90-degree v-bit give the 1.2” point to point star… so to test which is correct, I have to wait for the bits to arrive. ![]()
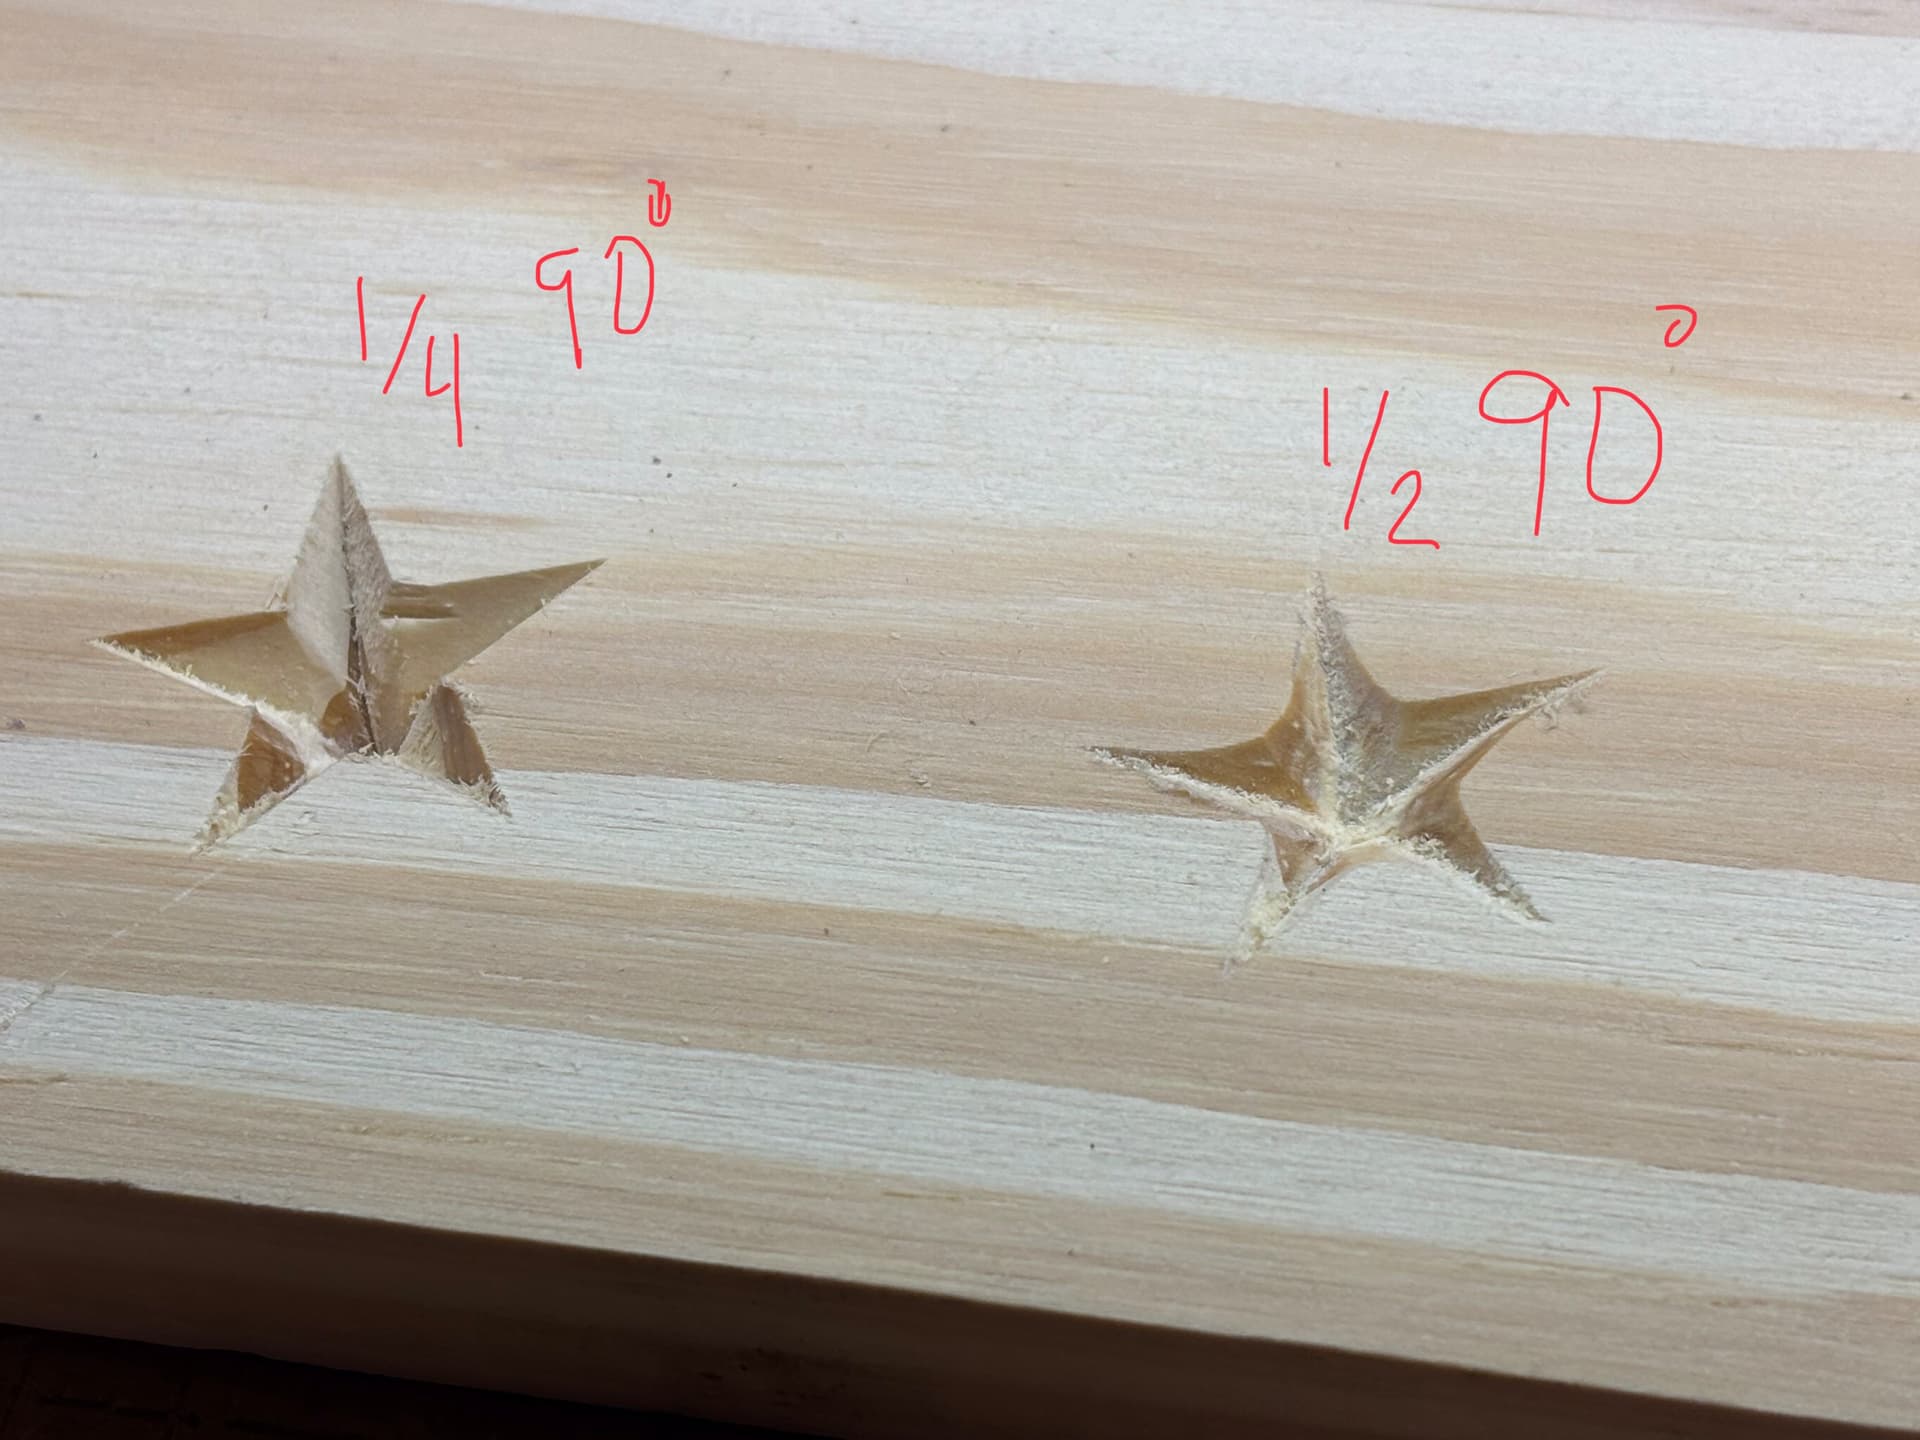
Did several tests with the 1/2” wide 90* v-bit… close but not as crisp at the 1/4” v-bit. Maybe 3/8 is the ticket… ![]()
The center was not as deep but the edges were wonky.
Something is wrong with the setup on that 1/2" 90deg V-bit, I’m guessing Depth is not at the default Automatic and/or Width is not >= tool diameter… or there’s a tool/setting angle mismatch… Wasn’t that 1/4” 90deg labeled one done with a 60deg V-bit?
Using the default settings for the 1/2 V-bit, rotate (up arrow) the Preview to the side view to see if Max depth is adequate. The only time the Depth setting comes into play is if you want to cut less than Max depth (e.g. w/ that 1” V-bit). The hack to increase depth is to lie and increase tool diameter (Width >= tool dia).
To rephrase the no hack method:
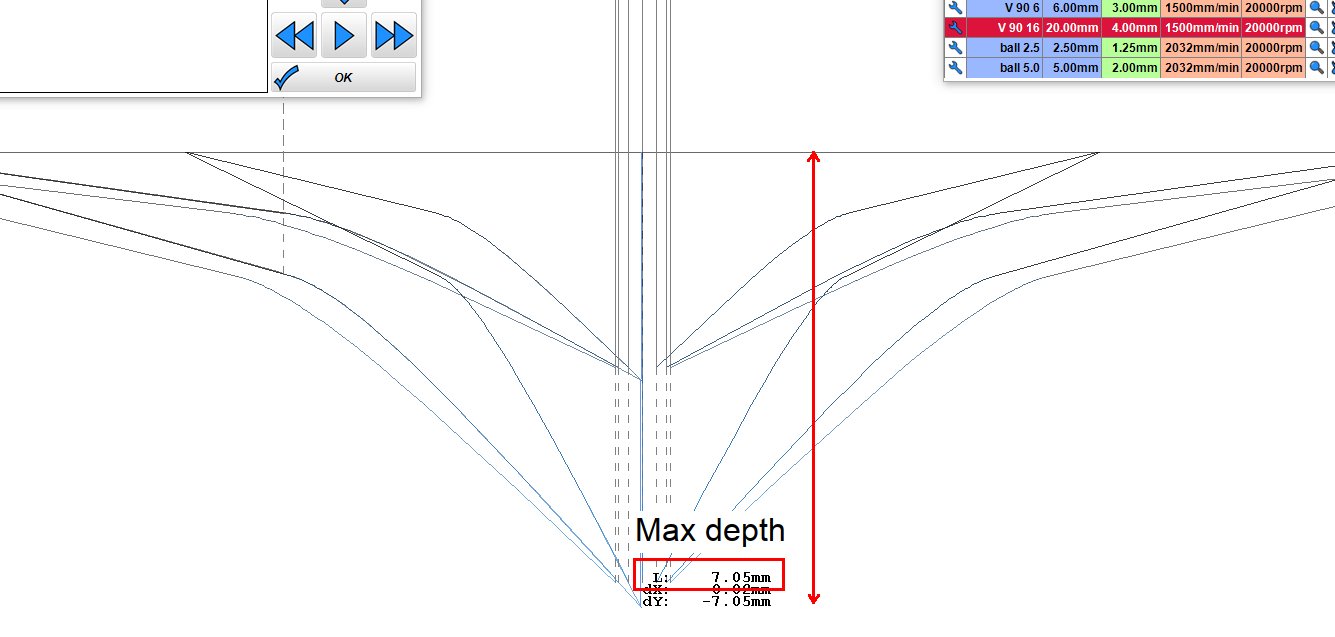
(whatever is needed to get a pointy full depth path). Rotate the Preview to the side view and measure Max depth (middle click and drag).
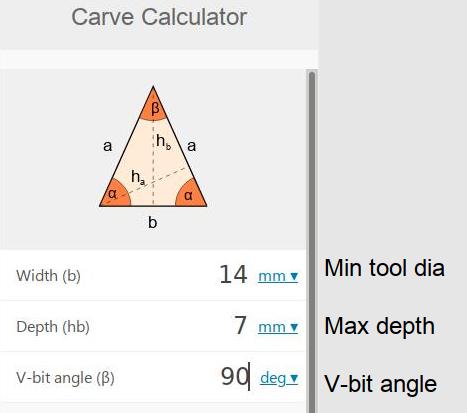
Enter Max depth and V-bit angle in the calculator to get the minimum tool diameter required to cut to Max depth (without changing any of the default settings).
If the Width/tool diameter is changed to 12.7 (1/2), Max depth = 6.35 and there will be a small flat (left example in my last image). Using the diameter hack, a 12.7 or 6.35 V-bit would cut the same full depth shape if their diameter was set to (>=) 14 (center w/ 16mm and right w/ 4mm examples in my last image).
Was actually a 90* v-bit, thanks for catching that I’ve corrected my original post