Yep! I have a 2.4m a 1.5 and a 900mm version - they are at least thirty years old and completely manky but still great. You can do the same with a router to make dadoes too.
BTW here’s a case for some really neat slightly undersized dogbones - you can set Kiri:moto up to do this I believe.
That’s pretty much what I did for the 18V metal-saw at work. I made a cheap and cheerful tracksaw track for it out of a bunch of scraps. 5mm ply for the saw to slide along, a chunk of 12mm ply as the straight edge. First cut with the saw calibrates the cut line and away you go. Worked mint!
Have you thought about adding some electric heating to it? That’s what I’m looking at doing for our cats at the moment, although mostly to try entice them to sleep somewhere that isn’t on the bed…
My approach is going to be an aluminium plate with some encased power resistors running off a ~20W 12V power supply and an el-cheapo digital temperature controller. Wouldn’t need much power to make it warm. Could probably run from a couple of old car batteries, a single solar panel and a cheap DC solar controller without too much hassle!
I found some ready-made heated beds on amazon for 30-40$. It’s quite a bit simpler and probably yields less chance of burning the cat alive
Heating pads for reptiles is an option too
I’ll start with a normal pillow, 2 cats in a well insulated box should provide their own heat, but I keep an option on this depending on the temperature…
I went the other way on that, most of the cheap ones I wouldn’t trust and are mains powered. The ‘good’ ones here are hundreds of $ and not big enough. I’m damn certain I could make something significantly safer than a commercial product, mostly by using somewhat more expensive monolithic resistors rather than relying on nichrome wire or heating trace wire etc.
For a warmer, look at the panel style chicken warmers. They’re fire safe and fairly cheap. Their default regulated temperature is a bit hi, but you can easily put a small thermostat on them with an external probe to turn it on/off and regulate your own temperature.
For the design, I’d consider putting a real cat door instead of just an opening. Something with a magnetic type flap to help keep it closed and then put a vent near the top of the box. Otherwise, you may be building a snake box.
Nice, the sureflap works well in our experience, although we don’t use it with our current cats. There’s a model now that logs coming and going, too, I think.
It works pretty well indeed, We’ve been using it for the past 5 years…
The best part about it is that it works with the chip that’s implanted under you pet’s skin, no collar to be lost…
yup… we have 3 other catstrying to invade our garden
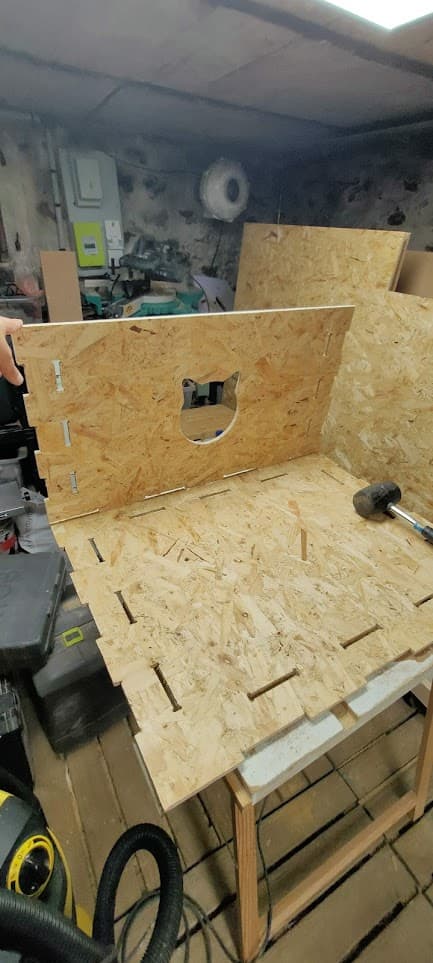
Hence the small window in the front so that my cats can take a look before going out too…
The box joint plugin in Fusion 360 modifies the bodies, not the original sketch. After generating the joints, the changes are applied directly to the solid model. If you’re planning to use ESTLcam, you can still export a DXF, but you’d need to create a new sketch from the updated body edges first.
If you prefer, you can also export the body as an STL and treat it like a 3D object in your CAM, but since it’s essentially a 2D profile, working from a DXF is usually simpler and keeps the workflow cleaner.
Oh. We might have to look in to that then. I’ve been considering putting a cat door on the shop for the cats in the winter. Most nights they’re inside the house when it gets dark, but the one cat still tries to stay outside sometimes. Plus it’d allow my mousers access to the inside of the shop to do some work.
Nice. We’ve had the original for about 15 years now, although it isn’t used at our current house any more because our cats are indoor only. I’ve thought about getting the connect and using it purely to control access to the deck for them and to log their in and out times etc.
Highly recommend the sureflap, ours got 10 years of use and worked well, I’d bet it’d still work well now. We also have the microchip sensing cat feeders from them so that our 2 cats can be fed the correct amounts each as one’s a bit of a scavenger, those work great as well.
Thanks for the info I have a garage cat right now when we first. Met i though she was a skunk in the corner but now getting comfortable with me. Thinking of the flap to keep the coons out but they may fit too. In the winter the more the merrier?
Also re-defined all my CAM paths as I messed up the orientation, and removed “Ramp” option as it added too much machining time
Now we’re looking at 01h24 machinig time, of wich 01h10 is remaining