I could see that.
I did another dry run after setting the $1=255 and seems to have no play in the vertical now. I will do a burn test today & run it twice to see if it overlays exactly. I created the elliptical spiral with sandify.

1 Like
I was SO waiting for the laser to turn on and the cat to start chasing it!
1 Like
Cats and lasers. Computer Numeric Control Cat Toy.
1 Like
I don’t have laser glasses for the cat so can’t run the laser with her around. Her name is Smokey.
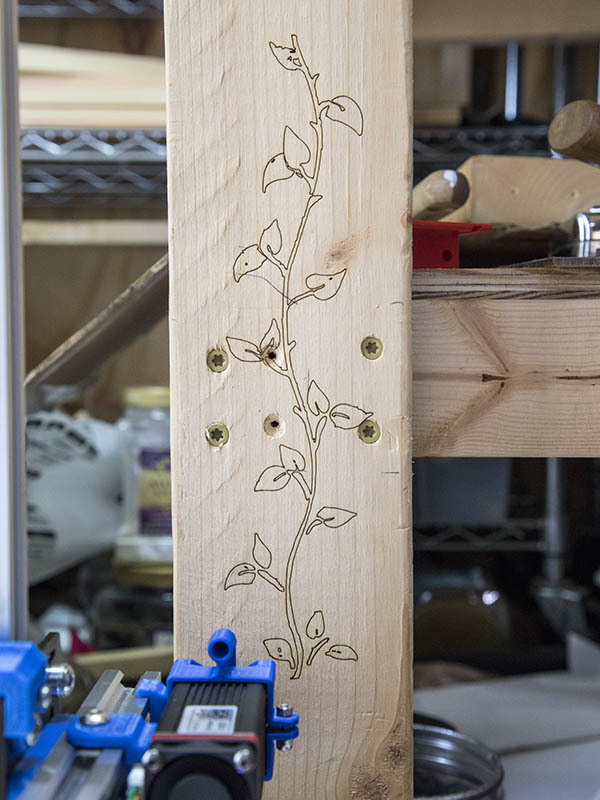
I did a burn of the leg for my CNC table & ran it twice & this photo was taken after the 2nd burn. I don’t see any overlap in the 2 burns. Don’t think I could ask for any better results on the first vertical burn test.
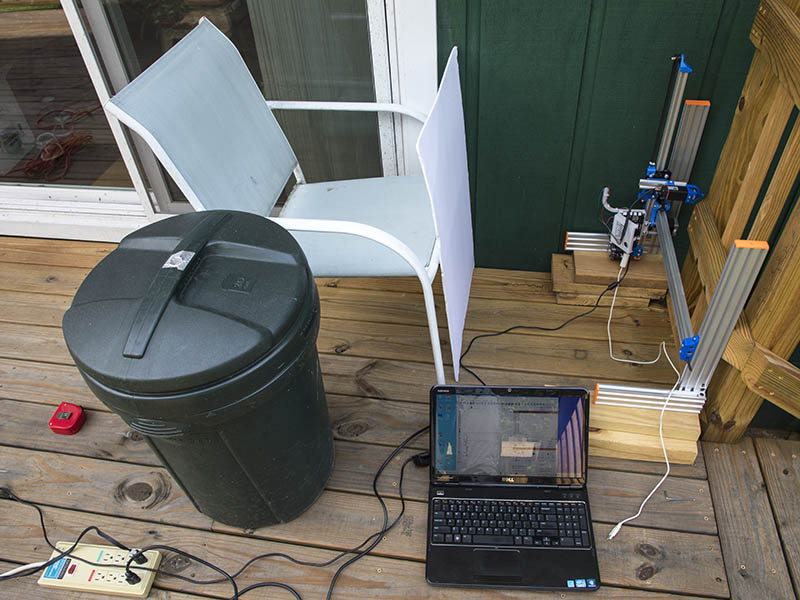
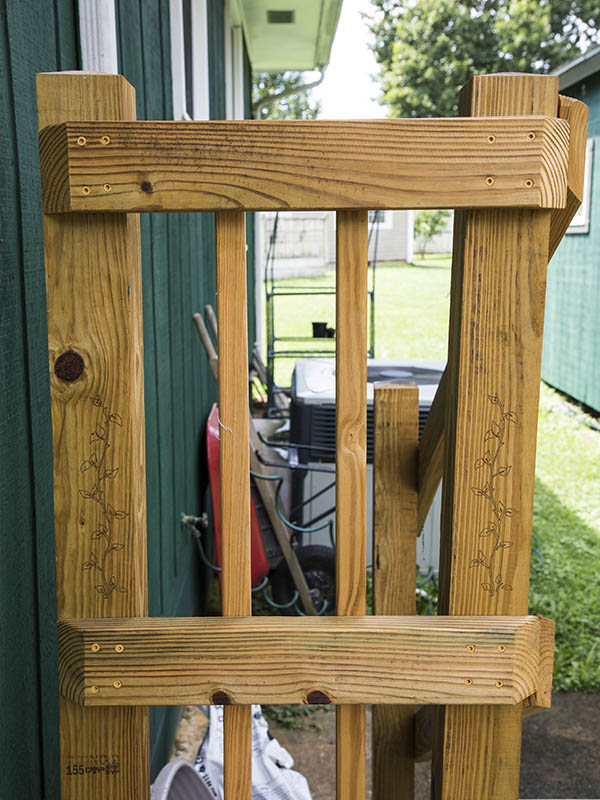
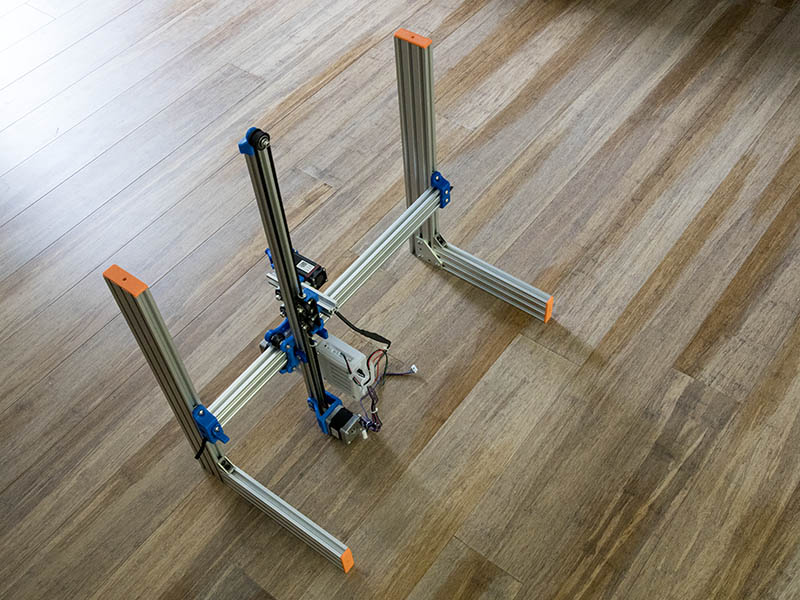
Since that worked well, I went on to burn a couple of posts on the deck. When I did the post closest to the house, I moved the leg closest to the inline with the 2060x500mm to be able to be able to move the machine close enough to house to get the design fully on the 4x4. Could also put the laser carriage on backwards if you really needed more space, but that is more trouble.
Here is what the updated design looks like. I am pretty happy with this design now.
11 Likes
While running these vertical burns, don’t know if it is my imagination, but it seems that smoke gets out of the way easier than when burning straight down.
1 Like
Hmmm. That makes a lot of sense. I wonder how that compares to air assist. And I wonder if it is possible to get better results with vertical and air assist.
Next step, a hobbit door burned into the wall…
2 Likes
Mark over at openbuilds gave me another idea for burning mugs or bottles. Use a turntable instead of the lathe type devices seen for these type of burns on horizontal engravers. Something along the lines of this design, Ciclop 3D Scanner by BQEducacion - Thingiverse
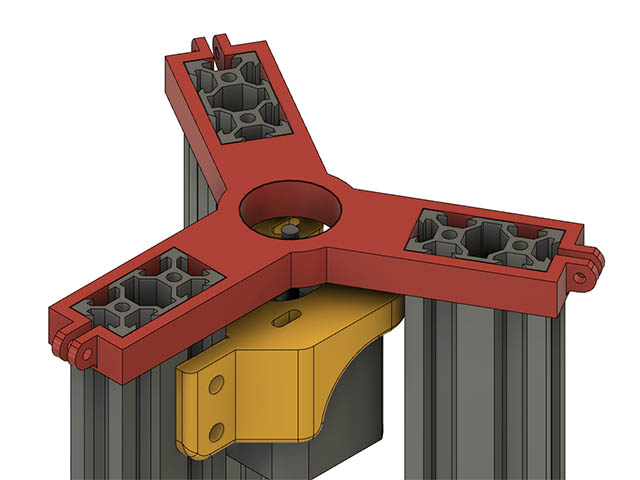
My work area needs to be about 10" above the ground, so I am pursuing a little different method using 3 -2040x250mm V-Slot & turntable above. The motor will have a coupler with a M8 hex head bolt with the head attached to the turntable & a bearing between table & coupling. I am not going to make the turntable very big, so hopefully it will not have any wobble. Here is where I am currently going with this. 2020s might be better to use, but 2040s is what I have. This is probably too complicated, so might just start with the turntable & go from there.
Any thoughts on this idea?
1 Like
This might be a good starting point. Printed Arduino Turntable Takes Objects For A Spin | Hackaday
or this one. Photo or Video Turntable - Motorized - 608 Bearing UNI.by Inhibit | seo.market.title-append | PrusaPrinters
I used the 2nd link in my previous message as a guide, but am using a pancake nema17 from zyltech. The bolt & bearing setup is similar to that used on the MPCNC. The shaft of the motor has a slotted bracket with an M3 screw. I am not yet sure how to secure the motor to the base yet. Top turntable is 126mm in diameter. I was trying to get that as small a diameter as possible so the laser does not have to be extended as far.

2 Likes
I got the diameter down to 110mm & have a wrap around bracket for motor to use 2 motor holes. I added some 2mm holes spaced 1/2" apart so I could center object. Looks like this should work.
1 Like
Actually, since the smoke does have mass, gravity will affect it.
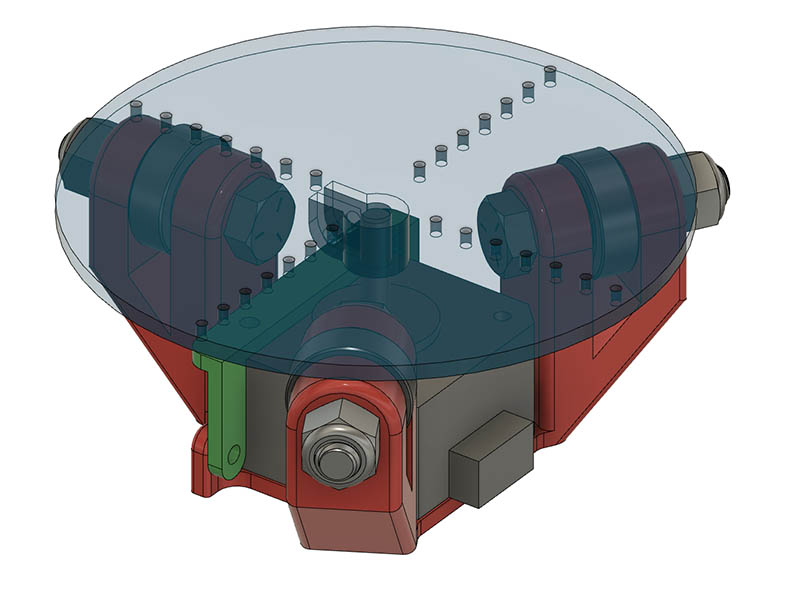
I went about as minimal as possible using 608-2RS bearings. I was able to make it a lot shorter by mounting the motor below base, so everything rests on the bottom of motor. I got the diameter of the turntable down to 100mm. The 2mm holes on the top are actually spaced 1/4" apart & not 1/2".
I will print this design out & see how it feels. Now I just need to figure out how to get the rotation axis to work. With lightburn, looks like it should be straight forward. I have an unused z-axis on the mana board, so should be able to use that.
1 Like
It is much more generic to mount to the face of the motor. That looks like a great upgrade. Even if you still need to mount a base to the bottom of the motor, at least the length of the motor won’t matter anymore.
Yep, that was my thought when this idea came to me this morning. I was trying to make it part of the design, but like you said it doesn’t limit you to motor depth & I could add a bracket to 2 of the Motor mount screw holes. Simpler is usually better.
1 Like
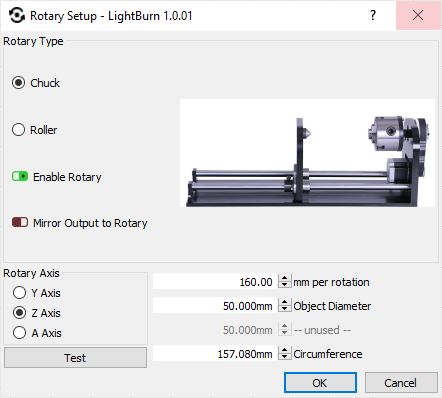
Looks like I am in new territory with this rotary turntable axis as far as laser burning goes anyway. Might be some trial & error setting it up with lightburn as there is not a turntable option. The mm per rotation is probably 160 with the DRV8825 since I have the motor directly connected to the turntable top. I probably need to set it to Chuck style which seems the most similar to the turntable style.
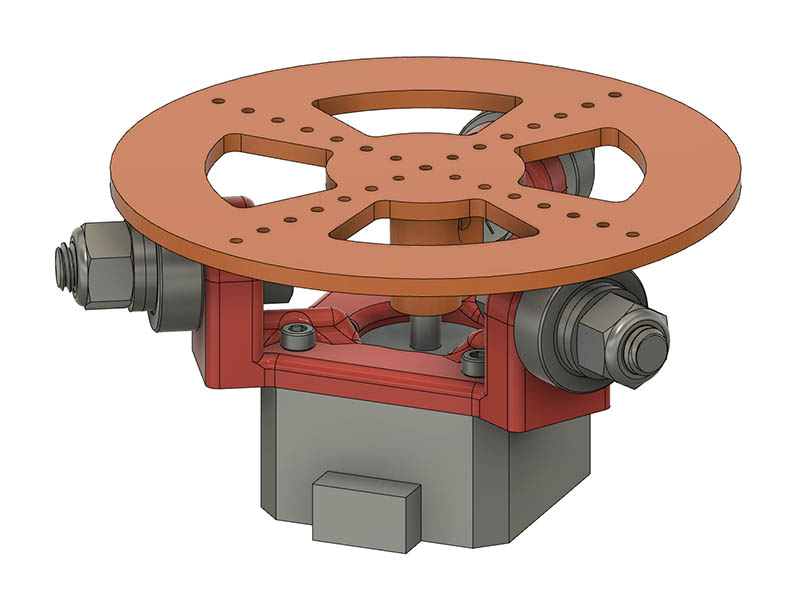
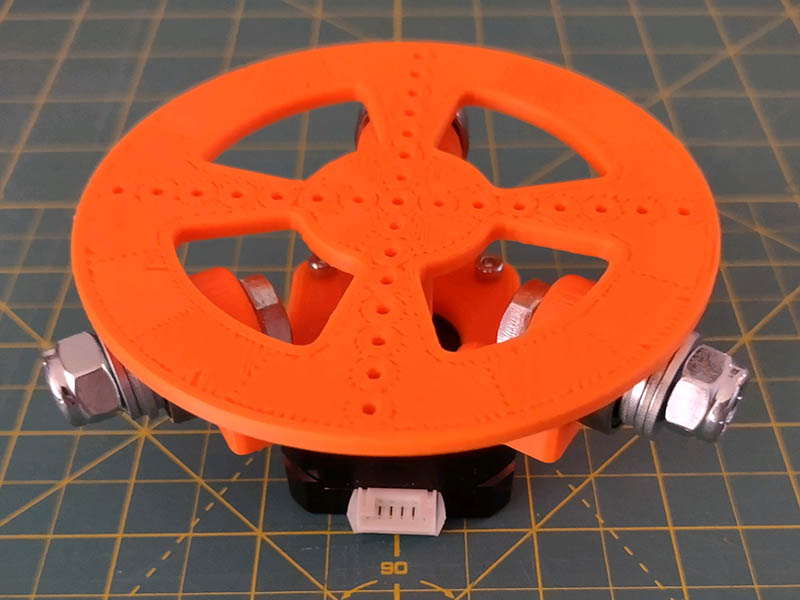
Here is how my print came out. I might add some chamfers to bottom of the 3 bearing mounts, I used 5/16"x1.25" bolts & could use 1" long bolts if I decrease that wall thickness a little. Unlike other parts, this does not need a really strong structure.
1 Like
If your cylinder is 100mm radius, and you have a 200 step motor and 1/32 microstepping, your steps/mm are:
200 steps / rotation * 32 microsteps / step * 1 rotation / (2pi100mm)
= 10.18 microsteps / mm.
Then, you just plug that motor into Y, and set your steps/mm. What lightburn doesn’t know, won’t hurt it.
If you did that on a fixed 100mm radius cylinder, A 2cm square would end up wrapping around, and having lengths of 2cm on each side. If you did something not uniform, like a bat, then the wider parts would stretch out, and the skinnier parts would shrink, but only in the circular dimension, not the linear dimension. You could try this by wrapping a tin can in some paper, or something.
You will need to be able to center it pretty well. I have no idea how eccentric you can go. I imagine it will depend on the depth of focus that is ok.
Thanks for the info. I am so used to setting steps for belts, I forgot this was more similar to z-axis lead screws. I am playing with the settings this morning. Will let you know what settings work.
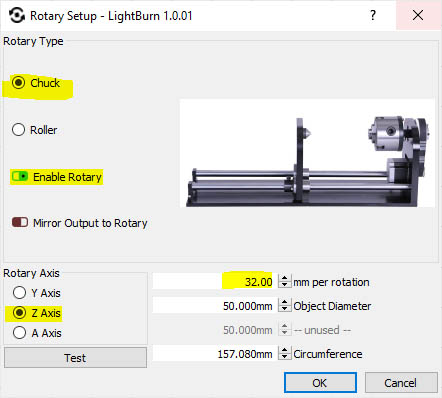
Turned out to be simpler than that formula. In grbl settings, I set:
$102=200.000 ;Z-axis steps per millimeter
In Lightburn I set mm per rotation to 32 which makes sense with the DRV8825 drivers. I did do a trial & error here, starting at 10mm, 20, 30, 35 & then 32. I have the rotary turntable plugged into the Z-axis. The diameter of the object will change with each object I use. Looks like I will also have to swap my Y & X axis when running this turntable since Lightburn uses X axis for the other axis & there does not seem to be a place to change that.
2 Likes