My Burly has been a great machine but I moved earlier this year which meant I had to disassemble it. Now that my new shop is starting to come together, I was trying to decide if it would be worth it to upgrade to the Primo since I have to rebuild it anyway. I recently found out that I can get free 1 in tube from work so that made up my mind since my burly was with conduit.
Right now I’m starting the part collecting and part printing. I’m trying to decide what material to print this out of. I don’t really love the brittleness of PLA, I used PLA+ on my Burly, but I want as stiff of a machine as I can get. I decided to try some cheap CF filled PETG to see if it’s stiffer than PLA. I’m going to test various filaments including PLA, PLA+, ABS, PETG, and CF PETG by printing bars in each and hanging a weight and seeing how much they deflect. If the CF PETG performs well that that’s what I will go with.
As for components, does anyone have a list of what is needed to upgrade the Burly to Primo? I know there used to be a listing for the upgrade but now that it’s gone I’m hoping someone has a list so I don’t have to inventory what I have to see what extra is needed.
If you look at the same manufacture’s specs for all of those you will get a pretty good estimation of what to expect. Without needing to buy them all and test. Might be able to narrow it down to two.
My printing has begun. I liked the added stiffness of the CF PETG (I was worried it wouldn’t be very stiff because it was so cheap) so now starts the long journey of printing everything. I’m not in a big rush and I’ve been reading around about how layer height and nozzle diameter changes the strength. So, I’m going to print these with a 0.6mm nozzle at 0.15 layer height. It’s definitely going to take some more time but that layer height also makes them look really good. I have also ordered all the extra components I need to convert from my Burly. All I have left to buy is the router now. I’m hoping it will go on sale as Black Friday is coming up.
For anyone wondering, I did the stiffness test on a couple materials I had along with the cheaper CF PETG I found. Here are the results I found.
I was surprised how much more deflection standard PETG has vs ABS since I saw another study show them pretty close. This also showed the cheap CF PETG as stiffer than my PLA. I also thought it was interesting that my PLA+ seemed to be the same stiffness at the standard PLA even though it is less brittle.
Brands:
PLA: Tidy Cable (It was just some cheap amazon stuff they don’t even sell anymore)
PLA+: Inland (from Microcenter) [$19]
ABS: Unknown scraps I got from work
PETG: Inland [$21]
PC PETG: IEMAI [$28]
Thanks for sharing that is super cool to see! I actually expected a larger gap for ABS. The last PLA+ I tried was clearly more flexible than regular PLA. Maybe I need to try again.
Remember now, that CF will bore out the nozzle as it prints. You will be doing a lot of printing for the set so you might want to start looking into a harder nozzle. I don’t remember the exact times it took but I think CNC Kitchen showed some pretty low numbers before it was noticeable.
That doesn’t sound right to me. I can’t print below 0.2mm with my 0.5mm nozzle. I use 0.37mm and am happy with it. I highly suggest doing Teaching tech’s max flow test as well. It really surprised me. I am limited in speed by the flow I can get, and then cooling on smaller parts.
Last bit of advice test to make sure you printer is printing square in all directions. XY YZ XZ. Accurate parts make for an easy build.
You’re welcome. I was curious since I see so many people claim one thing or another so I figured why not run a simple test. I think PLA+ can vary a lot depending on the brand. I don’t think there is a standard for what that +includes. I have another brand PLA+ so maybe after I do all this printing I may see how it compares.
Yup, I bought a hardened nozzle when I got this filament but thanks for making sure.
Interesting. One of the strength studies said they printed as low as 0.1 with a 0.6 nozzle and 0.15 with a 0.8 nozzle. Does your machine not allow it or did you have problems when you printed below that? I’m printing on a Prusa MK3S and I think 0.15 was the smallest of the standard options when I picked the 0.6 nozzle.
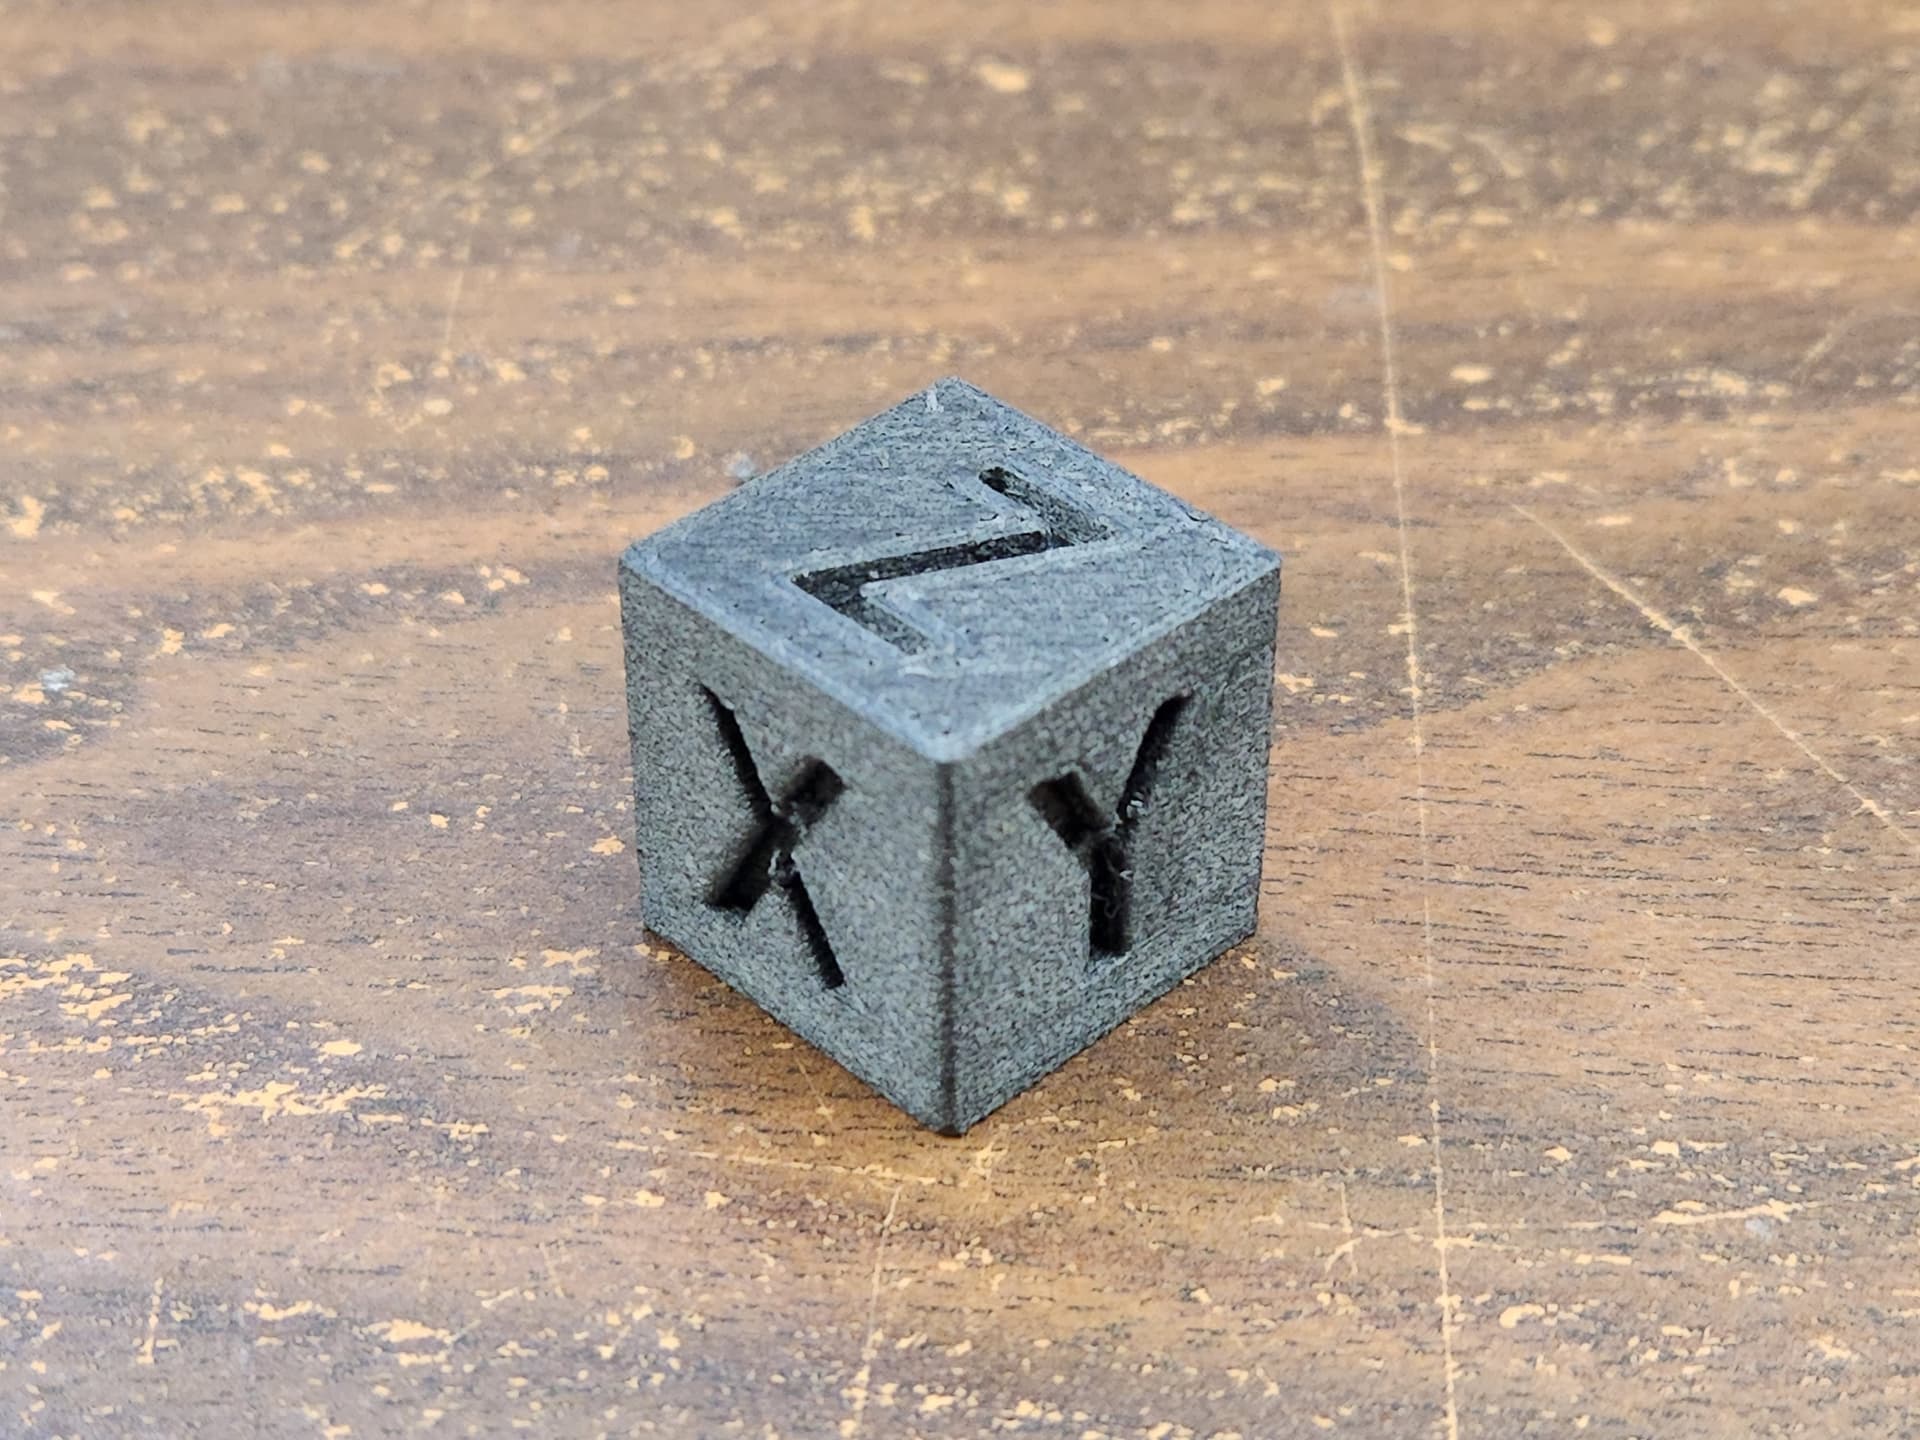
I made sure to print a calibration cube before starting on parts. I found I had to reduce the extrusion multiplier but once I did that it was a litter better than +/- 0.1mm on all axis.
Not just linear dimension, more like squareness. I use a 150mm test block and measure the diagonals against each other. My newest printer is doing diagonals of less than 0.02 off!!
We have had a few people with printer that print with a lean and that messes with the leadscrew and nut combo, and who know what else.
Here is a picture of the test cube I did at 0.15 layer height. I double checked the diagonals even though it’s small and they were the same. This is the same printer I sed for my Burly and had no problems so I was more worried about accuracy of the new filament because I knew my printer was already pretty decent.
I did find out this weekend that some of the larger parts were giving me some blobbing so I upped the layer height to 0.2 and it seems to have helped. Maybe printing at 0.15 was a bit optimistic. Especially for a filled PETG.
I would at least triple the scale of that block. In my opinion, it is far too small to help with any sort of accuracy test. It does help see print quality though!
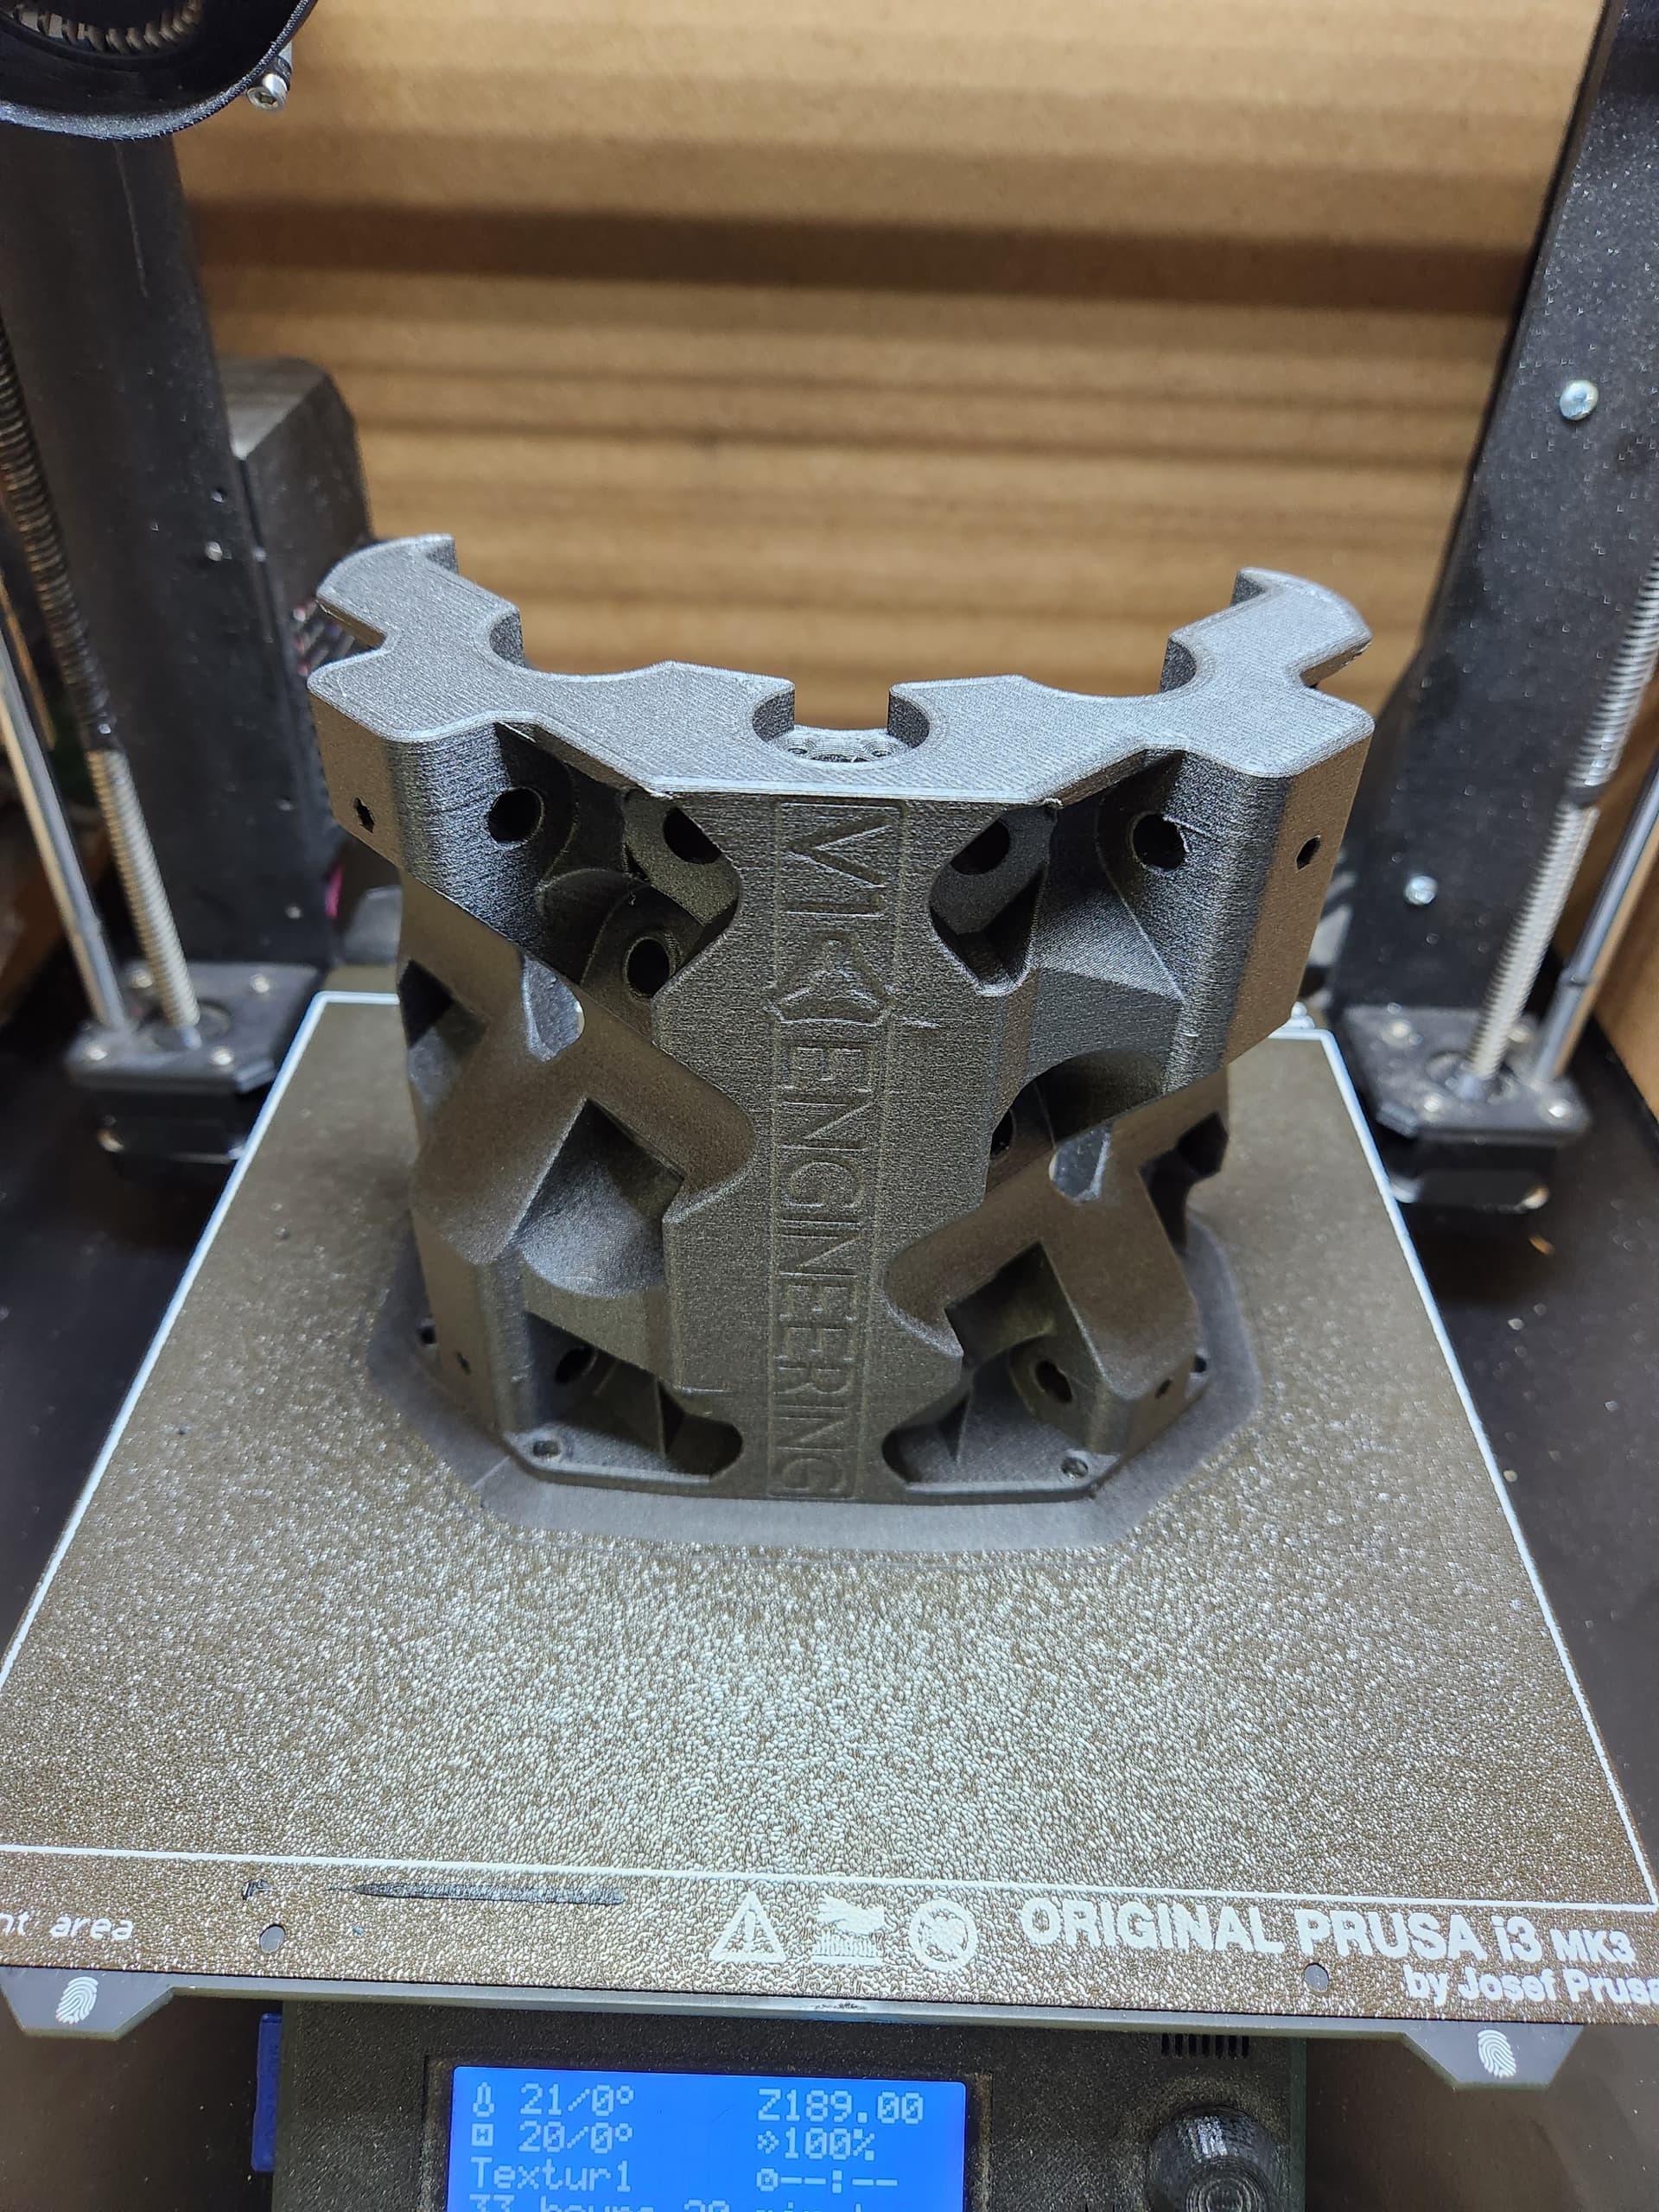
Now that I got the material pretty well dialed in and I ran out my first spool, I decided to print the core with a fresh new spool. And everything went really well, especially for a 34 hour print. I still have the occasional blobbing but they are small and can easily be scratched off.
I have a question on the corner leg locks. Everything else seems to print fine but these are having what almost looks like a layer shift on just one side. Does anyone know what could be causing this? My first one was fine but the next two had this more pronounced and were loose in the corner bottom part pocket. Almost like the bottom section is printing too small. The third one I moved and sliced it again in case it was a slicing issue but that didn’t fix it. I also greased up all my rails.
I am thinking of doing the same upgrade, I went here MPCNC Primo Parts list - V1 Engineering Documentation but the link to the kit in the shop is broken, I searched the shop and couldn’t find the kit. Is it still available?
I found a previous post where Ryan stated that he wasn’t getting enough orders for it so he stopped providing them. I just bought the individual components from Ryan and then the nuts and bolts from Amazon.
It looks to me like your wires are too short so all the way at the bottom it can’t reach, or perhaps your spool is having too much drag. In what direction is it too small, X I am guessing. If it is Y then your bed might have been hitting something.
I believe it is in the front right corner which would be both the X and Y axis. It just seems odd that it is pretty much the same position on these leg locks but I printed the core after printing these and it didn’t have any inaccuracies on the lower layers. And it’s only on one side of the part. One side looks small until this odd transition point and the other side looks fine. I’m just going to hold out on printing these again until last and if I run out of this CF filament then I’ll make them out of PLA. Just asking to see if this was unique to me.
As in the file itself? That has been proven thousands of times over.
The shift is only in one direction. So it was shifted in X or Y unless you placed it on your bed at a 45 degree angle and that would be even more odd because it would have sifted exactly the same in both directions. The print itself corrected perfectly as well so whatever happened stopped happening without missing any steps. That is extremly odd.
I wasn’t thinking the file was bad. I just thought maybe if it was due to unzipping the file or something with my slicer than maybe someone else may have experienced it. But, looks like I’m just the lucky one.
Given that it is just this part and the way it’s happening, I’ll just accept my printer just doesn’t like this part at the moment. I’ll just wait until everything else is printed then I’ll trouble shoot it some more and let you know what I find out.
Is the nut trap the same as as the one on the Burly? Are there any other components that are common between them?
Also, does anyone know the space needed around the Primo for it to be in an enclosure? I already have an enclosure and want to make sure I size my machine correctly.