Best to print all new parts.
The calculator page show the footprint of the build, outer dimensions, from there add an extra inch or two for your clearances.
Best to print all new parts.
The calculator page show the footprint of the build, outer dimensions, from there add an extra inch or two for your clearances.
From my experience, that kind warping near the bottom happens when the bed temp is high and no print cooling is used. The part appears to shrink slightly just above the bed, until the layers are far enough from the bed to cool properly. Bbed adhesion keeps the bottom layer from shrinking; so it forms sort of an hourglass cross section. I’d try adding just a smidge of cooling air shortly after the first layer to see if it helps. Also, asymmetrical warping on smaller parts (may appear similar to layer shift) can be caused by the same thing if there is any uneven airflow near the nozzle… for example leaking extruder heatsink air washing over one side of the part.
I did not know that could be from a cooling problem. I have it in an enclosure so there shouldn’t be any air washing over the part. Do you think either opening the enclosure to reduce the temp or letting it get hotter before printing would also improve it?
With PETG and this one specifically, it was advised to turn off cooling so I’ll try your suggestion and see if it helps. Thank you.
Some slicers have add ons that can insert gcode at specific layers. This can be used to turn the fan on only during the affected layers, and off above a certain layer to promote adhesion. With this you can measure the height of the deformed area, do some simple math, and insert gcode to turn the fan off at the correct layer.
Edit: I also use and enclosure… summer time in my garage it becomes hard to keep the enclosure at 28c that works for petg… I just leave the door open to help.
I don’t know if it was the file or the cooling but I re-downloaded the file and tried messing with the cooling and now those parts are printing great. All that is left is to print all the small parts and then start building.
A post was split to a new topic: Half swap?
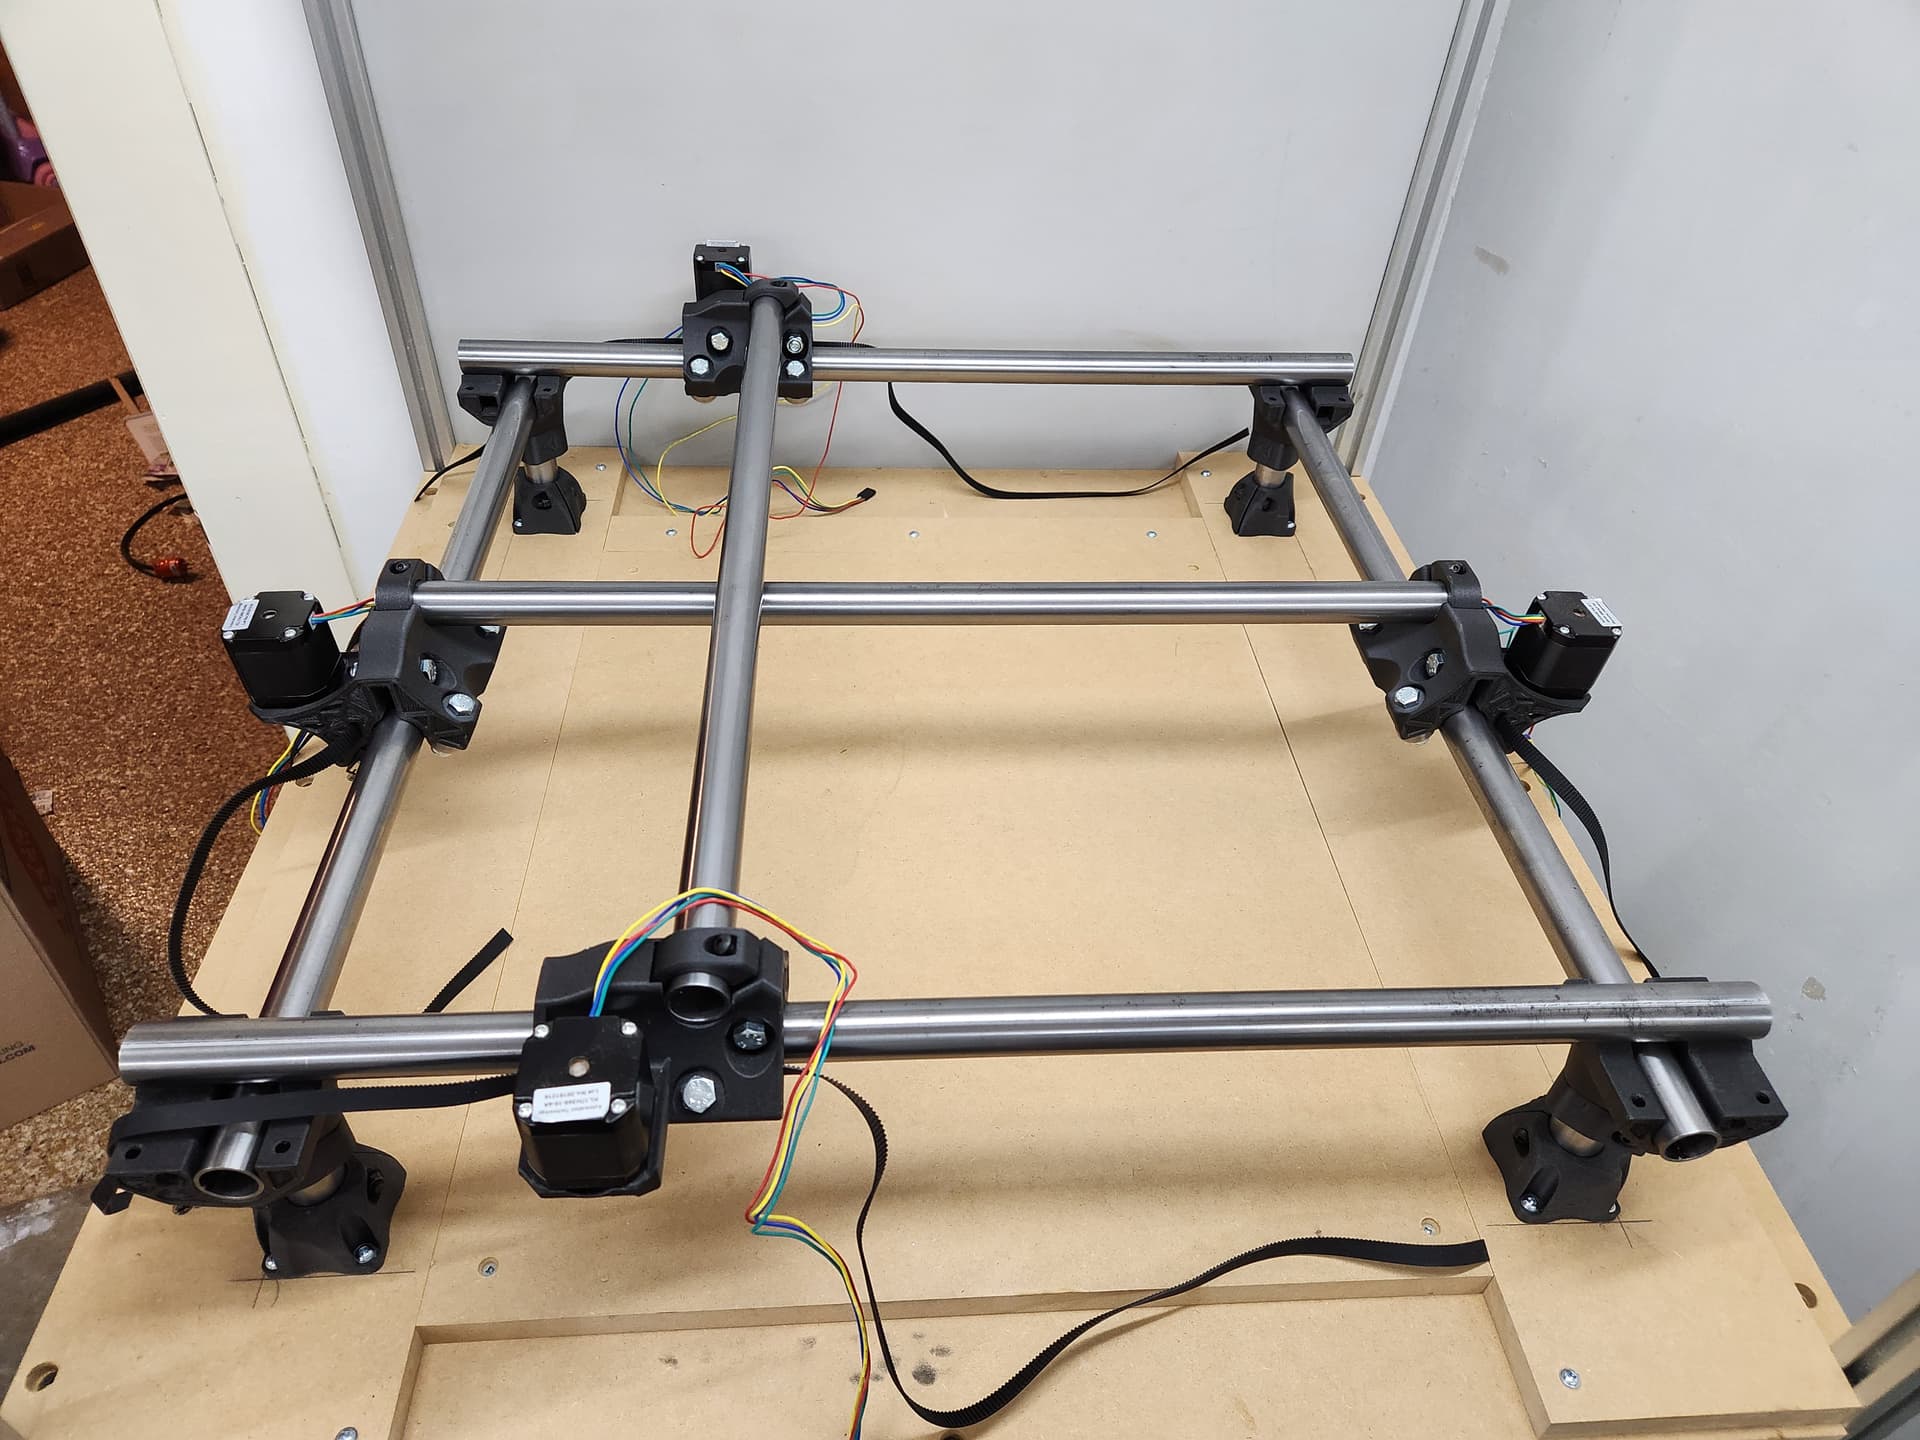
After a bit of a hiatus due to house projects and budgeting, I am finally back to assembling my MPCNC. I also wanted to get my lathe up and running again after the move so that I can make all the legs the same length. I’m trying to spend a little extra time and effort this time around to get everything as close to perfect as possible. Here is my current progress.
The x and y dimensions are less that 0.5mm difference and the diagonal dimensions look equal as much as I can tell. The leg heights all measure the same as well.
My time in the evening to work on it is limited so I probably have another week or so to finish the assembly.
In the meantime, does anyone have good links for cable management solutions for the J version of this? I’ve seen some good setups on here but looking at printables and thingiverse hasn’t come up with any that I really love.
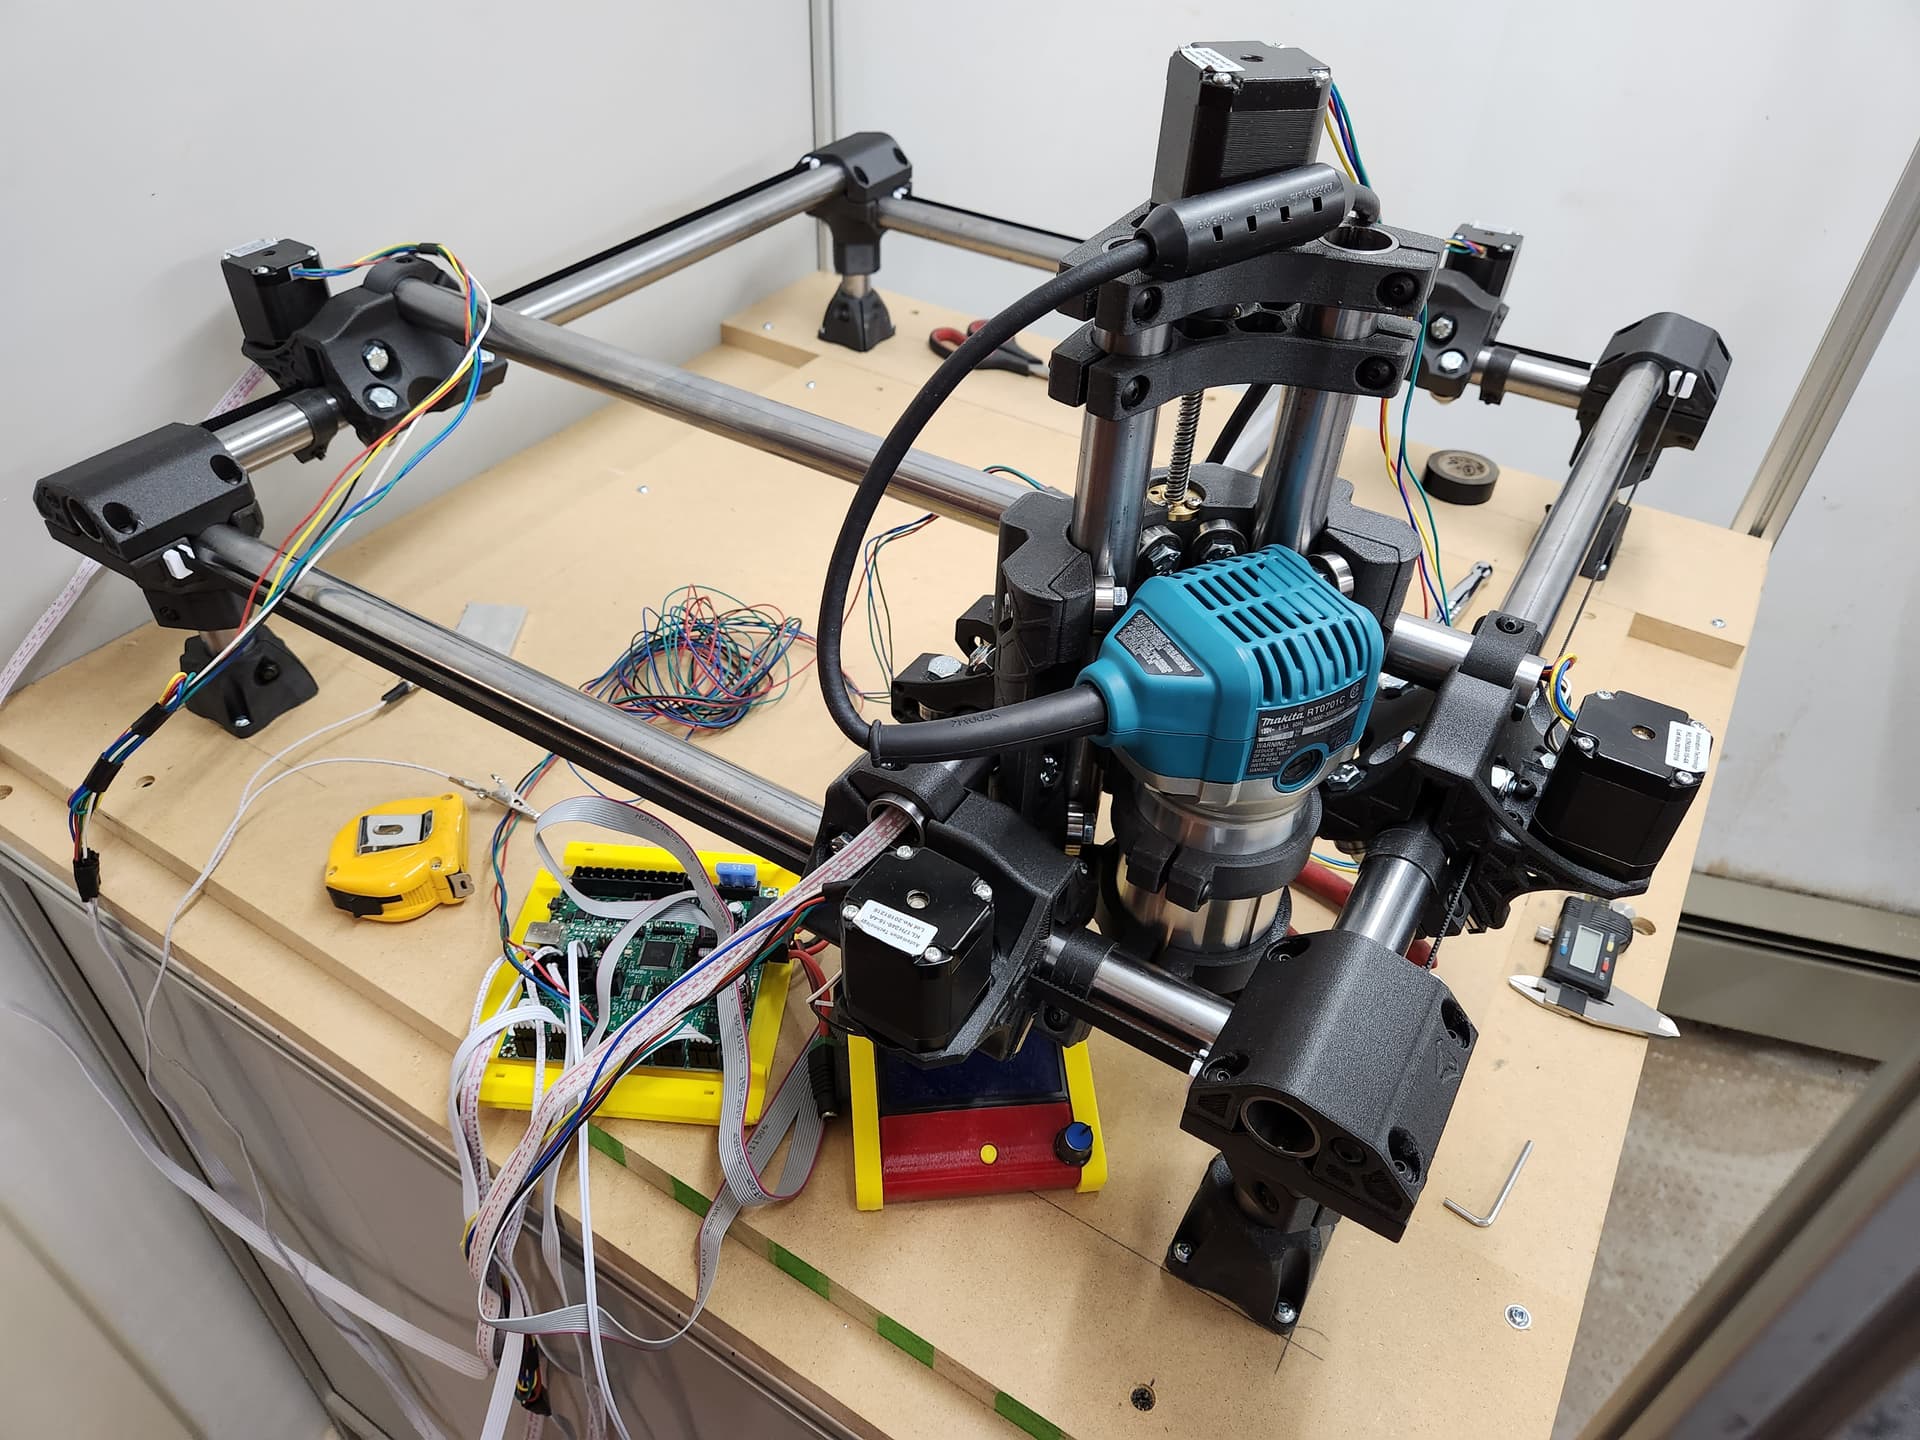
I finished putting this together and set up the rough wiring to test the homing and getting it square. I’m using the dual endstop setup just like I had on my Burly. With the endstops, I’m around 0.2mm off when squaring so I’m good with that.
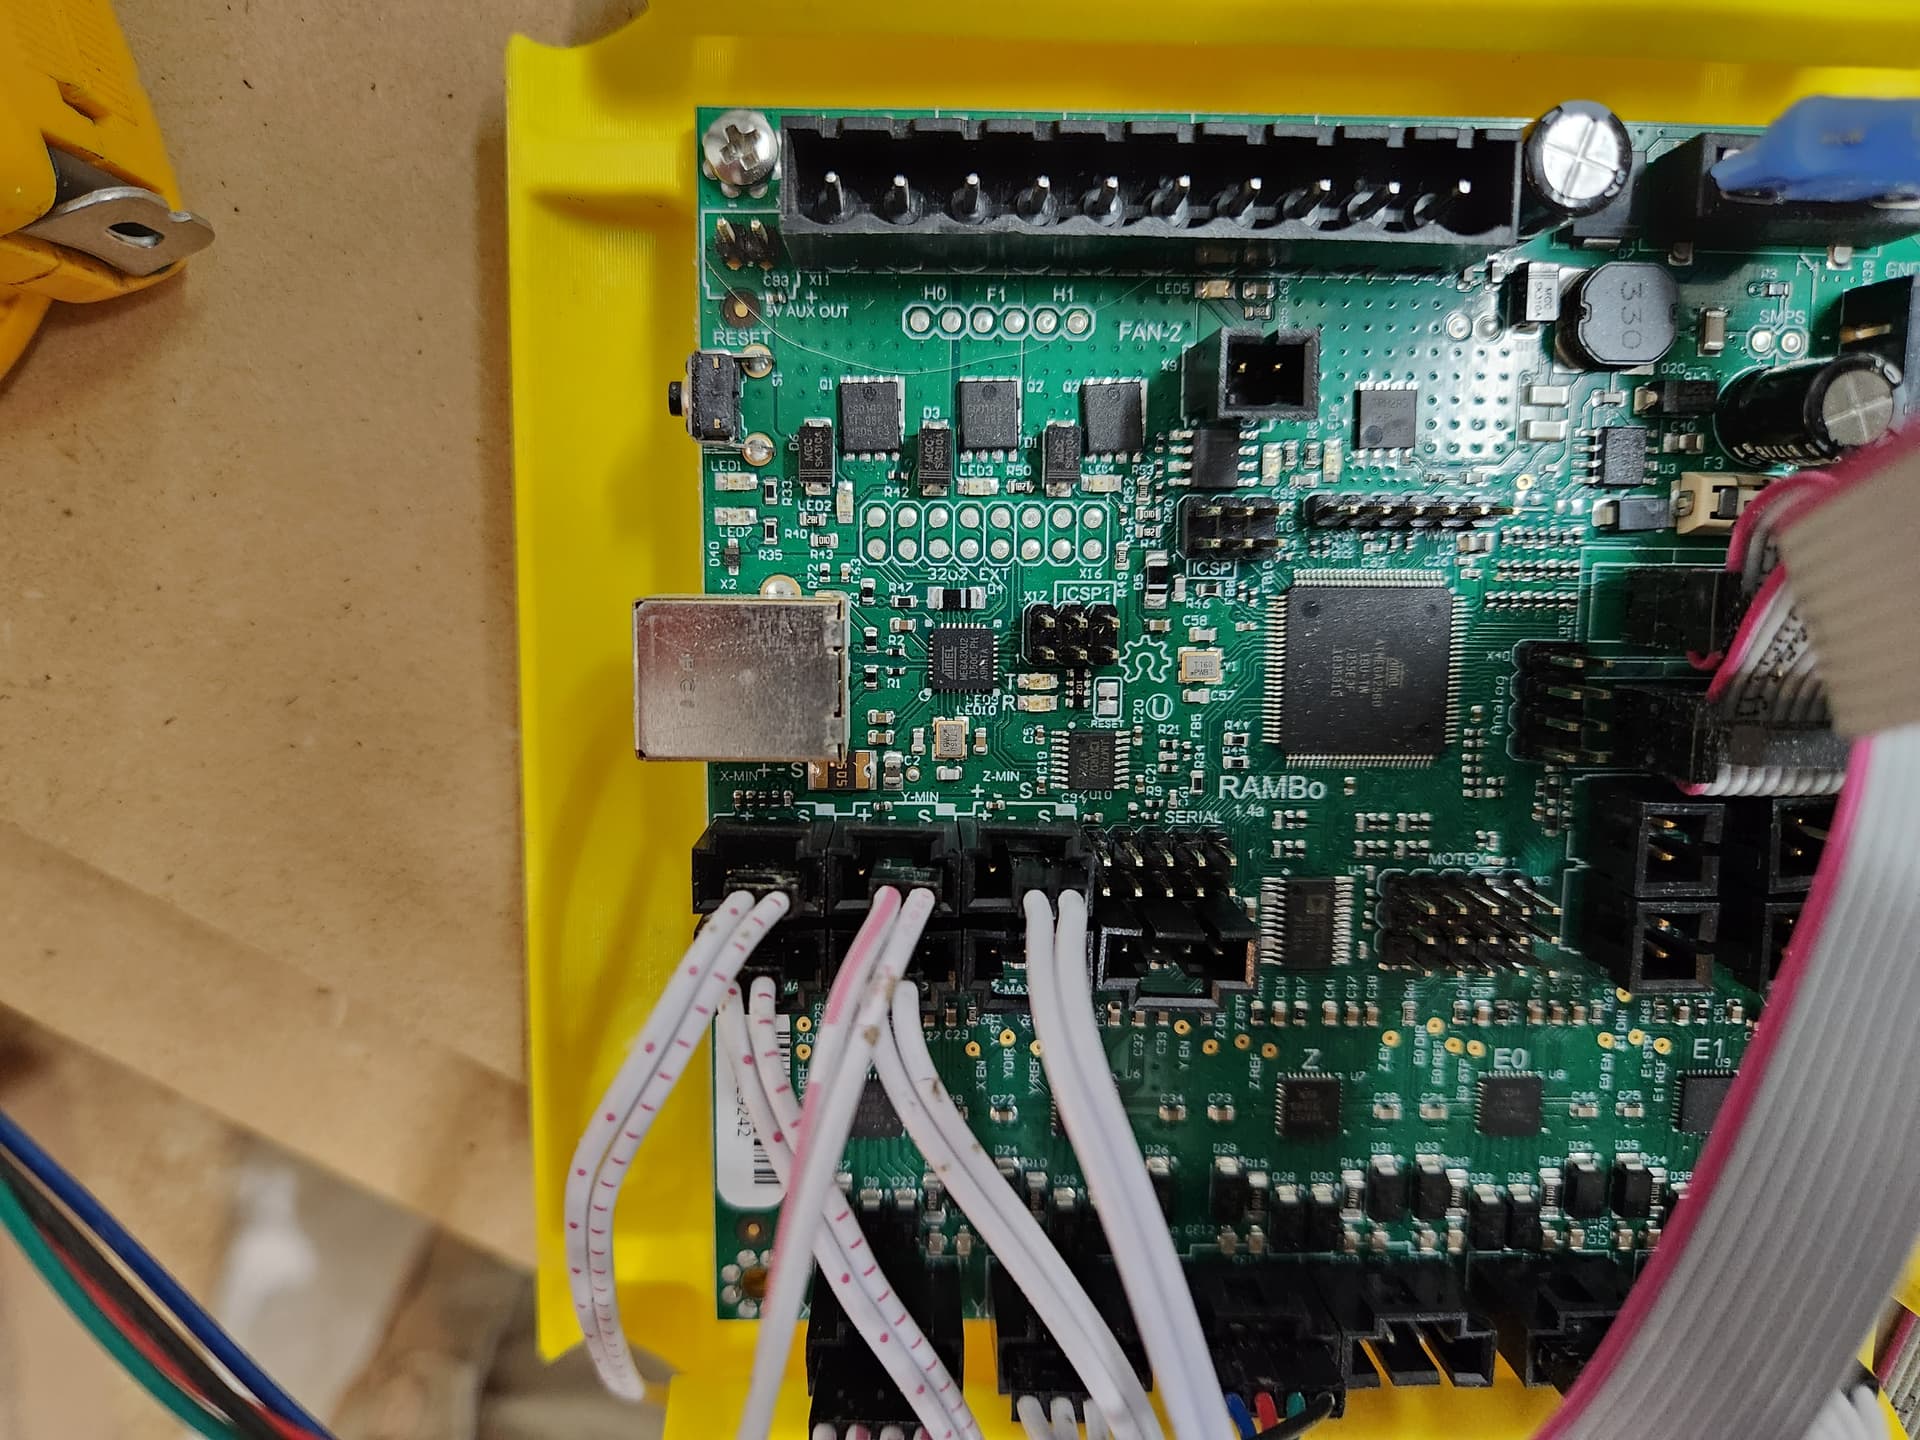
I have a problem maybe one of you can help me with. I have the Rambo board and even though I believe I wired it the same as before. When I home X and then go to home Y it restarts the board. When I first turn it on I can home either but once I go to home the other axis, it resets the board. Does anyone know what could be causing this?
Sounds like the endstops are plugged in wrong. Triple check so you do not pop the board. Each side is opposite.
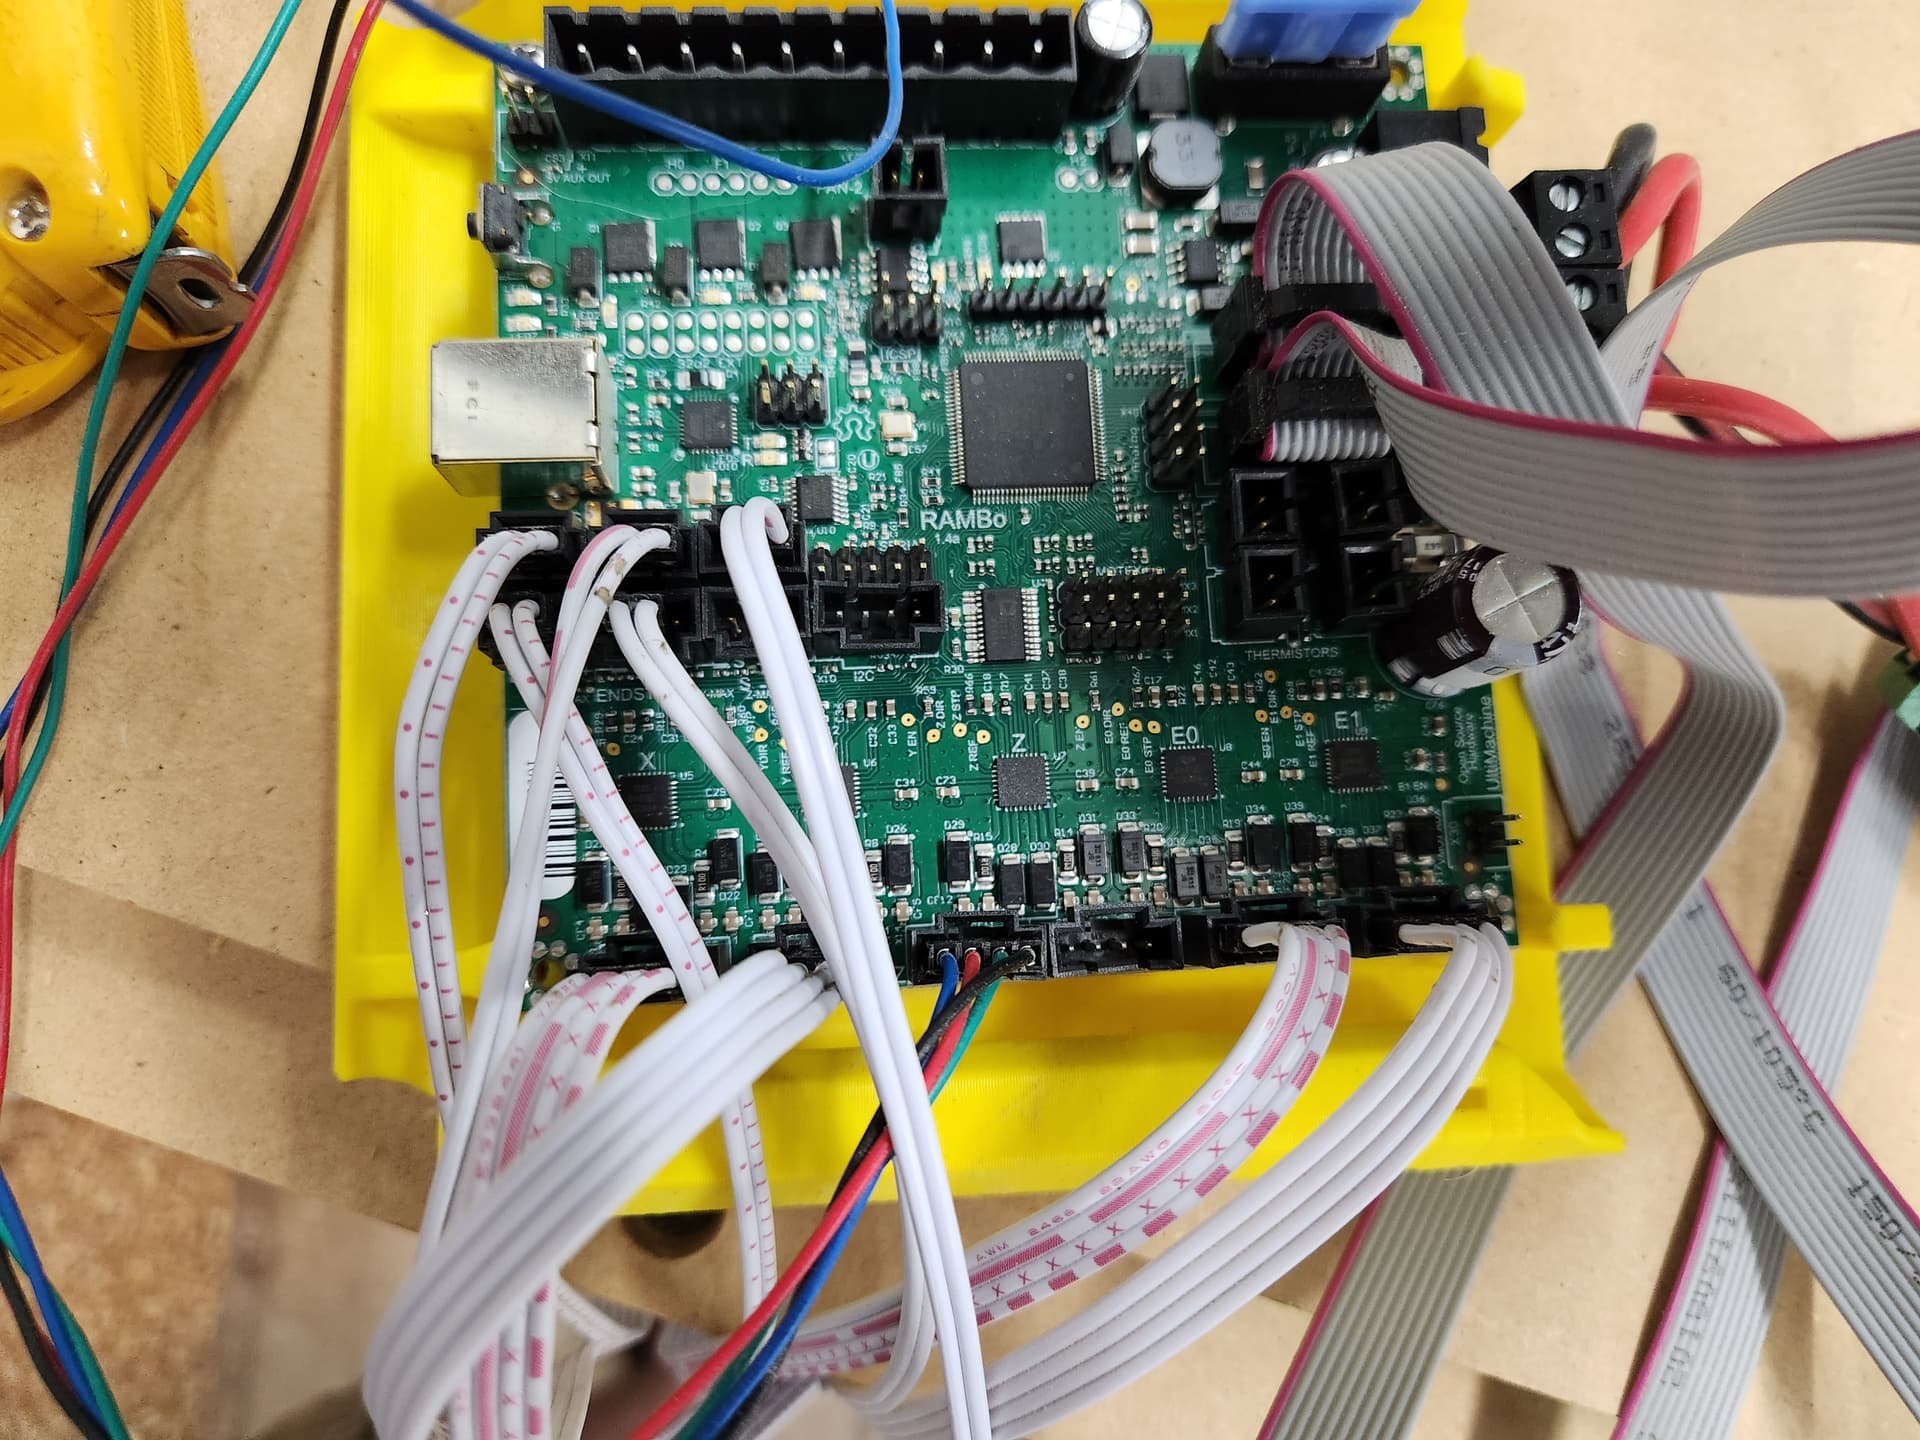
Here are pictures of my board. I checked the schematic for the board and I think everything looks good.
I’ve been using the Home x and y independently in the motion menu. I can do one but then when I do the other it will raise the z axis like before and then the board resets. I’ll do a full home sequence instead of doing them independently and see if it goes OK.
I would verify things are working with a terminal in repeater host and run M119 to test your endstops.
So, I installed repeater host and it was giving me weird readings so I decided to just reflash the board. After flashing the board again, everything now works fine. I don’t know how or why it got messed up but now it seems fine. Thanks for the help.
Now I’m off to work on wire routing and then I can get to cutting again.
I finally got the wiring completed and cleaned up. Now to check my accuracy. Does anyone have a good method to keep the z axis from falling from the weight of the router? My burly would only drop if the router was on which was nice since I had it turn off the router before disabling the steppers.
Nice enclosure!
Thank you. I scored the main frame from work, I just had to enclosed the upper portion and add the light. The downside is that it limits the size of my mpcnc. The nice thing about it being out of aluminum extrusion is the side walls can be loosened and lifted so I can pass through larger pieces that I can do in sections.
Is this all printed in PET-CF? I’m doing the same and wondering how it’s working out for you?
I didn’t think about measuring the the diagonal of the cubes before, yet I always do on large projects. Now I have to go print some larger cubes and check my printers. Always learn something everyday.
Yes, everything is printed out of PET-CF. I’m not sure if it’s the upgrade to the Primo version or the material but it is quite solid and I can cut much faster/deeper than with my original Burly version.
close older topics to help with spambots, and faster new user questions.