I was going to suggest a big empty box pattern. Something with only one wall.
1 Like
This is gonna drive me nuts.
I will say I thought I had an issue on my Y axis…and I was very irritated. Turns out in my slicer I had “gap fill” turned on and that made some odd infill near the perimeter and that showed as a wavy pattern on the surface. I turned on single extrusion fill and that solved that.
1 Like
Still trying adjustments. I think I’ve dialed in hub tension, it’s possible to twist the hotend, but it doesn’t want to. I’ll play with it to see, but just getting bed adhesion has been a fight so far.
It is not uniform across. The pattern remains the same at height, and is the same in X. So if it does it at one X coordinate, it replicates at the same X coordinate regardless of height, or Y location. Some places are more subtle than others. The silver filament shows it most prominently. There is one spot about 1/4 of the way in from the left where the pattern is almost invisible, and it’s most visible just to the left of center (which is where you see in the photo.) At no spot is it actually bad. At it’s worst it’s very hard to see in red. You have to catch the light exactly right for it to show at all.
Well any artifacts are “bad” in my book. I am going to fire mine up shortly.
2 Likes
I have a bunch of things to print. I think vase mode will show me some things, too.
I should also point out that I never did get to the hub just rolling off of the tube easily. I had to cram stuff into my hub to widen it with zero bolt tension anywhere to get it as loose as it is, and I can still feel what I assume is the same pattern in the X motion. I believe my 20mm CF tube is a bit oversized, and my hub print is overtight.
Maybe a new hub print is in order. I will give that a shot.
I would think it would stretch a bit and relax. But it is a fairly easy and quick print.
1 Like
Just out of curiosity, what did you use for infill and how many walls for the hub? maybe it is to rigid?
3 walls, 30% infill, 0.333333333mm layer height.
The 30% infill hardly matters, the print has so many openings, it’s pretty much solid from perimeters It might as well be, There are lots of fill spaces, but the perimeters give it a lot of strength around all of the wheels axles and belt fittings. It’s still quite flexible though because I printed in PETg, but it was super tight right from the start.
I have my PEI bed now, so I’m going to try a new hub.
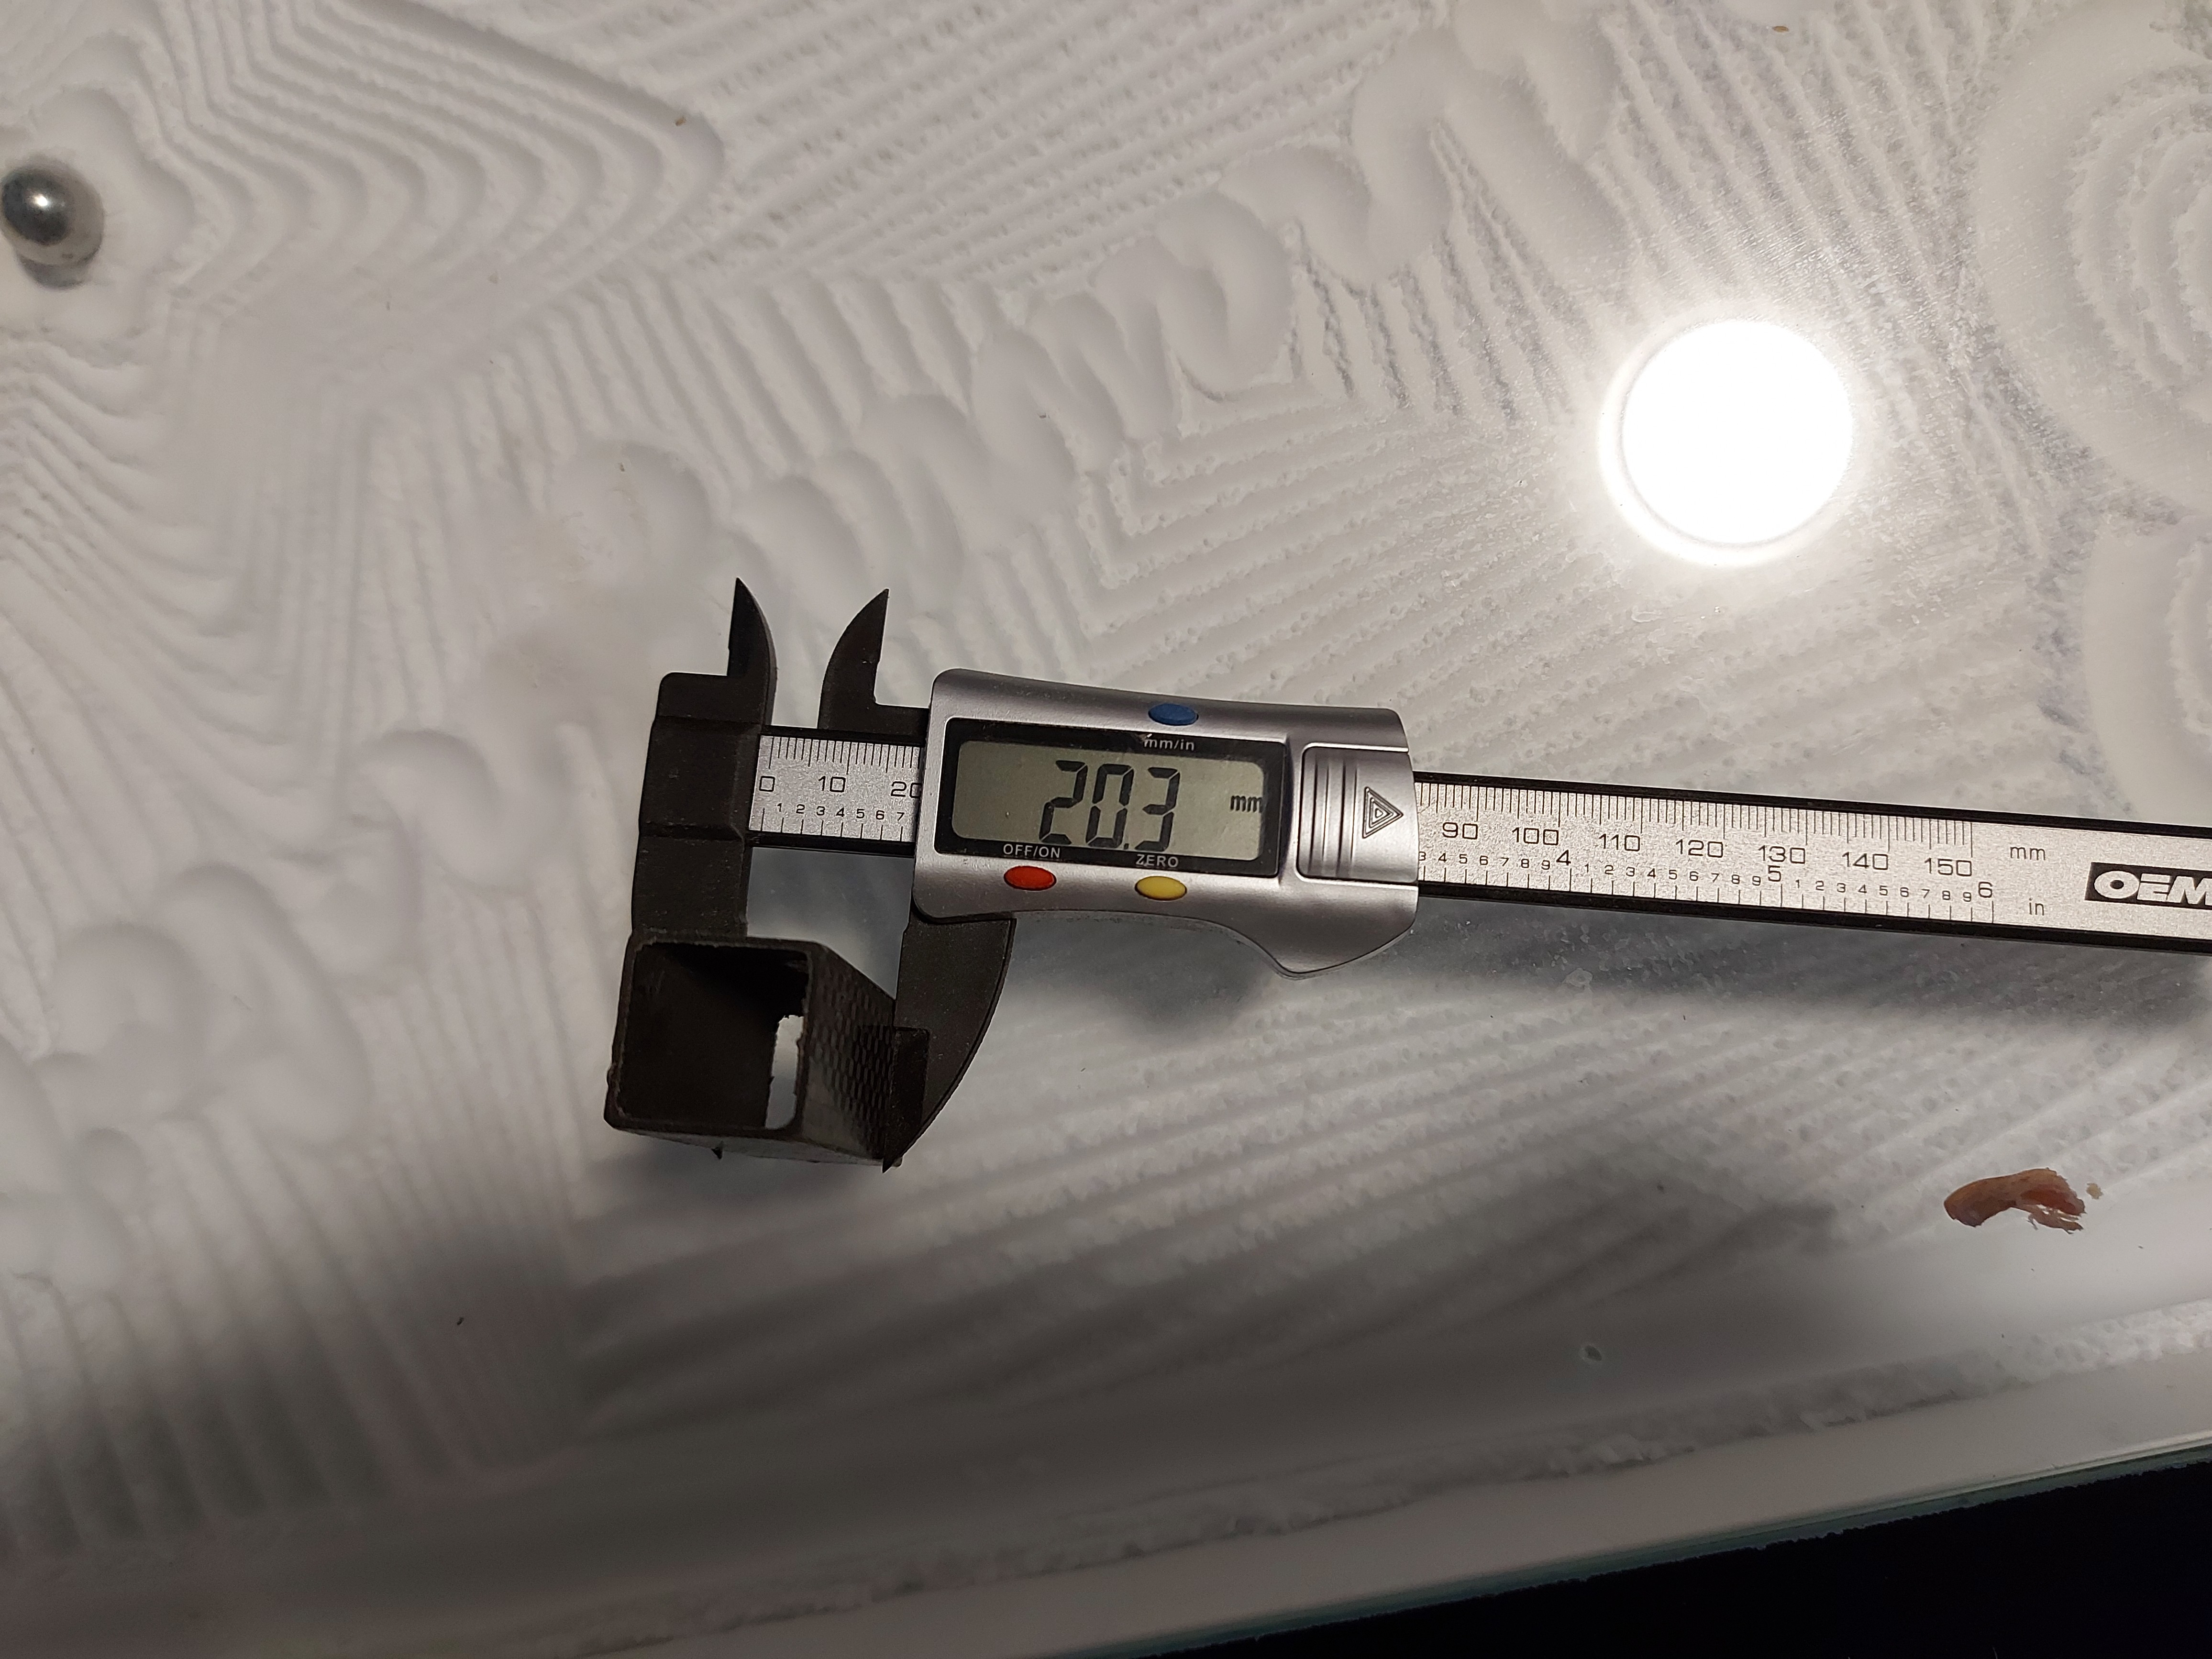
Because of where this is going to live, I didn’t do that. It’s supposed to end up in a closet with the spools stored overhead, so I don’t have the filament clip or the PTFE tube. I don’t think that’s the issue though. I do suspect the hub tension being too high. I remember measuring 20.2mm with my calipers on the CF.
I’m actually kind of curious if I could have made the 19.05mm 3/4" aluminum tube work with a bit of extra tightening. Maybe I’ll try to see with this hub after I.print a new one.
1 Like
Just for comparison, while printing the new hub, I thought I’d show how far open I had to jam the current hub to still have it too tight.

It’s open probably about 1.5mm more than it was while printing. It had slipped my mind how big that difference is, until I saw the new one printing down there. Hopefully it’ll be a more accurate copy, and any variation in the CF tube size is unimportant. I have plenty of new POM wheels so I can still run my 3/4" experiment, just because.
2 Likes

The pattern lines aren’t nearly so easy to see in this colour, I had to put a light at a pretty sharp angle to see them. The dark lines you can see here are the infill showing through the walls. You can’t even really see layer lines in this picture though so hard to say what it proves.
I do have a new hub part though. I’ll install the wheels tomorrow., getting late again tonight. 
2 Likes
I had a printer that would pull the filament tight on one side (and slightly lift the nozzle) and the. Slack on the other (slightly lower the nozzle) and it was driving me bananas. Adding a ptfe tube to somewhere rigid on the frame made that go away. The length of the tube is constant until it attached somewhere on the frame. So the nuzzle doesn’t experience that same lifting. You can still put the filament above the printer, you just need the tube to be attached somewhere on the frame.
I don’t see how that could affect the ringing though. I would expect that problem to show up as horizontal banding or poor layer adhesion.
I did some prints yesterday all over my bed to see if there was anything. I would say there seems to be a bit more not perfect on the X faces, for me I am wondering if my belts might be too tight as the pattern seems consistent.
I need to print some more of the acceleration test piece, I think, from TT’s test page. That has a flat face in each direction and a diagonal. Then I can pause halfway up adjust the belts a smidge and see if it changes.
For me I am leaning to belts as I also have a super high frequency ringing on small holes, so I want to see if that changes or if it is a build thing.
Like you said though the prints are good, for me it is far more perfect than any prints I have ever pulled off a printer but there is something. I will do a few more prints today.
3 Likes
I just want to thank both of you for all this troubleshooting before I get to my build!
3 Likes
I’m not seeing that, but I do see a tiny bit of ringing. It’s nowhere near what I’ve seen from each and every single one of my previous printers, so I’m not concerned. I actually thought that I might have left too much slack in my belts.
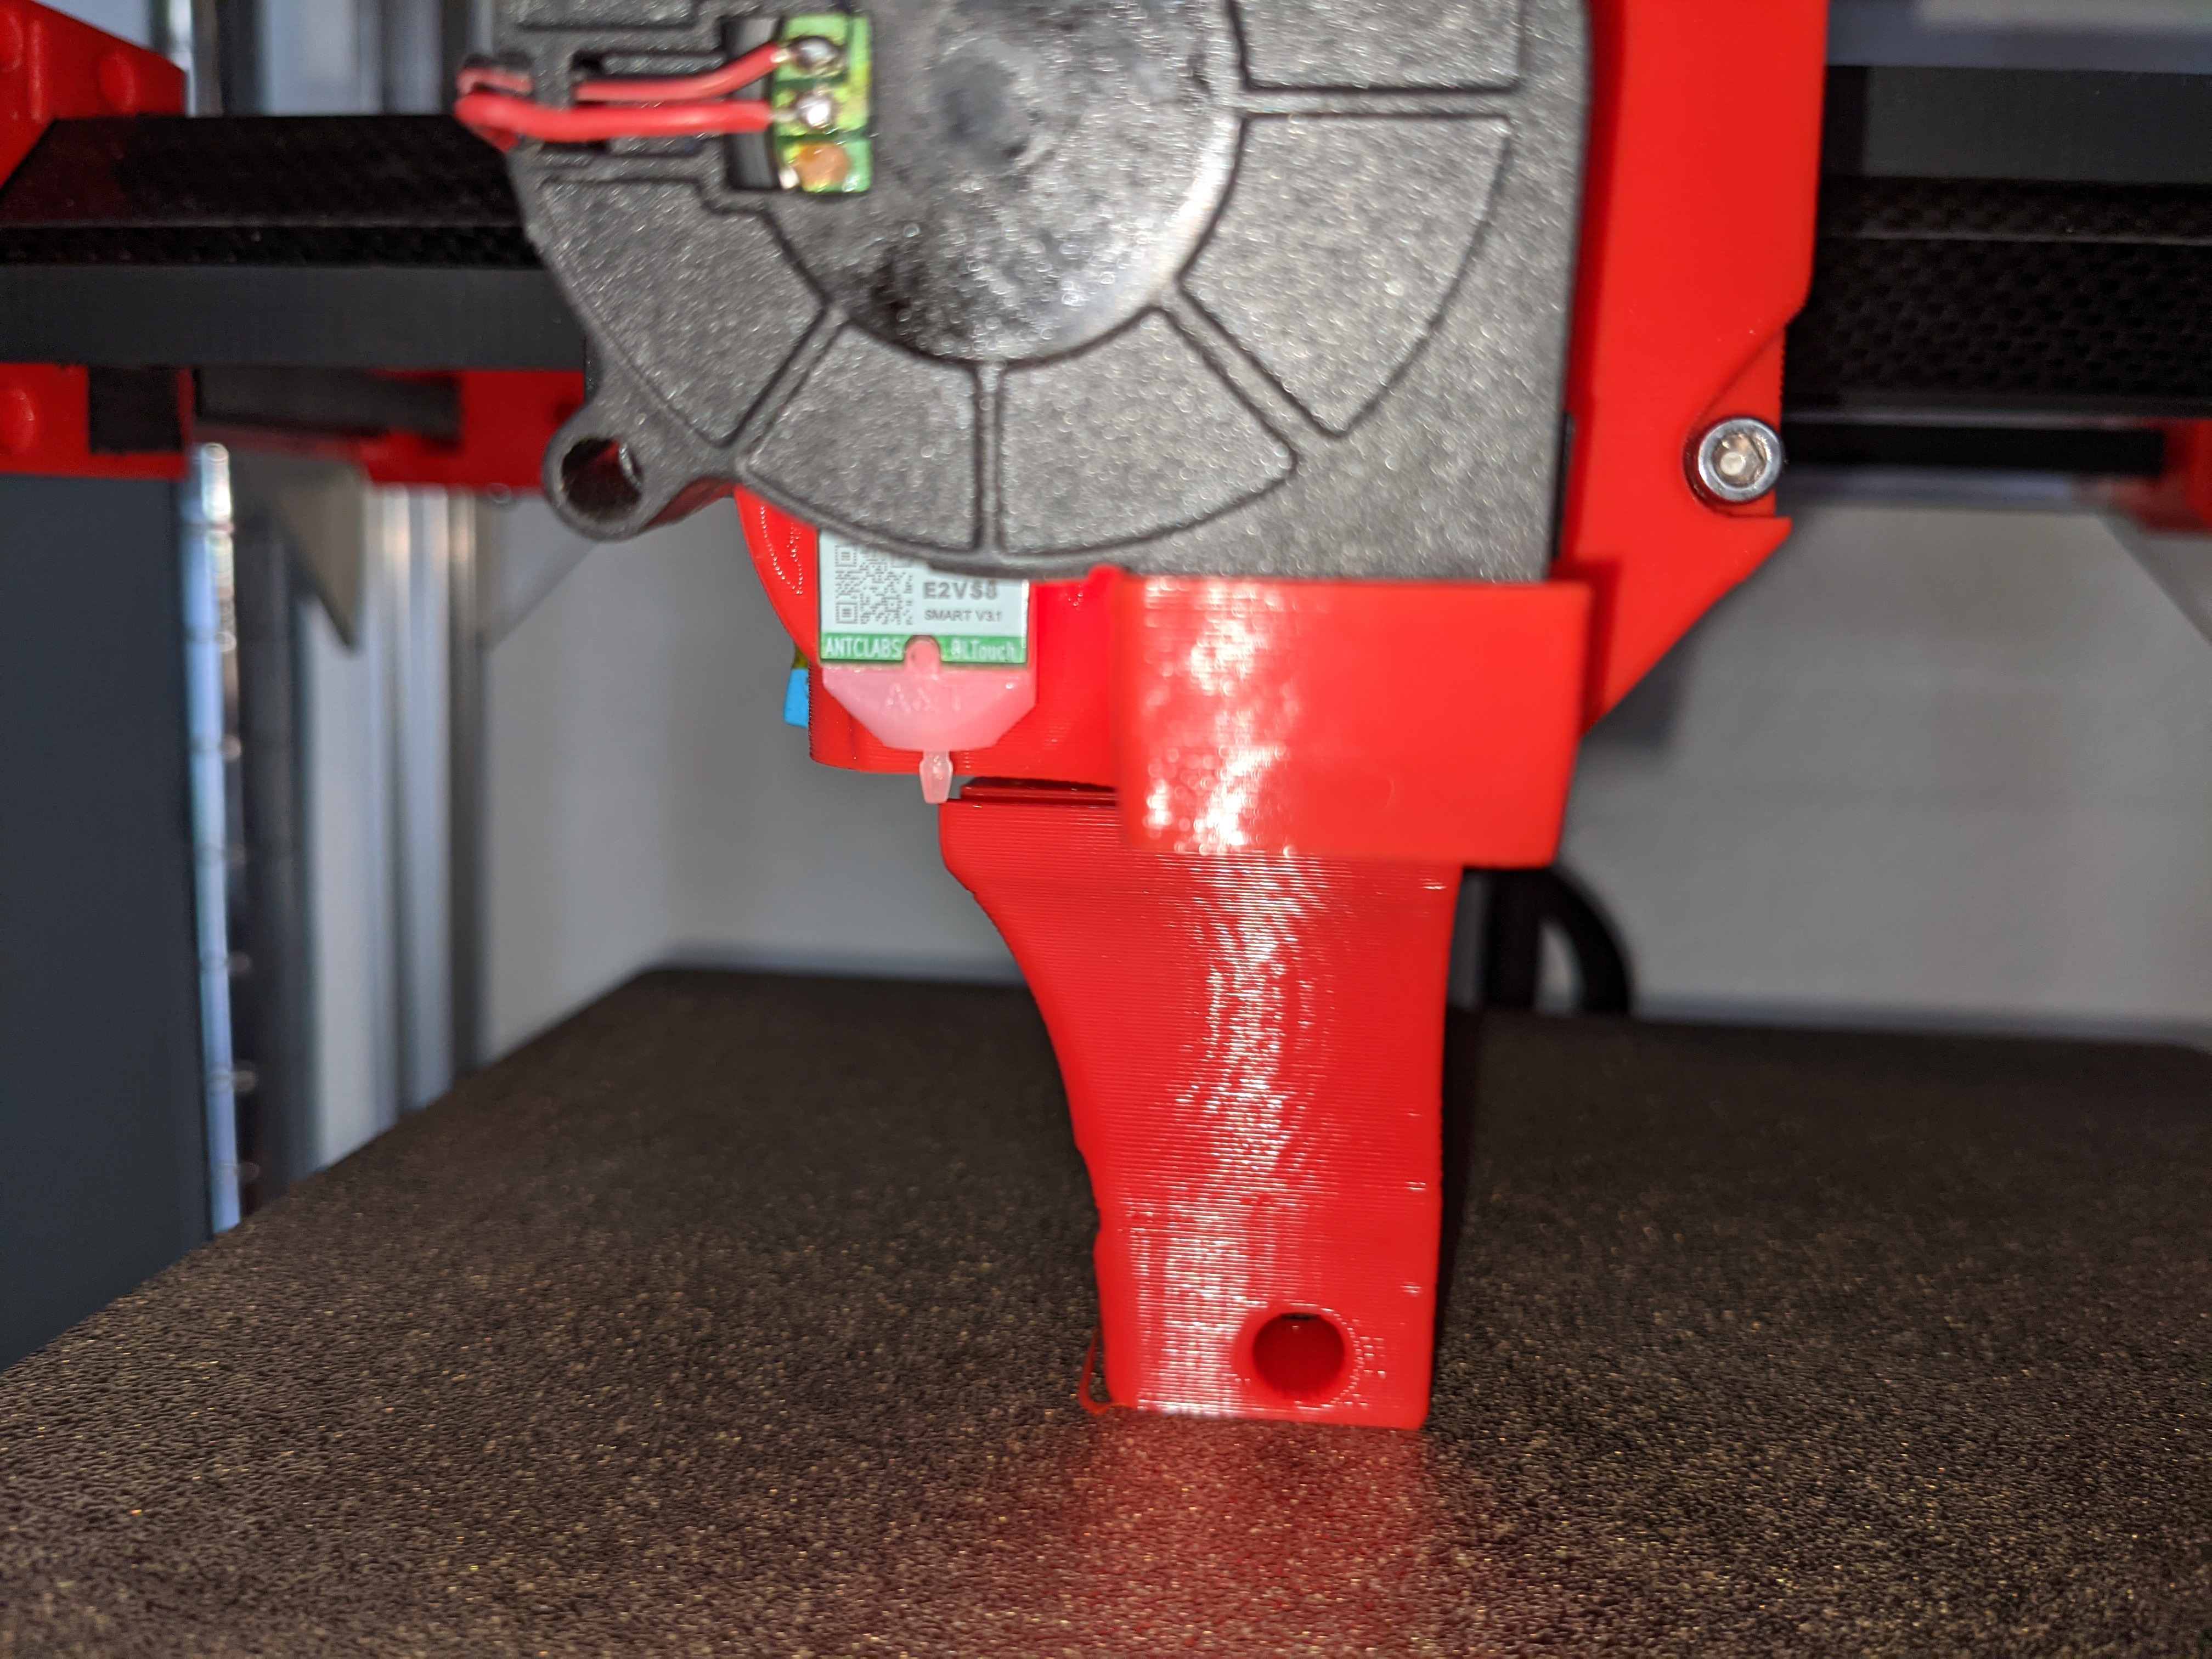
I was looking at it, and I am not going to be able to get the belts out of my current hub part, so I’ll have to cut them from the front face of the hub. Fortunately, I left a couple of inches of extra belt in the tuggers, so I can afford to do this maybe twice before needing to buy a new belt set. As is, I used up the rest of the belt that came with my LR2 kit building this printer (But I budgeted on doing that, so it was OK) Because the tool mount is right there, I cut the belt flush with the face of the hub in front, so I can’t pull the belt forward, and I can’t manage to push it from the other side, it just binds up. I suppose that I could break it out of the hub if it came to it, but I actually really do want to try that experiment with the 3/4" aluminum tube. (19.05mm) just to see if the print really is that much too tight. Not sure why it would be though. I know my dimensional accuracy is good, or else I’d have had trouble with the ZenXY and with the MP3DPv2 as well, both of which had all of the printed parts come off of the same printer. (It uses TR8 leadscrews, so I know steps/mm is going to be exactly right.) I was showing the tiniest amount of overextrusion sometimes, because I get the bets layer adhesion that way, but that’s about it. (I know that 100mm of commanded extrusion is less than 101mm.)
Anyway, I’m going to add a PTFE tube to the extruder as soon as I remember where I left all of my PTFE tubing. I really don’t think that’s a problem though, but maybe a short length will help with control. I also need to do something to keep the wire bundle arch from falling forwards,
I use a small flat head screwdriver and just push the belt in from the toothed side, one tooth at a time then you can pull it out after you get a few teeth in…who knew you can actually push a rope/belt!
The one I bought was 3mm wall, wayyyy to heavy.
This feels like this means something.
The lines curve… really hard to get a clear shot, very subtle.
That would be a pulley or idler right? On a curve the position is a little further or closer on the Y and Belt, but the same exact place on the CF rail. So this eliminates the rail, hub, and wheels??
My rails are pretty smooth, I can’t feel anything even with a fingernail.
I am going to loosen the belts a 1/4 turn and print another motor mount to see if anything changes…same gcode.
Yeah, I broke two teeth off of the belt trying that. I seem to get more than the average for undersized holes. Also, because the bridging on my print was bad, it left loops in the channel that seemed to grab stuff way better than it should have. I don’t expect that this problem will repeat itself with the new print. Also, I did leave some extra, so it’s all good.
The 3/4" aluminum tube that I have is 1/16" wall, so it’s fairly light. It’s about 1.5mm so should be adequate for strength, and still reasonably light. Not as light as the carbon fiber, but much lighter than the MGN12 railing. EDIT: To be clear, I am really only testing this for my print, which seems to be too tight on the CF rail that I have.
I can feel the weave pattern with my fingernail on the CF rail that I got. I’m actually not particularly happy with the piece, and am looking for a supplier that doesn’t want a ridiculous amount. The tolerance for 20mm is also more than a little sketchy…
That looks like pulley noise to me. Probably tension on the belt making it ever so slightly chunky on the smooth idlers. Curving like that (Try rotating the part 45°, I bet they’ll be straight then.) would be very typical the “noise” will follow one belt or the other, which on coreXY kinematics is at 45° to orthagonal.
1 Like