Building the "Repeat" printer

The Y motors get to “not cold” but they’re set to the default 900mA. Now the X motor gets warm, but decidedly not hot. I should take some readings with my IR thermometer to be sure though.

Well. most of my Estlcam settings were left alone from working on the Primo. I thought that should be safe, considering that the Primo is oversized.

A quick look, 1800mm/min rapids, 2.15mm DOC 1/8" single flute. It’s a brand new bit straight out of the package (though I did cut some foam with it to square the machine.) I’ll see about slowing it down, and increasing DOC back to 3.xmm. I’d hoped the LR would be able to handle the same speed, but I can deal with slower. Gives me another reason to hang onto the Primo.

The last 2 sheets of 12mm MDF I bought have been like this for surface tearing, but it looks perfect with a light touch of sandpaper. That top pic, I just gave it a quick once-over with 300 grit.

I’d be seriously red-faced if that were the problem. Yes I checked them. And then checked them again.

Maybe I’ll risk the birch plywood. It is way easier to cut.

It should, but the acceleration could be messing with you. I would slow down the rapids a bit for now, or use the LCD to dial down the acceleration. Gotta get a good baseline before pushing it.

2 Likes

Round 2. ding!

Picked up another sheet of 1/2" C2 Birch ply. Had it cut into quarters so that I could put it in my car, and it’ll fit on the LR. The C2 is a nice clear grain. Maybe not as pretty as the Baltic, but less expensive, and much nicer than the utility grain. (I got the whole sheet at Windsor plywood for about what a half sheet would cost at Agent Orange.) I should have plenty of leftover (I need less than a half sheet for the whole cabinet.)

It is making me second-guess my choice for the cabinet front. Well, I’ll leave it as-is for the time being, and maybe consider re-cutting a new panel out of 1/4" birch at a later date. Maybe when I make my “regular scale” printer, which I plan to at some future date.

I think I’m going to try to cut the back on the Primo while I cut a side panel on the LR.

I’ve added the idea of 4 “registration” holes to the front of the Gcode. (Well, 5 “drill” operations 5mm deep with orders 1, 2, 3, 4 and 5.

I’ll be using the tape and glue hold-down method for the piece, so no tabs. It’s too close to the size of the raw piece to start with.

2 Likes

You’re keeping me on the edge of my seat here!

The first thing I saw the was the ragged cut on the top and thought surely not… :open_mouth:

It’s day time for me, could you do it tonight please so I don’t have to worry all afternoon! :smiley:

2 Likes


Okay 3 panels done… This is a monster.

No wedge panel as yet. Not 100% sure I’ll get that one cut. It might end up being an acrylic panel, or maybe 1/4" I really should have used 3/8" (9mm) material. Lessons learned…

Definitely need to deal with those LR screws, the screw heads drag at 12.9mm DOC, unless I risk pulling the bit out of the collet again. Not fun. Or I really need to get used to using a 1/4" bit. That’s probably the real answer, but I’ll do the countersunk screws anyway.

11 Likes

I think the wedge piece keeps it square. If you decide to skip it, maybe cut a few 4"x4" trianglish pieces to glue in the corners to square it up.

Looks amazing though. What a great looking cabinet for a printer.

4 Likes

Nice!!

That front panel is not as bad as I thought. I thought it would box it in too much. Extremely functional and good looking.

I might have to do that as the plywood I have is kinda twisted after cutting. I put some spray on shallac on mine so I stop getting it dirty and can start screwing in some parts.

3 Likes


Getting there. Bunches of 3mm screws and nylocks. I thought I’d bought 100 m3 nylocks, but only 50, so I’m out with the last Y rail still to bolt on. I also have to cut the CF tube, since it’s a bit long.

I’ll use regular nuts for initial assembly, and swap them put when the replacements arrive.

Next step is figuring out belt attachment for the Z axis. I didn’t look closely at it yet, but it appears as though I needed to get the rails on first.

4 Likes

Hey Dan,
been following your build since day 1, It is looking amazing btw.
You totally convinced me to build the frame out of wood.
I do like the look of 20x20 extrusion but the wood frame kill 2 birds with one stone…
Thank you for sharing.

3 Likes

And… just because, one more shot, getting ready for belts.

6 Likes

So crazy to see another one!

4 Likes

Ok. Belts are a little tougher. My printer likes to make openings tight, so getting a locking piece in there isn’t fun. It occurs to me that heat shrink might make it easier though, now that I’ve done most of it.

I have the tensioner and the back Z slider to do. (Sure hope I guessed how this works right, lol!)

When I look at the Fusion project, I lose all the change history, so I see whichever I import as version 1. If I make changes to it, like expanding a size, or adding holes, I get a version 2, but I can’t see any changes Ryan made to the original. Certainly can’t roll back. I sure hope that Ryan doesn’t have to see/deal with some of the absurd things I’ve done.

Anyway I am getting really close to needing that Hemera mount, even if it’s a temp one to be replaced later

3 Likes

I want to make one more mount change, but can put it up as is if you need it. I am happier with my new fan mount I just finished yesterday morning.

The belts can be easier if you cut the end at a point or wedge shape to feed it through, for stubborn ones you can push it one tooth at a time with pliers. My first prints were tough as well…the prints coming off this new printer work as intended.

For the lock I kinda tuck the belt end in with a flat head or needle nose then just pull the other end. Same here though the new prints are much easier.

I think you can make a copy of the CAD and open mine as is, not sure though. Your changes are not seen by me at all…I can’t even tell you looked at it. No analytics at all.

2 Likes

No panic yet.

Yeah, my prints seem to be extra tight, I need both of those tricks to make it possible. A couple of places, I needed to cut some printed plastic away to get the locks started. The Z supports on the top lock were the most troublesome for me. Still possible though.

I think that it would be different if I were opening y our project through the Fusion 360 cloud, instead of making a copy. I know that it’s supposed to be possible (Though I think that may be a paid subscription only feature now) to do so as a collaboration, but I don’t want to mess with your work for this alteration.

I’m re-doing the panels based on the results I get in FreeCad, and took the .STL files from the Fusion copy. Of course as stated earlier, I have no idea how to do things like assemblies in FreeCAD, so I haven’t neen able to do much to show off the work that I’ve done (Other than import stuff into TinkerCAD, which is a seriously Mickey Mouse way to do it.) The wedge panel is difficult to get right when I change stuff, and it keeps wanting to stick into the back panel, so I haven’t got a good drawing of it yet, but I’m working on it. I think it’ll end up being 1/4" material, and Ill have some square reinforcements in the top corners.

I did realize that I made an error on my side panels. I thought that I left 50mm for the beta motor on the right hand side, but I left 50mm from the motor mount which of course is intended to be in the center of the 2020 extrusion, so my right hand motor sticks up from the side by about 8mm, where it was suppose to be under the edge by about 2mm. This was intended to give me clearance to put a top panel on.

The top panel was going to be 1/4" and mostly open, about 50mm around the edges covered. (Similar to the front) just to keep the top reinforced and square, but not get in the way of any of the printer’s operation.

I could do it with 1/2" material and pocket out a bit for the motor… Or I could leave a hole in the corner… Or I could laugh it off and just use a couple of right triangles in the back corners. as reinforcement.

I’m glad that I cut handles into the sides. It’s rather unwieldy to move around.

2 Likes


Belts are installed. I haven’t tensioned the CoreXY belts yet, I want to wait until I am sure that I have the X/Y plane squared, then I can be sure to have the X rail square at the same time.


And I.painted the front panel. Since I seem to be going with a blue theme, this deep blue seemed appropriate. The V1 decal was a spur of the moment thing. I was going to laser onto the melamine. I might still laser on the paint, but now I’m not sure. I can still do the sides later.

Next up is to print a mount for the SKR Pro that will allow some external wire management. I still need a pass-through for some of the Z motor wiring and the LCD cables too.

5 Likes


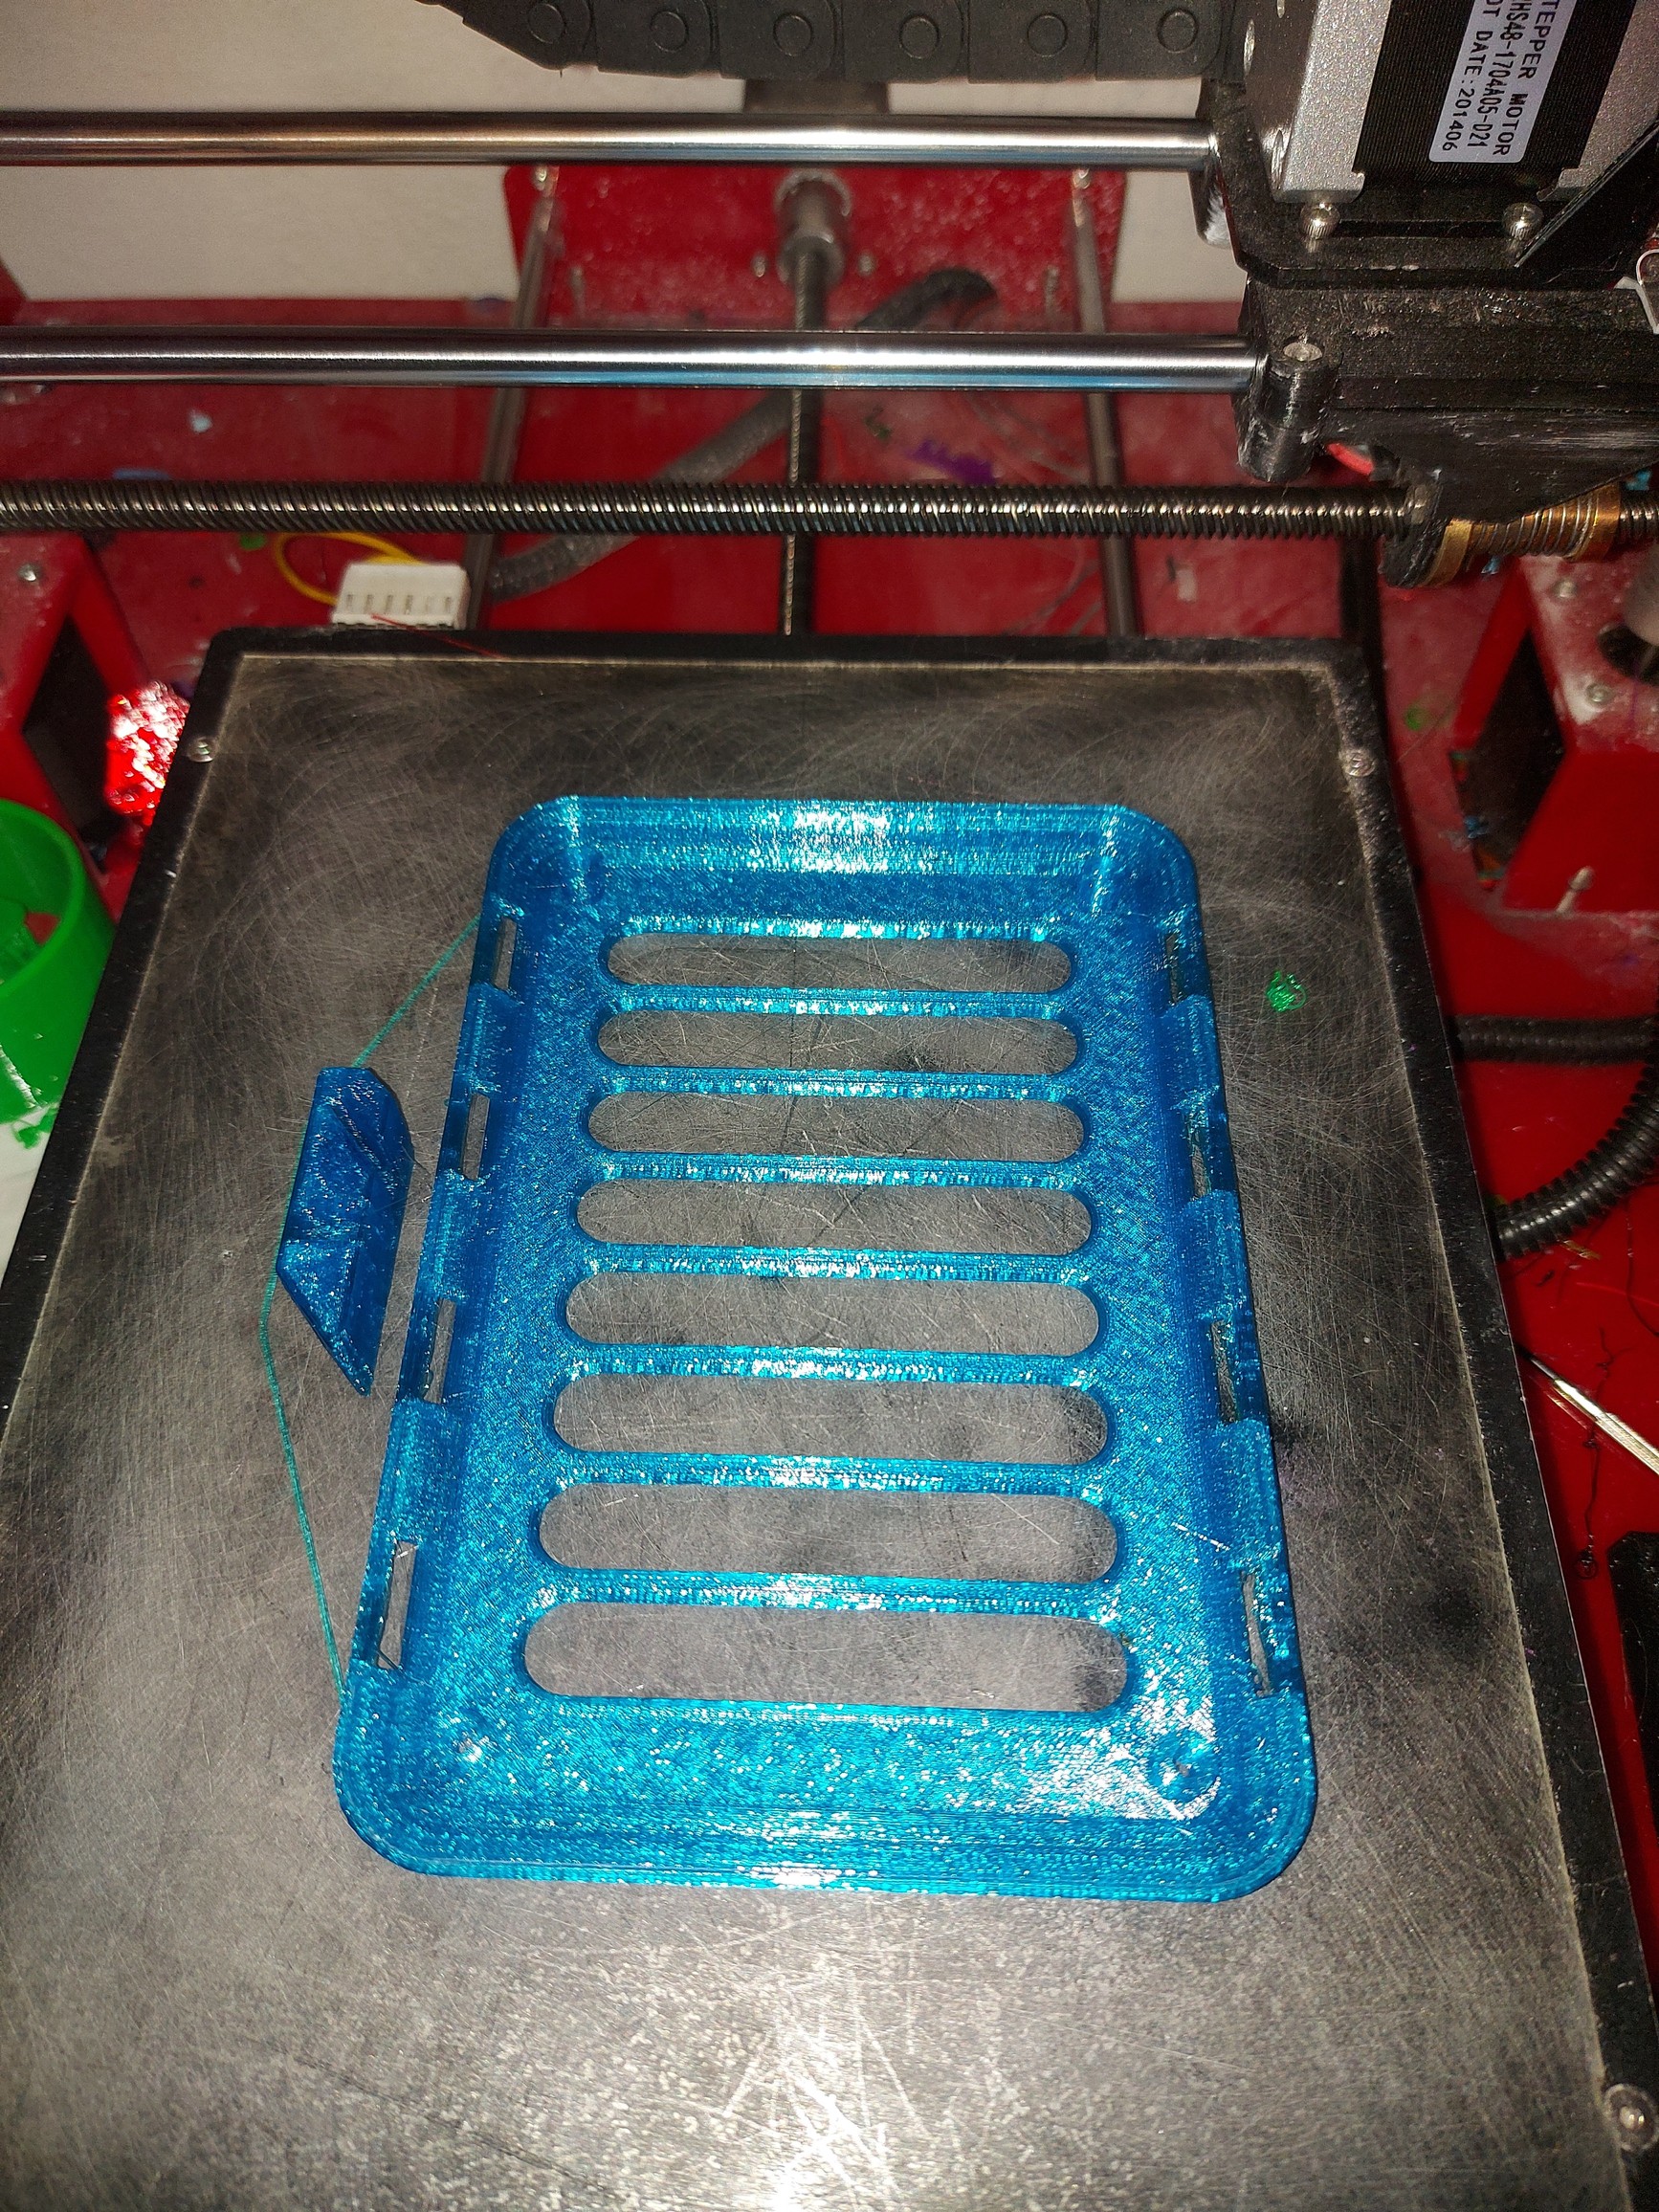
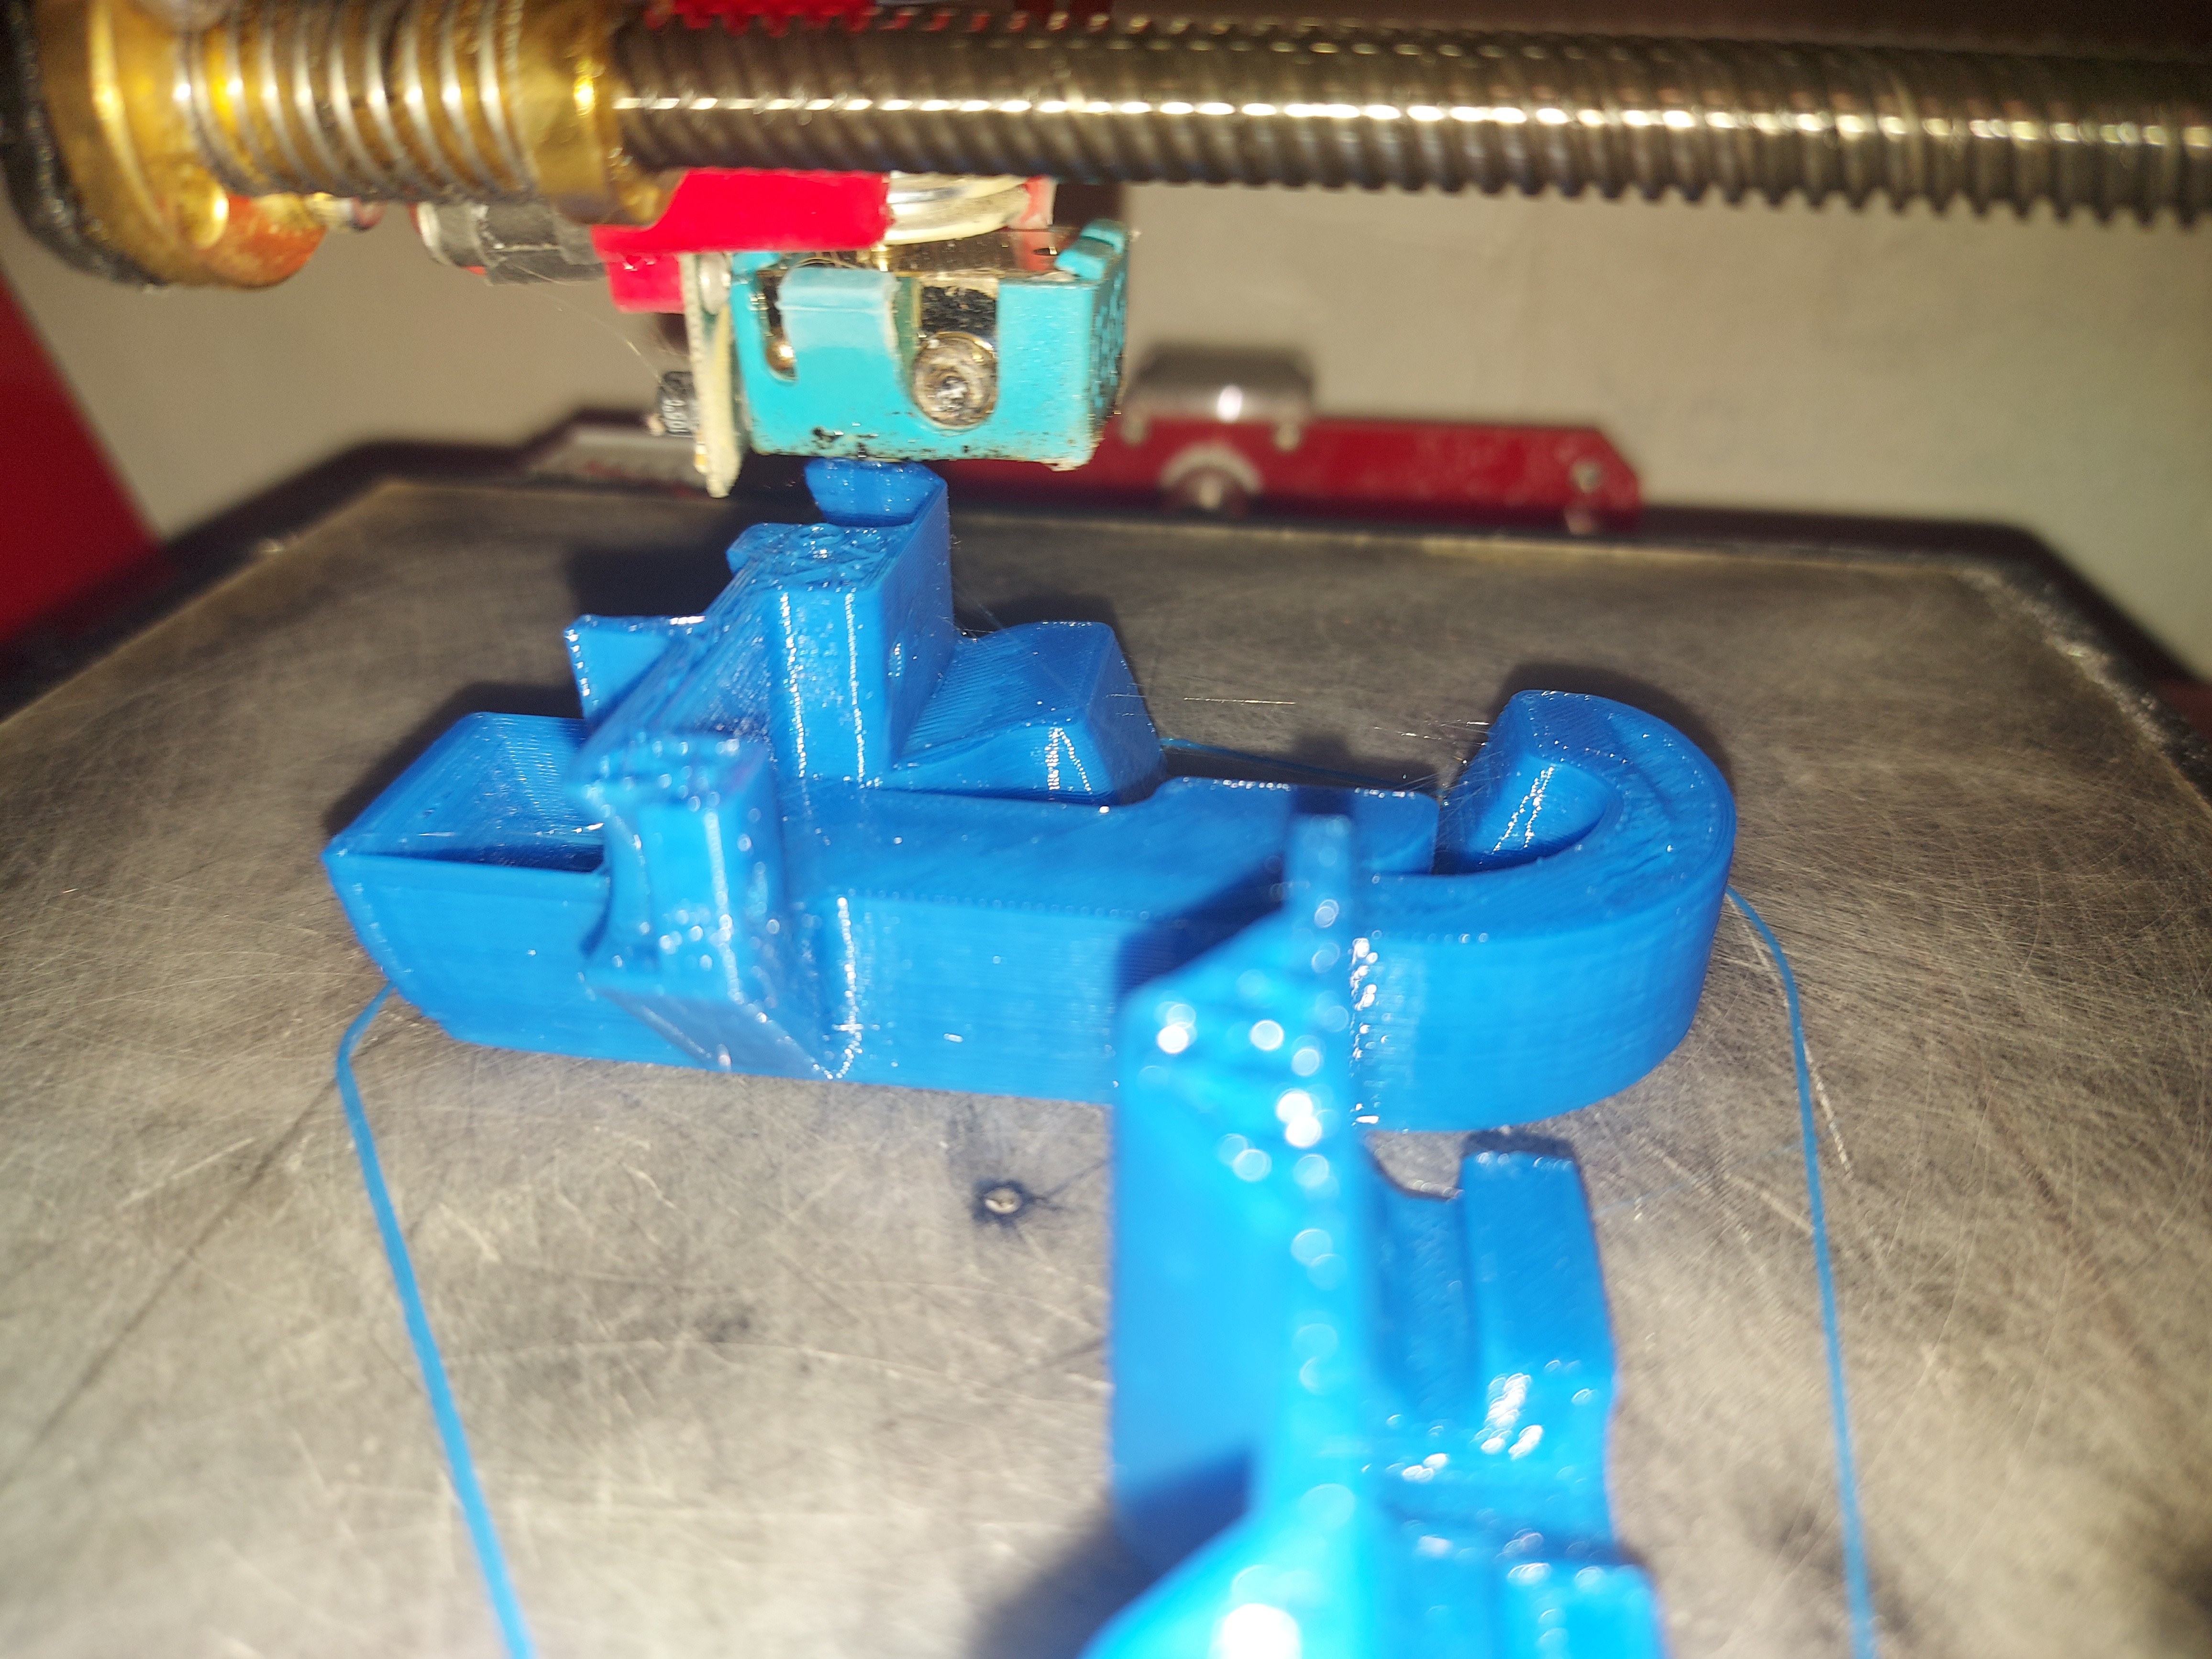
Just a tray for the SKR Pro. I also broke one of the belt tuggers, so I reprinted it.

It’s not too dissimilar from the tray that Ryan designed, with holes lined up to attach wires to. It’ll do until I can figure out more what I need.

My wiring is typically kind of messy. I should do something about that. It’s been that way since I was a teenager messing with stuff, so might not change anytime soon.


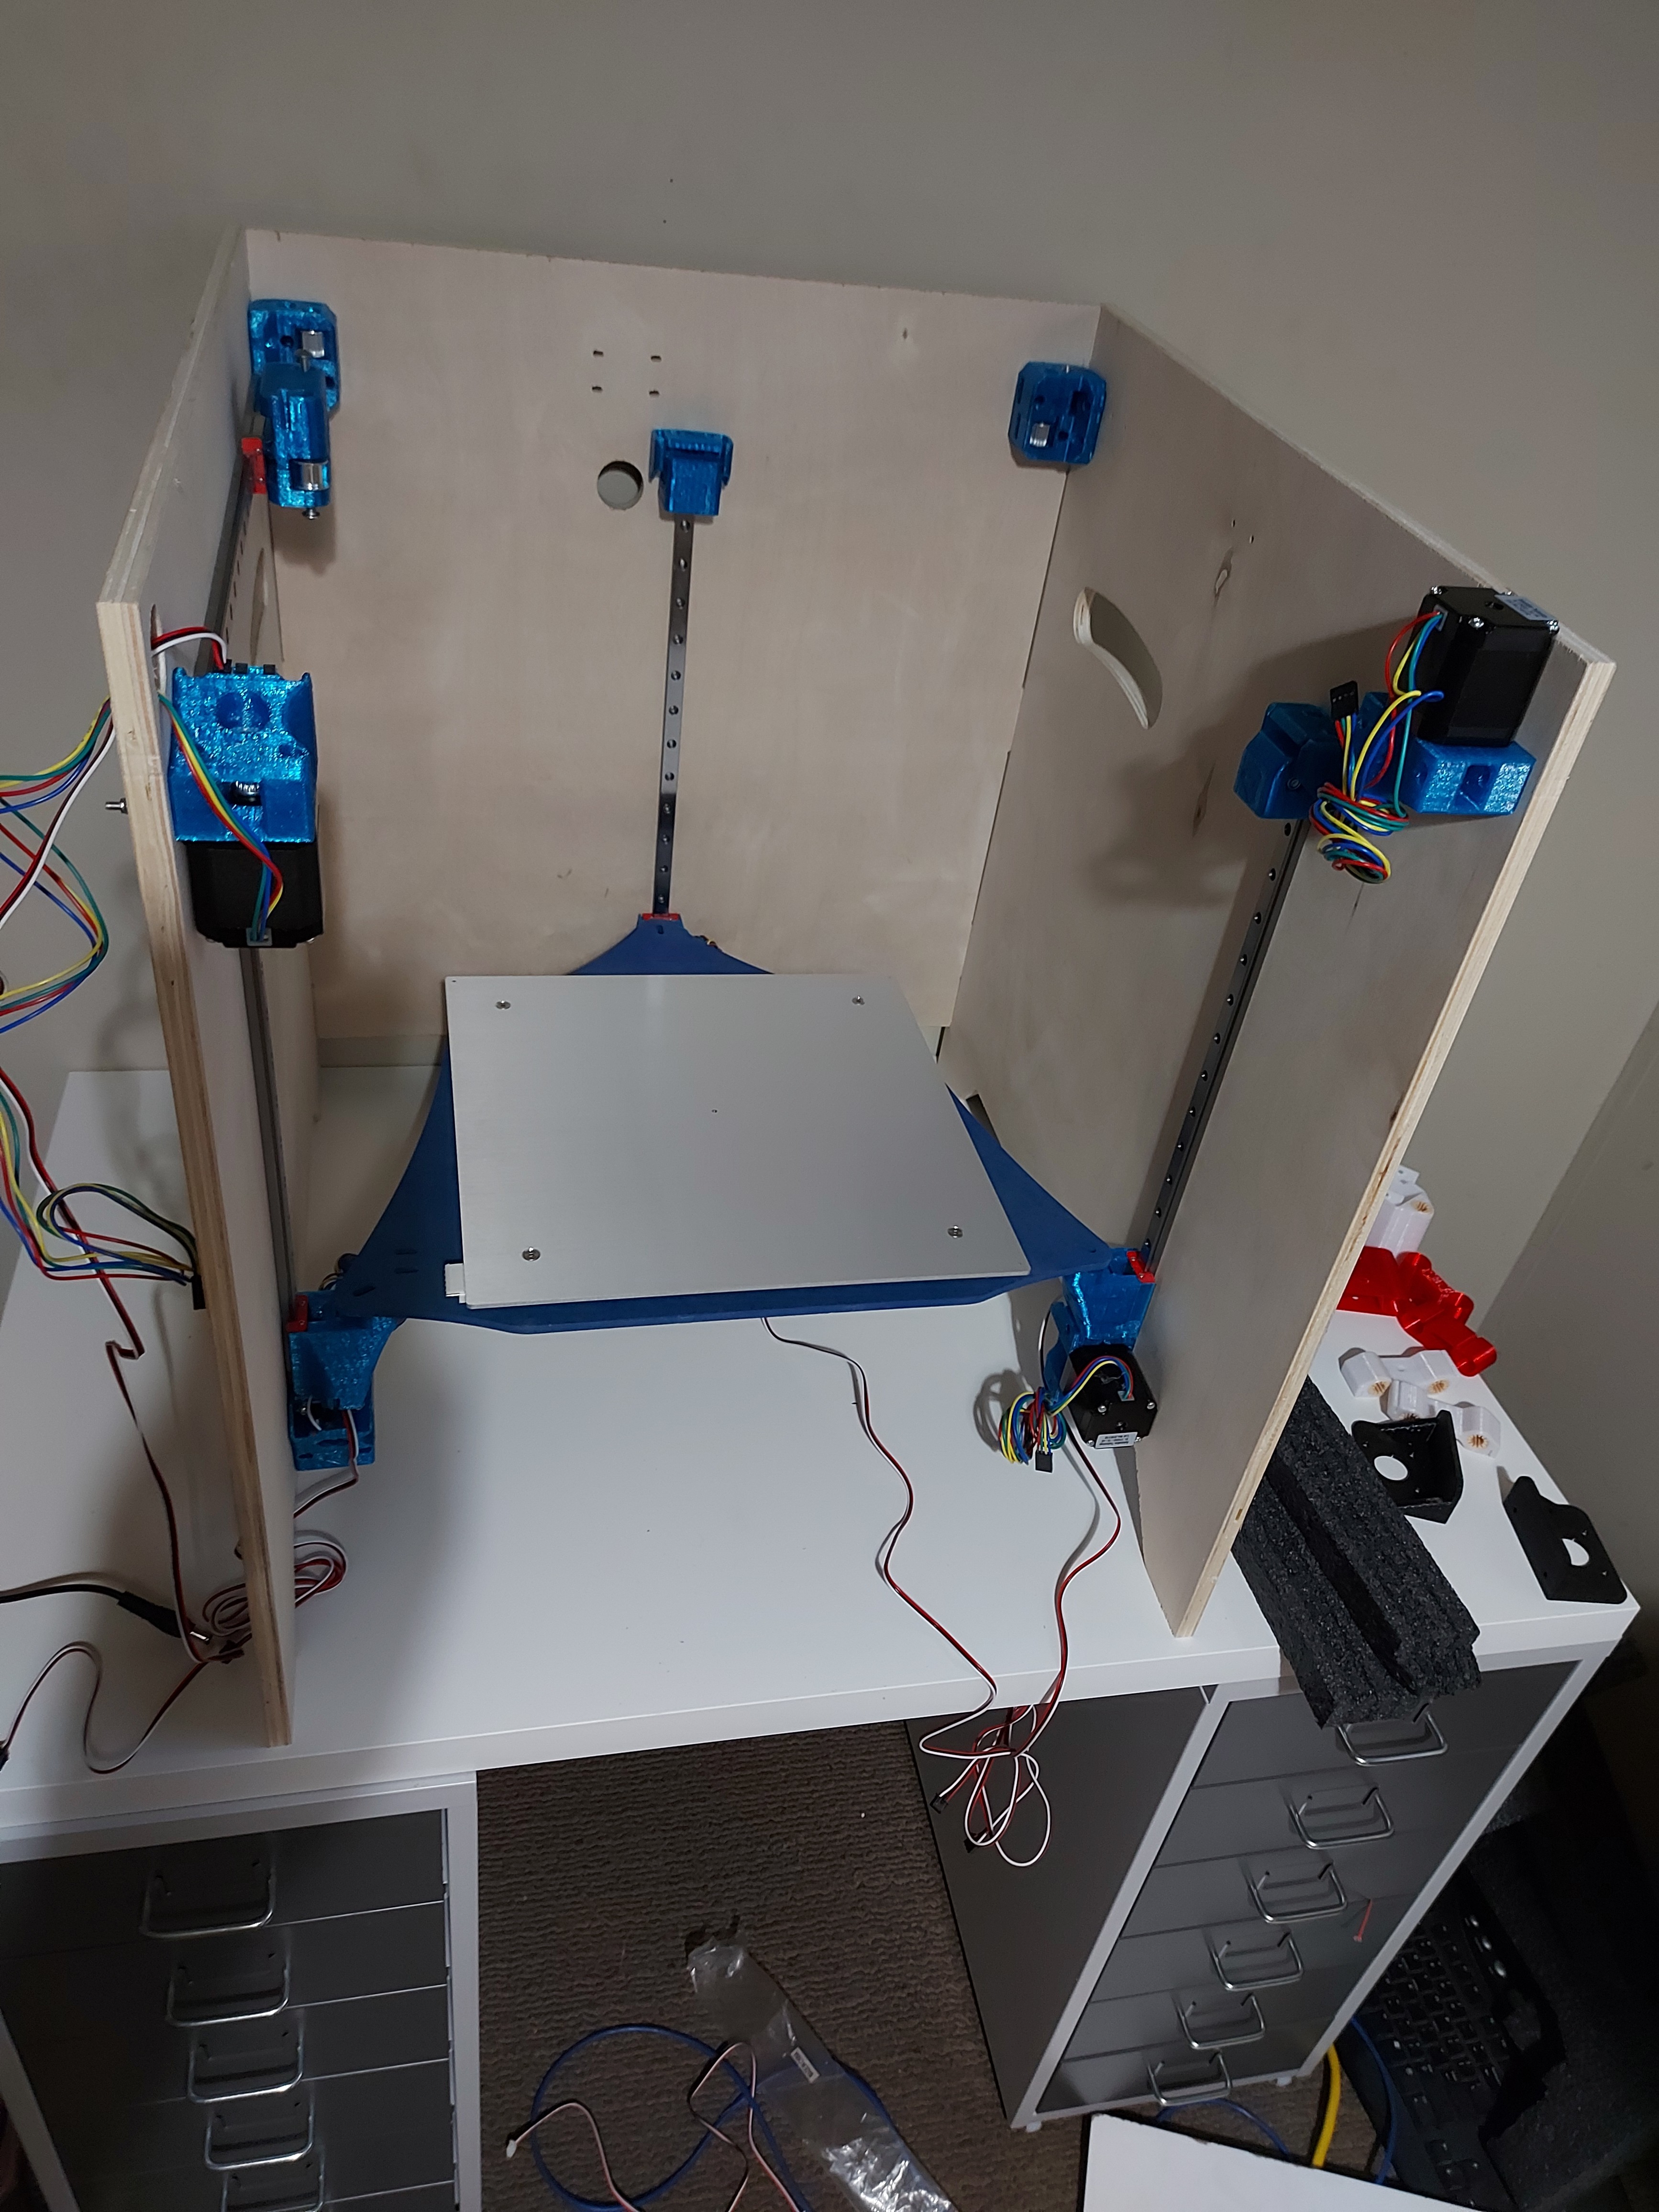
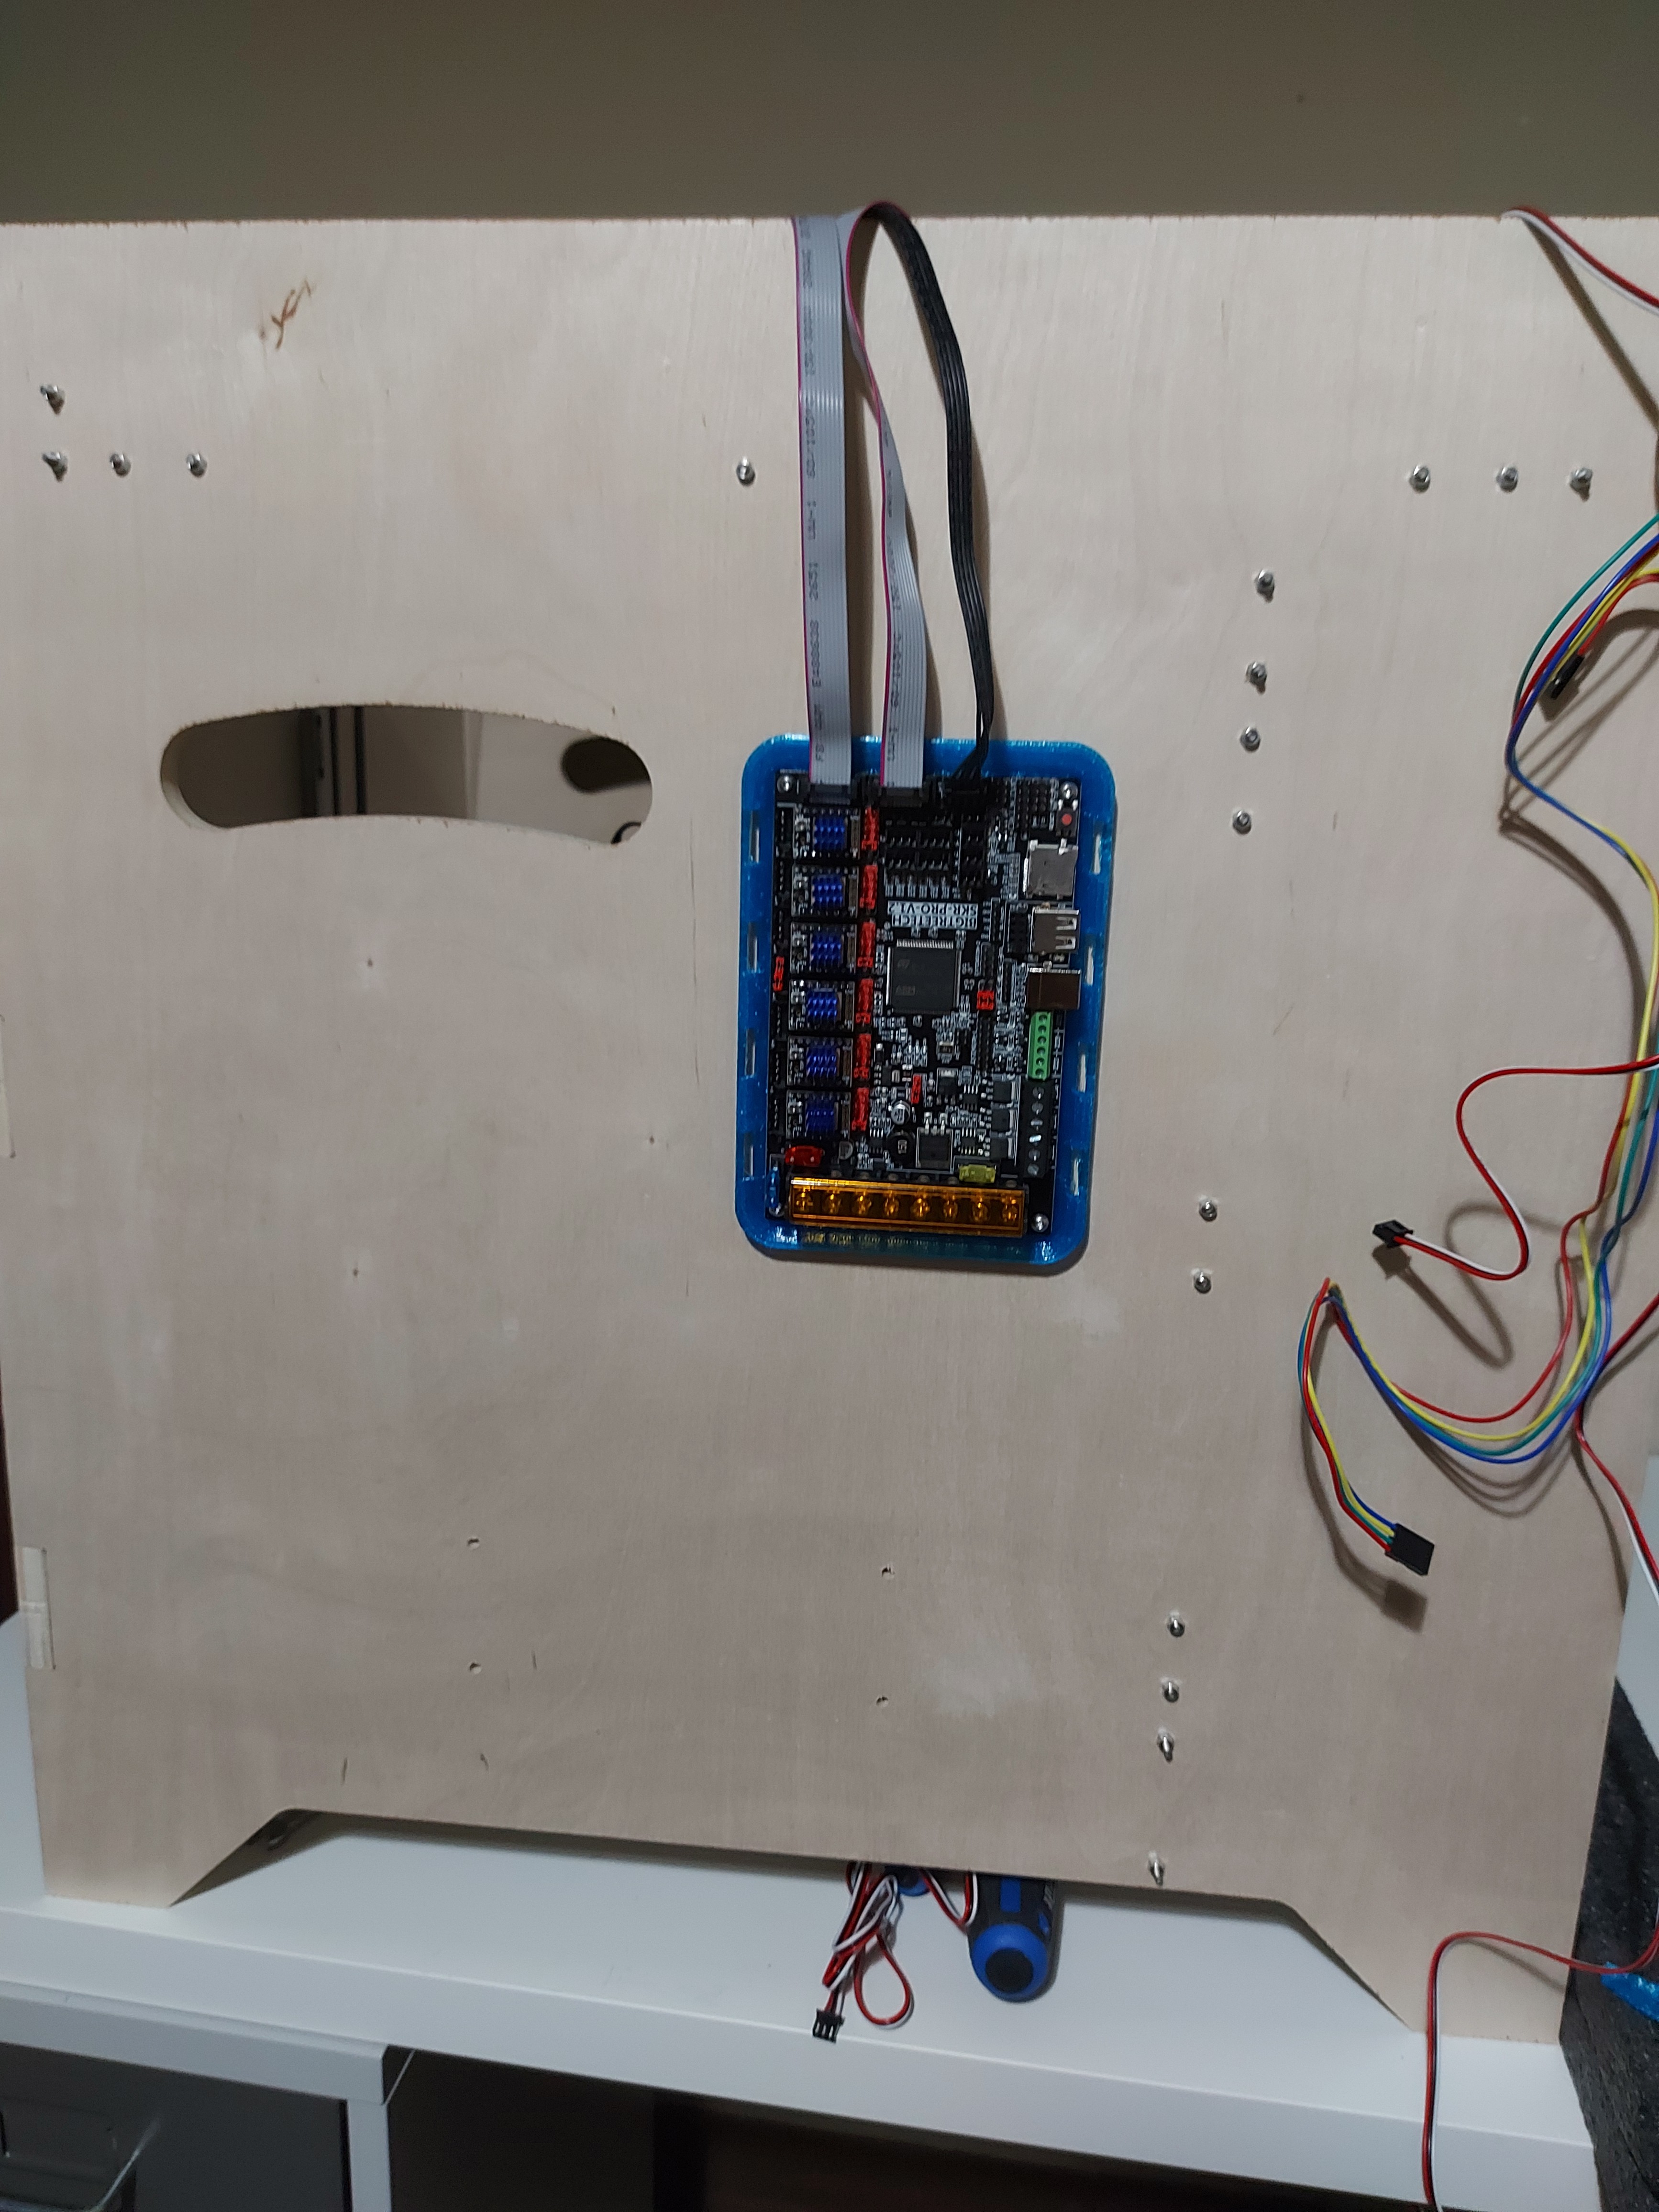
So that’s the tray mounted on the side.

Looking at the wiring… gonna need to extend the wires for the Beta motor, as well as Z2 and Z3. I’ll also need another passthrough on the left panel for the LCD and the Z motor wires.

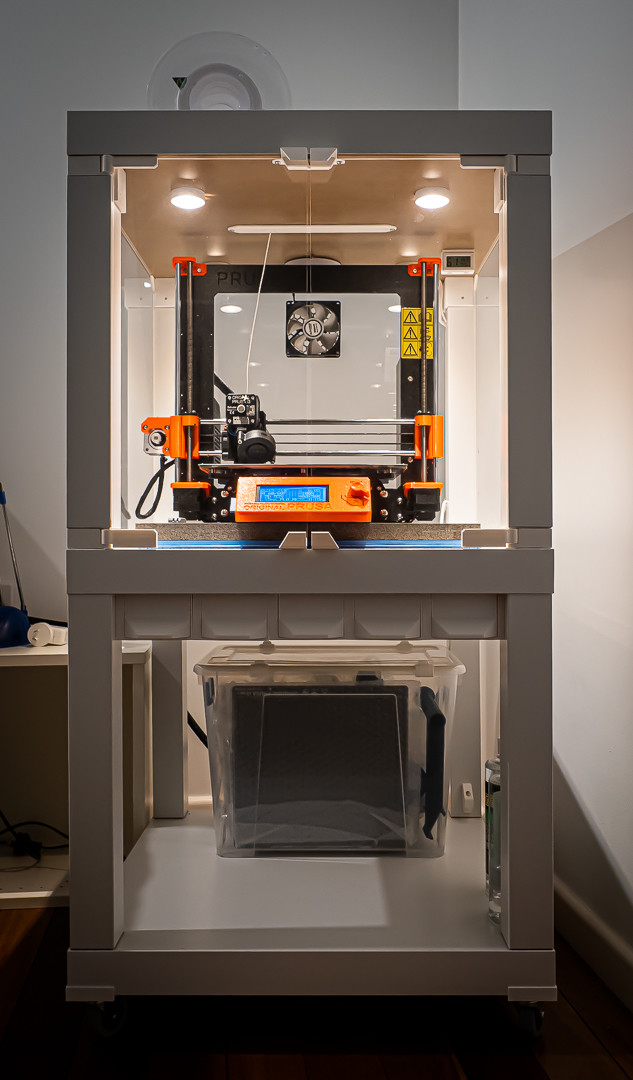
I put a couple of LED strips inside the front panel. They’re 12V, but I can either put them in series, or use a buck converter to drop the voltage. I tried the series trick with my old printer, it worked, but the LEDs got dim after a year. Maybe because cheap Chinese LEDs, maybe because of the series trick. I think I’ll use a dimmer circuit, which will allow me to save the LEDs lifespan, or just turn them off. It does require the buck converter, but… I have one.

I need some M4 screws for the PSU, too.

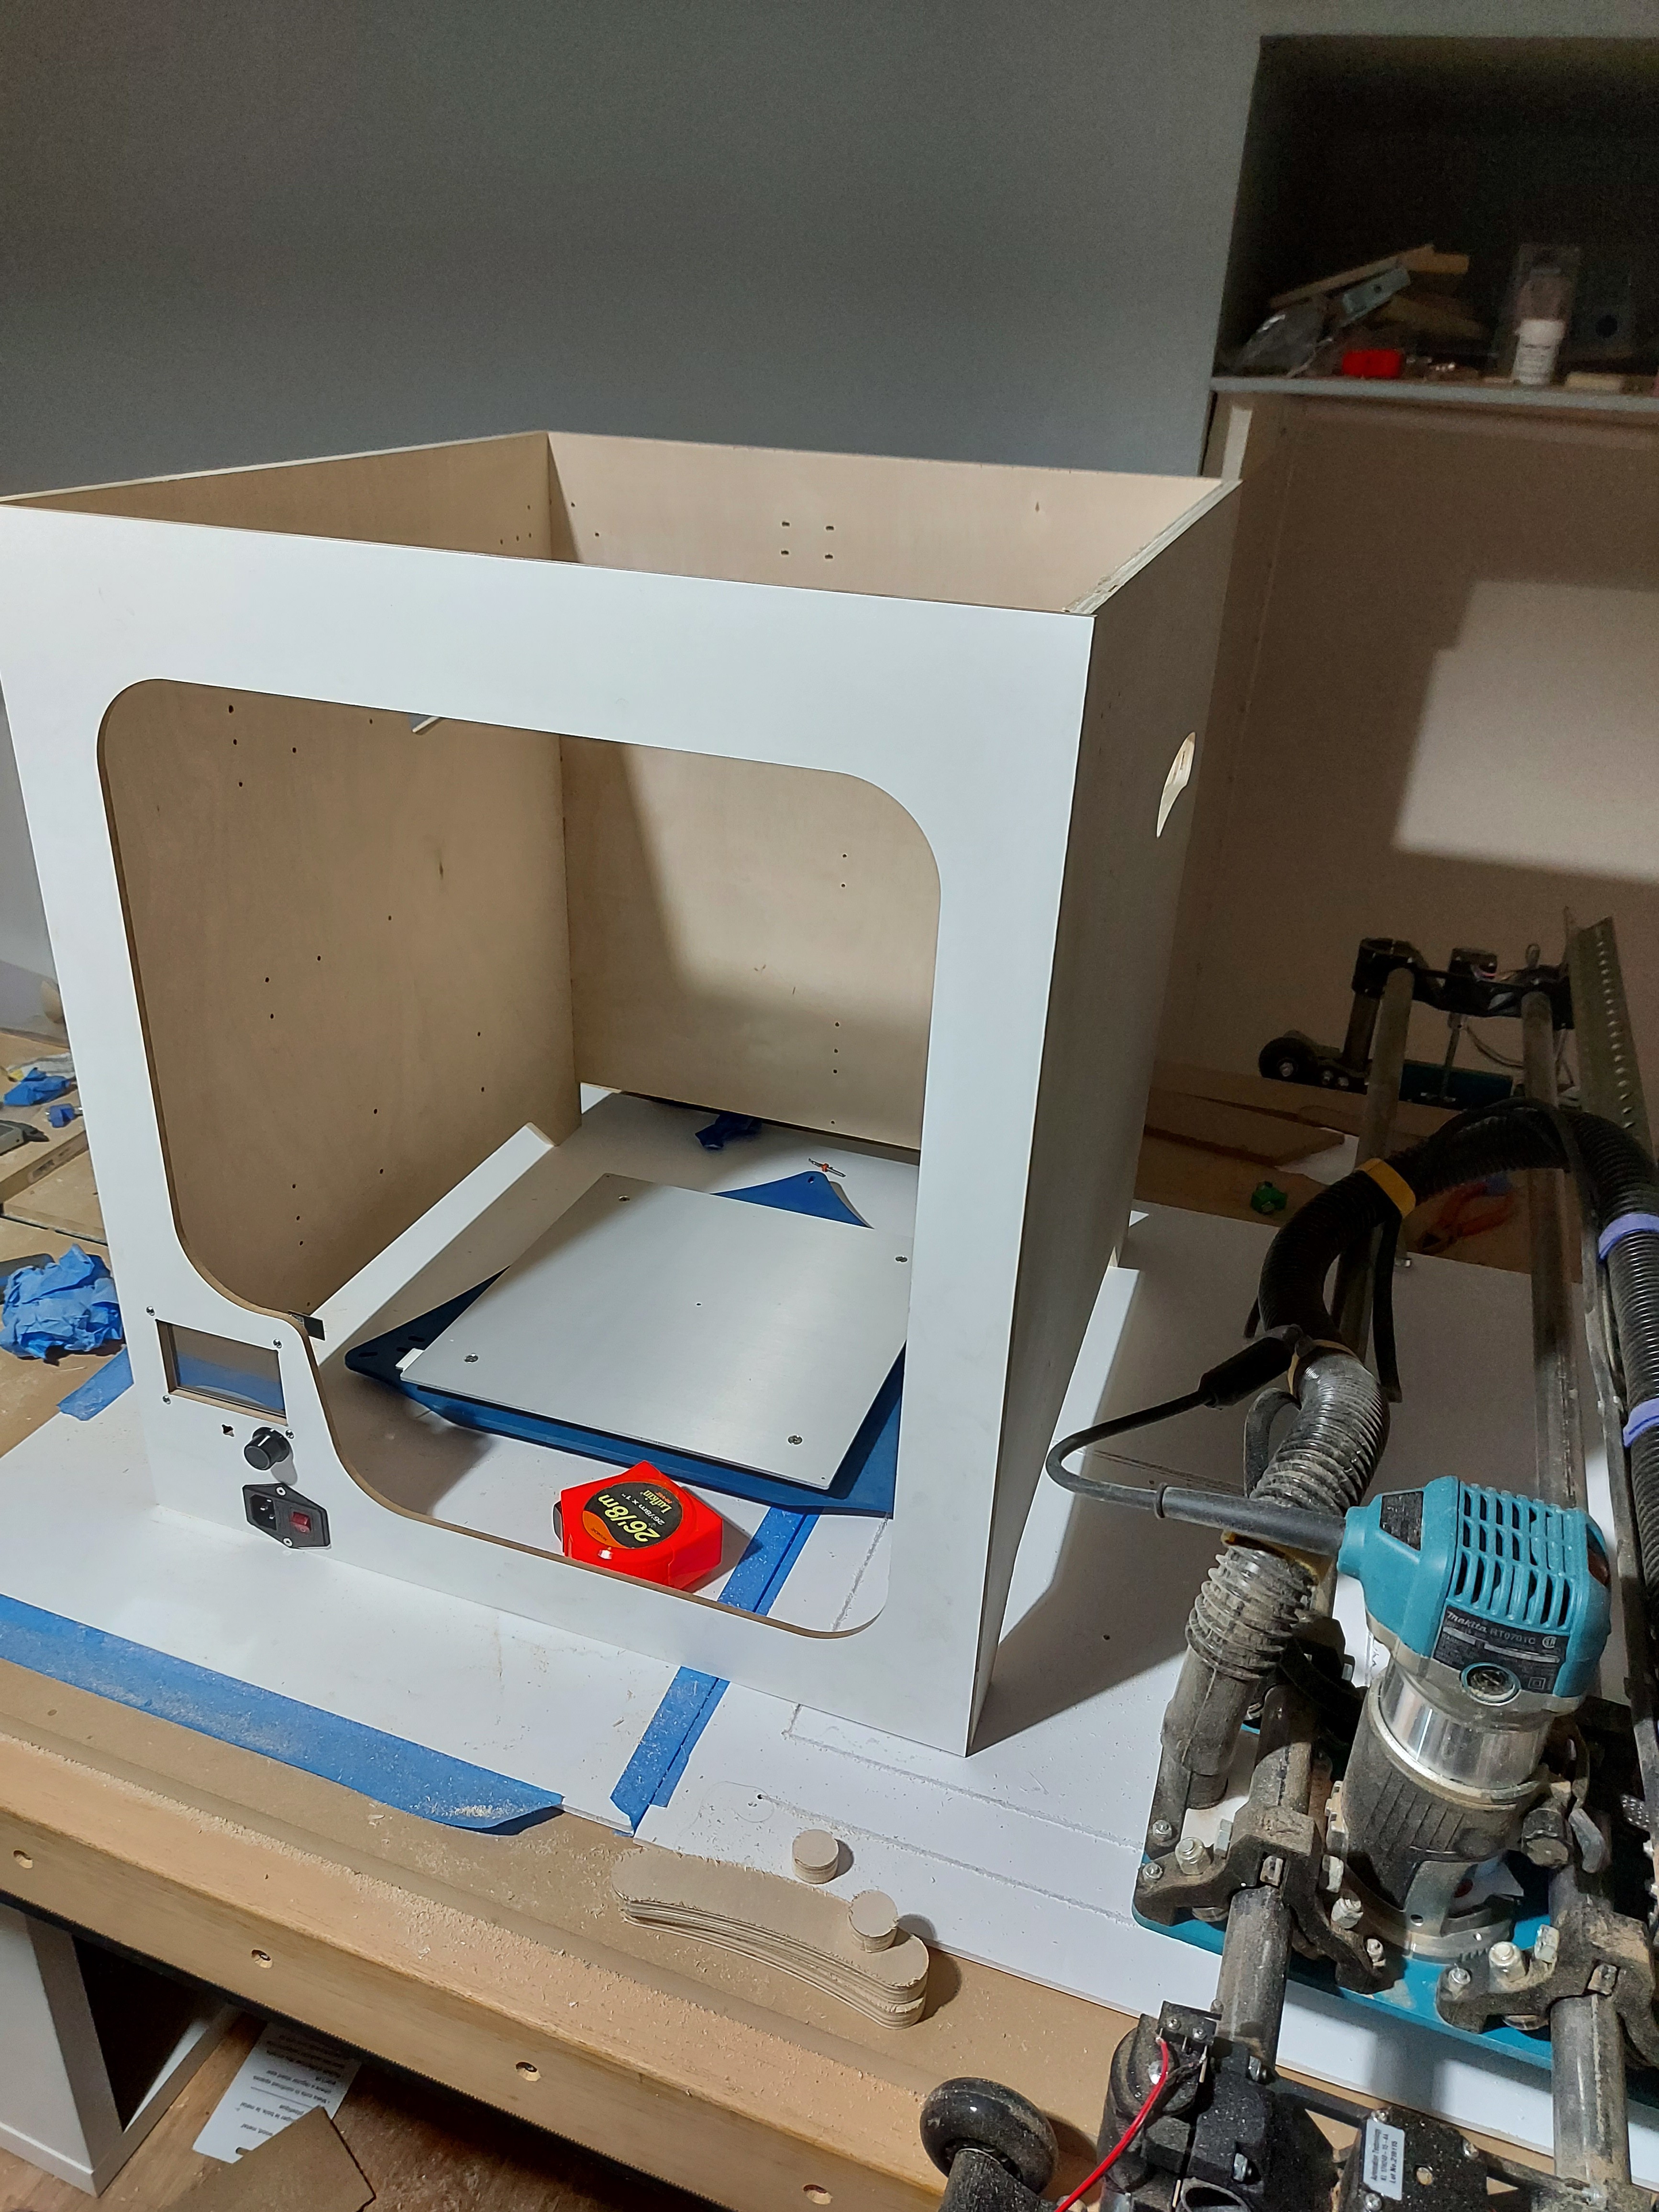
The hold-down screws for the build plate are a little short at 30mm. I think I need longer ones. The screw heads also are a trifle small for the springs, they can pop through if I tighten too much. I guess washers might be called for, too.

One of the supports for the build plate sticks out just a little too far, and it interferes with the hood over the belt pulley. (The one at the back center) I hope that I don’t have to raise the bed height more than that. Well, I suppose that I have a few mm that I can release tension on the bed springs, so I can most certainly get there.

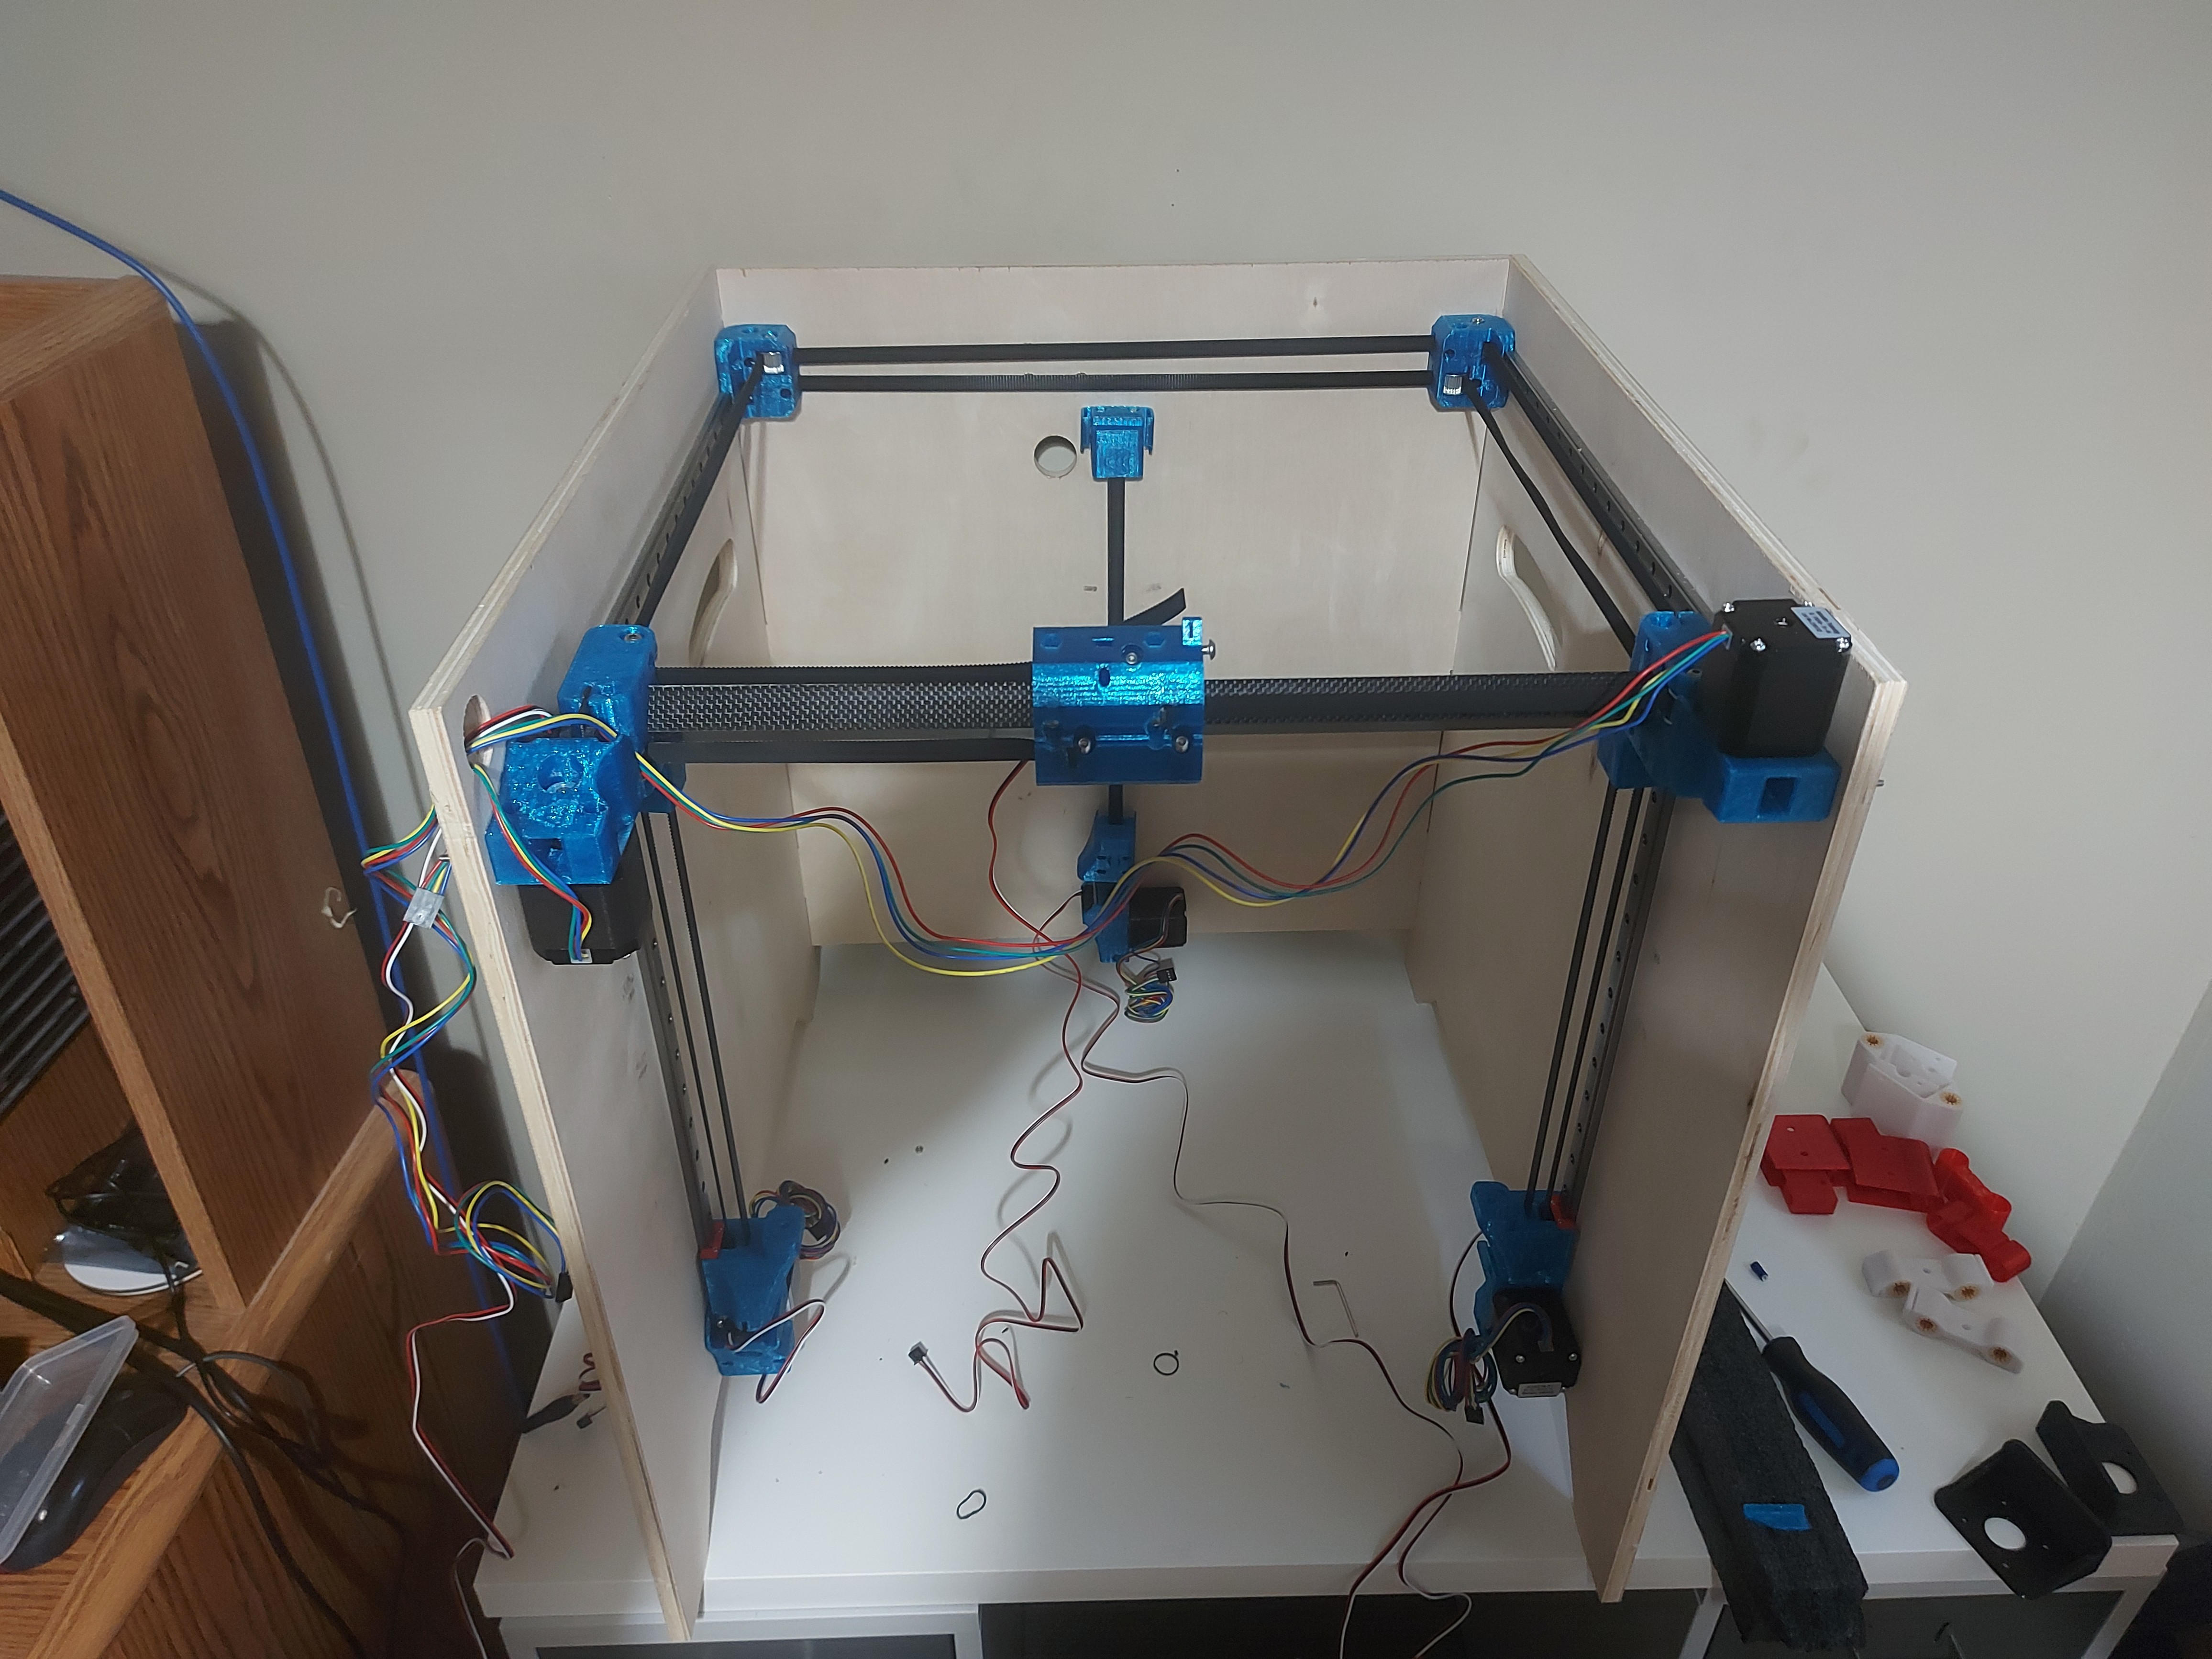
I really should have realized that I was going to need the extra pass through. Also, it’s almost 99% sure that the umbilical for the print head will come out the top of the left side, instead of the back where I left the provision for it. If I move it tot he left hand side directly above the board, I will not need any extenstion for the Hemera or the X endstop whereas I most certainly will need to extend all of that wiring if I do it at the back. If I do keep it at the back, I’ll make up a PCB to connect all the wiring to, and make up an extension harness, but really, I don’t see the need.

I left a few inches of belt sticking out the back of the belt tuggers, but I can see that these might interfere when the printer is close to Y_MAX, so I’ll trim them as soon as I have the machine guaranteed square and the belt tension adjusted to my liking.

2 Likes

This isn’t a flippant hijack, just some thinking going on in the background.
There’s something to be said for Ikea’s hollow legs and table tops. All the wiring and switches in my setup are completely invisible. Perhaps there’s room in future for a double skin or hollow beam to make management of (concealment of) wiring runs easier? Perhaps run everything on the outside and clip a light skin in the material of your choice over it all?

Not sure if an enclosure is contemplated, but that stepper might make it interesting putting a lid on the thing. If so, and yes I know you live in a place where a balmy spring evening does not bring you 27° and 65% humidity (for the benefit of the pixel peepers who spot the hygrometer in the cabinet) but be aware that when that 5" fan is running and the doors open some days I struggle to keep the temperature below 30° in the cabinet - and PLA doesn’t particularly like it after that.

Hmmm… about now I’m really glad I’ve only got room for one printer… :smiley:

Hmmm… I wonder if there’s room for a third floor… :thinking:

2 Likes


My printer’s less than stellar performance at bridging is going to cost me a bit for this fan shroud. The Hemera mount should be fine though, and I think the fan shroud will work well enough to print its own replacement when the printer is up and running.

It isn’t hard to anthropomorphize machines, and I sometimes wonder if my printer’s recent snits are because it’s working on its own replacement.

Well regardless, I don’t intend to entirely retire it, but instead I’m hoping to implement improvements to its design to make it faster and more accurate.

3 Likes


Well, that’s one potential worry out of the way. No problem with having the ability to get to Z=0

The Hemera mount isn’t bolted onto the hub yet, it’s just friction fit. I have some spare belt pieces holding the Z axis up, but for now the Z belts are tight enough not to slip that.easily anyhow.

I need 4 more M3x8 screws to fit the fan shroud. The M3x10 bottom out in the mounts. (Docs say no more than 3mm depth. I have M3x6, but those aren’t quite enough. It’s a small range of size that works, and I ran out of them.

I have 4 extension harnesses to make, then I should be ready to claim my serial number :rofl: 
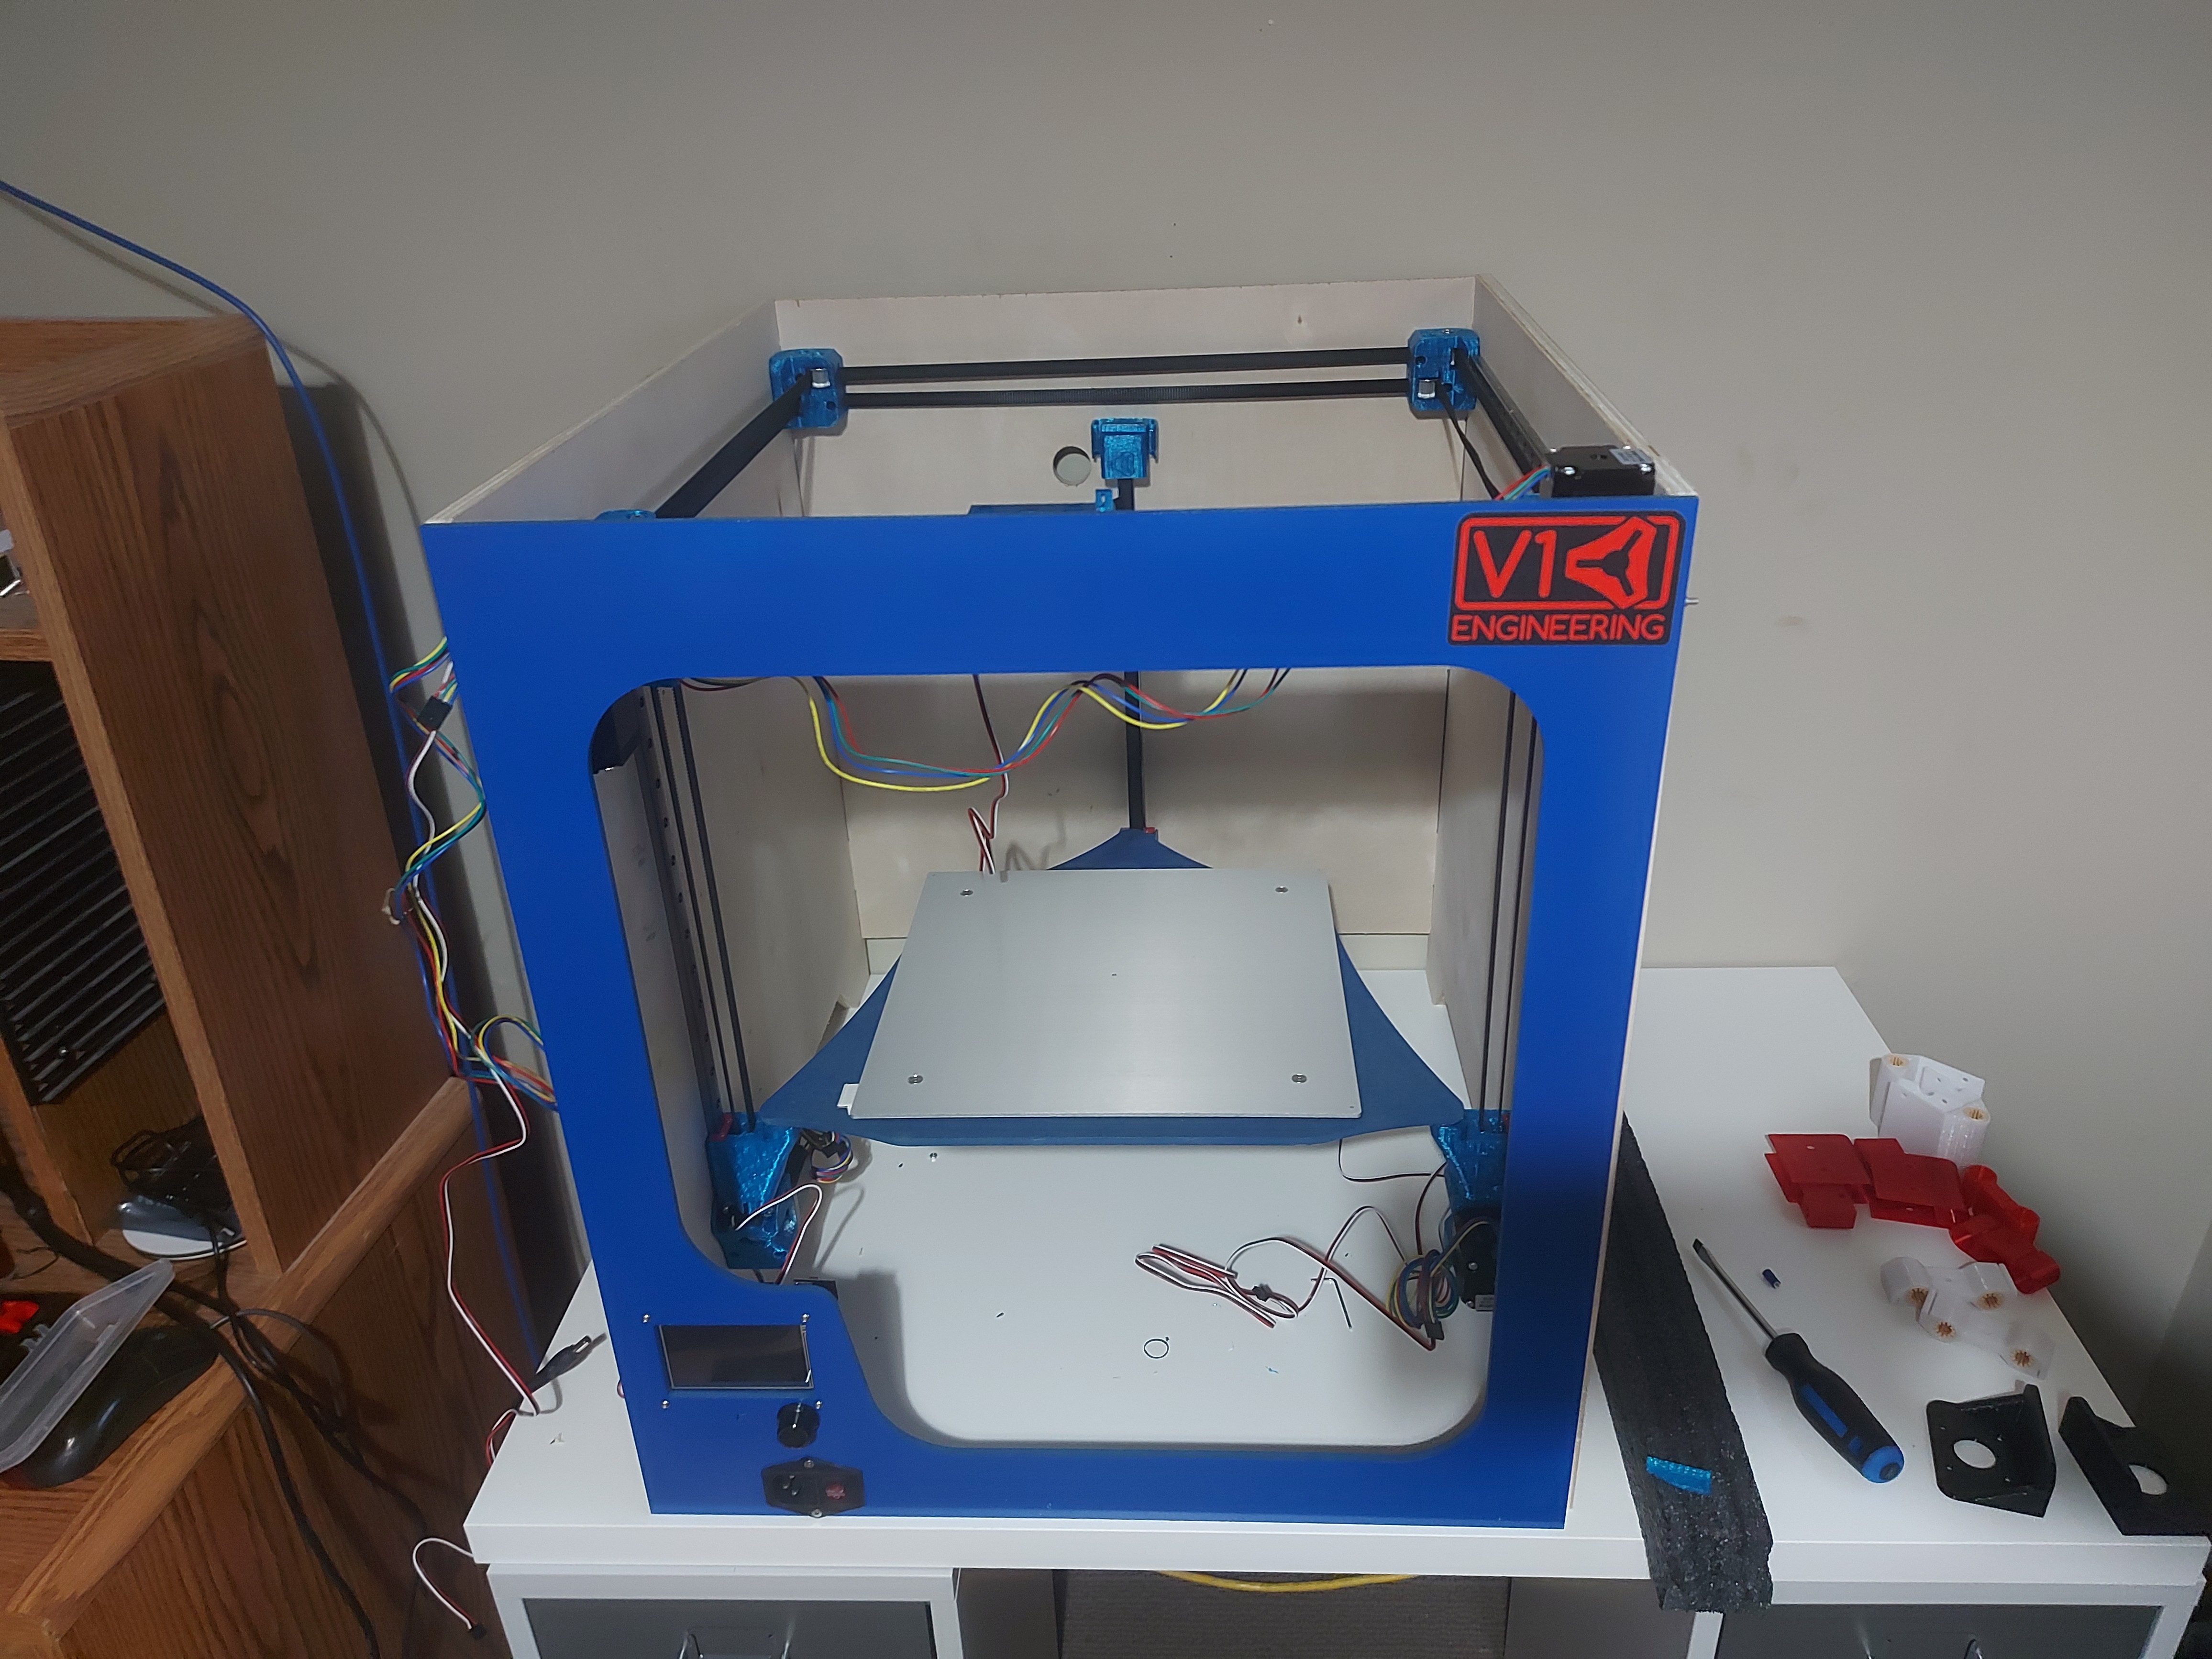
at that point it should be able to start up.

I got the ESP01 flashed, and it seems to work, at least it is reporting back on the web interface. I have 2, so I put one on the LR2 as well. The 8.3 filenames are a pain, funny all the files on the LR SD card are MP3DPV~#.GCO where # is from 1 to 7. Naturally I have no clue which file is what panel, but it at least proves that I’ll be able to put files on the SD card over wifi, even if I have to stick to 8.3 conventions. So long as Marlin will let me print .GCO files…I know it doesn’t like .NC

File management was my big concern. So long as I don’t need to sneakernet files from the second floor to the basement or vise-versa I’ll be happier.

1 Like