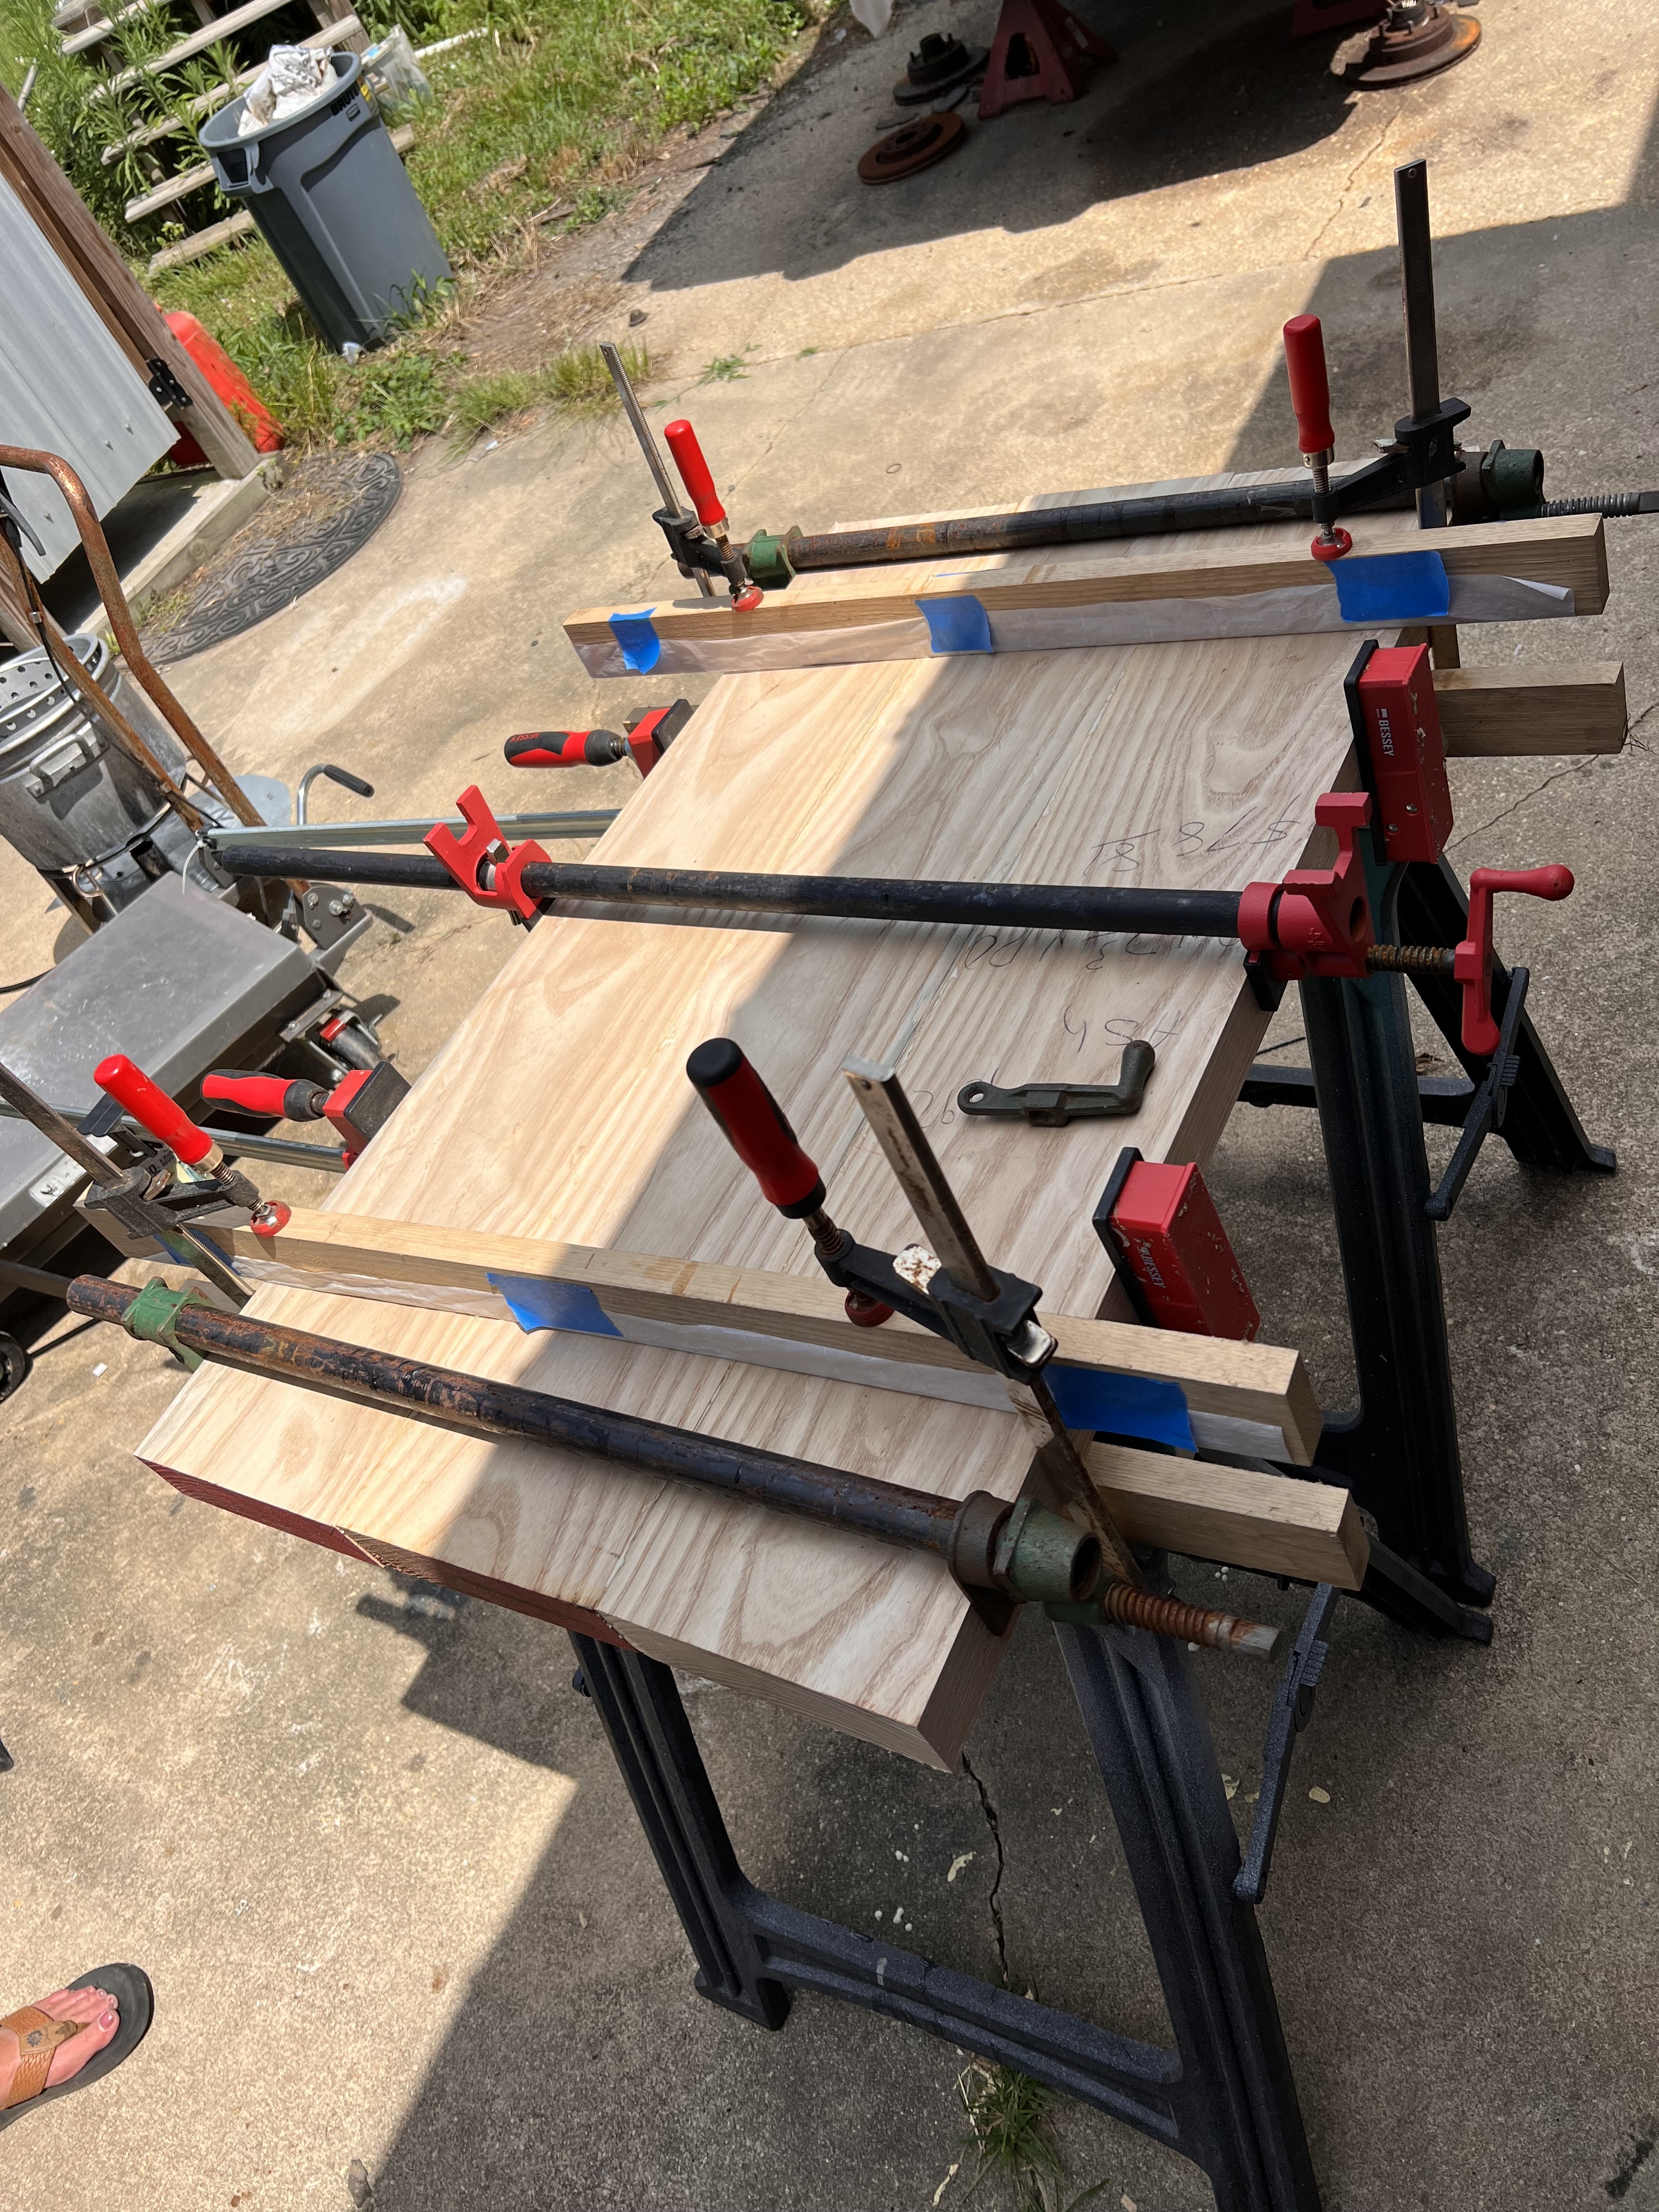
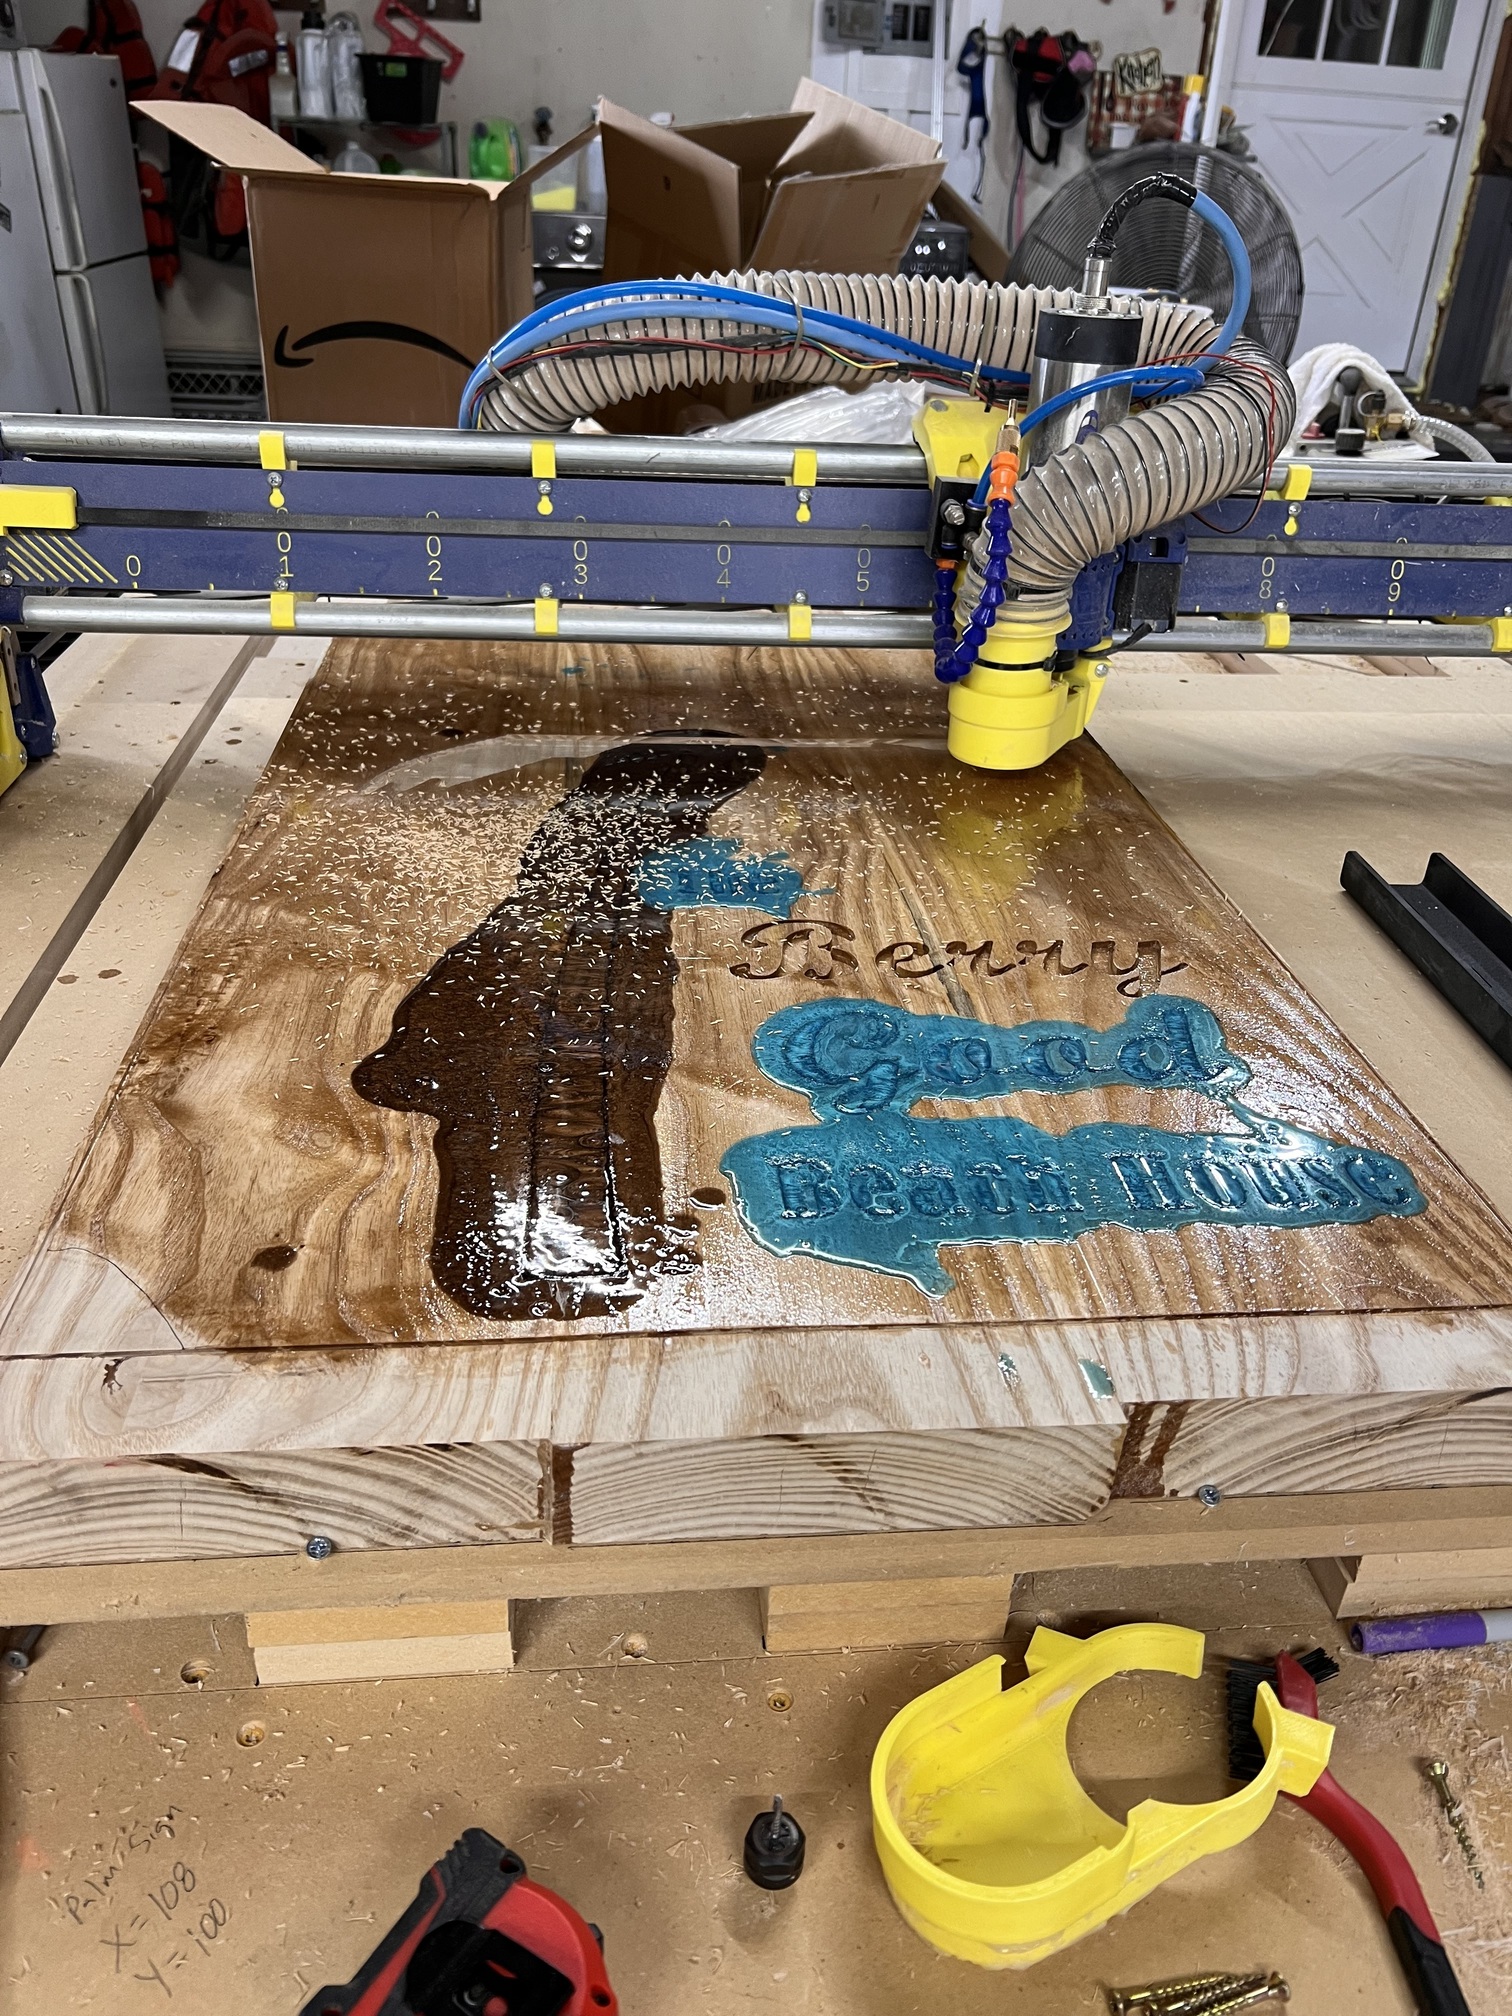
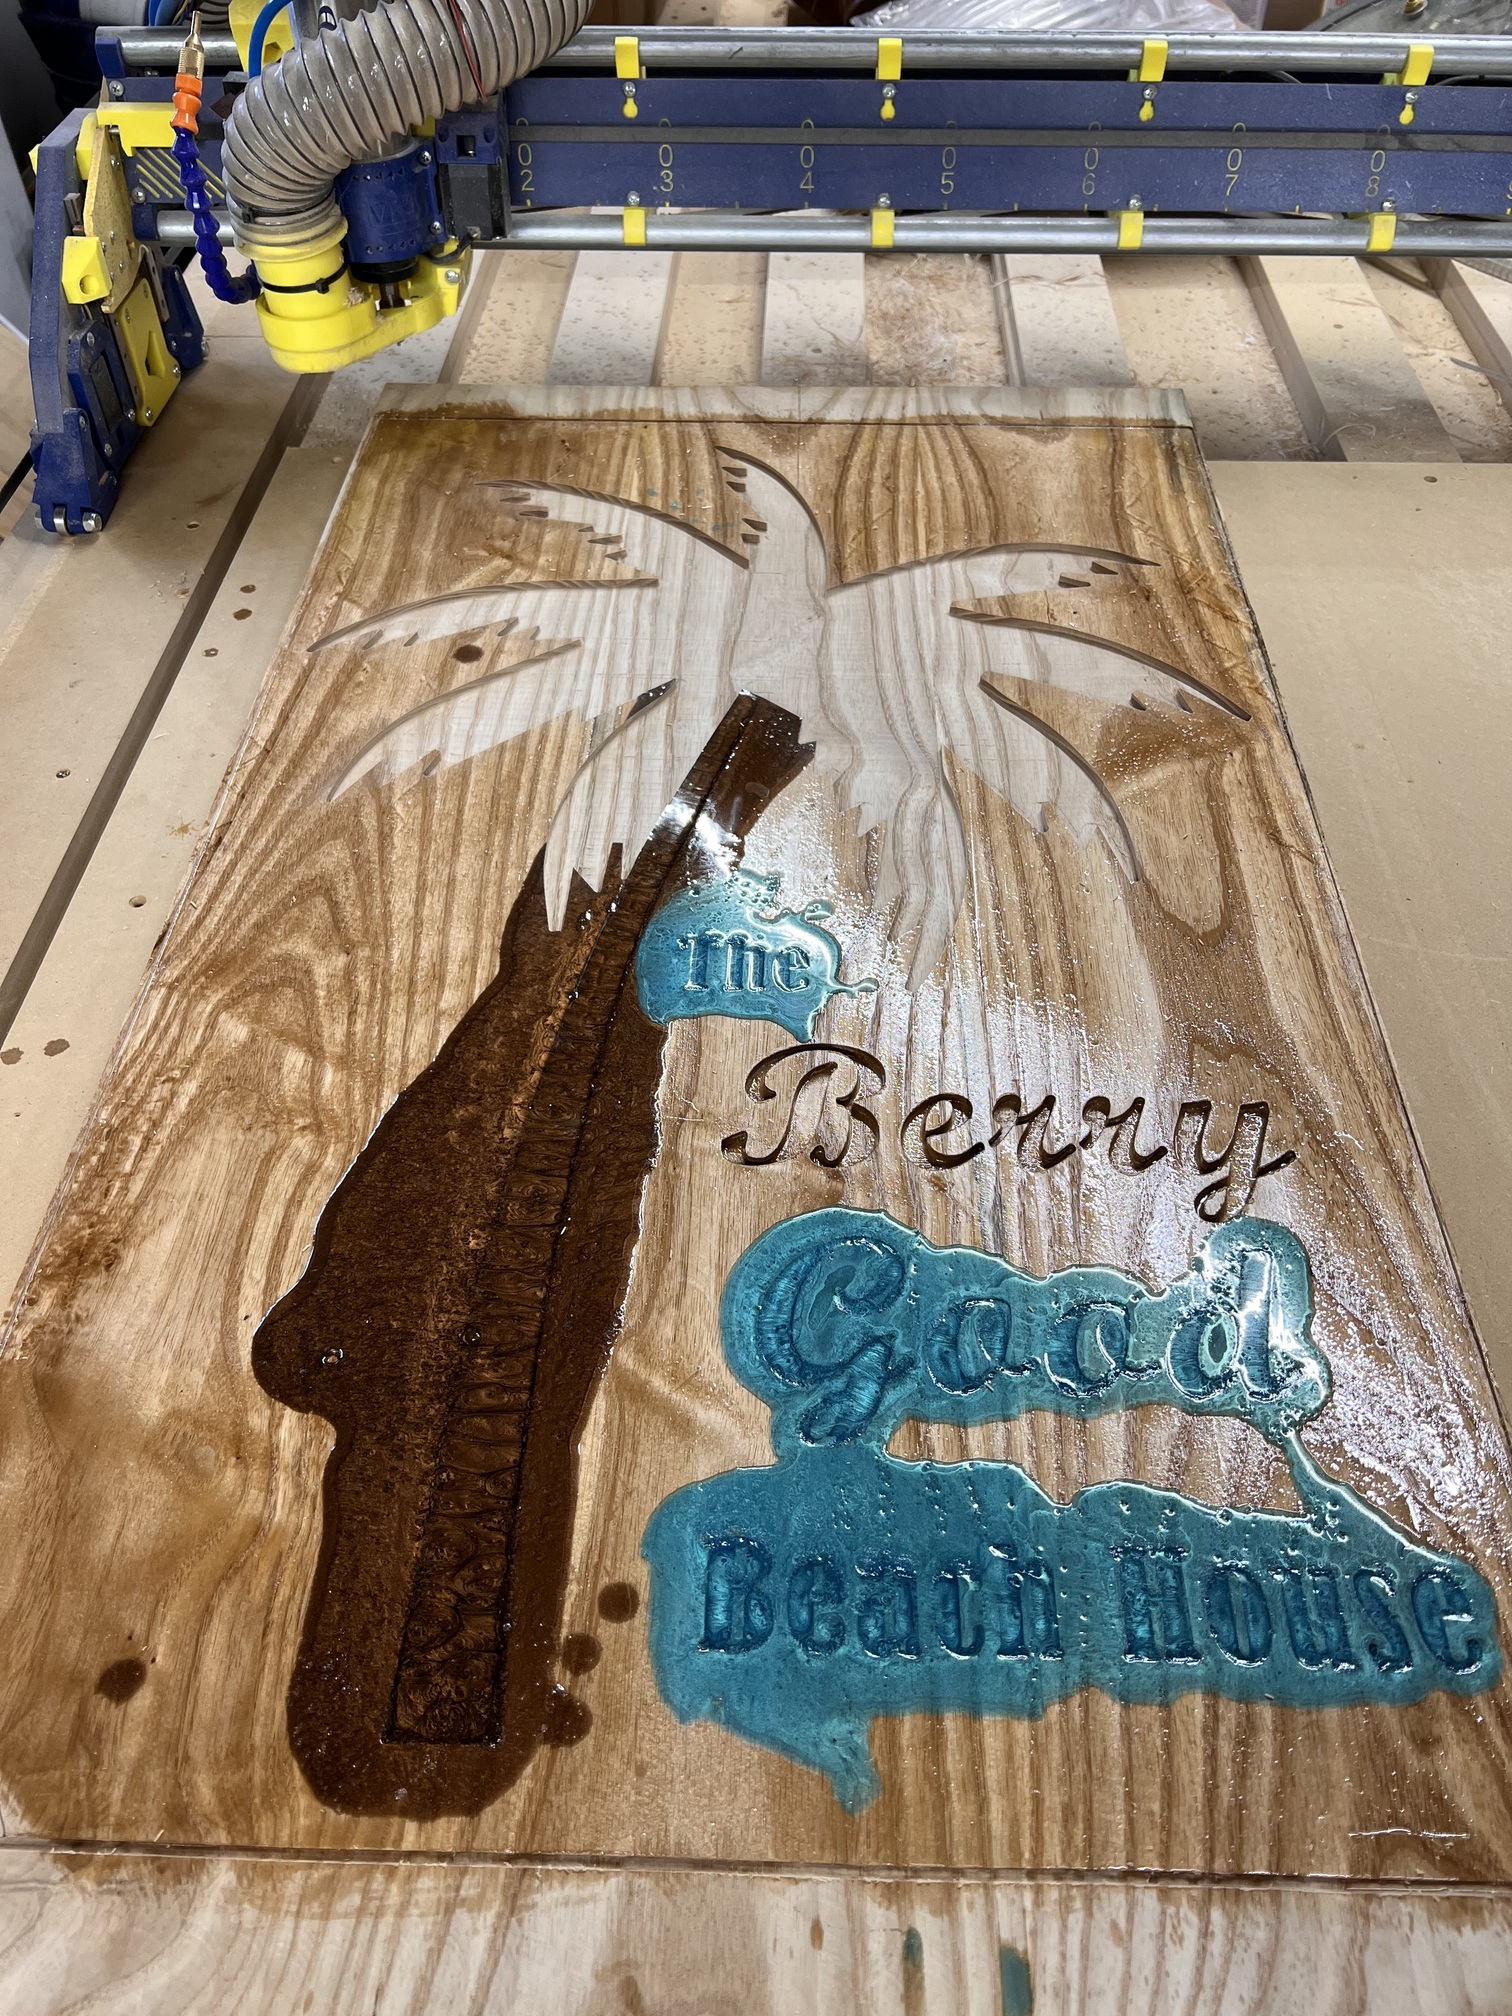
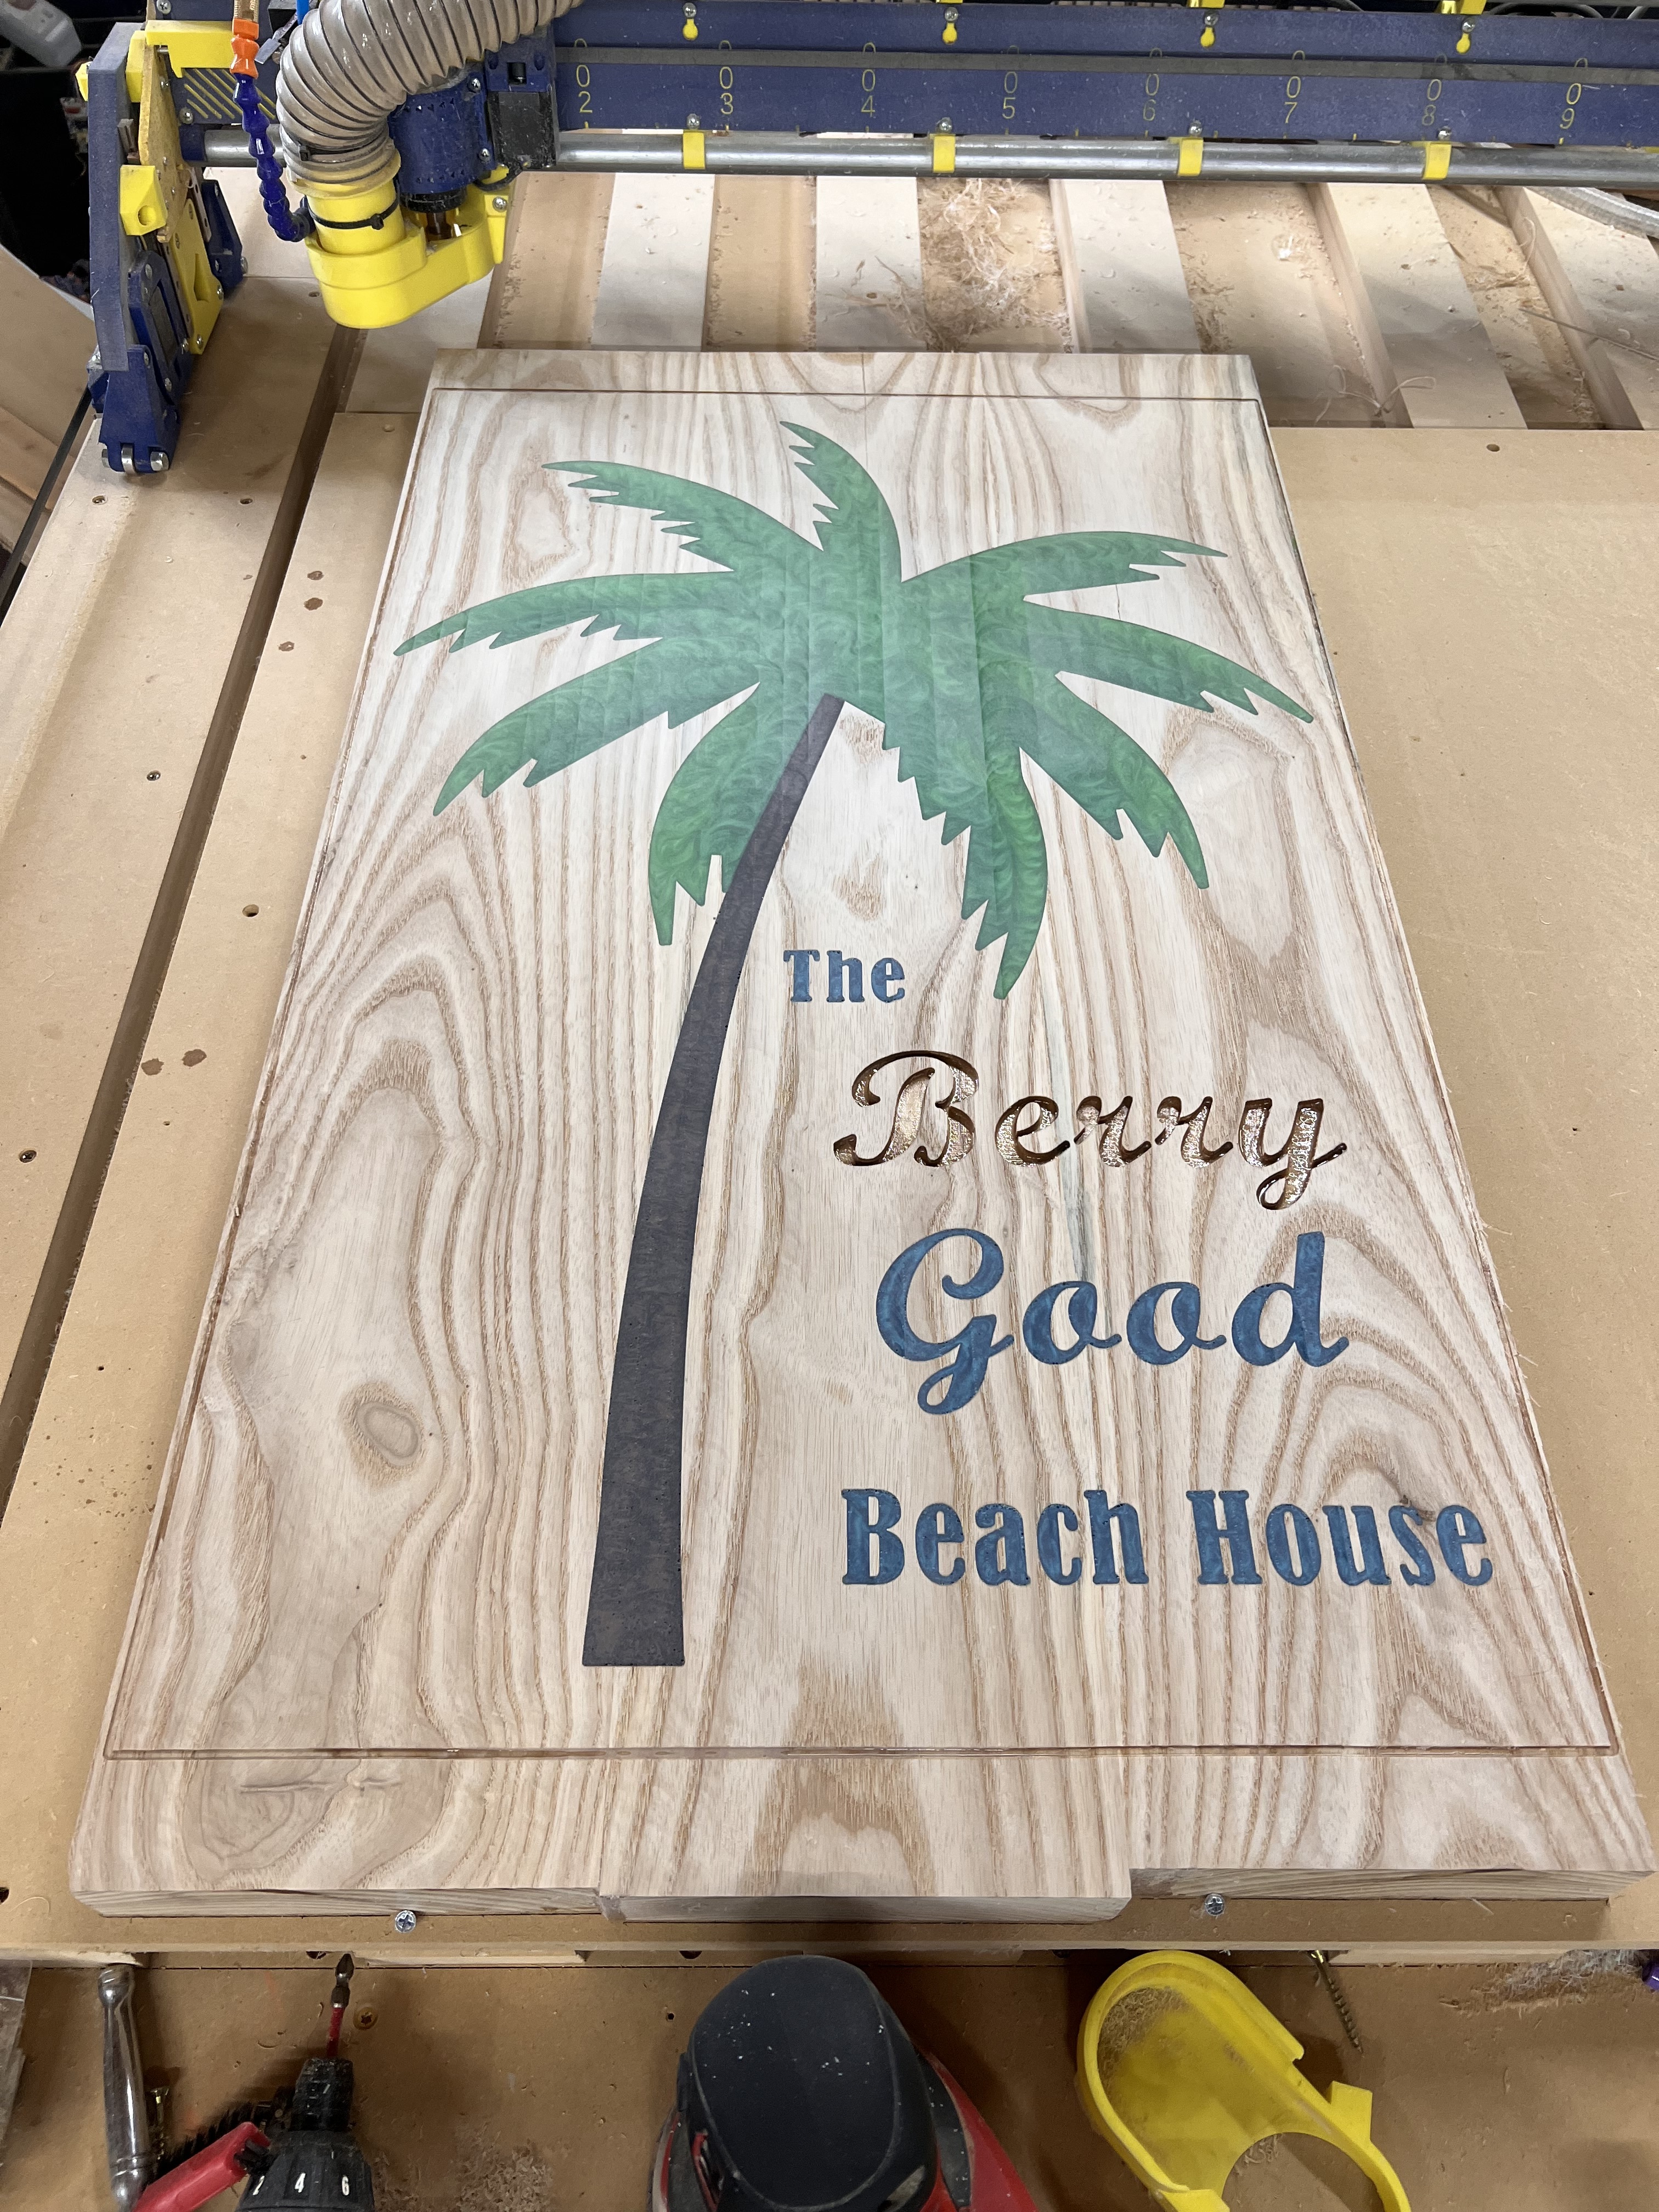
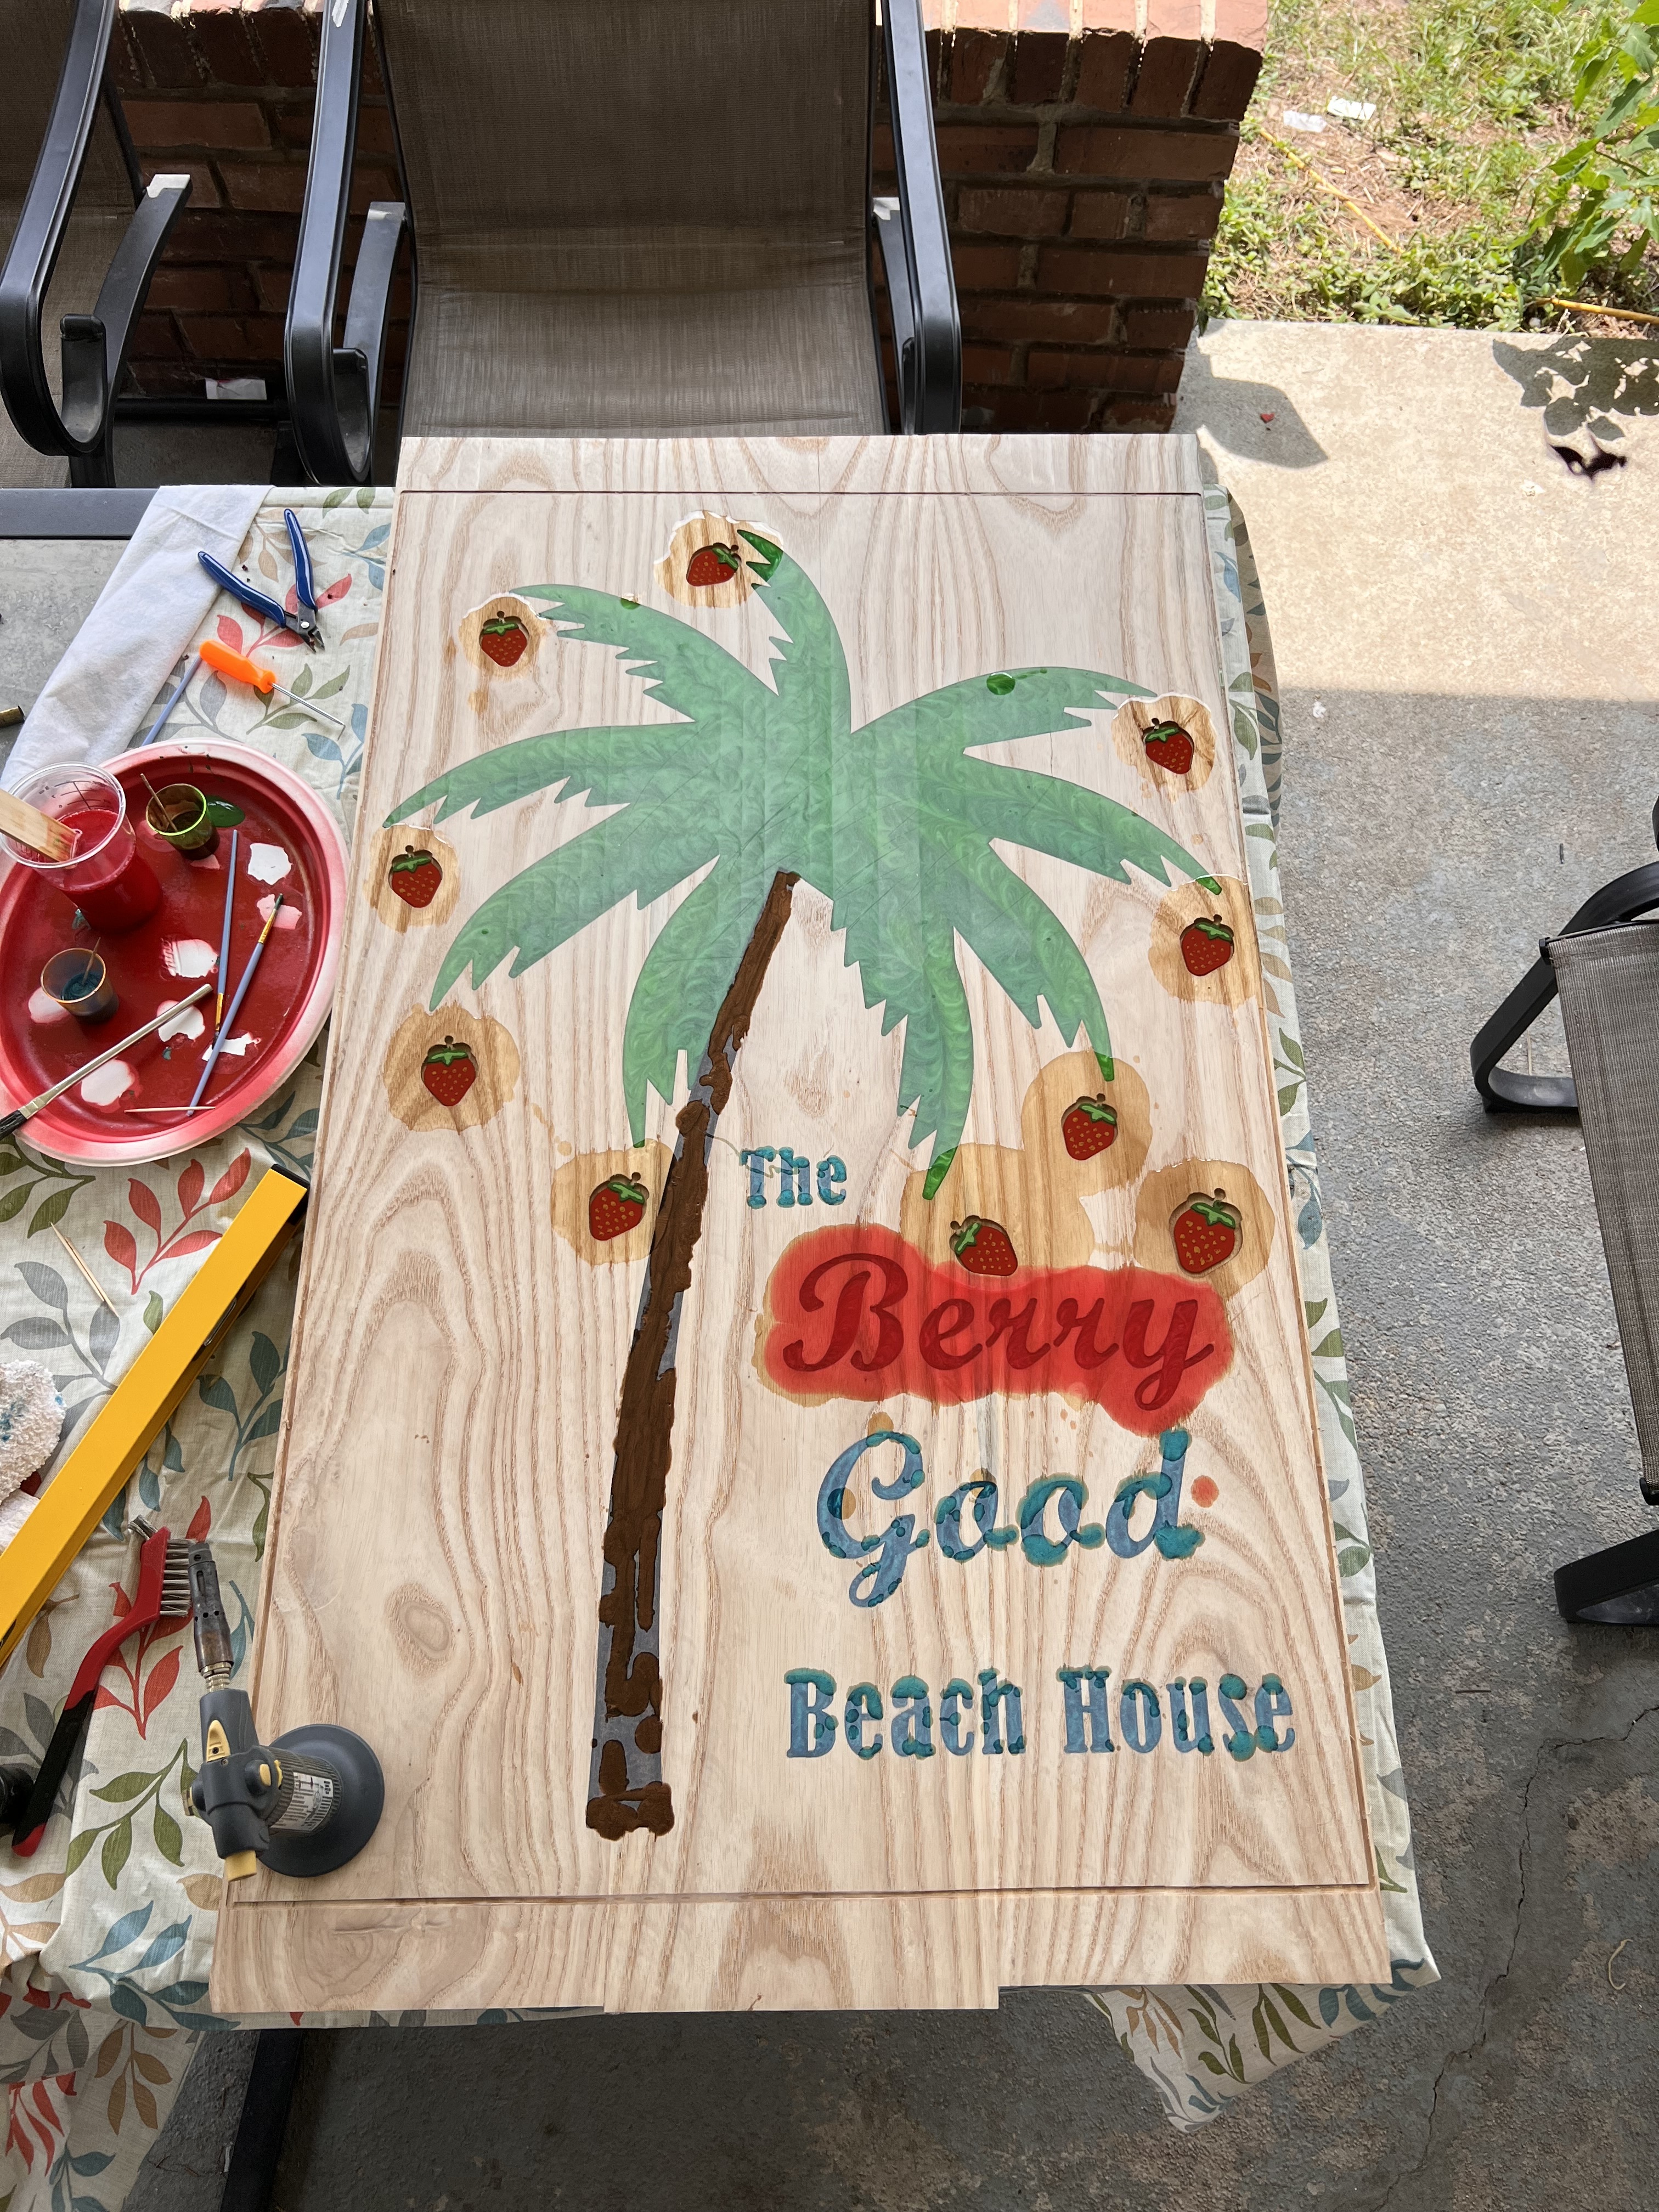
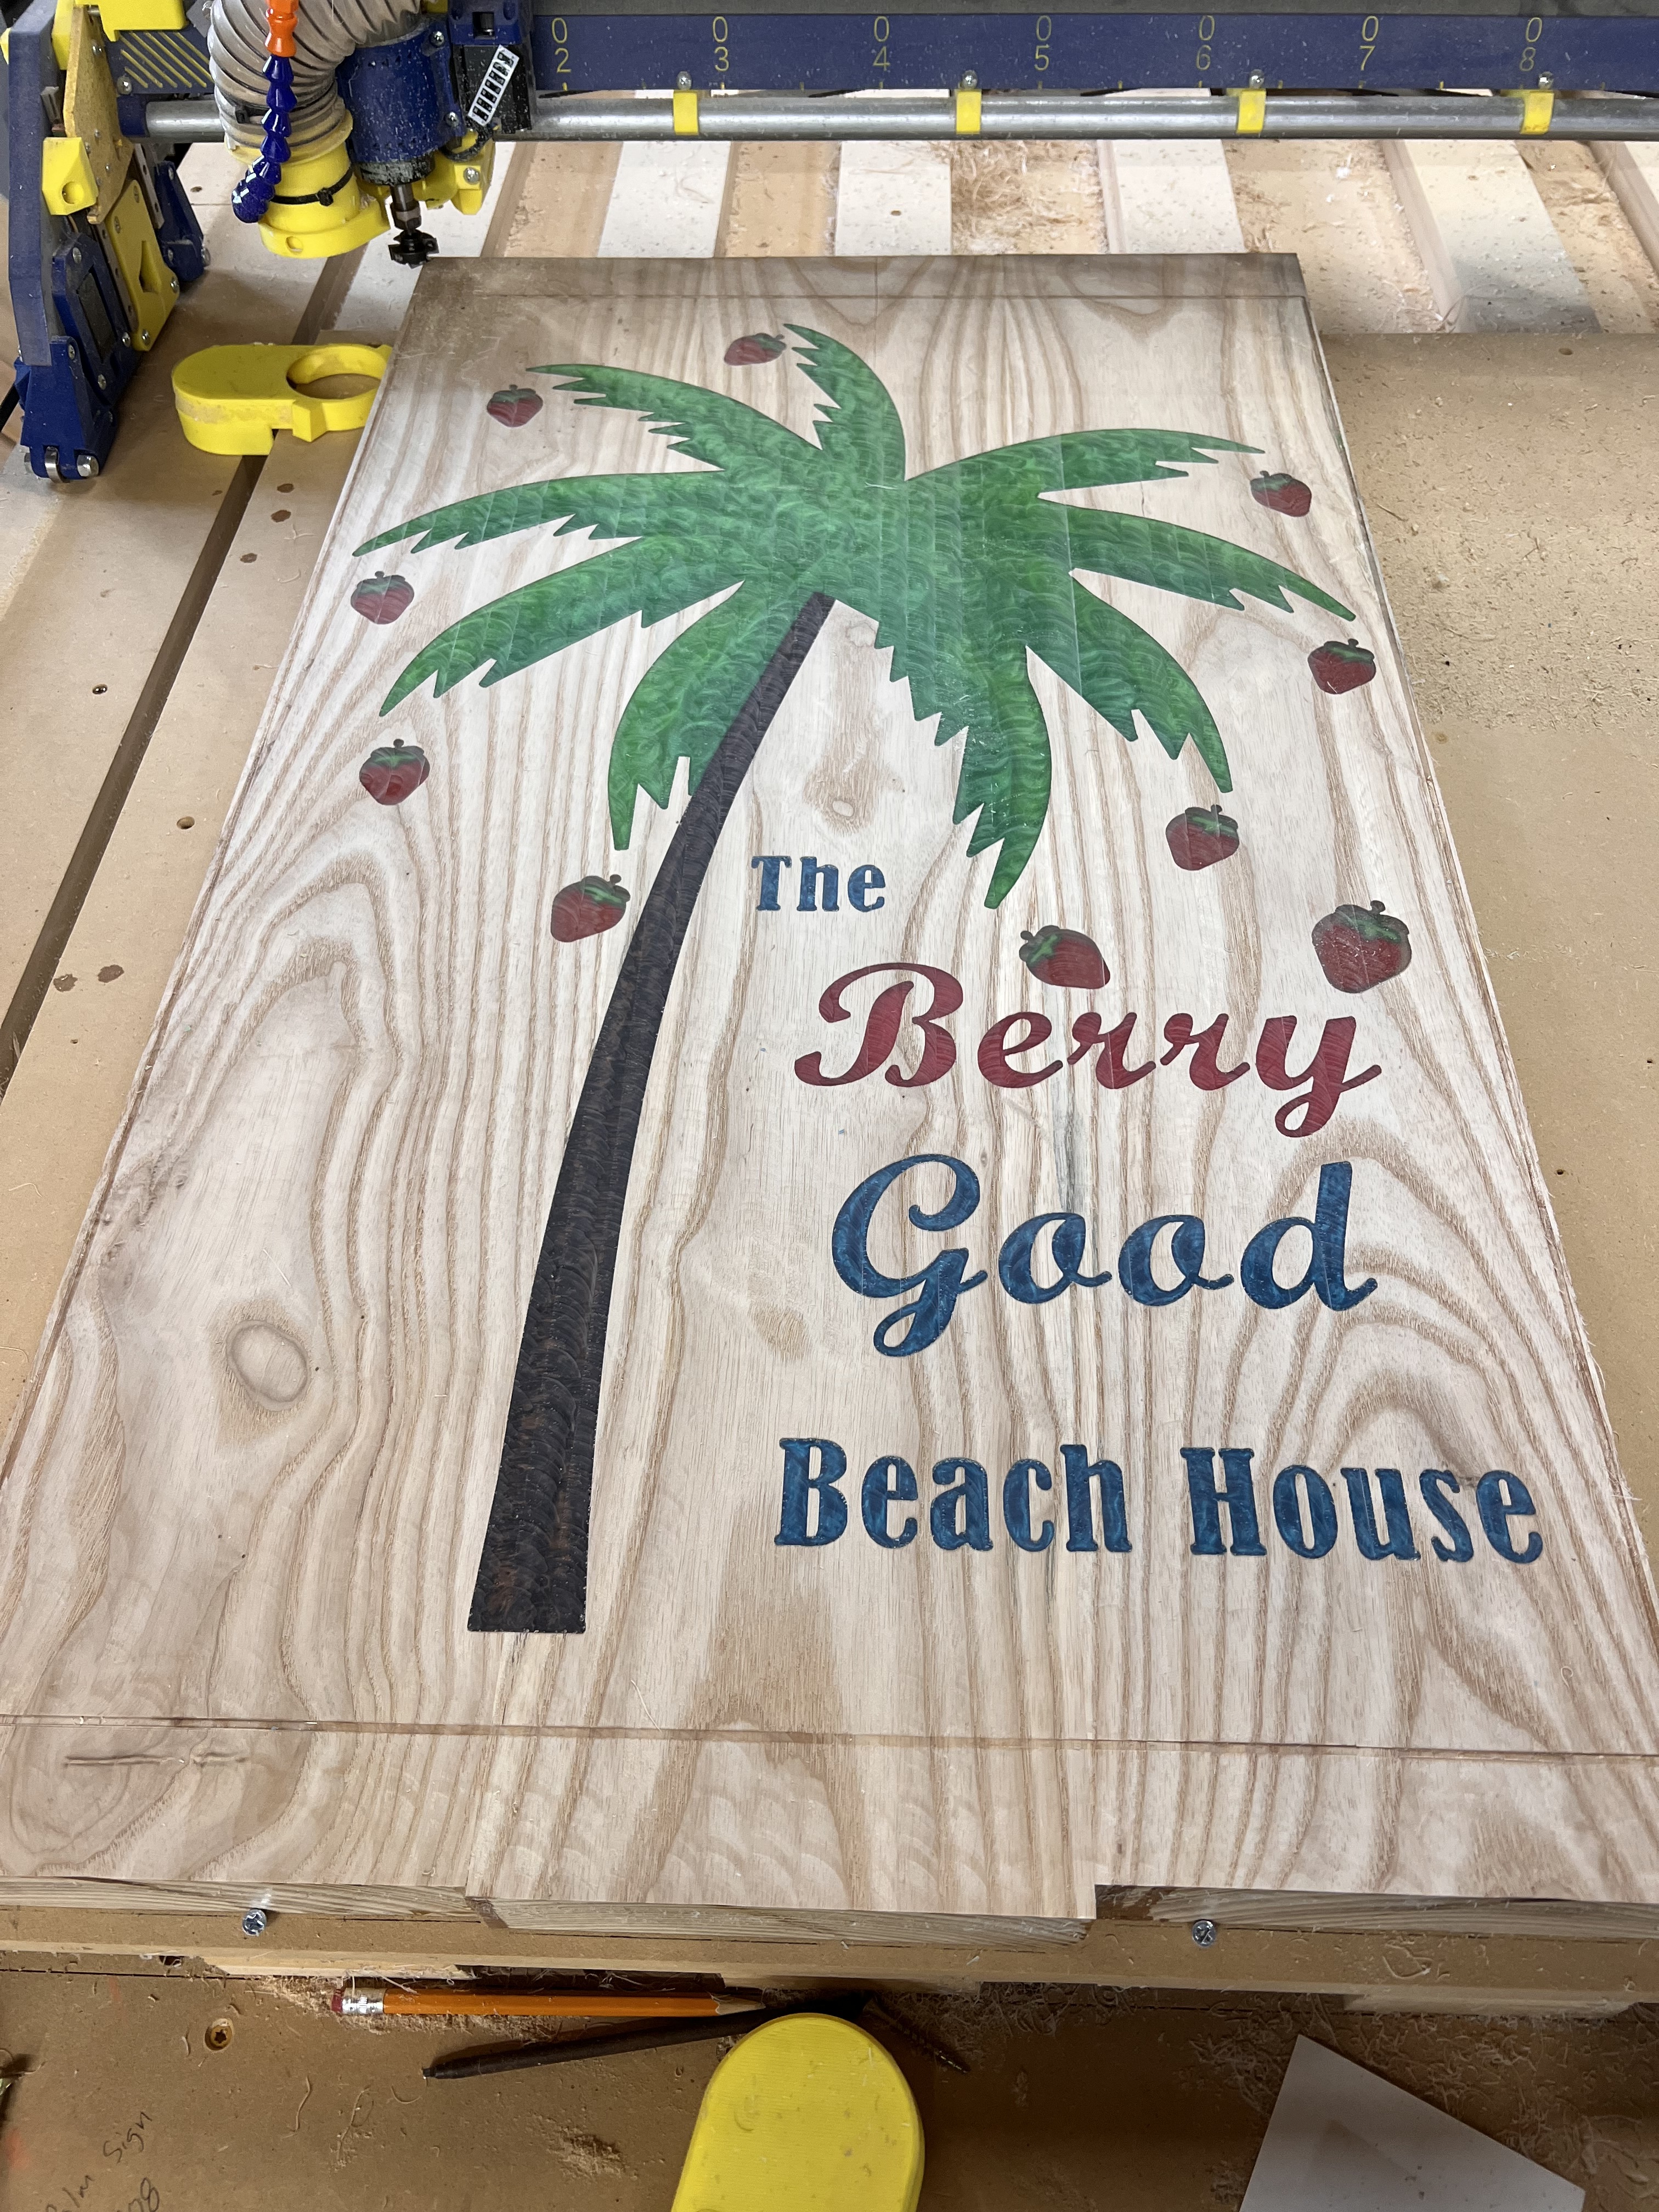
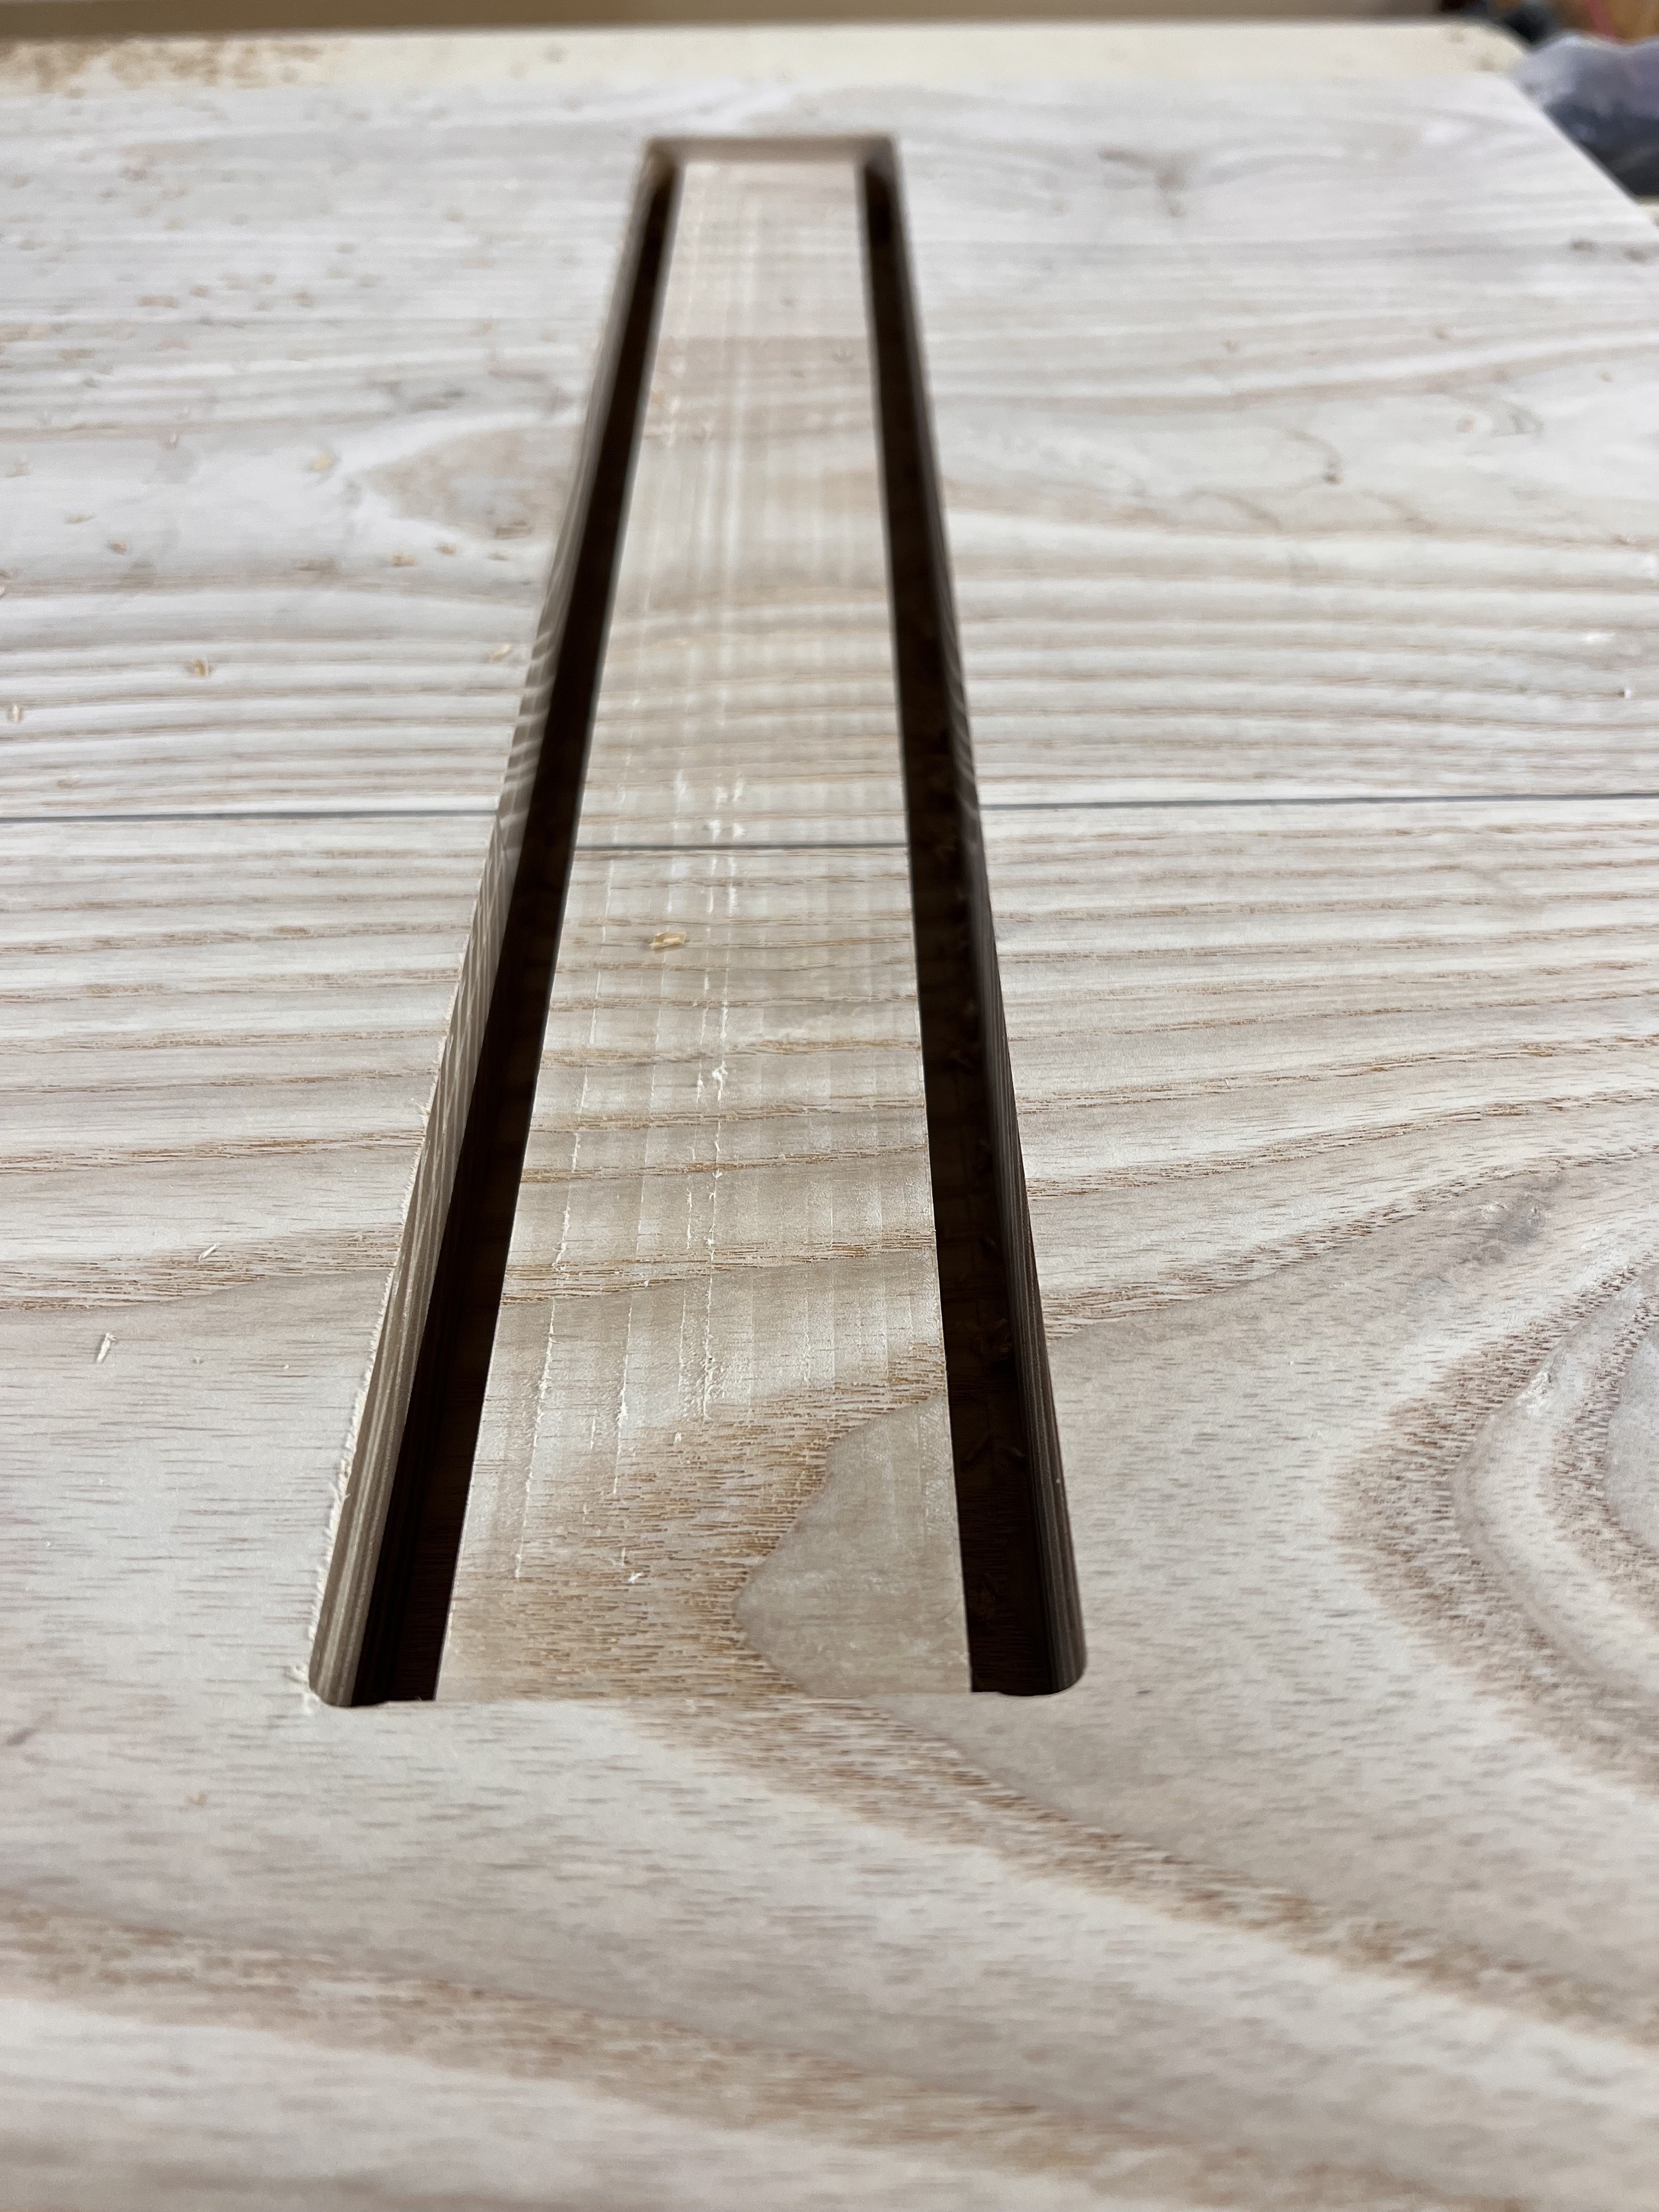
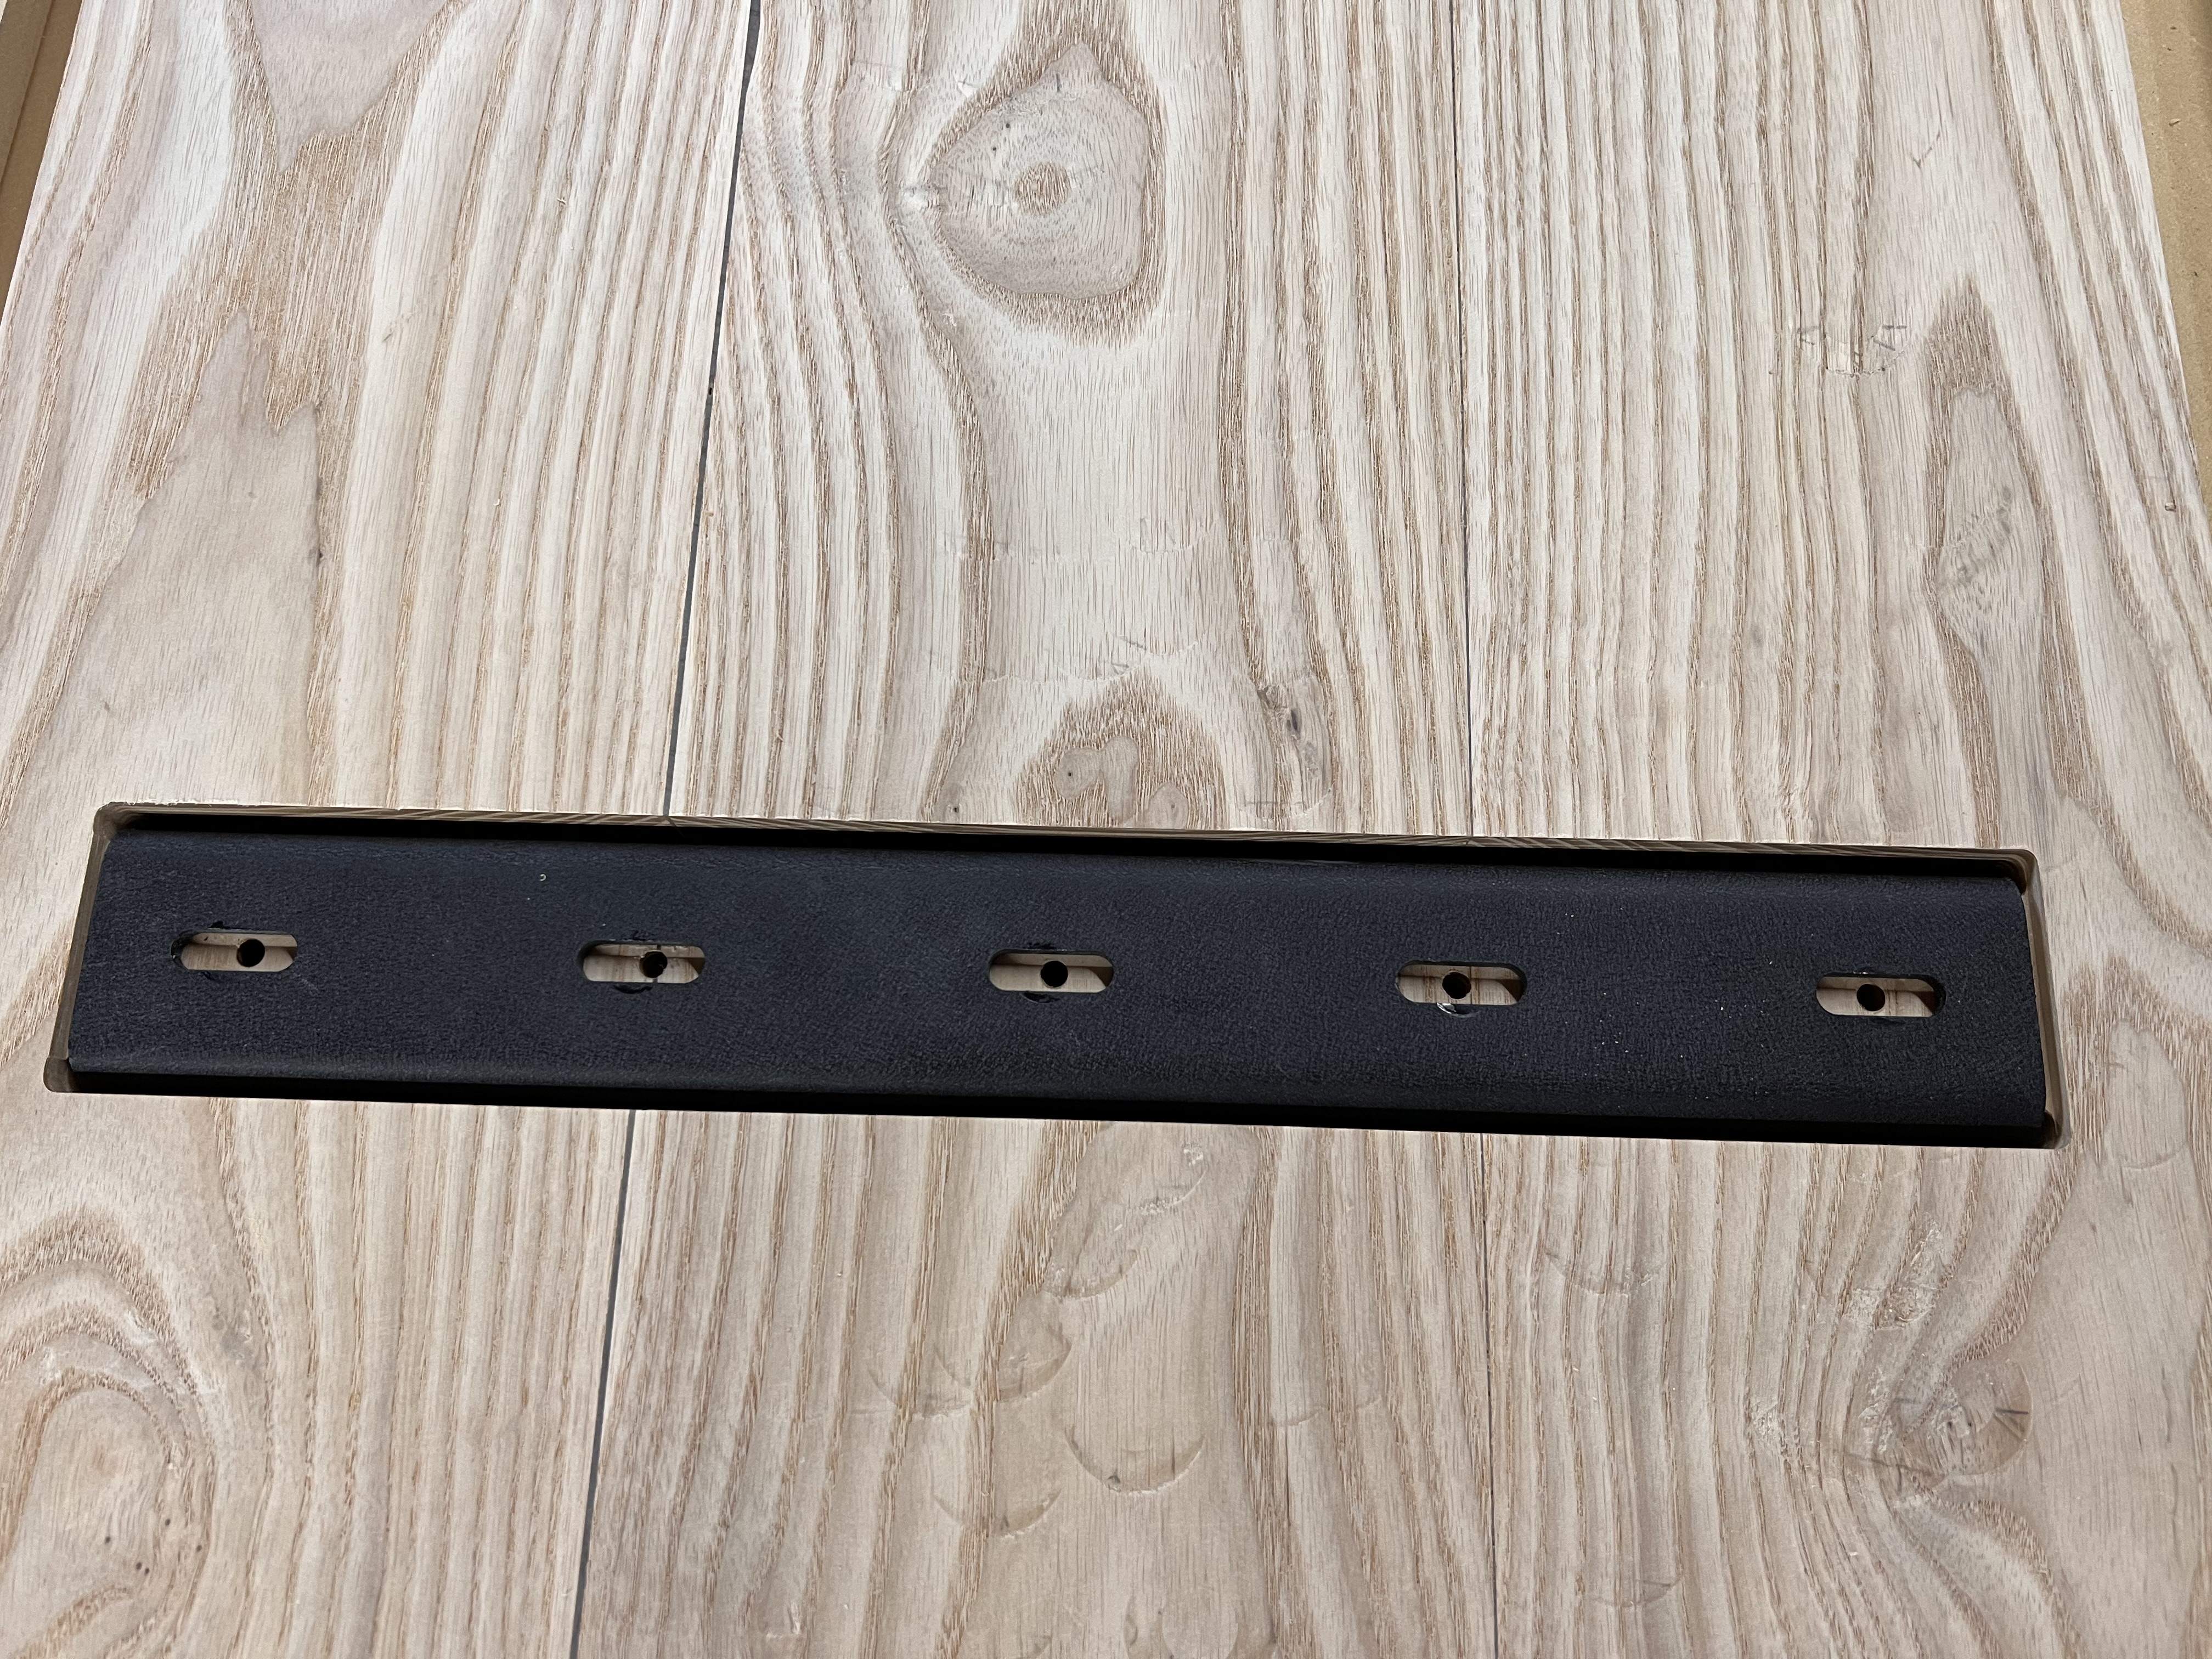
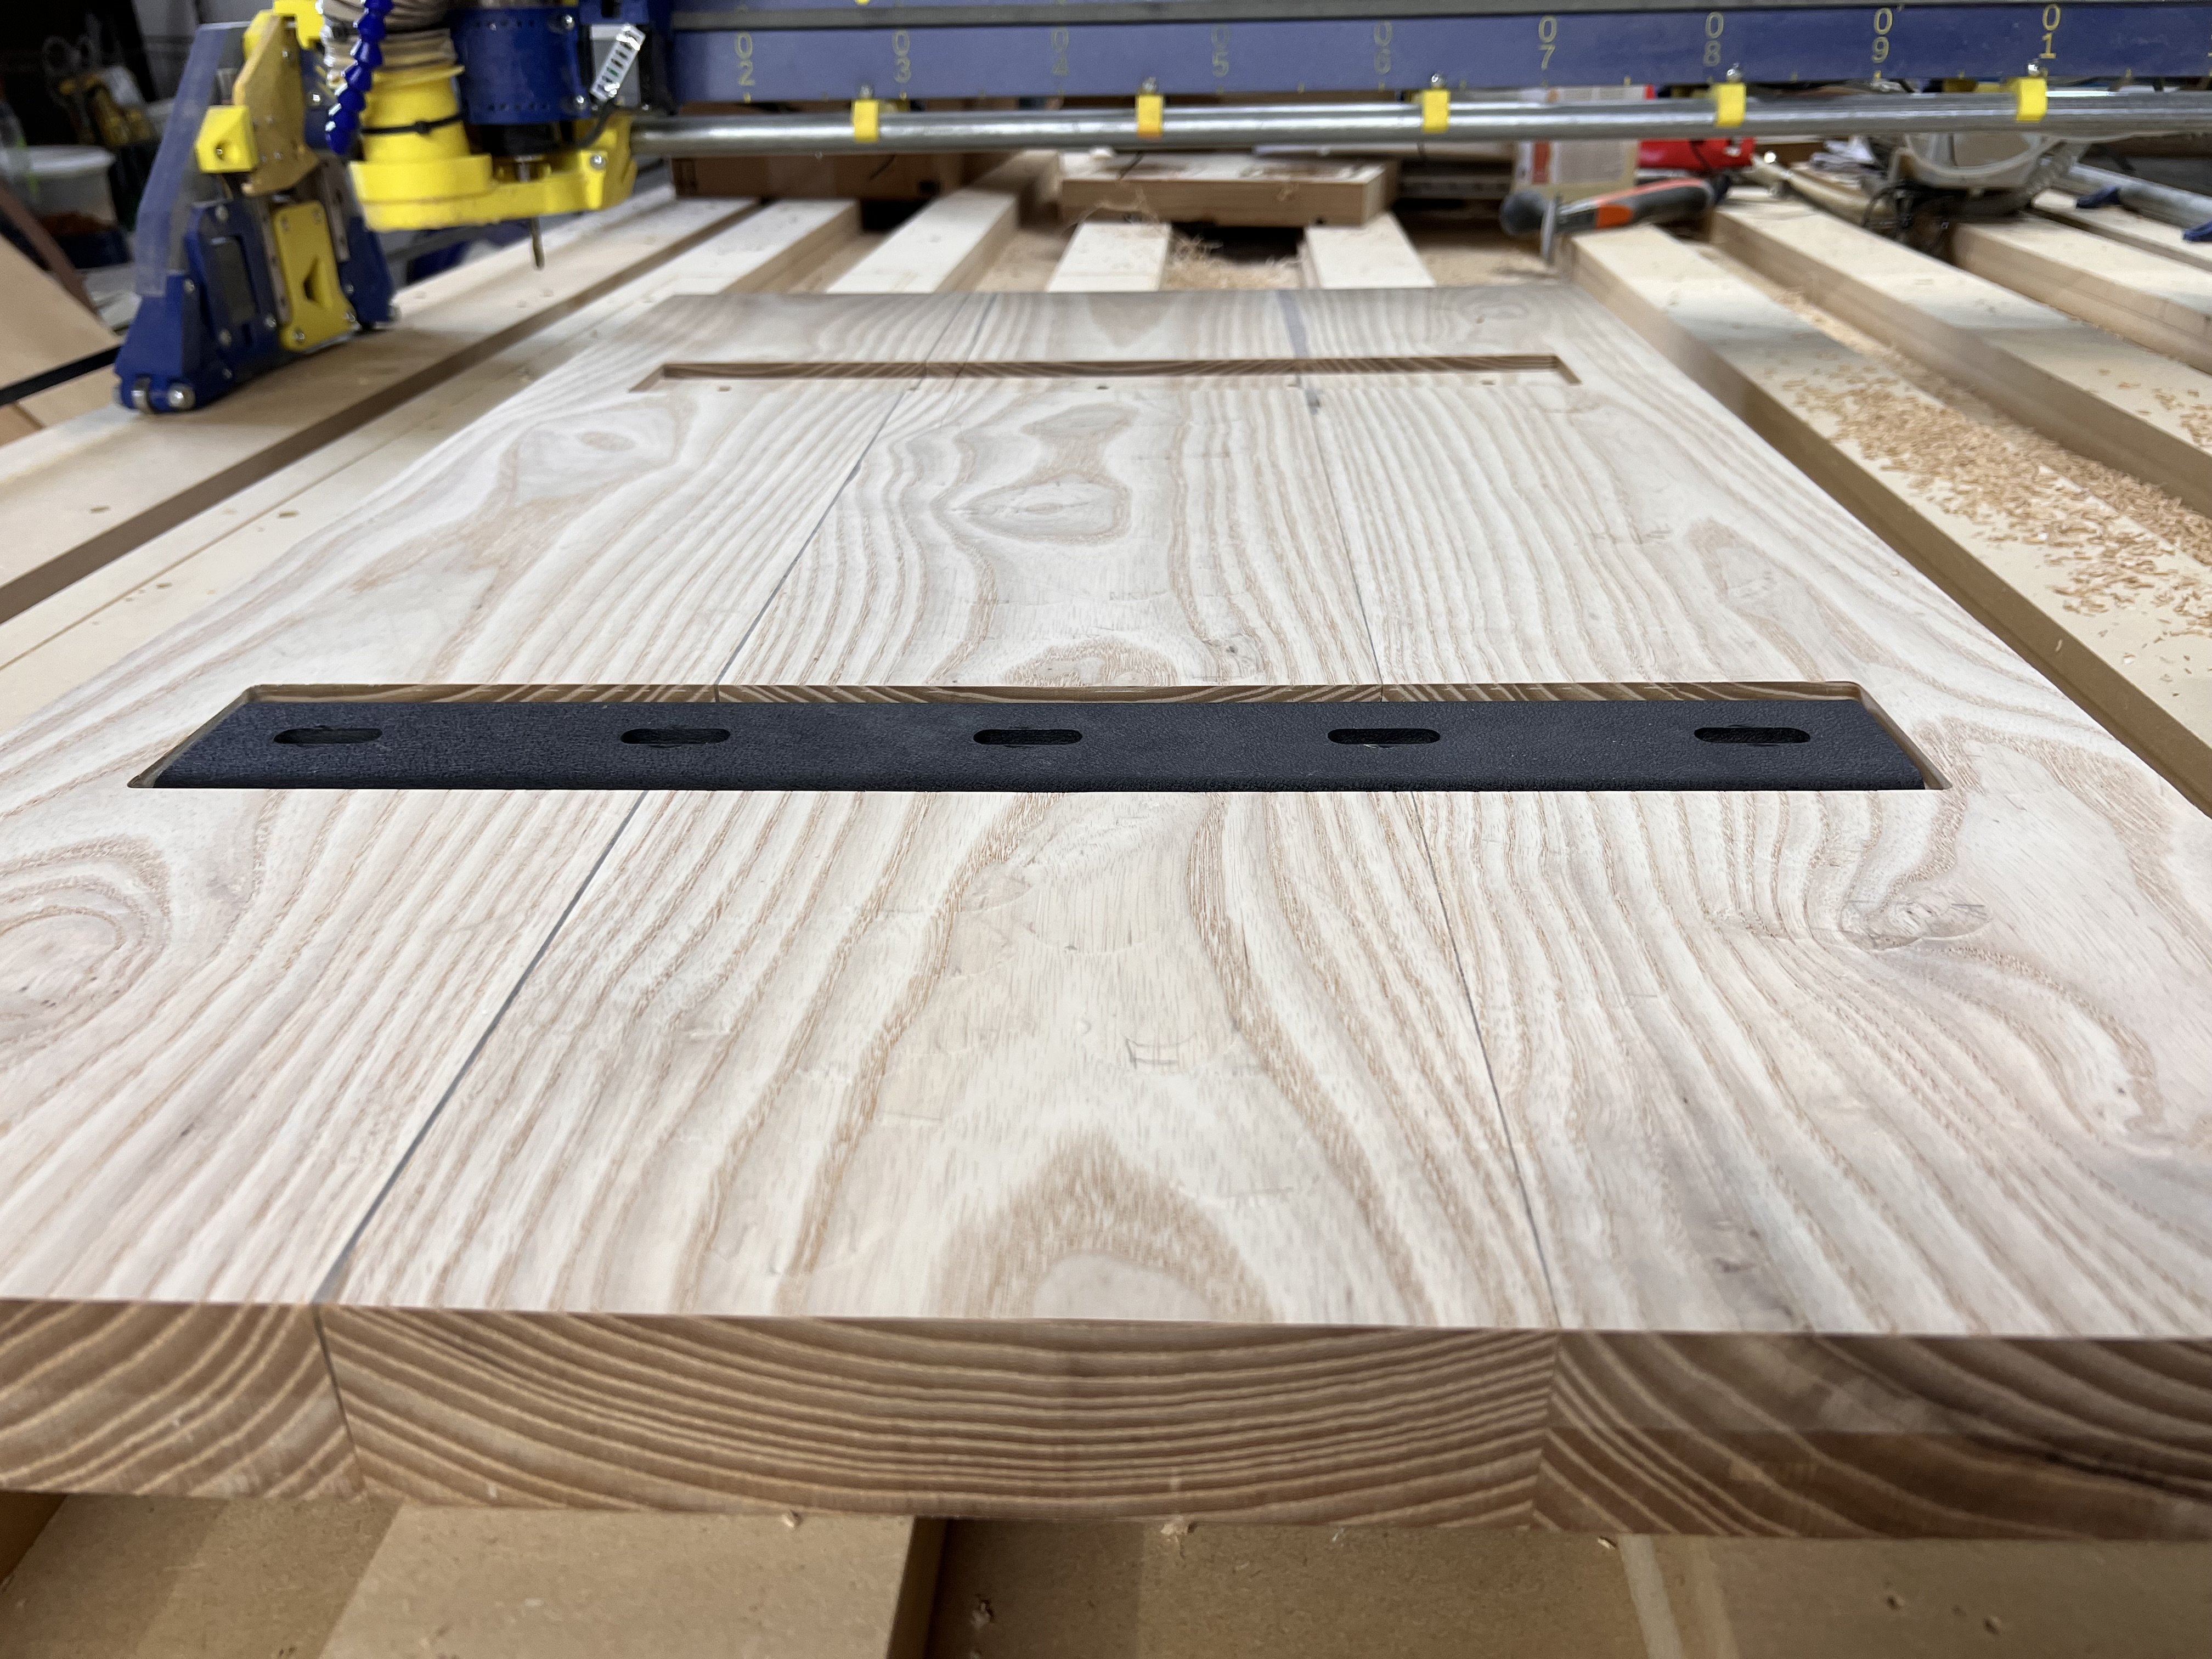
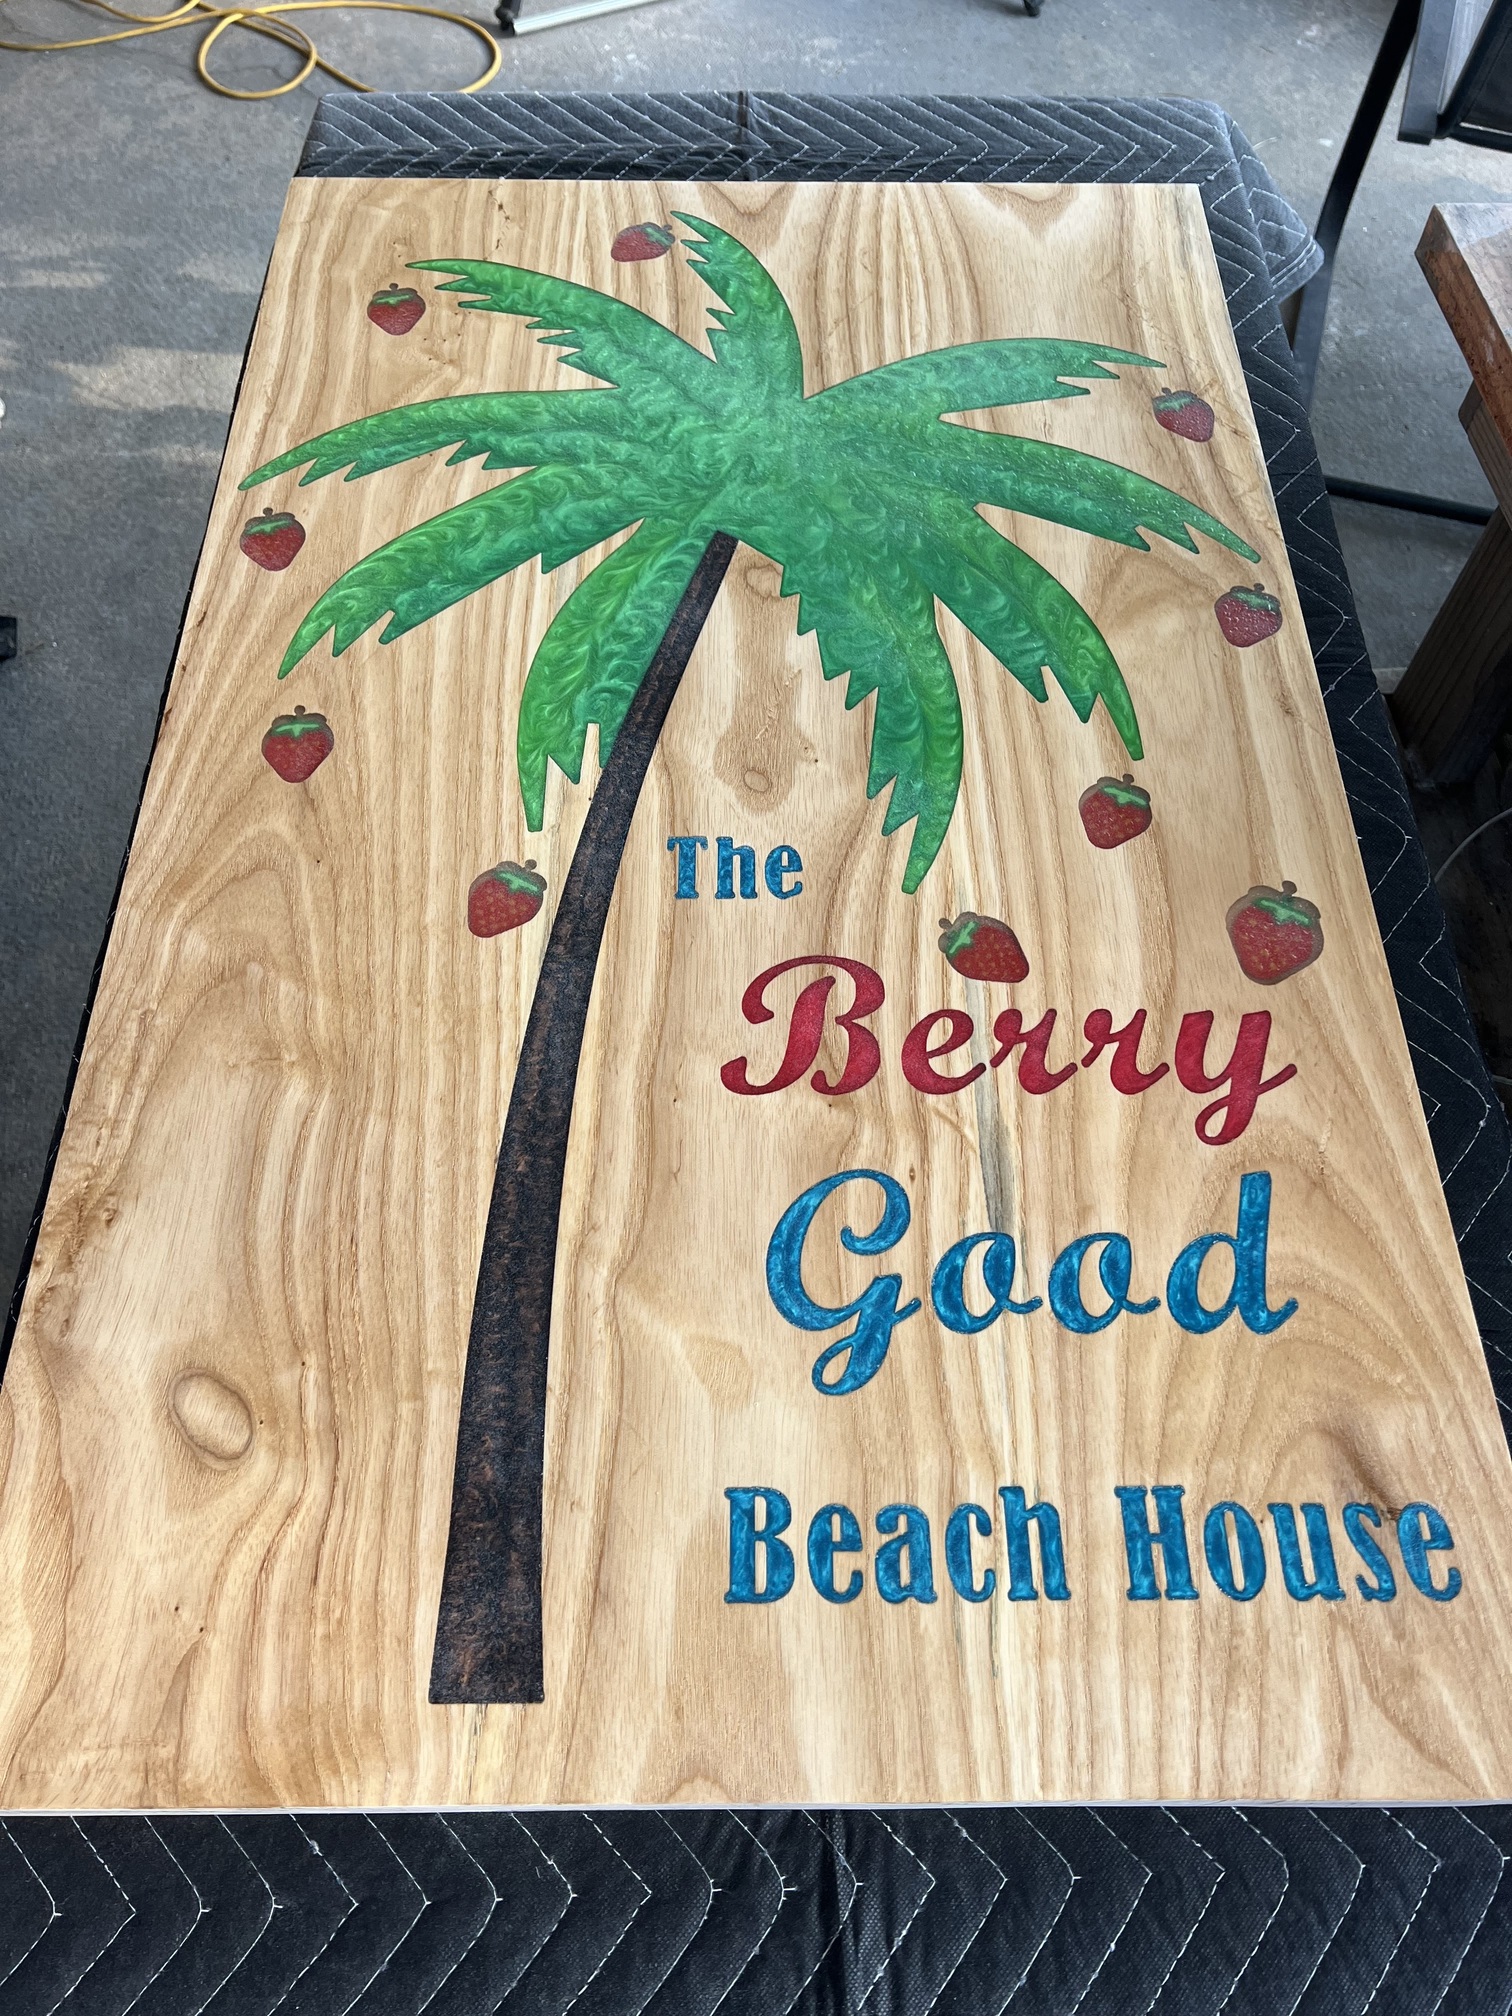
This sign was definitely a lot of fun to make and taught me a TON. This was my first ever epoxy project and not a small one at that. Sign has finished demensions of 22” x 36” x 1 3/4”. Started off as 8/4 southern ash. Glued the panel up, surfaced on the LR3. Engraved parts of it (loving the new single flute 1/8” & 1/4” carbide bits in the V1 store). Made my first pour. Then engraved the next part and made that pour. Strawberres are a 3D printed key chain I found on thingiverse and my wife painted. After all the pours were done I surfaced it again on the LR3. Picked up some C channel on Amazon and after measuring it all up I flipped the sign over to have the LR3 cut out and drill the holes for them. The bolts I was able to find were longer than I needed. Thought about cutting them but never have good luck getting them to start in the threads after cutting so I set the hole to 1/4” and 1” deep then used the proper size drill bit with a bit stop for the threaded inserts afterwards. Sign was then rough sanded, rounded over with a 3/16” round over bit. Back was sanded to 180 grit while front and sides were sanded to 240. Then put a coat of Rubio mono coat pure on it. There are several mistakes in it but none that I couldn’t get past. This was my second attempt at this sign. The first one I failed at by trying to make it perfect and wound up surfacing it down to nothing and didn’t have enough thickness left to fix the pours and have the C channel in the back. All in all it was a good experience. Learned a TON and I will be much more prepared for the next one
This sign was made for a very good friend of mine at work. She puts up with a TON of stuff from me and my guys. Along with all the other boats lol. So I really wanted to make something special for her. Her and her husband just purchased a fixer upper beach house that this sign is made for. When I asked her what she wanted on it and what they called the house she told me they have a friend that always says “Berry Good” in place of very good. And this house is on strawberry ln. so she wanted a palm tree with strawberries coming out of it and for it to say the berry good beach house. I think we did pretty well with that lol.
Looks cool. I am sure they will like it. Looks like you screwed these panels together & maybe didn’t glue them also, but I always thought it was better to glue wood panels with grain alternating direction to avoid cupping. After reading this article, maybe it is not always necessary. Someone on here with more experience with this might chime in their thoughts. Avoiding Cupped Panels - The Wood Whisperer
They are only glued together and I wanted to alternate the grain but the face just looked a ton better this way. I’m hoping with the large c channel in the back of it warping won’t be an issue at all
I got the idea for the C channel from watching blacktail studio on YouTube. Figured if it was good enough for his $15k tables it should work good for this sign lol
With the C channel it won’t cup most likely since the wood is thin. It’ll probably check on the ends over time but that will actually look pretty cool. A new coat of poly every year or two will fill in those cracks and preserve it for a lifetime.
I will say the second try went much faster lol. Easier when you know what to expect and what’s coming next. Now I just have to figure out how to not get so many bubbles. Lol
Thanks. It was tough for sure. Epoxy is not very forgiving and I can’t stand all the bubbles. But it’s a learning process for sure. Hopefully I’ll get to do another one before I forget everything I’ve learned so far lol
One trick with the epoxy is to SLIGHTLY warm it and fold not stir the mixture. You can also put the mix into a jar and use your “seal-a-meal” to bring all the bubbles to the surface. The one I have includes a Mason jar compatible lid that is used to pull a semi-vacumn in the jar.
The bubbles can definitely be a real pain. Some observations from using a LOT of epoxy for electrical work and making some hilarious/horrifying/hideously expensive mistakes:
Using a thinner epoxy intended for filling/pouring rather than structural/boat building epoxies makes a HUGE difference. Keeping air out to begin with can help a lot by folding it together with a paddle rather than stirring vigorously. Transferring the mixed epoxy to a new container and mixing again can help avoid any consequences of under-mixed epoxy that might be clinging to the walls. This is especially obvious when using additives that change the colour, so I’m sure you’ll have noticed that. We have a cheap vacuum degassing setup that works great (cheap A/C type vac pump and a big stainless pressure pot with an acrylic lid), but depending on the epoxy it can be difficult to work quickly enough to degas it and keep everything cool. It also doesn’t need to have a huge vacuum pulled on it and it’s possible to over-vac the epoxy, boiling off some of the components and making the result behave a little strangely, usually a minute or two does it. Contrary to the advice above, I’m not sure I’d personally ever want to deliberately try to warm up the epoxy, most of the issues I’ve had have been over curing. I guess maybe that’s more make sure it’s not in a cold garage or has been left in the cold rather than actually try to warm it somehow. Using small amounts in larger containers helps a lot with this by keeping the surface area to volume ratio nice and high.
Those C channel braces are an amazing product to have such simple access to. I’m quite jealous. I spent ages looking for an equivalent here in NZ and ended up getting steel box section, slitting it with an angle grinder, spending hours bending/milling it back into some semblance of being flat when it warped from the embedded stress, painting it etc. Same issue with the fasteners for them.
Very nice! Thanks for the great write up and progressive pictures. Really helps me to see and understand the process.
I learned a tip for cutting bolts to length that has worked well for me. Thread a nut on past the cut point. Cut at the necessary length. Try to cut as clean as possible, meaning, if using a hacksaw or other cutting tool, try not to let it bounce around on the threads. You want to damage the usable threads as minimally as possible. Once cut, put the head of the bolt in a vice, thread the nut as close to the end as possible and then twist it the rest of the way off with a good and solid wrench, like a long handled socket wrench. Assuming the threads have minimal damage and the bolt and nut are of good quality, unscrewing the nut straightens out any issues on the end of the cut. Works pretty well for me most of the time unless I cut it really badly.
Keep showing your great stuff! I’m sure your friends will love th new sign and it will be a great conversation piece for them.