Ran into a bit of a hiccup on the rebuild, which has put me on a bit of a diversion, and has delayed things a bit…
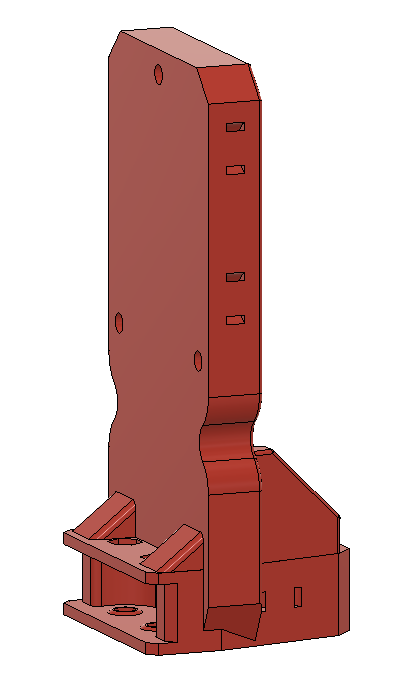
As mentioned several times above, my plan has been to use @Fabien’s truly cool (somewhat parametric) side mounted belt Y motor holder. It is designed for use on the non-rail side, and it worked great there…
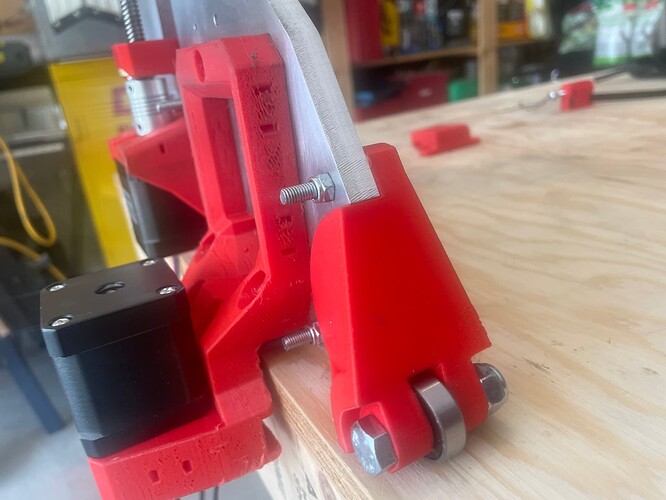
However on the rail side, it sticks out a bit too much for my plans, which was to put the rail right at the edge of the table.
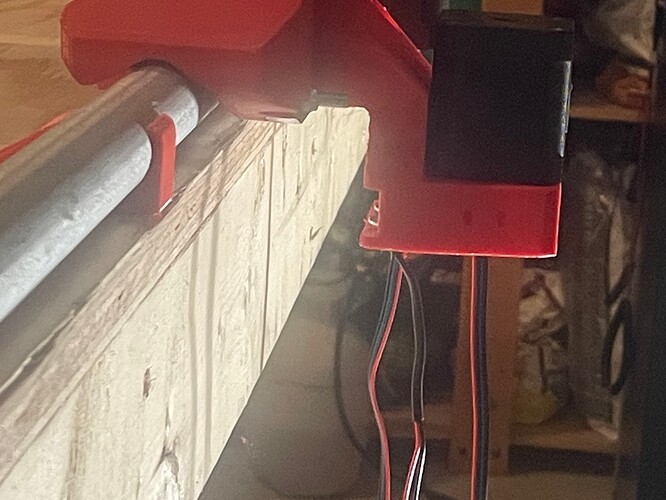
I looked into @Rob_W 's remix version, which sits a bit closer, but still was too far away for my plans.
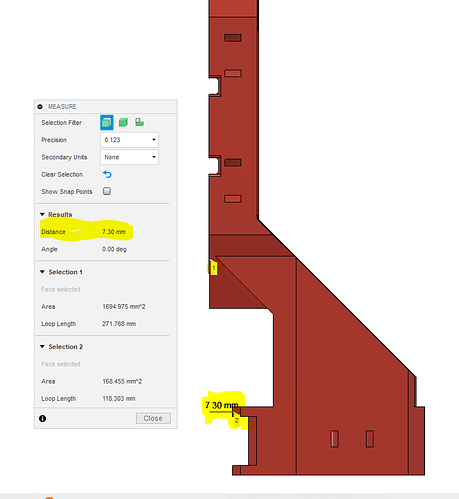
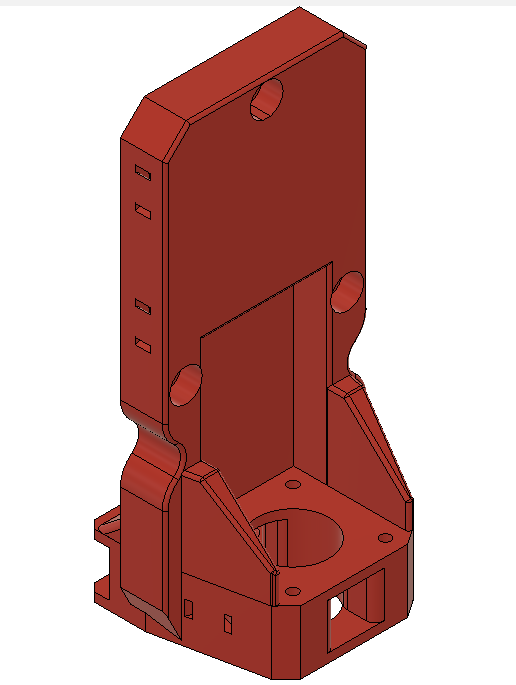
So I ended up doing my own remix of Rob’s remix, and made a version that allows for the Y rail to be right at the edge of the table:
I must admit that when I considered doing a remix with F360, I didn’t have a clue how to proceed or where to begin. However @Rob_W very patiently and helpfully gave me a few tips and pointers, and got me started on the journey. There is no way that I could have accomplished this without his help, so THANK YOU!!! Also kudos and many thanks to @Fabien for his valuable contributions to the discussion, and for creating the original design!
(More details about the process and the issues involved starting here…)
So now I just need to dust off the Ender 3, print out the new motor holder, then it is back on track!