Another LR4 Table

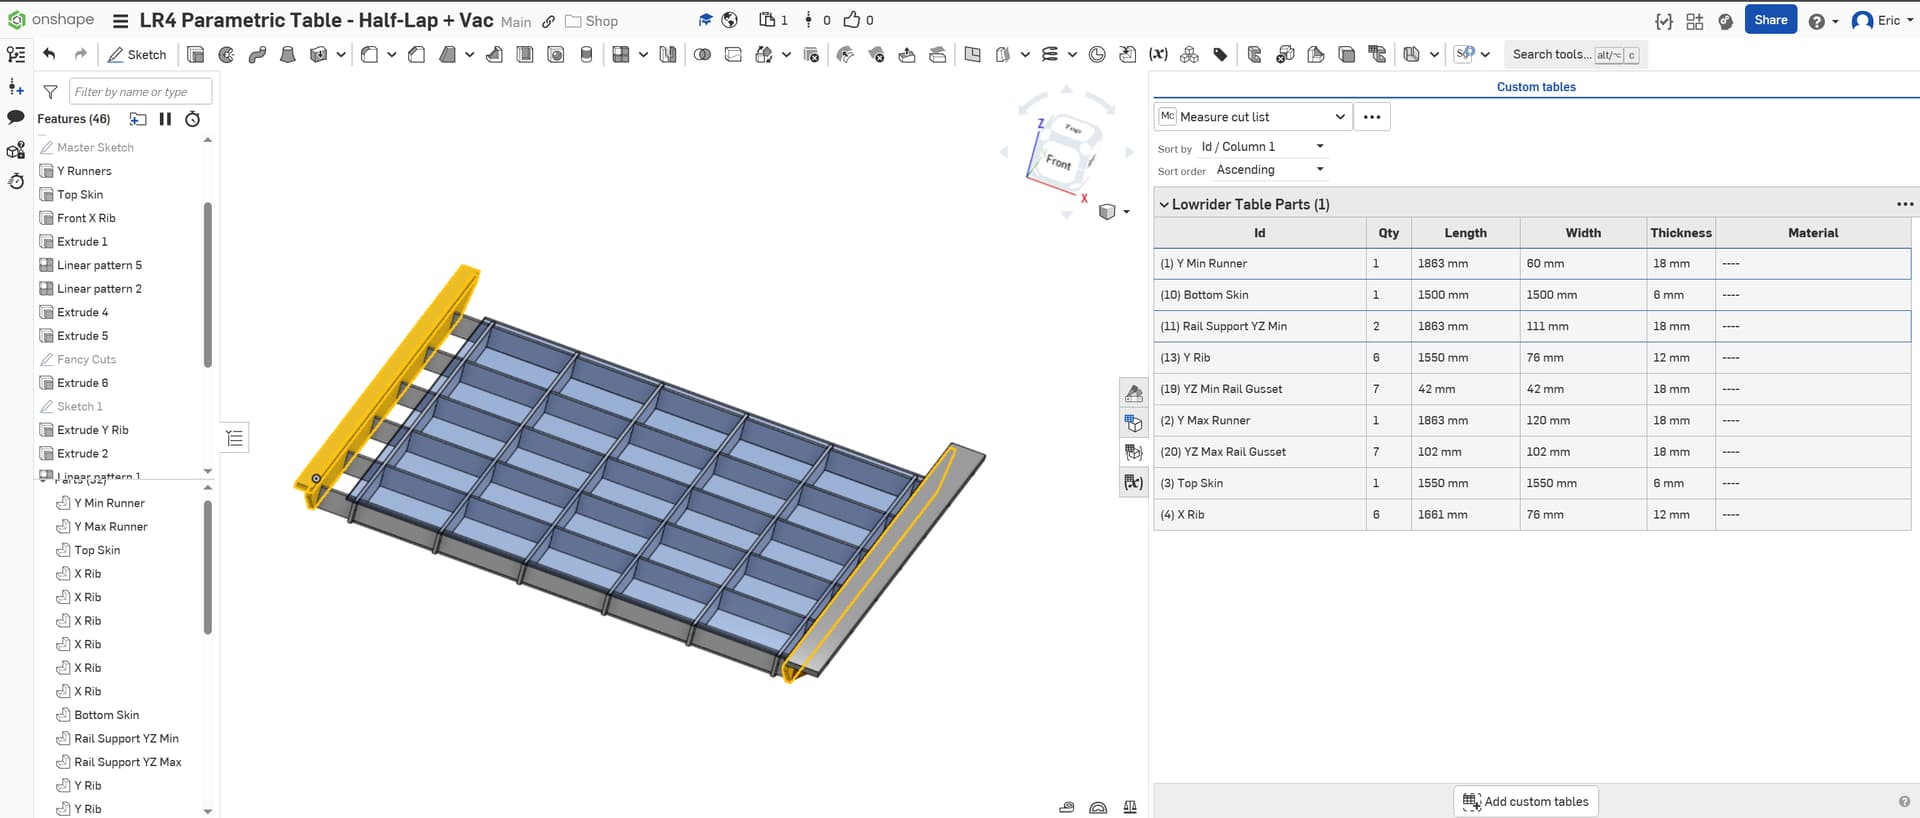
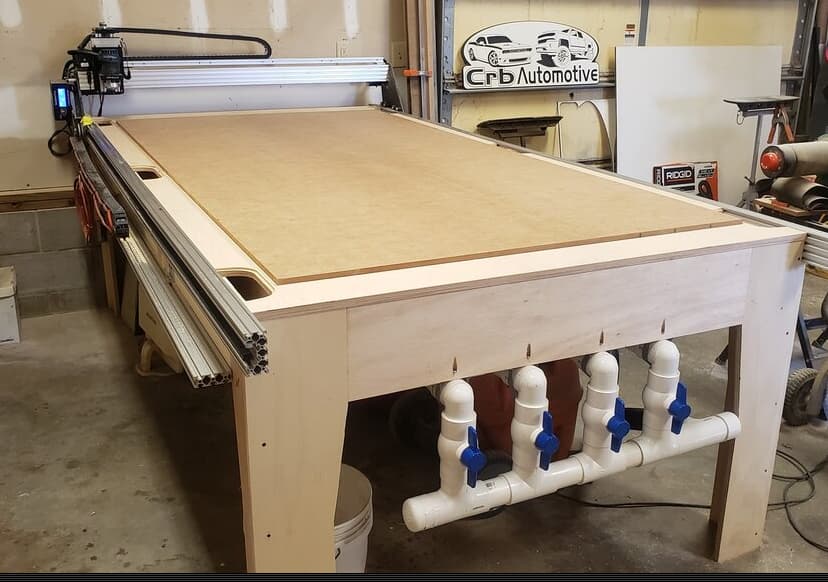
I have been mucking around with the Parametric Table(s) for my own preference on how to build a torsion box/table with what I have in my shop.

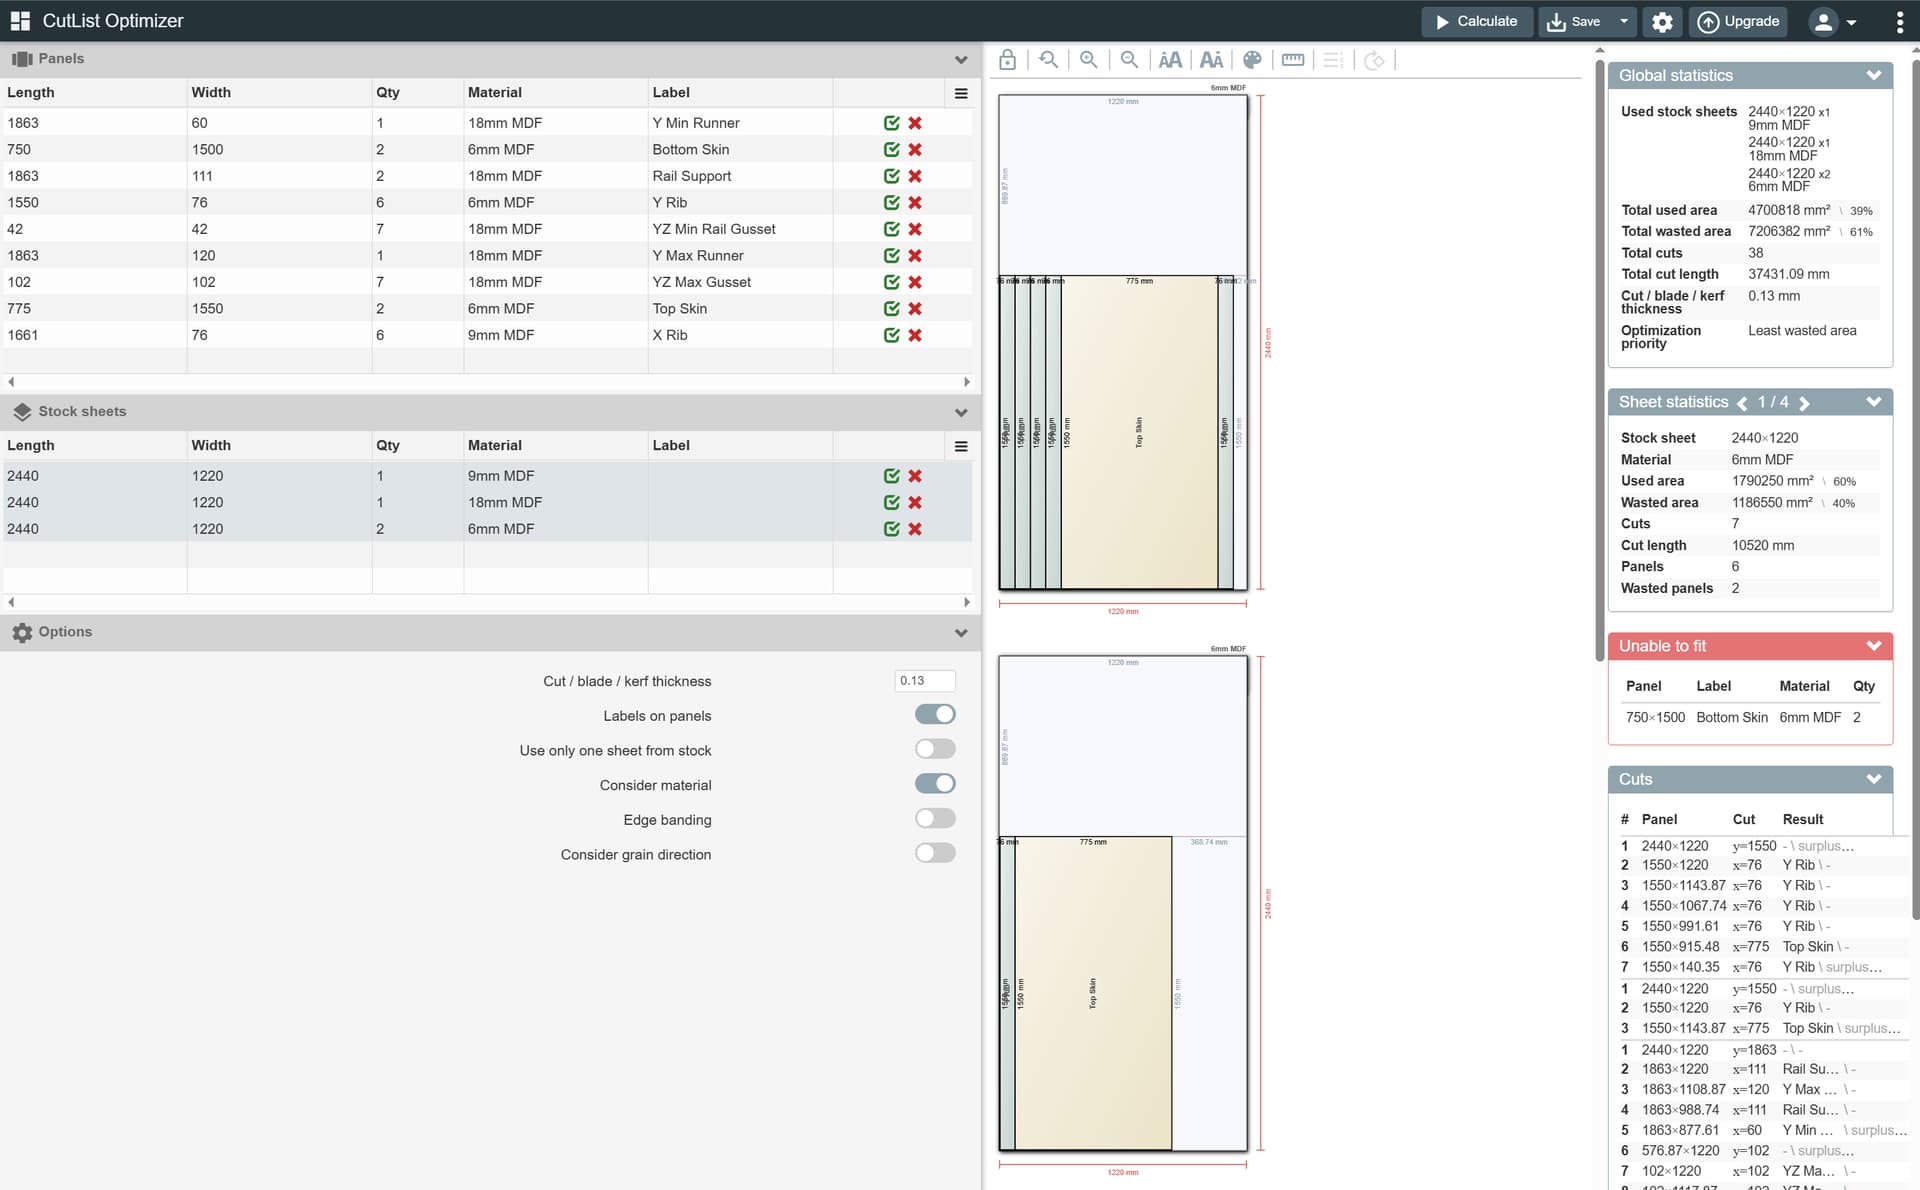
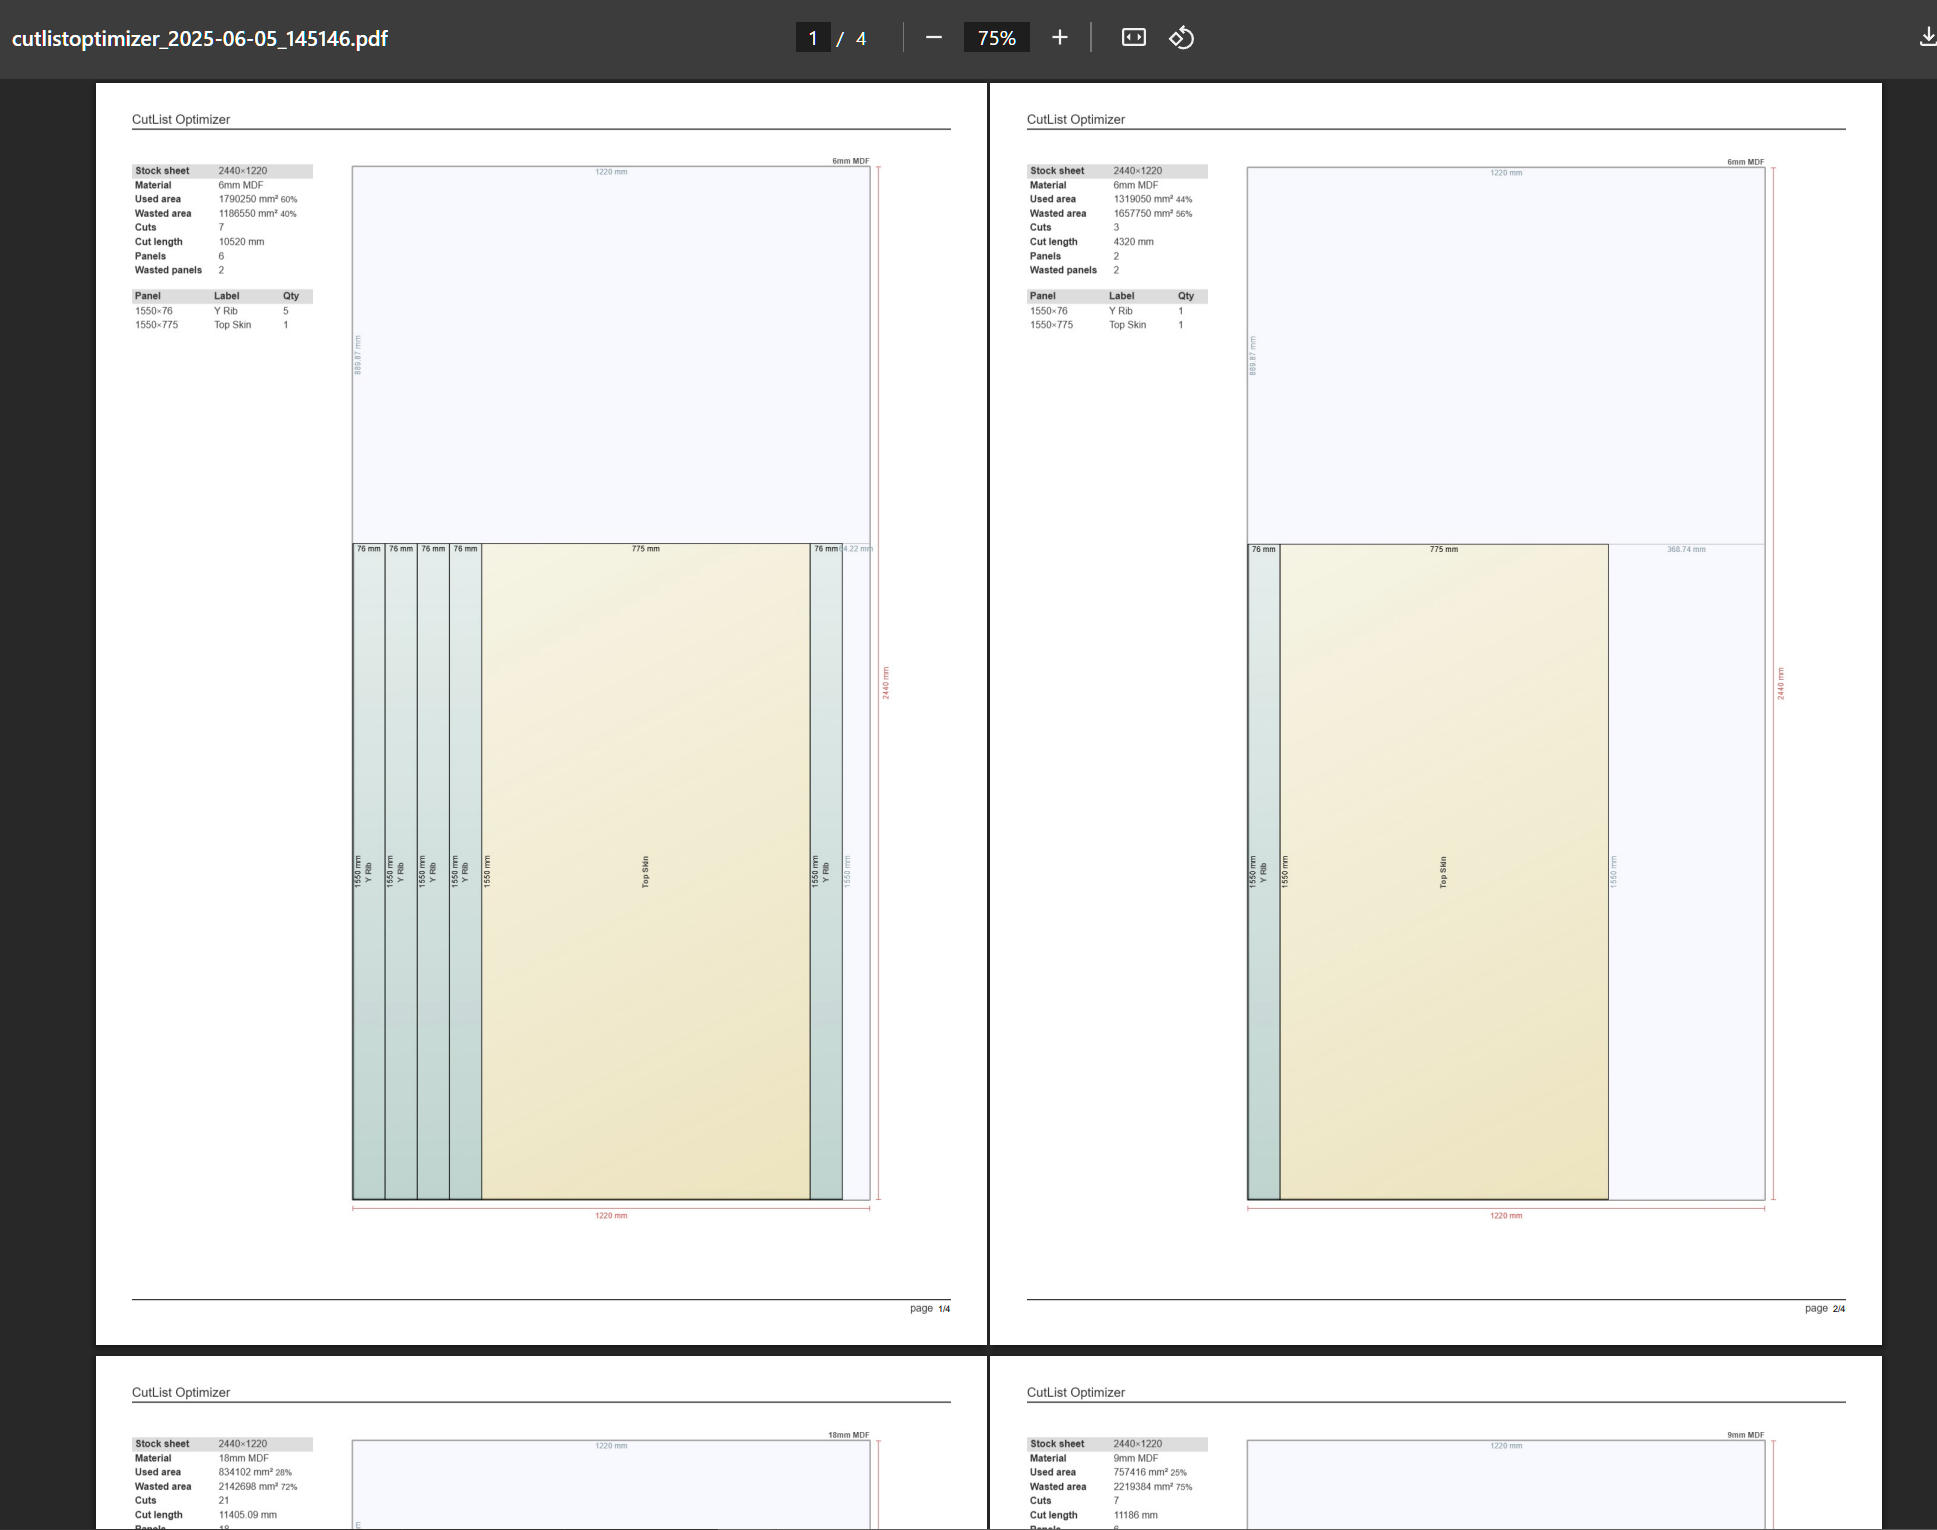
I wanted to use half-lap joinery for the torsion ribs, instead of all those screws and little pieces, and I have the capacity to cut my own parts, so don’t have to resort to MDF moldings. My gut says slicing up a 4x8 sheet of 9mm or 12mm MDF will be cheaper.

My plan is to rip all of those ribs, edges, rails, etc on my Sawstop, and then set up my router to cut the half-laps. Then slot them together, square, glue, screw, whatever to make the torsion box.

I’m also pondering implications of the Top Skin and the Spoilboard being two different things.

If you have the capacity, maybe this Onshape design will work for you.

I’m a bullet point kinda guy, so:

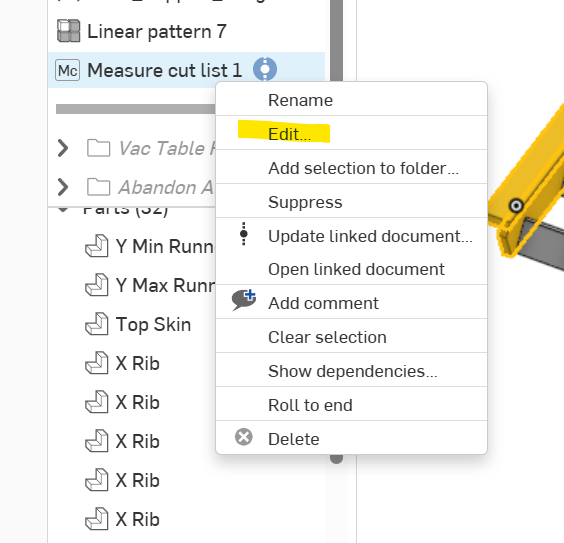
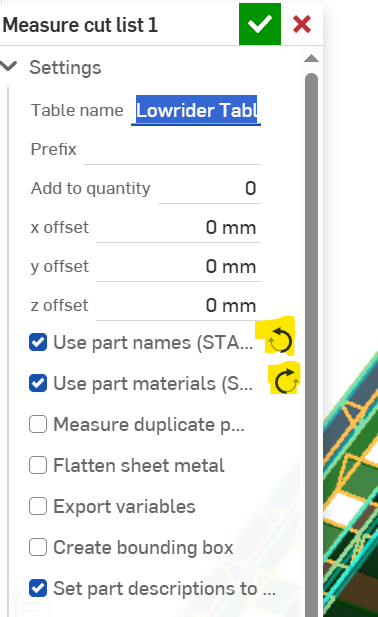
  • This is my first use of OnShape. Have mercy.
  • I did not modify the leg designs. I am strictly futzing around with the top. The old Leg stuff has been moved to a folder.
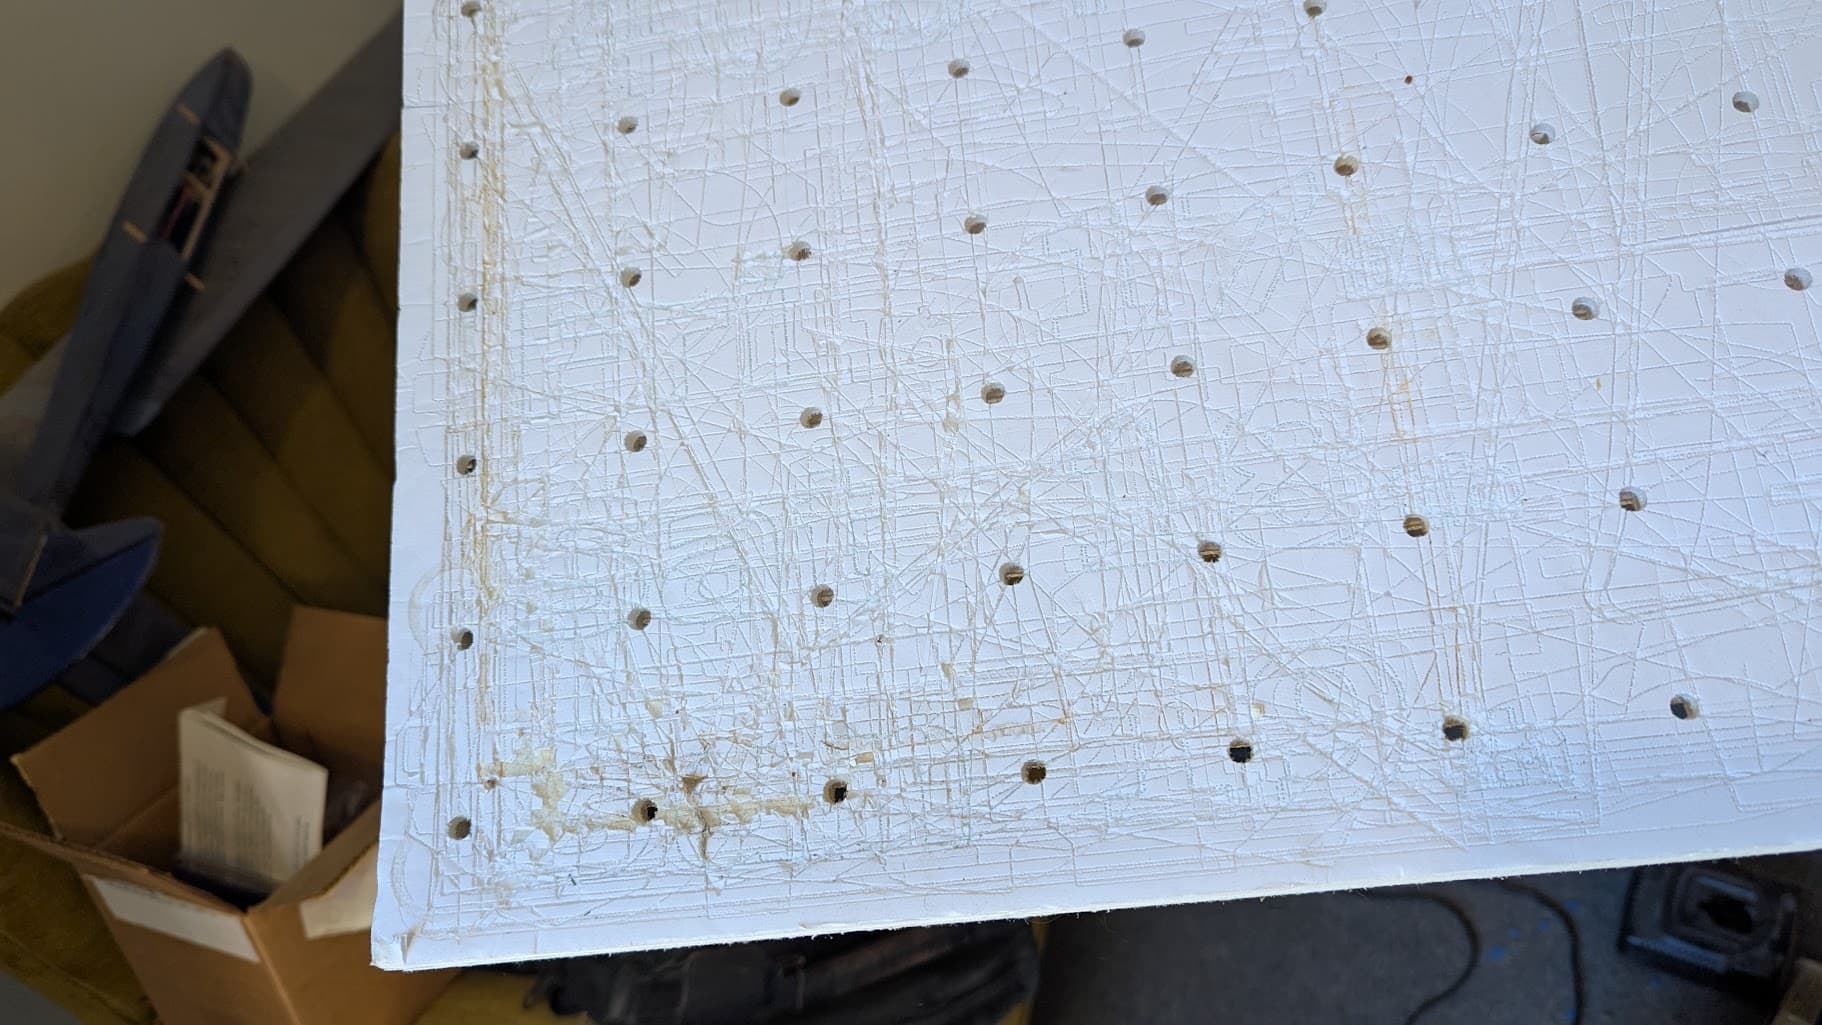
  • I am going to be experimenting with using vacuum power to hold the work down. Basically the idea will be to slap my material down, and rely on my dust collector to collect dust AND provide vacuum pressure (It’s a big 'un). So, there’s a folder for all those features. Just move the project pointer past that folder if you want to play with that. I’ll update with news of how it’s going.
  • Cleaned up the variable table and added new appropriate values for my changes. Removed vars that were obsolete. Added some for a few magic numbers I found.
  • Added the ability to add extra clearance/height to the rails, to allow for full use of Z axis range, or allow attachments that need to dip down lower.
  • Switched the drawing to metric. I find it easier to set my tools up for metric.
  • Changed the rail supports to use gussets.

Also considering using thin aluminum bar mortised into the rails for the “drive” lane to eliminate wear. Though I don’t know how much of an issue that would be. I wouldn’t be me if I didn’t overthink it.

Also wondering if there are issues with dust and debris interfering with the bearings. Air assist or vacuum/brush attachments?

I’m open to feedback, suggestions, comments, ideas. Though I can’t promise if/when I’ll get a chance to act on anything.

I’m sharing a link to my “V3” of this. If anyone knows how to keep one link that just goes to the latest version, I’m all ears. Otherwise I guess updates will mean new links to new versions.

1 Like

Here’s a snap of the vacuum version. This would require adding a port to attach the vac SOMEWHERE within the bounds of the torsion box (not modeled).

[LR4 Parametric Table - Half-Lap + Vac] Onshape

Edit: Oooh! Links worked!

ooohhhh… this was on my modeling todo list…

I will definitely have a closer look. I was researching vacuum tables for a while earlier in the year

On that design that spoilboard needs a lot of sealing, specially on the edges and the inside, not to mention sealing around the structure and the under skin

My first impression is that this is great.

How are you cutting the half laps? Are you cutting them on a table saw with a mitre guage? Or on a CNC?

I also think this torsion box, along with most designs, have way more ribs than necessary. 15"-30" would be my starting point. Honestly. Check out this table top from new yankee workshop (about 7 mins in you can see the top):

I built a similarly dimensioned table (photos here).

One of those pictures has a 50lb vise in the middle, one end held up with a tape measure and the top is still dead flat to my straight edge.

This was from my LR1 build. The ribs were 32" long and 15" apart. They were closer in the X direction (not being flat in Y is less of an issue).

3/4" stock ribs and 1/8" top and bottom skin are very strong. Add another 3/4" spoil board so nothing punctures the top and you’re good to go.

I would wait and see if you needed this. Maybe build the rails so they can be replaced by unscrewing them. My gut tells me you will never wear through the MDF ones. But if you noticed wear after 100 hours of running the machine, you could replace them with aluminum at that point and gotten your moneys worth out of the wooden ones.

I intend for mine to be fully sealed except for surface, and sectioned off to 4 chambers.

I just didn’t have time up til now to even begin drawing it out, so this maybe will help, or maybe just give me the kick in the butt I need to get started .

In my opinion it needs at least four entry points for the vac or it won’t get the air out well enough. There is also a lot of air that needs to get sucked out, dunno if that works.

I tried my first one here: Vacuum Table - Work in Progress and modified it for the Ghostrider quite a bit, using Ply as a basis.

On that design that spoilboard needs a lot of sealing, specially on the edges and the inside, not to mention sealing around the structure and the under skin.

The sealing comes for free as it’s intended to be glued together.

Yes, if this was still the screwed butt joints, you’d go crazy caulking. But using adhesives for assembly covers that step intrinsically.

The actual big challenge is closing “unused” holes. But I has an idea.

How are you cutting the half laps? Are you cutting them on a table saw with a mitre guage? Or on a CNC?

My intent is that this doesn’t need a CNC. At least up til I cut holes in the top.

I’ll just clamp the ribs together in a stack and cut the laps with a spiral router bit and a straight edge.

I also think this torsion box, along with most designs, have way more ribs than necessary. 15"-30" would be my starting point.

I’m not settled on anything yet. I just happened to leave my parameters set for 7 with a 76mm wide rib. Adjust to you your liking (I love parametric CAD). The # of “cells” may also be pertinent to my approach to vacuum hold.

I remember Norm did this way back. That’s where I first learned to make these!

1 Like

In my opinion it needs at least four entry points for the vac or it won’t get the air out well enough. There is also a lot of air that needs to get sucked out, dunno if that works.

Air pressure equalization between cells should be near instantaneous. The cell to cell hole size is configurable if there’s any concern.

My vac system does like 2000cfm. Shouldn’t take long. :grin:
Prototype testing will occur.

I figured since it’s gonna be running for the dust anyway, I’ll use the extra capacity to dynamically hold the work.

2 Likes

I set up the cut list table in my design.

It should stay in sync on measurements automagically, BUT if you rename a part, you’ll have to manually regen the table to get the names to update.

TO DO THIS:

Edit the cutlist…

Then click the circular arrows…

You should see the labels updated.

LR4 Parametric Table - Half-Lap + Vac Onshape

Side note, if you don’t know about https://www.cutlistoptimizer.com, it’ll make your life so easy and reduce material waste when cutting a bunch of parts from sheet goods (like torsion box rails!)

Put your available (or soon to be purchased) stock sheet info (Full or cutoffs) into the STOCK SHEETS table, and then your required cut info into the PANELS table. Click CALCULATE, and TADA!

It’ll let you account for edges, kerfs, and even grain orientation.

It’ll also generate a printable report/image you can take to the garage with you.

Note that my report says it couldn’t fit my bottom skin pieces because I didn’t give it enough stock. Since my skins accommodate 5’x5’ birch ply, I’ll have to muck around with segmented skins so I can cut them from 4x8 mdf/hardboard stock.

Hope this helps. I found it saves tons of time and waste when you’re building stuff like this with no CNC:

Another good option: https://www.opticutter.com/

And this one does linear stock (pipe, aluminum extrusion, etc) too!

On the edges…but what material are you using?

MDF is shockingly porous and won’t hold vacuum unless you seal all of the surfaces quite well. And some plys have a lot of porosity along the edges that will leak vacuum.

I had big plans for a vacuum table on my old MPCNC…then got talked into just doing a quick test with some sheets of foam from the dollar tree.

I wound up using 3 sheets of foam - one with a series of horizontal slots, one with a series of vertical slots, and one with a grid of holes over the intersections of the slots. Added a 3D printed plenum on the side and hooked up the smallest cheapest shopvac I found at walmart for $20.

Almost wasn’t worth drawing it up in onshape at the time but I did:

I just cut slits for the plenum with an xacto. I forget who designed the plenum but I see I had it in onShape as well: Onshape

Actually…just found in the description on the terrible video I did about the vac table that it was @moebeast who did the plenum which is here: Foam Ripper by moebeast - Thingiverse

Video is here - terribly edited (I hate editing video so leave in way more than I should) https://www.youtube.com/watch?v=tyKDV7OIQQs

I had originally planned on only using it for cutting foam and it worked great for that. But I found it also worked great for conventional milling as a “Vacuum pad” more than a “Vacuum table” Since the bottom slots were open to the table it would just suck itself down and hold position. I’d just put my work on top and then toss some sheets of paper over the holes that were still exposed.

I need to make a new one…tossed that one out in March when I started my LR4 because it was really wearing out:

So…point of this long ramble. I started out planning on building a big complex vacuum system into my table. Wound up making a quick proof of concept that cost me $3 and about an hour of effort (would be $3.75 now thanks to DT raising their prices) and found it worked so much better than I expected that I decided the big complex plans weren’t really necessary.

Oh - and just to be really annoying. I’ll finish by somewhat contradicting myself. MDF will leak vacuum like crazy…particle board will too…but…surprisingly not as bad as MDF. My table top I used this on was particle board and it never had any issues holding itself down. Though I did find using it to hold MDF was a lost cause unless you seal the MDF.

1 Like

I think he’s talking about vacuum like a ShopVac.

Unfortunately, it’s very hard in the DIY space because people call their ShopVac/Suction tables a “Vacuum table”.

I think in this case, he’s really talking about a suction table, where, I could be wrong, but I think the only seal that is necessary is actual cracks. I think sealing all of the MDF in this case is less important. That’s why he said the glue is a free seal.

I originally looked into making a multi-zone suction table like this one

But I think my aspirations have graduated to a real multi-zone vacuum table with a vacuum pump.

1 Like

Thats how i started. A big vacuum cleaner, the noise is unbelievable with 2 shopvacs running you may want to build a silencer box but thats a nice and fast way to kill them. Big air pumps/vacumm are the way to go but kind of expensive. Depending on your needs you can get away with less than 2.4kw pump (I mostly cut acm sheets and i dont use it while cutting, just for v-routing.

With a 3HP vac running the entire time the cuts are happening (it’s doing dust collection too), I doubt the porosity of MDF is going to matter at 2000CFM.

Besides, I’ll be putting SOME kind of finish over it. Paint, Poly, Fluorescent Faux Fur, who knows. But something.

Perhaps this is a better term for what I’m doing.

I’m not attempting to hold a vacuum.

Well, it’s one big impeller, and it’s going to be running anyway. May as well get the most out of it. This will double as revenge for my neighbor’s wind chimes.

I toyed with the idea of valves or gates or sliders. Even something like this:

That’s gonna be a no from me, dawg.

At the cheapest, I can toss some tagboard down on the uncovered holes.
I am working on a CAD design for a 3D printed valve that goes in the holes that will open when the stock is placed on it. That way, only the covered holes will open. :crossed_fingers:

So no cuts all the way through the material?

I’m looking forward to the furry table :rofl:

But yes, I am talking about a “suction table” rather than hard vacuum. I don’t remember who the youtuber was but 7 years ago when I built my vac pad I found a video from a CNC youtuber who made a big fancy baffled table with valves to turn sections on and off with a big blower making plenty of CFM…but he did it all out of MDF.

He was shocked when he fired it up and it wouldn’t hold anything. Turned out it was the porosity of MDF. He had to go back and seal it all with a few coats of poly and then it worked as expected.

I found the same when I tried to hold a piece of MDF on my pad. I had done foam and ply with no issues…but I put that piece of MDF down and it seemed like it was holding but as soon as I started trying to cut it it moved around. Wound up just using screws on that one.