As many/most of you know I bought two of these machines… and I’m now setting up the second one. All is going well… flashing and configuring GRBL, wiring mods for different laser, etc. One thing I’m doing different, however, is adding a newer, thinner, Z-lift to minimize futher reduction of an already small workarea.
This machine really presents a nice big, flat, metal, carriage plate to work with and enough convenient pre-drilled/threaded holes to make it a “snap” to bolt stuff on…
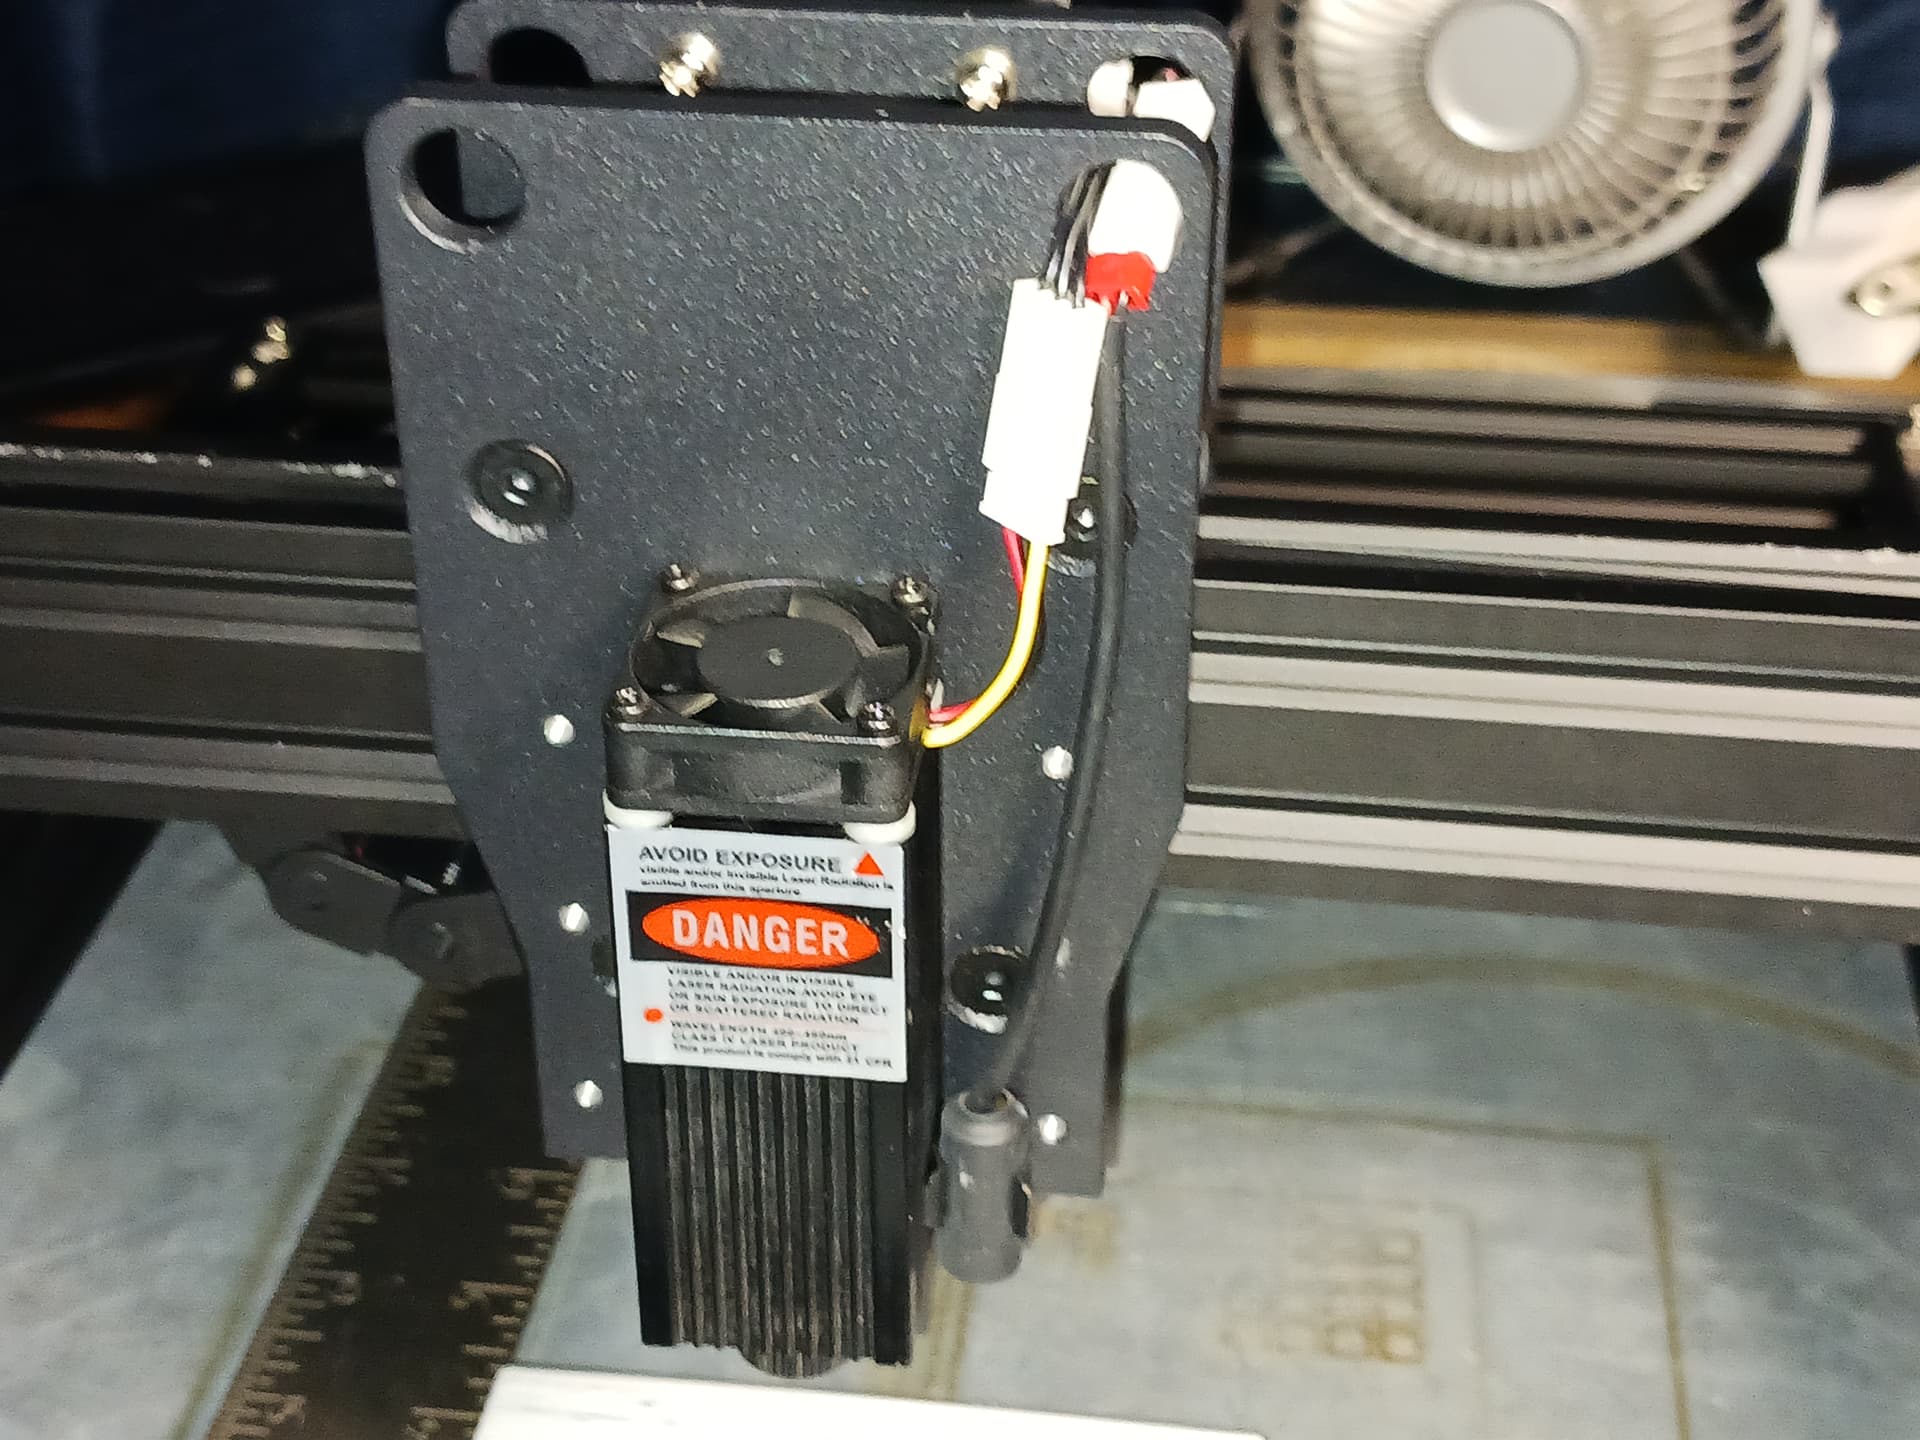
Removing the included laser and red cross-LED module, I used Onshape to create and set up a relatively thin three-piece dovetail slide using the 3-hole “stack” down each side…
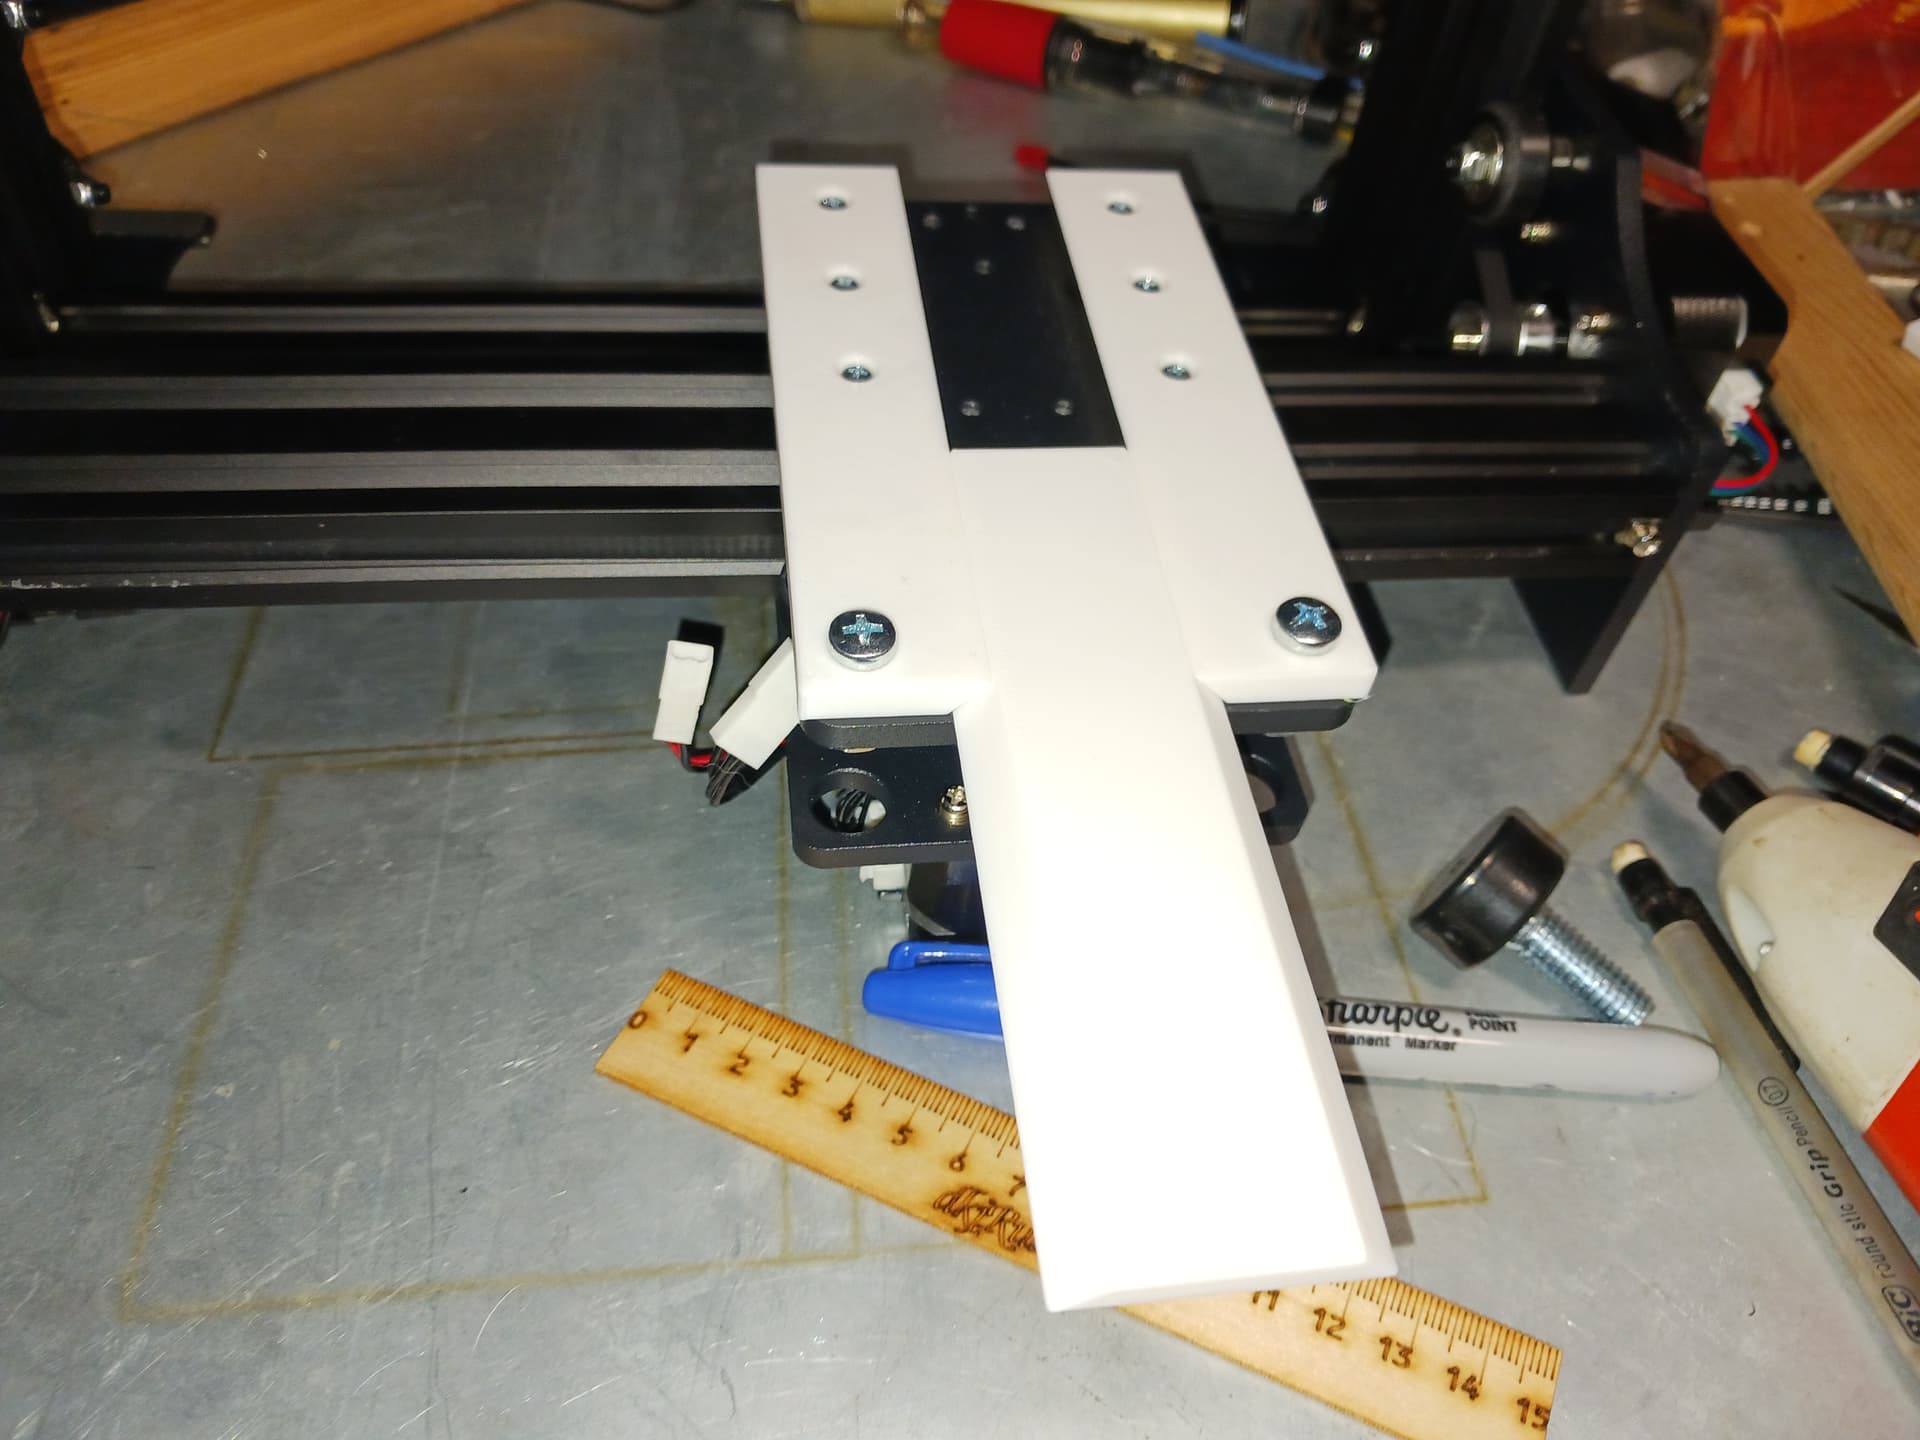
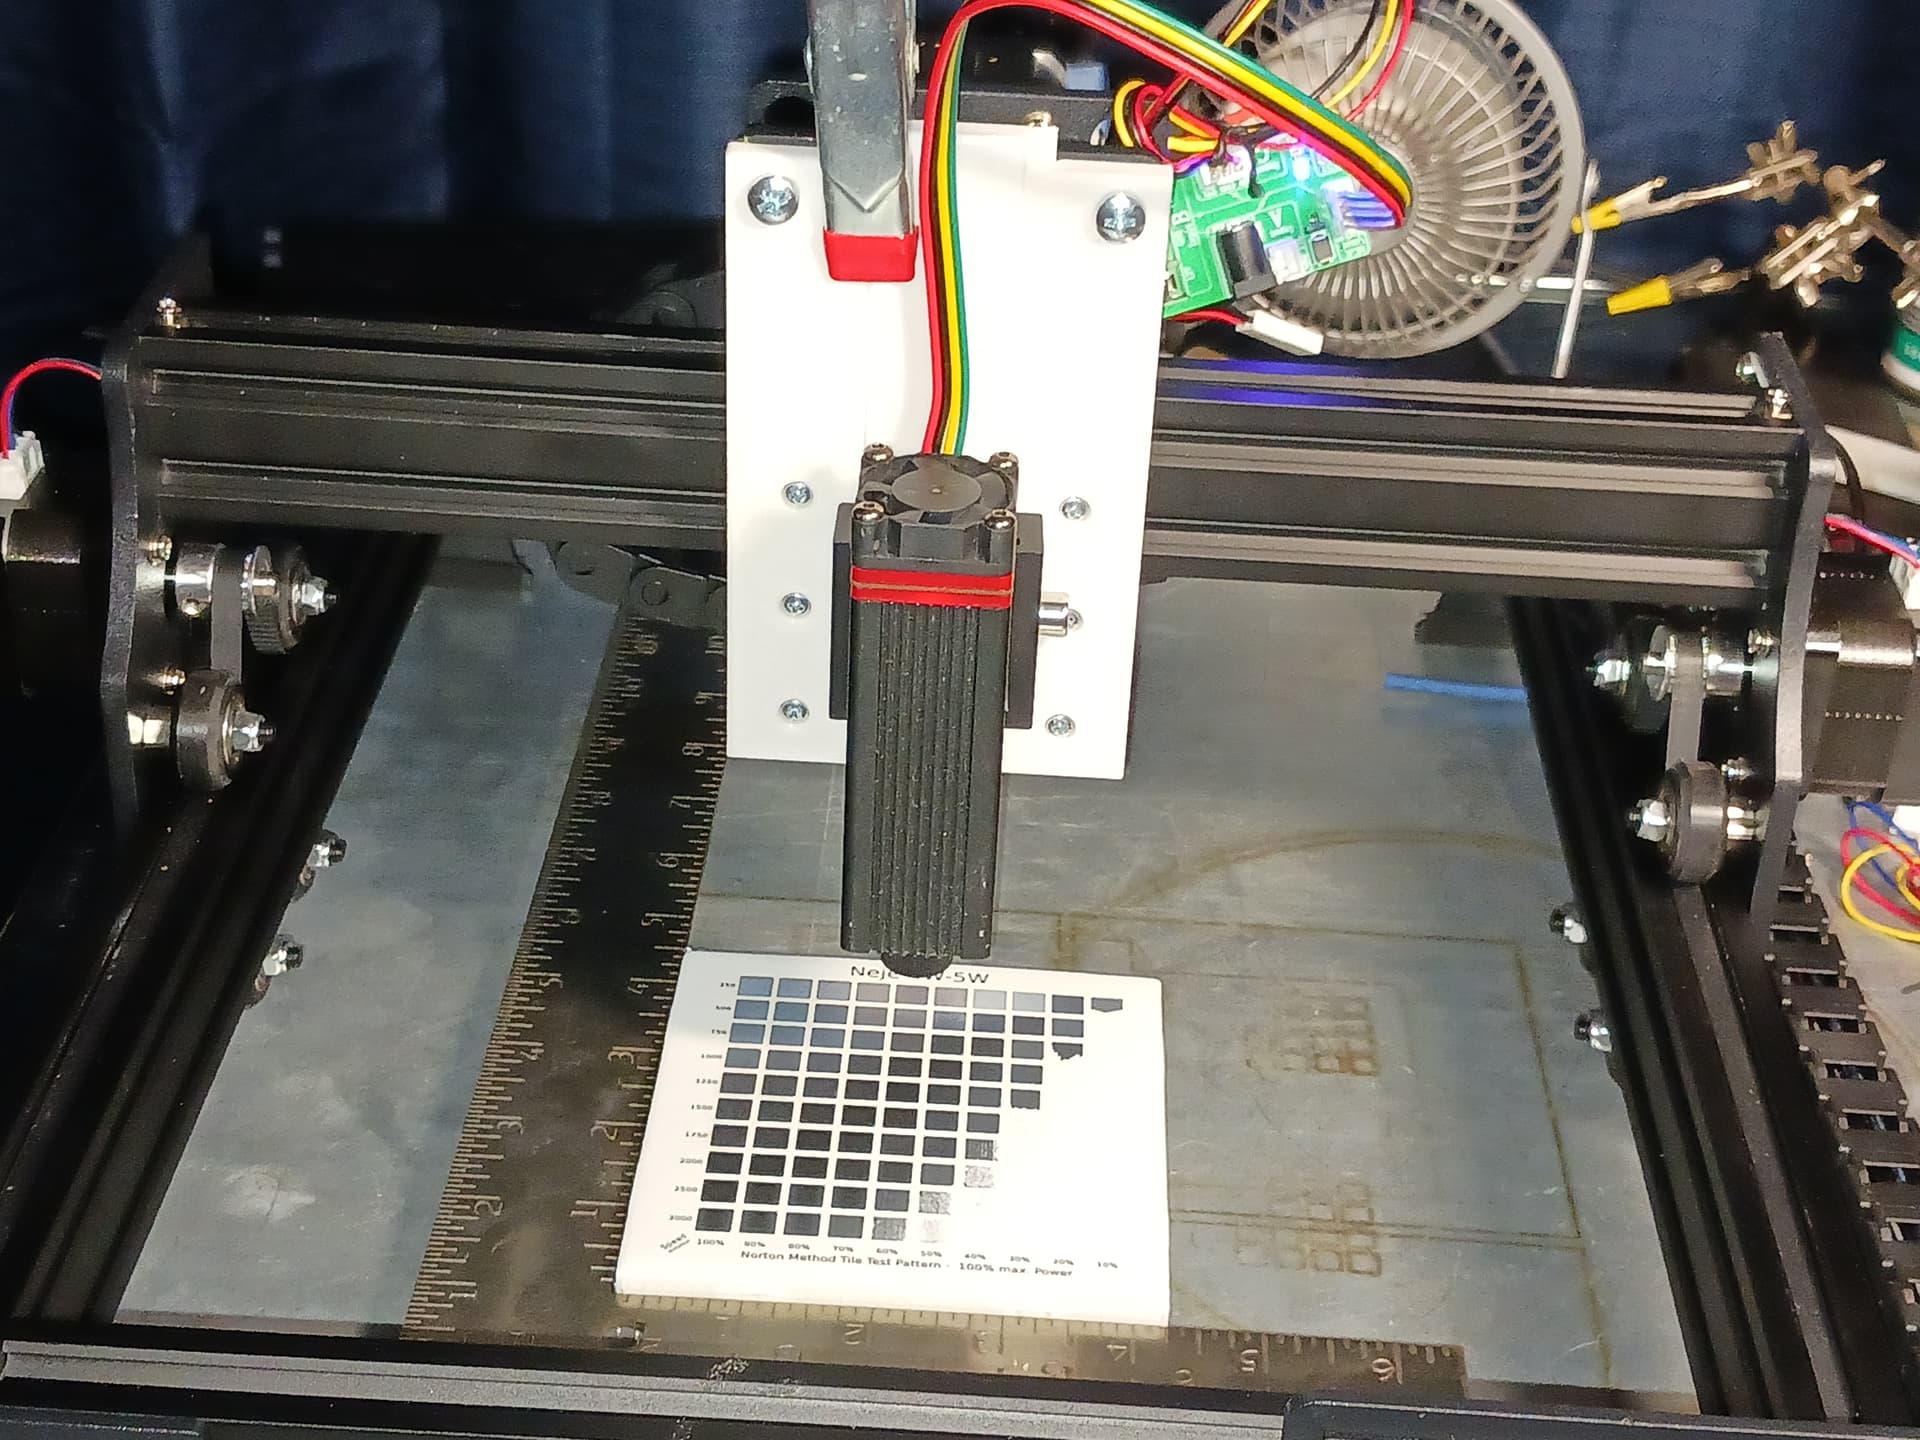
The central slide provides ample room for different laser module hole patterns. But I’ve got several Neje laser modules that came with a high quality metal clamping mechanism so I just added holes to mount one…

Setting the laser on it’s feet a simple clamp holds things quite securely for testing…
Noting the two large holes at top, I envisioned a bar with threaded bolt through it to clamp the slide in place. I found a printed C-clamp and a knurled thumbscrew out on Printables… and then used TinkerCad to cut, stretch, combine, and add the bits I needed to make a suitable clamp mechanism…
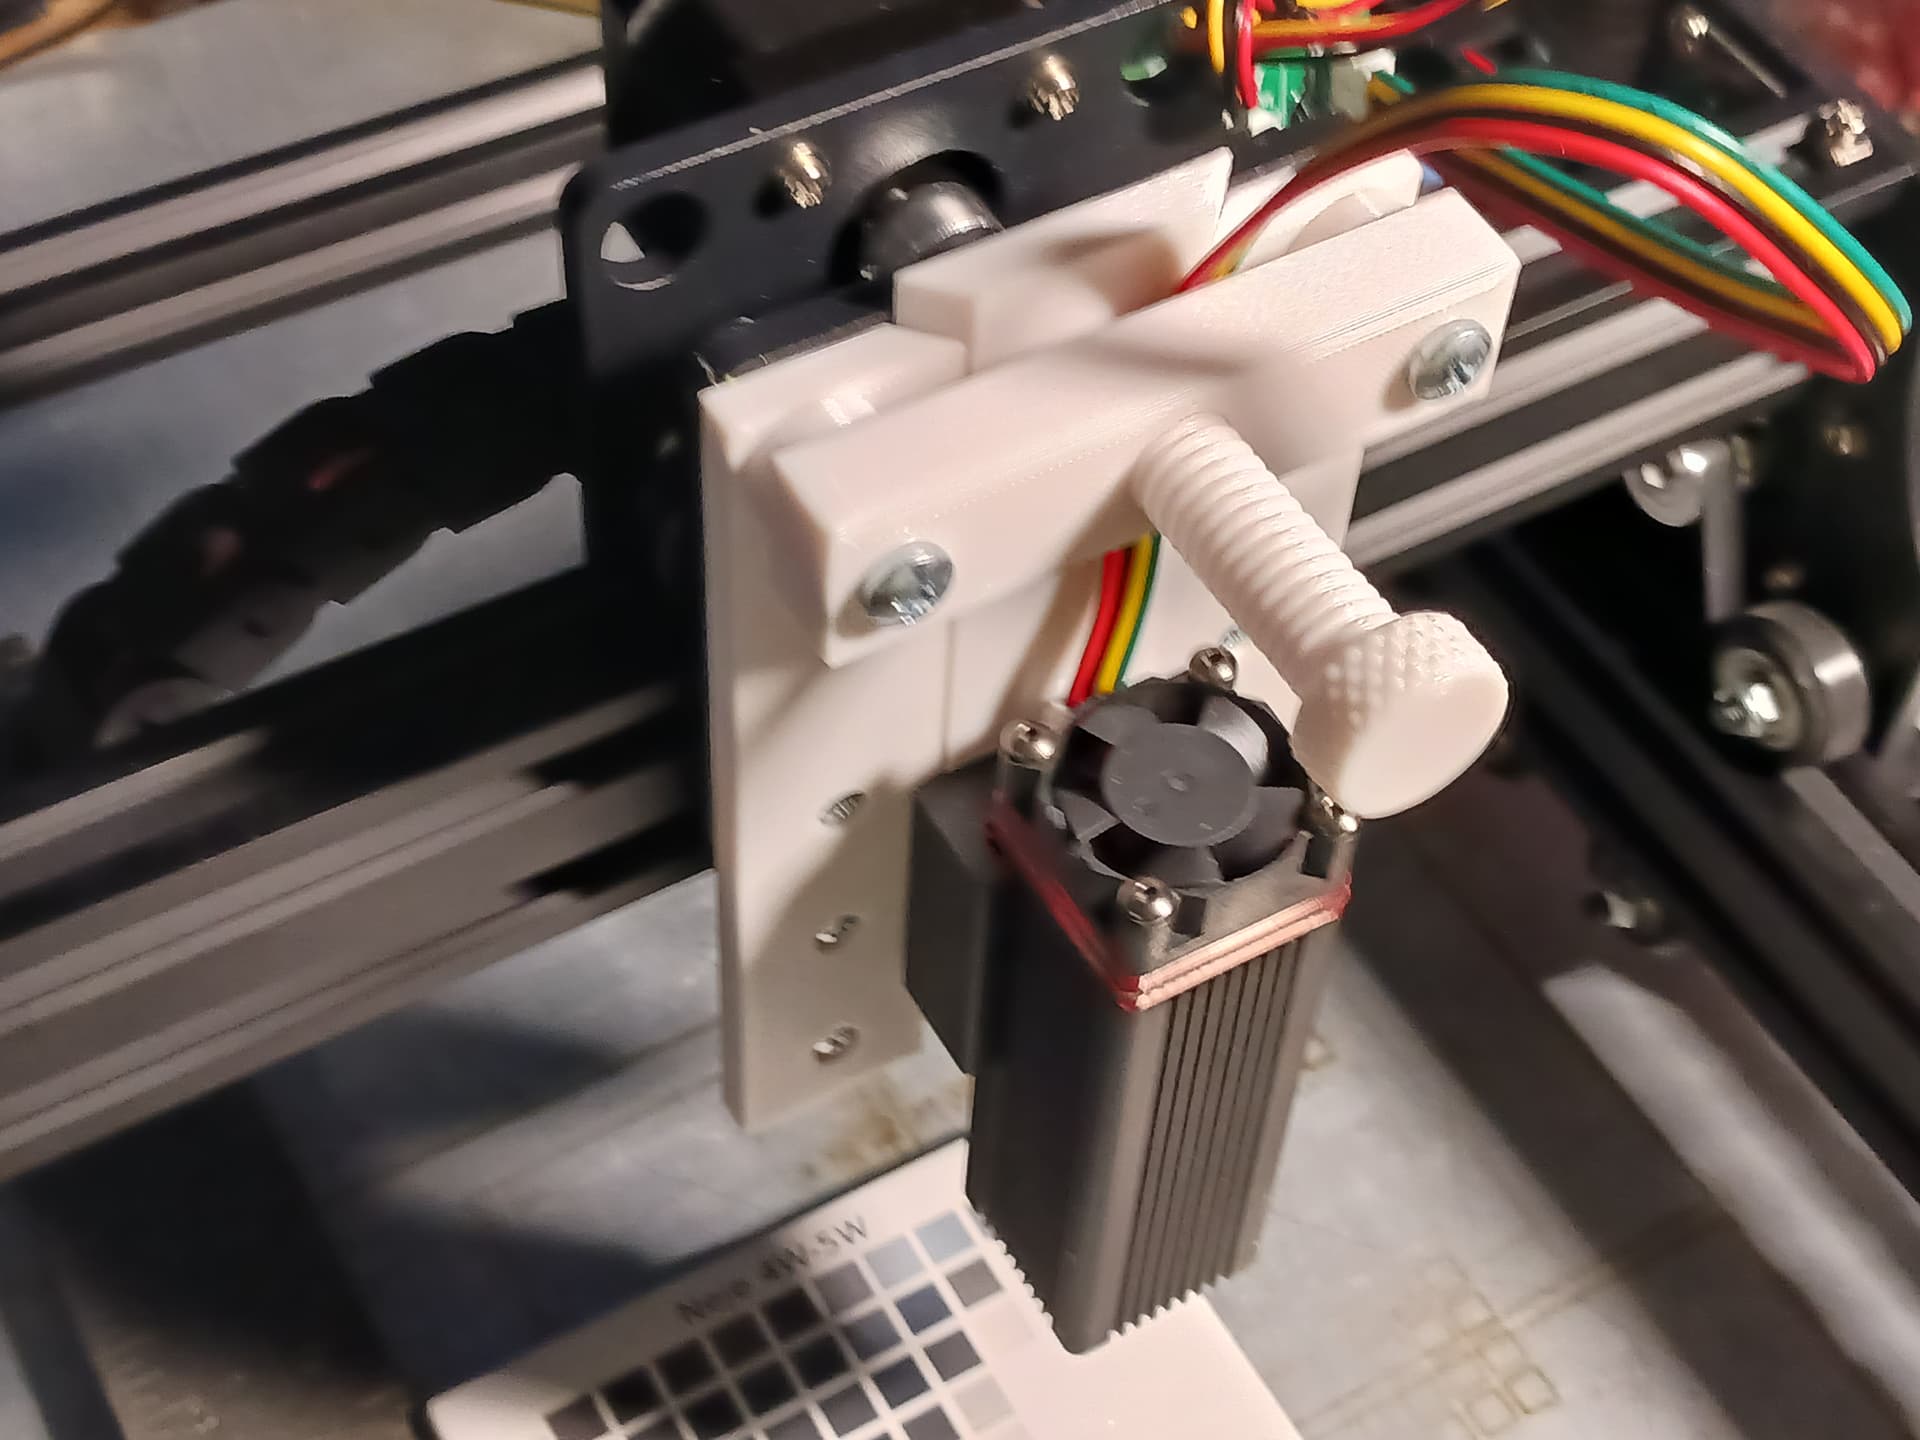
I’ll probably need to lengthen the central slide to insure I have enough “reach” to get down to the work surface but otherwise all this seems very workable. I usually set all my lasers to focus at 50mm below the bottom edge of the laser housing, so using a 50mm gauge block I can easily set the focus for varying material thickness…

I’ll put it out on Printables when I get the time and energy. Wow, so busy I am 

But right now… I think it’s time for my nap. 
– David