I’ll post more about the build in a future Youtube video, but thought I’d share one of the first patterns I drew after cobbling this thing together. So satisfying!
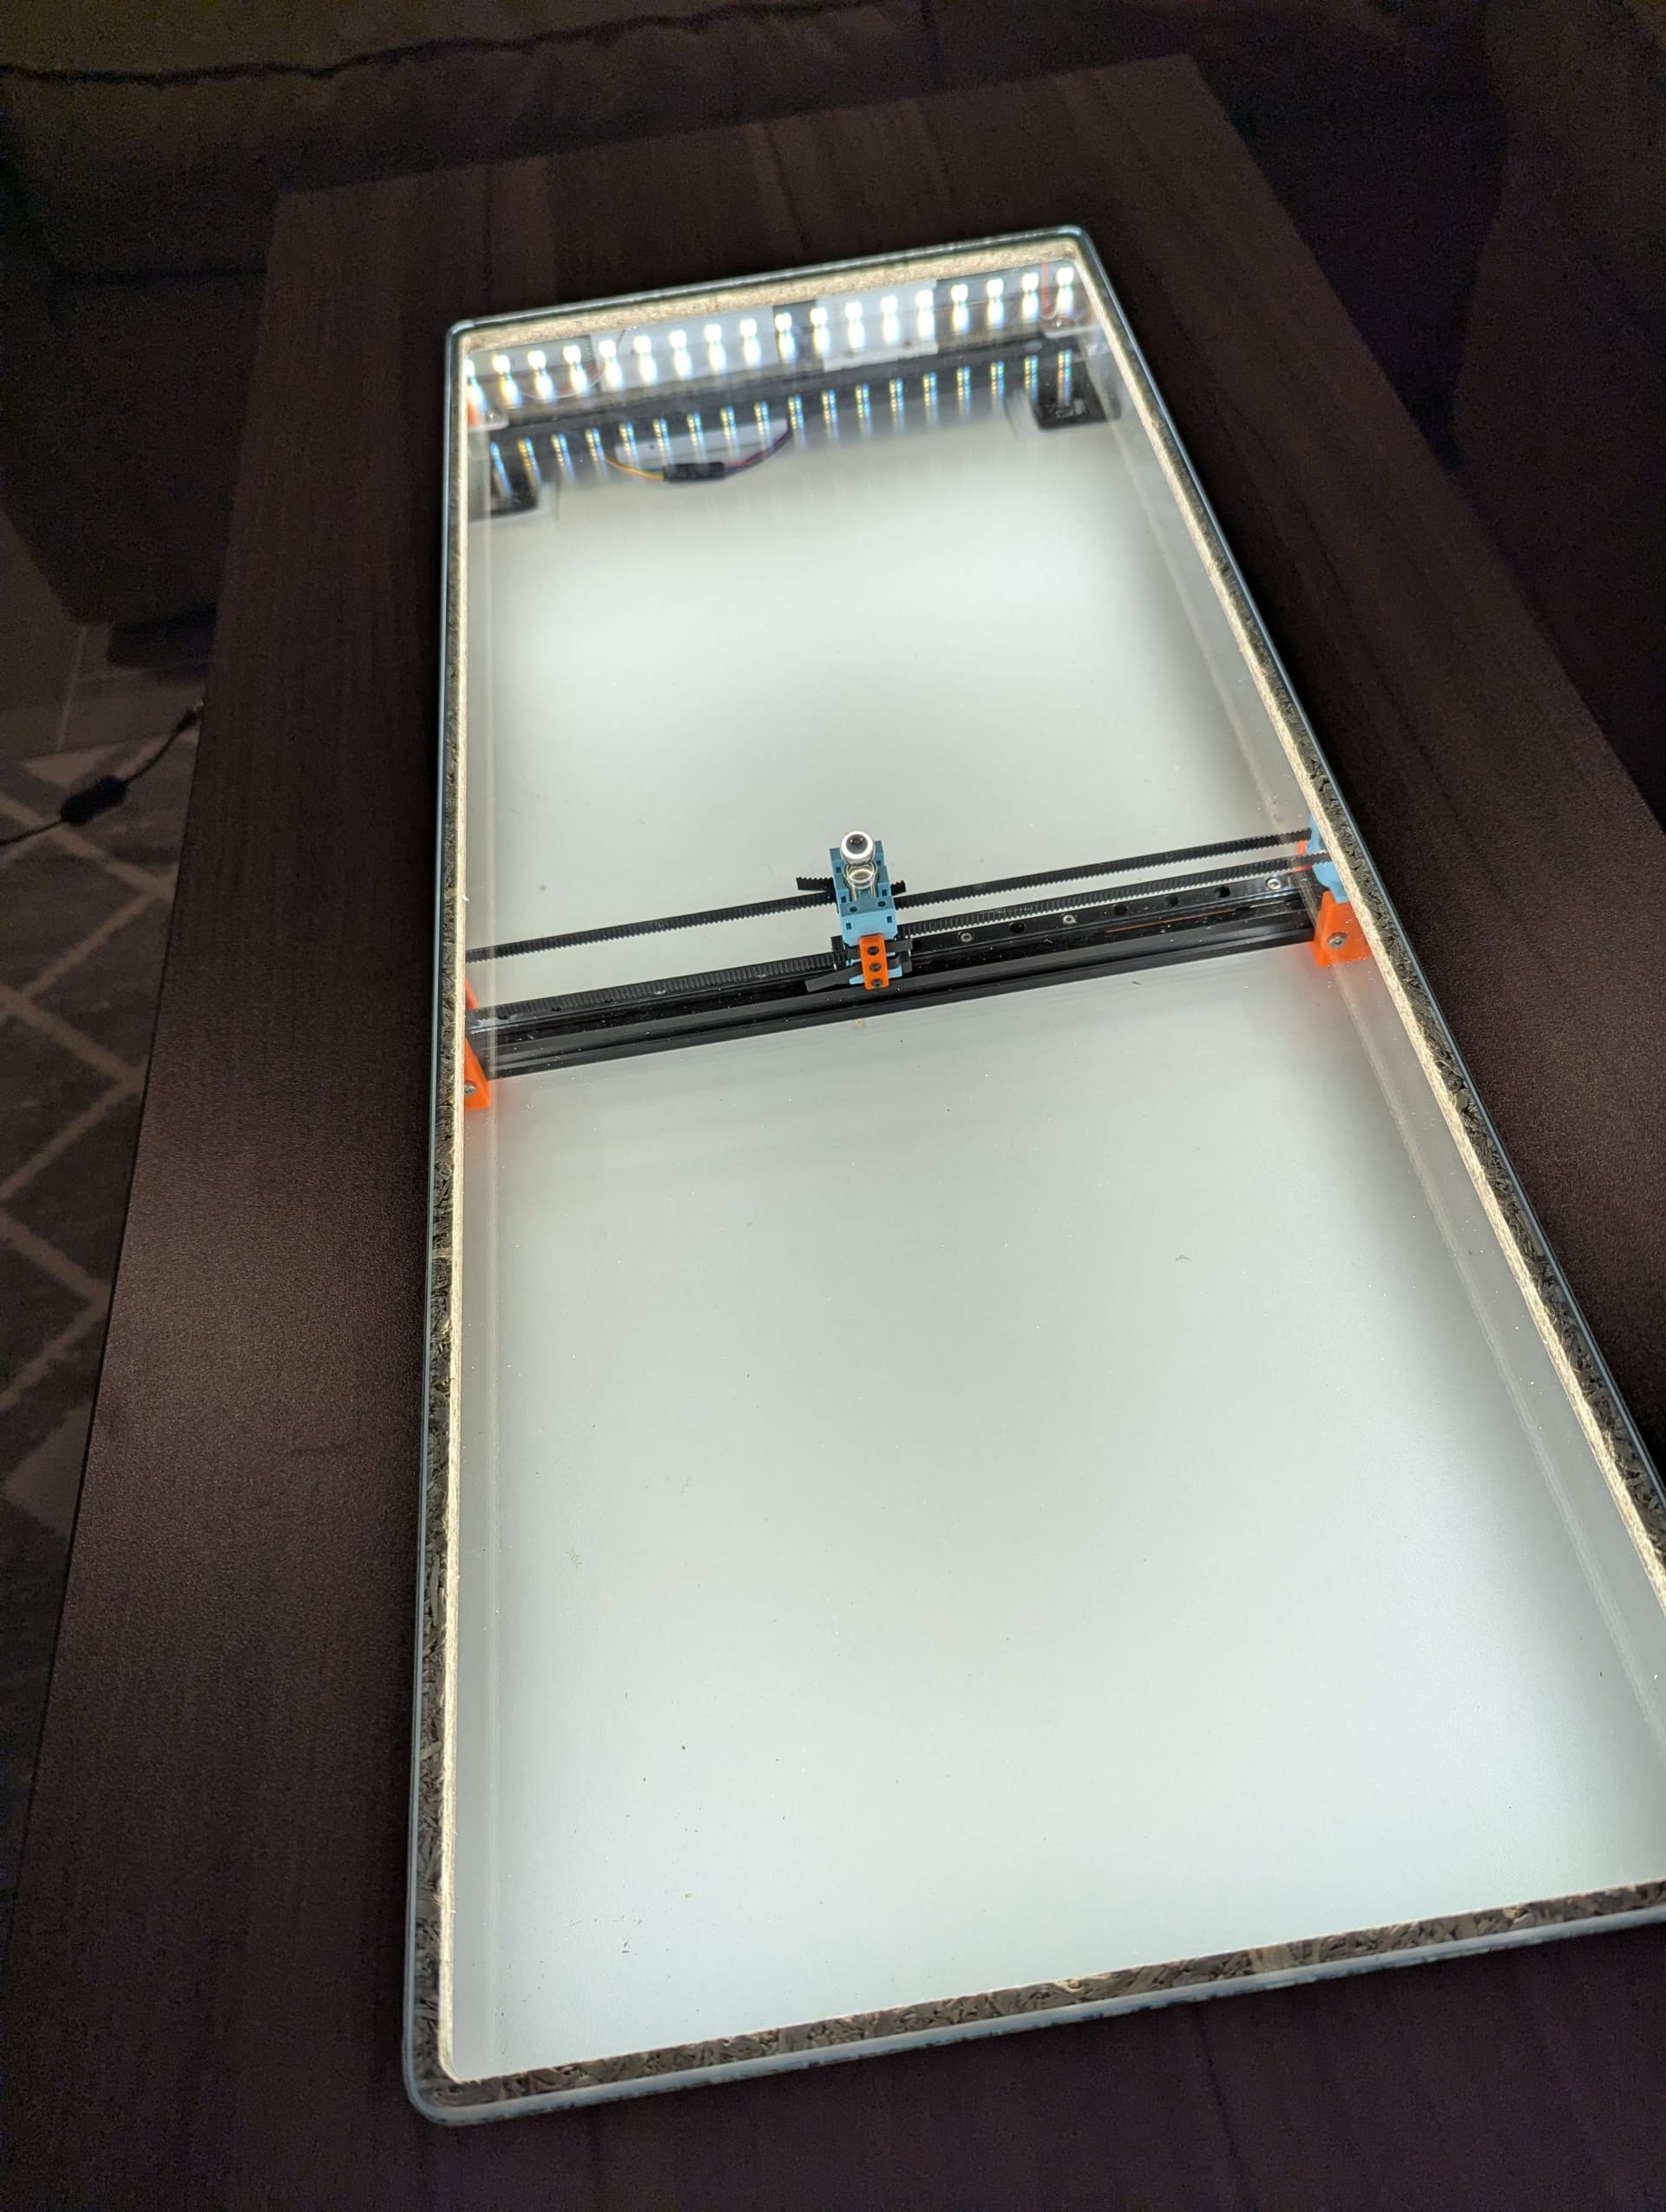
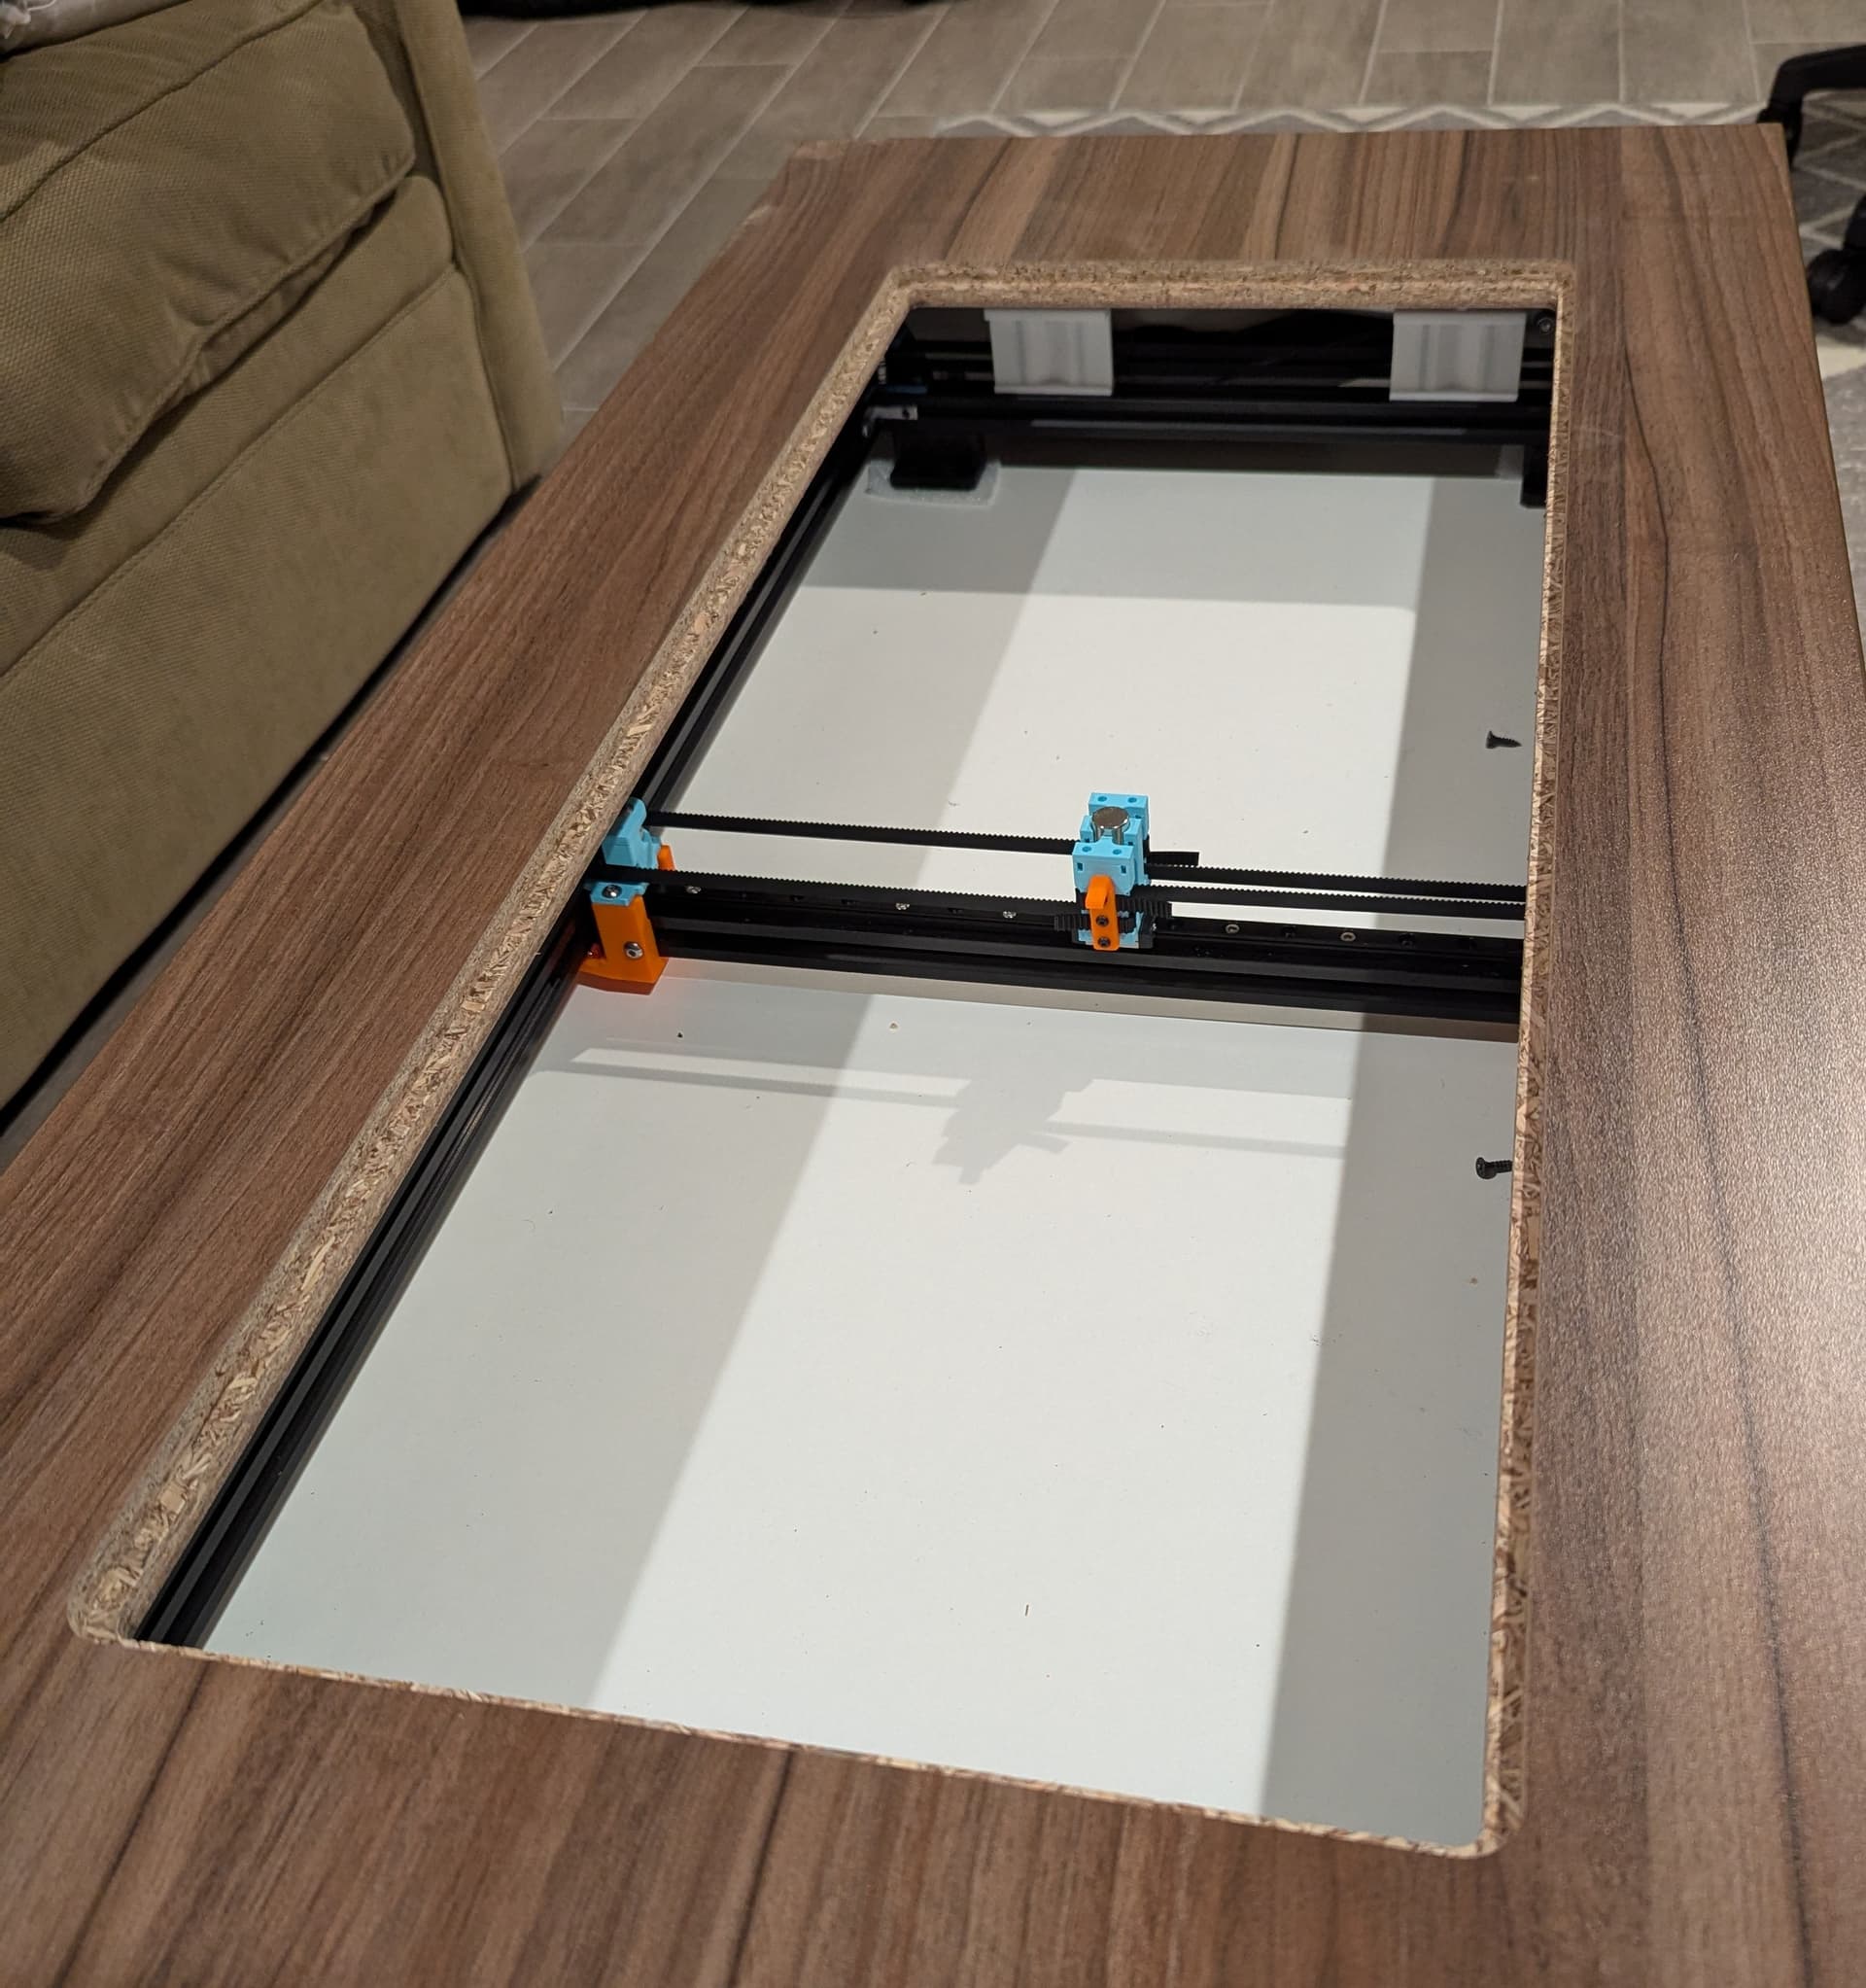
I was originally going to go with the vanilla ZenXY V2 and build a custom table for it. But once the idea struck me to use this lift-top coffee table, I was immediately set on making it work. However, the ZenXY frame is very space inefficient, and this table has a very short dimension that would be crippled having to give up 92mm on both sides. The cavity is about 900x400mm with 100mm depth. I would end up with an massive aspect ratio of like 28:8.
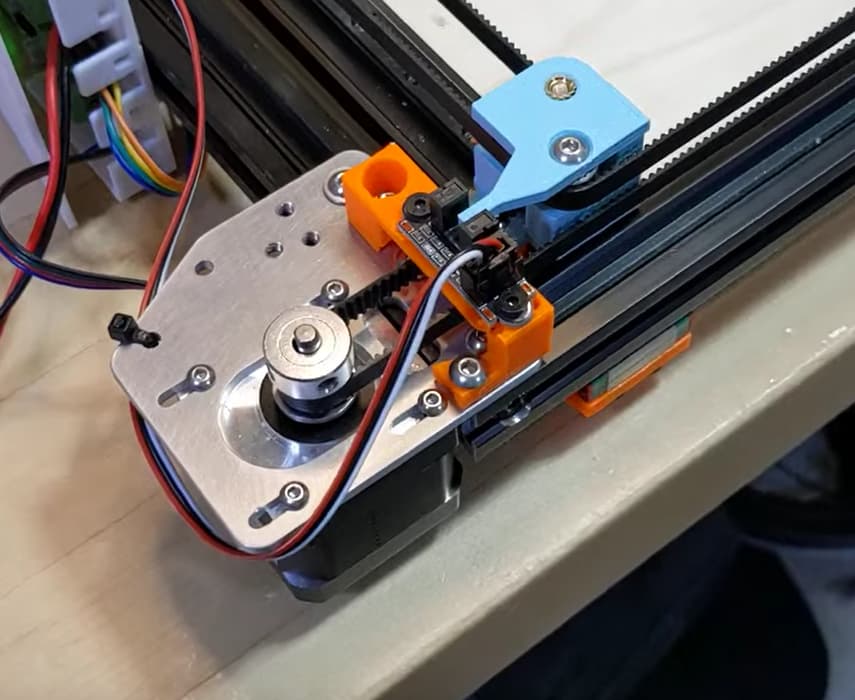
So instead I started with the “Funssor” CoreXY frame (https://www.thingiverse.com/thing:2138286), which was already pretty space efficient, and I modified it to preserve as much space as possible in the short dimension. I got it down to about 45mm border, compared to the ZenXY 92mm. My final image size is 730x308mm
The biggest issue I have is the OSB/particleboard inside the cut laminate tabletop. I’m trying to decide how to clean it up because it’s a pretty ugly edge. Thinking of some kind of wood filler, then sealant, then brown paint. I don’t know, I’m not very good with finishing. But, I’m very happy with the result, even if I leave it that way.
EDIT: I forgot to mention that I used my MPCNC to cut custom aluminum motor mounts for this. The belt tension was causing the printed motor mounts to deflect:
That looks great. You really flattened the sand before drawing the circle packer filler pattern.
The mechanism looks pretty smooth too.
Can you paste a picture? Does it just need edge banding? Or maybe a veneer? Wood filler and stain isn’t usually very good looking. I would rather do filler and black paint.
I’m only doing one Sandify pattern at a time for testing. I printed some rakes and the kids have been having fun trying to flatten it out before I run it. It’s difficult and tedious, but it does make for some great demo/timelapses
(on that note I have a crazy idea that I started playing around with for automatic flattening, but it needs some help – I will make another thread for it)
Yes, the mechanism is surprisingly smooth. I wasn’t expecting it based on other tables I’ve seen. It’s using the V1E 1/2"x1/2" cylindrical magnet, and there’s 1/8" thick annealed glass between the magnet and baking soda/ball.
I already tried filler + stain and it looks terrible. I was thinking filler + paint. A close brown might work well enough. I might try the veneer, though most are iron-on which is difficult here, and I’d probably have to recut the cavity with more clearance. The glass is already a tight fit…
Hmmm. Is it tempered glass? It might be easier to have it cut if not.
Even OSB will grow and shrink with the changing humidity. So if it is that tight, I would make sure to check it often. If it gets stuck, you will have a lot of stress getting it out.
After seeing it, the iron on edge banding is the typical solution for edges like that. But the goemetry would make it tricky. You could cut out more and use solid wood trim for the rabbet. I think paint and filler would be a good look. But it won’t blend in. So I would go with a contrasting color like black or red. Own it at that point.
Yeah 3/8" tempered glass. Cost almost $200, but people put their feet up on this thing so I went for high-spec.
I considered simply ditching this table top and getting a new piece solid wood, CNC cut it, then stain and seal the whole thing at once to get a consistent finish. But since I already cut (not realizing in advance how terrible the inner surface would be), I figured I’d see what I could do with it before committing to a new top.
I like the idea of not trying to blend, and just owning it. Red is kinda bold, but might be the right kind of bold I have some red filament, I’ll print a red cover for it just to see how it looks. Thanks for the idea.