If I may hijack and add to this thread. If a nuisance, let me know and I’ll start a new thread
We are in a similar problem. I came here now to start a new post and write about the very same thing that happened to me today, with the same cut distance of approx. 7mm as I was trying to do a test cut, though I haven’t done your thorough investigation yet.
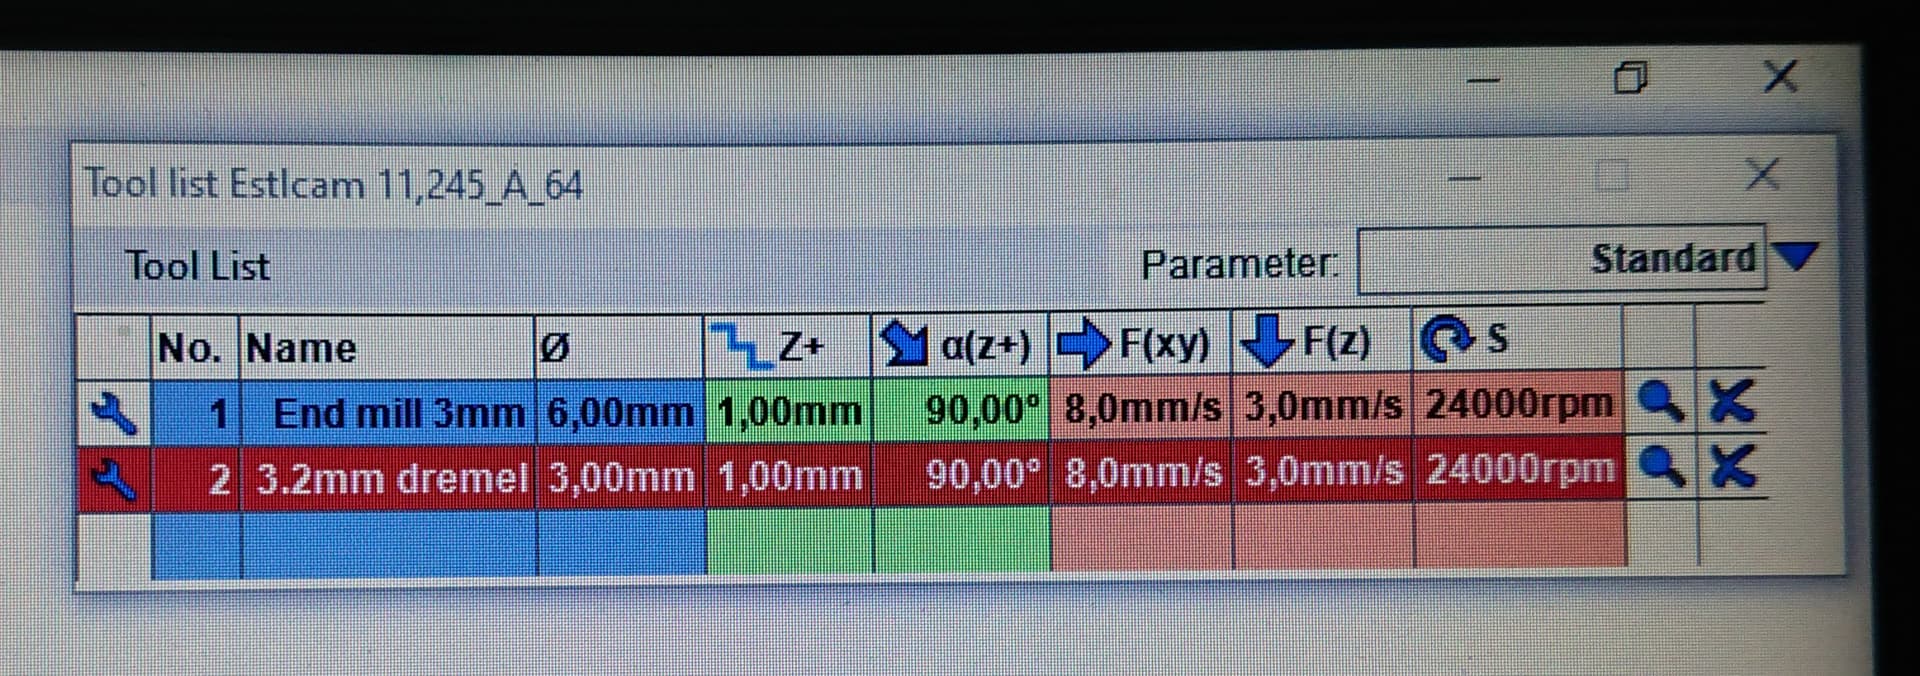
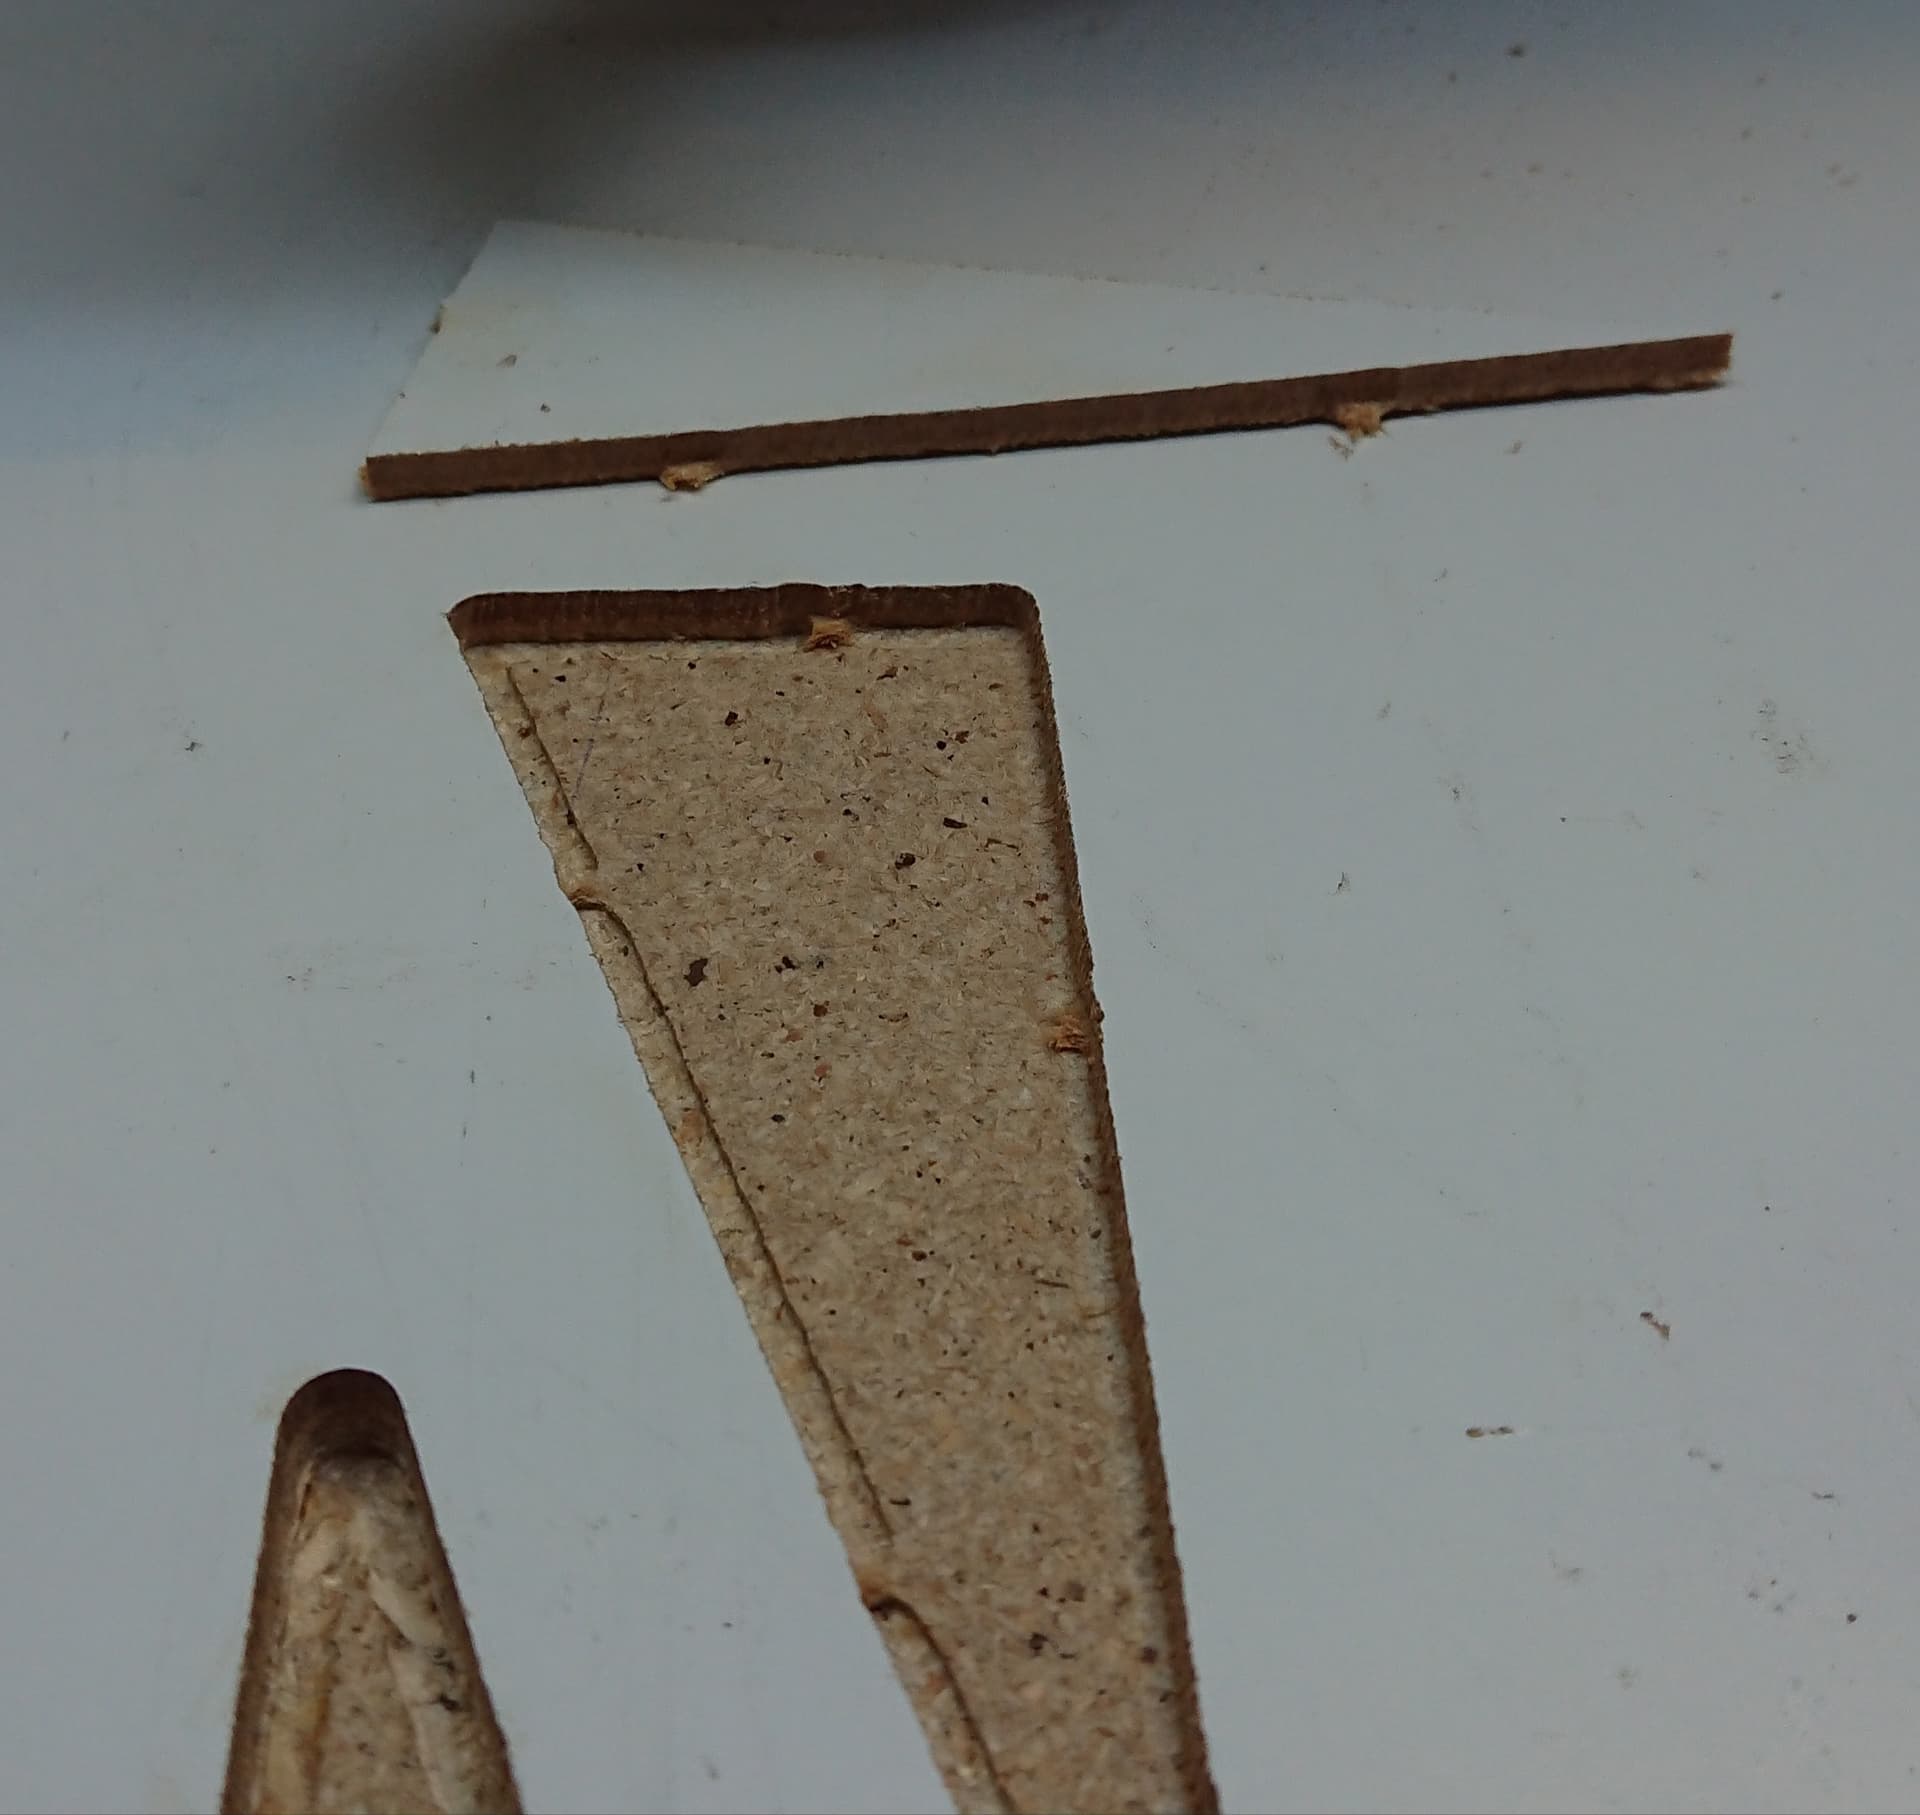
With a hard board of 3.5mm thickness I started with 3.6mm cutting depth for all cuts on the struts (the value you add before saving the gcode file in estlcam) with 1mm “step down” on my tool but once it started the drill just plunged all the way down directly and started working directly instead of taking 1mm passes.
I changed the cutting depth to 0.01mm for all cuts and once it started the machine just hovered of the material all the way, as expected. I changed it to 1.00mm and it went down, what I could see, around +/- 1mm. I changed it back to 3.6mm (material thickness at 3.5mm) and once again went into the board underneath.
I’ll follow and try to finish my struts as well and see where it leads me.
To everyone, I dont have much more to add for the moment than to continue making the struts while experimenting with estlcam and its odd behavior. Results might take some time but if you have, feel free to grill me with questions
So how do I change my steps? Do I have to go into the Marlin code? But also good to add, when I did my first cut ever with my company’s logo on a board it worked perfectly. It went down by 1mm each pass, not like today’s mishap
If you try to move your router by hand in the mounts up and down, can you? Just to rule out that it didn’t actually move down that much in your mounts?
When I first installed mine, I was worried about over-tightening it, and had actually under-tightened it. I never ran it like that, but I was able to spin it and move it in the mount more than I thought I should and caught it right before I did my first cuts
A friend stole my xz plates so it will take some time before I can check. However, I have noticed that occasionally the connection between repetier host and LR3 while using the manual control is not responding correctly. I can press the button “50” on the Y axis and it goes 100ish or 1mm on Z axis and it goes 10mm. Not as common on the LCD display but it can happen. But once I get my xz plates back I’ll get back to you
That is/was my end goal from the start…too cumbersome with a bulky laptop and another extra cable dangling I have to be careful with so I’m glad to get rid of it. Do I upload the files through the LCD or the MCU?
And if I may sidestep a little, I haven’t done my research yet but I believe I’ve seen some clip of someone (you Ryan?) using a tablet to control the LR3, is this possible? If so, is it reliable? Can you, like 3d printers, upload files wirelessly? Or for reliable controls, a game controller perhaps?
Have you seen the new Jackpot control board? They’re still ironing out a couple of minor issues (it is a ver 1 product after all, but it is a V1 product as well, so we’re all watching the Dev/R&D/QA process unfold in front of us…)
Well, it’s designed by Ryan, with help from some folks in the EE/maker space as a controller for CNC type applications. Specifically, for 6 drivers and an ESP32 “brain”. As currently designed/conceived, it utilizes FluidNC on the ESP32 (instead of Marlin or grbl), including leveraging the built-in wireless capabilities of the board to provide control via phone, tablet, or computer using a web interface.