I am a total newb. I just finished my MPCNC Primo and got my Jackpot board. I did my crown test and it works great! Once I surface my spoil board I’ll be ready to mill. Okay now for the hard part. Macros. I want to buy a XYZ touch plate. Wiring it and macros… need help. Does it just wire to the Z probe? Also I need a macro I’m assuming. I found this website:
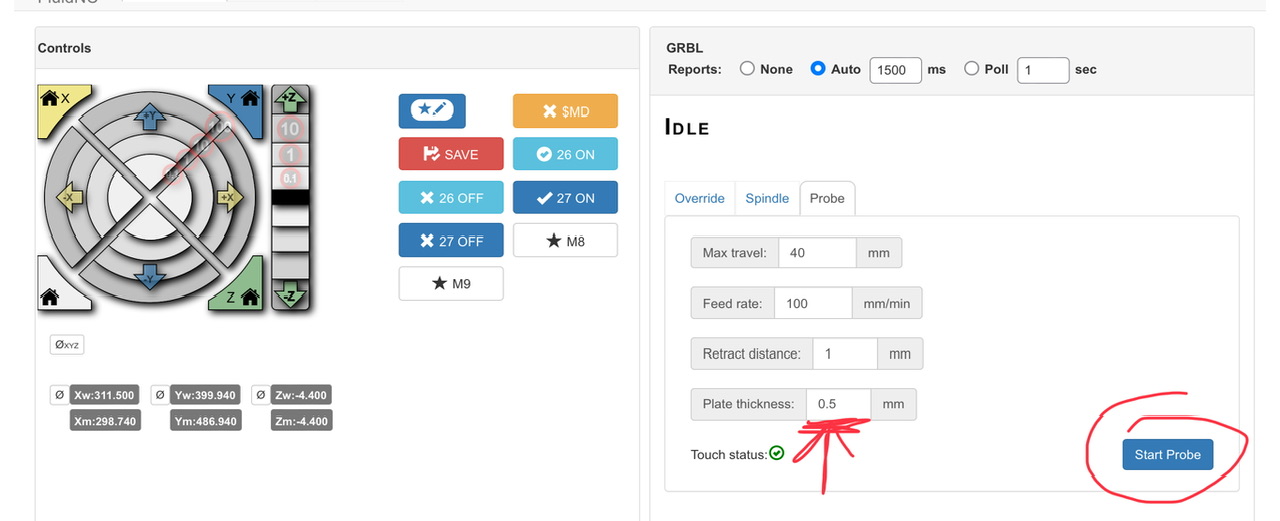
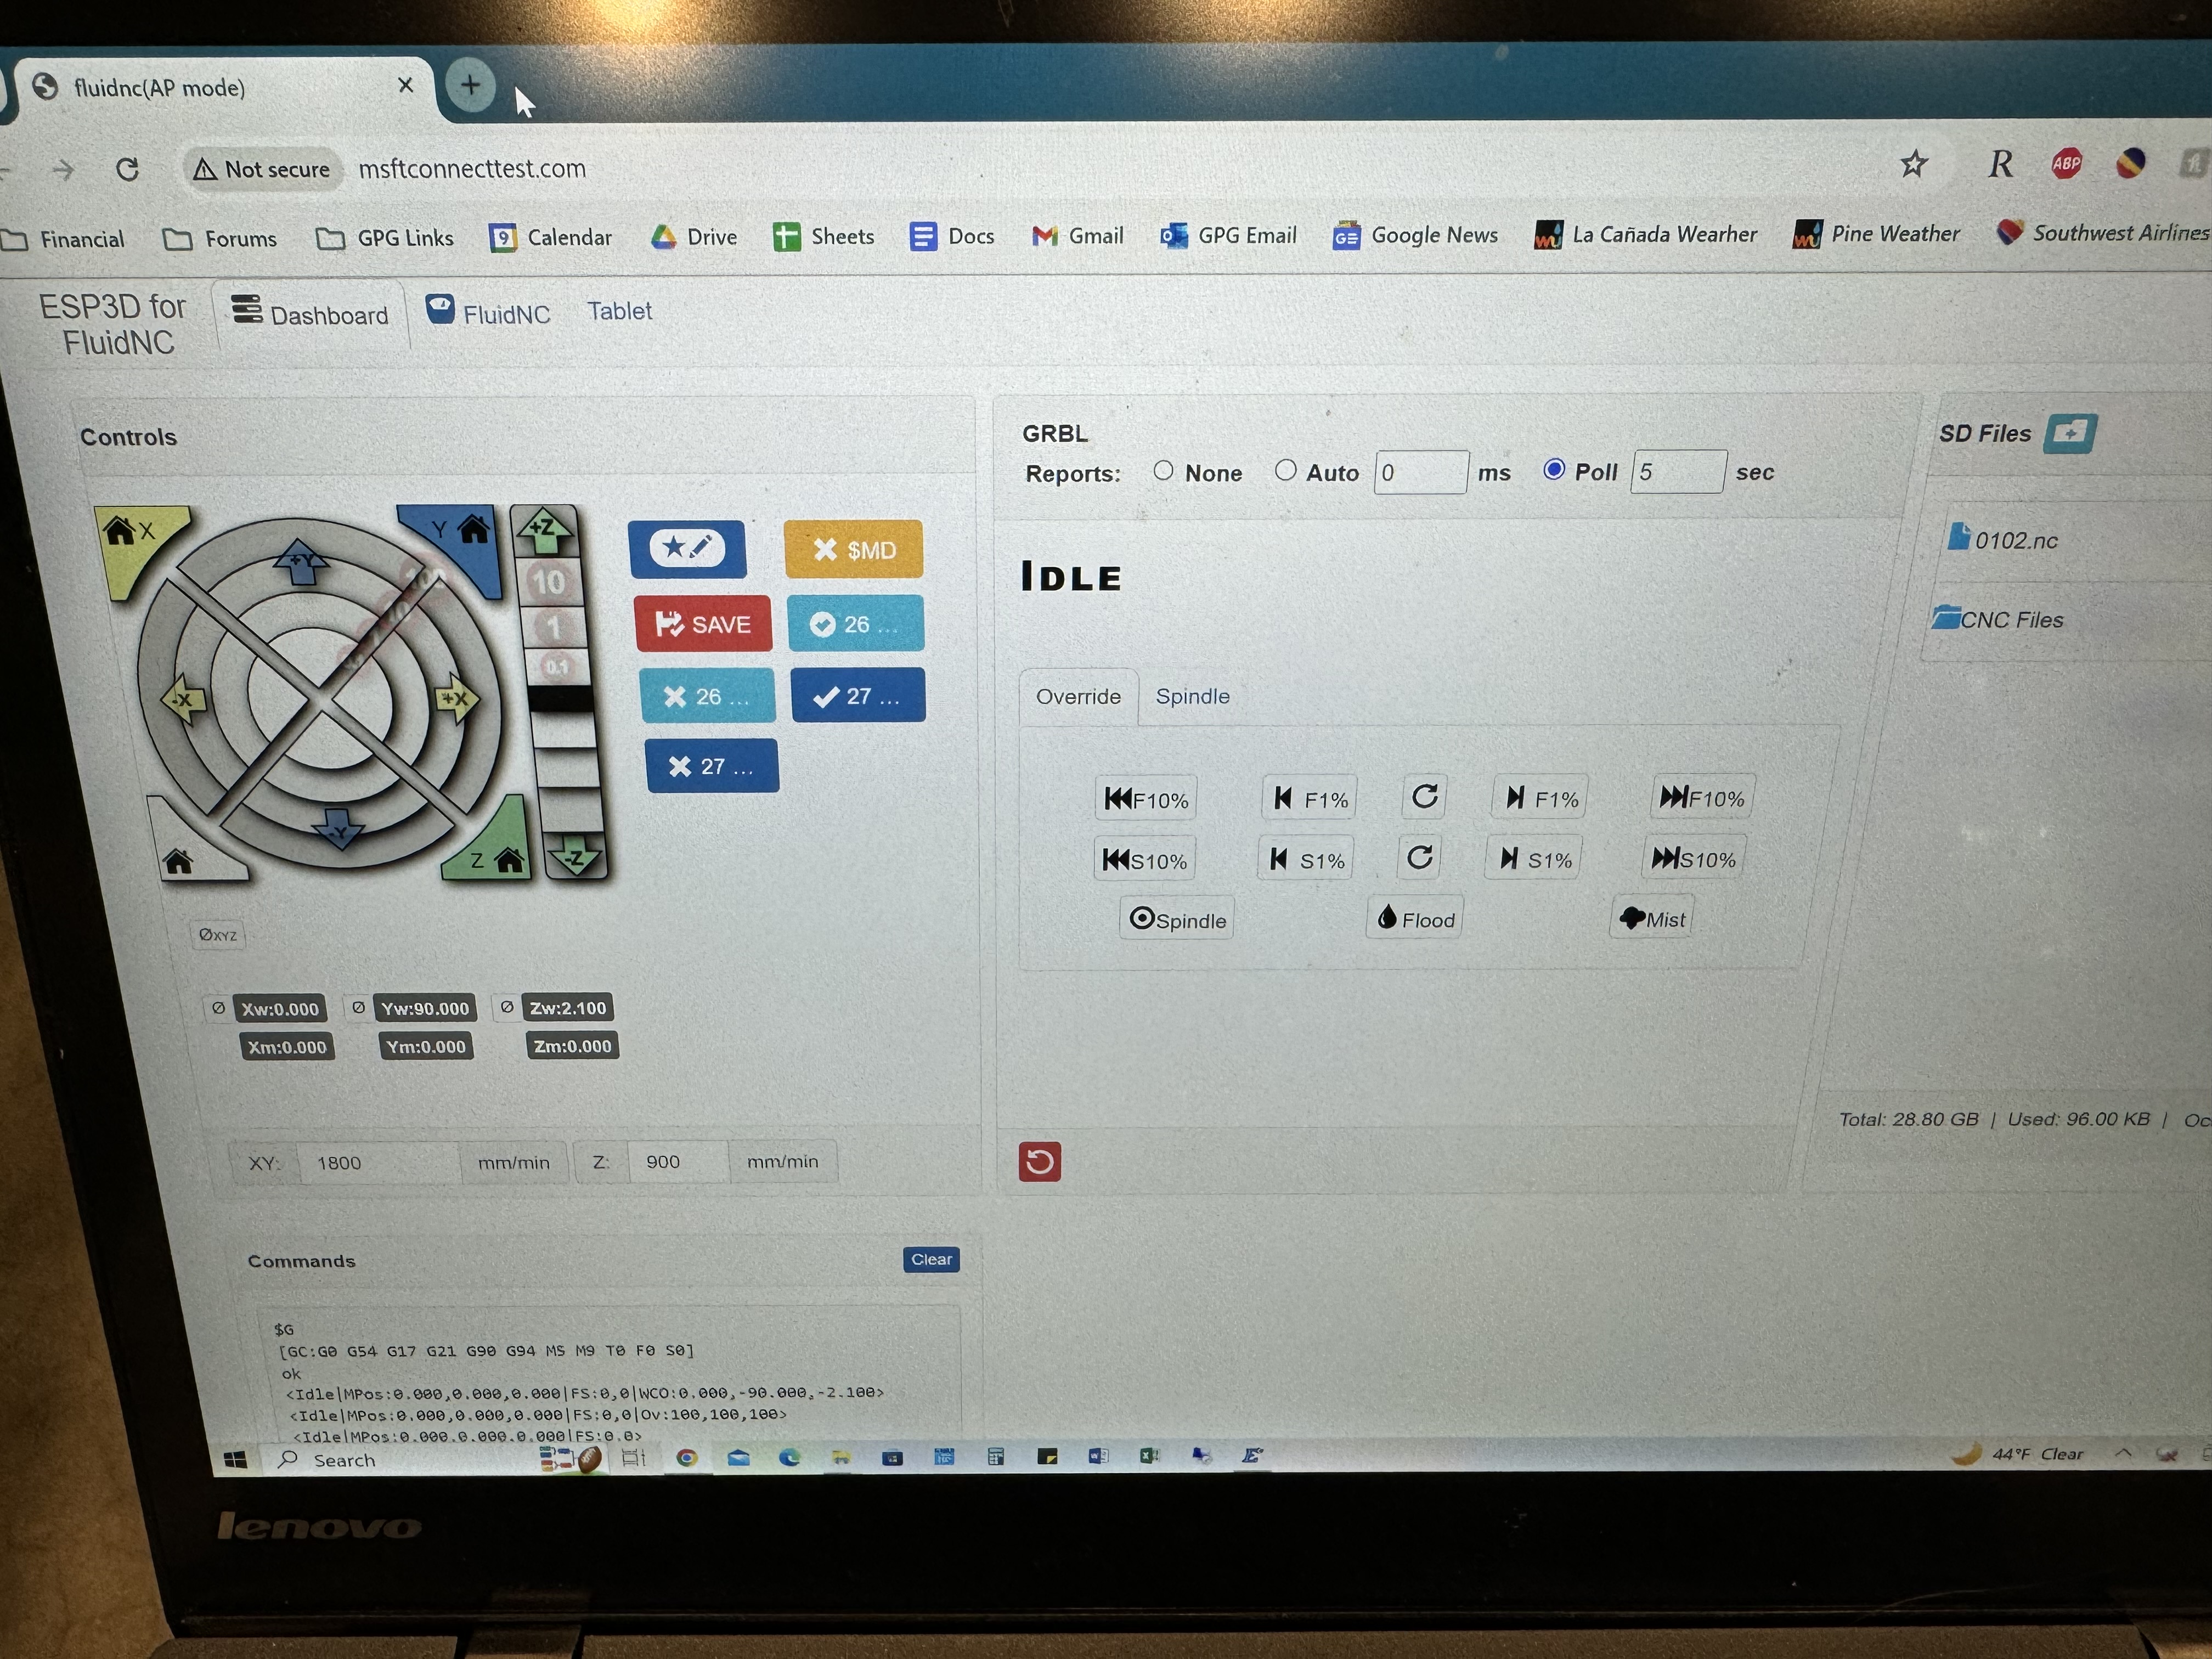
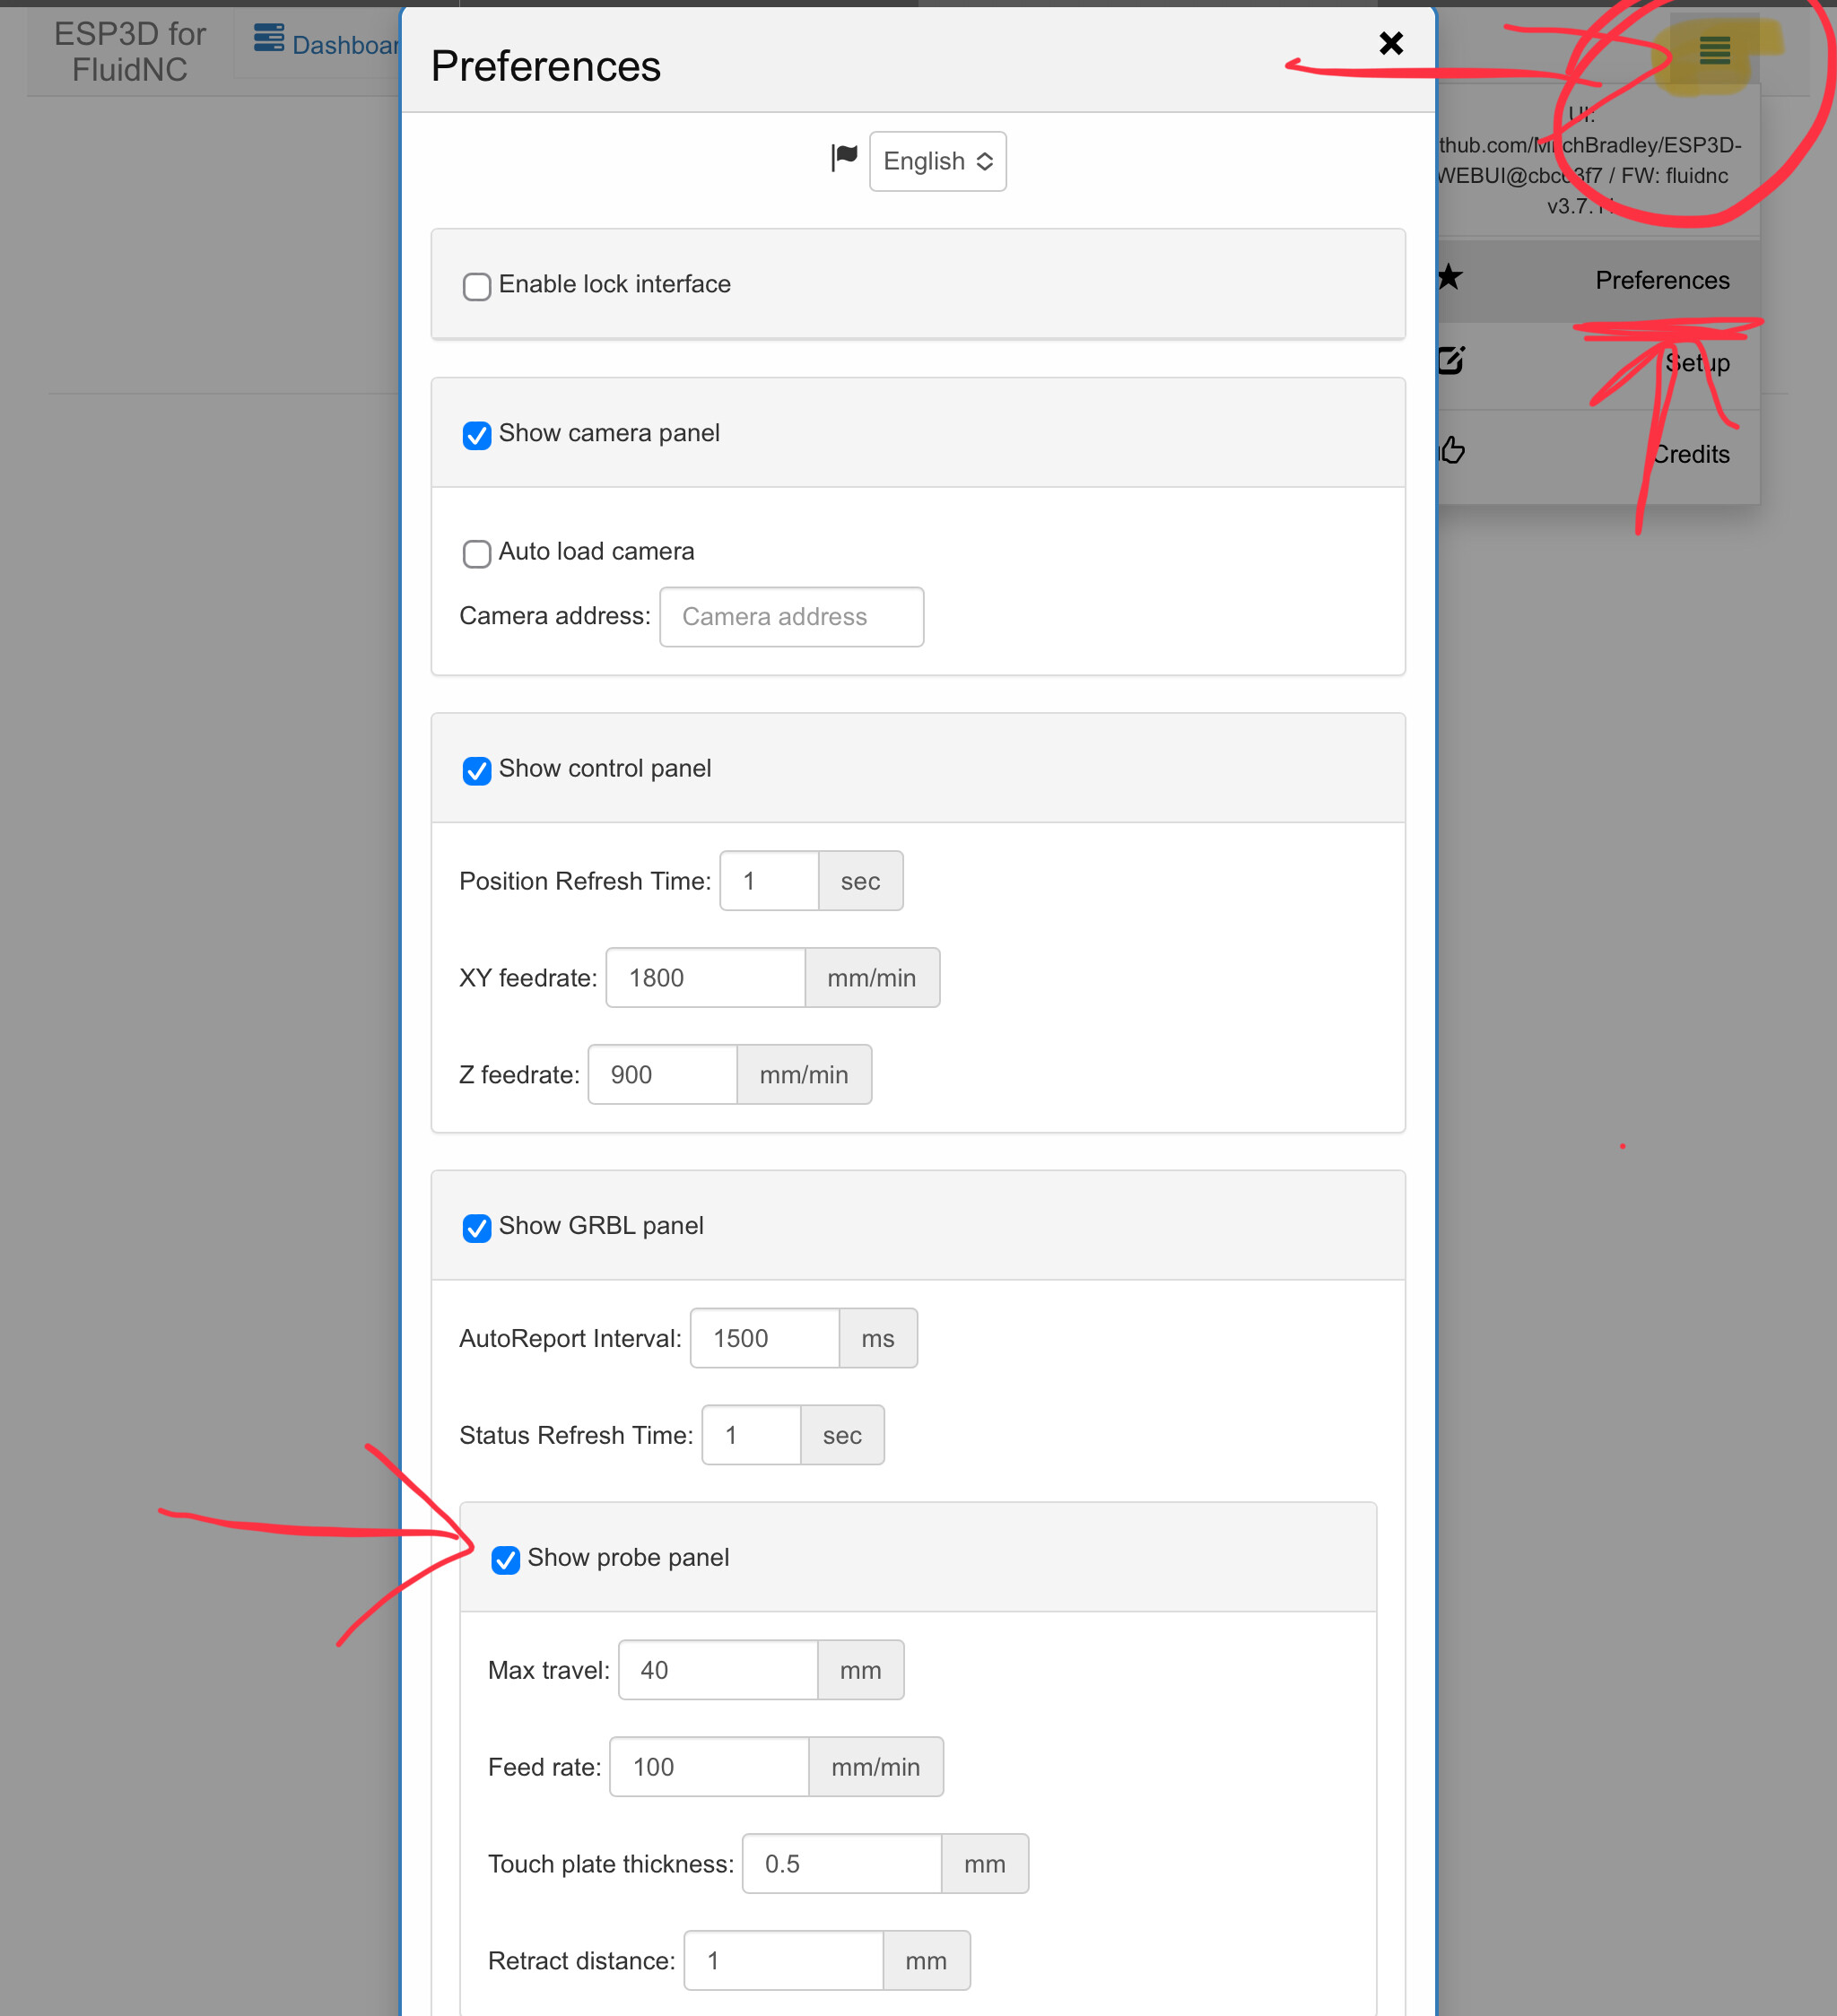
No need for macros - there’s a probe tab!
Wiring is signal and ground NOT 5v.
One wire to the router, the other to the probe on the surface of your material, when they touch, close the circuit, that stops the probe. This is your new 0 (plus plate thickness)
You just need to specify the thickness of whatever metalic thing you used for the probe. As long as you lose the same plate you don’t need to change anything - regardless of tool size tip of the tool will always be at the same distance from the surface.
Personally I use 2 magnets at the end of my wires, one goes on the collet the other on a steel ruler I know is 0.5mm thick
I have an odd occasional problem with the probe tab. It always works fine on the first use. But if I keep the machine on and jog out of the way to change bits I have a problem at least half the time.
I use the probe tab and probe to a touch plate. After touching it doesn’t retract IT CONTINUES DOWNWARD AND MAKES NOISE! (Losing steps)
So for this reason I use a run file to probe. I need to make it into a macro.
You need to make sure the grounding clip is on good metal. Without good contact it will never register the touch. Every time I’ve had a failed probe, adjusting the clip fixed it. All the buttons on the dash are, are pre-built macros. They run the same commands.
I had the same thoughts in the beginning. Jackpot runs fluidnc, which doesn’t do x/y probing really. Other control software will not only mark the origin but adjust the controls to adjust for the workpiece being out of alignment. But that software isnt compatible with the jackpot so you need an arduino or other based control system.
The full xyz probe is neat, but you’re not missing out on anything by not having it. Set your origin, probe, off to the races. It’s probably a 4 second difference in work time.
Besides, by not having the feature it gives you a reason to install laser sights on your machine. I make pew pew noises when I’m setting origin
The plate thickness setting is important. Otherwise you spend a few minutes like me just drooling and trying to figure out why you’re cutting air only to find out because you’re telling the machine you have a .5 plate but you’re using a 15mm plate.
I’ve had it fail to make contact and keep going, but this sounds like it goes faster after it hits the plate
I’ve confirmed that it is doing that by doing a probe in air.
Perhaps this has something to do with relative and absolute positioning.
I’m using this for my rotary set up. I cannot probe to zero which is the axis so I probe to Z equals 40 radius and I go 10 above that.
And my post processors start with a G 92Z 50 which sets the position at 50 so that my drawings work properly with the axis equal Z0
Perhaps I need to add commands to put it into relative mode or absolute mode, but I’m not sure which I should use.
There was recently another thread about probing in which the issue was the probe script was without a G91 command (relative mode, aka incremental mode), so it was issuing a retract command while the machine was still in G90 (absolute mode) so the script was literally telling the machine to push down lower into the material as an attempt to retract.
Can you post the code in your probe script? Or if you are using a probe tab in which you don’t have access to the code executed behind a button, consider switching to a macro button for probing, in which you have total control over the code being executed.
Here’s a script you can save and point a macro button to it.
Choices to make:
Some lines are commented out. You may want them functional. Remove the semicolon at the start of the line to uncomment.
“Plate thickness: 0.34” — update the thickness to match yours.
“Z-124.9” — My probe target distance is a greater number than “normal” because I have extra tall YZ plates, with max travel in Z of 125, and I home to the top before probing. Edit to suit your desired target distance. If you have your Z max travel stored in your config file, and also have soft limits enabled there, then any probe attempt with a target distance that would travel outside your max travel range, will fail, with an alarm.
G21 (MSG G21: Metric mode)
G90 (MSG G90: Switching to absolute positioning)
G94 (MSG G94: Feed = per minute)
; G92 X0 Y0 (MSG G92: Setting current XY position as workspace origin 0,0)
M0 (MSG Attach probe)
G38.2 G91 Z-124.9 F400 (MSG G38.2: Fast probing to material)
G1 G91 Z5 F400 (MSG G1 move Z up by 5mm, speed 400)
G38.2 G91 Z-5 F100 P0.34 (MSG G38.2: Slow probing to material. Plate thickness: 0.34)
G90 (MSG G90: Switching to absolute positioning)
G1 Z30 F900 (MSG G1: go to Z30, speed 900)
M0 (MSG Remove probe)
; M62 P1 (If used start spindle pin27)
Some things I’ve seen, and may bear consideration:
Dual probe homing will sometimes error if you limit the second probe to the same as the back off distance. If the trigger value at speed was early for any reason, you may need to go further on the second probe. As such after the G1 Z5 to back off, I would run the subsequent probe as G38.2 G91 Z-7 F100 P0.34 changing the -5 to -7. What you have will work in the vast majority of cases, but might sometimes return an unreasonable homing error that would be a real pain to debug because it would be intermittent.
The use of G91 as part of the probe command is curious to me. I suppose jf it works, but it makes the code harder to read. Would it not be easier to just set everything to relative mode at the start instead of absolute mode, then change back at the end? So far as I know, the probe will alter the workspace offsets correctly in either mode.