[WIP] Floating shelves with fancy joinery

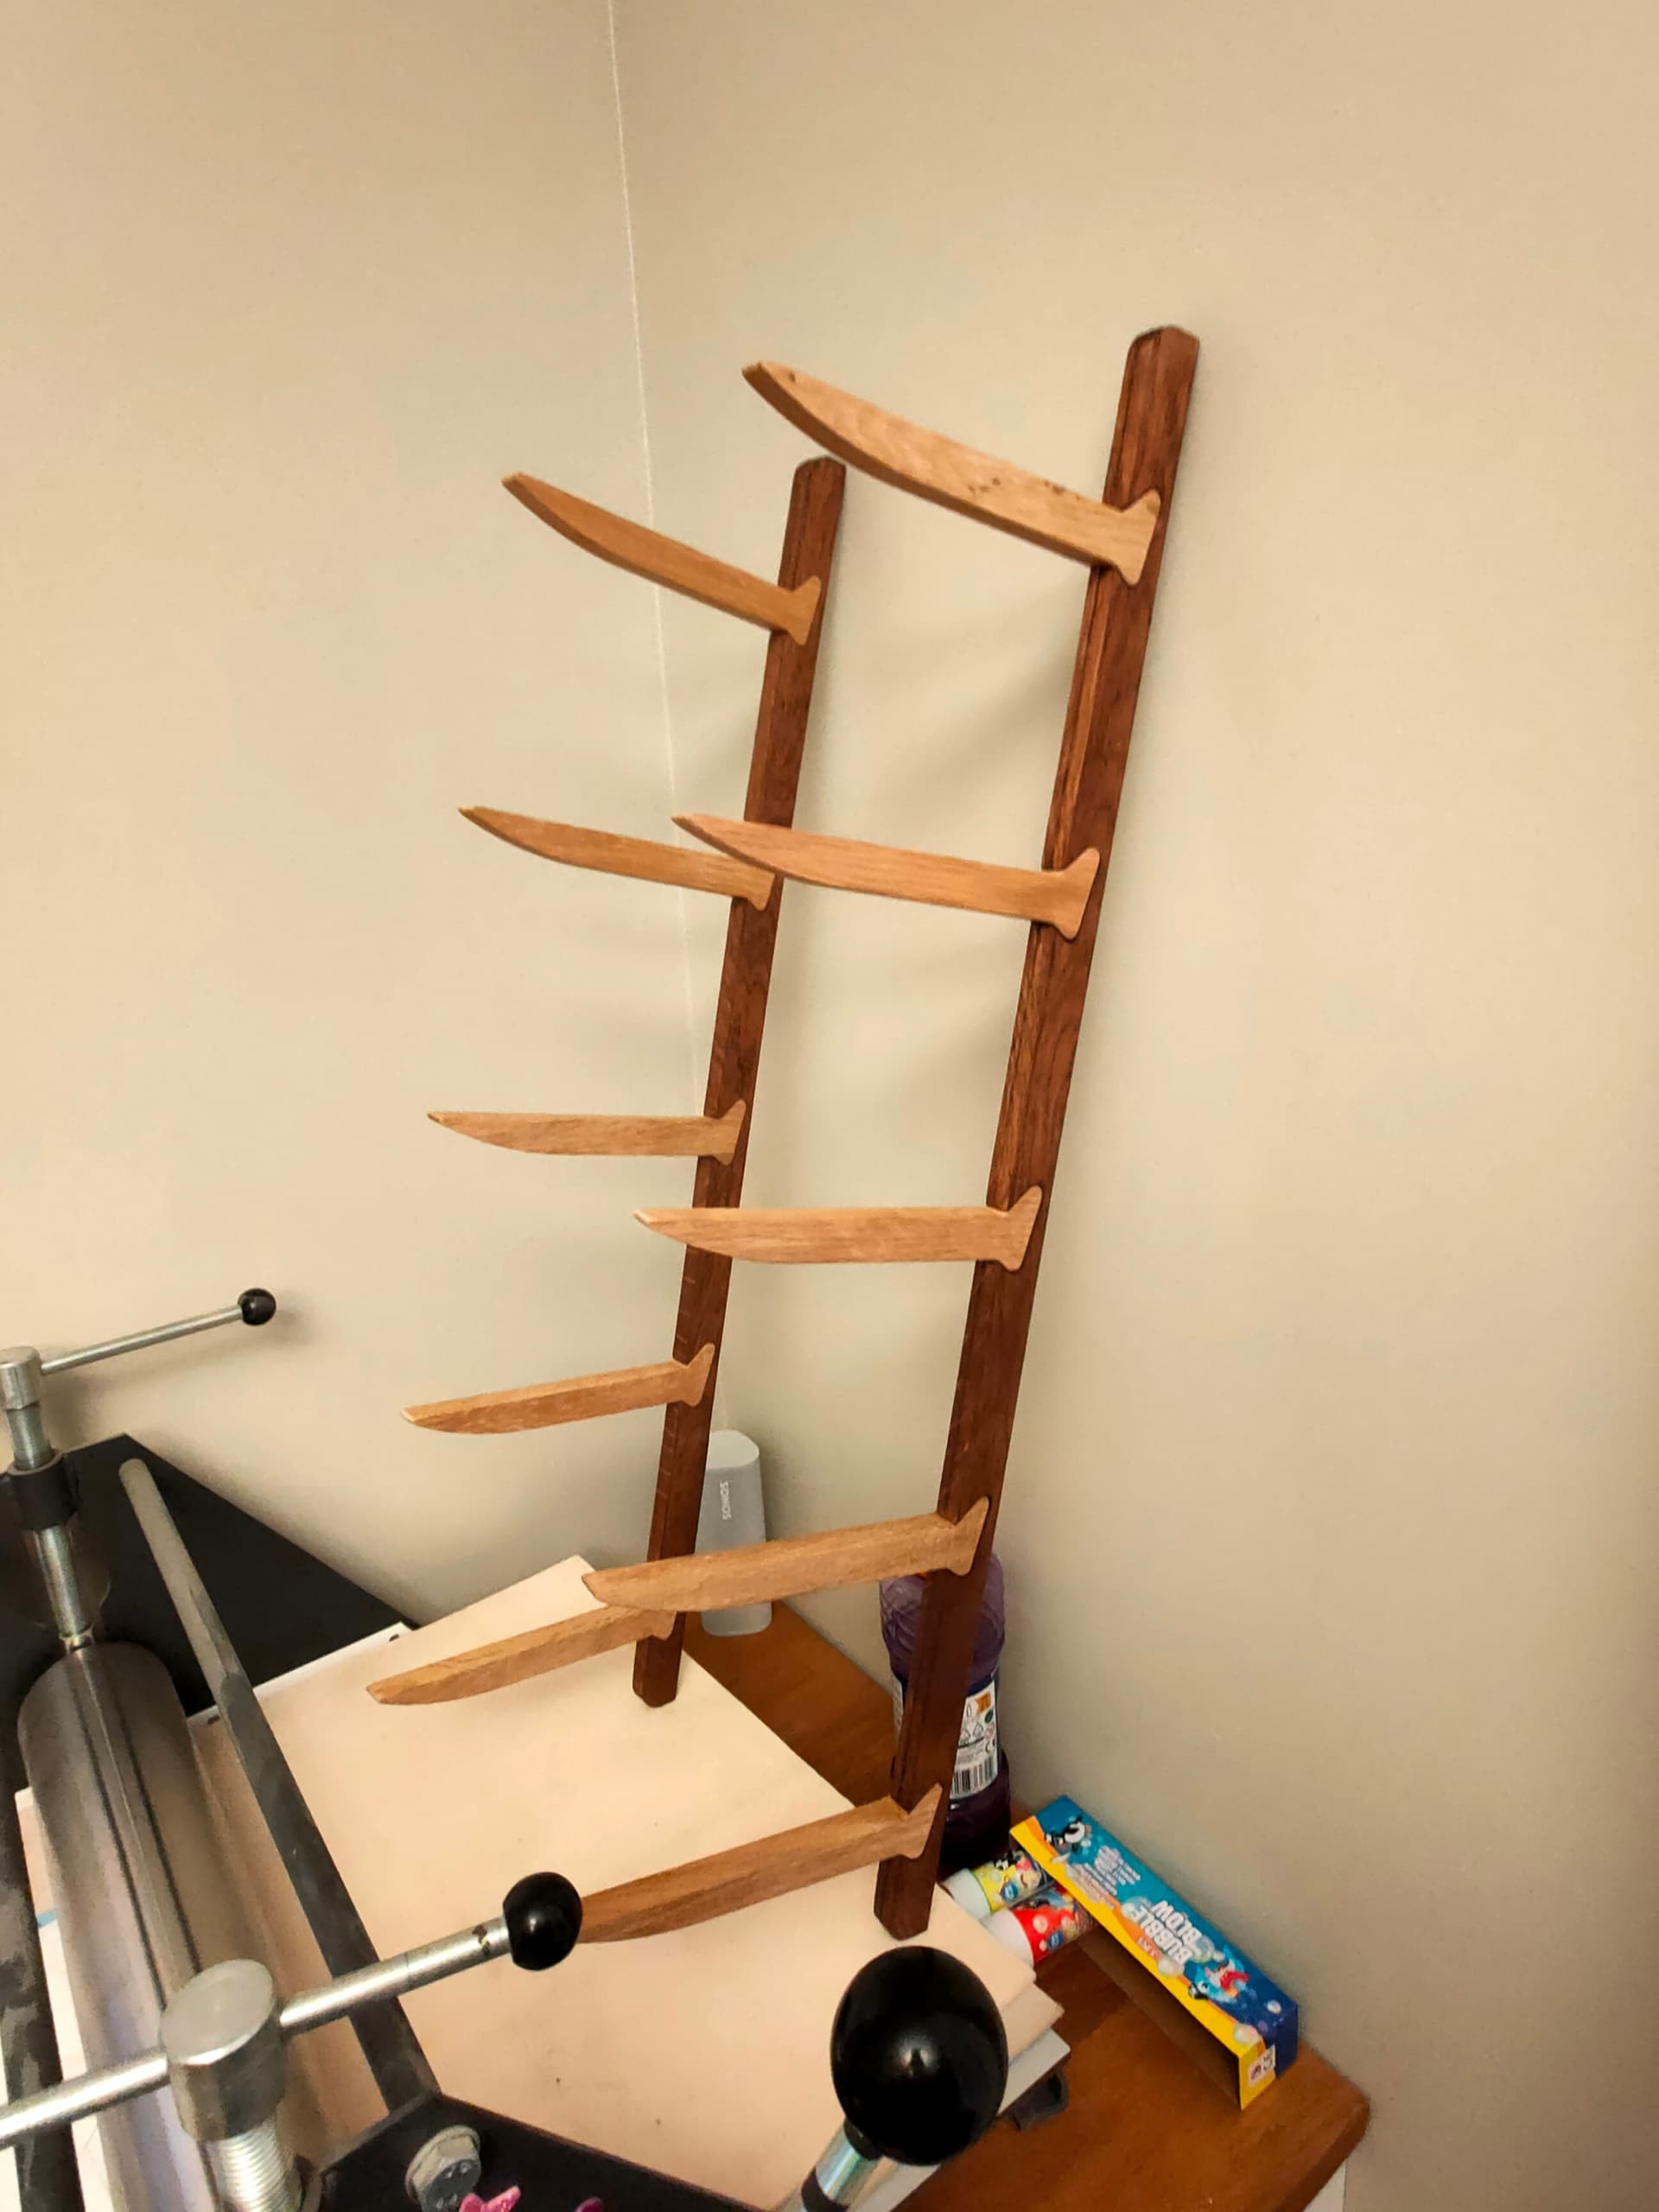
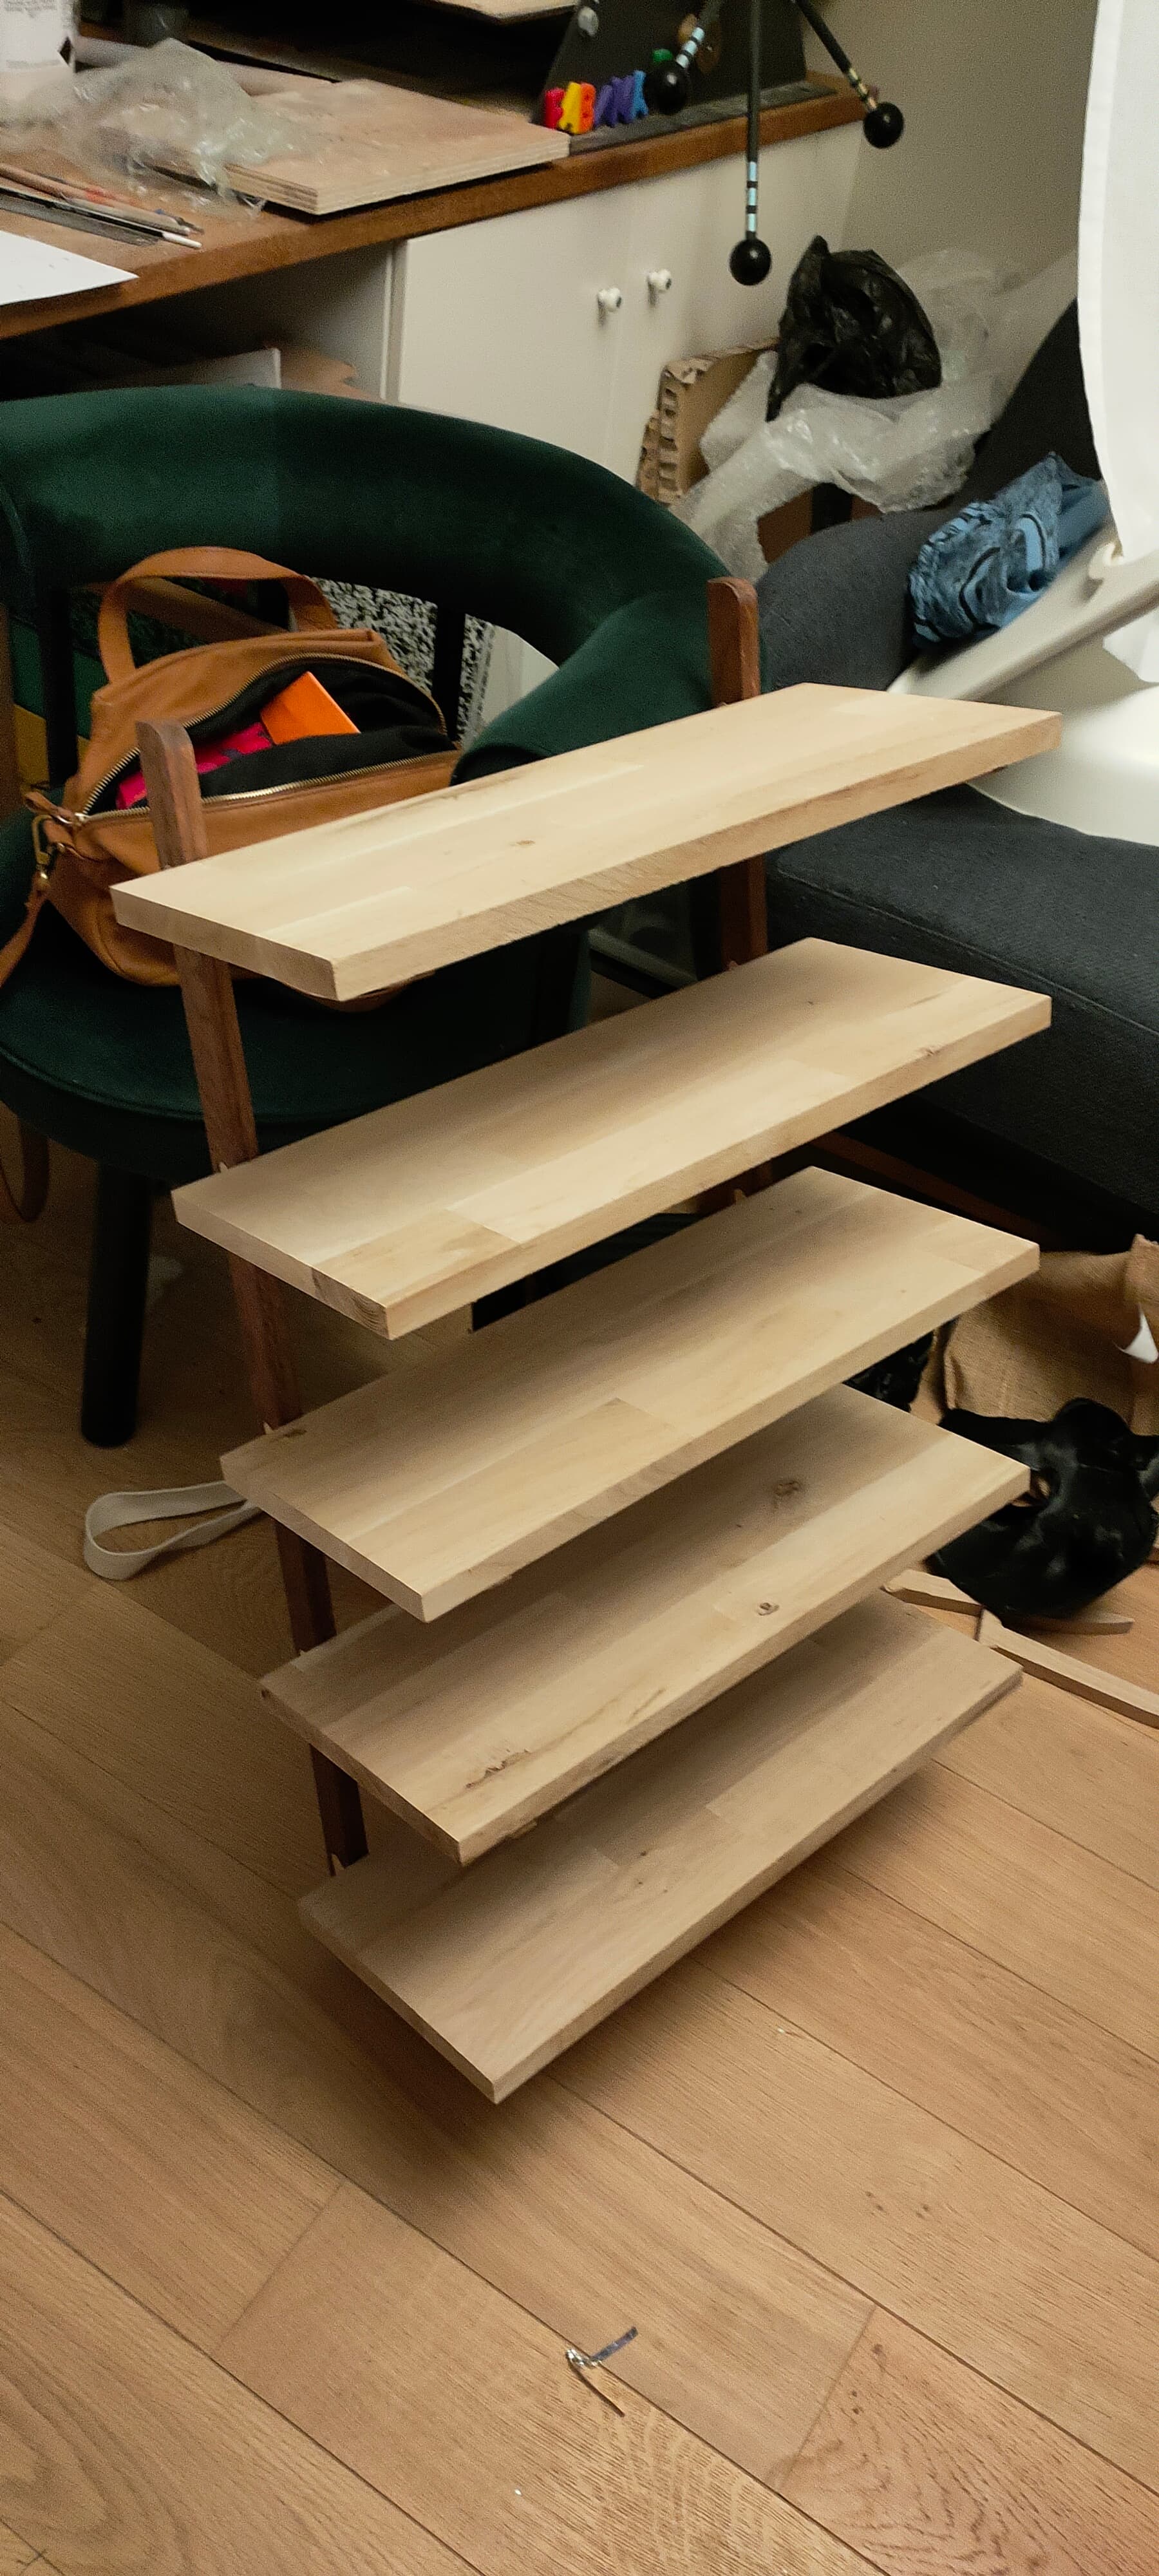
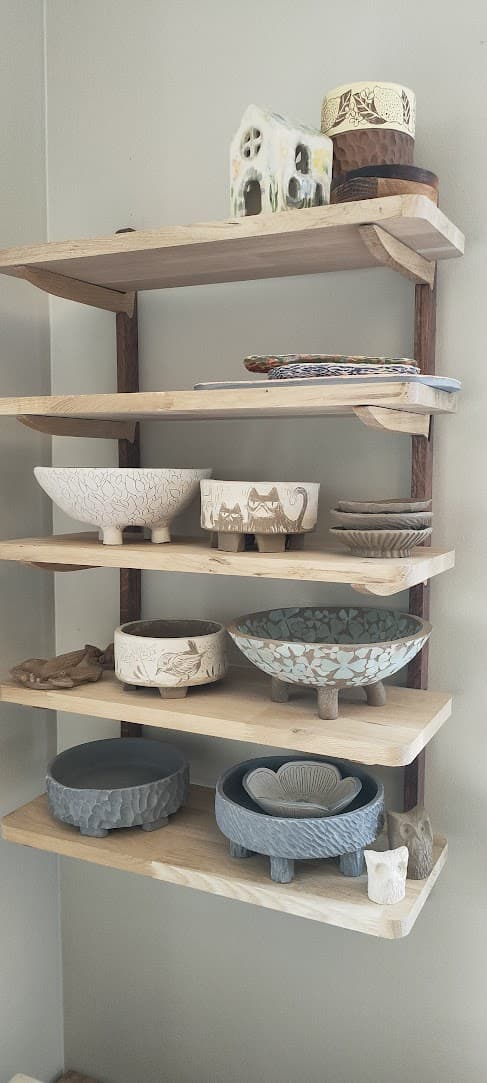
My wife comissioned some shelves for the new office to display some pottery

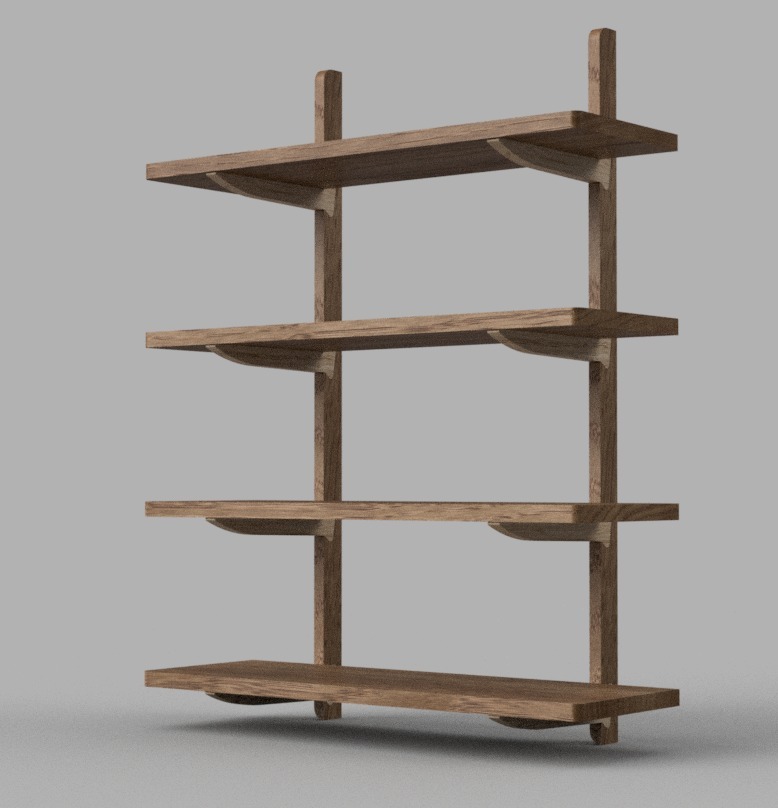
After a bit of searching and inspiration, I settled on this design

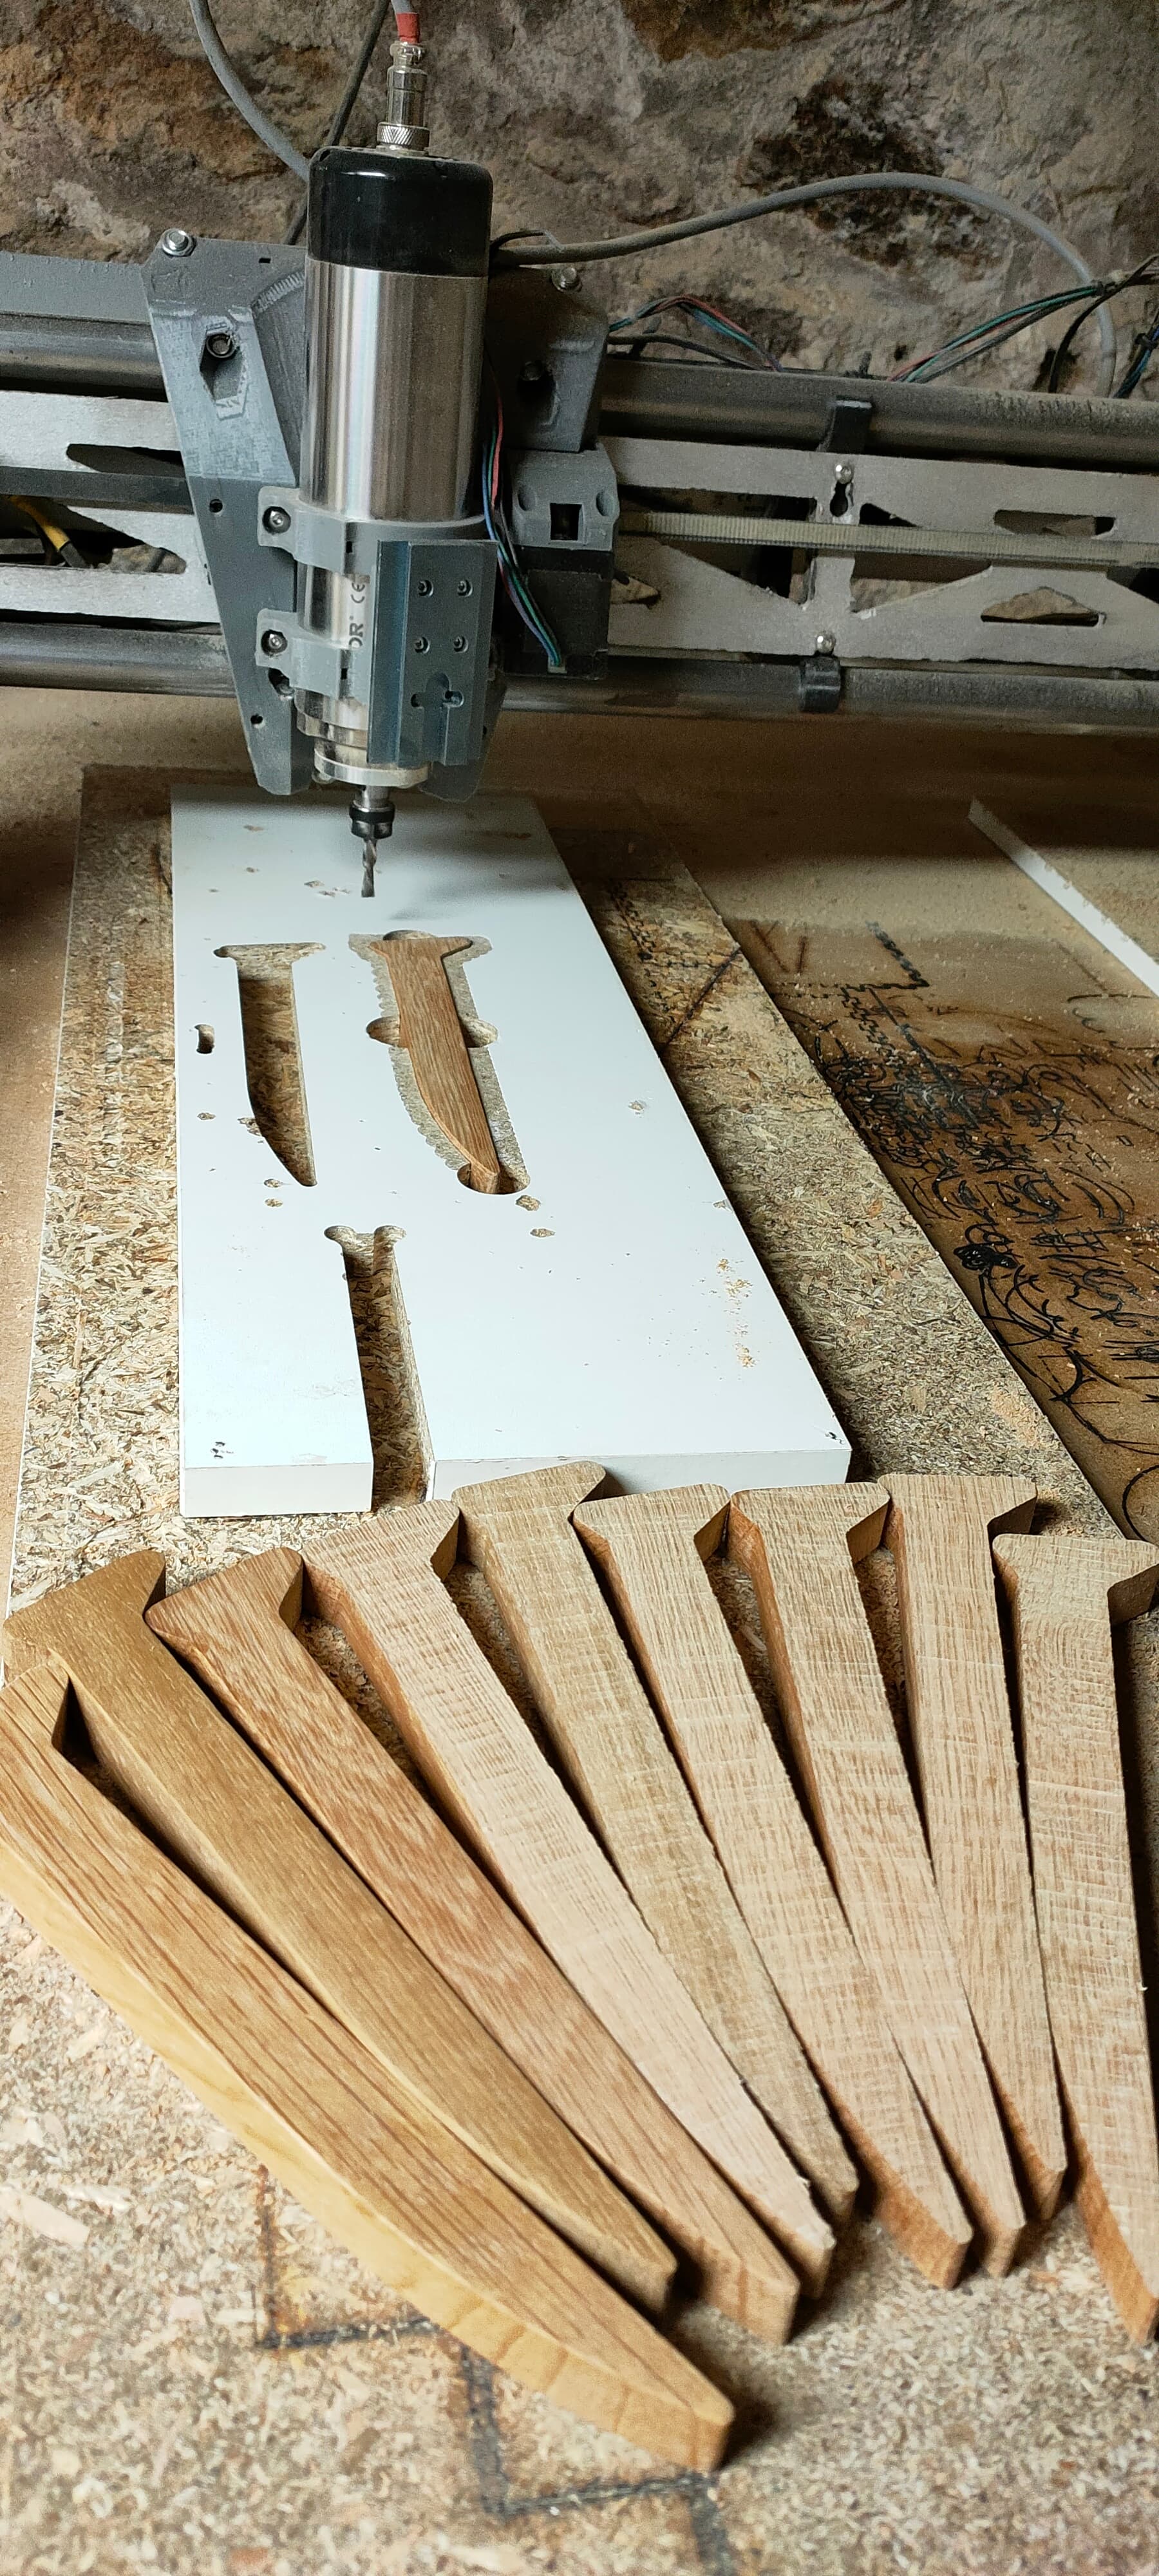
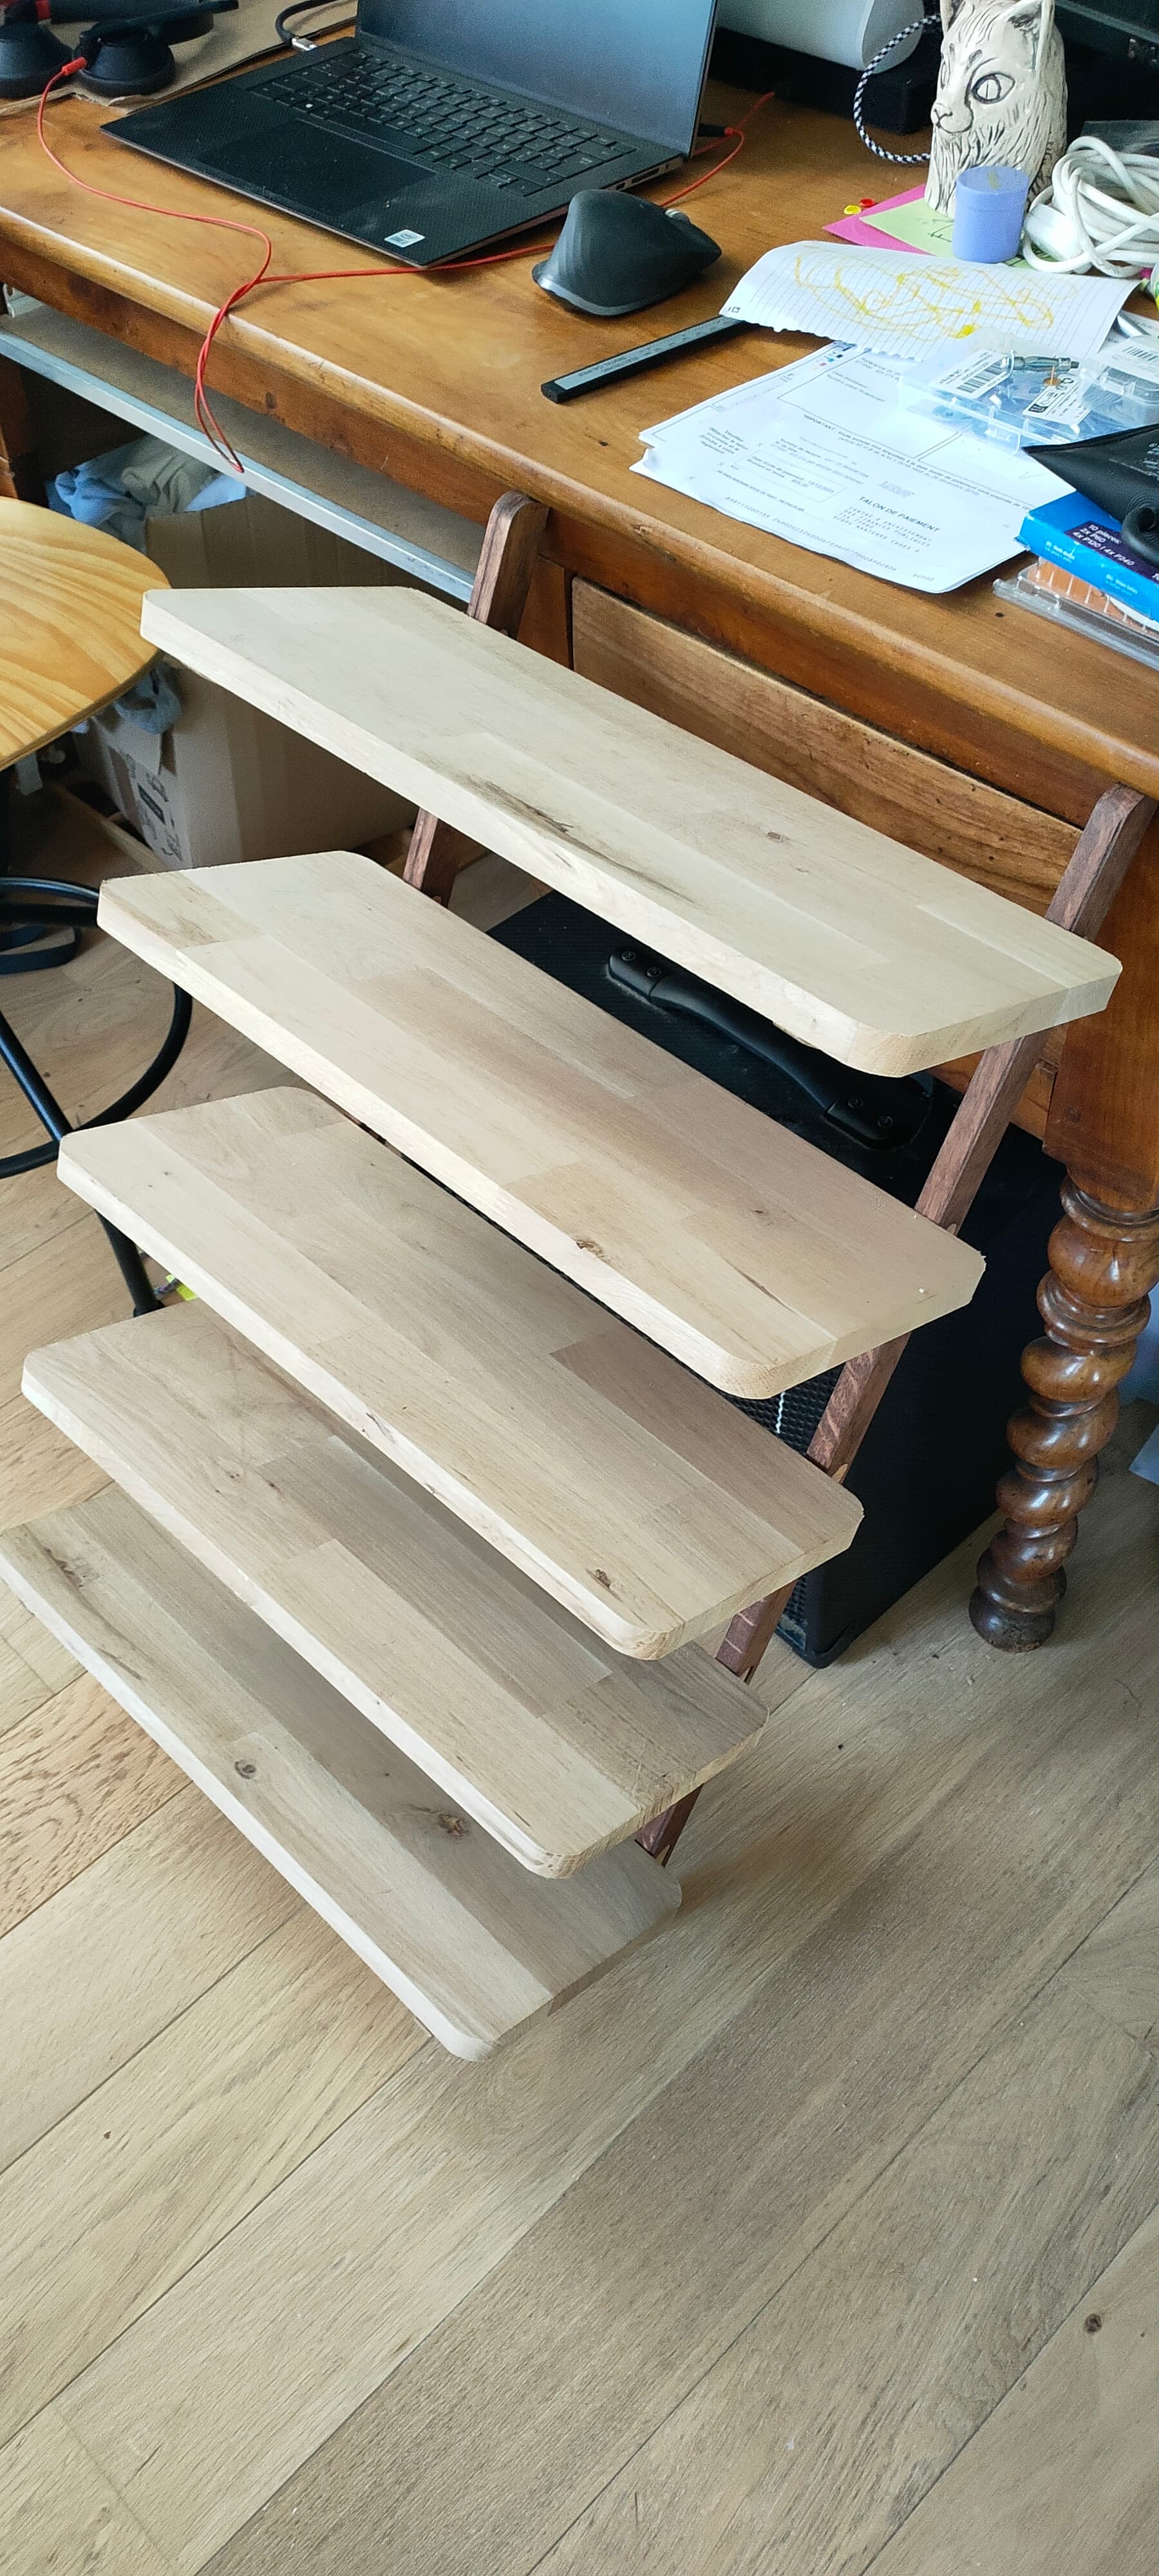
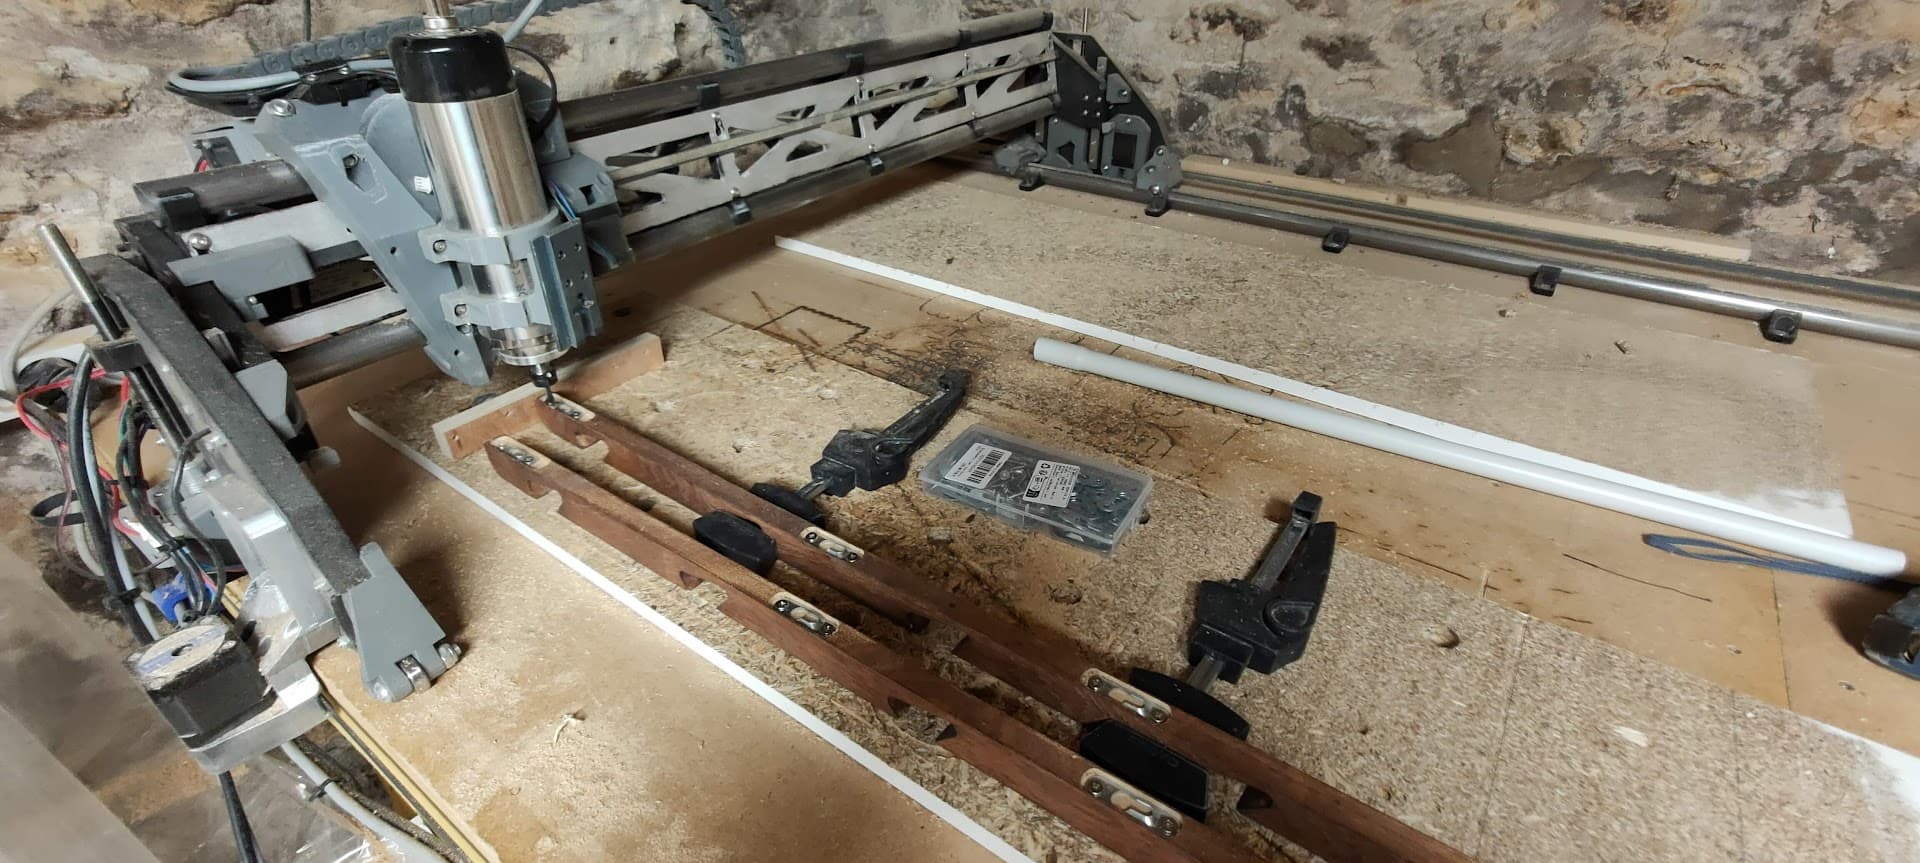
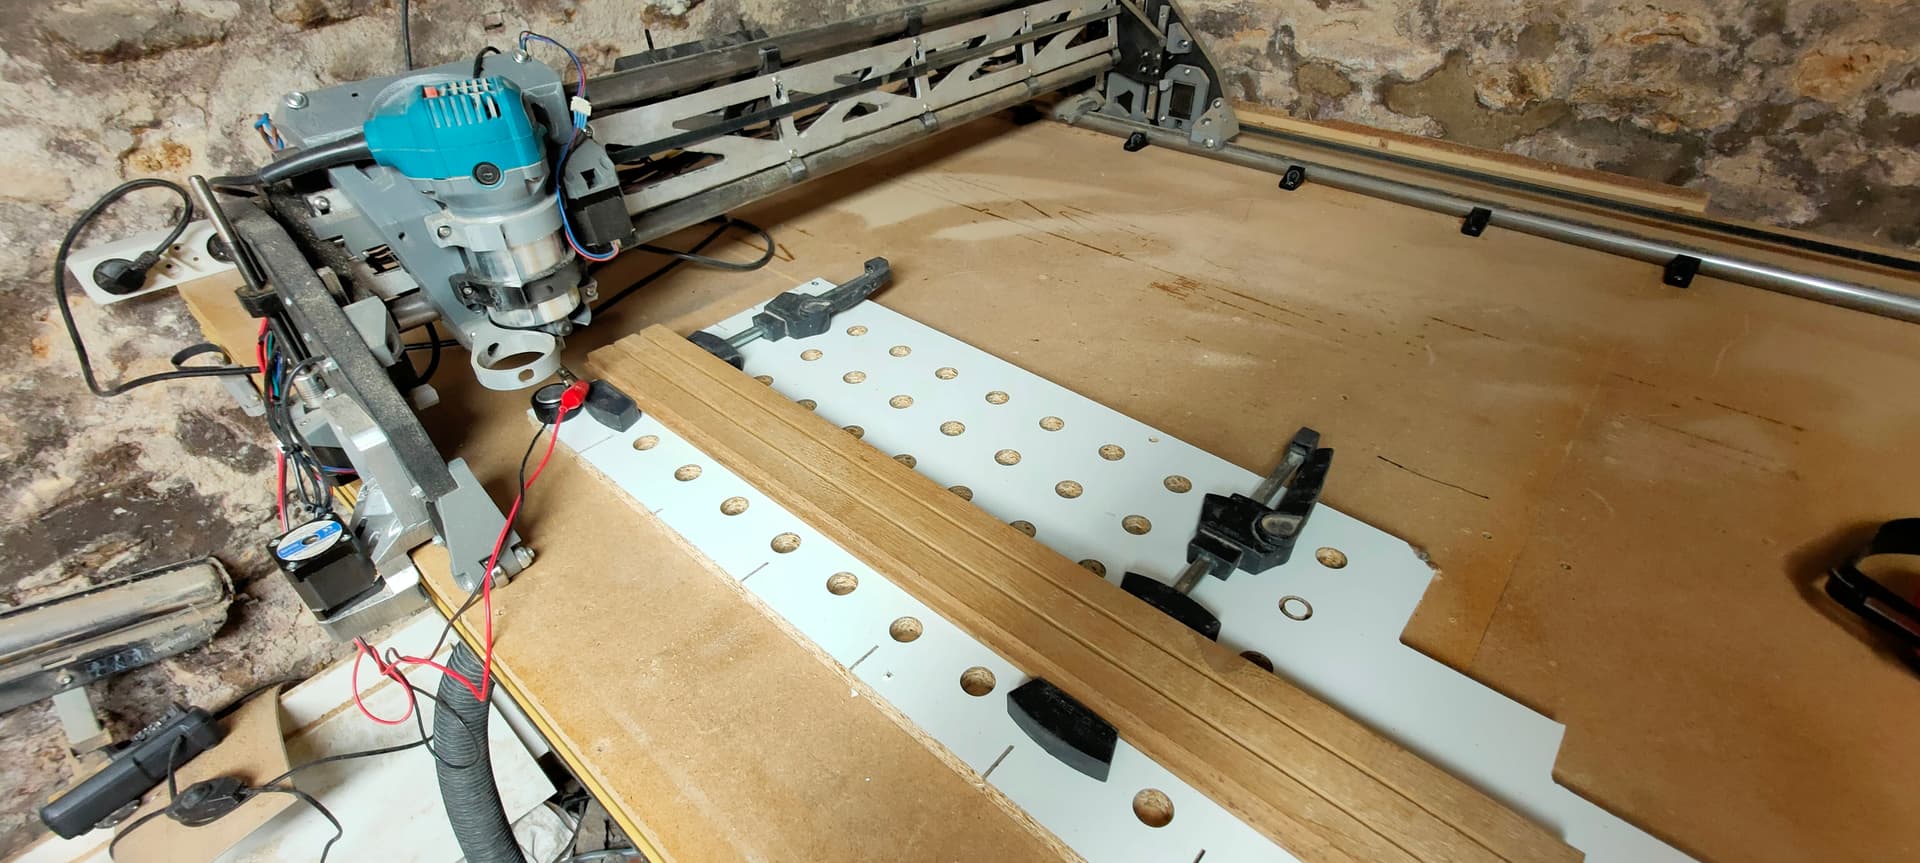
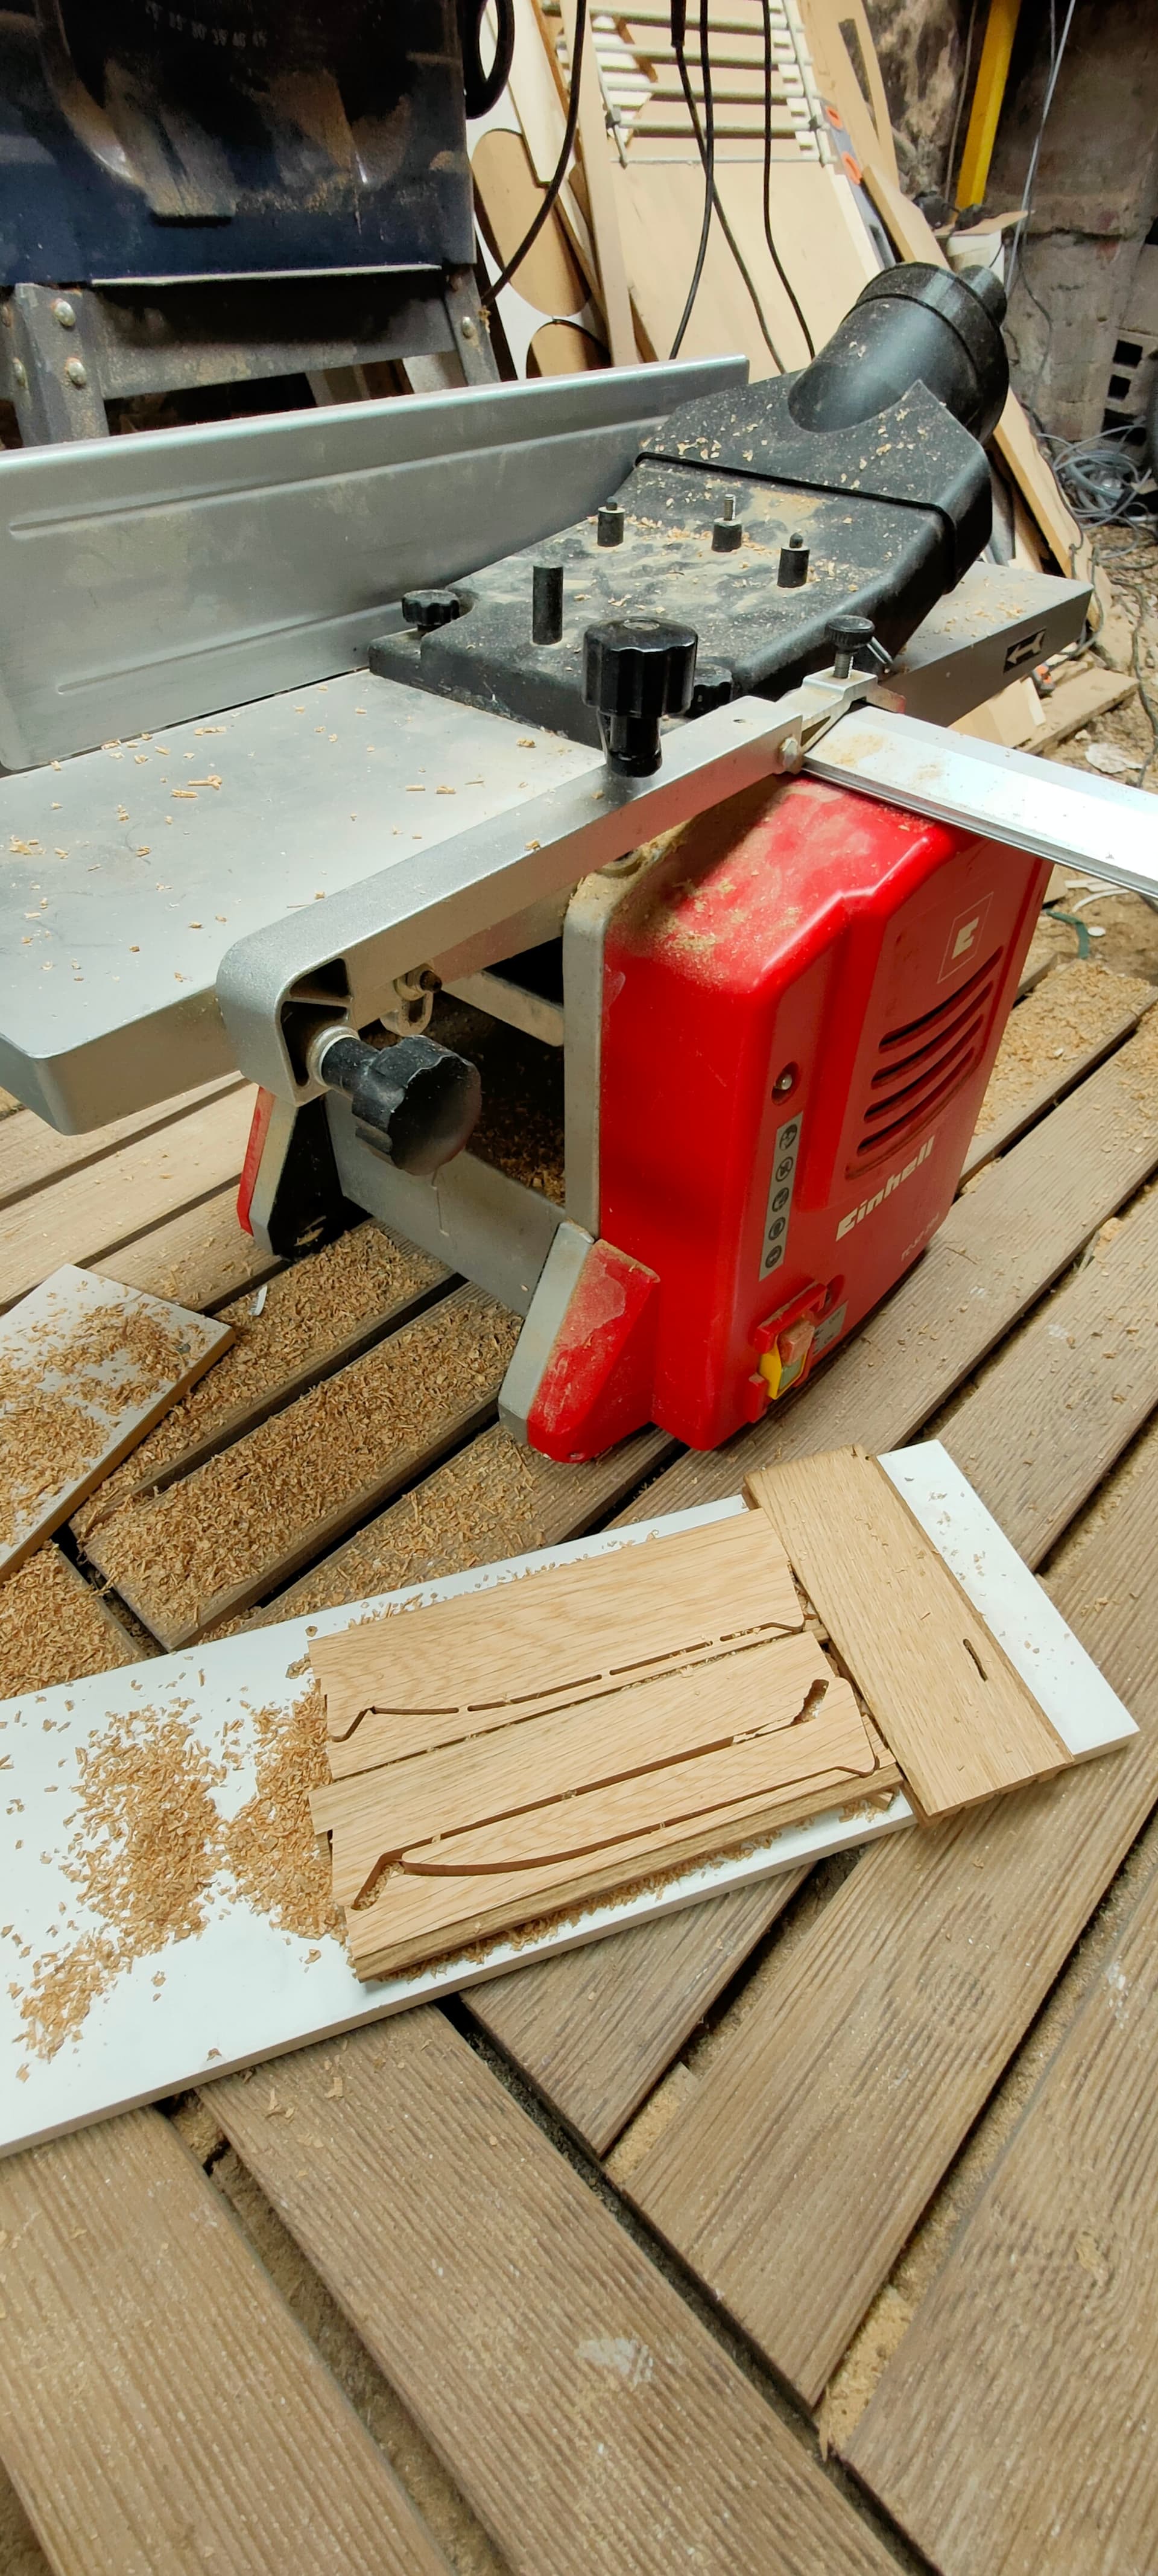
These will be cut out of oak flooring I have laying around

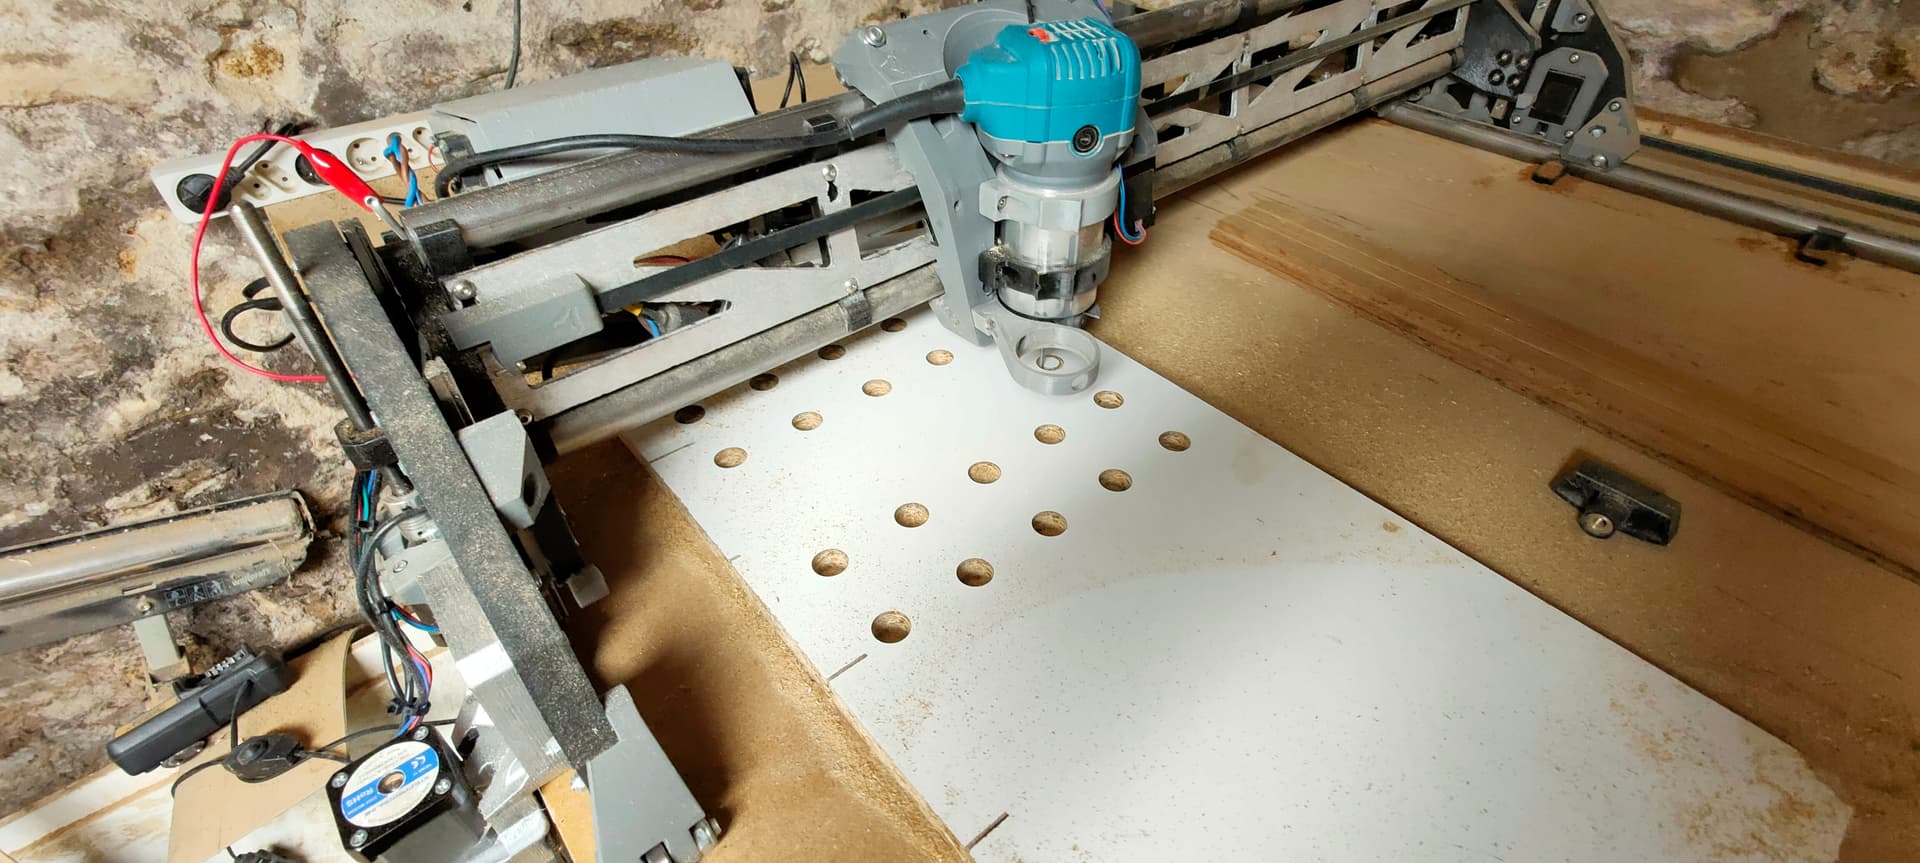
First, I cut an mft-style fixture plate to ensure the stock is aligned with the machine

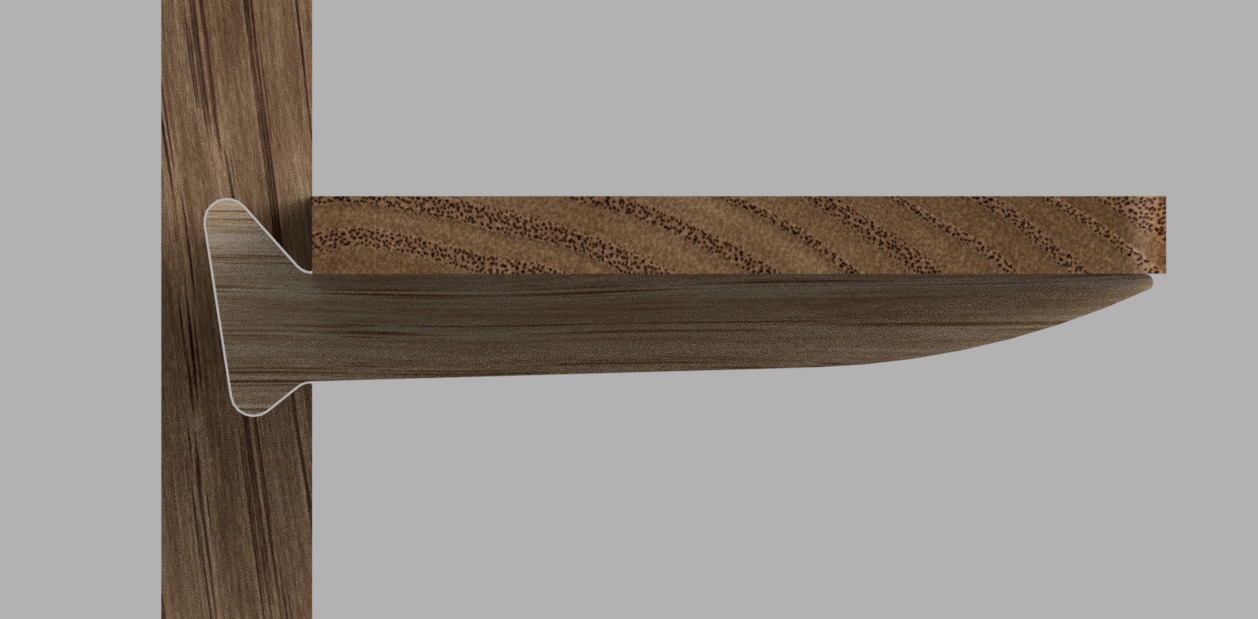
Then after some refining to fit two pieces in the width of a plank, and burning the router, I cut the contours 18-19mm deep

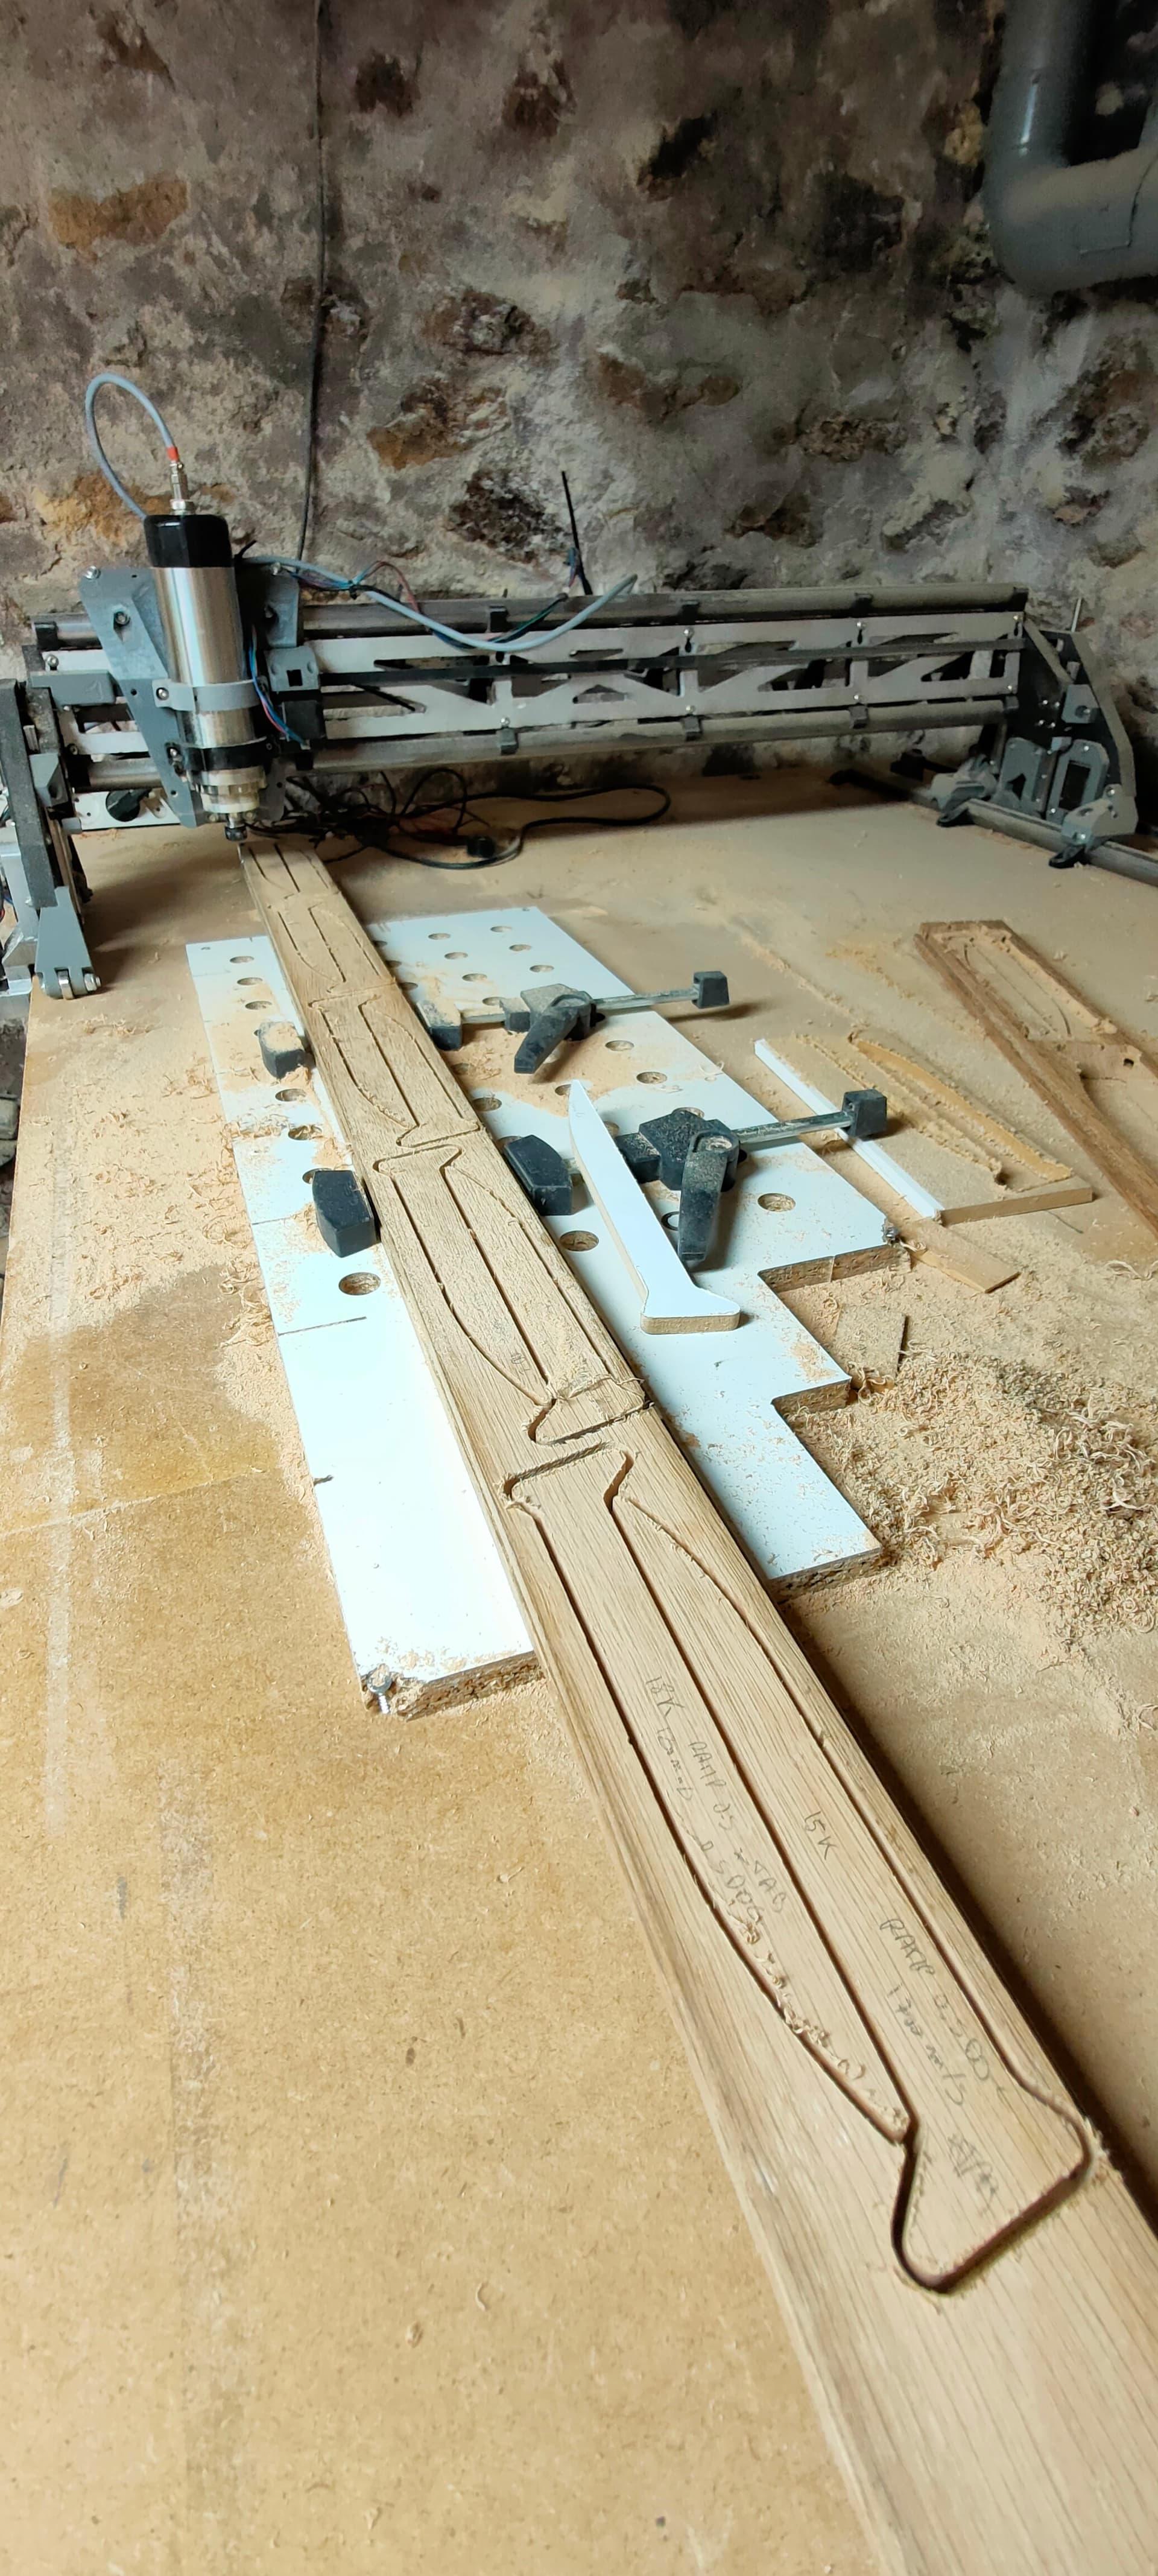
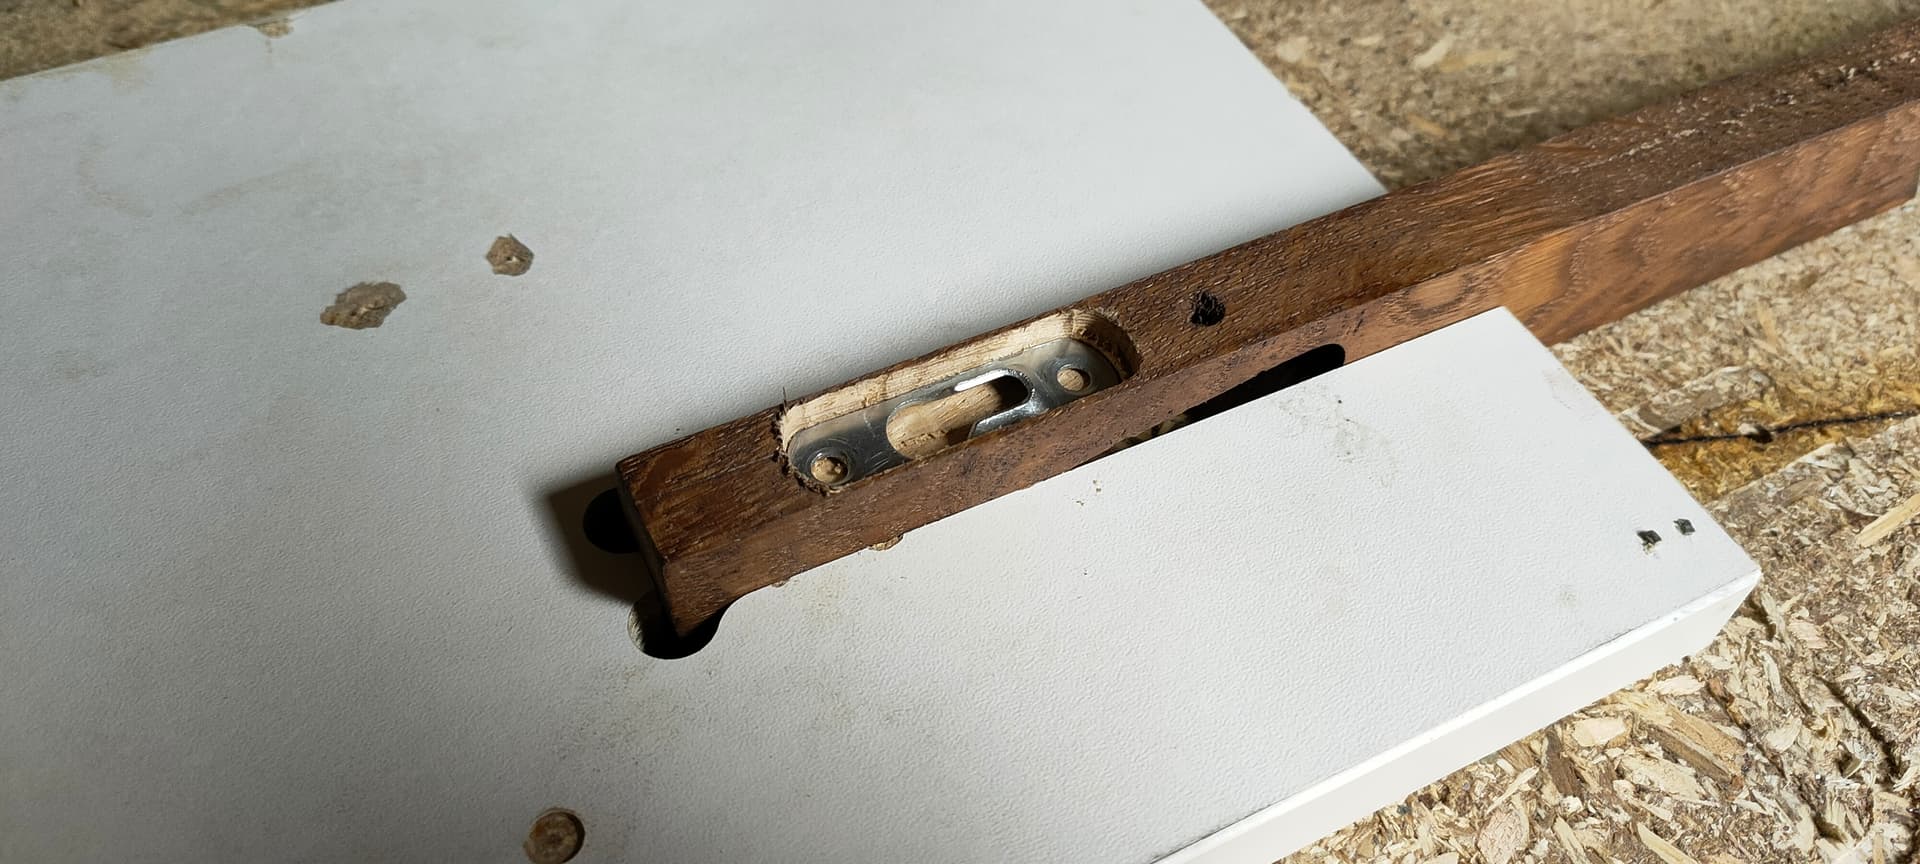
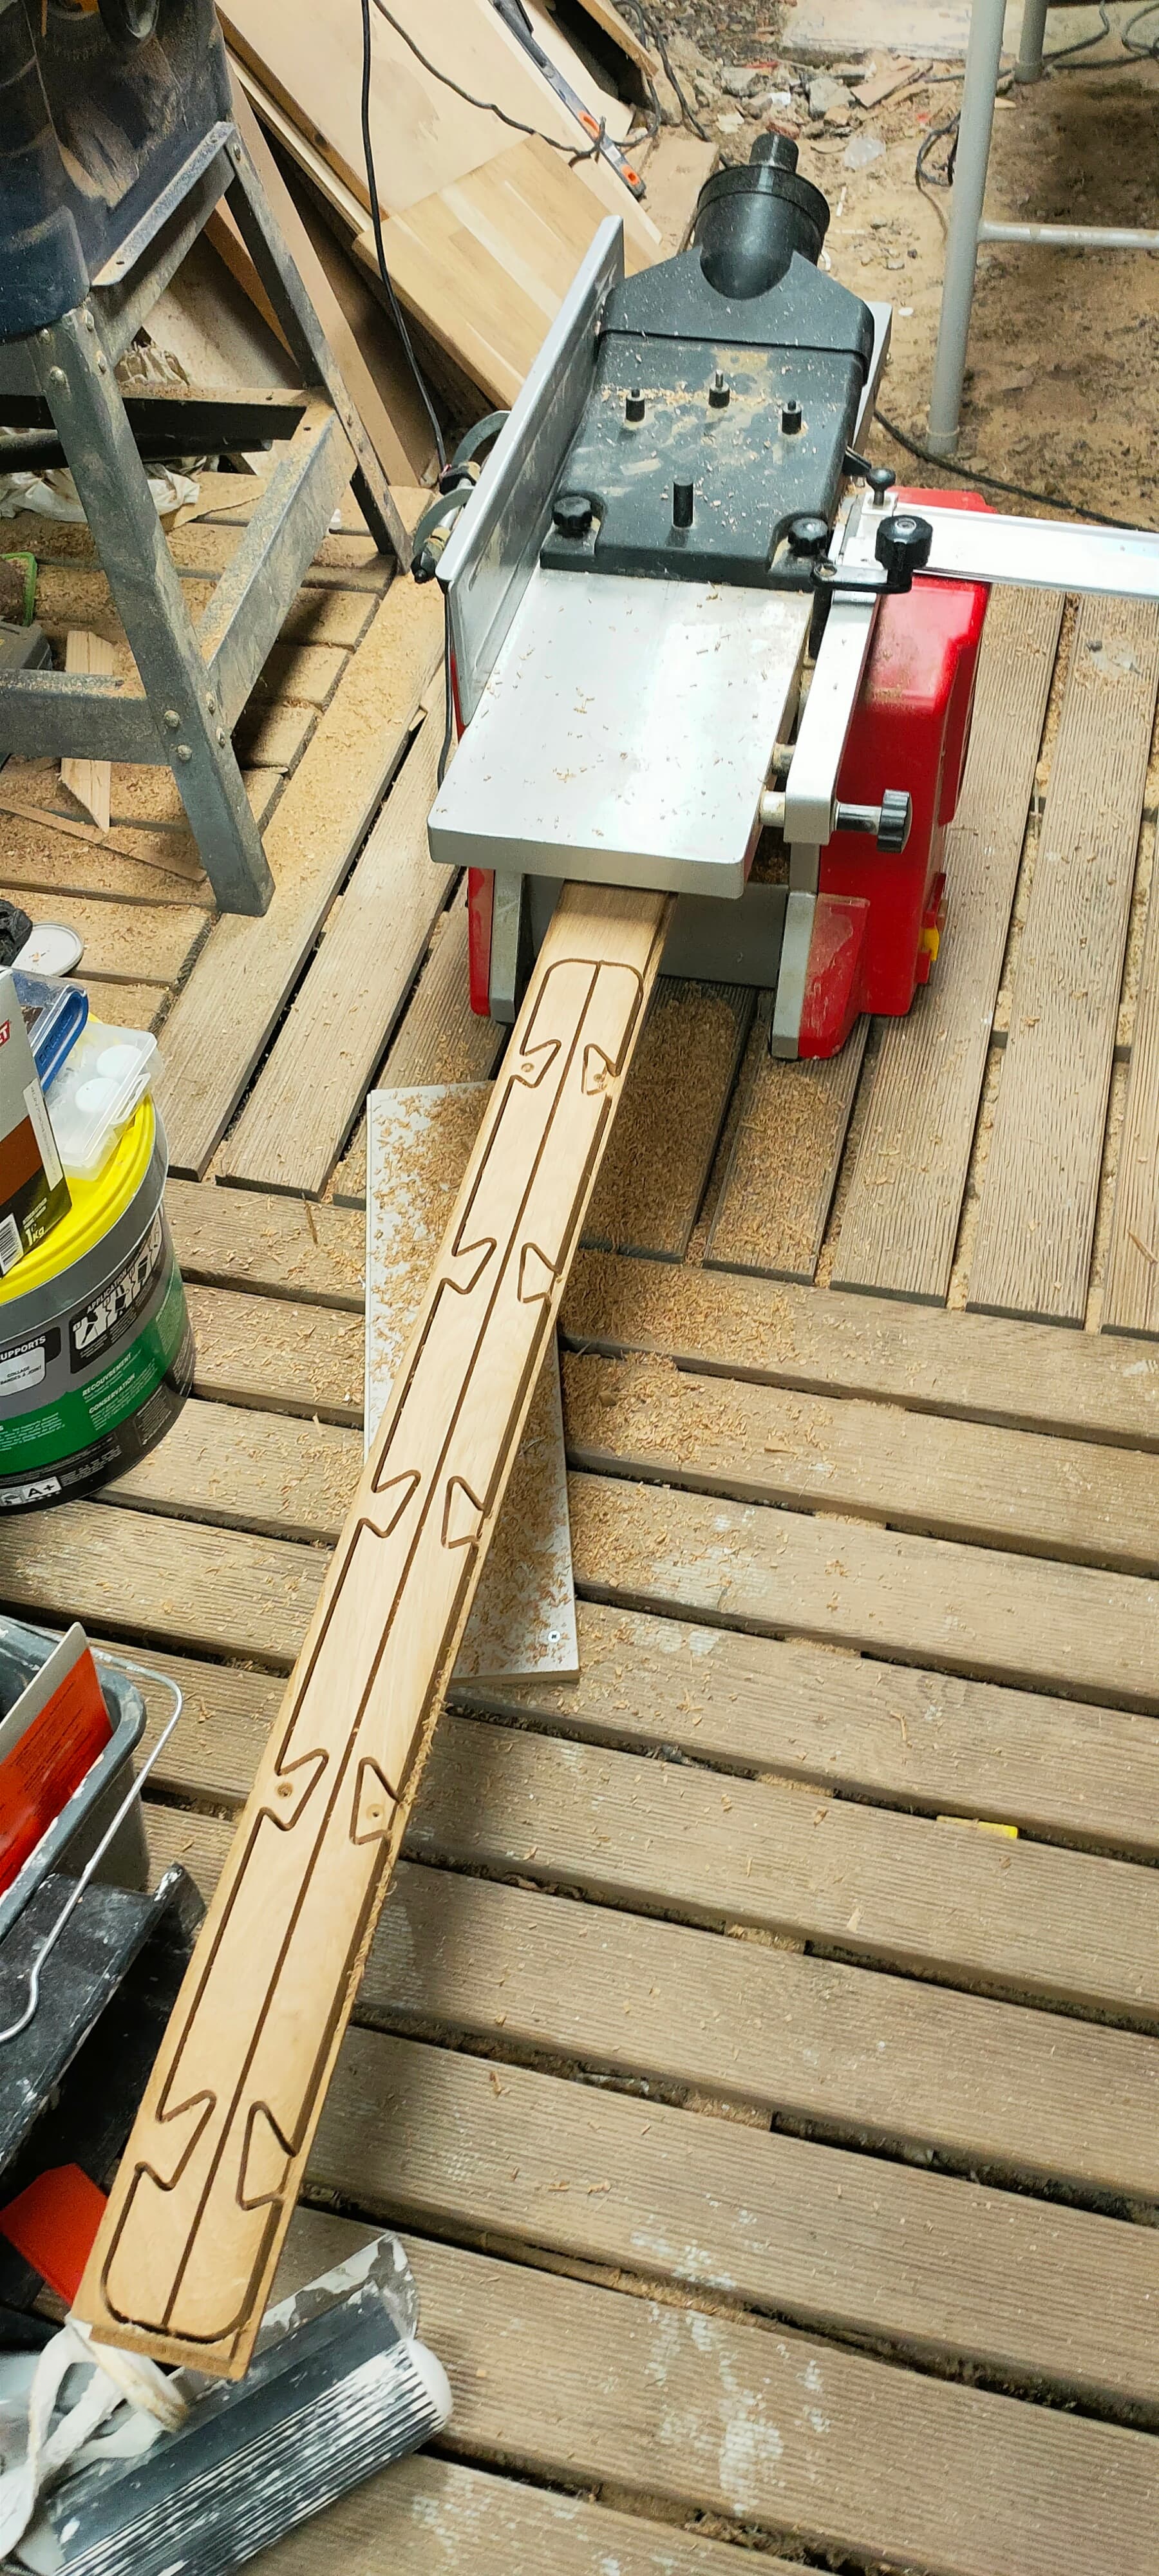
The flooring is 23mm thick and has 5mm deep grooves on the underside for glue

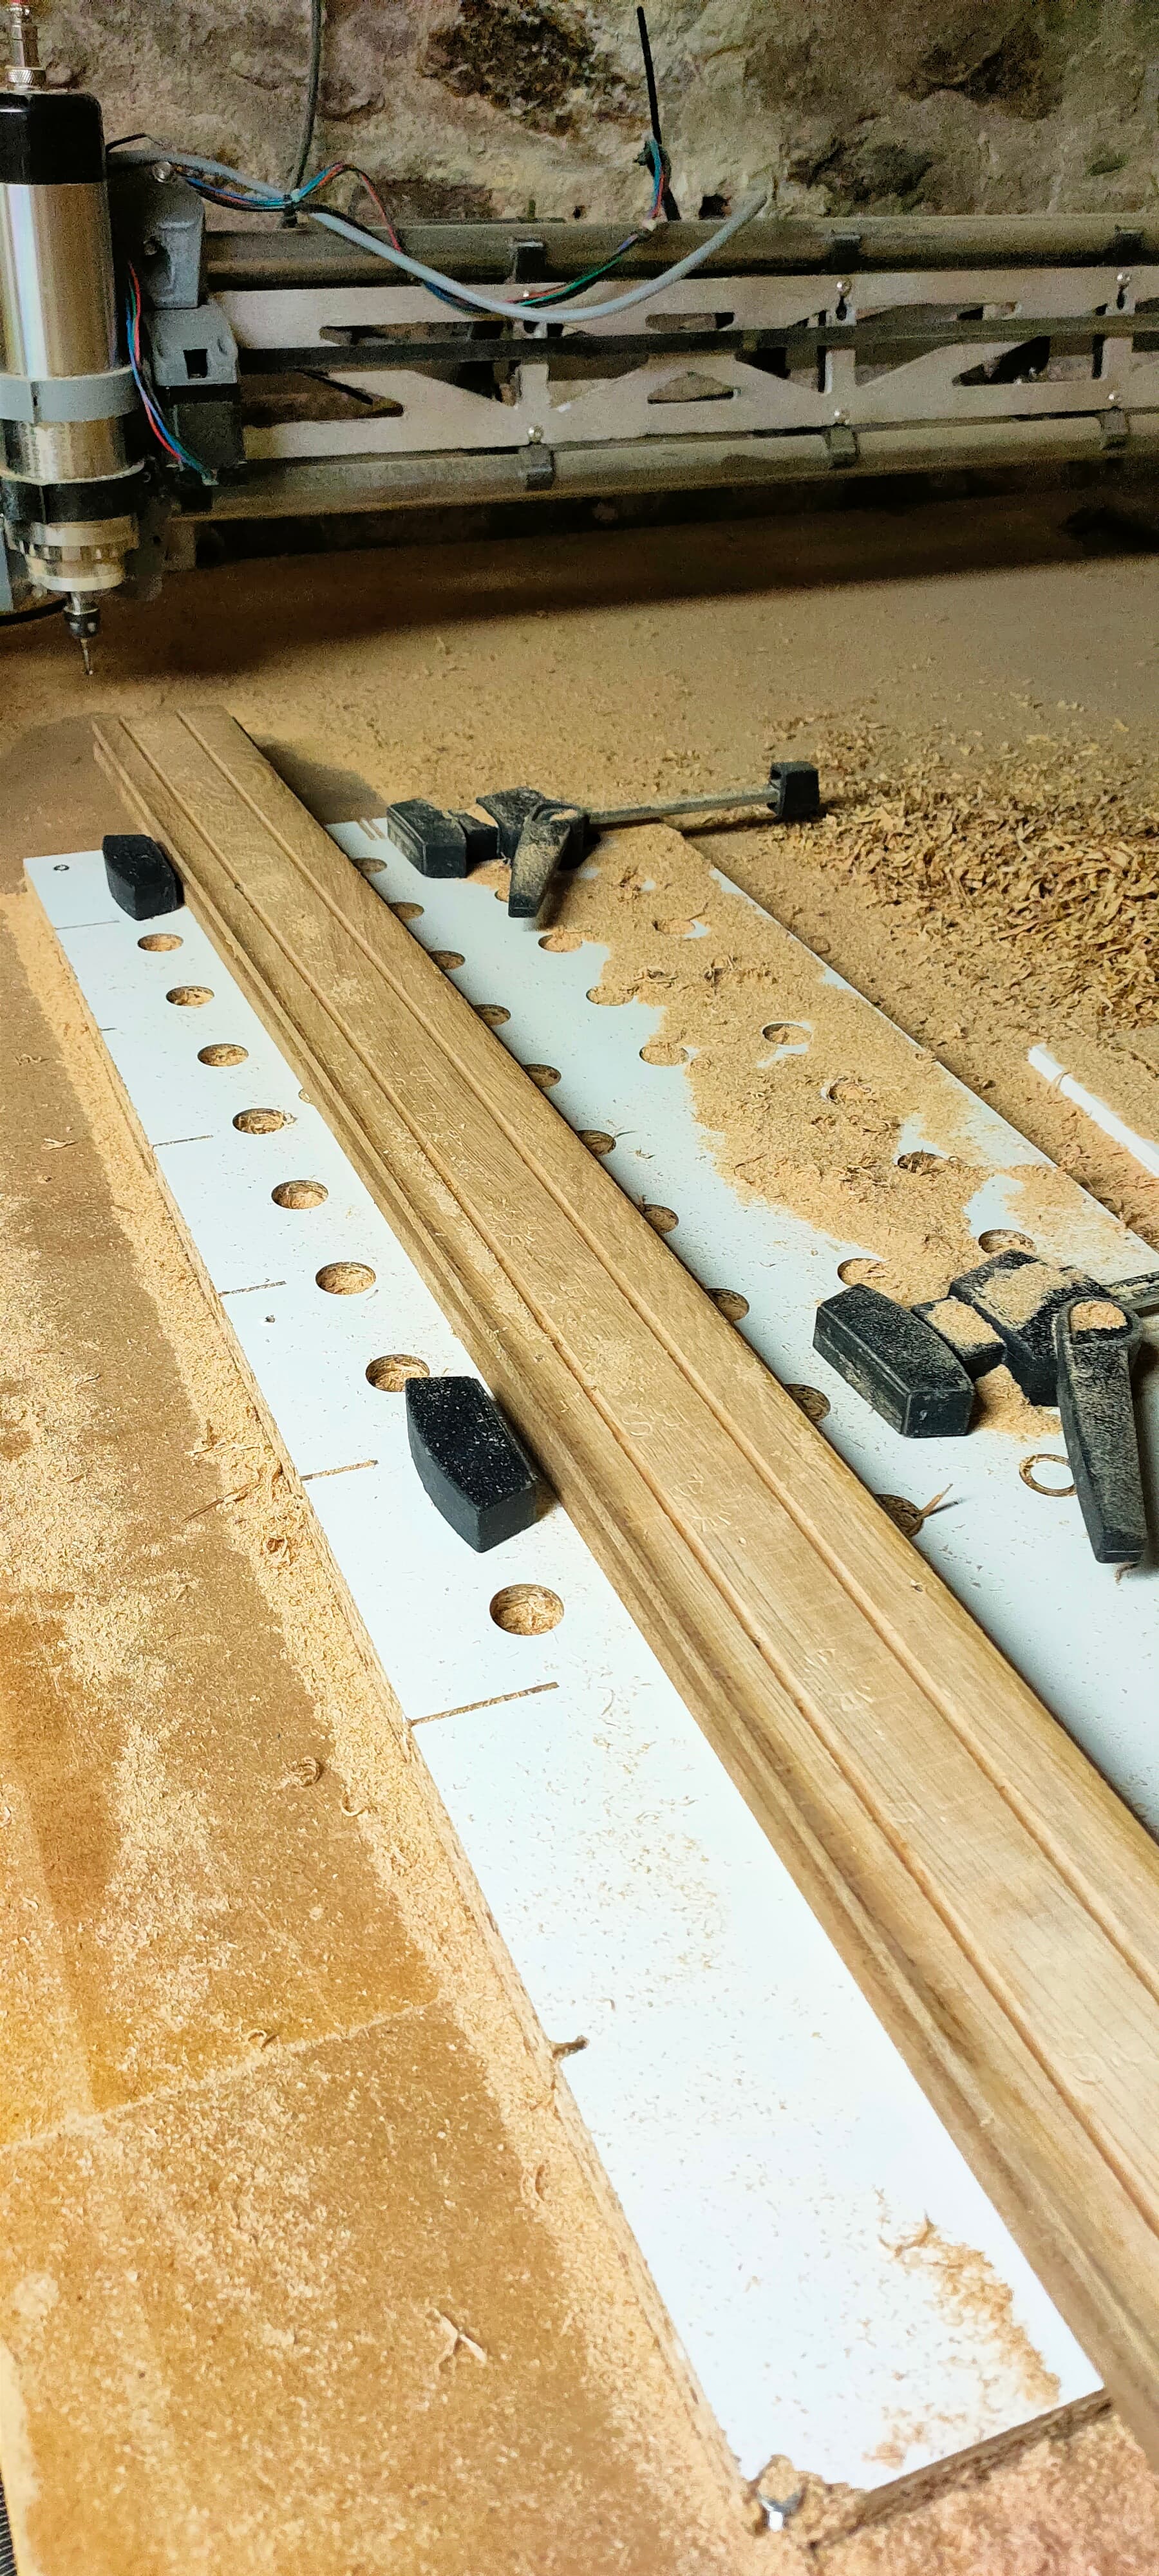
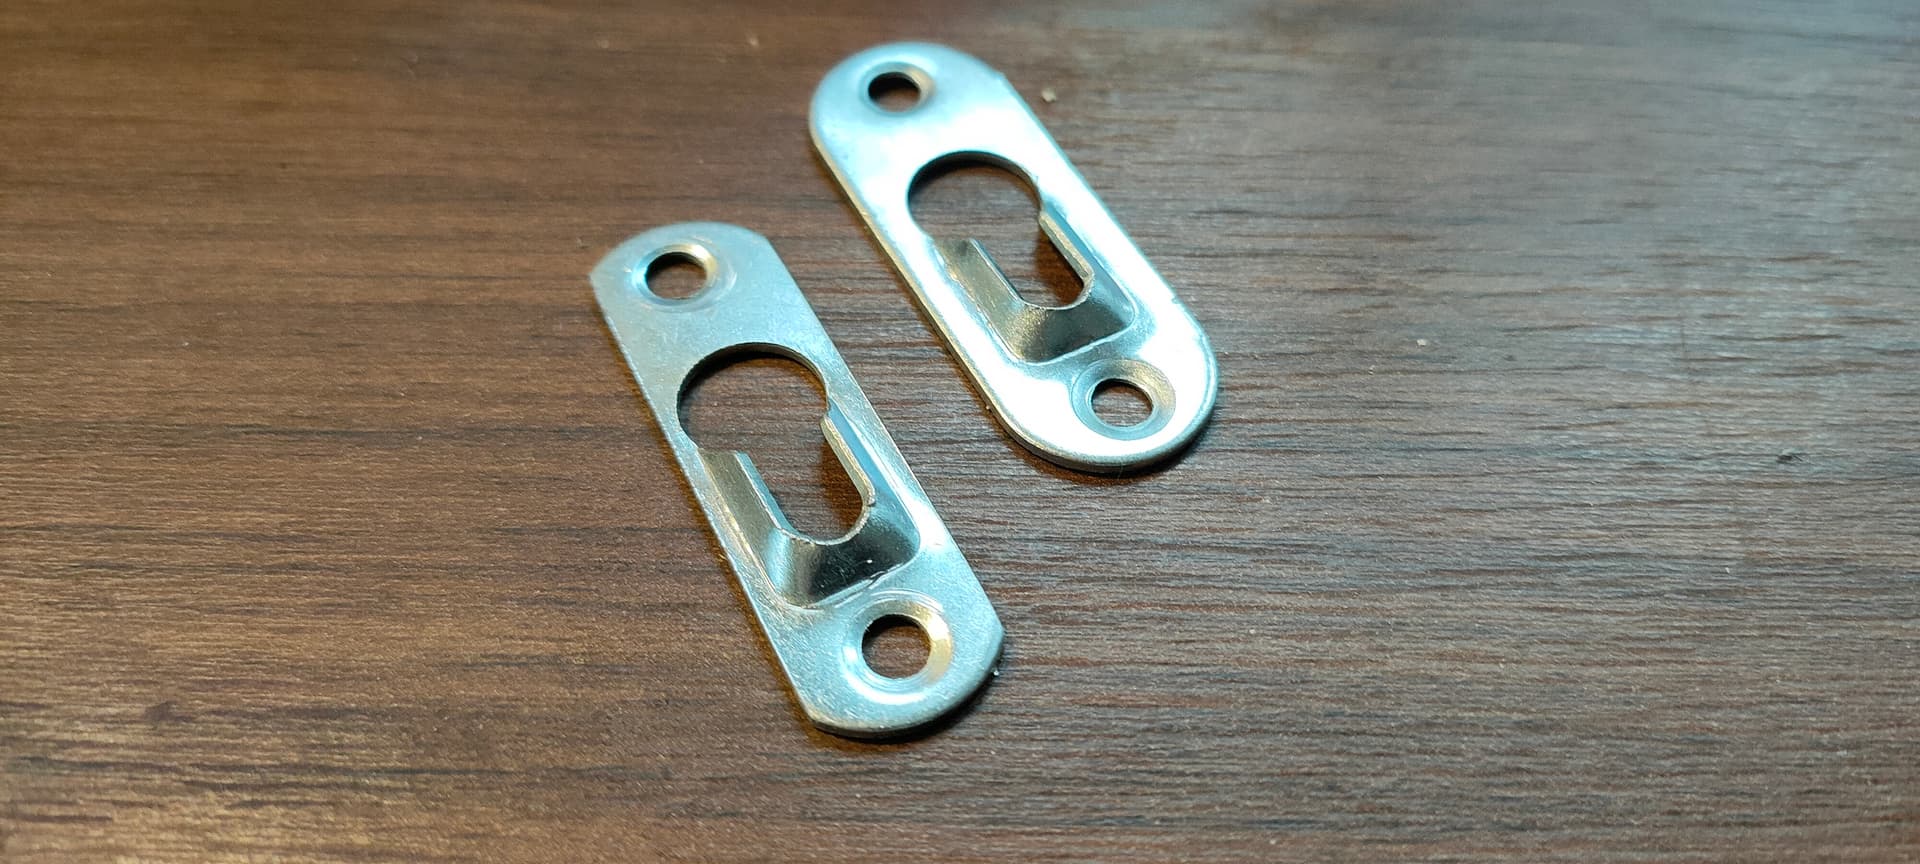
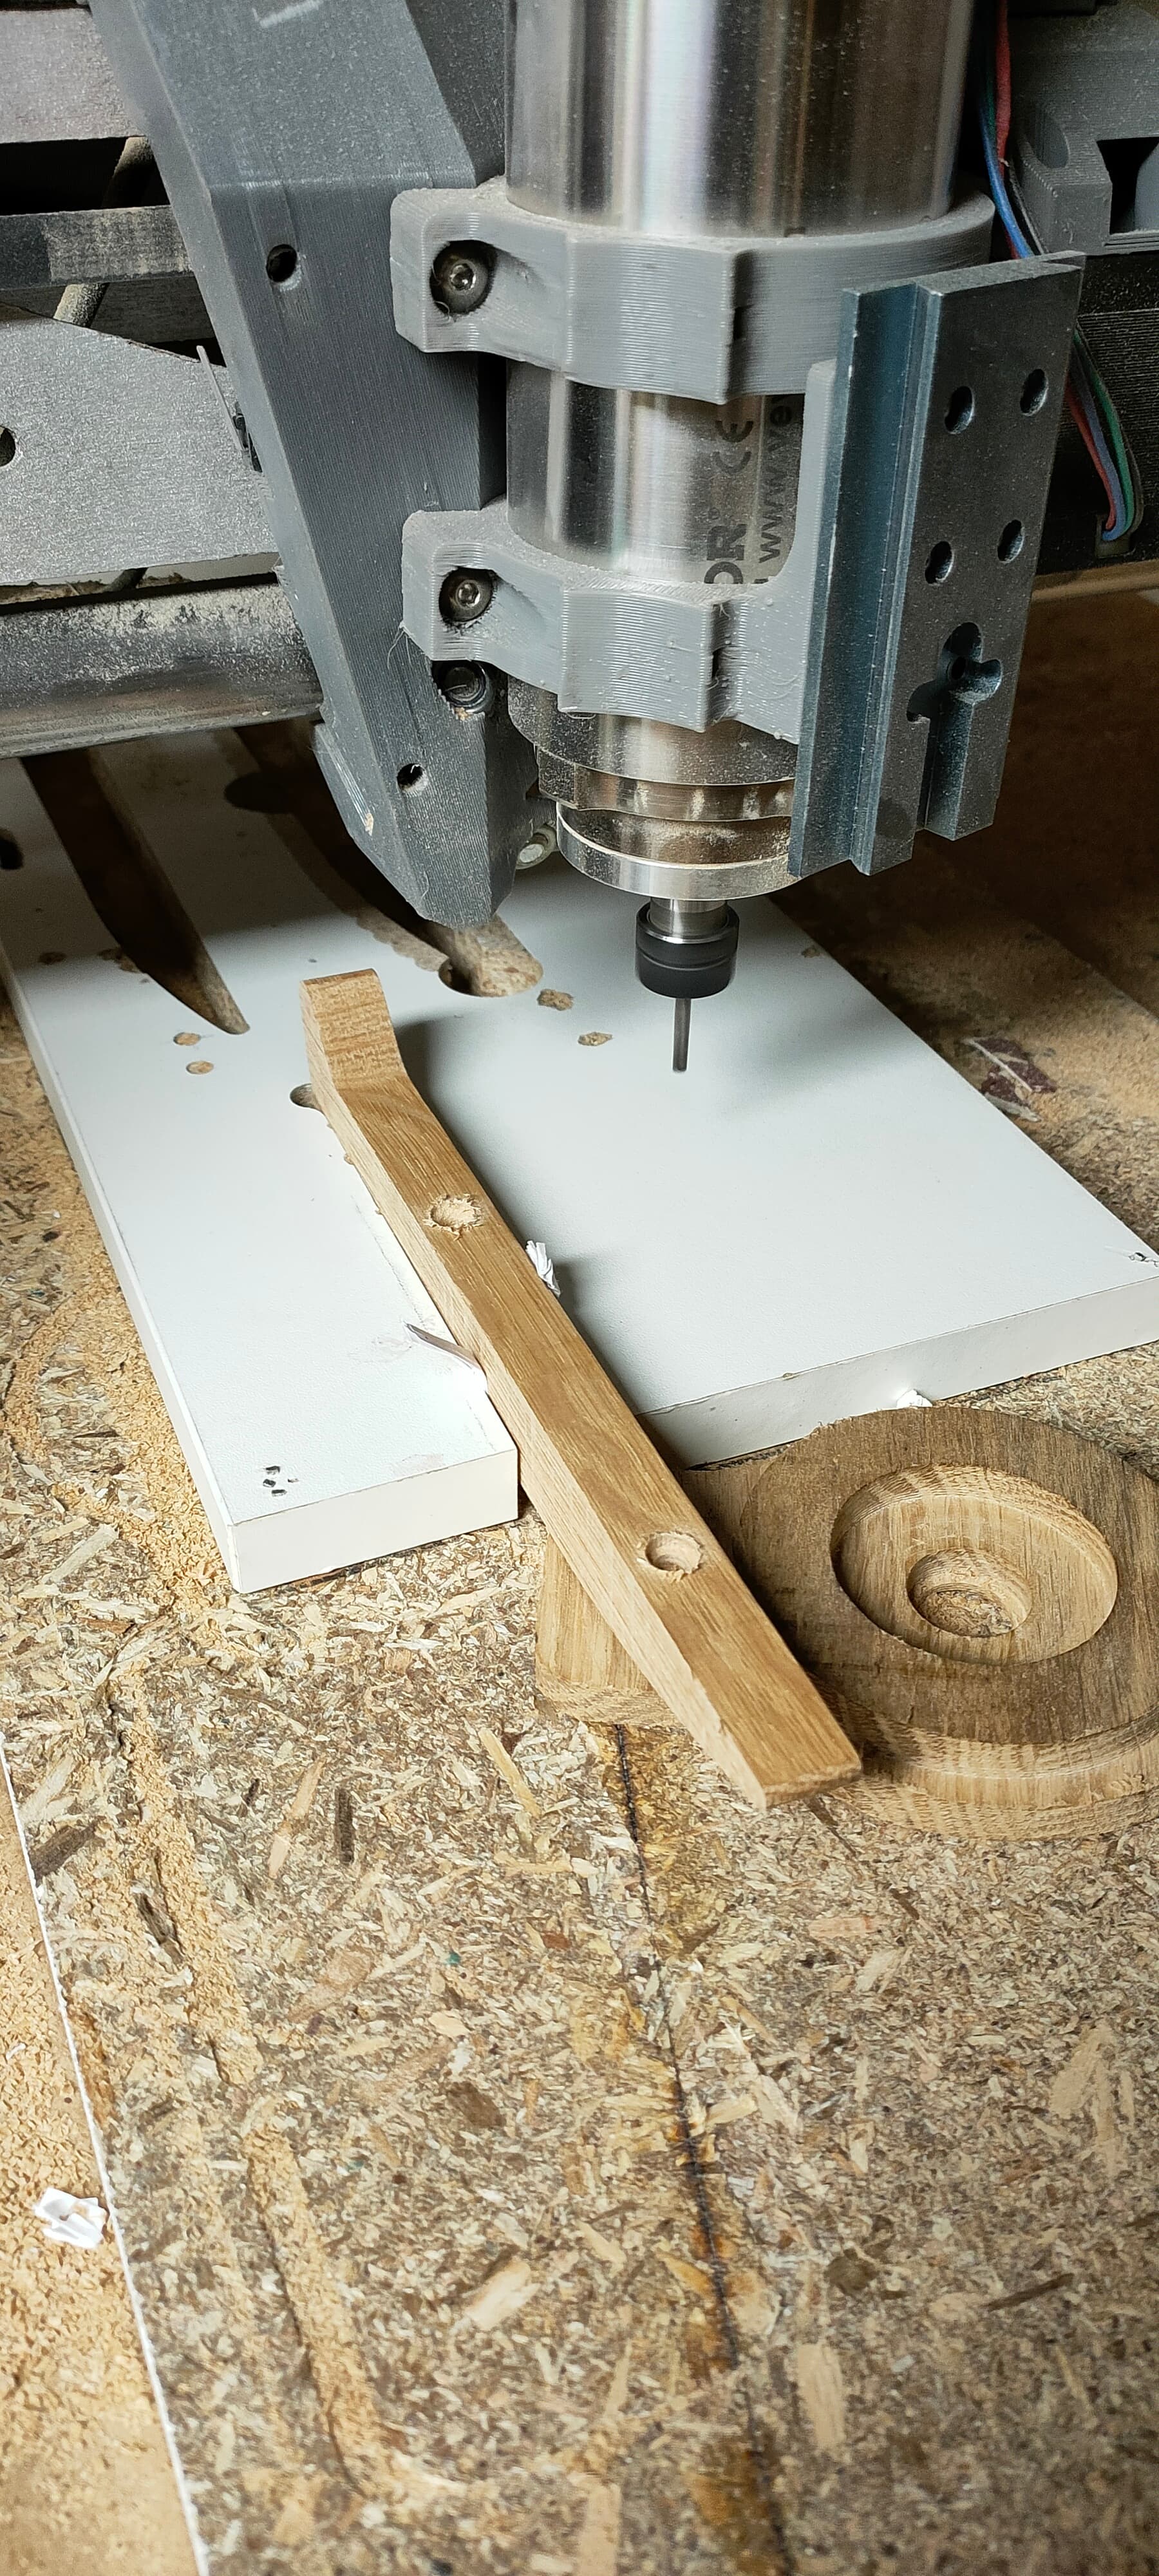
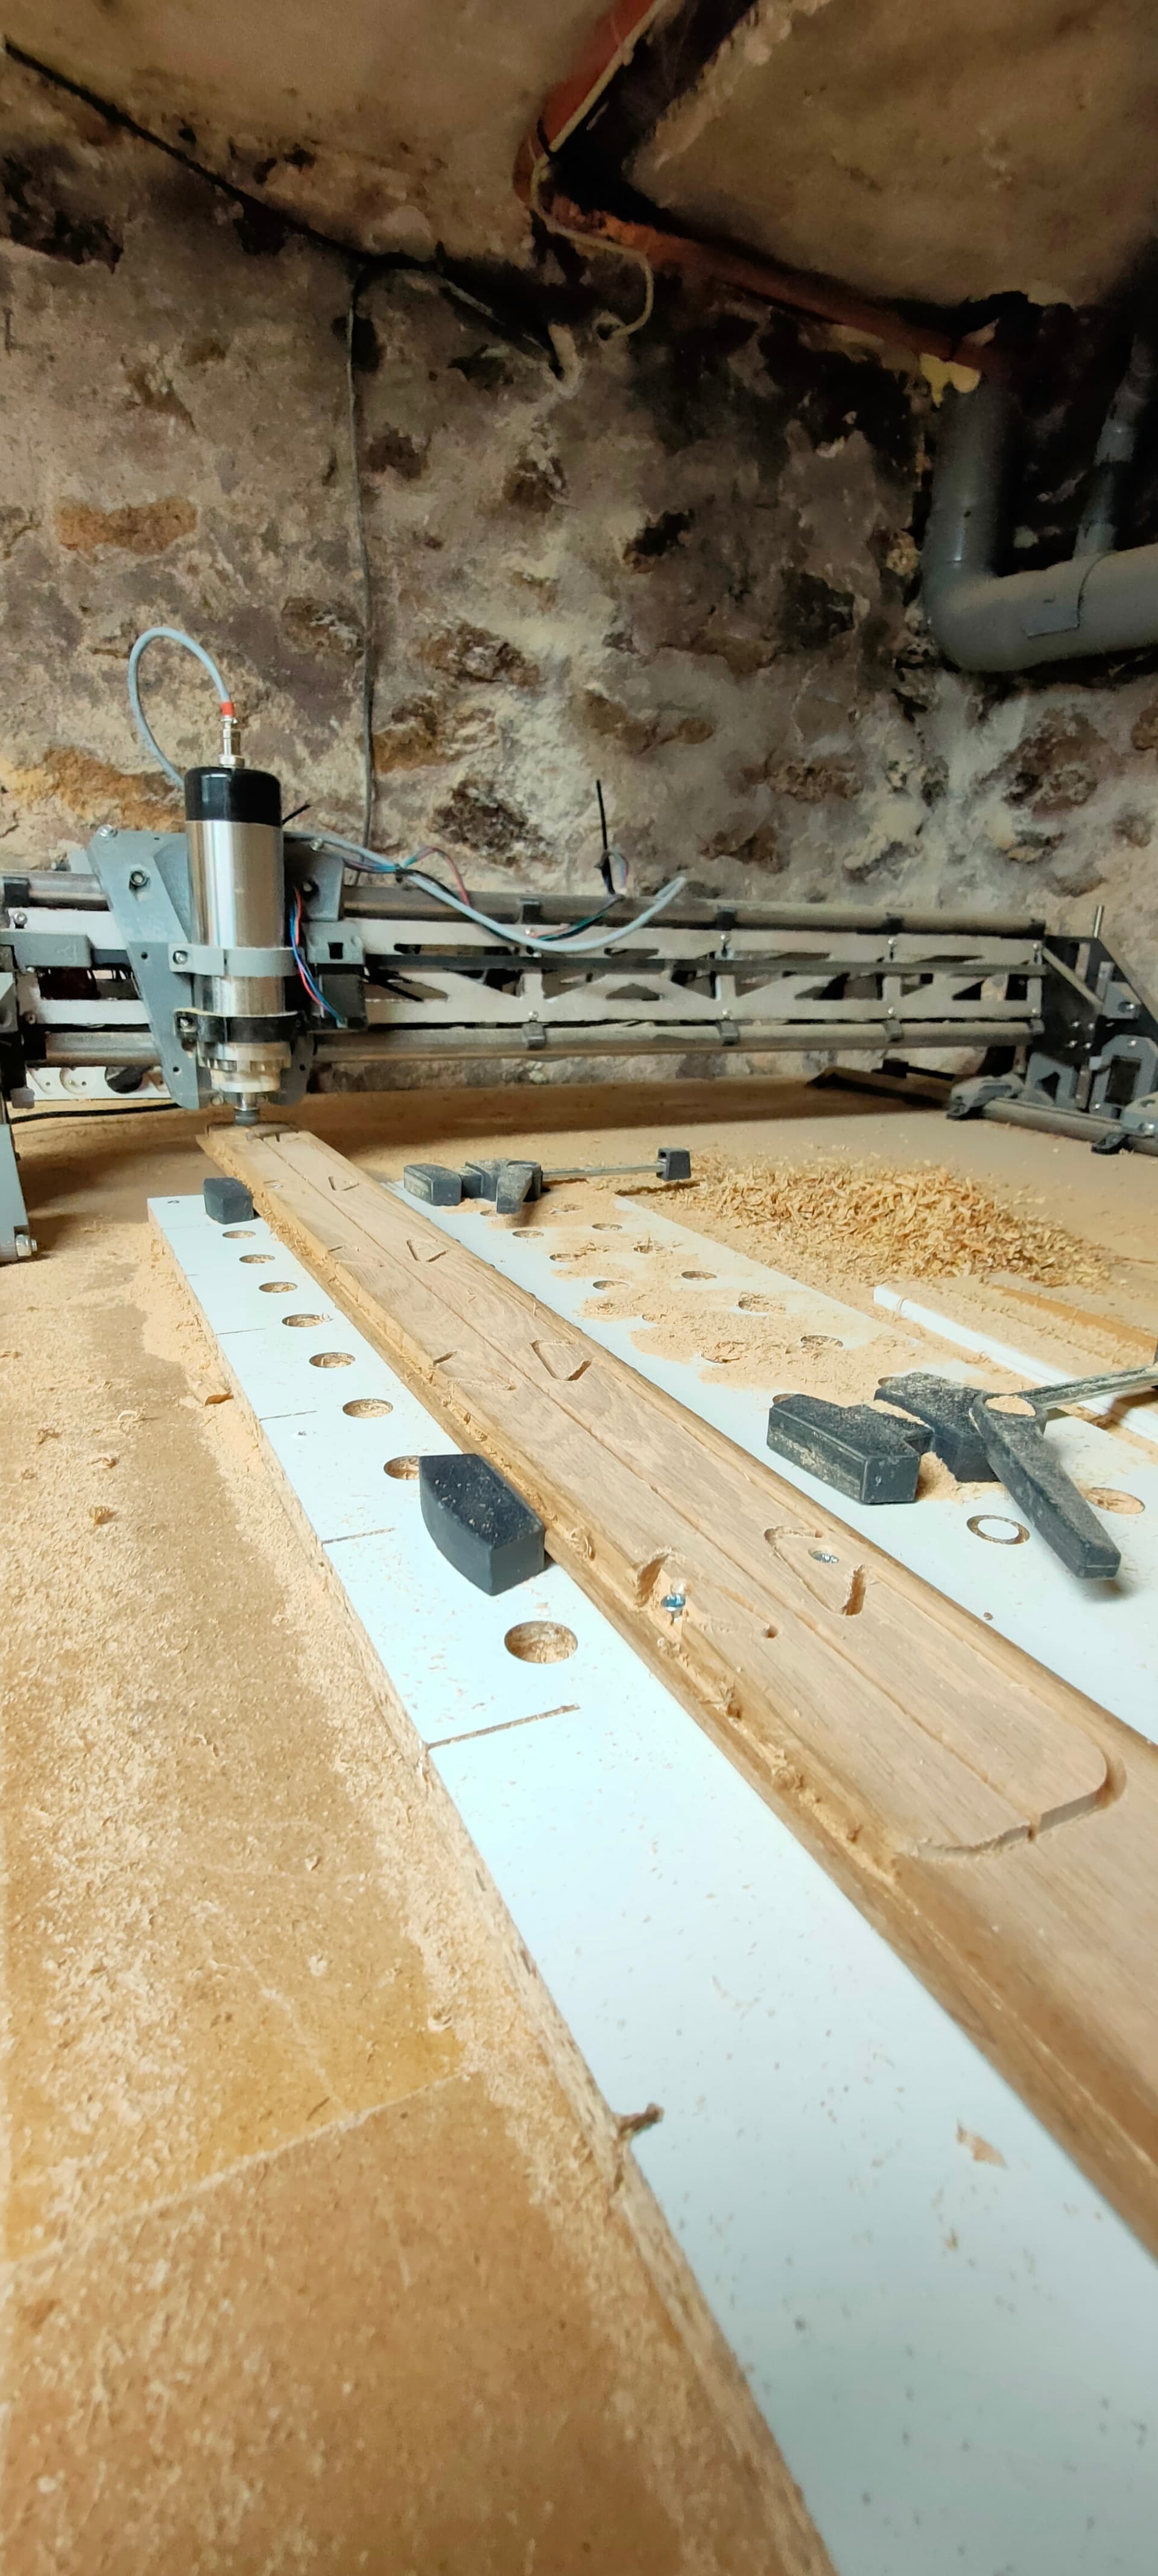
I need to purge these grooves and release the parts, so into the planner it goes…

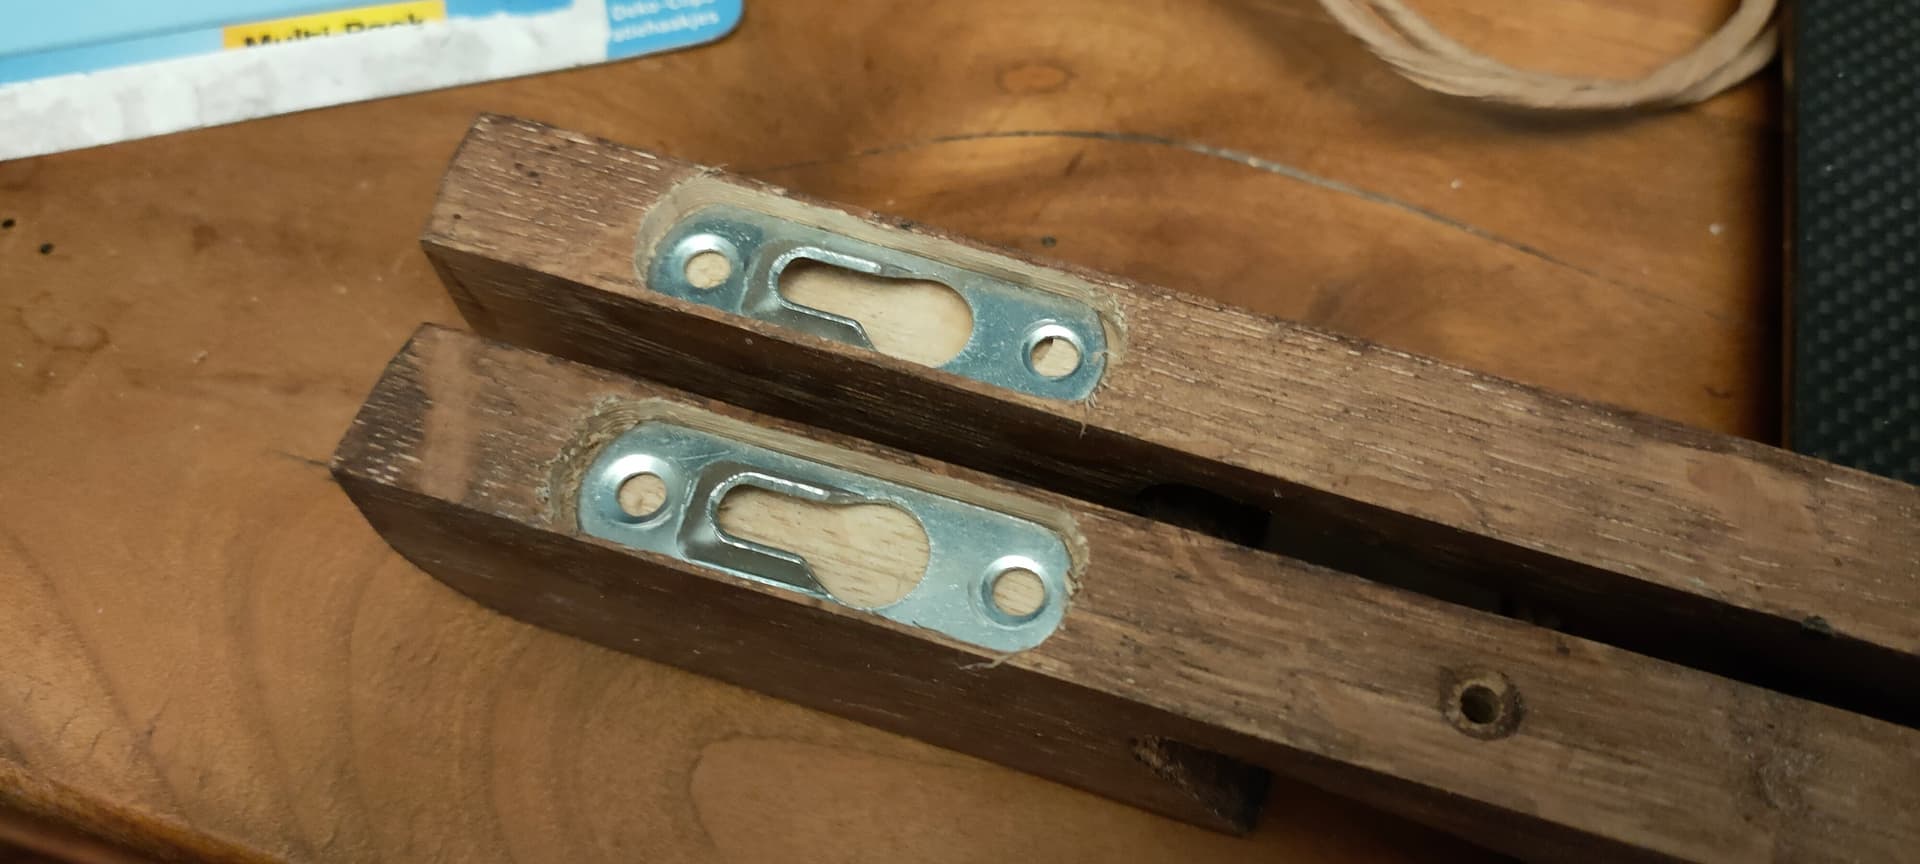
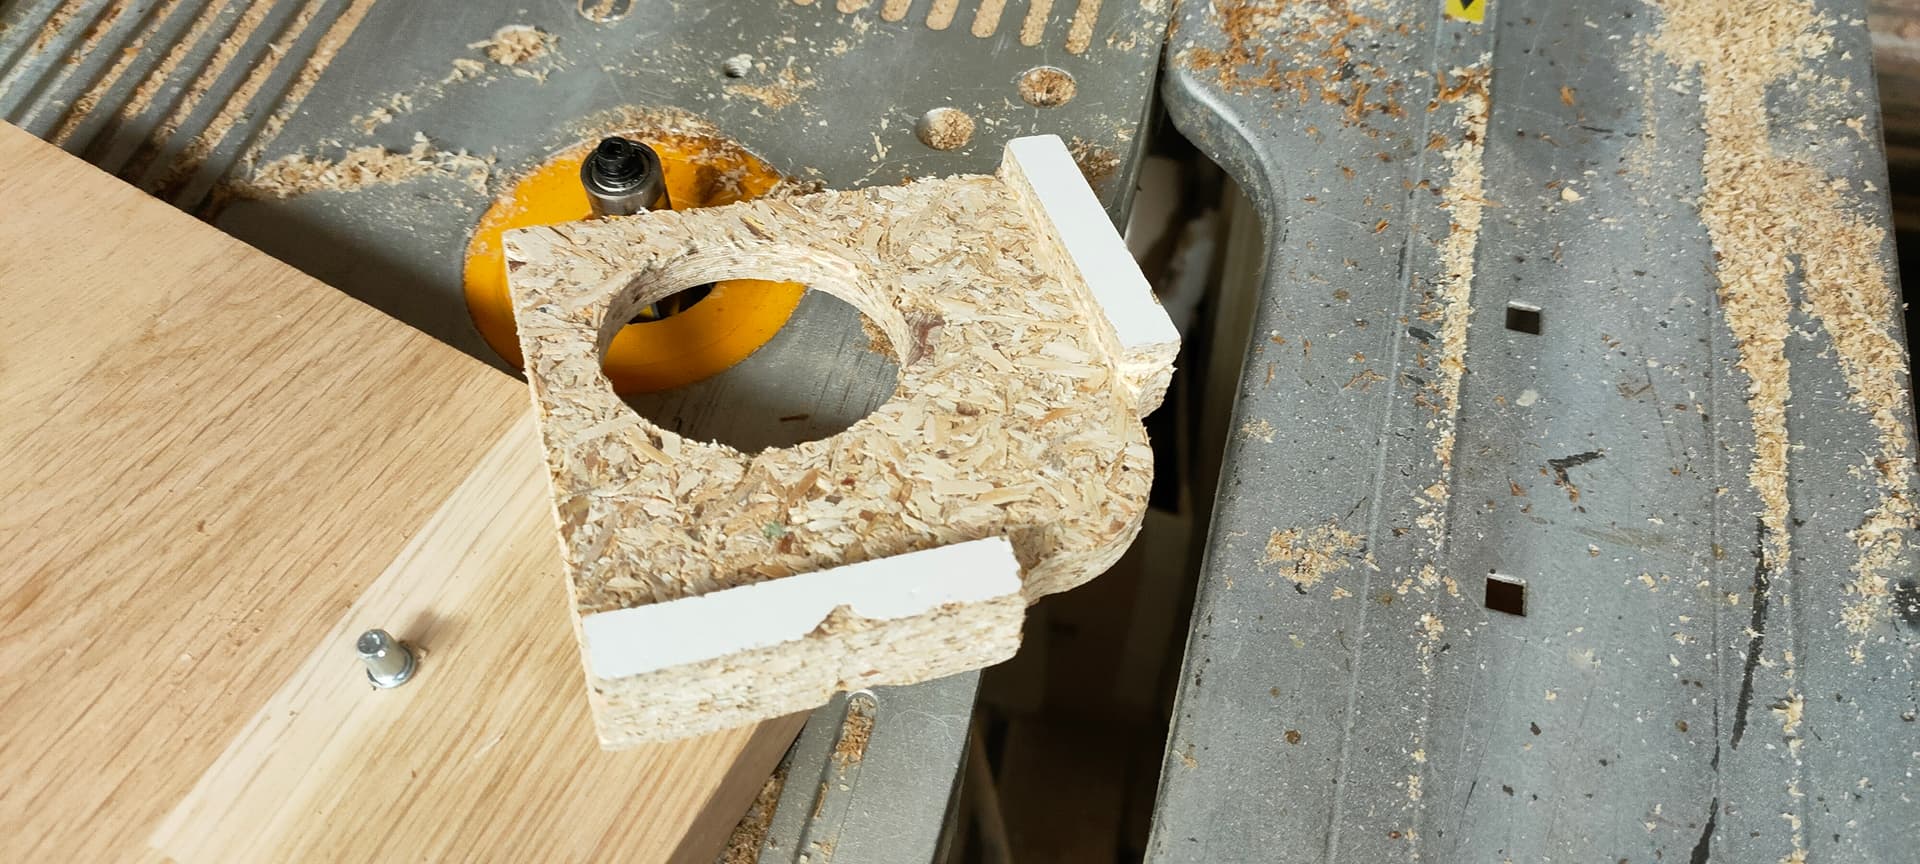
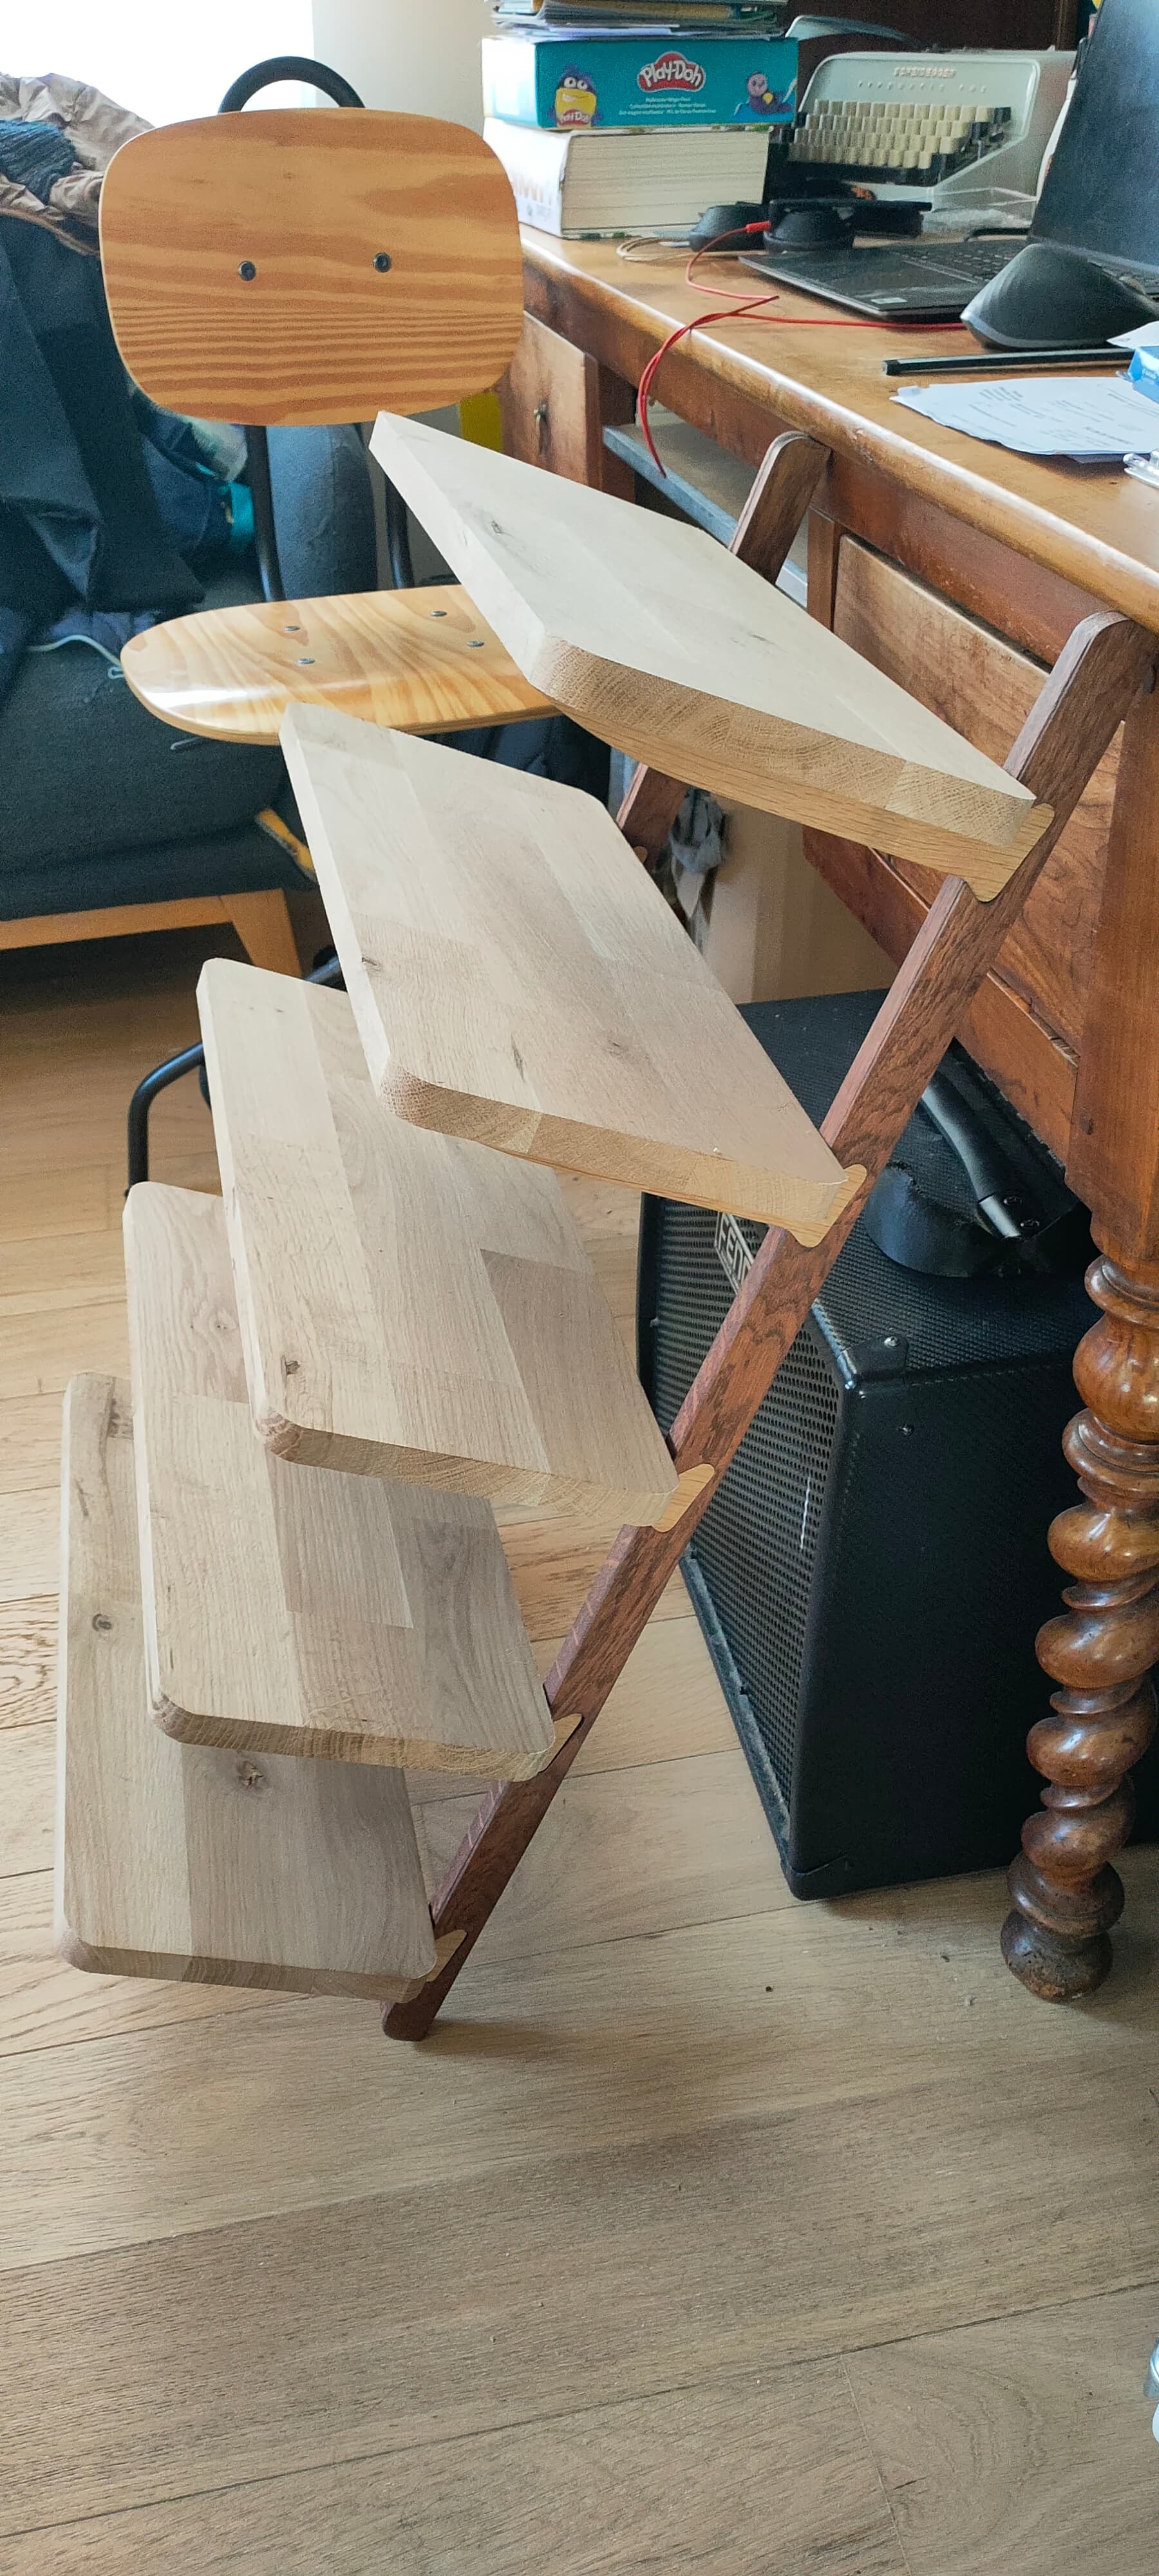
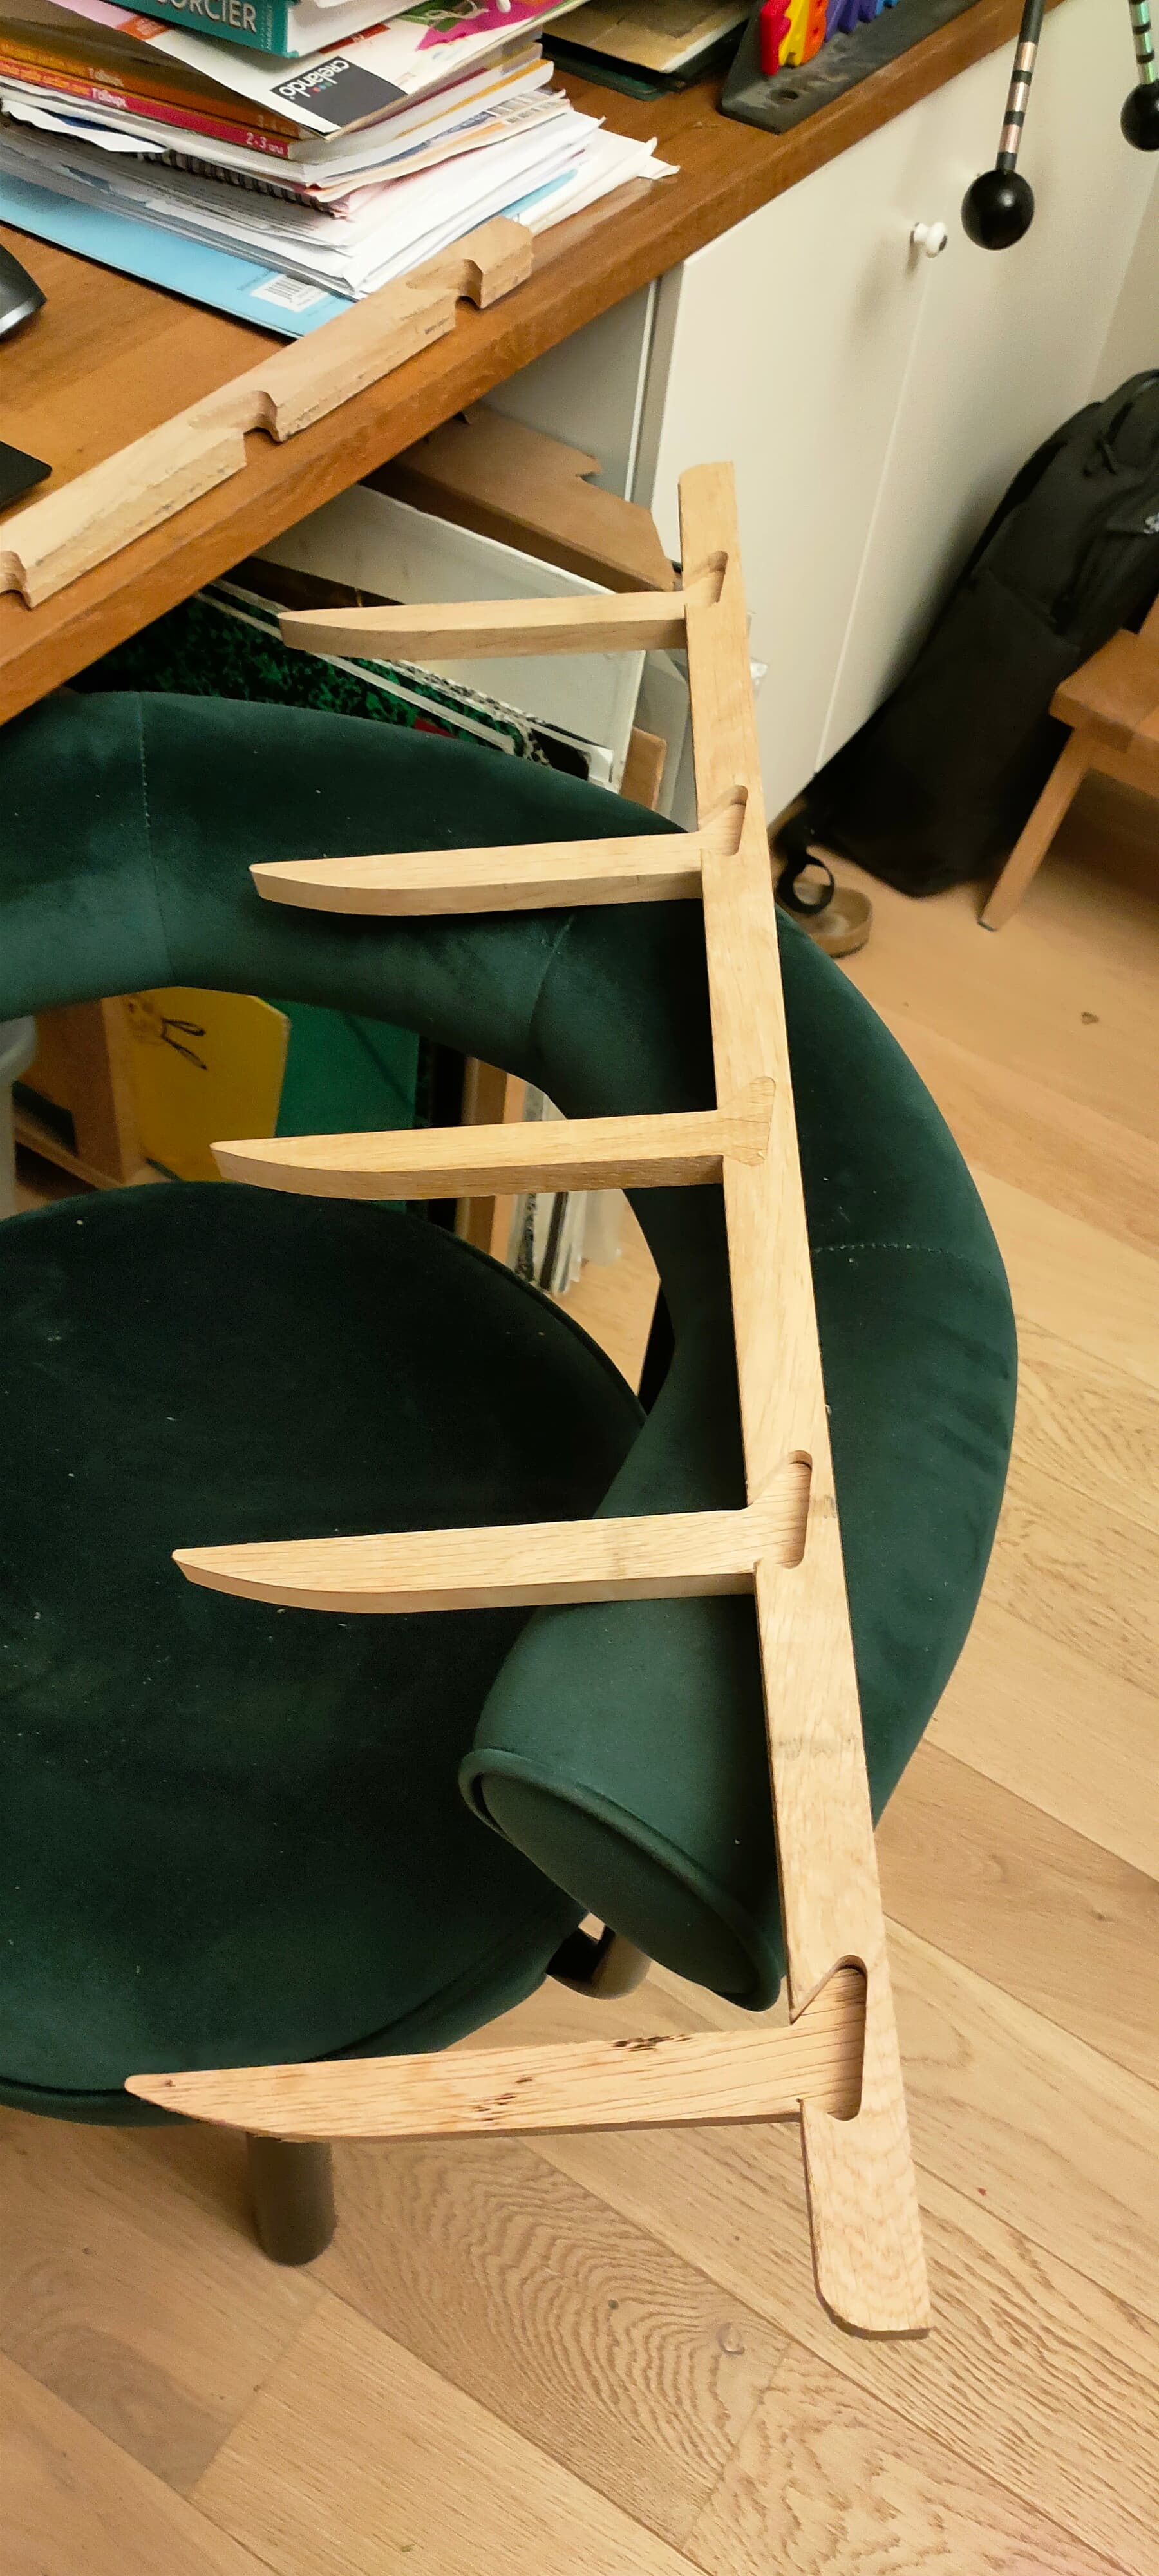
The LR3 had a hard time cutting the back pieces, so the parts don’t really fit :confused:

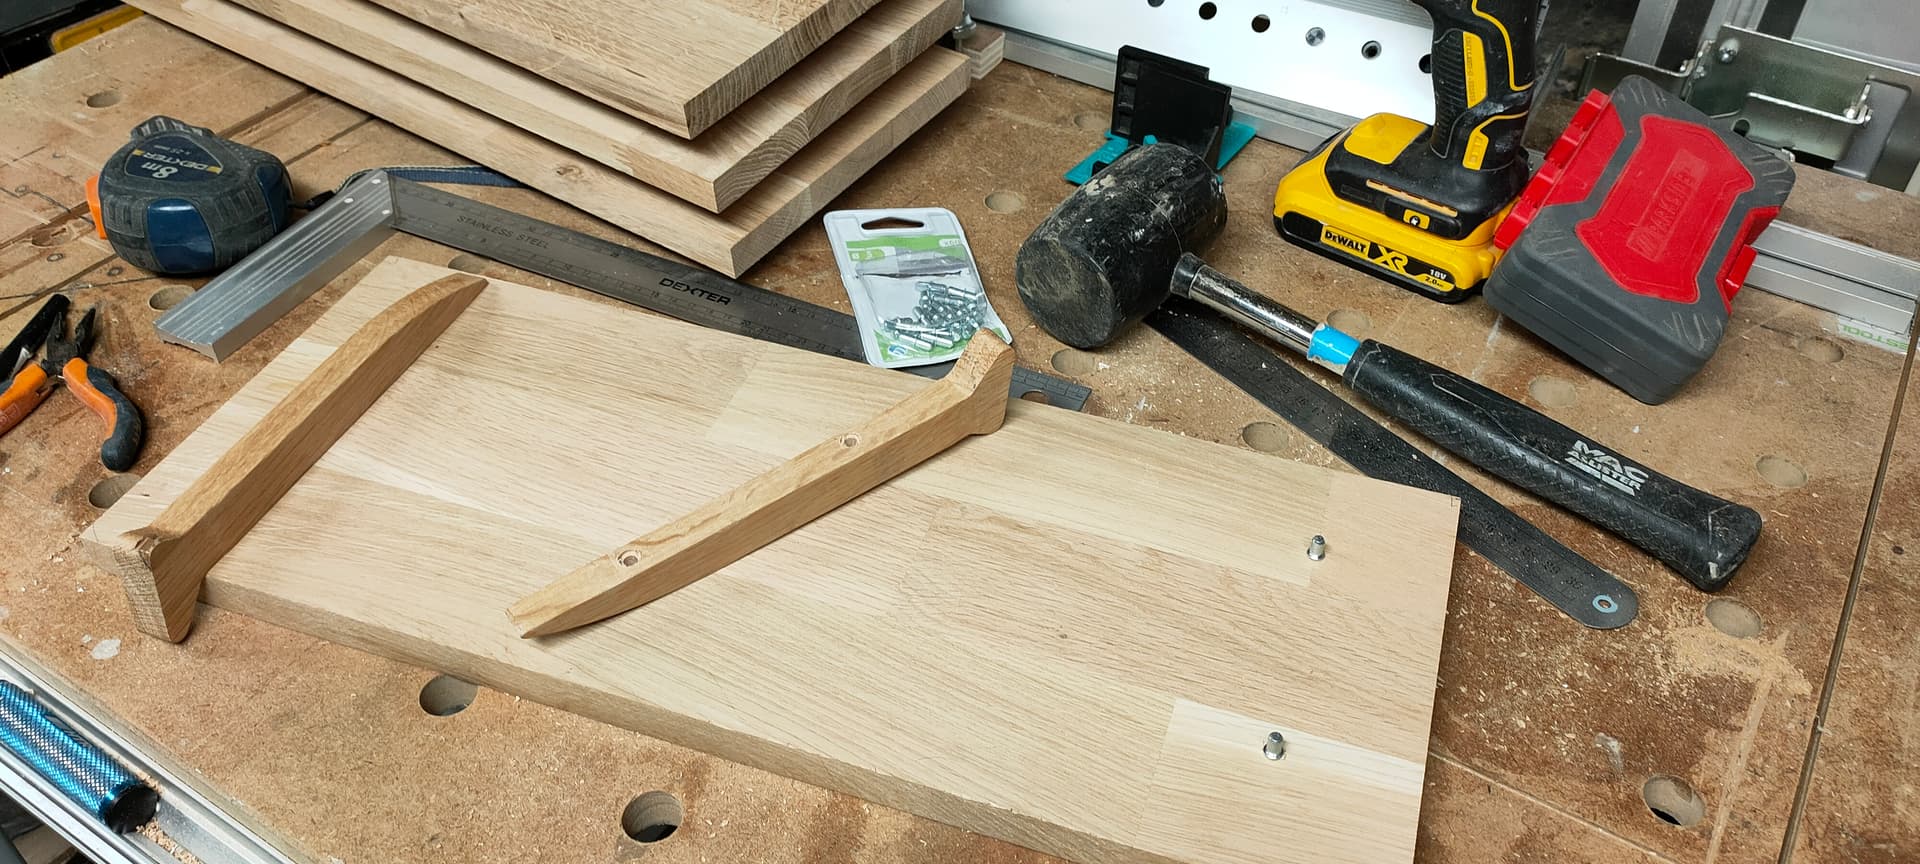
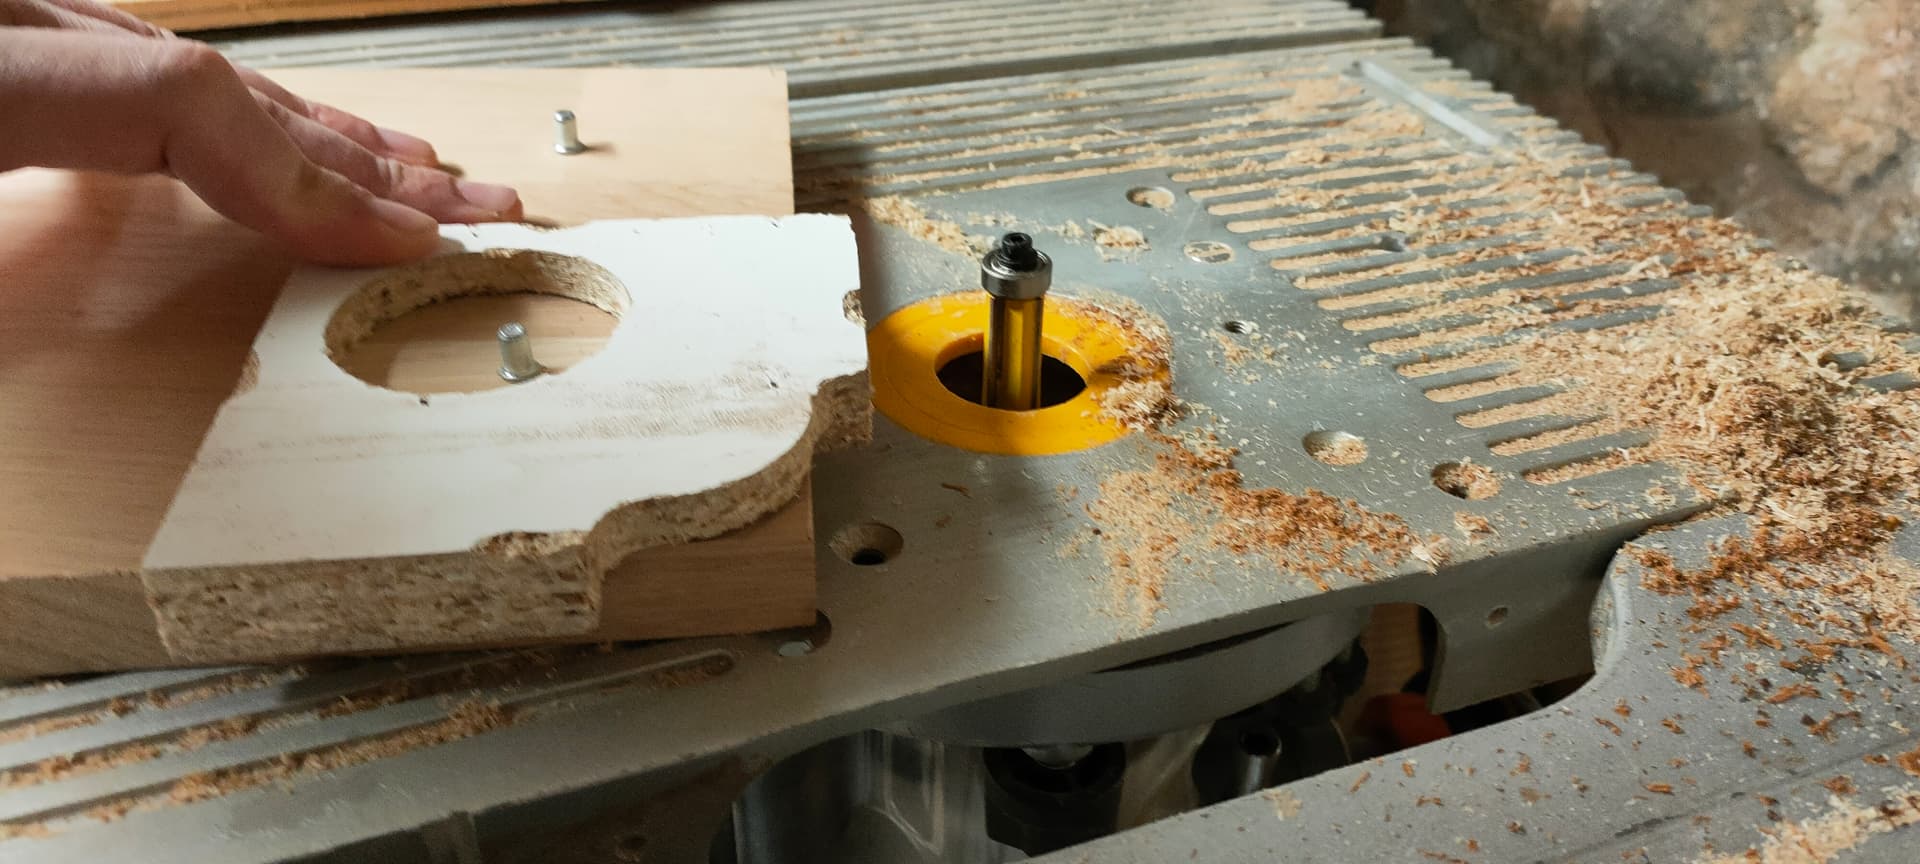
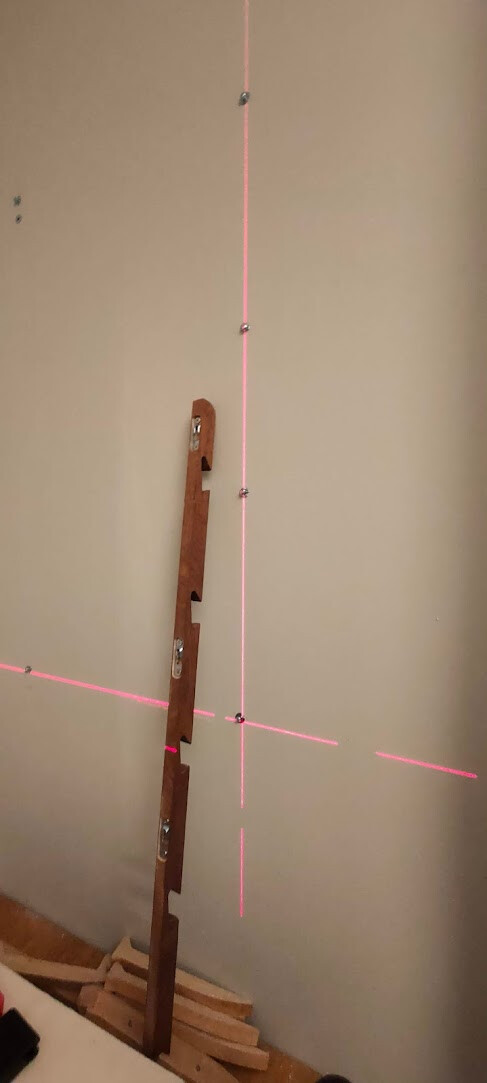
I 3d printed a router template and gave every slot a quick cleanup with a copying bit

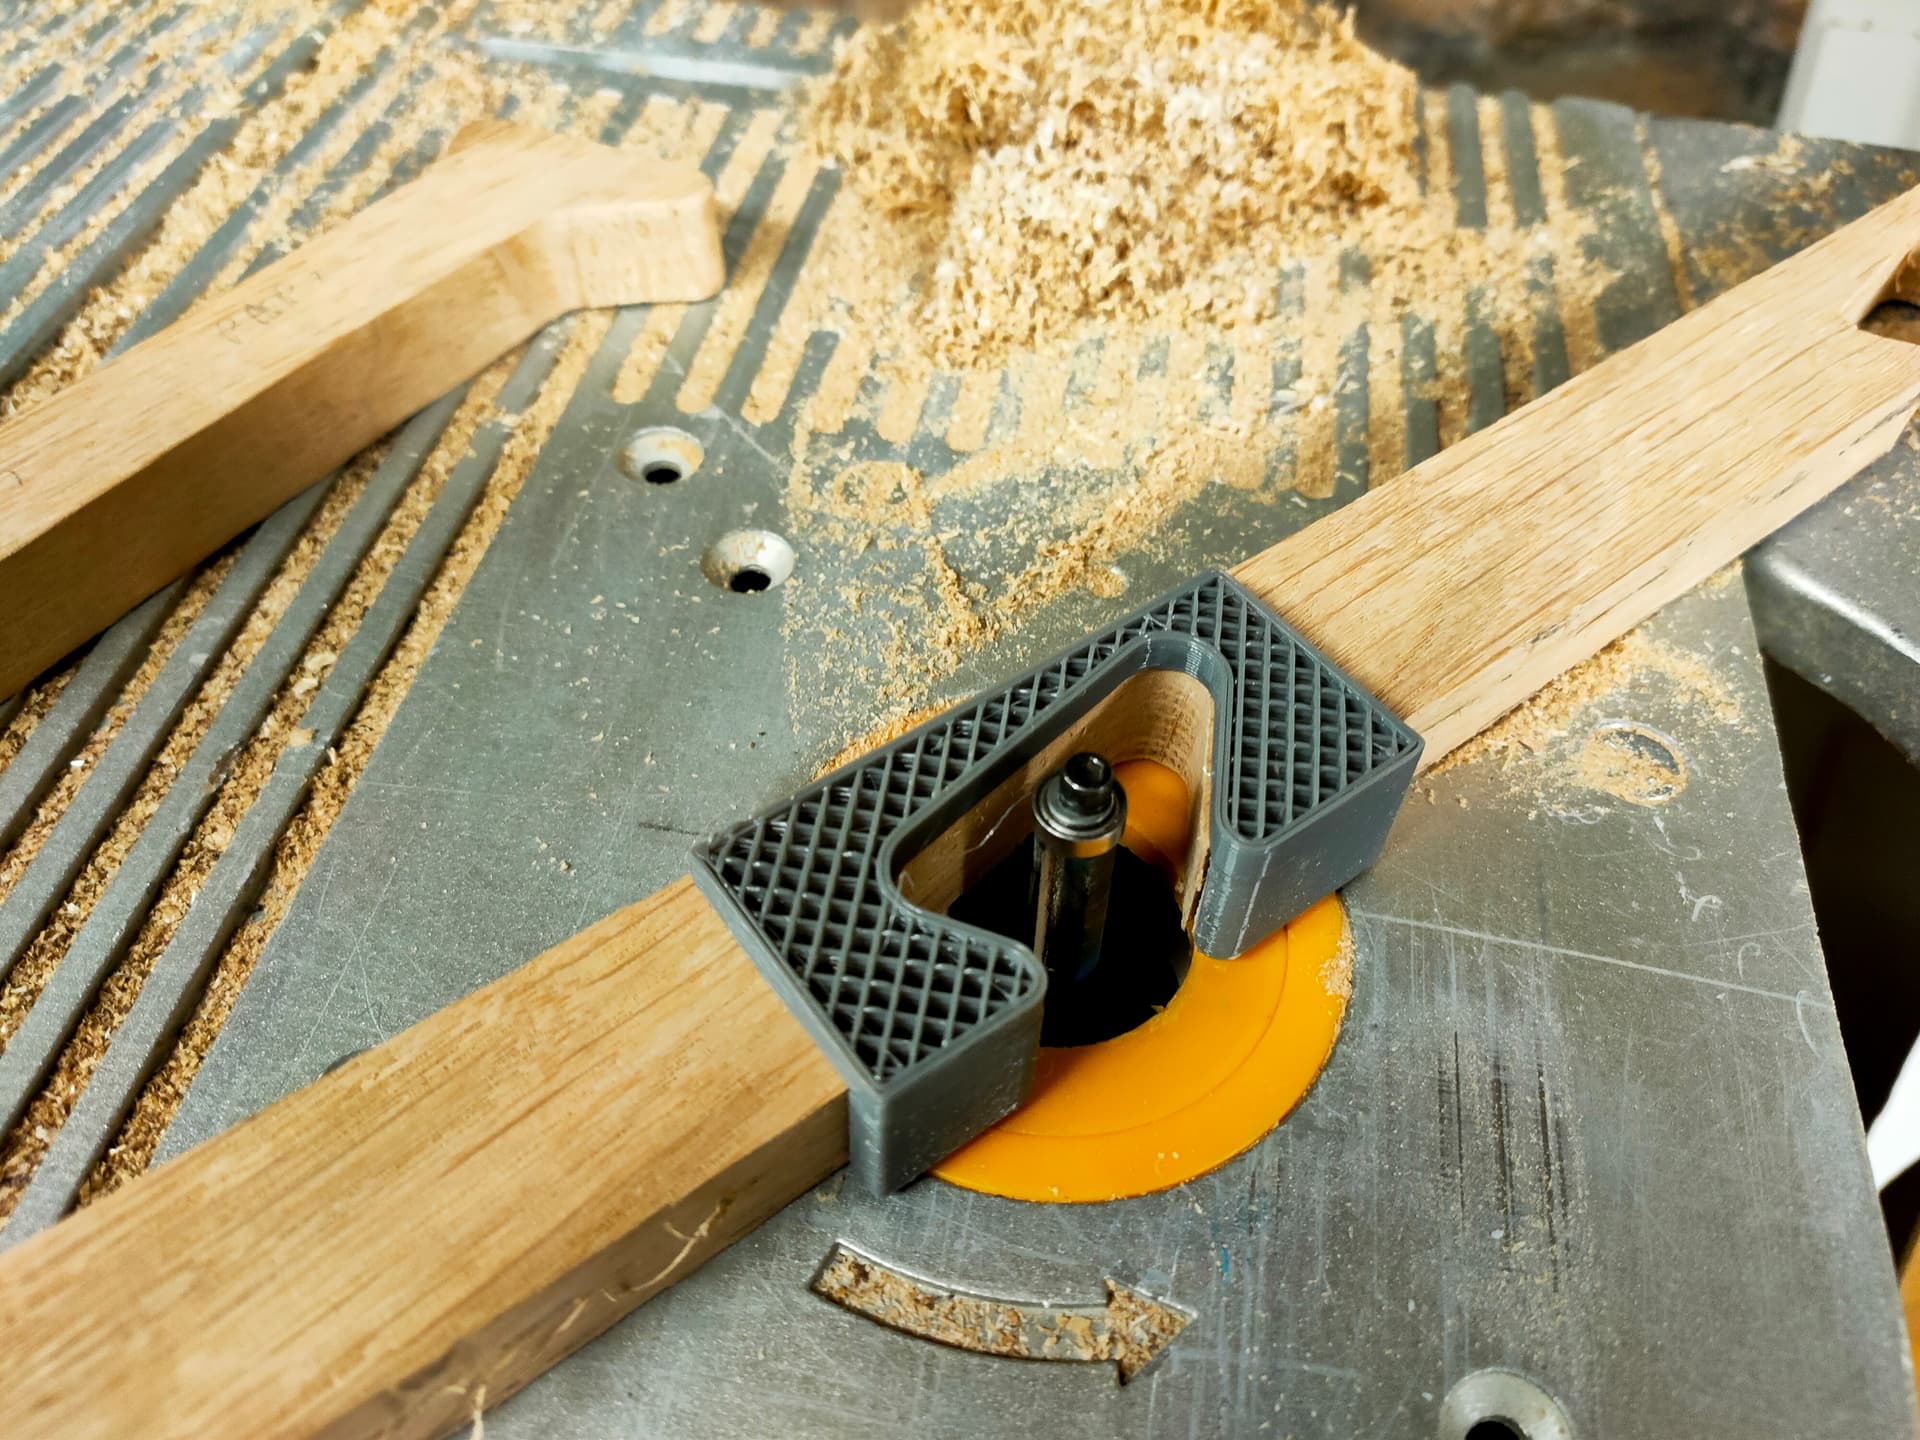
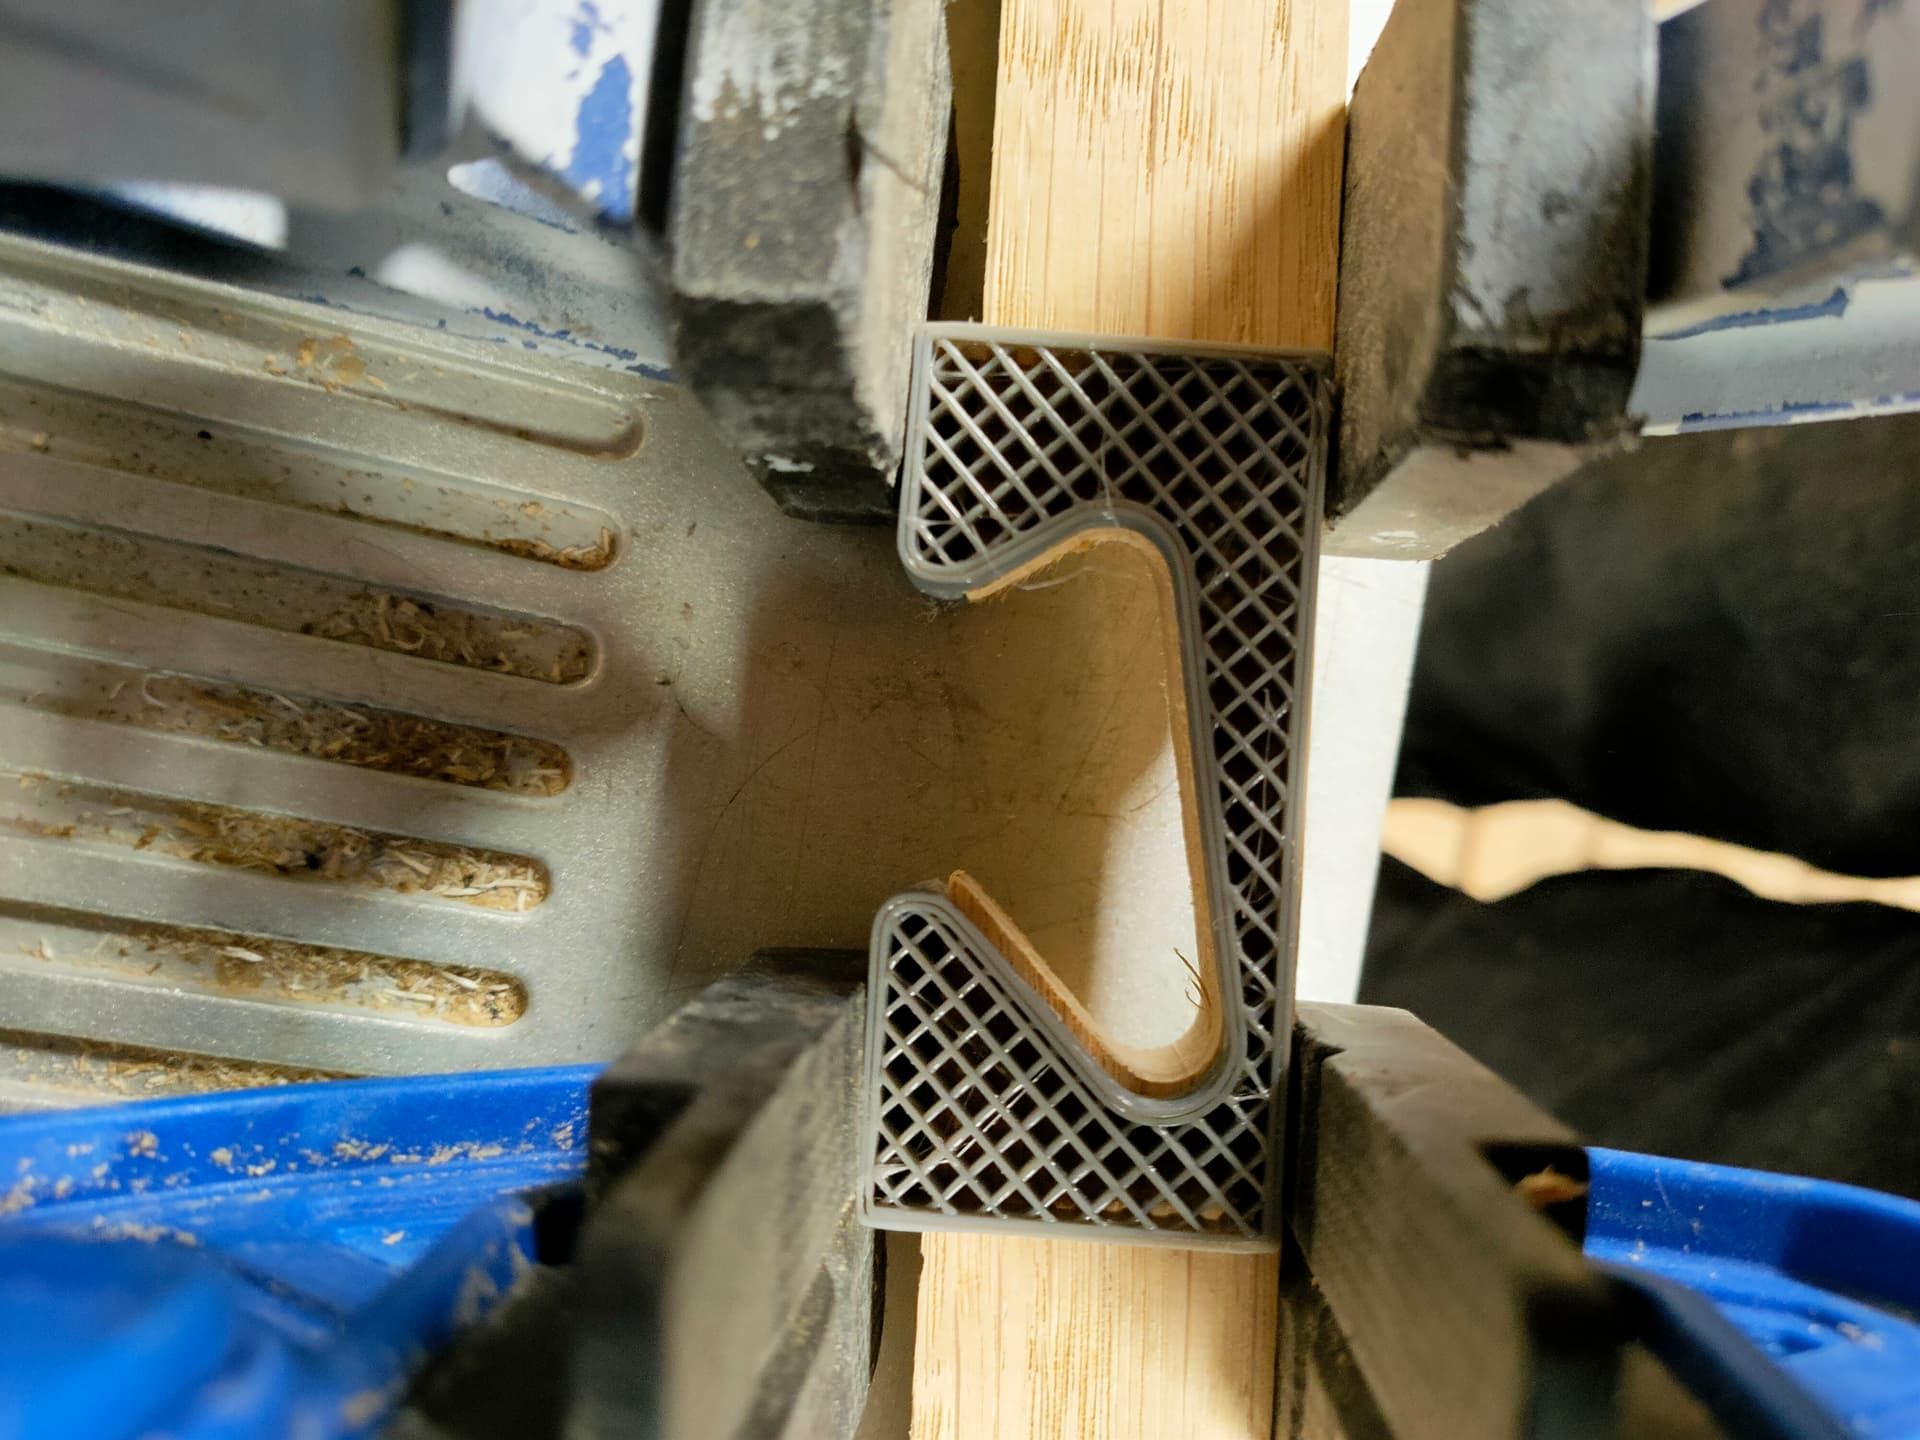
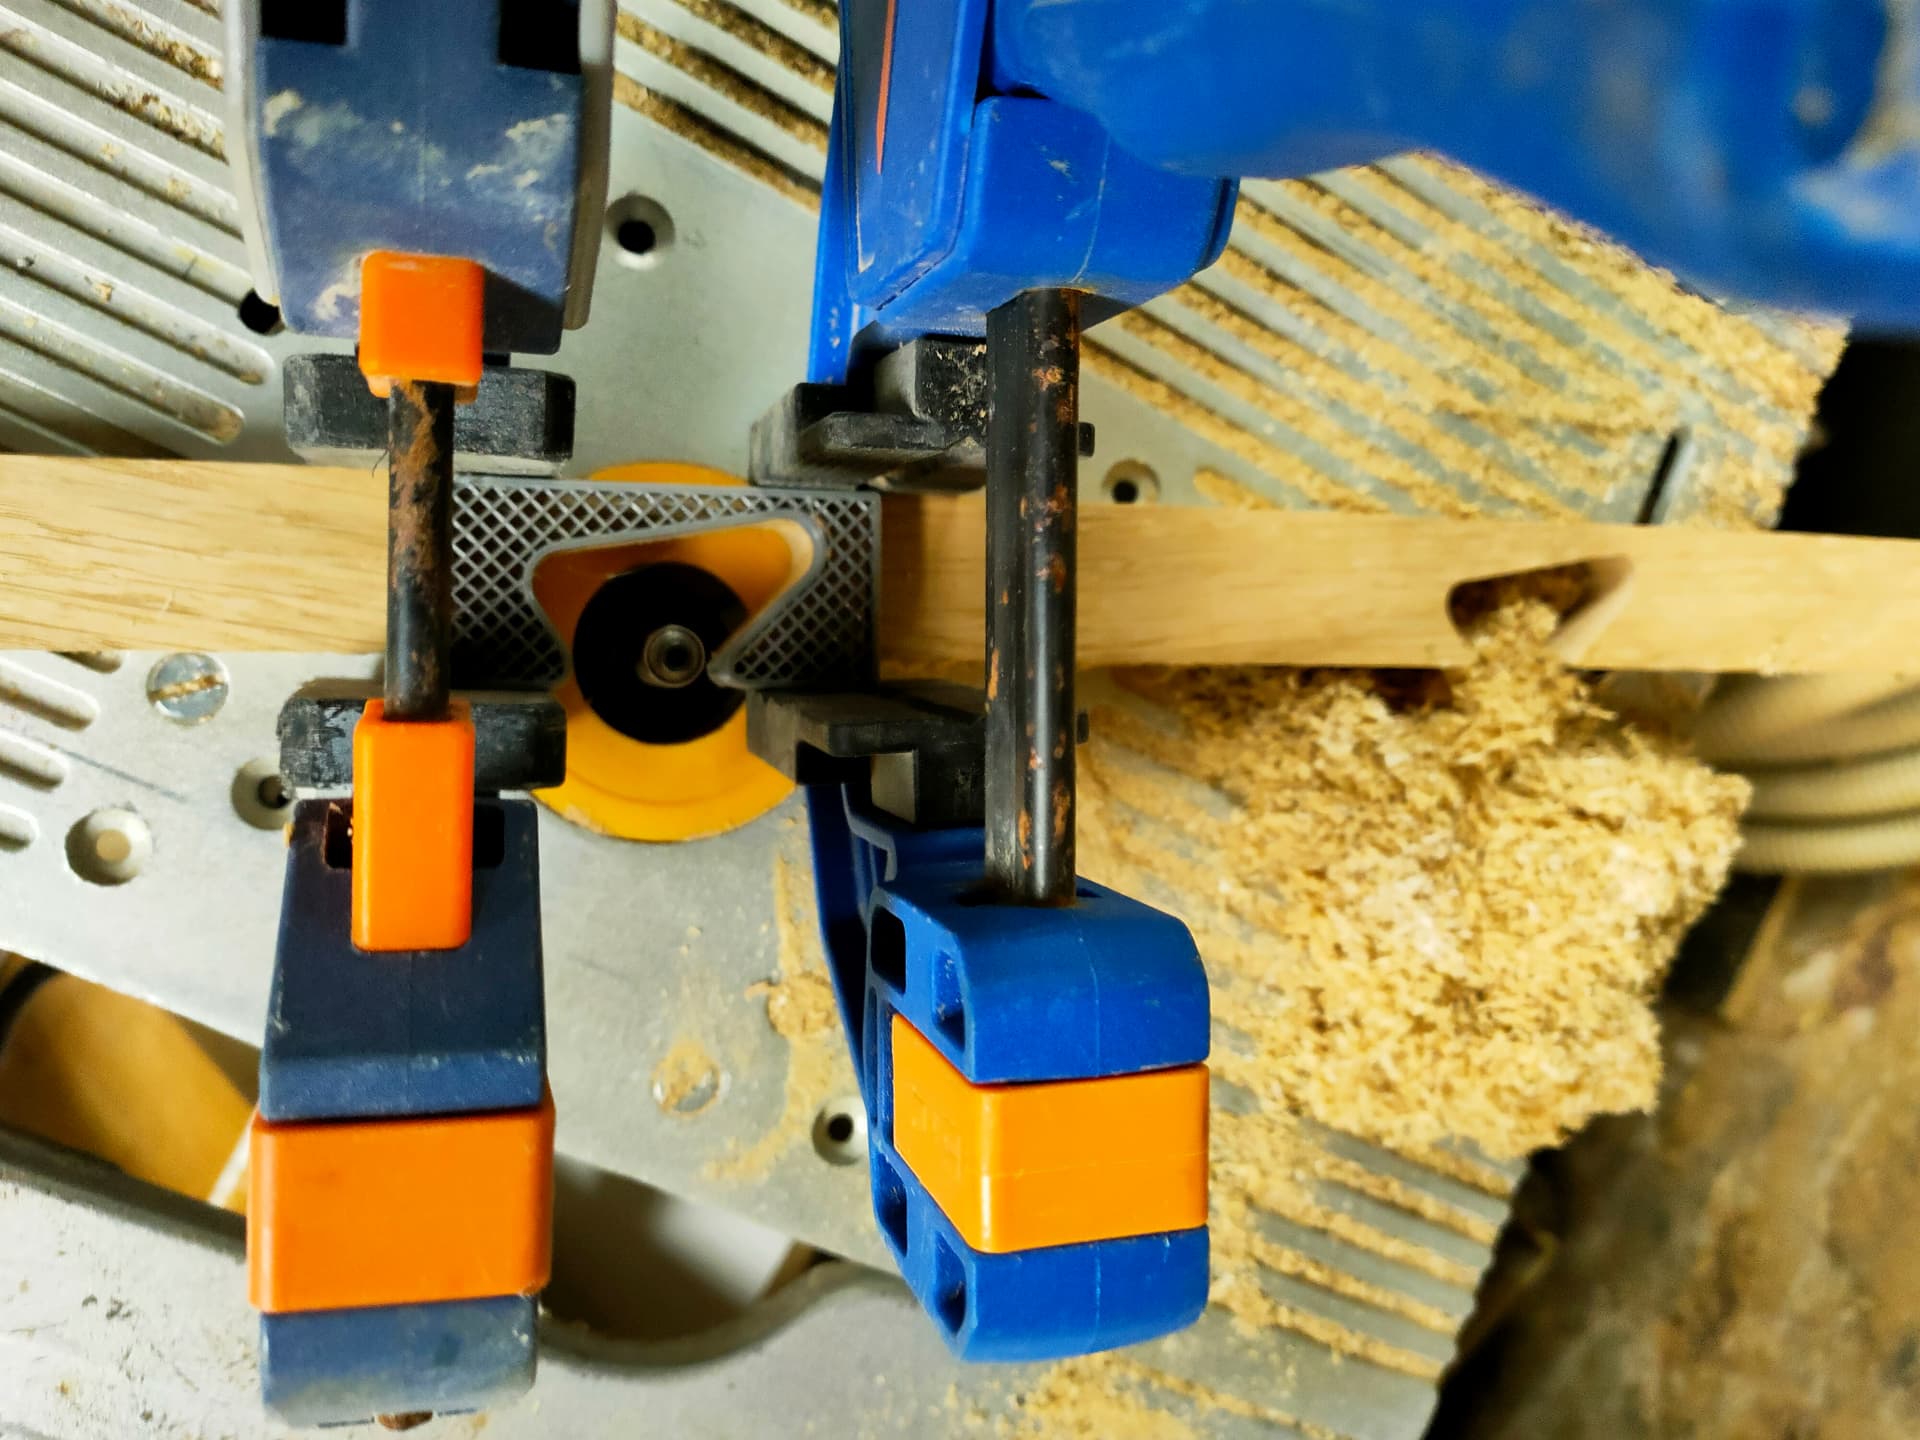
The fit was not perfect but much better after this…

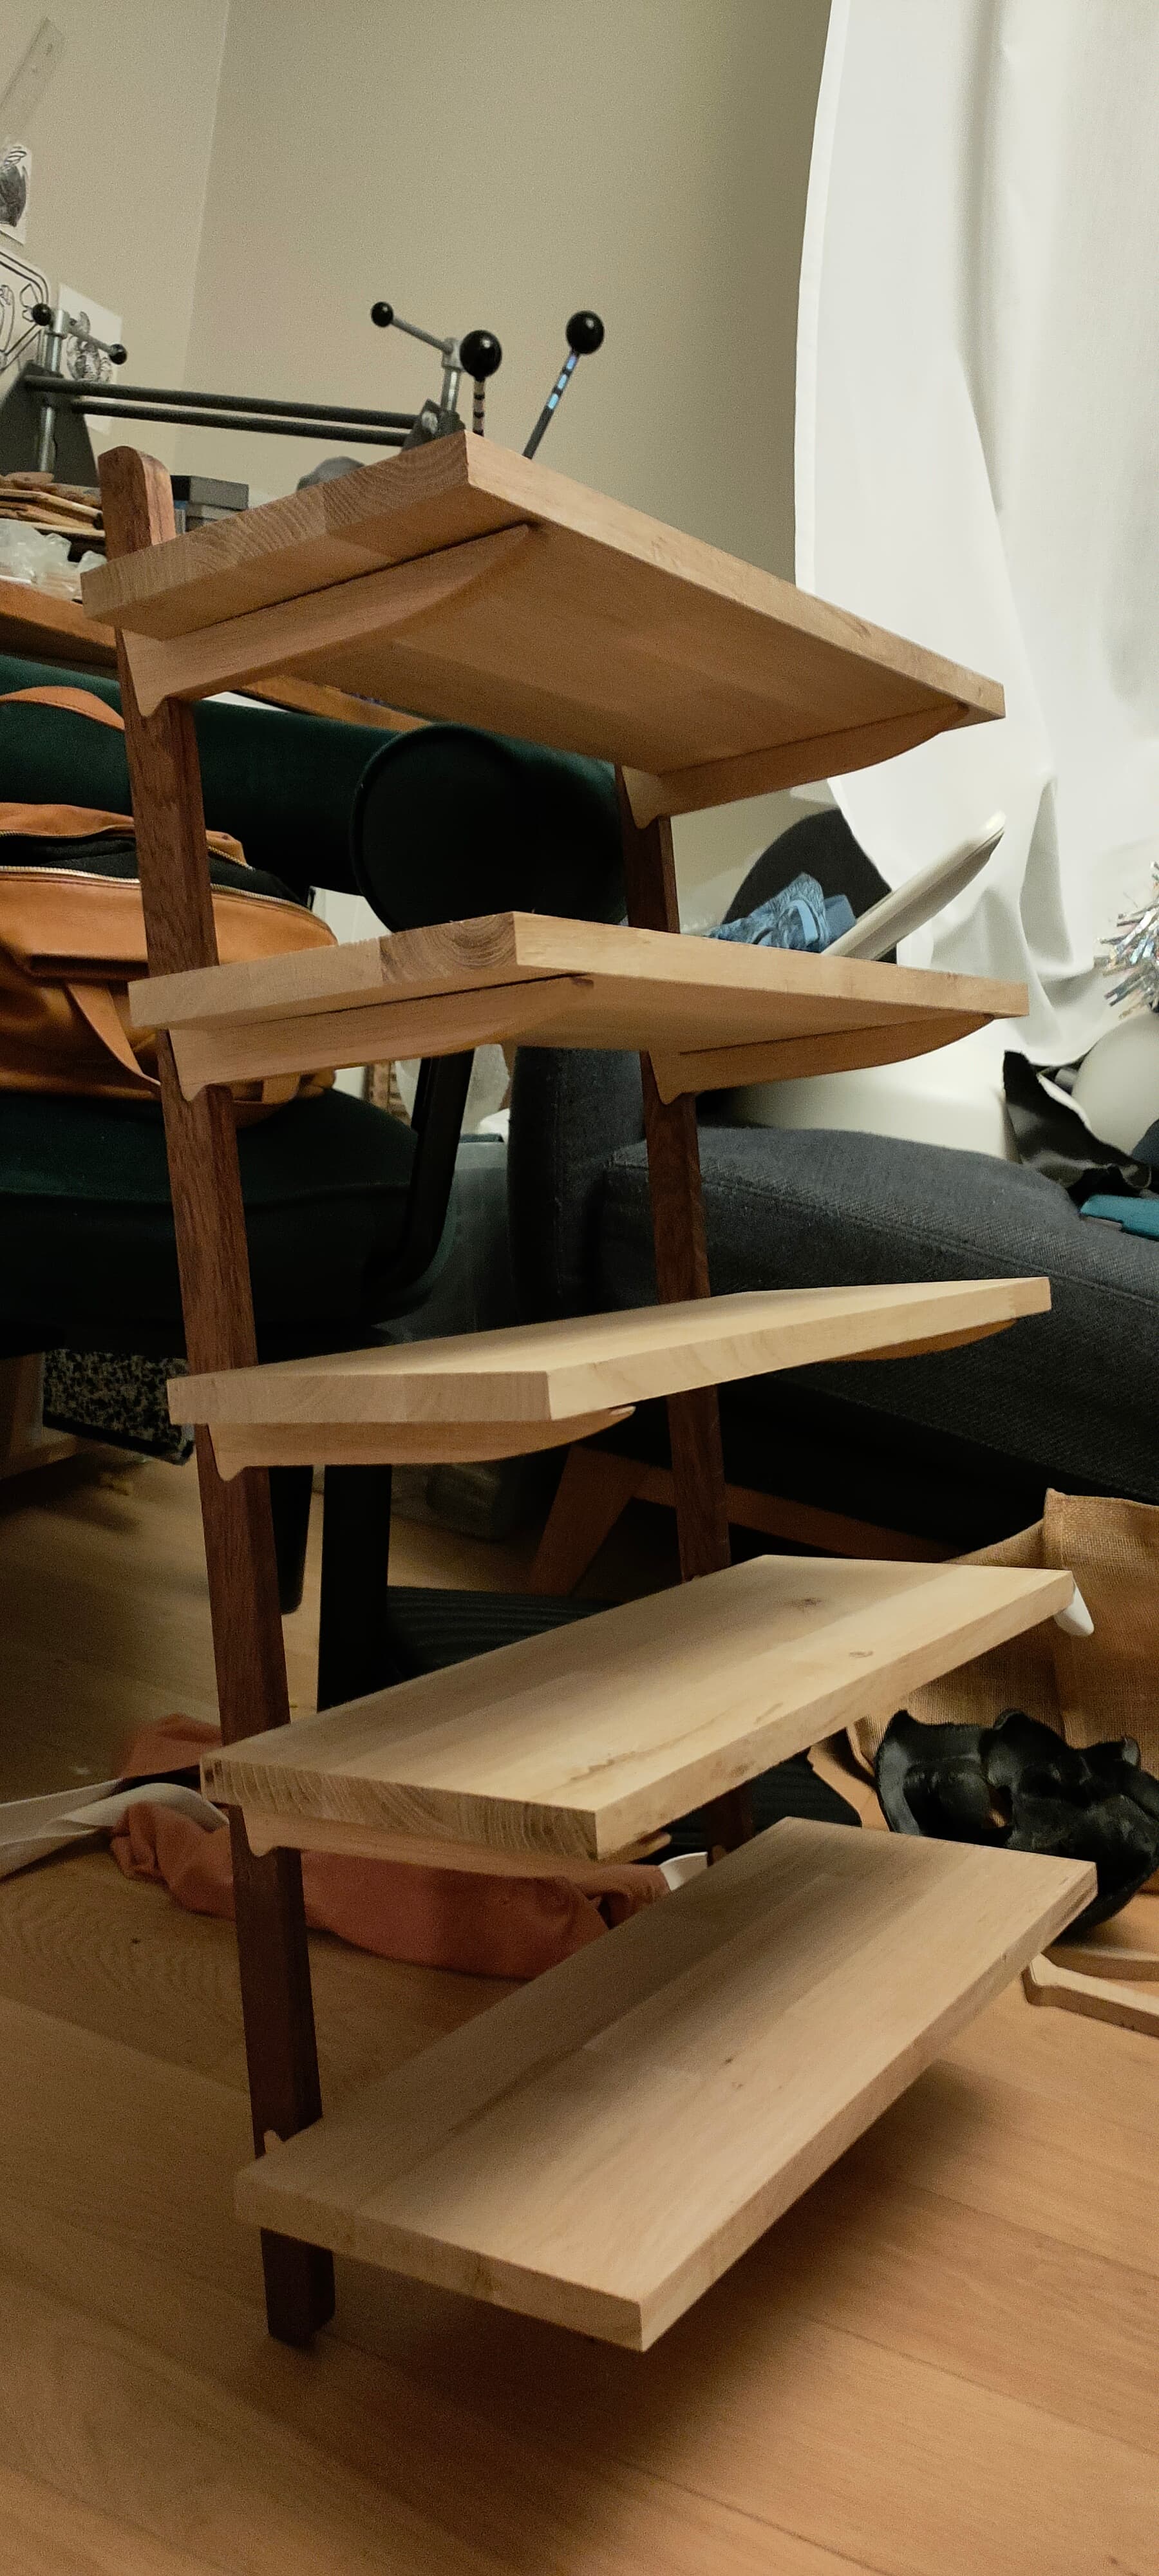
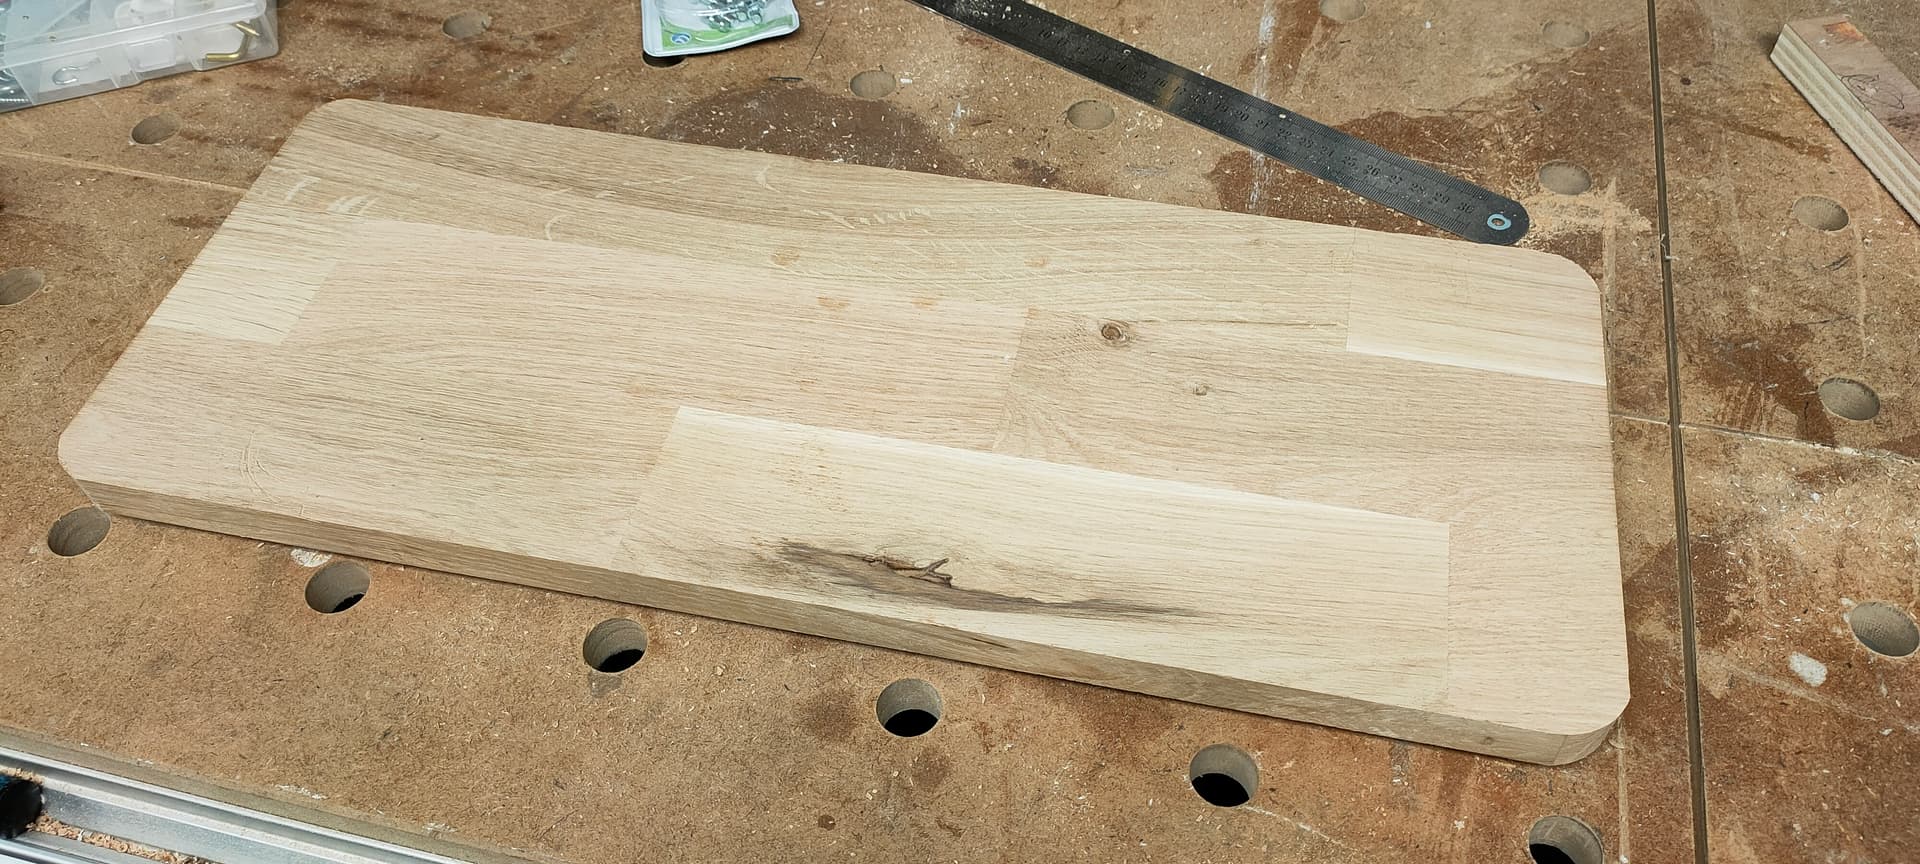
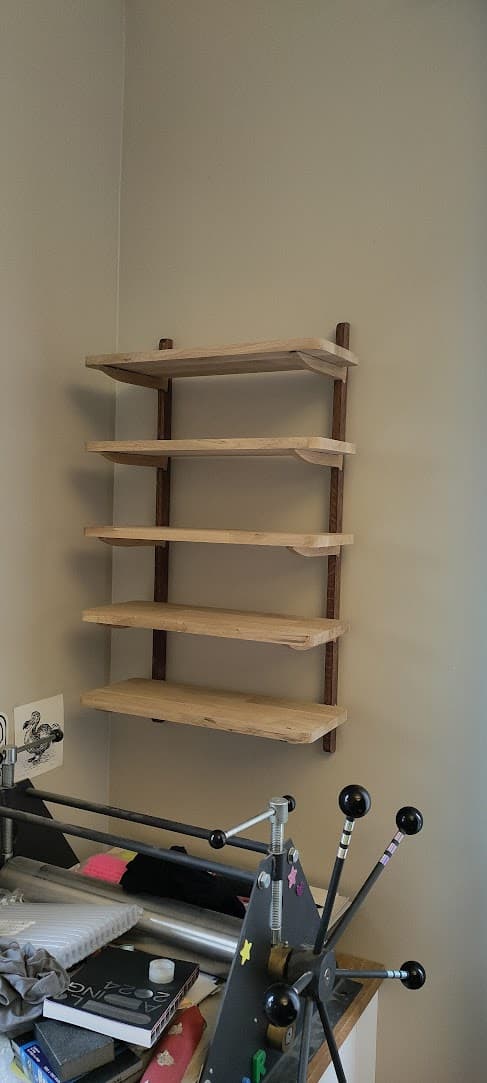
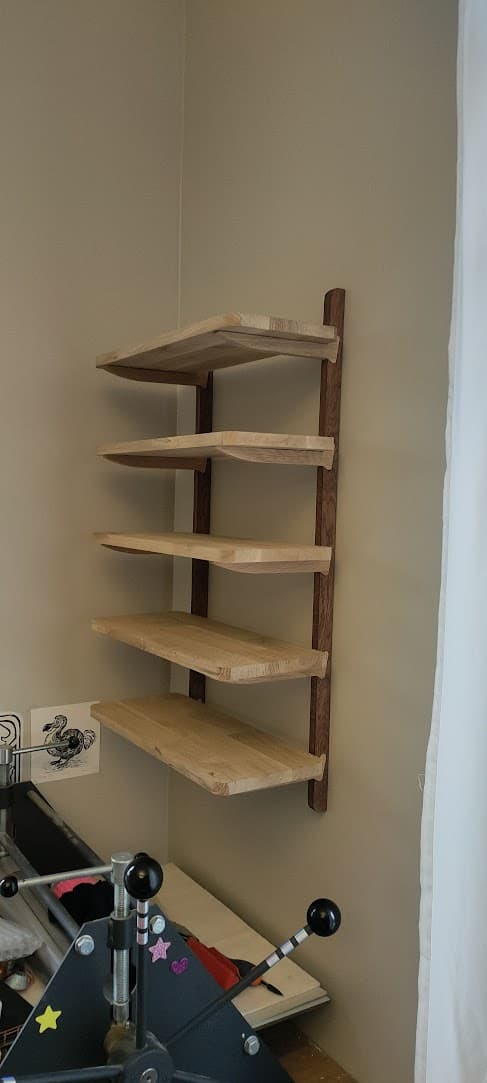
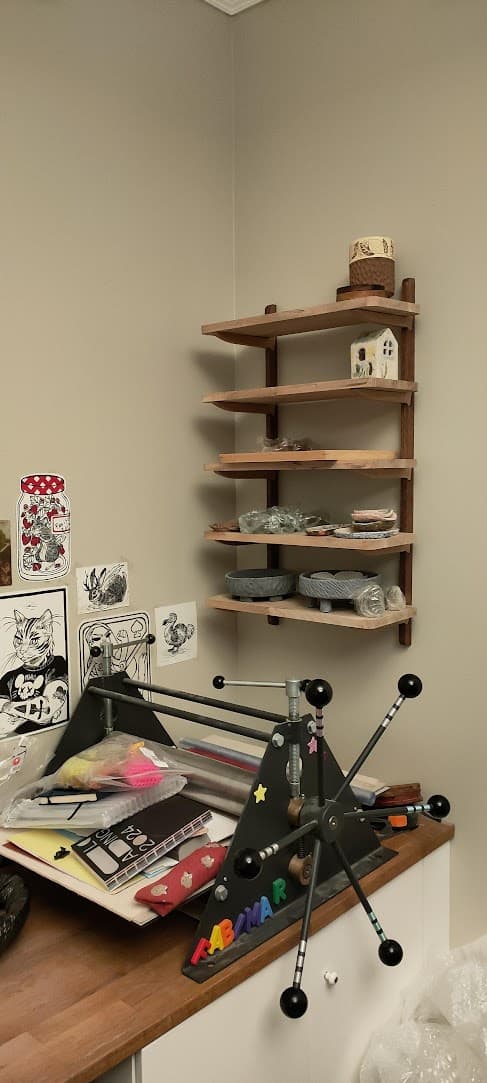
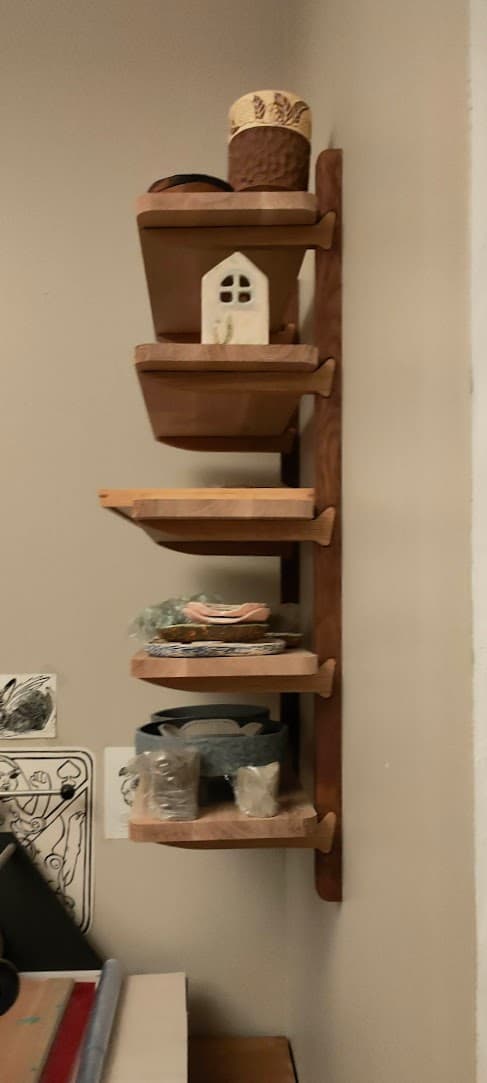
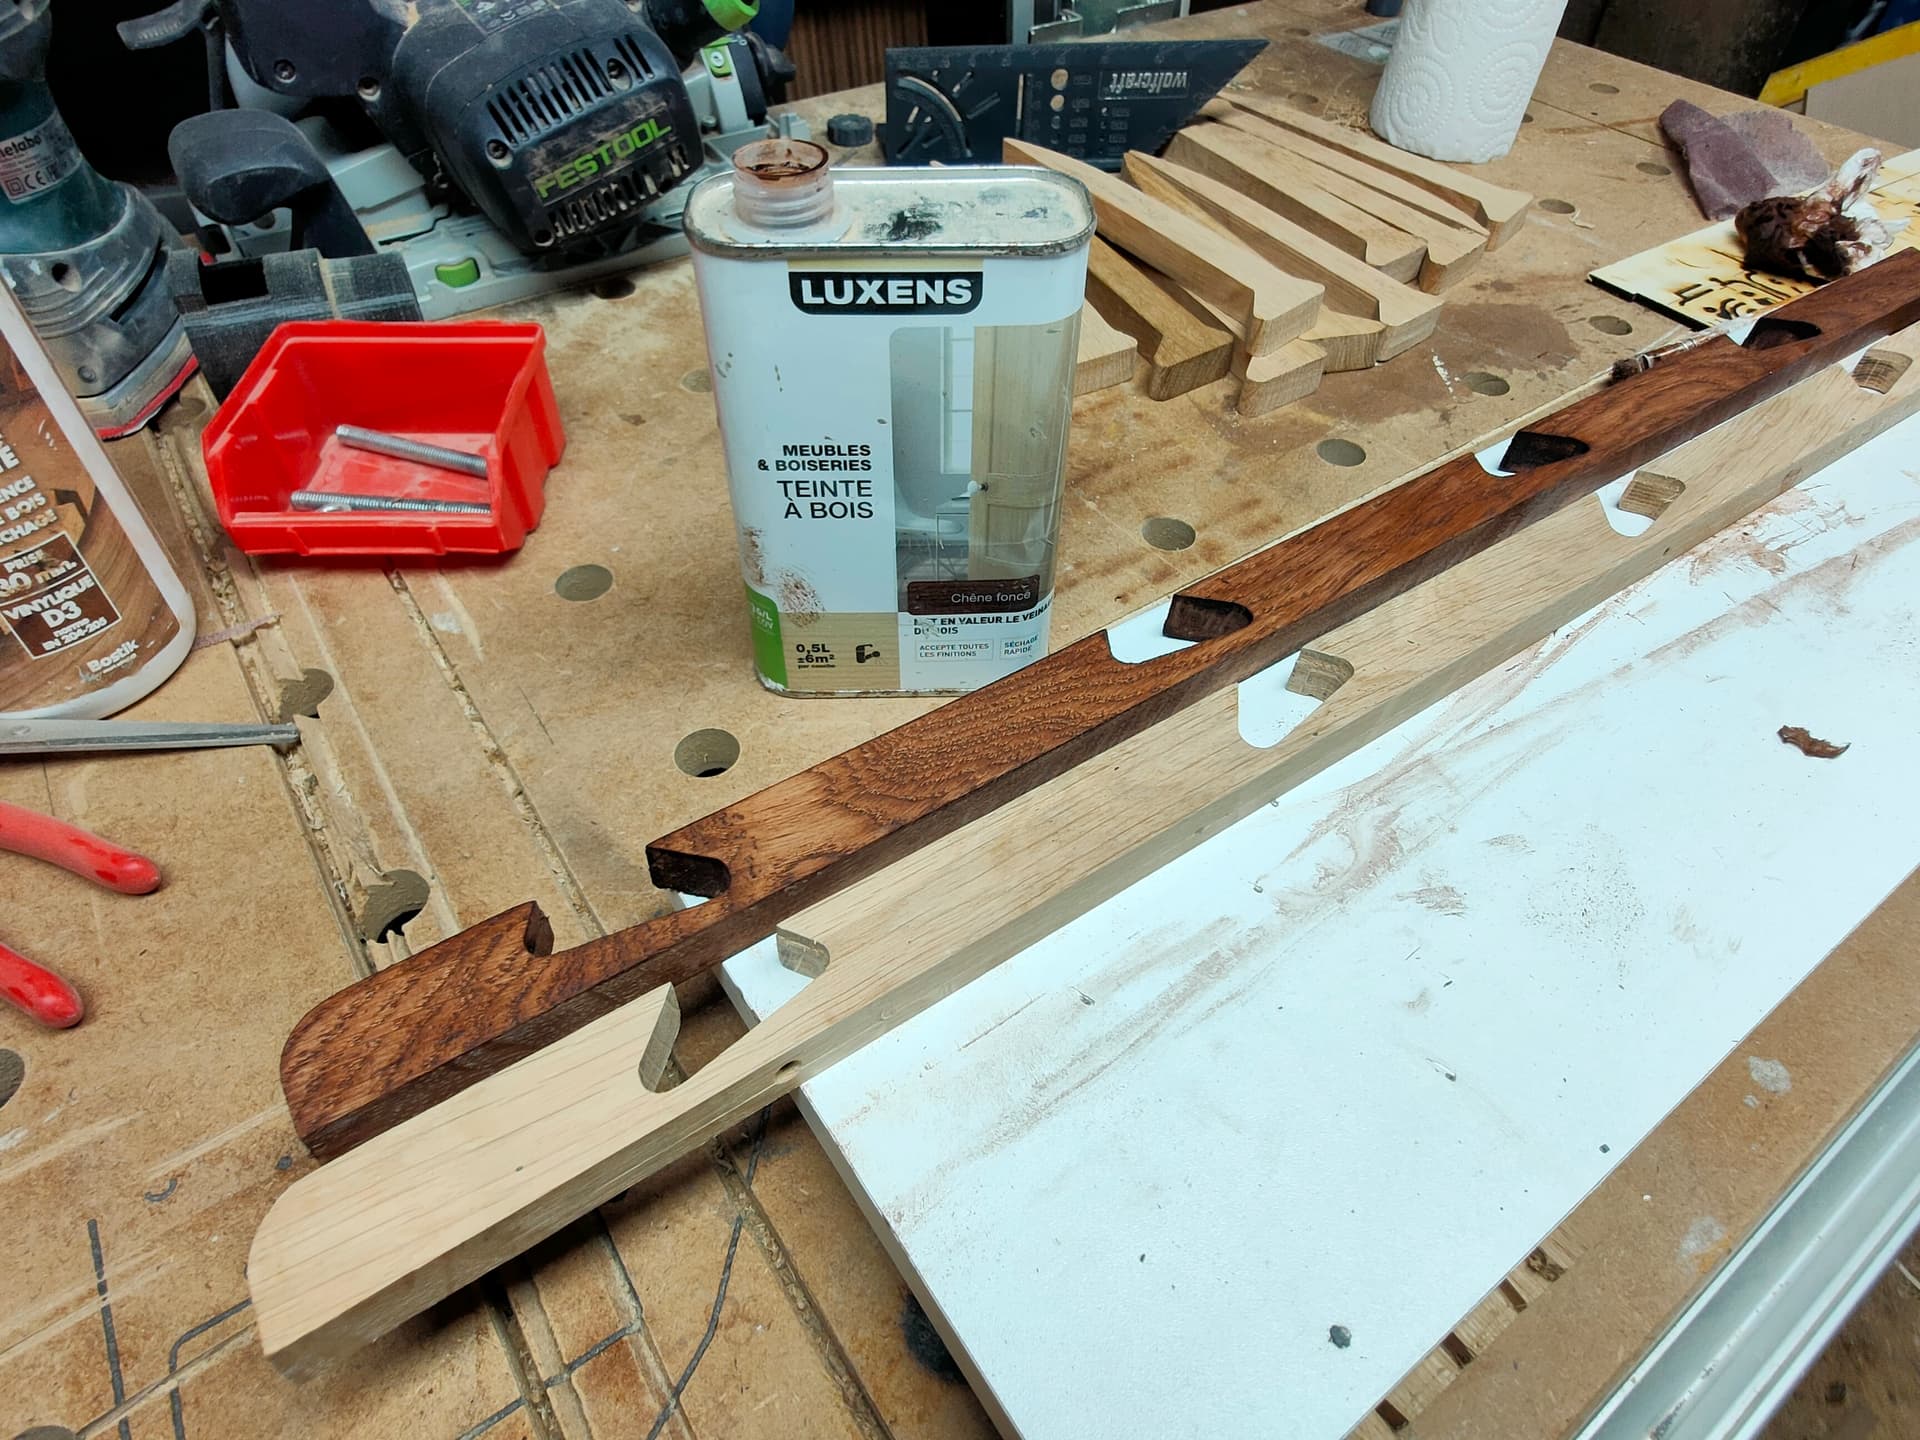
Sanded everything, tainted the back pieces dark and gave everything a quick coat of varnish

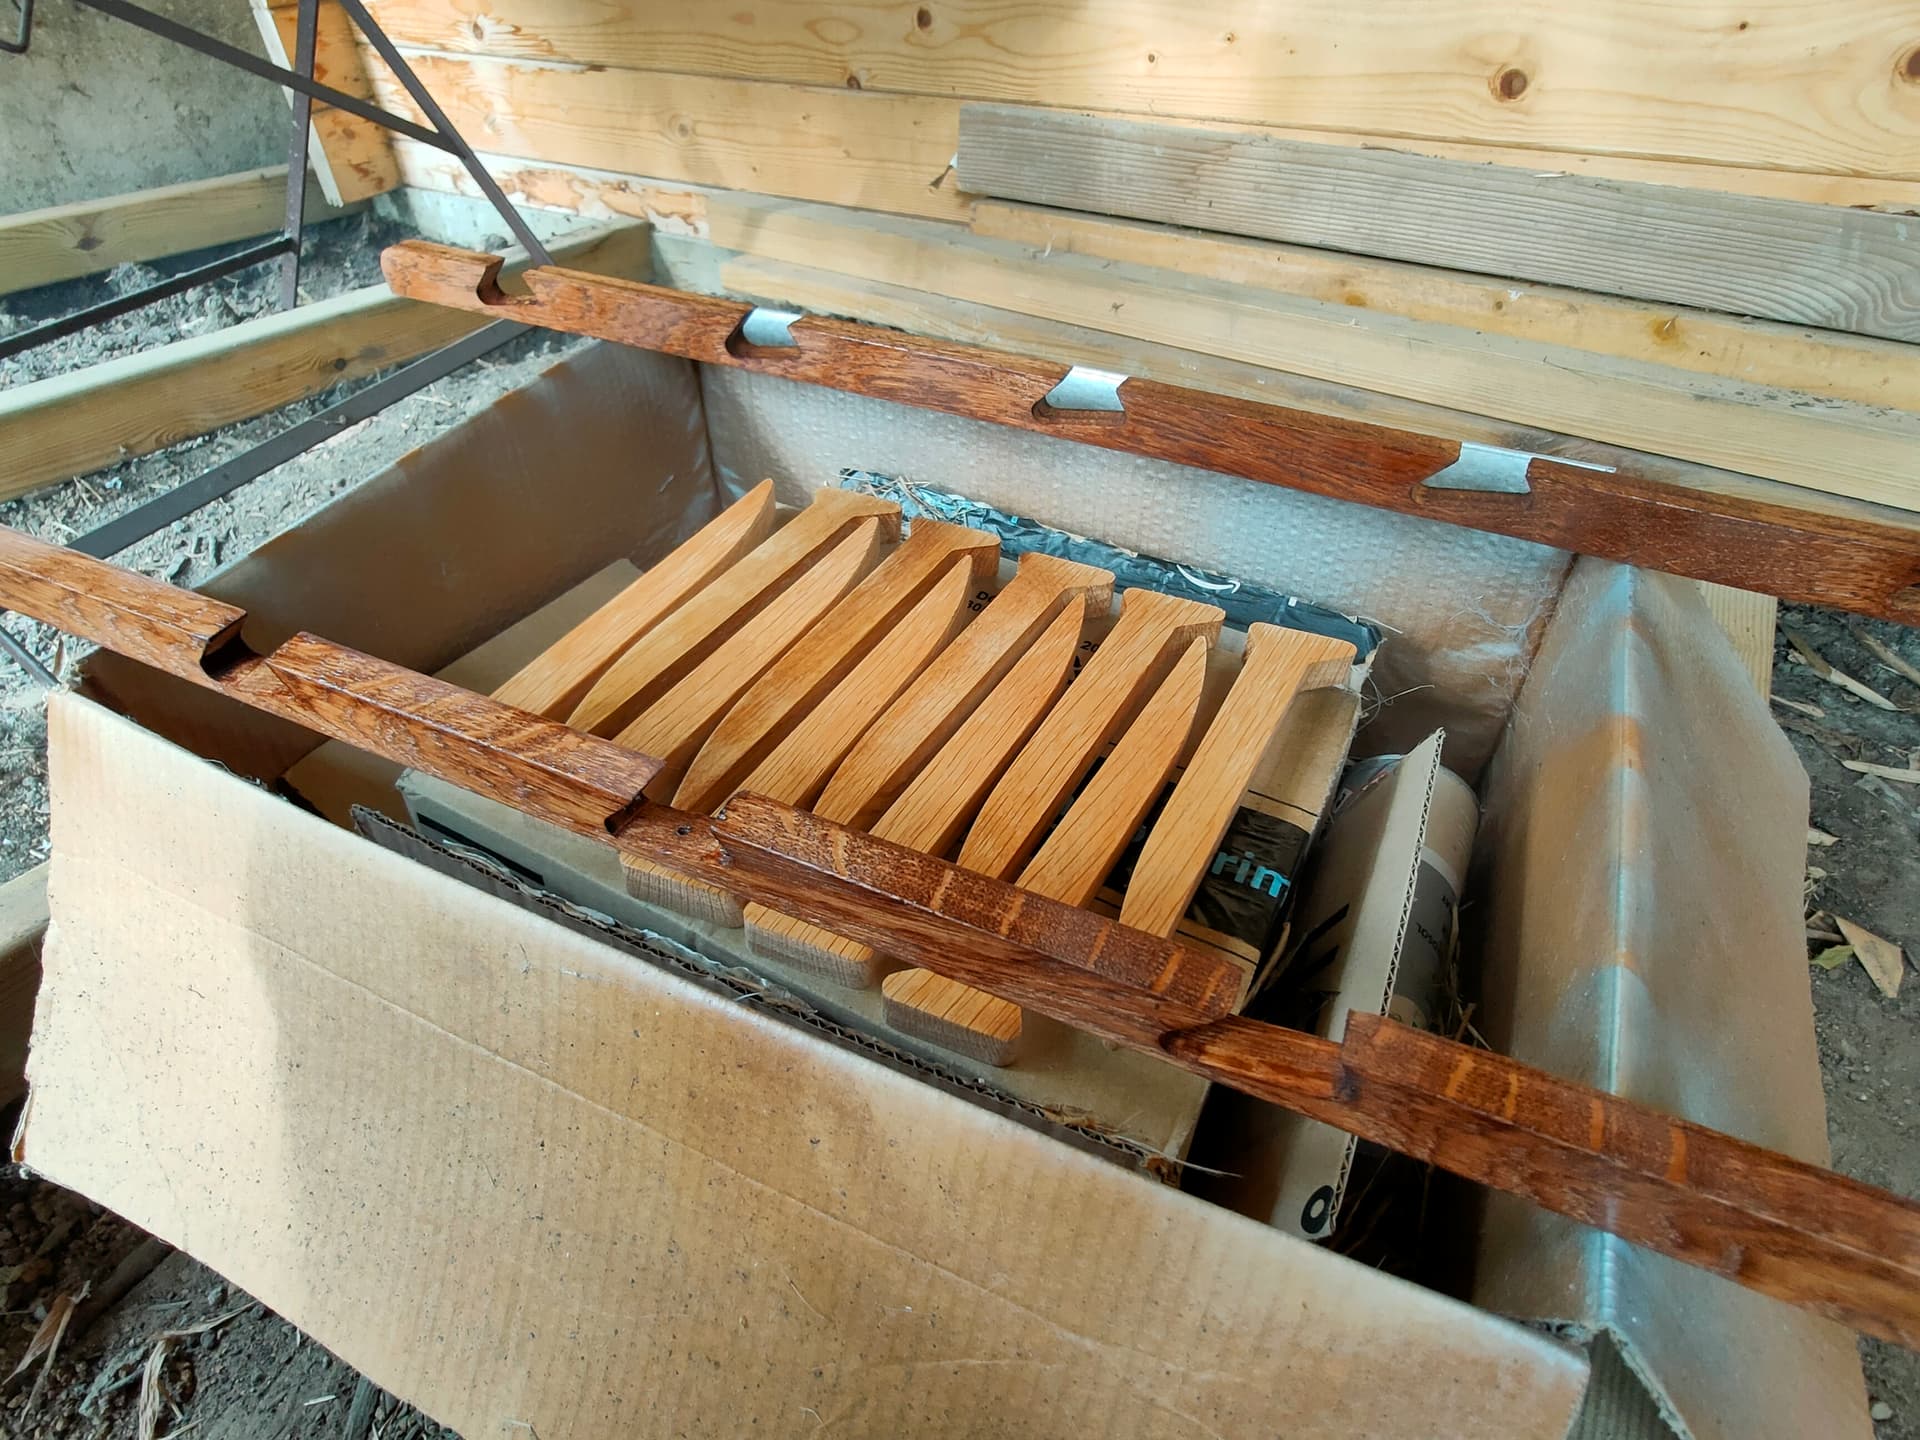
Now I need to make the shelves themselves and attach the back struts to the wall, but it will have to wait a couple weeks :slight_smile:

15 Likes

Dude, this is so much smarter than what I did (Wooden shelves)…

I wanted them to hold some weight so I went for the classic form. But really, I’ve got a CNC. I could have made some like you that hold the weight without the need of doing holes on the boards. Great idea!

3 Likes

Didn’t see this one! I love the CNC joinery mixed with traditional woodworking

5 Likes

They look fantastic - I’m glad to see I’m not the only one 3d printing router templates! I think if the printer couldn’t do anything else it would be worth having just for that.

4 Likes

Btw, quick tip on these templates : zero top/bottom thickness
This drasticaly cuts down on print time and makes no difference in usage

4 Likes

Those are gorgeous!

2 Likes

Cool! I was about to ask you how you did that. Really nice work!

1 Like

Welcome to the fixture and jigs galore!

After a small pause, I just had a bit of time to put into this…
This project just seems to have no end, really -_-

First problem, first fixture: I ordered eyelets to hang the posts to the wall… But they are too wide…
Let’s call this a nice occasion to try milling aluminium for the first time…
Drilled 2 holes with the CNC to locate the part with screws, and took very conservative cuts for this first try…

Second problem, second fixture: I need to carve a pocket in the back of the posts to mount the fixtures

I carved a long pocket in scrap and press fitted the post inside

The margin is pretty thin, about 1mm on each side, getting the fitting just right took many attempt running the file, testing the fit, zero-ing at an offset, re-running the file, rince and repeat…

Third problem… you guessed it, yet another fixture needed: the arms were all a different thickness, most of them wider than the posts
Again, I carved a pocket to fit the arm, and ran a surfacing opération on each 10 of them …


.
Do not ask me why there are two pockets in there… let’s just Say the part may be hard to remove once it’s surfaced flush with the other one -_-

Last but not least, I didn’t really though out how the tablets would attach to the arms…
I opted for small pins inserted in corresponding holes between the tablet underside and arm surface

Getting the locations right was a real challenge to begin with… making a fixture to hold a curved arm tight and flat was also quite interesting…

Setting this up took a whooping 2 hours all by itself -_-
Once again… reapeat 10 Times once setup correctly

Holes in the tablet were drilled manually using a doweling jig, and it all fits with a bit of hammer persuasion :smiley:

Finally all was ready for the first dry-test assembly

Now I need to hang this to the wall and decide if it’s sturdy enough for holding pottery, or if this was all for nothing :stuck_out_tongue:

Then I’ll need to hit it with some varnish, and maybe see if I add corner radiuses and chamfers…

8 Likes

I love everything about that post!

3 Likes

I really like the “I have a CNC so I am going to do it on the CNC” approach. :smile: It’s what I am usually doing, disregarding all easier solutions. :yum:

That’s what happened when I got my welder too.

1 Like

Just to prove you wrong!!! :slight_smile:
The jig is cnc’d though :stuck_out_tongue:

I just love how a small radius takes the final result to a whole other level

3 Likes

Yup it matches really well. That contrasting joinery is what gets me, though, I would never have thought to do it but I will now!

I must admit I did not come up with this idea, I just closely reproduced an existing designer furniture piece

The contrasting colors are “my idea” though, but it’s a pretty common trick in joinery
Even with basic wood, contrasting colors can bring a lot of flare to the project.

Also, I kinda like those “pseudo-dovetails”, they are easy to design and feel very organic with the rounded angles… the fitting can be a bit challenging though…

1 Like

Cool stuff!

That looks absolutely beautiful.

Hanged the shelves on the wall today… it has quite a bit more flex than I anticipated :confused:
I think I can still save it if I had a couple fixtures in the middle though

2 Likes

I’d put a spline down the middle of the underside of the shelves. Make them out of the same material as the shelf. Use dowels to pin it to the shelf and to the two supports on each end.

You could use the cnc to give it a slightly curved decorative edge on the bottom mimicking the curve on the supports.

I need to do the same on a shelf in my office. In my case, the shelf is just a cheap shelf and it’s sagging in the middle. I’m just going to screw a lip on the front of mine.

Alas, it’s not the shelf that’s saggin, it’s the posts that lift from th wall in the middle
I think I can add a couple fixture in the middle to lock them to the wall…

1 Like

Back to the CNC table, and we’re making two new pockets…

I didn’t carve a bespoke pocket this time… I drilled some mft-style holes on the worktop and used my clamps to hold the piece, then I eyeballed the location, using the bit to reference the side of the post and centering it from there…

Had to deepen the pockets too, as the bolt’s head wouldn’t fit under the fixture for certain pockets…

Then it’s just a matter of making a few holes in the wall, trying not to screw up the positions too much (which I did, of course…)

Now everything is firmly held to the wall and the posts don’t sag, so we can put this shelves to proper use

6 Likes