I have used F360 for a while for 3D Printing and it works fine. I have also successfully brought in the MPCNC Post Processor. But I would love it if someone could point to somewhere so I can learn how to PROPERLY create a new tool, where to establish material thickness for your work piece, how to add start and end gcodes, etc. I was able to draw the Crown with Estlcam and F360, but that is as far as I can get with F360, and I really want to start cutting something. The CNC side is completely new to me.
Thanks for the prompt response Ryan! Yes that video and others are a pretty good start, but a couple things they don’t include and I can’t find are:
They do not show cutting out a part from the stock. They are more about shaping stock that is being held. I currently want to cut out the Crown from Foamboard. I have drawn it with my MPCNC but now I want to cut it out. What operation/s is that?
I have seen it mentioned that I can add to my starting and ending gcode, such as setting all axis to zero at the current position. I know how to do that for 3D printing, but I have no idea where to do that for the MPCNC with F360 for gcode.
you don't need to add any codes. post processor issues all required codes. usually it easiest way to start is to set origin to left-near-top point of the stock. or top center of the stock. then just move the tool to this point and start the program
Thanks Guffy for your reply! I’ll try Contour or slot and see how that goes.
However, relative to starting gcode, when I used F360 to Draw the Crown, I Homed X & Y (Dual endstop config, Kit Rambo/FW) the gantry zipped quite a way from home and printed on my table board far from the paper. I posted this on FB group wan was advised to include certain code in the starting gcode. I believe I am using your Post processor. gcode of the drawing attached.
Thanks again! Bill
Edit: Neither one of these allows me to select the outer edge of the Crown to be cut from the foam board. With either I can select all the inner features, but not the outer edge.
Brilliant find @randysteck ! Looks like this is a front end for configuring the native Octoprint Custom Controls functionality which pivots around otherwise manual update of config.yaml
Will be sure to get this setup as finding Octoprint the most stable method of interfacing with my controller.
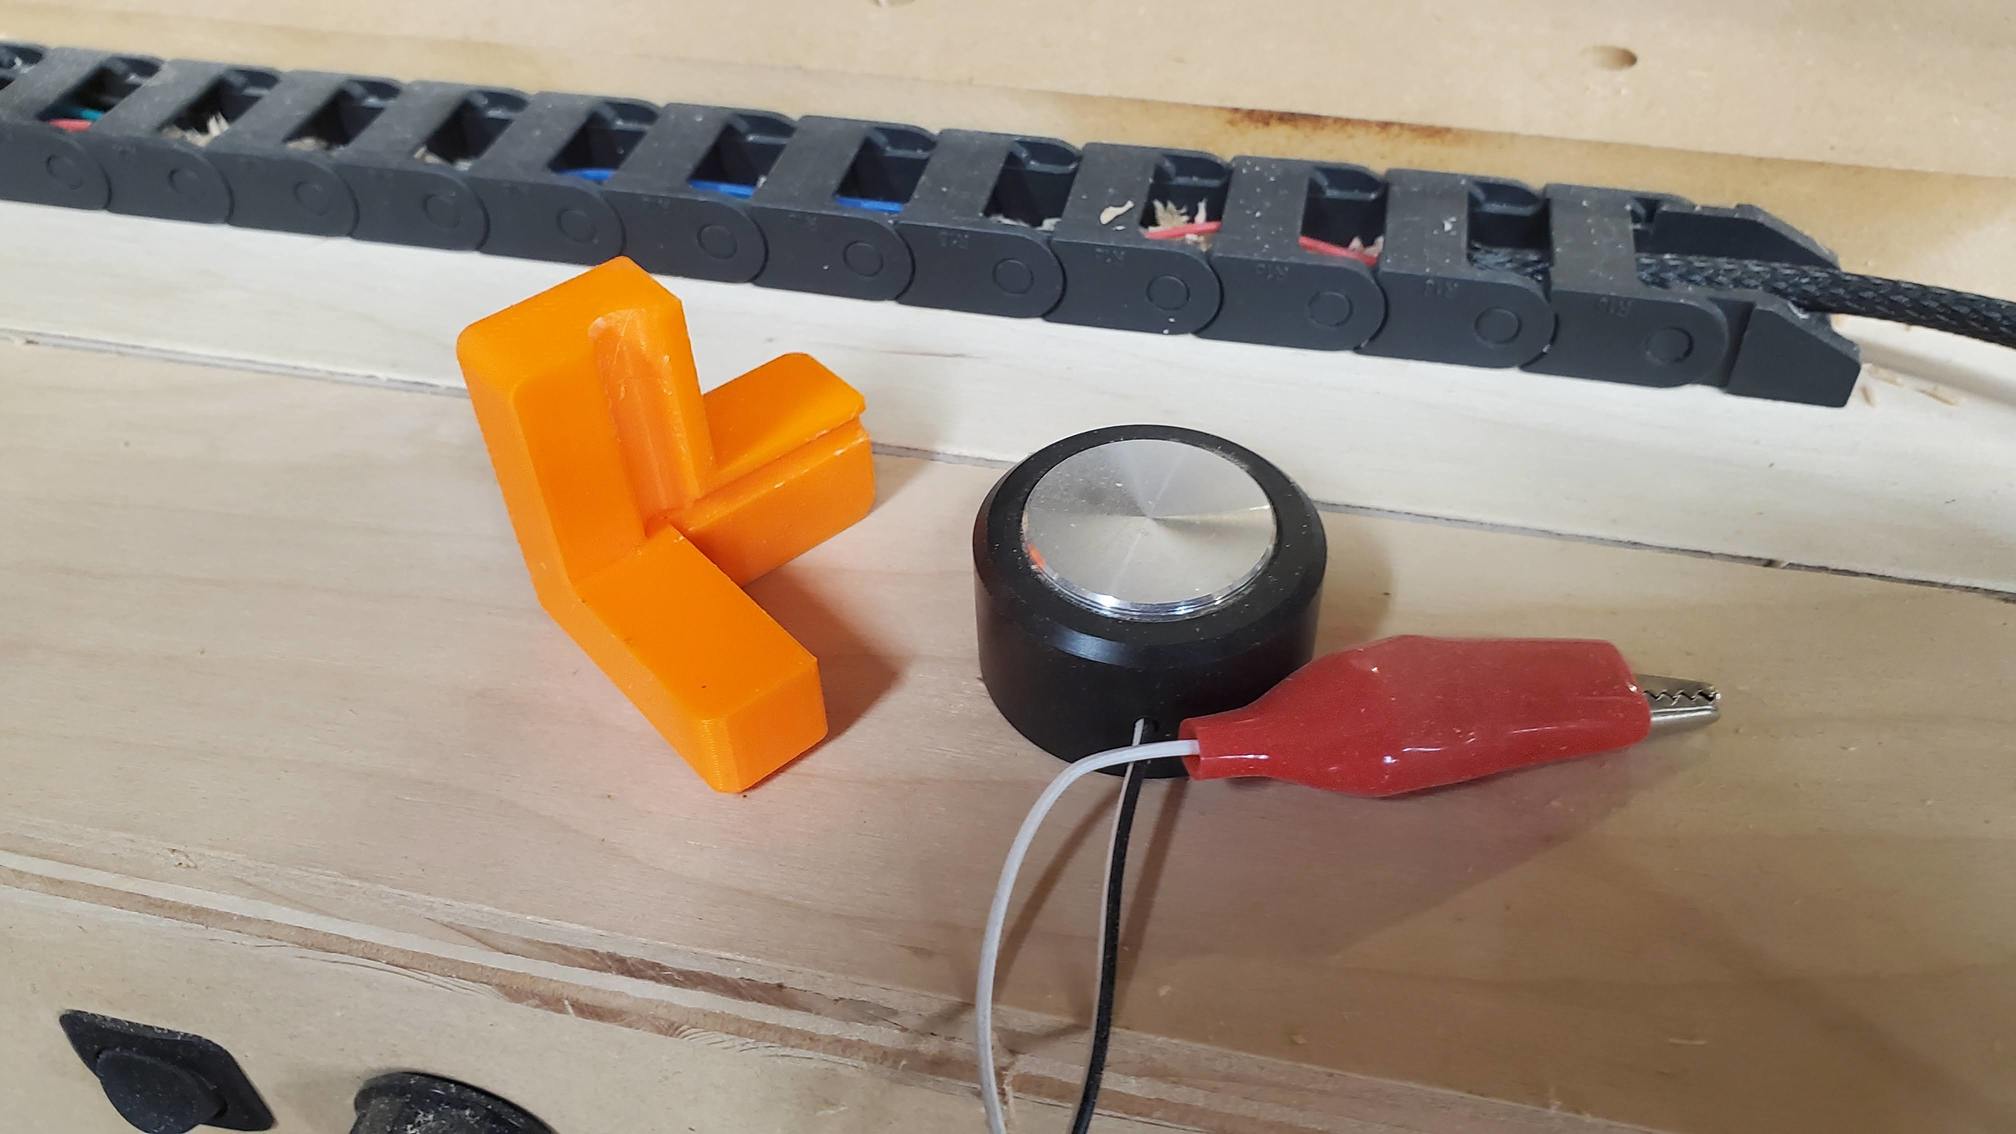
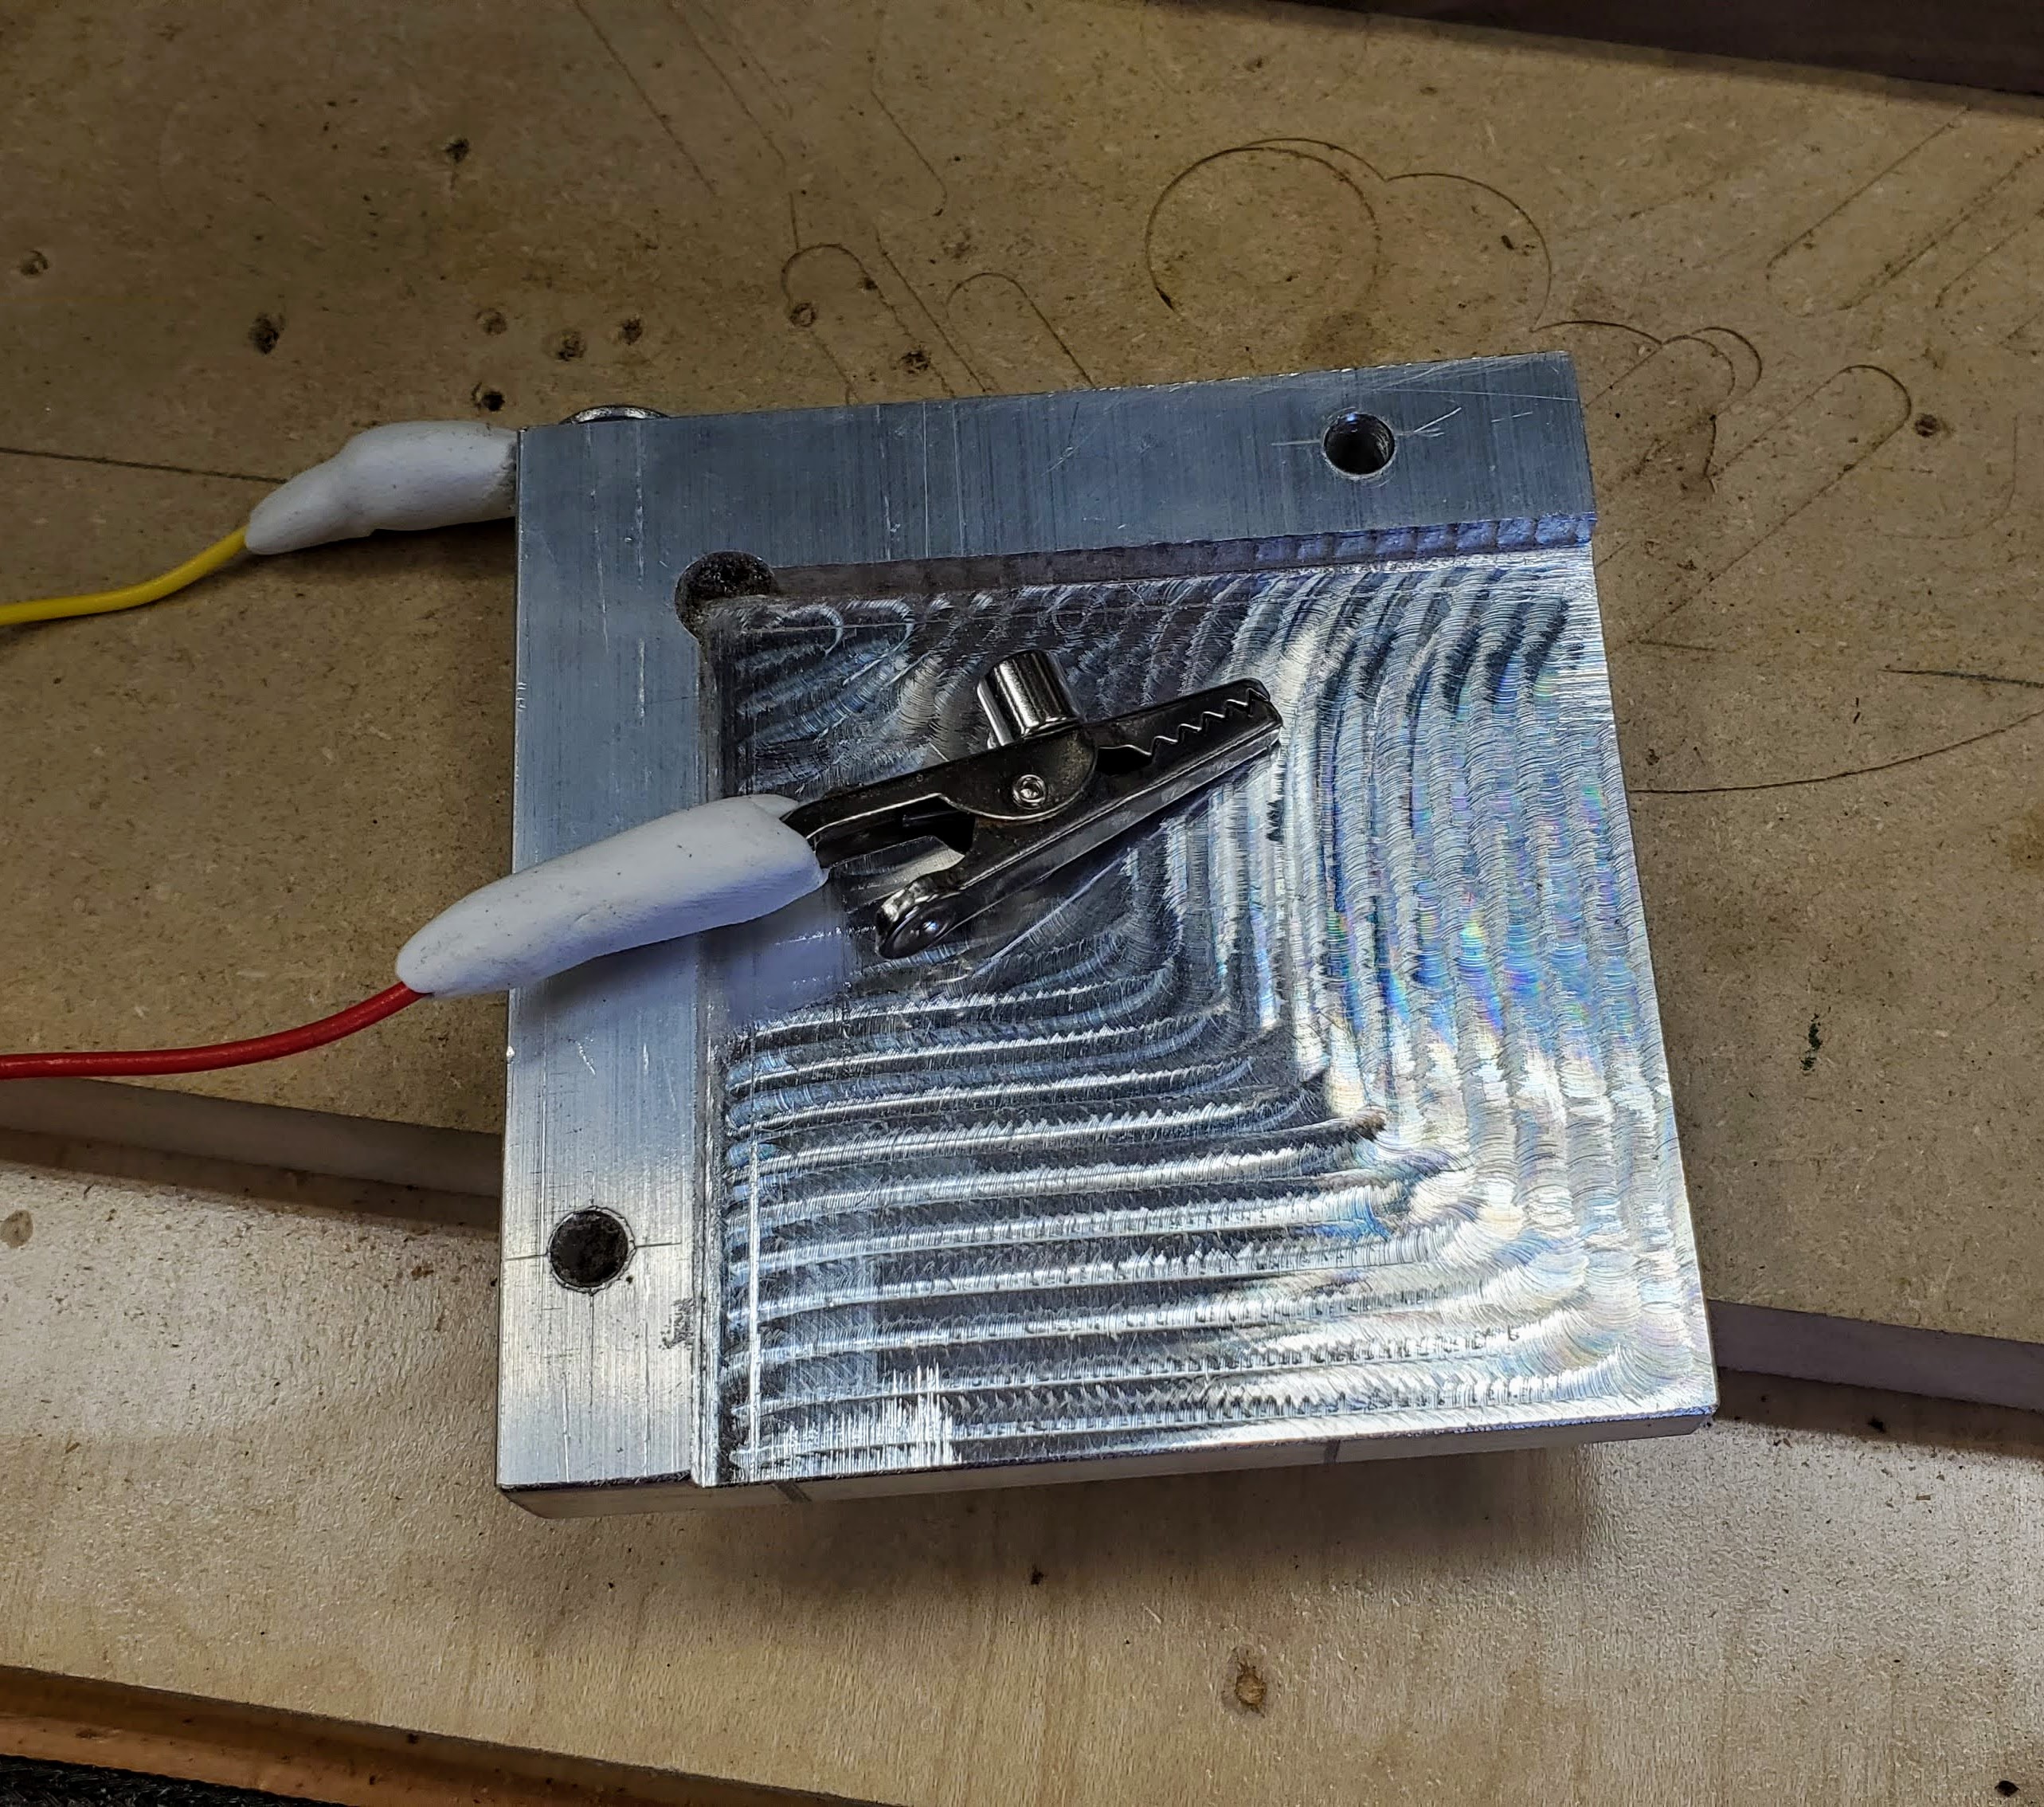
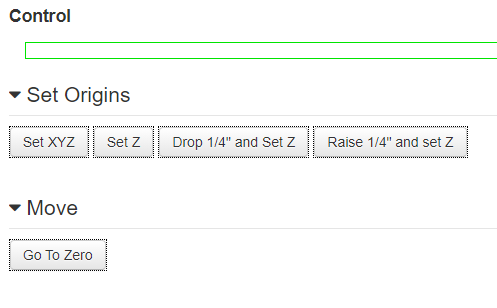
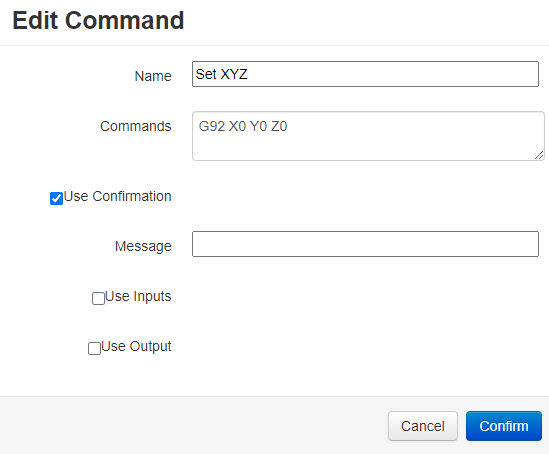
Wait, there’s more! Sorry, couldn’t resist. I’ve been using custom control for a while but recently found another interesting approach to this. I now have two CNCs and both find good use. I’ve been using the combination of a 3D printed jig to center X and Y along with a touchprobe for Z on the MPCNC, but have just finished milling a piece of aluminum for the other CNC to do XYZ probing in one operation. That operation can be assigned one key. Below find a video of the operation and the code that makes it work. I’ll be retrofitting this to the MPCNC, although I think I’ll need to combine the probes points for all three axes on my MiniRambo. (I don’t use endstops - never figured out the crying need).
I’ll program this into the custom controls just like I do now with setting zero.
Liking your work. Might just try this out myself especially with the coding you lay out there at the end.
I am being plagued by a random Shutdown during probing operations at the moment which is bugging me. I suspect that its due to spurious signals being fed back to ramps 1.4 controller; I have got some capacitors to add to the endstop input to see if I can filter out any disruptive noise.
You might want to throw a voltmeter on your power supply to see if it’s dropping for some reason. Or perhaps somehow the emergency stop is being invoked? Since the probe contacts are simple switches there’s not much that could go wrong. Hmm, perhaps you’re shorting a supply inadvertently on probing?
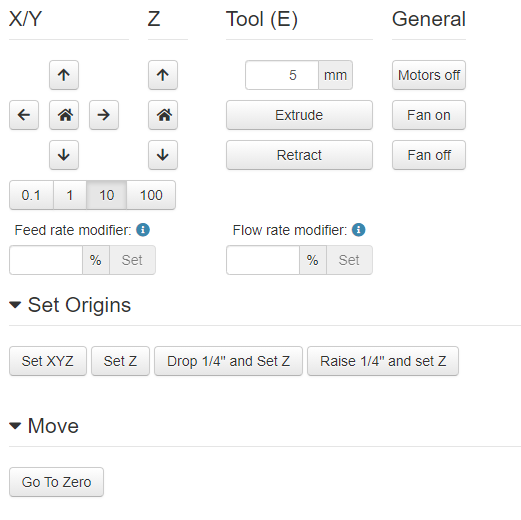
 …might even be possible to remove some of the redundant 3D printer clutter by modifying the config.yaml