Web Enabled Sand Table

Hello Folks,
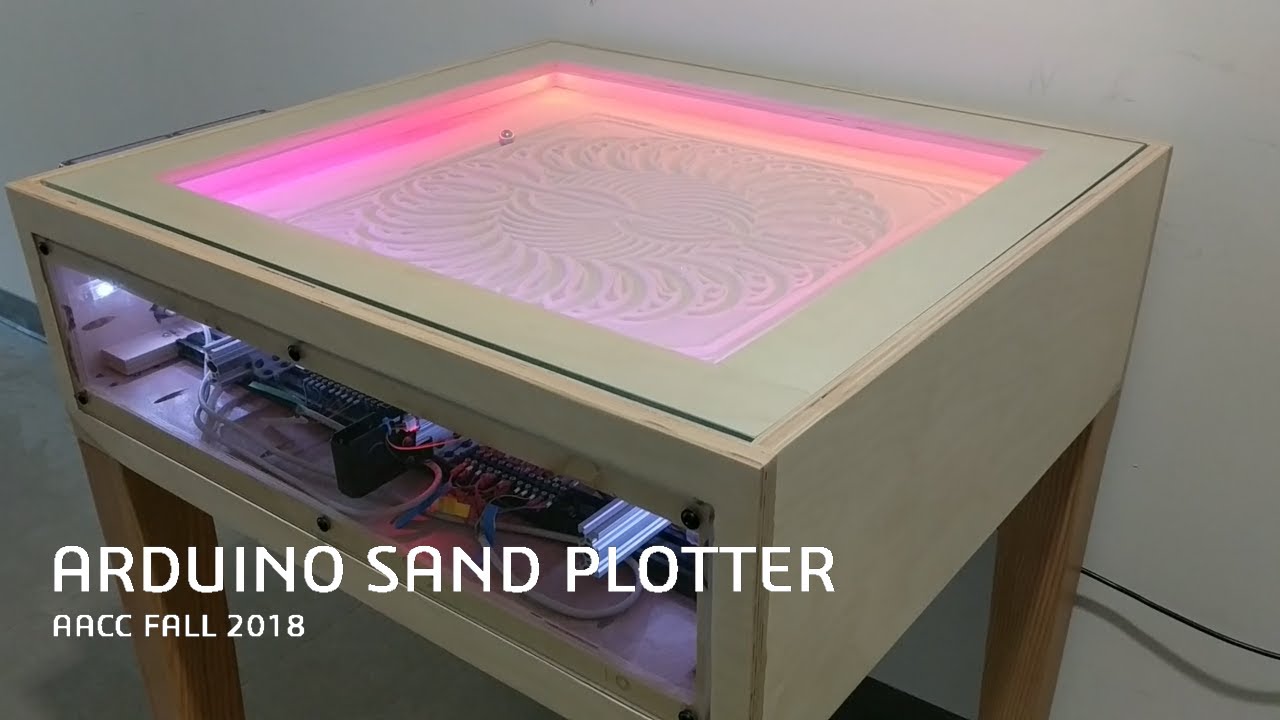
Hope you are all keeping well. We made a sand table in 2018 with major help from you lads which I appreciate.

I have another group of students working on REV 2 of the design which I will share when its done. Its going to be much easier to slide out the mechanism to work on if needed but the main thing I would like is to have the table to be web enabled. For example -

  1. Someone would be able to load up a website from a QR code and pick which pattern the machine completed
  2. It would be great if we could have a little app with a joystick on their phone to control the ball in real-time?
  3. We could access sand table controls and any error logging ?

At the moment - we are playing around with an ESP32 with Adadruit I/O connected to GRBL board driving the steppers. Sorry for the ramble - do you folks know of anyone whos done good work in this area that we could piggy back on. Any advice or suggestions are definitely appreciated.
Thanks again - Hope Jeff & co are keeping well.
Tim

3 Likes

I used one of the Bart Dring 2209 laser/pen controllers on one, which has a web interface to load and run gcode files.

I have another ZenXY (the beta test build for the V2) which runs a RAMPS stack and uses a V1pi to run Octoprint to manage its gcode library.

The V2 zen table is far superior, IMO.

2 Likes

Hello! That is a great table. I am sure I saw this when it came out. Very well built and bright build.

Dan has shared some good advice, let me add some to it:

  1. Grbl ESP32 by Bart Dring has been renamed FluidNC. There was just another post today asking about configuration. Maybe you two could share some of the debugging? FluidNC will let you upload gcode files (if it has an SD card), do manual control (jog left/right/up/down), play, pause home. It isn’t fancy (there is no preview, and there are unremovable Z axis buttons). But it is a great start.
  2. If you’re running a pi, v1pi would work, but I would recommend trying the octopi image first. Octoprint is very reliable. It also won’t have image previews and it has a lot of 3D printer buttons on it. But it will also allow you to upload files, you can extend it, or delete stuff if you write plugins for it. It can connect to grbl machines, so the fluidNC board would still work for this.
  3. There is a project by @texx called “sandypi” that runs on a pi similar to octoprint. It is much less mature (a few dozen users, at most). But it is shooting to be great for sand tables. There are image previews and some slick features. IIRC, it can also connect to grbl machines. So the fluidNC board is again a good choice.

If you have any students that are interested in writing a web interface for the machine, then it is worth looking into the api for octoprint and fluidNC. It may be that some student with JavaScript knowledge can make a nice static page that connects to one of those as the back end, and just provides a neat front end for sand machines. I can dream about that, anyway :slight_smile:.

5 Likes

Thanks Jeff and Dan. Hope you lads are keeping well. You’ve given us a bit to research and check out. None of us in the group would be a strong programmer to say the least. We’ll certainly post whatever we create. I was going to ask - in the last design our board holding the sand would flex and bow. We are currently testing using a 1/4 sheet of glass - Is there a reason that no one seems to use glass as a base?
Tim

1 Like

Mine is using glass. It isn’t huge. But when I made a prototype with hardboard, the hardboard sank.

I think glass is a winner. I don’t know how big or thick it can go.

I am using 1/8" hardboard, and it doesnt sag, but it’s also not large, 350mm by 570mm.

In my case it’s basically that I built it from relatively inexpensive stuff. An Ikea LACK coffee table with a UTRUSTA glass shelf serves as the basis for the machine.

I would be ok with using glass.

One thing I would say, 1/4" is pretty thick. The magnetic field strength is inverse square, so the thicker the material of your table bottom, the weaker the force holding the steel ball in place. 1/4" gap is a quarter of the strength of a 1/8" gap. There is also a bit of an air gap between the magnet and the botton, and some thickness for the table media (sand or baking soda). The closer you can get the magnet to the ball, the more.precisely and faster ypu can move it.

Can I ask you lads one more question - my students are having a hard time with the optical beam splitter having false positives when it is homing. Would a contact limit switch have better luck? FYI - we are using a GRBL board.
Thanks for any help. We will make a video to show our new design ASAP.
Tim

1 Like

The optical sensors are usually pretty good, but you should try to keep them out of stray light.

Mechanical stops work ok, but since the machine goes through the home position often, and personally, I found the clicking noisr distracting.

1 Like

Hope you lads are keeping well. I havent given up on the sand table - Im fortunate to have a bit of spare time this summer and have been playing around with it. I will upload everything Ive done in a month or so.
I do have some more questions though.

  1. Ive been focusing a lot more on the arduino code - ESP32 - SD card reader sending G-Code to a G-Shield on top of a UNO. I have the serial communication kinda working but it seems like it is blasting the GRBL board with a load of G-Code. Is it possible to send a line of G-code to the GRBL once it has completed each step or line. Is there a signal the GRBL sends back that says the steppers have completed the line and are waiting for the next one? I dont know it would help but Ill include the Arduino code Im working on. ANY advice is appreciated - Im not a big fan of coding TBH

  2. Does anyone have experiece with glass thickness - what seemed to work and didnt flex. Im using 0.25" now and someone said that is too thick which is fair enough. The dimensions are approx 30x30
    Tim

We found out that having the optical end stops or limit switch cables anywhere near the stepper motor cables was a bad idea. There seem to be too much interference causing false positives.

Weird. I have mine right next to the stepper motors with the cables tight together, and I’ve never noted a false positive from my optical stops. Same with my 3D printer. The “Repeat” printer as designed by Ryan has the optical stops on the motor mounts for 4 of the 5 motors (3 for Z and 1 for Y – the X stop is not near a motor) and again, I have the cables zip-tied together with the motor cables right near the endstop, and have never seen a false positive. Maybe it’s a weakness of the CNC shield on the Arduino? I have it working on an SKR Pro 1.2, on an Arduino Mega 2560 with a RAMPS 1.4 shield, and on 2 of Bart Dring’s laser/pen controller boards, and also on a Duet 2 Wifi. Soon to be added to the list will be another SKR Pro 1.2, and possibly an MKS Gen L v1.0.

If you’re using an ESP32 already, you might want to consider something like FluidNC on an ESP32 driven board. That gives you the web-enabled control built in, and gets rid of the serial connection.

GRBL tries to buffer as many commands ahead as it can, as does Marlin, and for the same reason, so that it can plan ahead as to what to do with the motors, so that the machine does not need to come to a complete stop after every line of Gcode. If you wait for the command to finish before you send the next one, the machine will be very jerky when in operation, because the parser will have to assume that the machine needs to decelerate to 0 speed at the end of every command. This would really suck with sandify code, because as yet, I believe that sandify only sends short straight line commands to simulate arcs.

That said, I think there’s an “ok” response that the controller sends back when it’s finished a command, so you can sort of keep track of where it’s at in the real world.

For glass thickness, the top doesn’t matter, but for the bottom, the thinner you can make that surface, the better. Magnetic force decreases as the square of the distance, so having the magnet 1/8" away from the ball will have 4X the force of having the magnet 1/4" away. This means more ability to plough through the sand medium, being able to go faster and have higher rate turns. It means higher machine acceleration and overall smoother motion.

Personally, I would recommend a maximum of 1/8" or 3mm thickness. One of my Zen tables uses 1/16" whiteboard, which gets excellent results.
1 Like

We were just talking about this the other day. @karltinsly wrote an arduino gcode sender a while ago and I just had to look up how he manages the serial connection.

Grbl has a buffer of a few lines of gcode. It will send an ‘ok’ back as soon as it has your command in the buffer. So sending the next command after you see an ok should be good enough to keep smooth operation.

The endstop nose is strange. It sounds like you need a pullup or pulldown resistor to keep the pin from floating. But we also use NC endstops in most configurations, which reduces noise by constantly sending a small amount of current.

1 Like

THANK YOU DAN & JEFF. I spent the day working the table today and made some small progress. I thought about your replies a fair bit and of course have more questions as usual.

It makes sense having a NC end stop - i think this would reduce the chance of false positives - this should be easy to change. I also bought a 1/8" mirror from home depot to play around with. Im using a 1x1x1 magnetic cube from amazon which has plenty of magnetic force. I was testing the GRBL G-Shield and for some reason the X axis driver was not even turning on which pissed me off but I ended up buying one of those FLUIDNC pen plotter boards from Bart Dring like you mentioned. Anyway here are my questions…
Does the FluidNC have a way to queue up NC files and run through them or will I need an extra ESP32 to still communicate via serial. Honestly at this stage - Ive given up on the web enabled part of the program.
Im looking for a pretty solid way to run through a homing sequence, viping sequence and then through 10 or so patterns. The machine is hopefully going to sit in community college hallway and Im just trying to automate its running 5 days a week.
Tim

Are there any rock solid sand pattern ‘controllers’ that feed the GRBL a load of NC files one after the other?

Nope. Those boards use esp3d webui. It can start a single file and play it, but not play the next one.

Nope to that too. It is a need. For sure. Here are some options though:

  1. Sandypi is an open source solution that runs on a raspberry pi. It only has a few users. So I wouldn’t call it rock solid.
  2. Octoprint is rock solid. I don’t know if there is a plugin to play a playlist or not.
  3. There may be gcode you can use to convince fluidnc to play a specific file. If you had files A, B, C. You might be able to make a main file that set up the playlist and then called “play A, play B, play C”. I don’t know if fluidnc can do that though. It might be worth asking in the fluidnc discord.
  4. The arduino nano from Karl does work to do what your asking. You don’t have to reinvent the wheel. But it is also only used by a few people. So also can’t be called rock solid.
  5. You can use a text editor, or sandify to combine many patterns into one giant pattern. AFAIK, there’s no reason you can’t have a week’s worth of pattern on one file (although sandify might be very slow). You can just add a file to another one (concatenate them). Looks making a mix tape. It would be nice to play around with the digital signals like the pause button in fluidnc to see if you can get some rudimentary hardware controls on it. I would also want it to autostart the mix tape when it boots.
2 Likes

Thank you Jeff and Dan. Definitely appreciate all your help. Im going to get Barts FluidNC working and go from there. I get impatient sometimes and think too far ahead. Anyway you’re sound lads.
Tim

2 Likes

I have a bunch of Sandify code that has many patterns appended one right after another. The files start with a homing sequence, and usually a table wipe, then go on to draw many patterns. I also have a Python script that can take several patterns and concatenate them. The python script recognizes the start Gcode which homes the machine and strips it out. It was pretty simple to write.

2 Likes

Care to share?