Watch dials (title changed)

Not sure if this is the right forum for this, so please feel free to move it, but since it wasn’t machine specific and some of the replies would (hopefully) feature things people have made…

I collect, build, and repair wristwatches as yet another hobby. Everything I have built has been from ready made parts, but I want to try making a watch dial for my next project.

There are a ton of different ways this can be done (acid etch, fiber laser, etc), but I was curious if the CNC could produce fine enough details to be among them since I have the machine already.

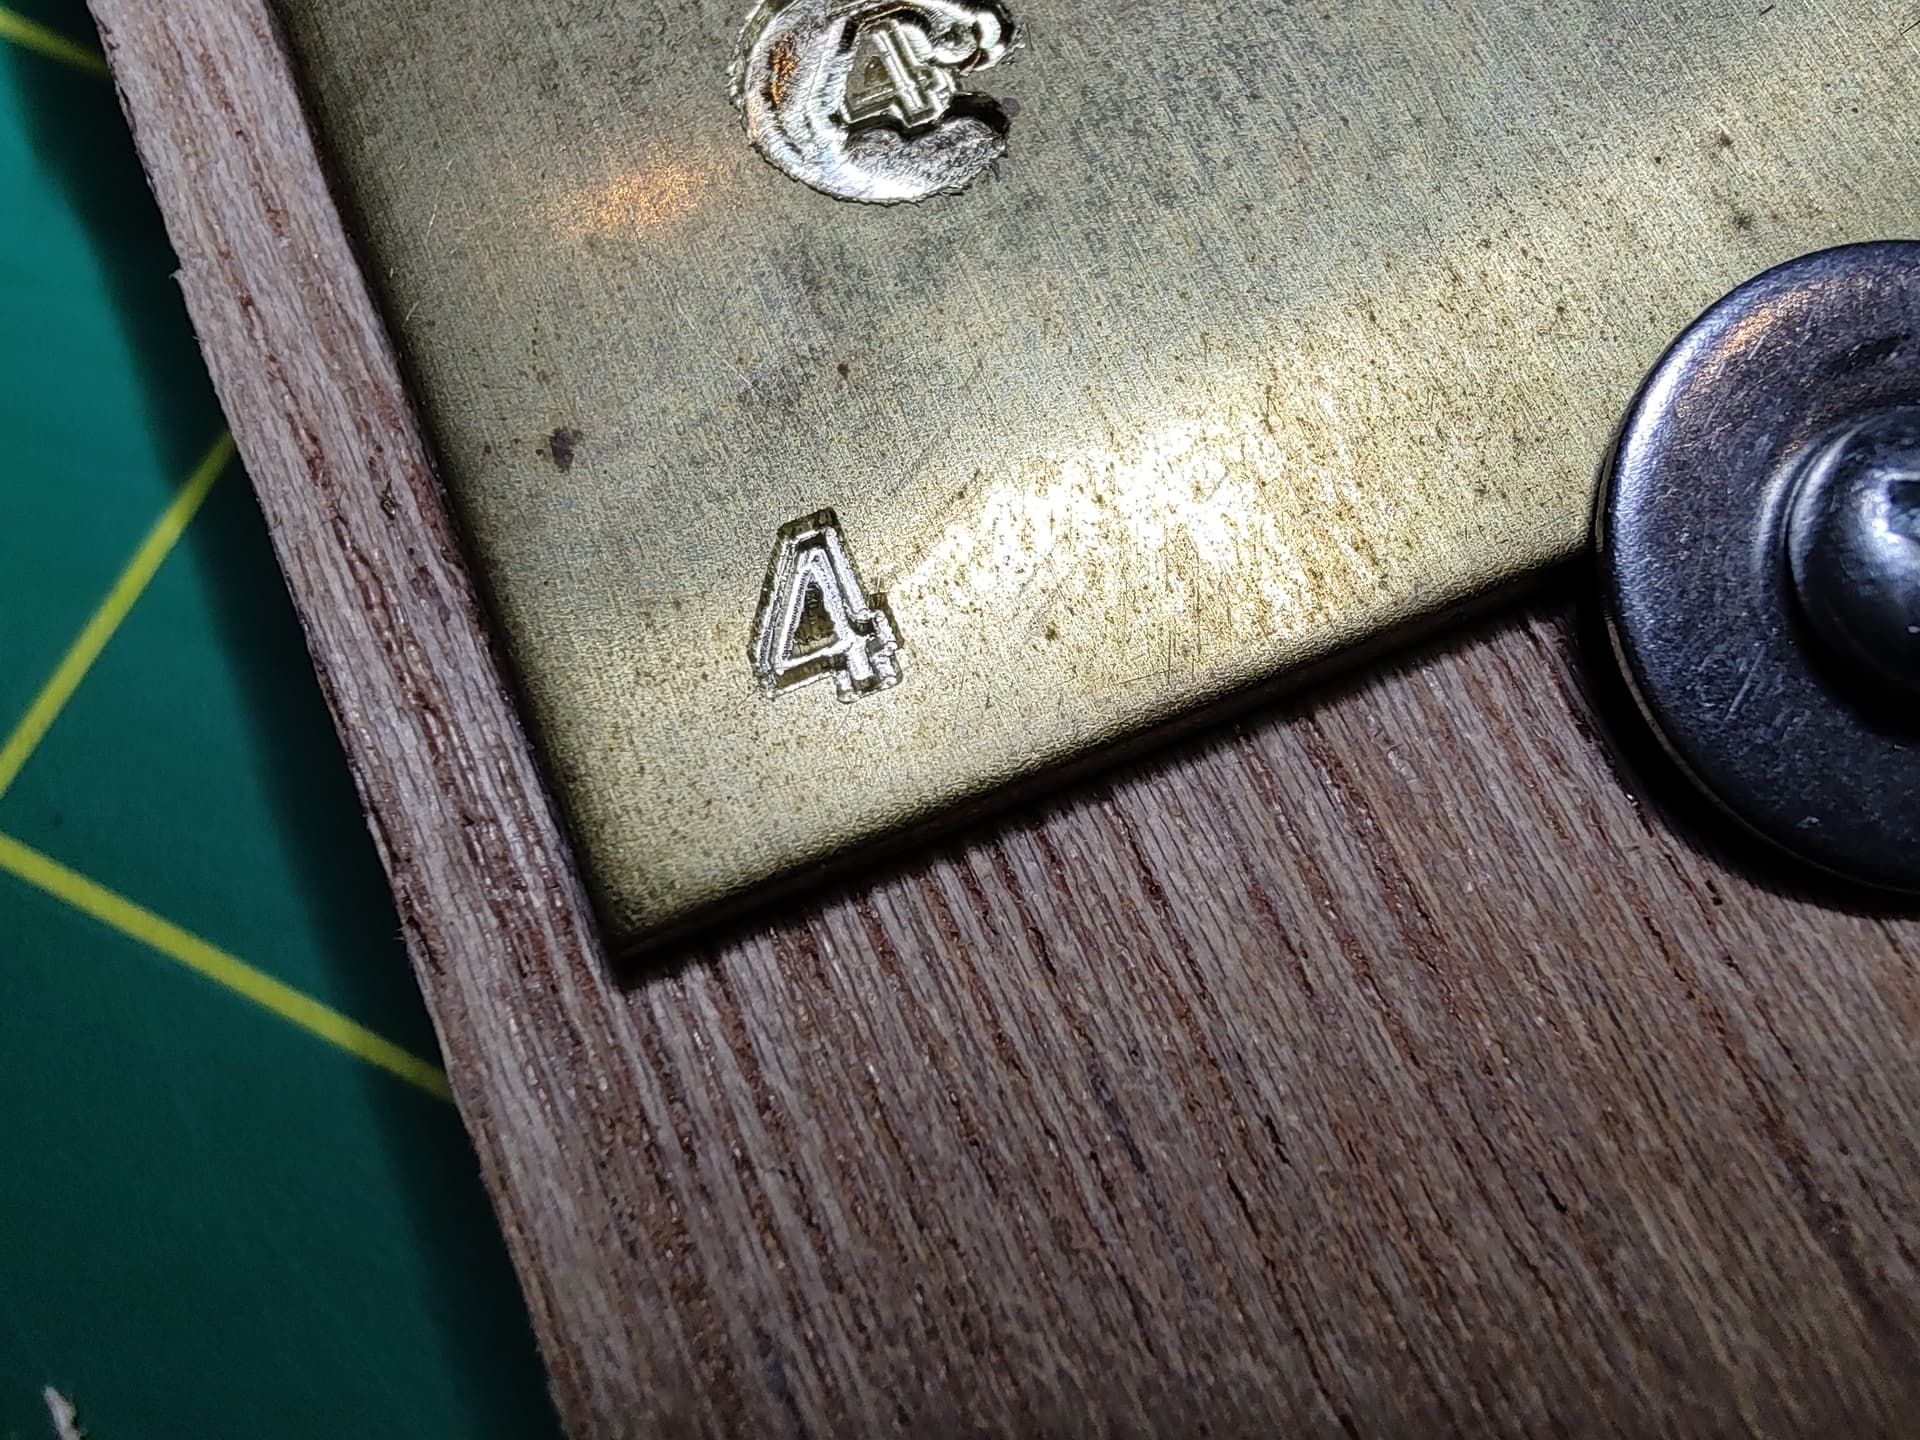
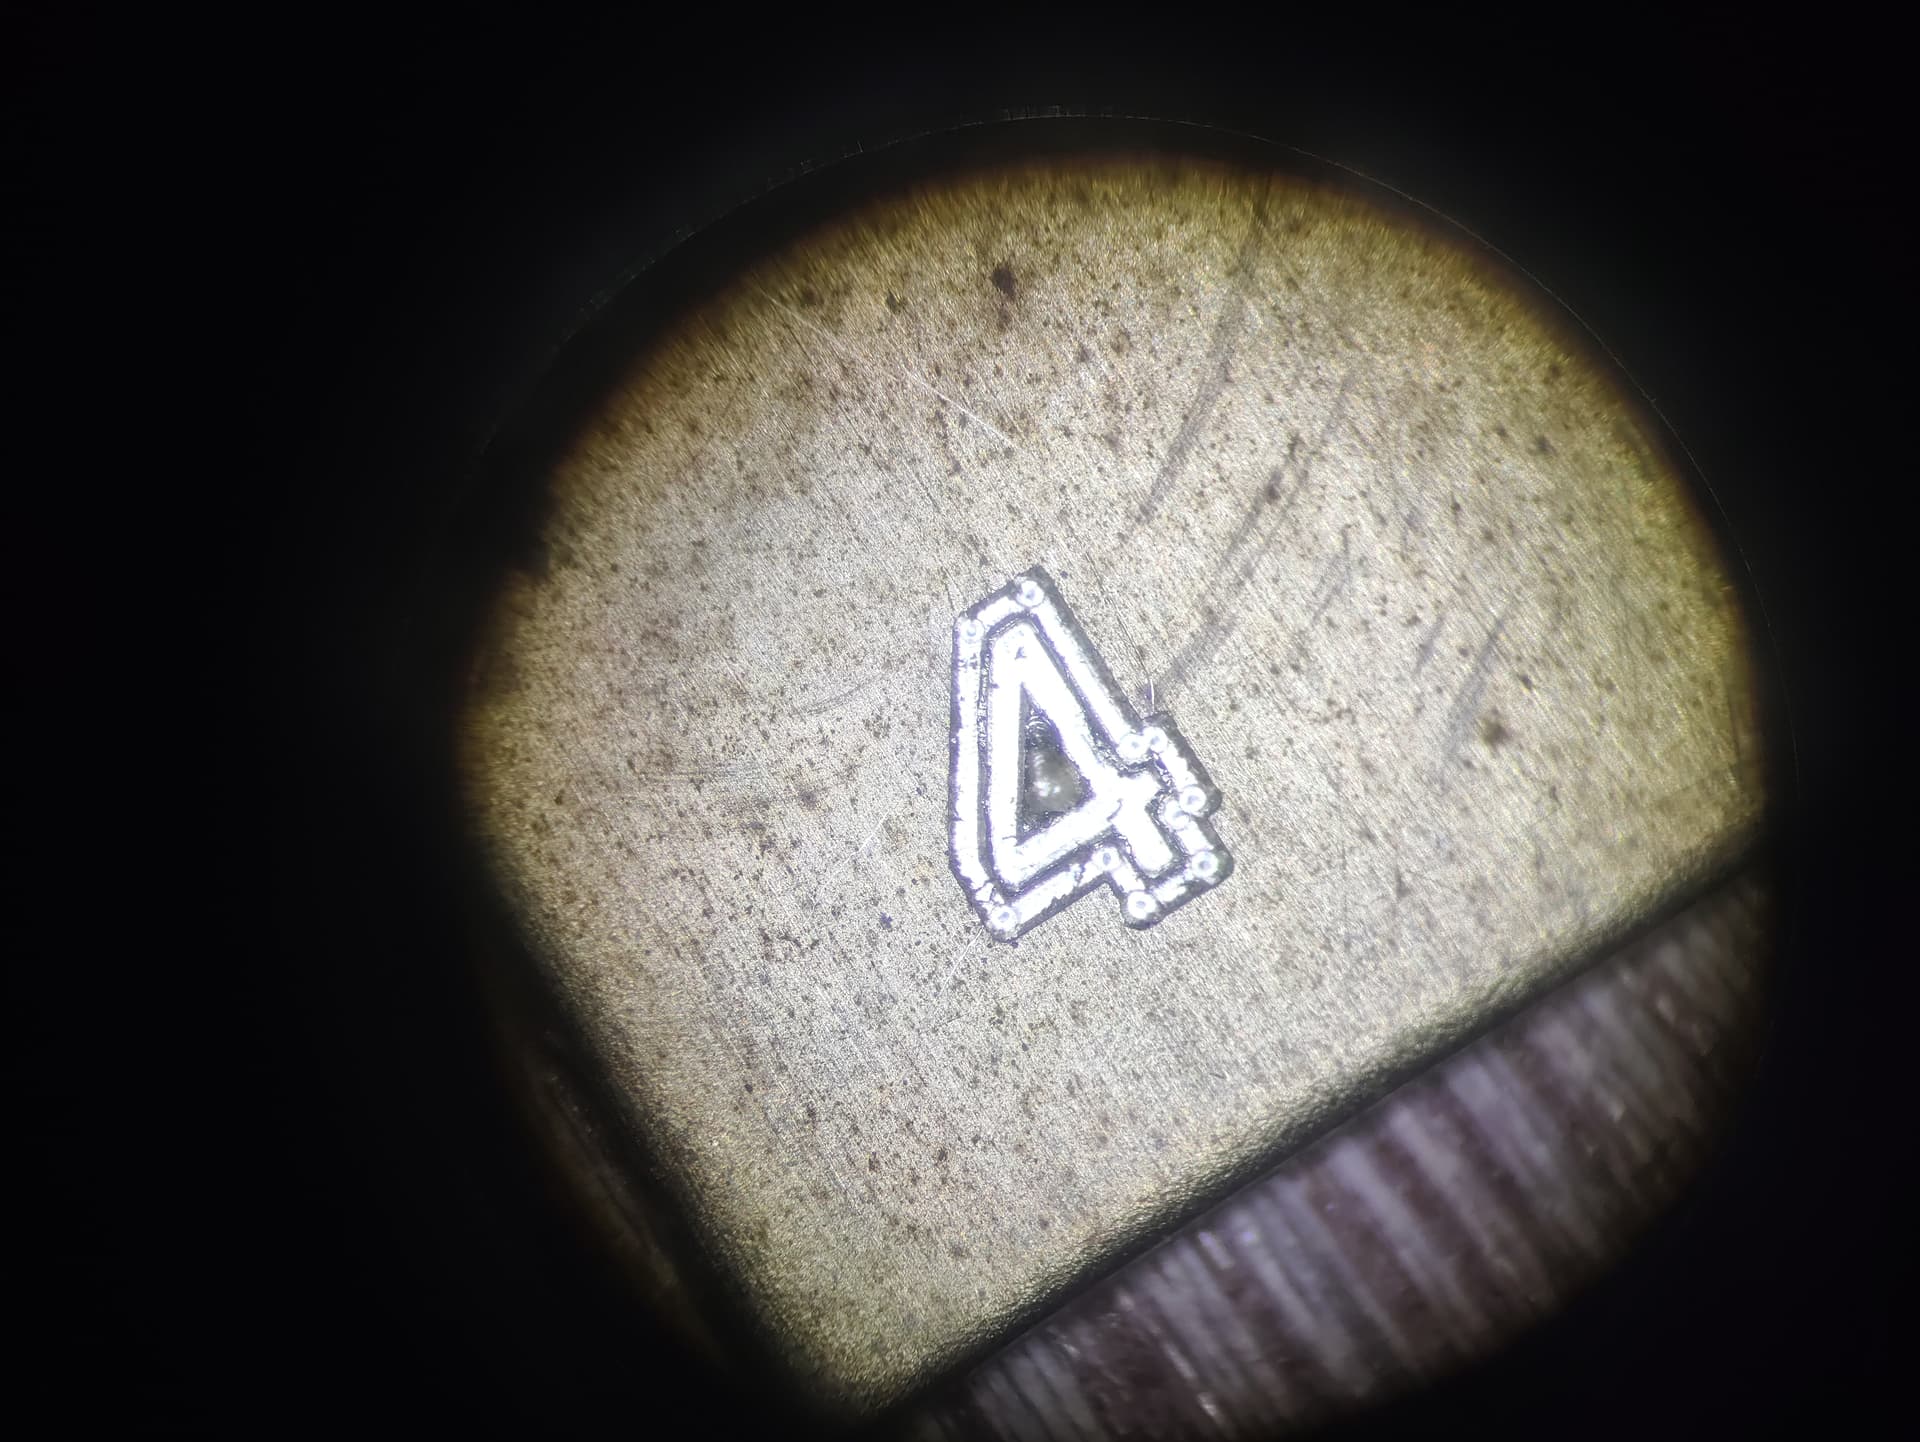
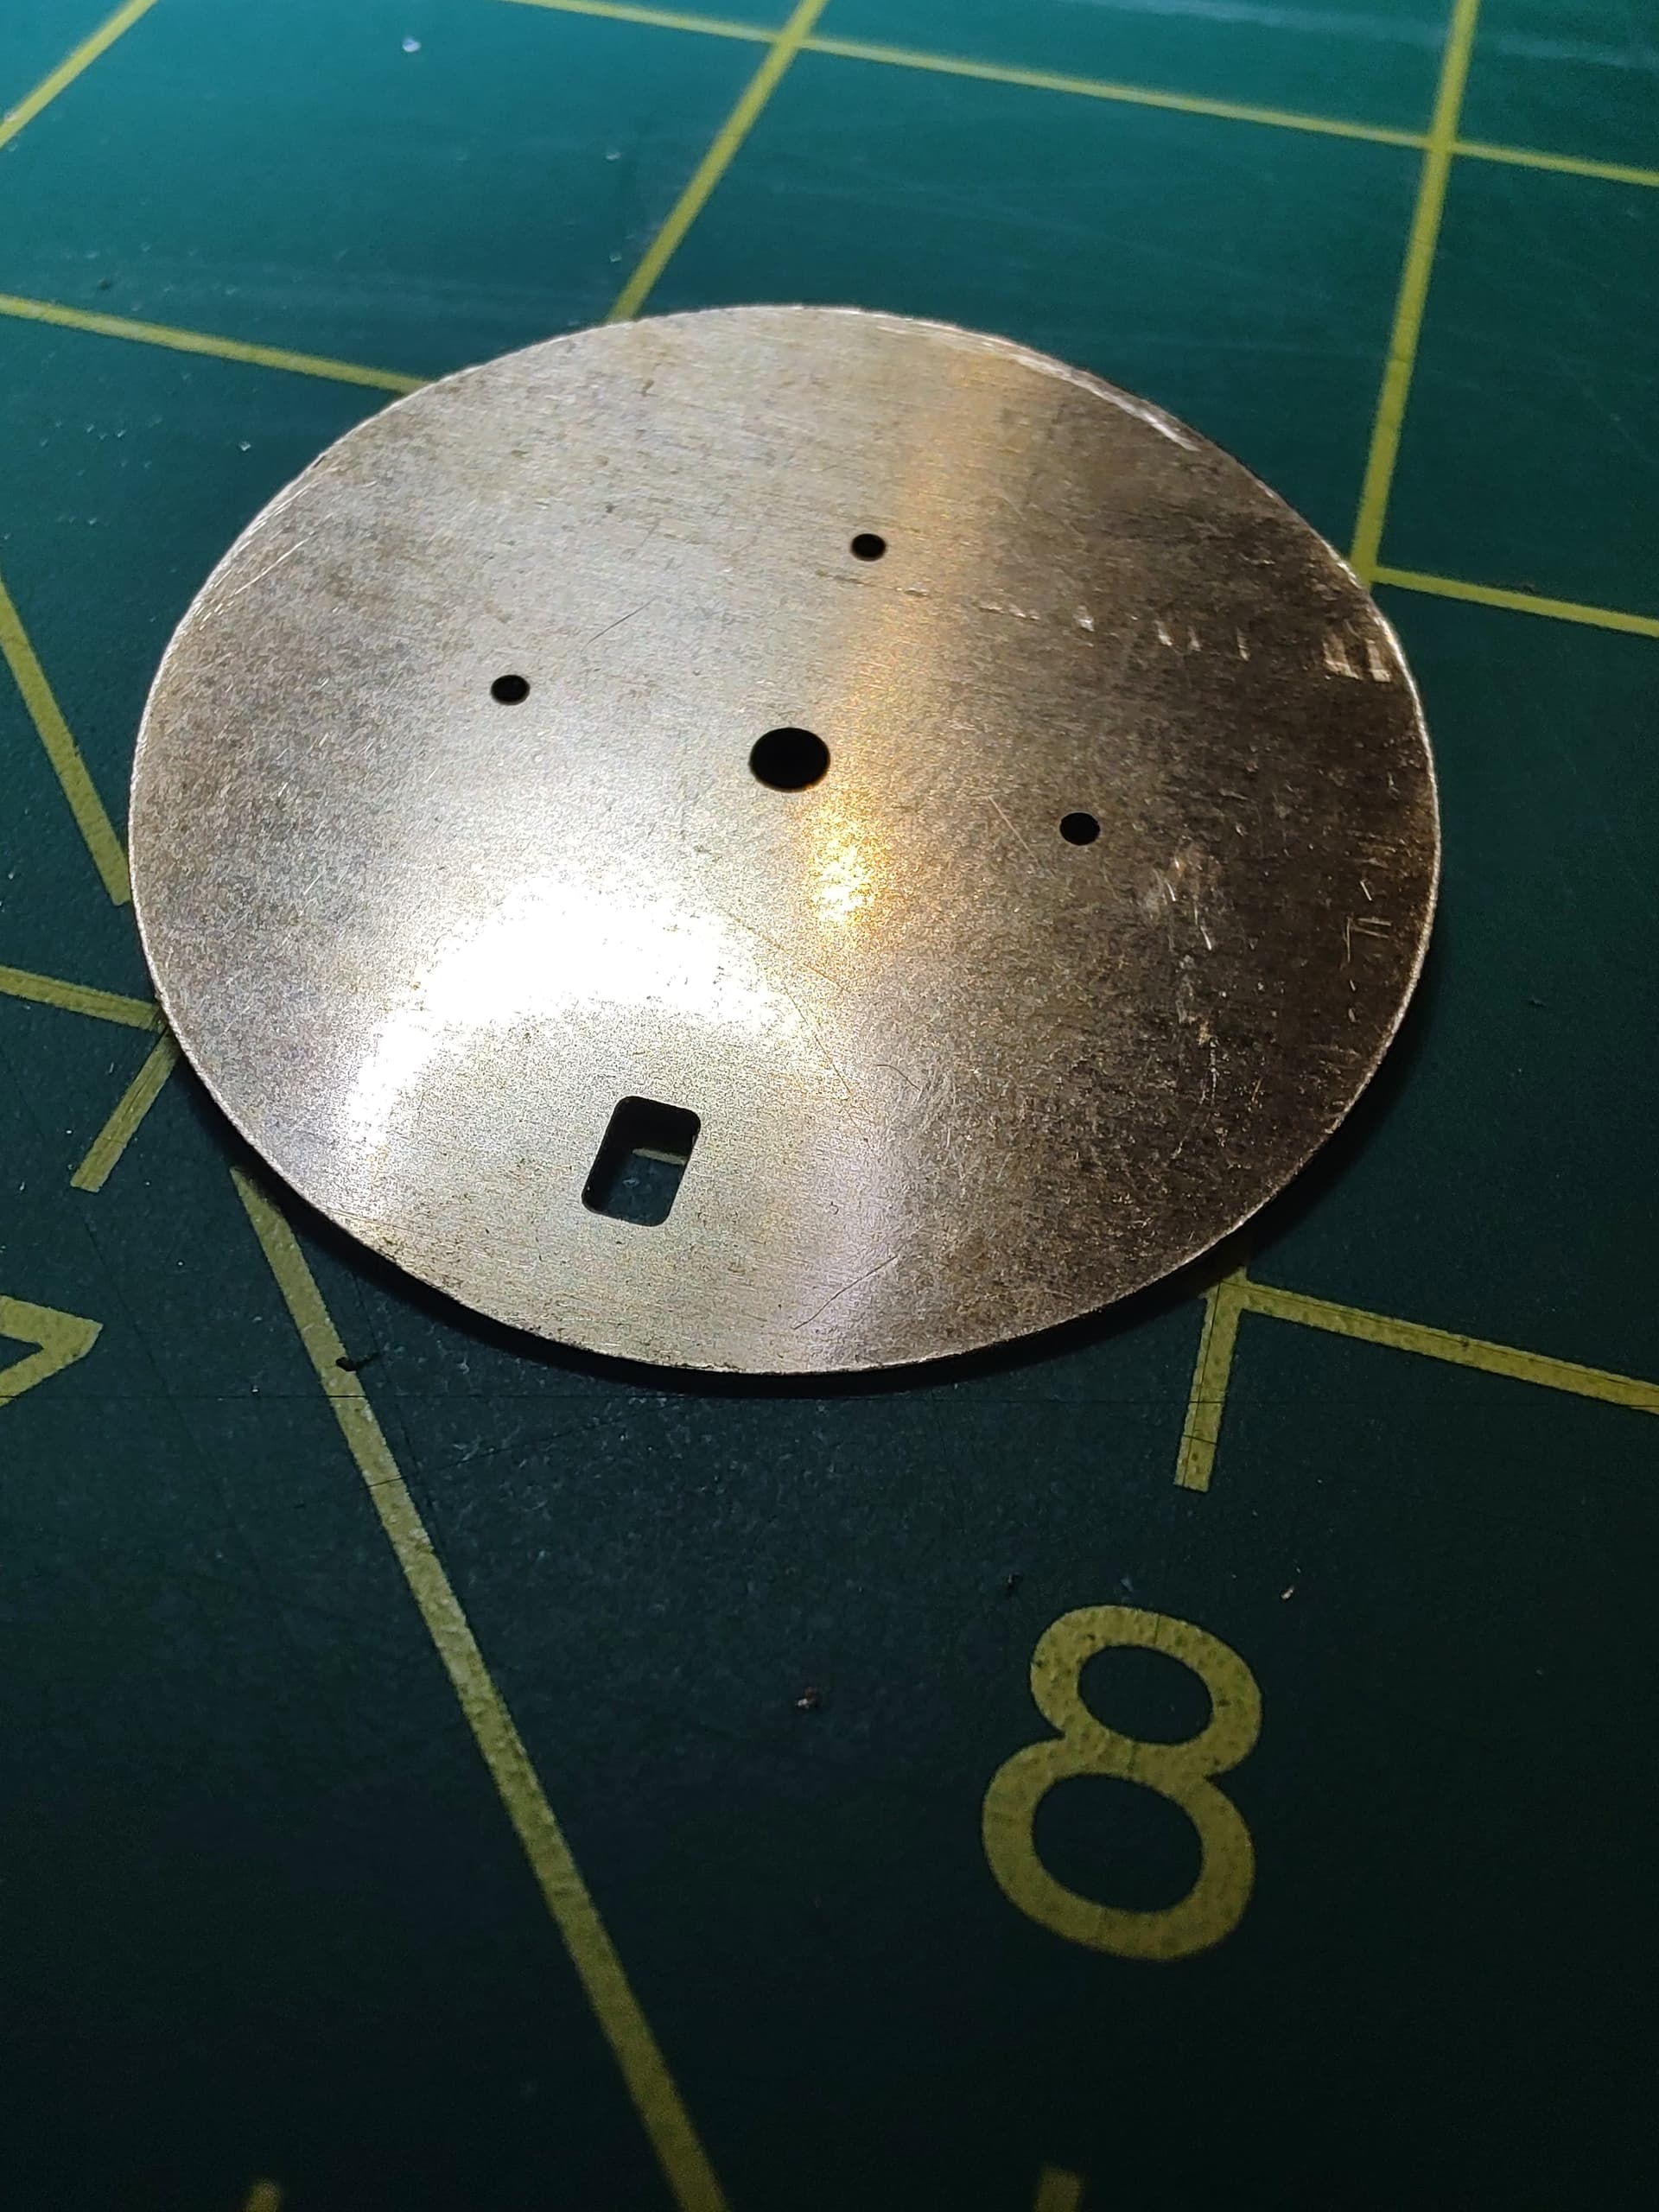
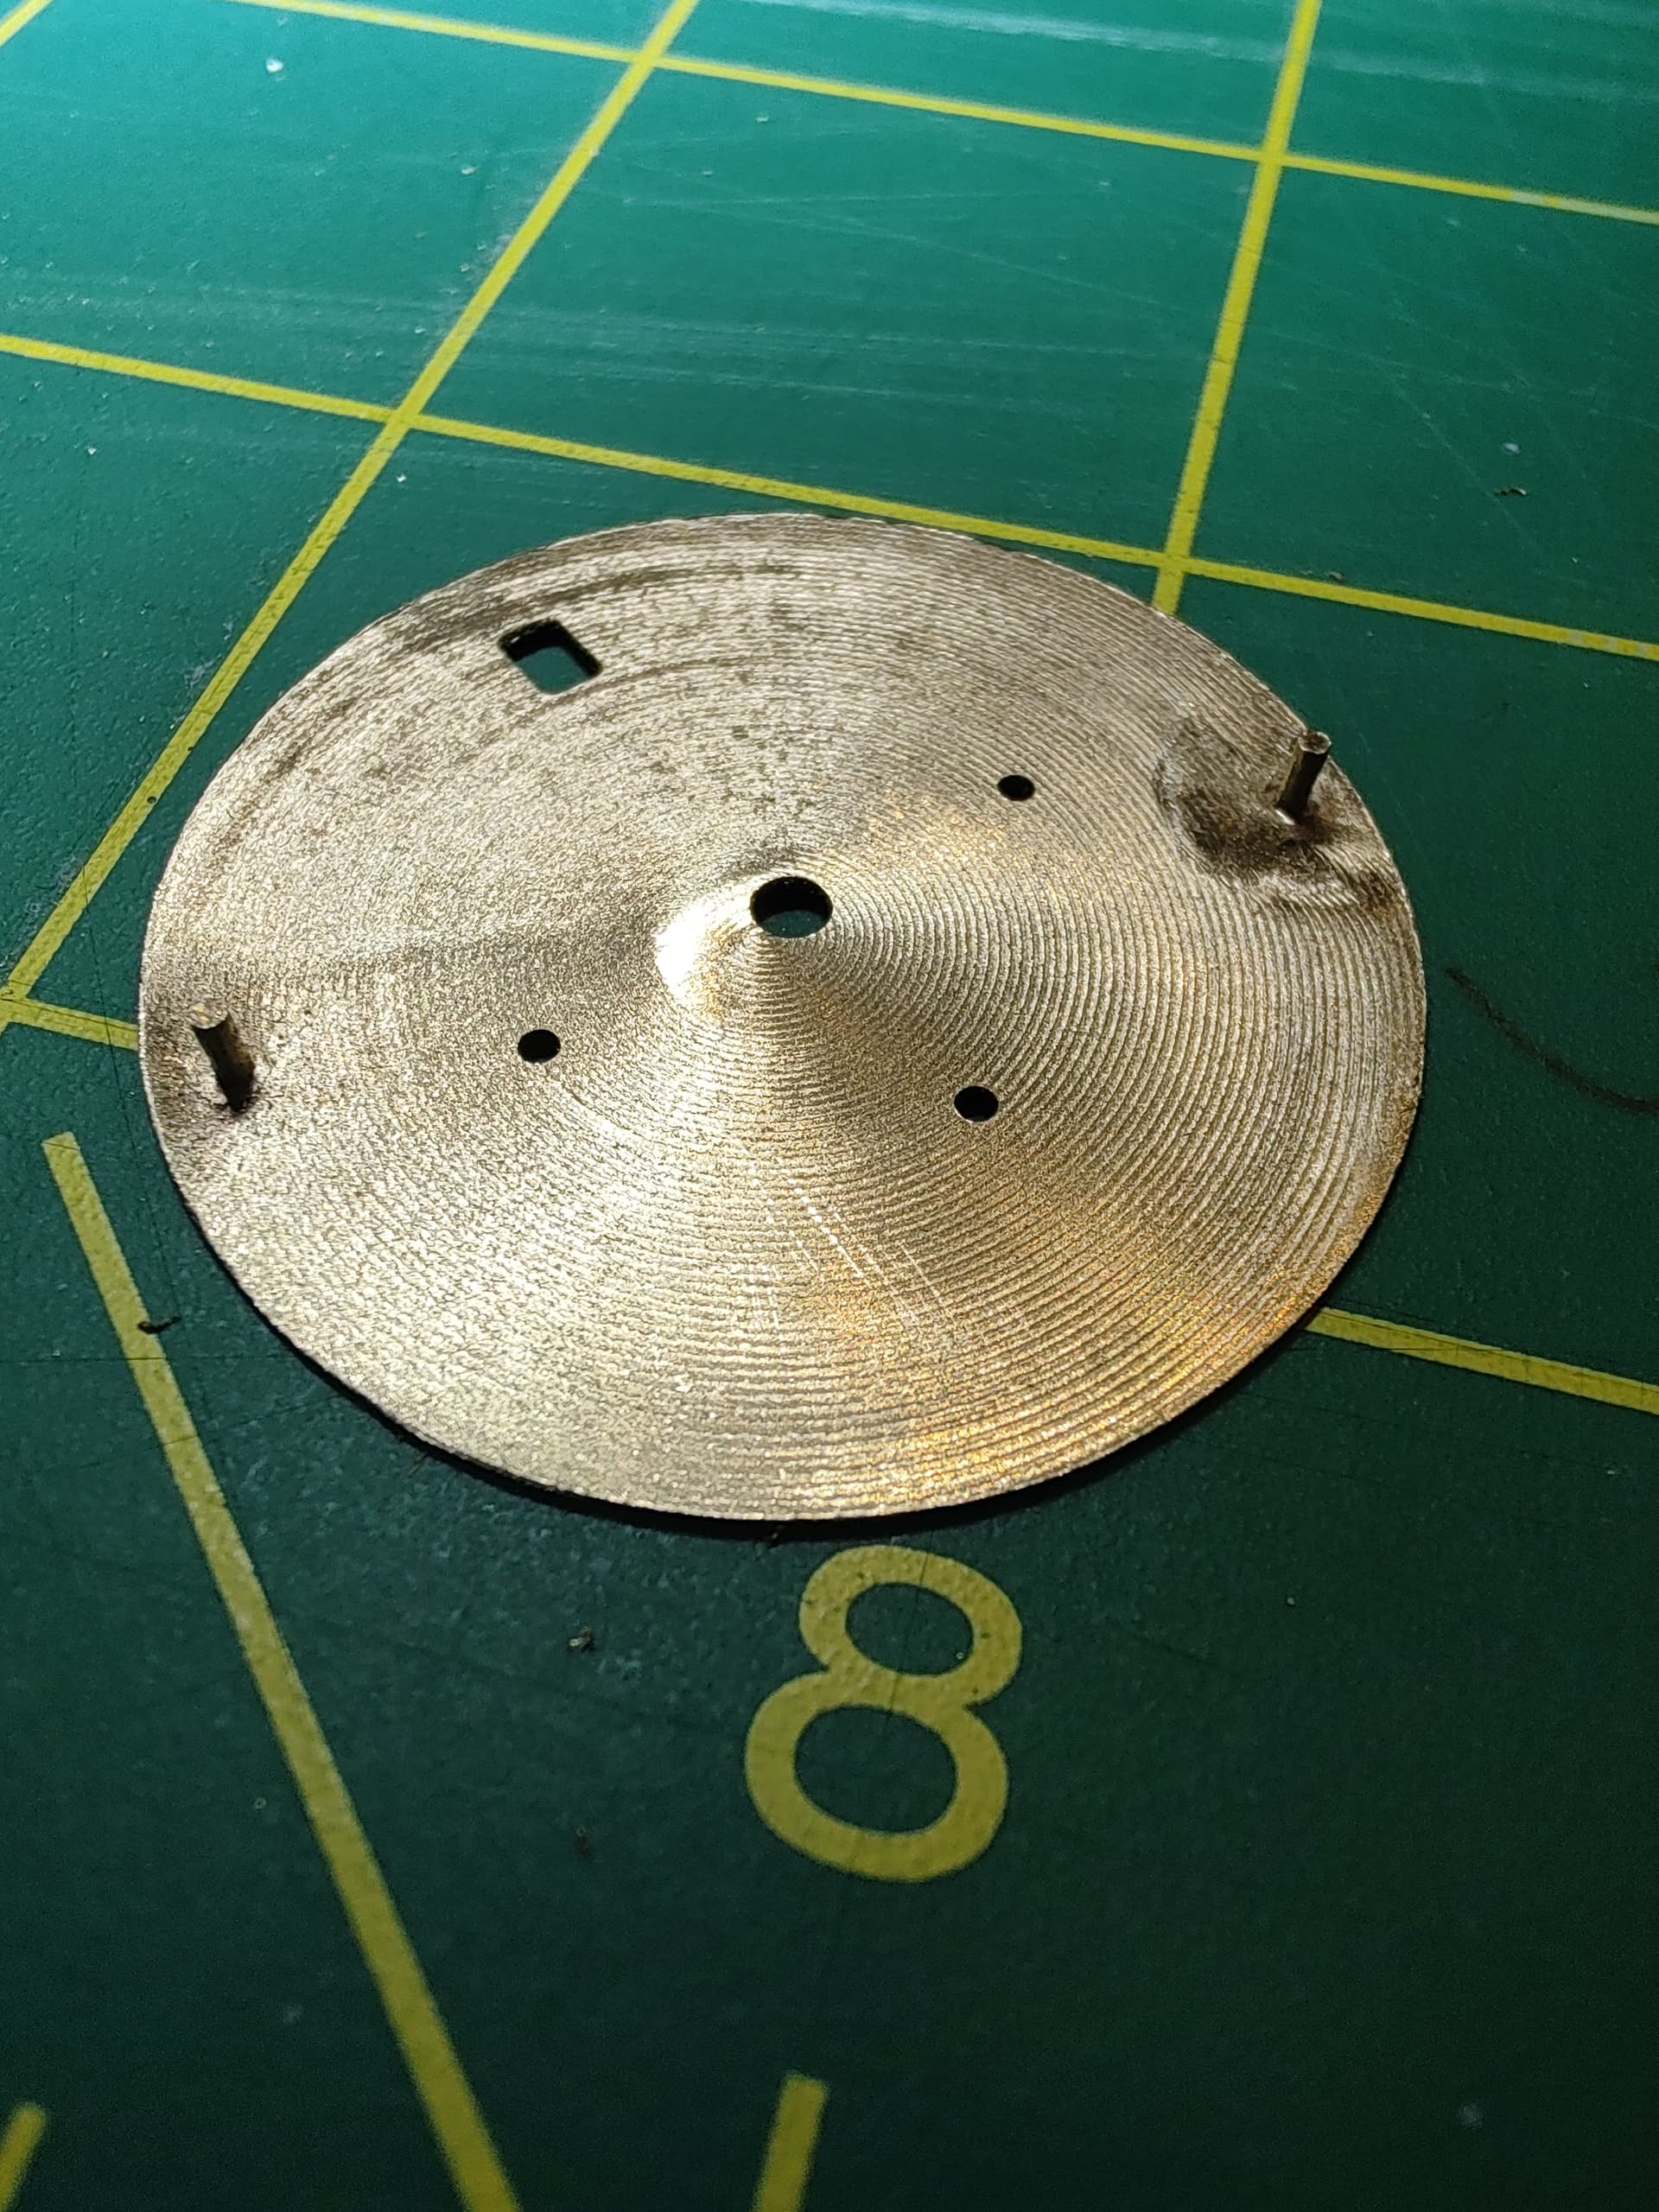
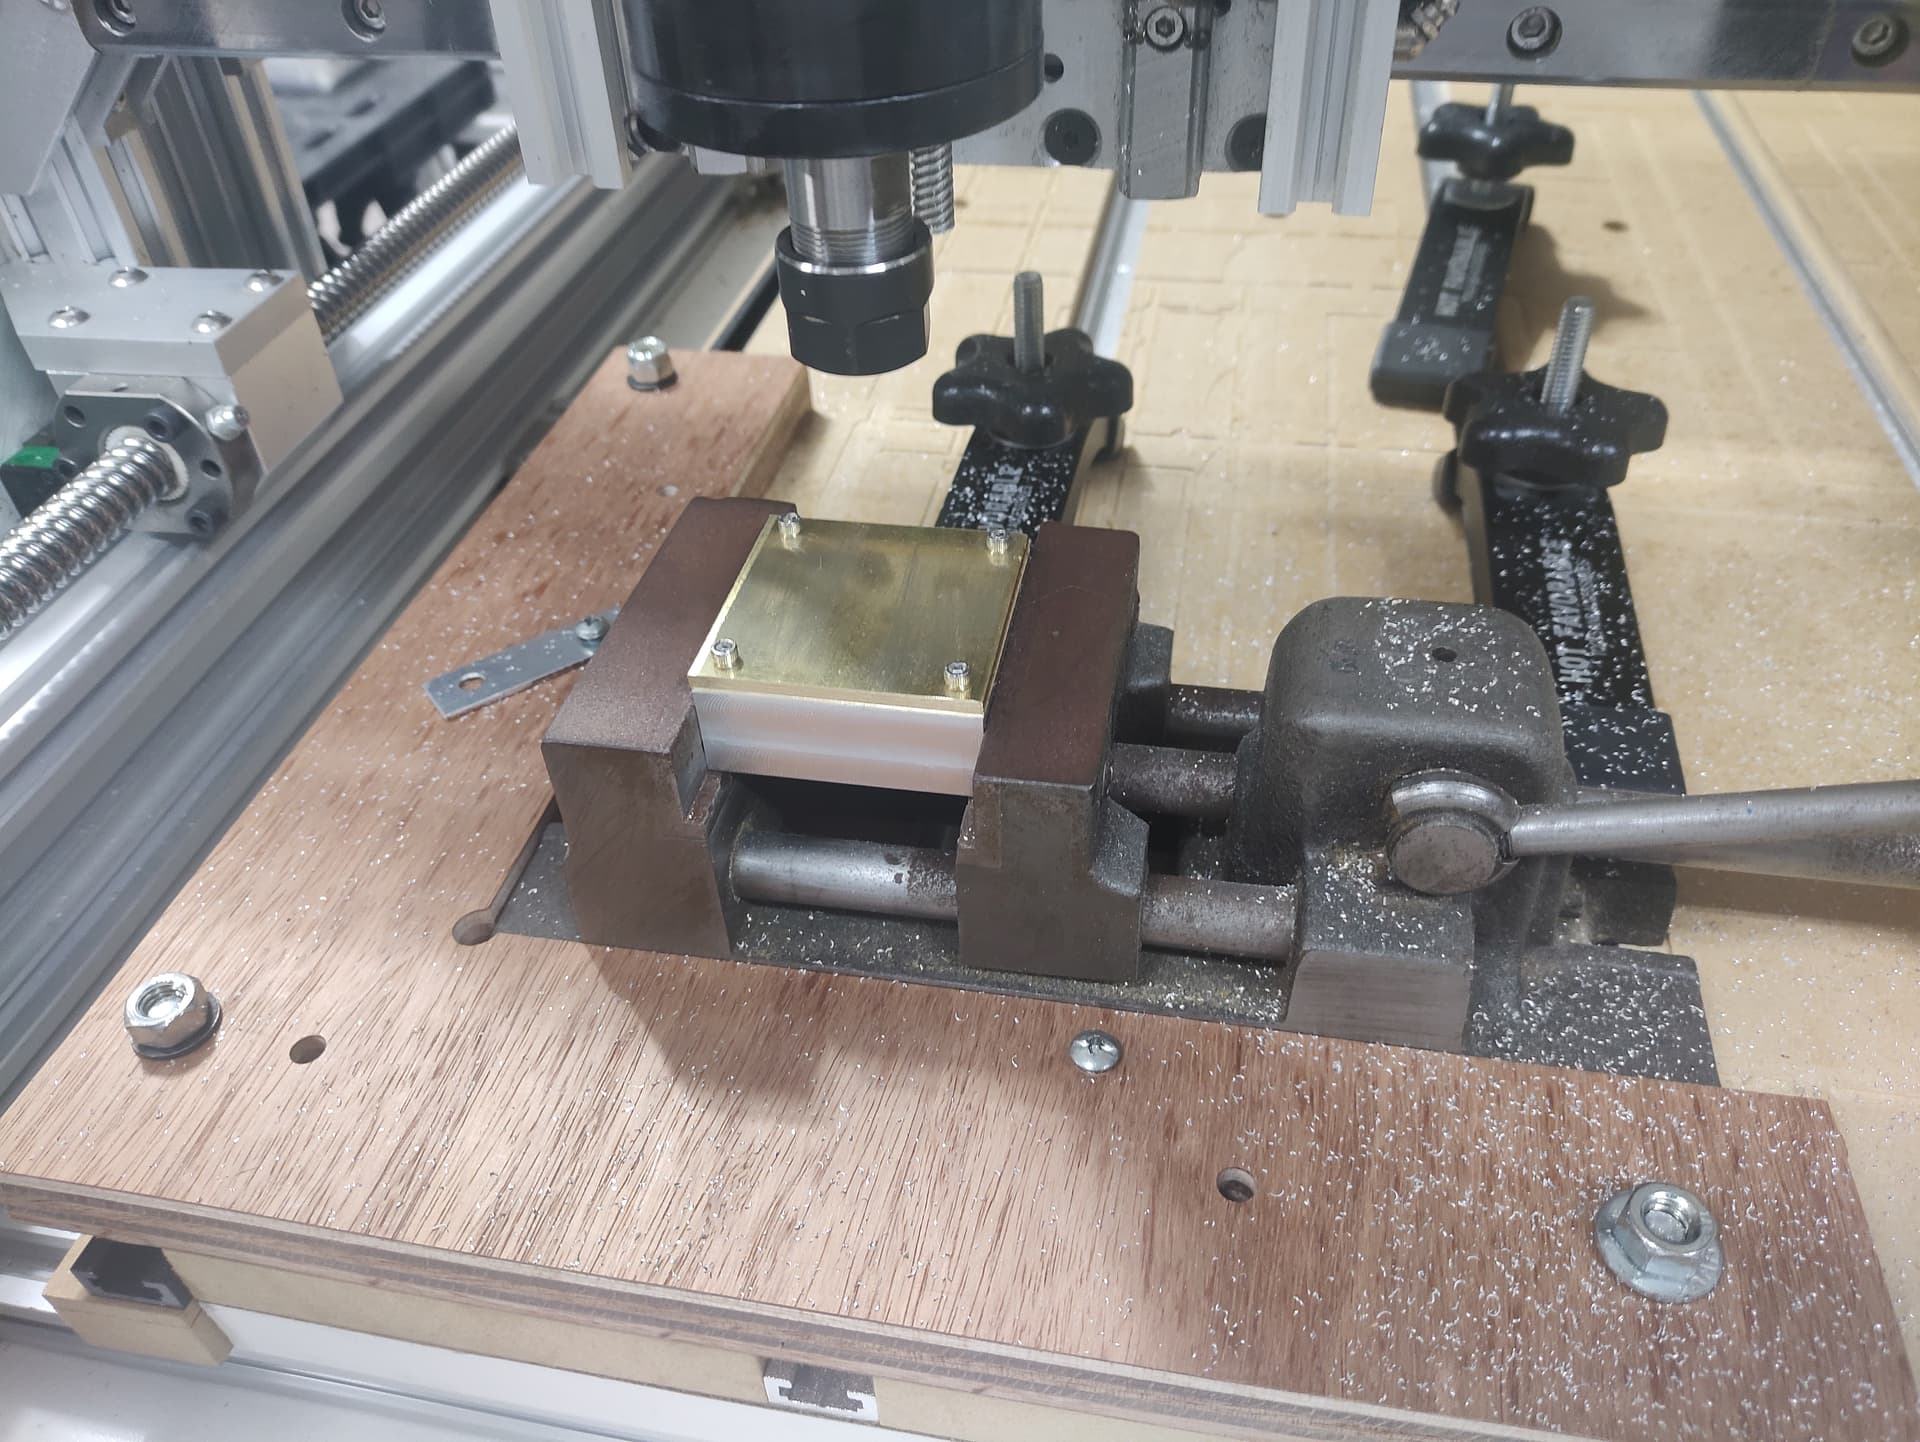
I have run one test, which used old and cheap tooling on an unknown brass alloy that didn’t go well, but I am not sure if I am ready to give up on it yet.

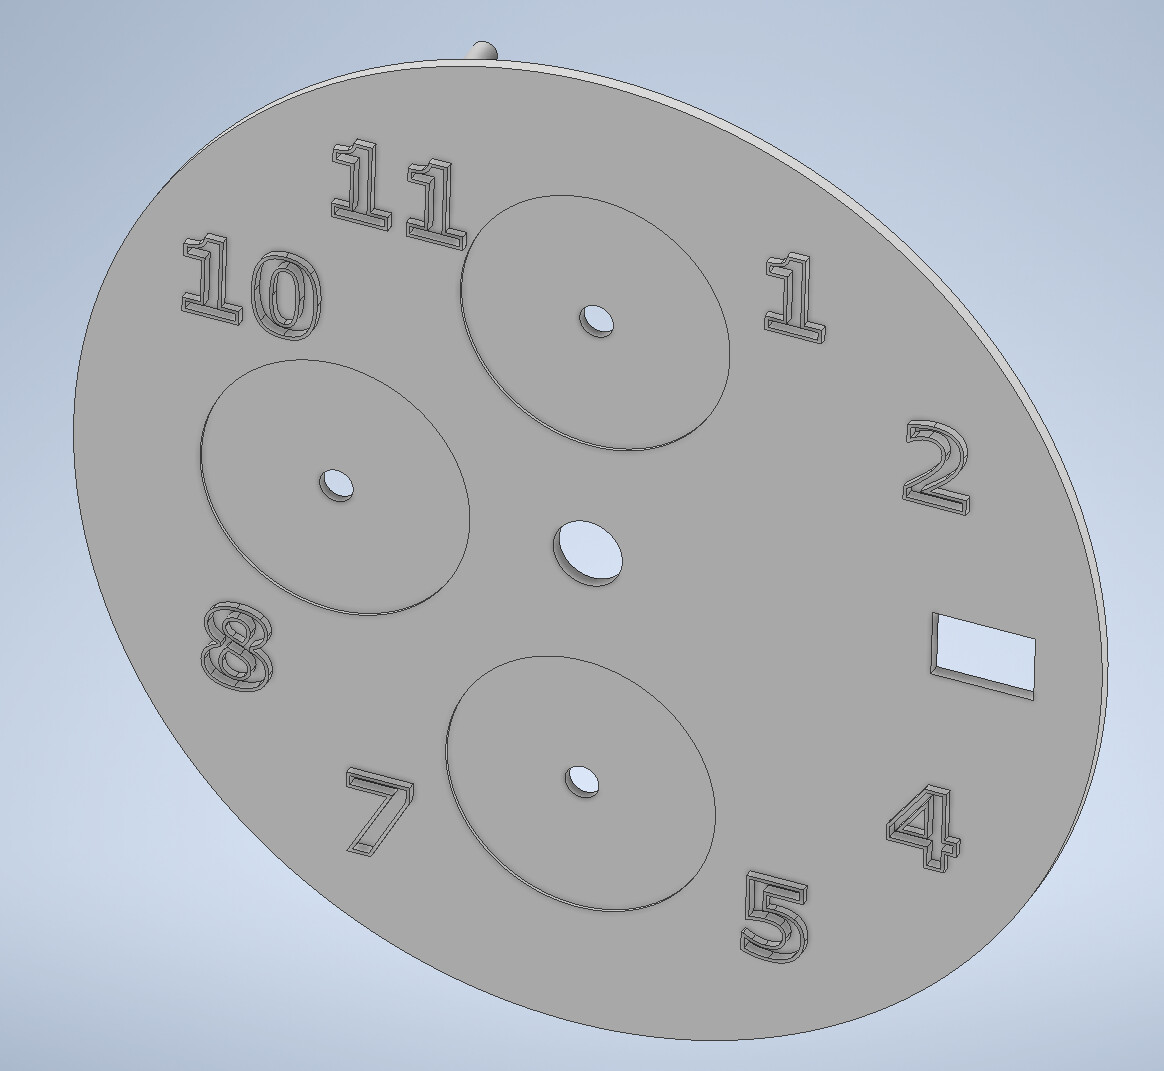
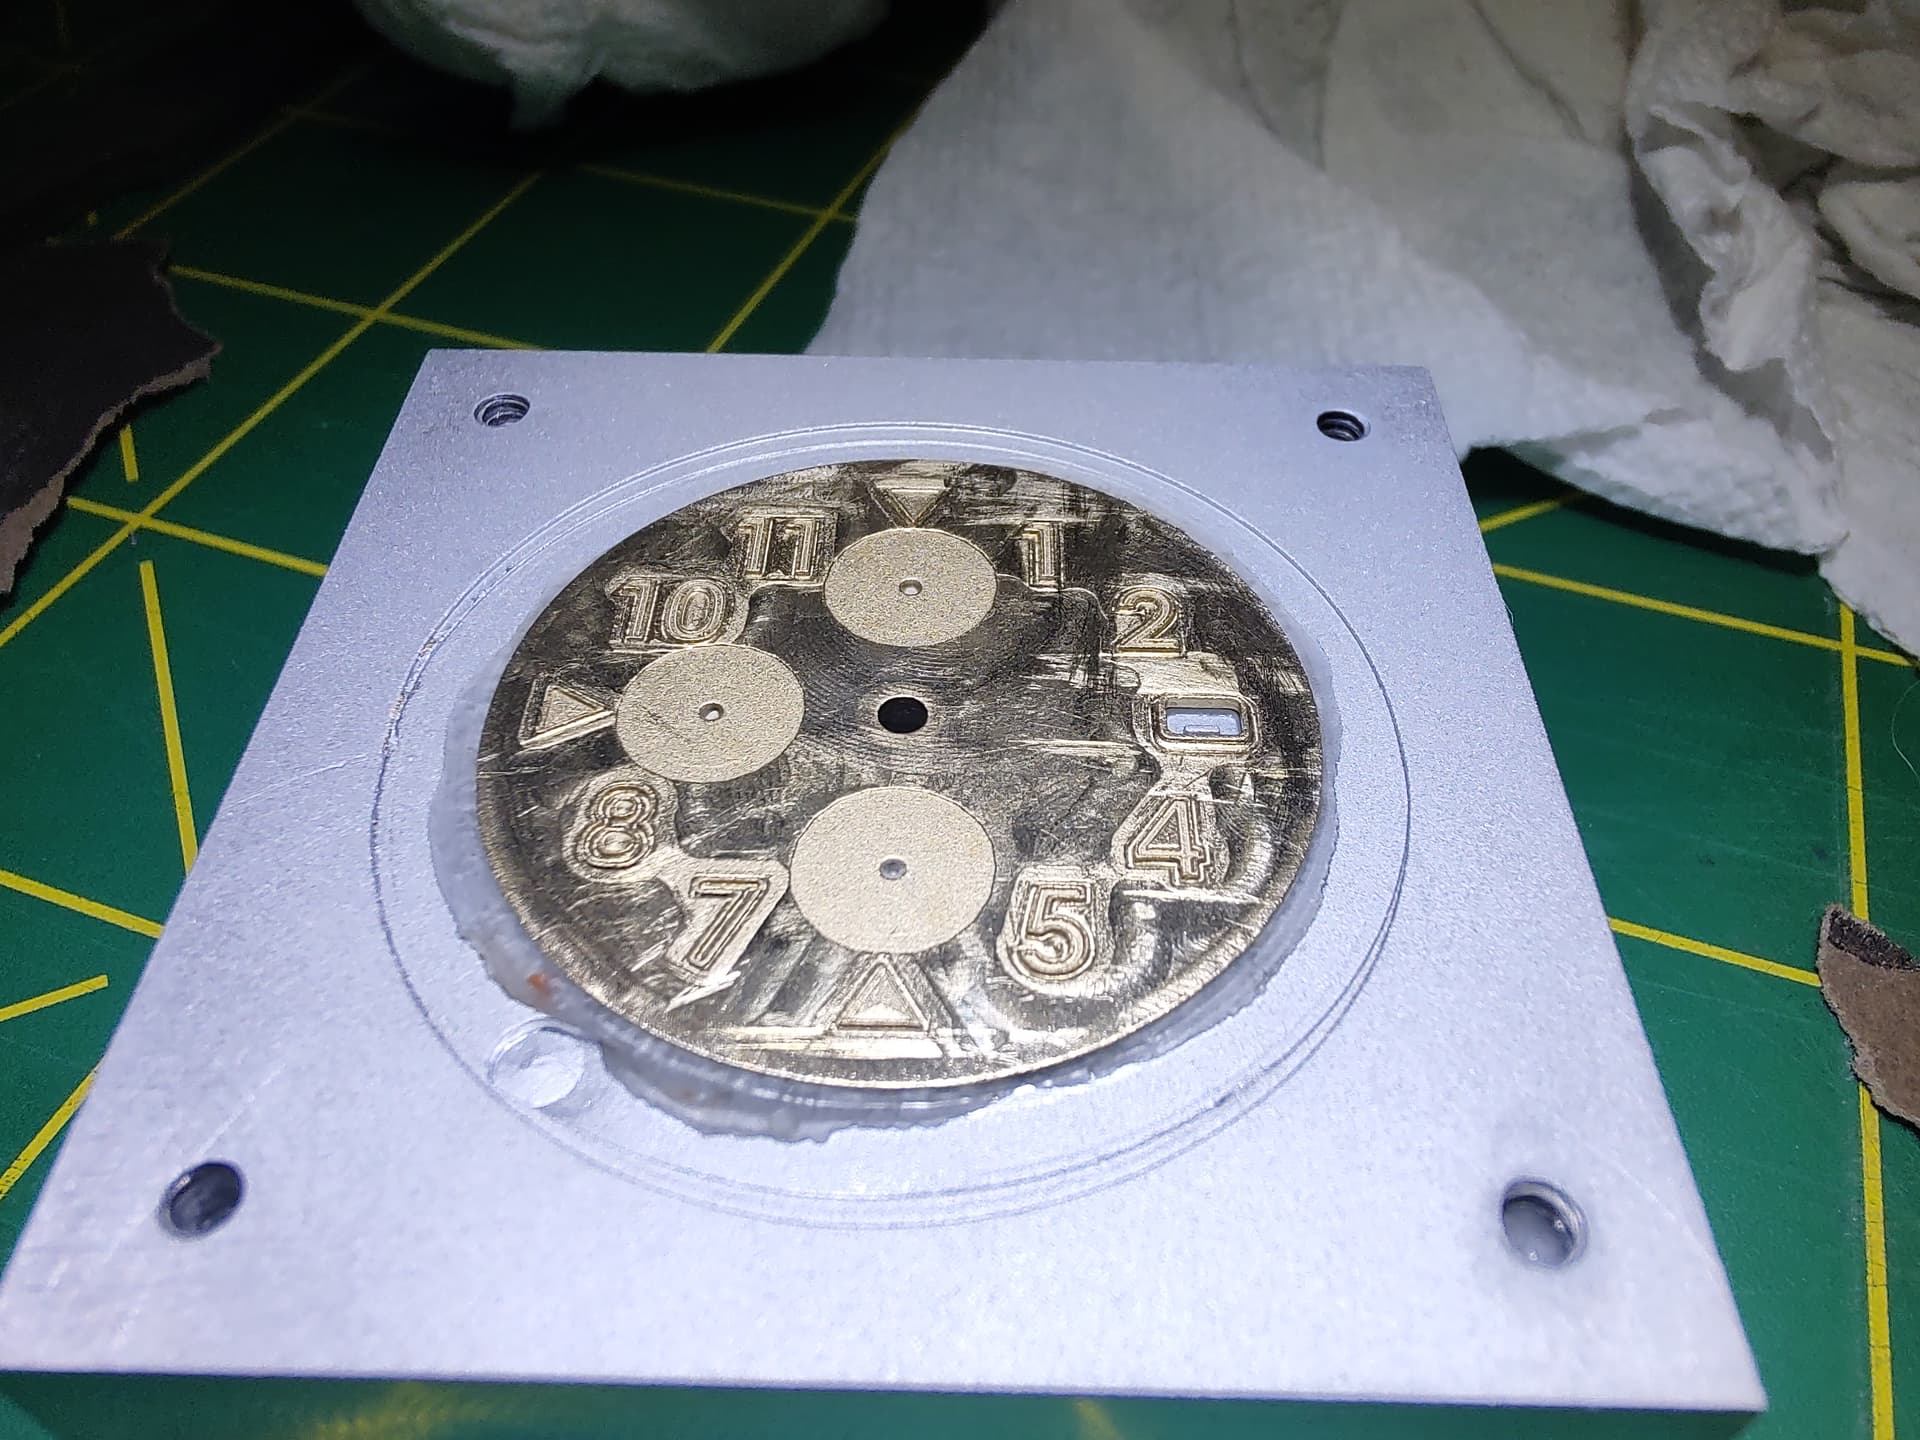
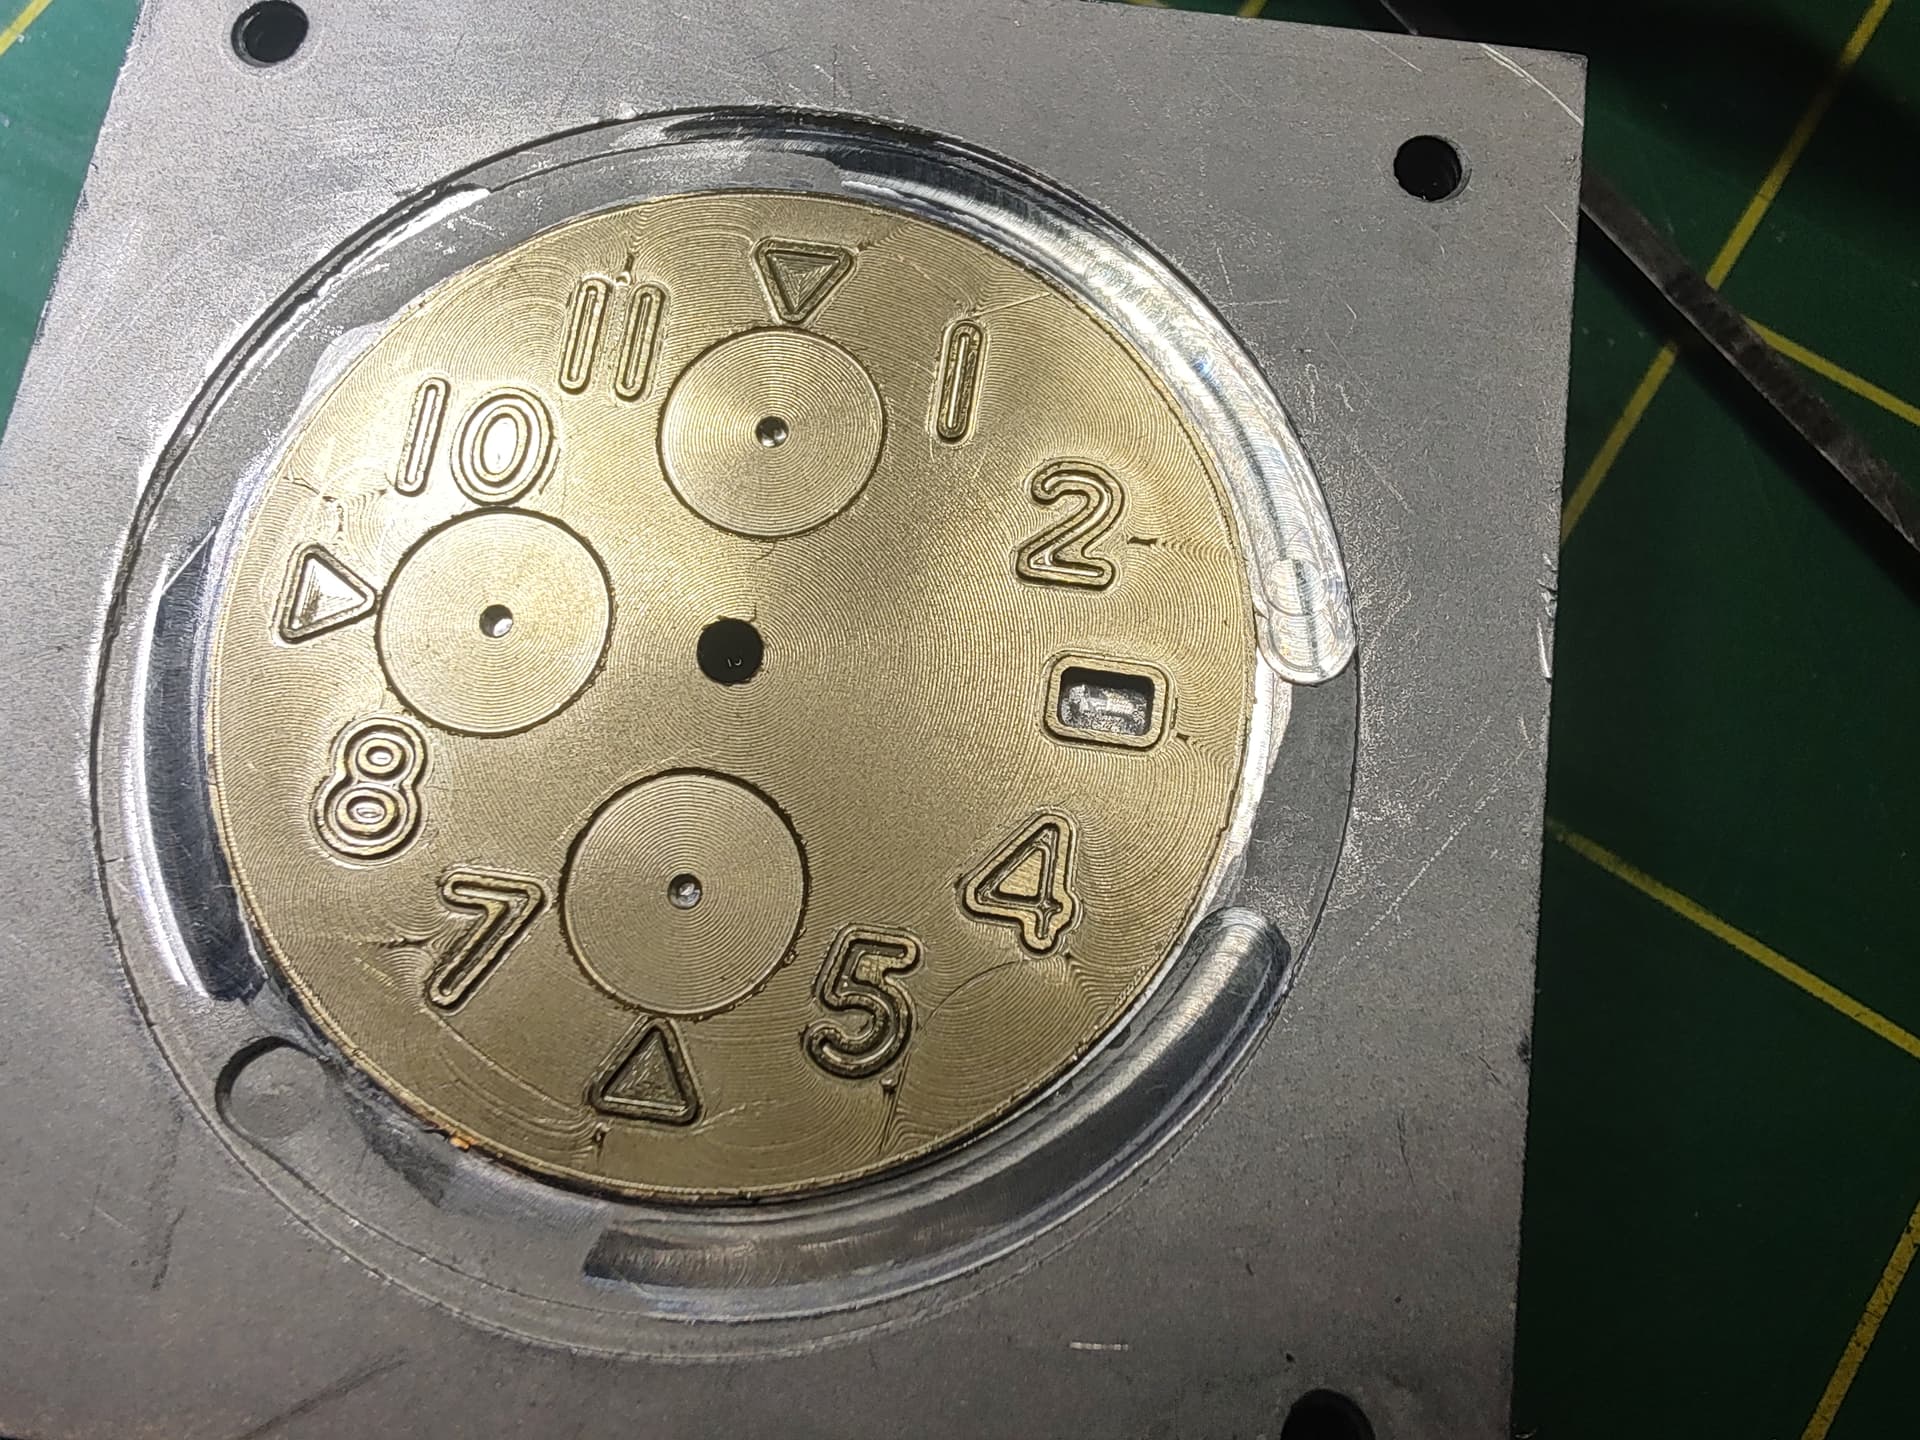
The dial I want to make is a 0.4mm thick wafer of brass with 0.5mm tall “embossed” numerals 1-12 projected from the surface. The numerals would be ~2.5mm in size (like the font size). Ideally, IF i can engrave very fine, they would also be slightly hollowed out in the middle to accept luminous paint.

My spindle can go to 24k. I had one, old, probably HSS .030 endmill which broke on my first test at .38mm doc, ~4mm/s. (10ipm). I felt the feed was slow, but when your part is SO small it looked super fast, so I would definitely slow that down. The engraving bits also dulled very fast, but not so much broke.

I’m thinking to try one more time with new tools and free machining C360 brass, but not sure if its worth it.

When I am home I will post a photo of my CAD model to give an idea of what I am after. Any tooling, process, material, etc recommendations?
Lessons learned? Thanks!

1 Like

I’ve been wanting to try this to make some name plates so I’ll be keeping an eye on how this works out for you. :grin:

I have seen some recommendations to use carbide instead of HSS, but not sure how much of a difference that will make. Also, are you using an alcohol mister? That should help with the tool life. Please post pictures of your results.

Well I stupidly ordered 10 new endmills and an overpriced length of free machining brass so I guess I’m giving this a real go

1 Like

So this is the goal:

I am confident I can do the holes, recesses for the subdials, and overall shape. bonus points if I can mill the .47mm posts on the back side, but if not I can buy those and solder them on.

I’m doing some more testing tonight with my current engraving bits just to test some things before the good stuff arrives.

Test #2 actually wasn’t as bad as I expected. Same doc, but cut feed rate in half. Using a bit that I know doesn’t have the point it once had, so I’m going to adjust the next try to try and leave thicker lines.

It’s actually not bad, except the “frame” of the number is razor thin. It’s supposed to be sort of visible.

Ultimately, this is the goal:

For the record, I can’t imagine how watchmakers actually make these numbers…they are PERFECT

3 Likes

Attempt #3. Went half as deep to artificially increase the frame width without changing the program or design. This is actually alot better! (bear in mind the microscope pictures are taken at 32x where even “perfect” aint so perfect anymore). Also bear in mind in the final design larger endmills will clear out all of the material outside of the number frame.

This may have merit…If my design can tolerate large enough numerals to bring the machining into the range of feasibility.

1 Like

How about a hardened tool steel die, and stamp each with a very precisely calculated amount of force?

Take a look at an average coin. Even better look at a “double stamped” souvenir coin. The level of detail on those is astounding. Mass production, even in limited quantities makes things possible that simply can’t happen for one-of projects, unless the person doing it is an artisan. (Sure ain’t me!)

Look at the difference between a 3D printed part and an injection molded part. It is true that 3D printing can actually have an advantage over injection molding. It would be extremely difficult to make the LR4 YZ plates injection molded, unless you were to make each side from 2 pieces in order to get the voids in place. That might actually be superior, however, given some of the strength advantages of injection molding.

Same with your watch dial. A watchmaker can produce hundreds of identical watches thst you couldn’t tell from each other. YOU can produce one absolutely unique one, in a way that the watchmaker cannot. At least not one he could sell. Your process could also engrave the back of the watch in the same font and style if you choose, so there’s that.

Comparing results of different manufacturing methods, you find that each has benefits. If you want to repair or retool ONE watch, this is great. If you want to make a line of watches to sell at an affordable price and make high profits from, this is not the way.

1 Like

I changed the title of this thread since it is no longer a question. The game is afoot!

I got some new tools and material in this weekend and gave it a go. Despite a programming error that plunged 1/8 em to full depth, and the resulting snapped tool stuck in the material essentially facing my collet and collet nut (in a glorious shower or sparks), I was able to make a dial blank…albeit a scrap dial blank.

Not all is lost though, some very good things happened. The 1/32nd endmills I bought performed BEAUTIFULLY. They are responsible for the holes which are pretty much immaculate.

But, the rest is bad:

  1. inconsistent thickness. The material was warped, and I only machined one side. Easy fix. Cut stock into smaller bits, improve work holding, and face both sides.

  2. OD was rough, even though it was pretty accurate overall. I blame a lack of finish pass, and poor tooling.

  3. the posts are oversized. Bad tooling and bad programming. Pretty sure I can fix this.

The most concerning part is that I was not happy with the performance of the machine with an 1/8 O-flute. Not sure if it was the tool (Amazon cheapies), feeds and speeds, work holding, or a combination. A lot of chatter, relatively poor finish, and a ton of noise/vibration. None of that was there with the 1/32, but it’s so small taking such a light cut, it’s just not moving much mass.

I may try holding the brass in a toolmakers vise mounted to the table for extra mass, rather than just screwed down to plywood. Plus a different tool.

1 Like

Gearing up for round 2. Ran out of time tonight, don’t want to rush and make another mistake.

Improved setup: check

5 Likes

Technically, this was successful. But, I think I am going to have to come up with a method to finish the dial with a single tool. I went through so many .1mm single flute engravers and each time the z axis was just a little different.

Practically, it doesn’t matter, but when it comes to decorating and finishing, it’s a no go. Notice how the sundial registers soda blasted very nicely, but the rest is very uneven? I need that evened out. If I go with a more aggressive blast media, I run the risk of killing. The frame around the numbers

3 Likes

This is probably as good as it is going to get. Still deburring, haven’t tried to soda blasting yet, don’t even know if I should. I’m paranoid about losing the detail in the numbers. They came out even shorter than the .25mm target. Still legible, but…

Big difference was using a 0.5mm tapered ball mill engraver, and a lot of patience. 2+ hours of cycle time. I really hope this is the one and I don’t mess it up in finishing.

6 Likes

This is really nice work. :slight_smile:

1 Like

Thanks!

Unfortunately now the REAL hard part starts. I need to decorate this to a level worth of a (albeit cheap) timepiece. It wont be a Rolex or Patek when its done, but there is a certainly level of finishing I will require before I actually buy the parts for a build.

My current plan is to soda blast, silver or nickel plate, fill the engravings, then finish it with laser marked minute track and subdials. No idea if all of those elements will work together, but I have 5 scrap dials to experiment on. First up tonight will be deburr and blast, once I get this pesky workday over with!

1 Like