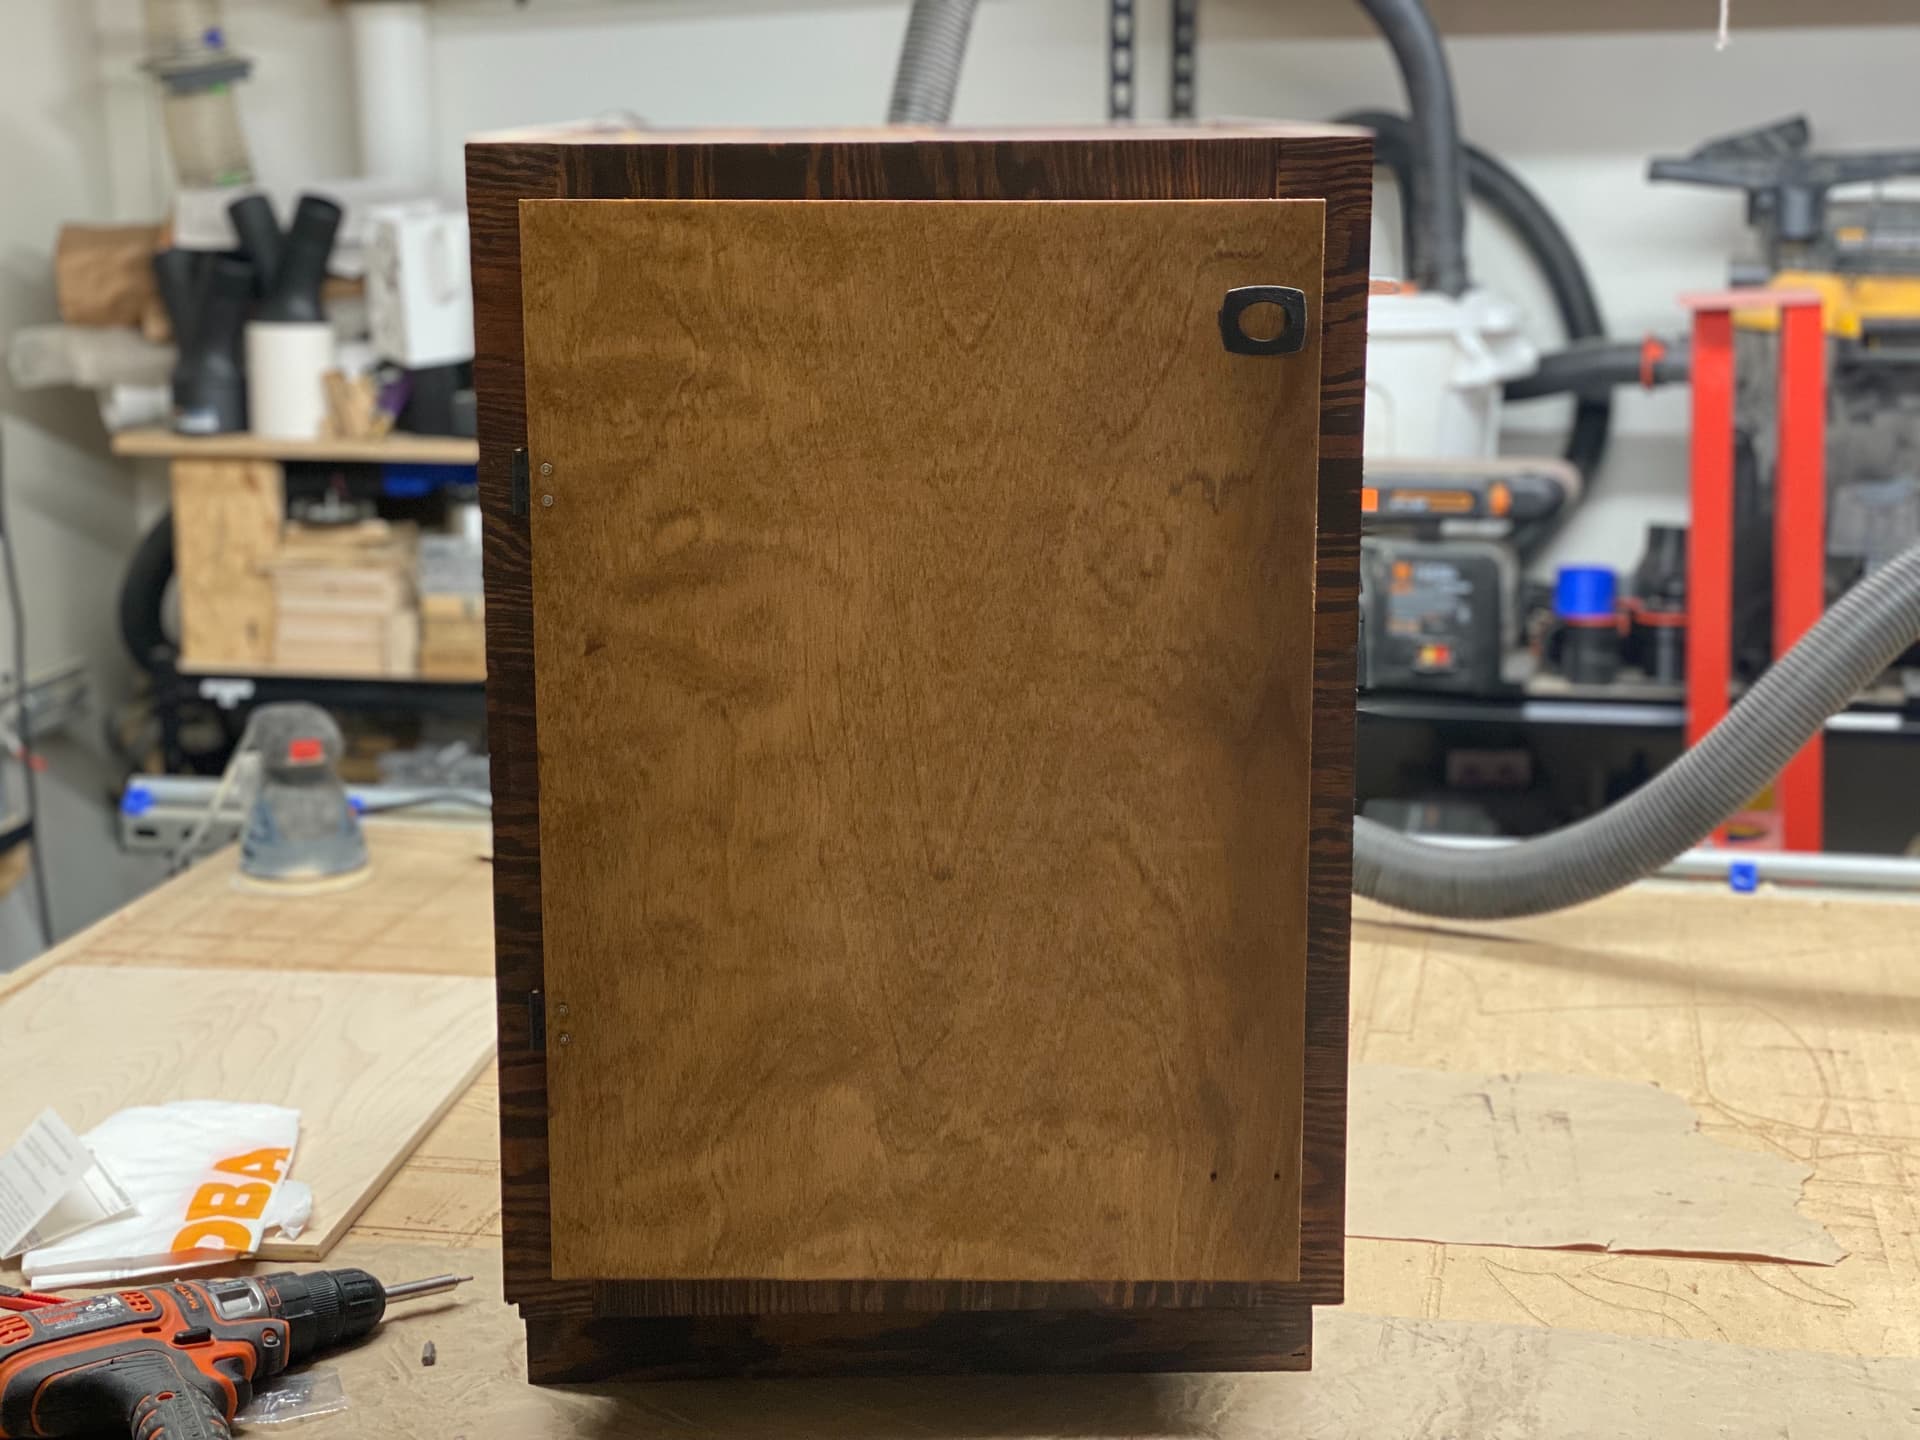
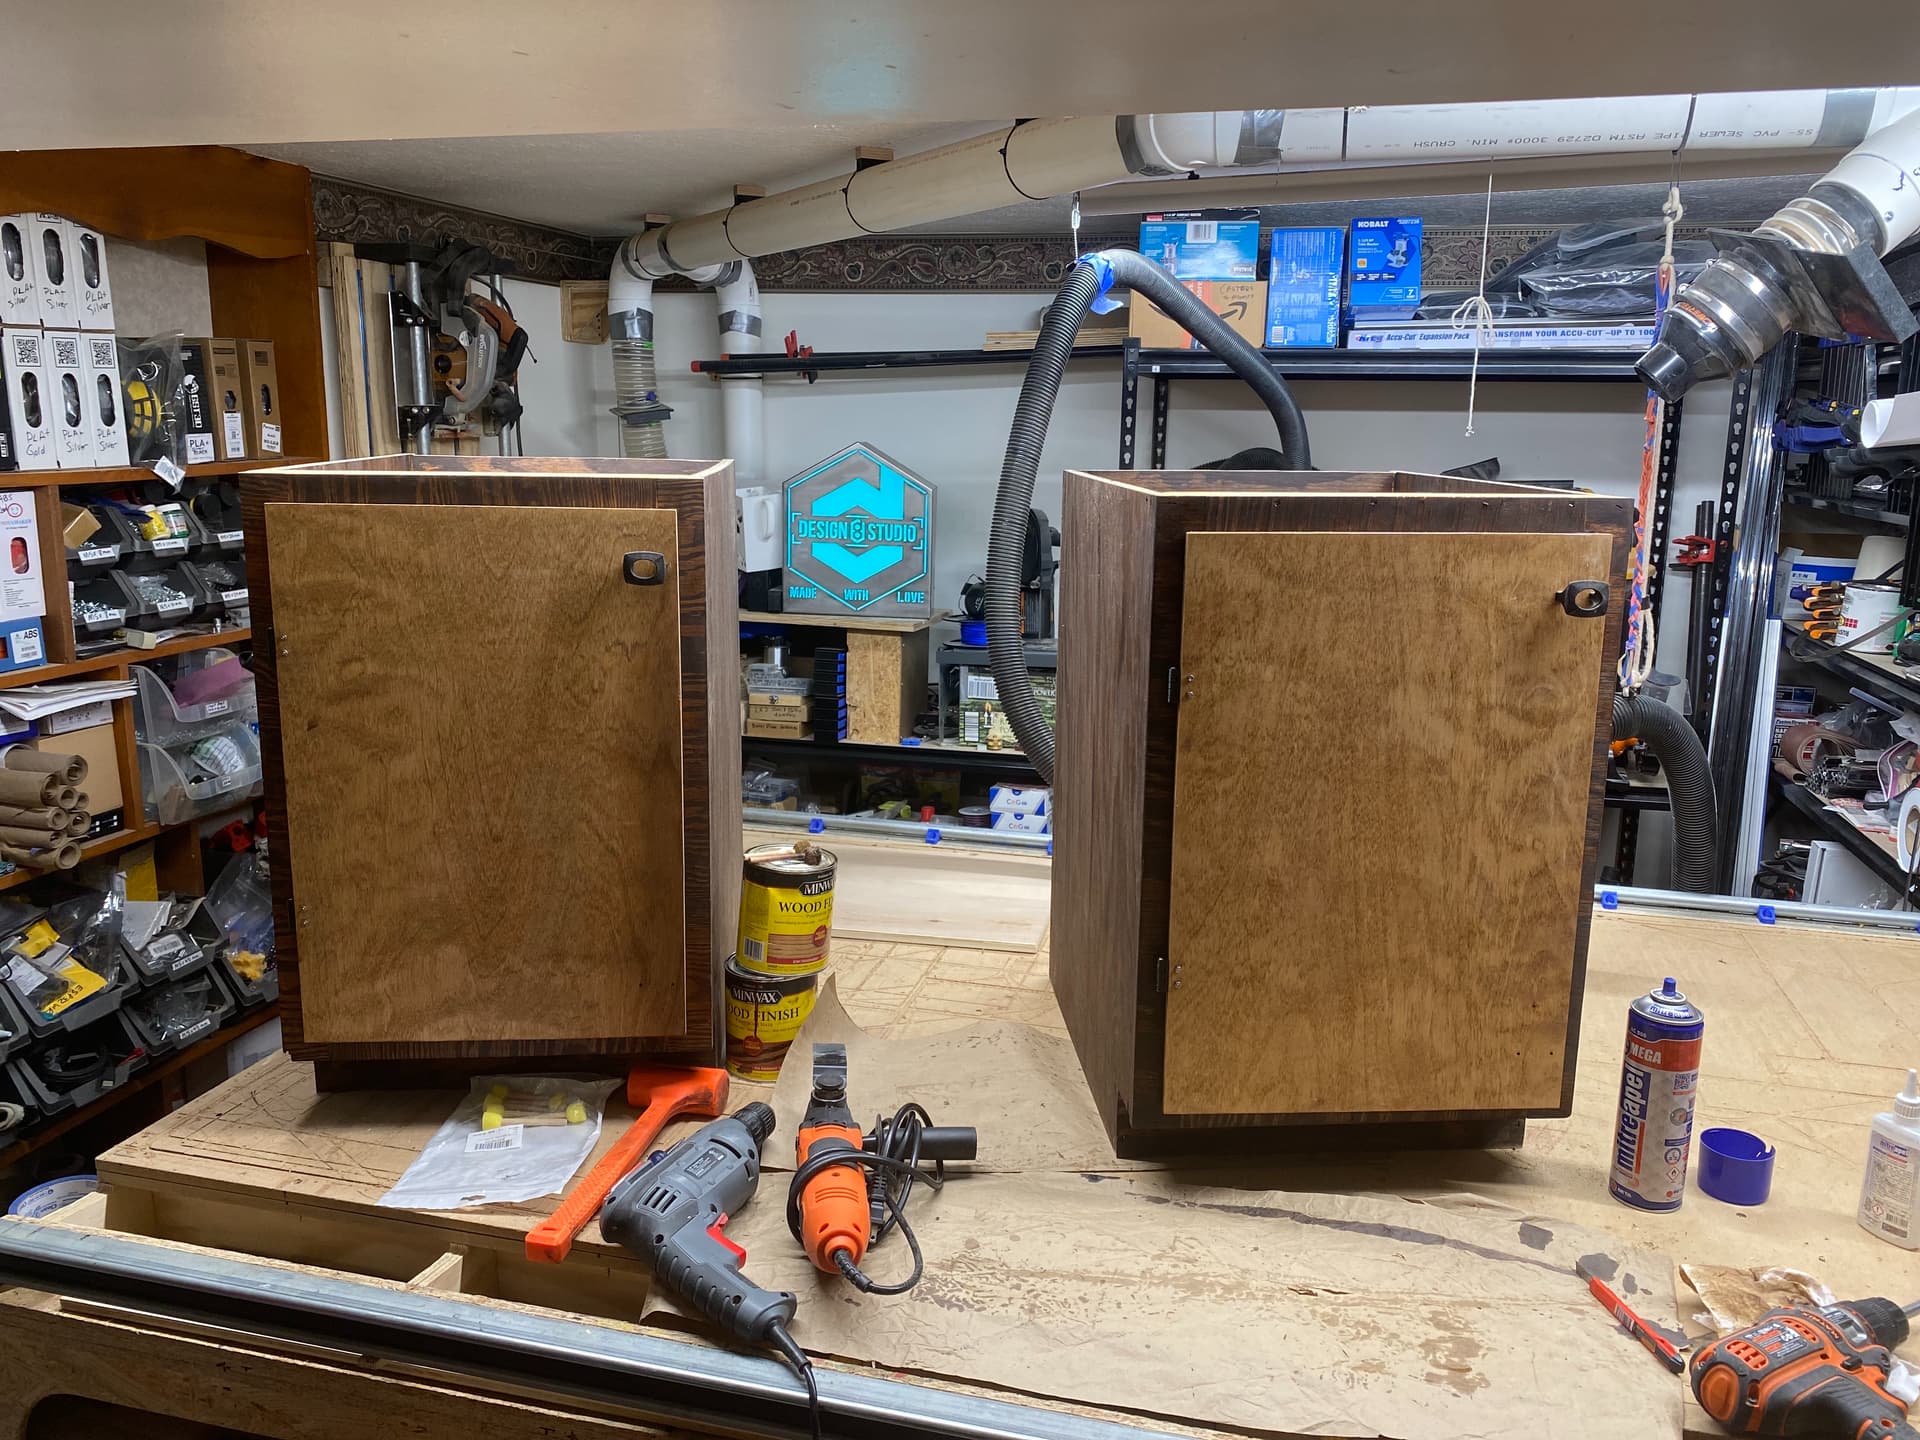
I got the first of two base cabinets completed. All the wood cabinet parts were cut on my LowRider v3 mostly-printed CNC. The second cabinet is all cut out, waiting to be assembled and stained etc.
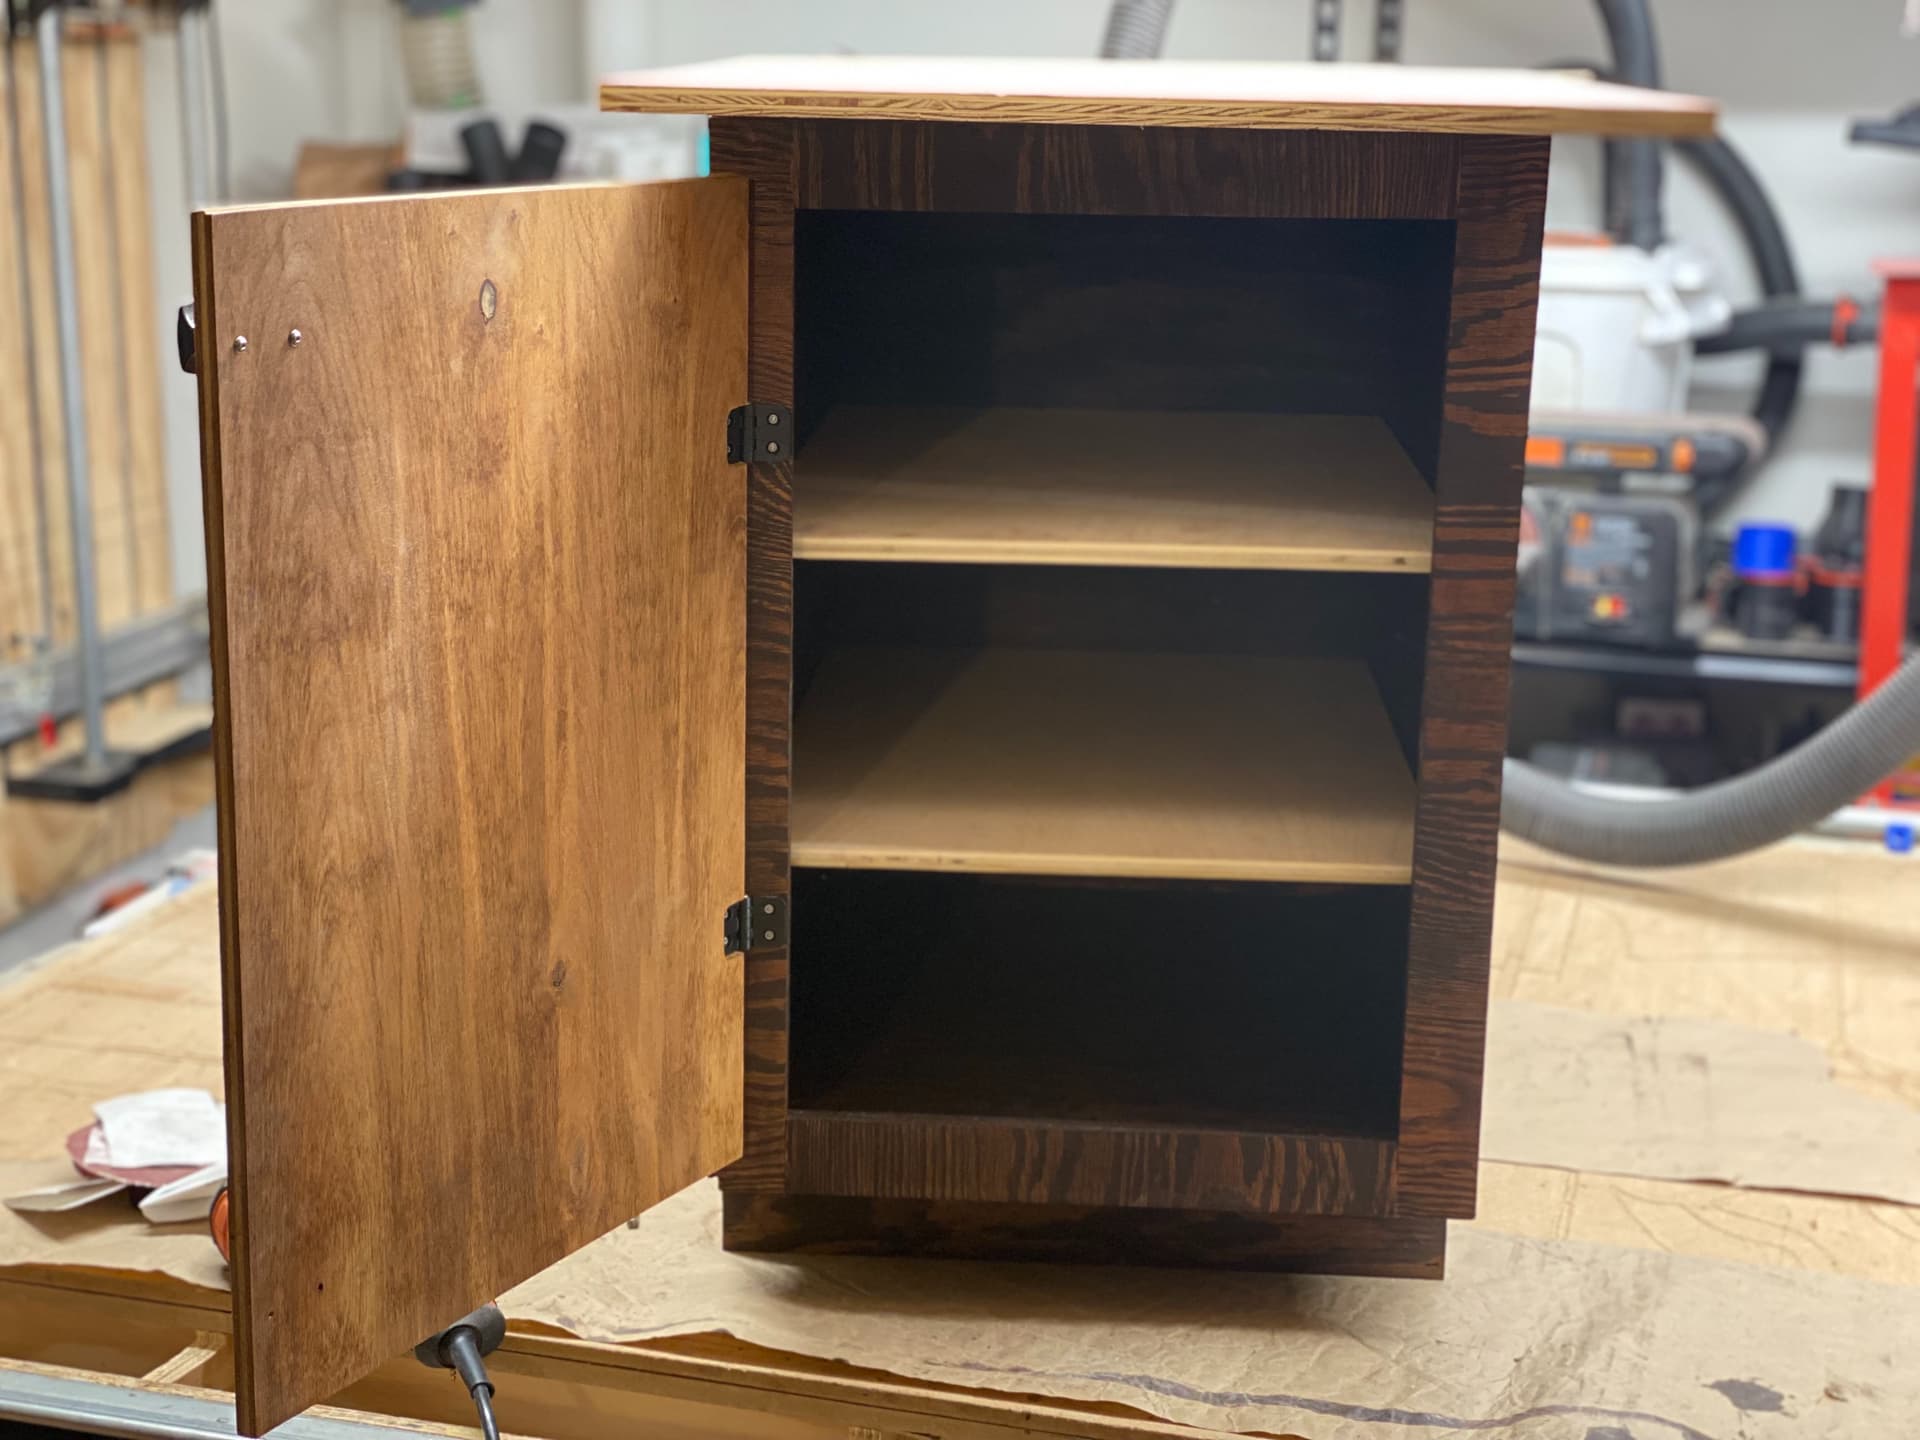
These needed to be a custom height, shorter than normal base cabinets, because they are to support a “desk height” table surface for the Audio Visual mixing and monitoring work in the back of our church sanctuary. Normal height cabinets are for supporting countertops at a height for a standing adult. These are for a seated adult.
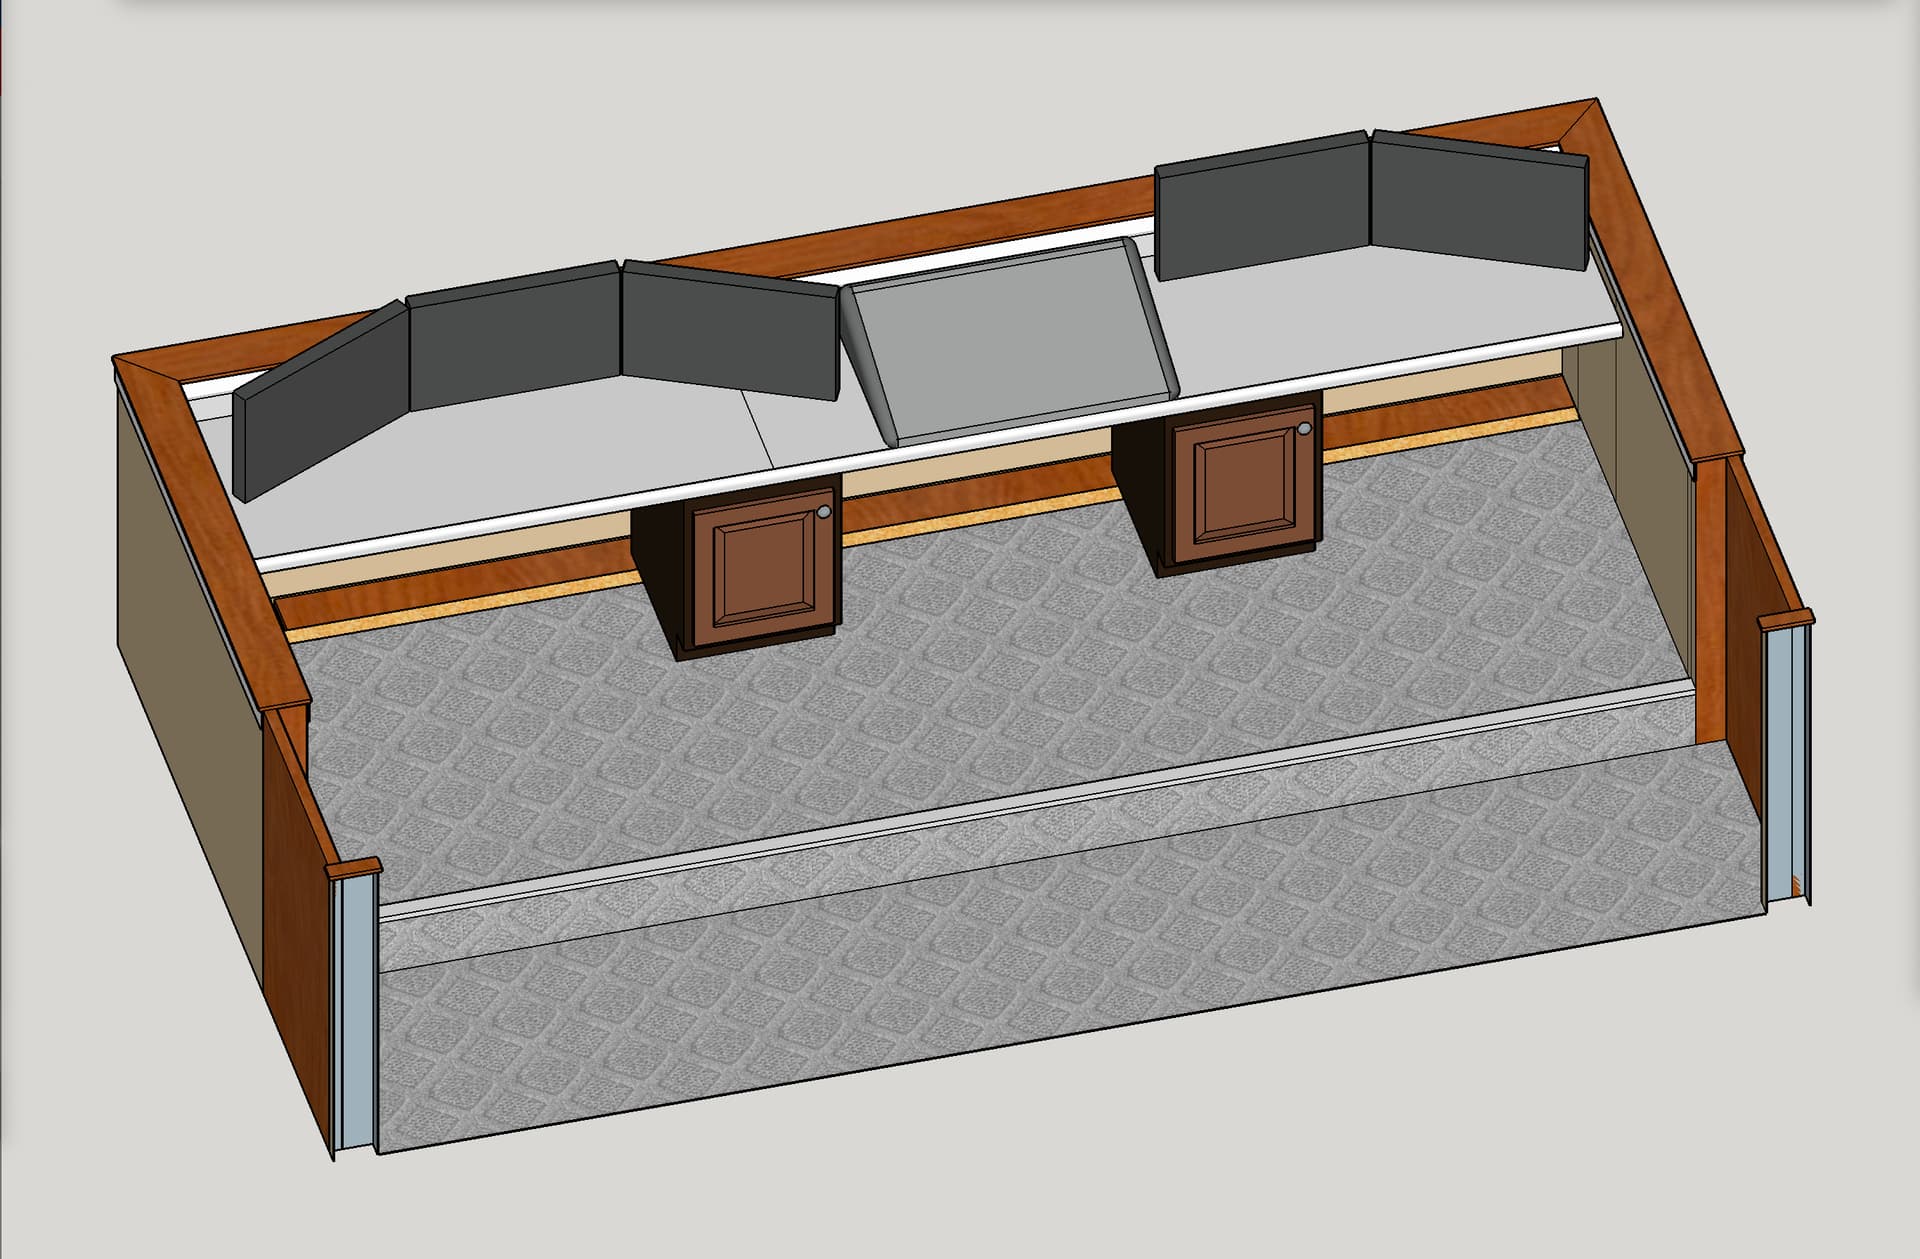
Screen shot of my 3D plans for a new AV booth at the back of our church sanctuary:
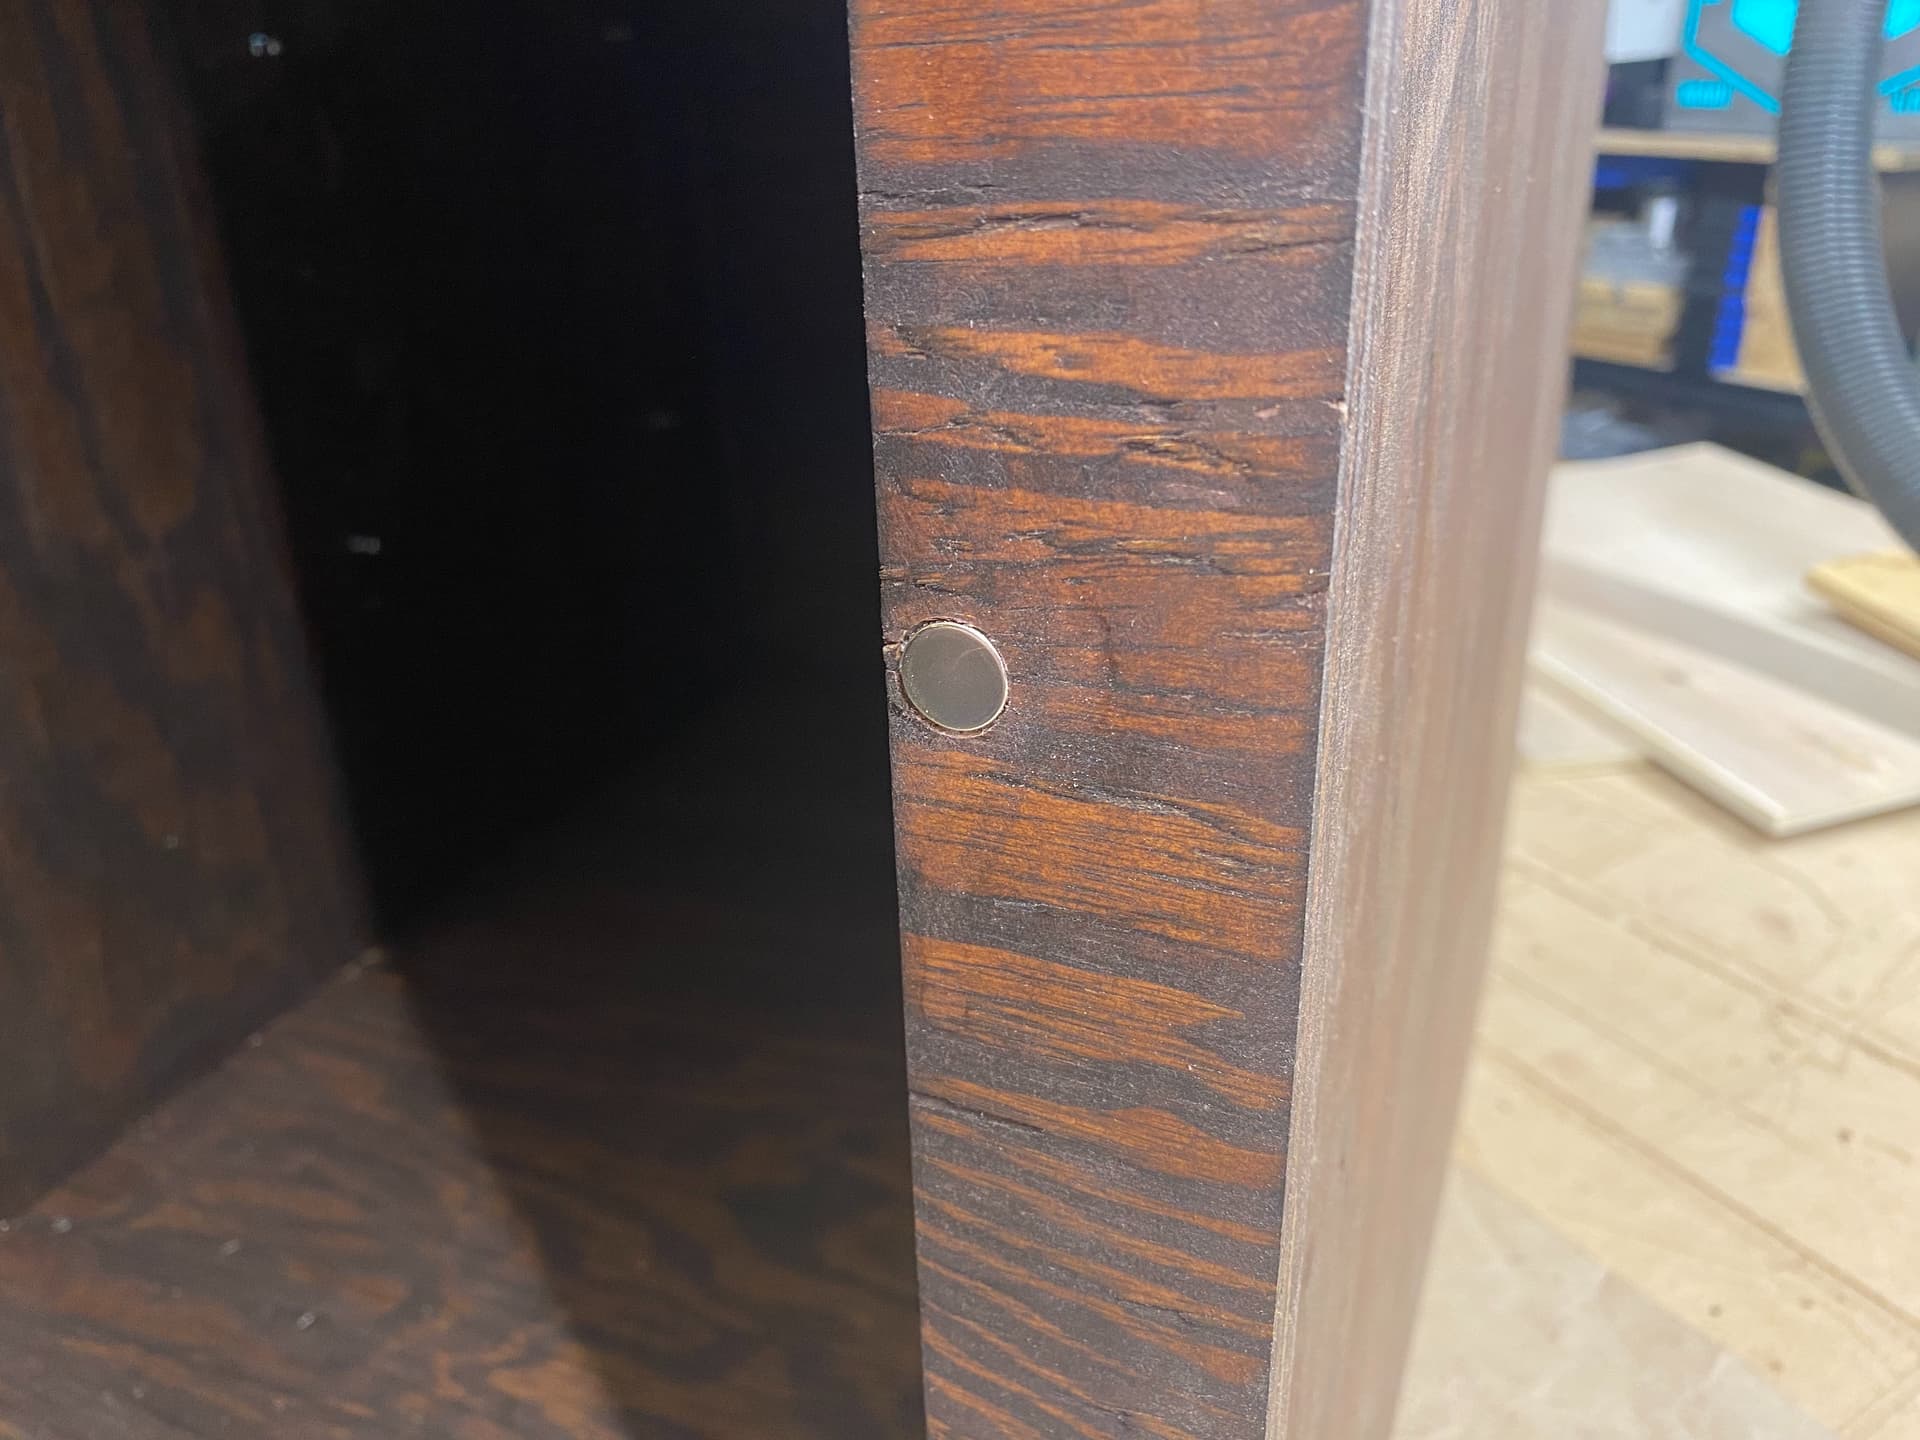
For a magnetic door latch, I used a ½" Forstner bit ( I bought this set (affiliate link) Amazon.com but this other set has fewer bits and costs less (affiliate link): Amazon.com ) to drill out a recess in the cabinet face to glue in a 12 x 3mm neodymium disc magnet (affiliate link: Amazon.com ), and then I attached a thin square strip of metal to the door, positioned so it would stick to the magnet when the door closes.
These are kind of “shop quality+” type cabinets, so even though I made them look somewhat decent, they do not need to be of the quality of nice kitchen cabinets. Still, they will serve nicely and look decently OK.
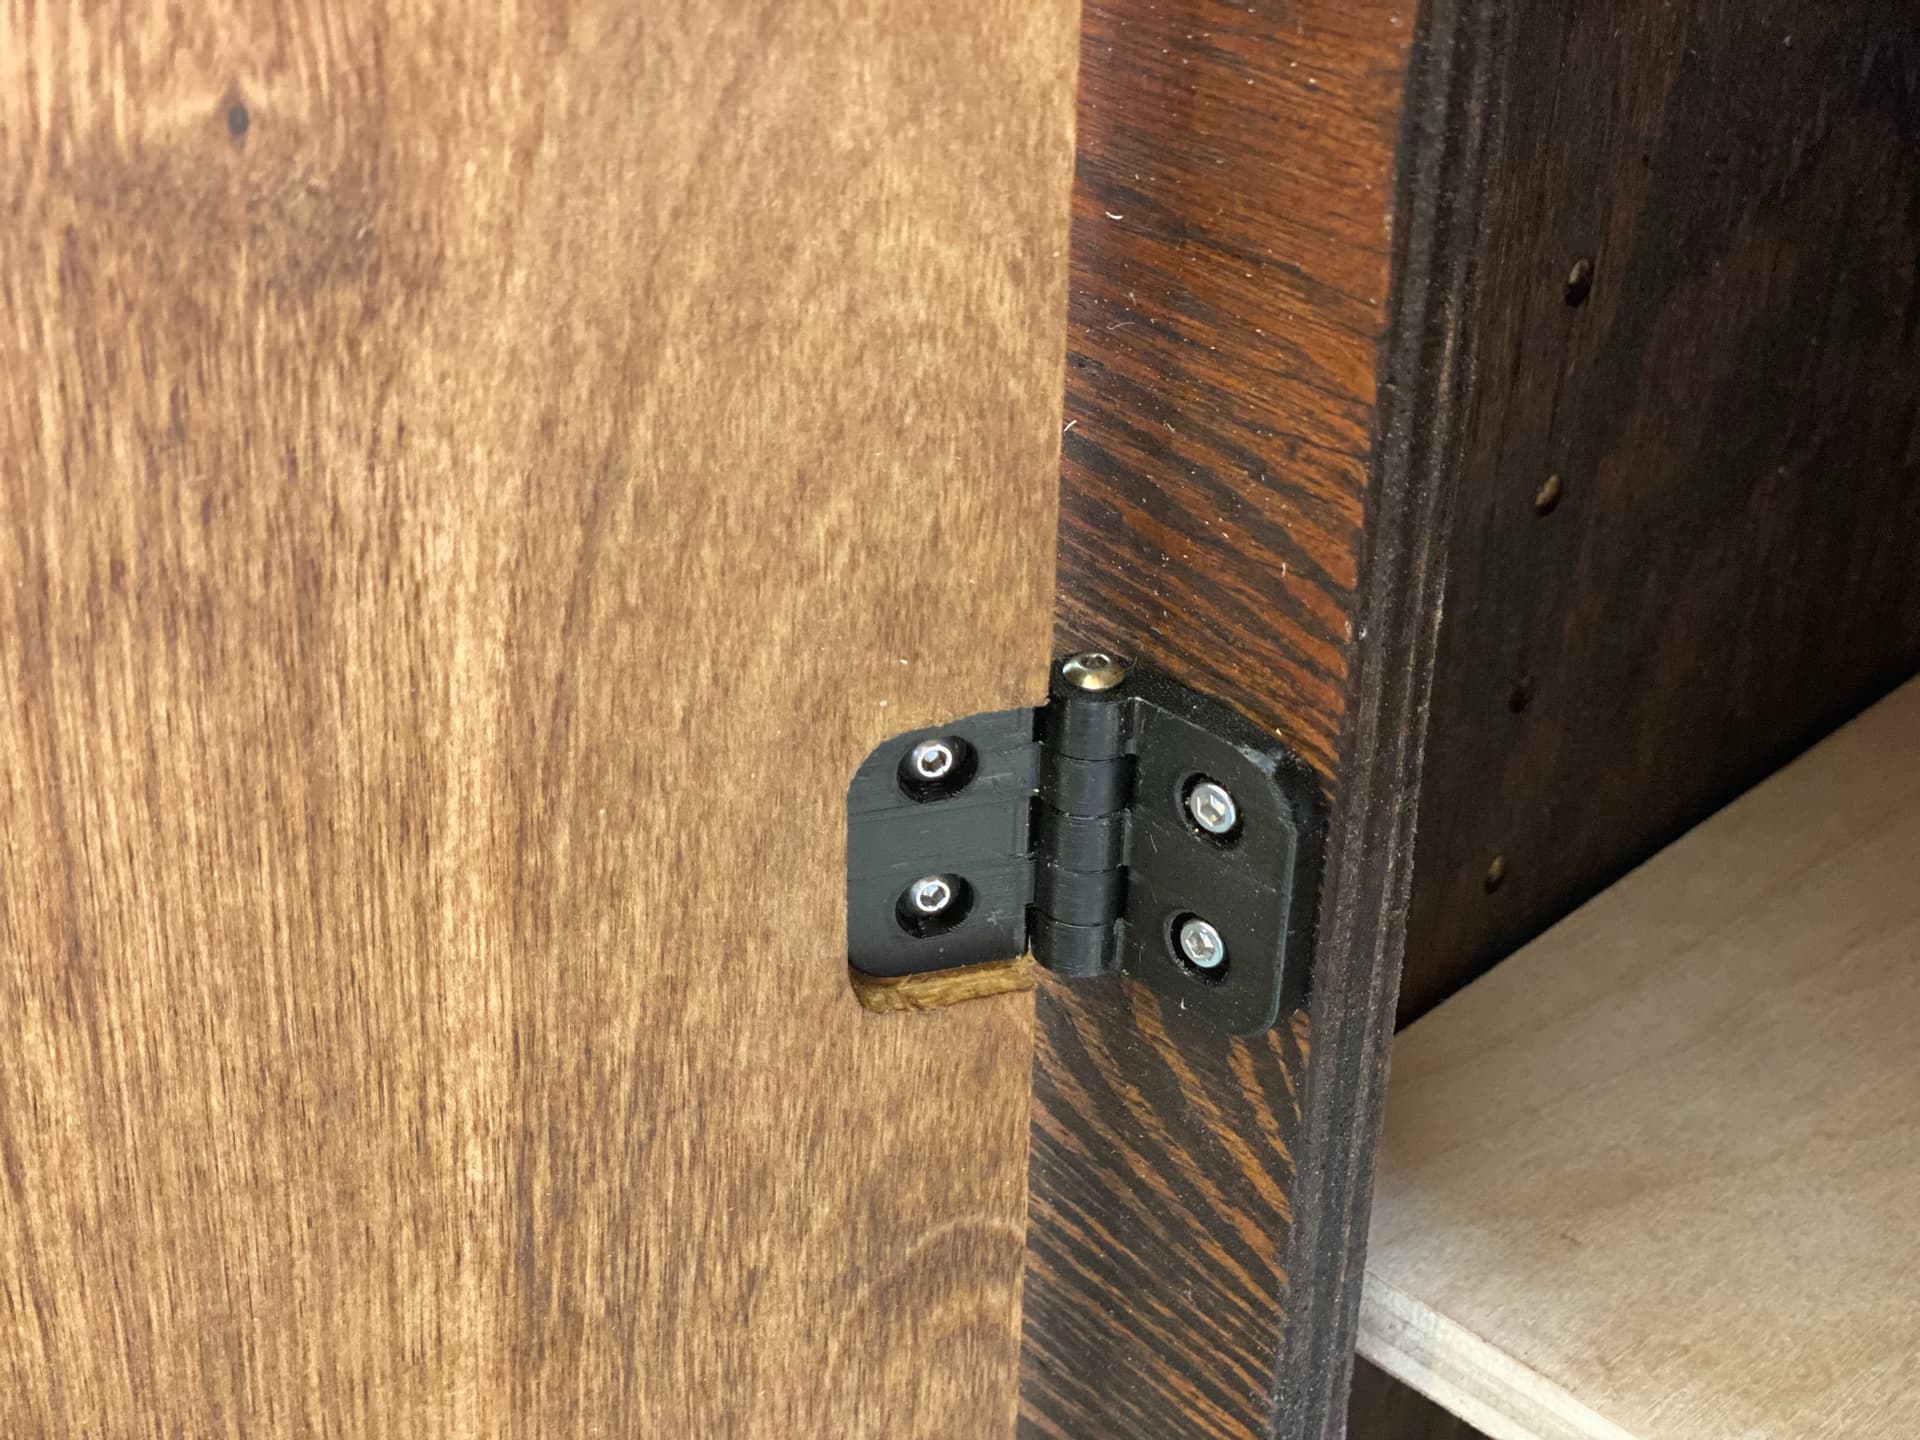
Note: I wouldn’t trust thos 3d-printed hinges though, if anyone knocks the door past it’s max opening, I think they’ll break right away
I needed some similar height cabinets for my desk recently and went the easy route: I just cut down some Ikea cabinets to height
Do you have any plan for cable management?
I built a sort of u-shaped “gutter” i attached to the back of the cabinets, flush with the worktop, and added some custom-cut panels on top with 3d-printed latches
They are using an M3 x 30 mm screw as a hinge pin, but you are right in that they can be broken. It will be in the use and care of a two man team. They will be aware to be careful. If it does happen, it won’t be the end of the world.
That works too, no doubt.
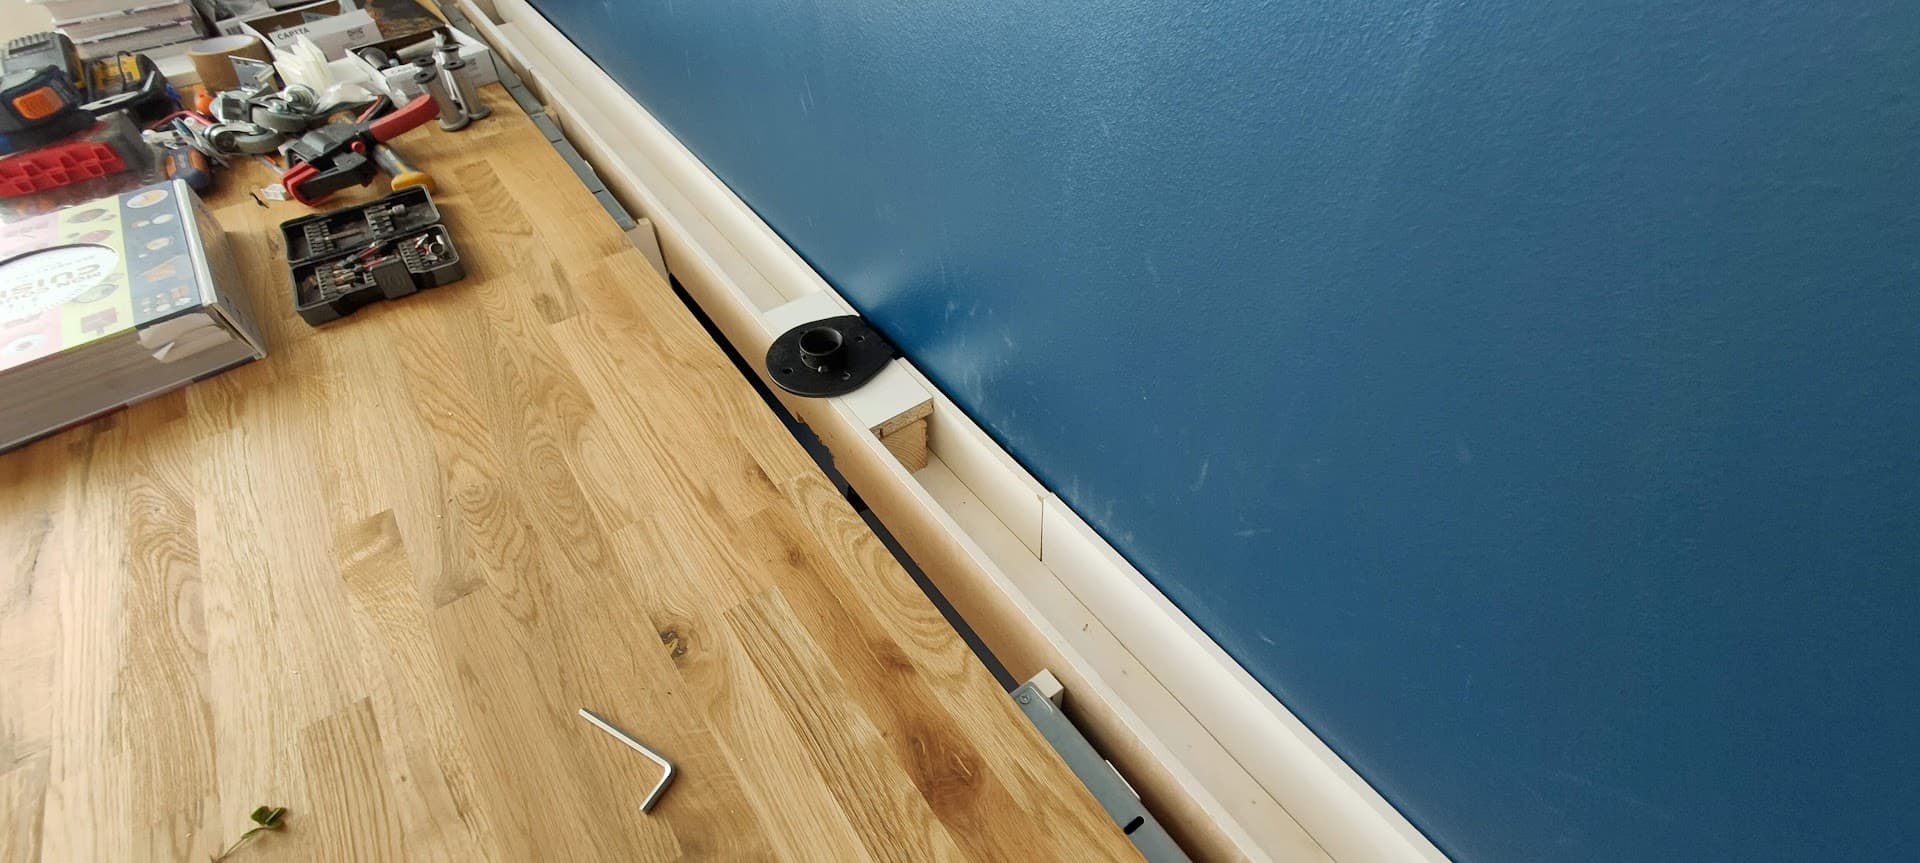
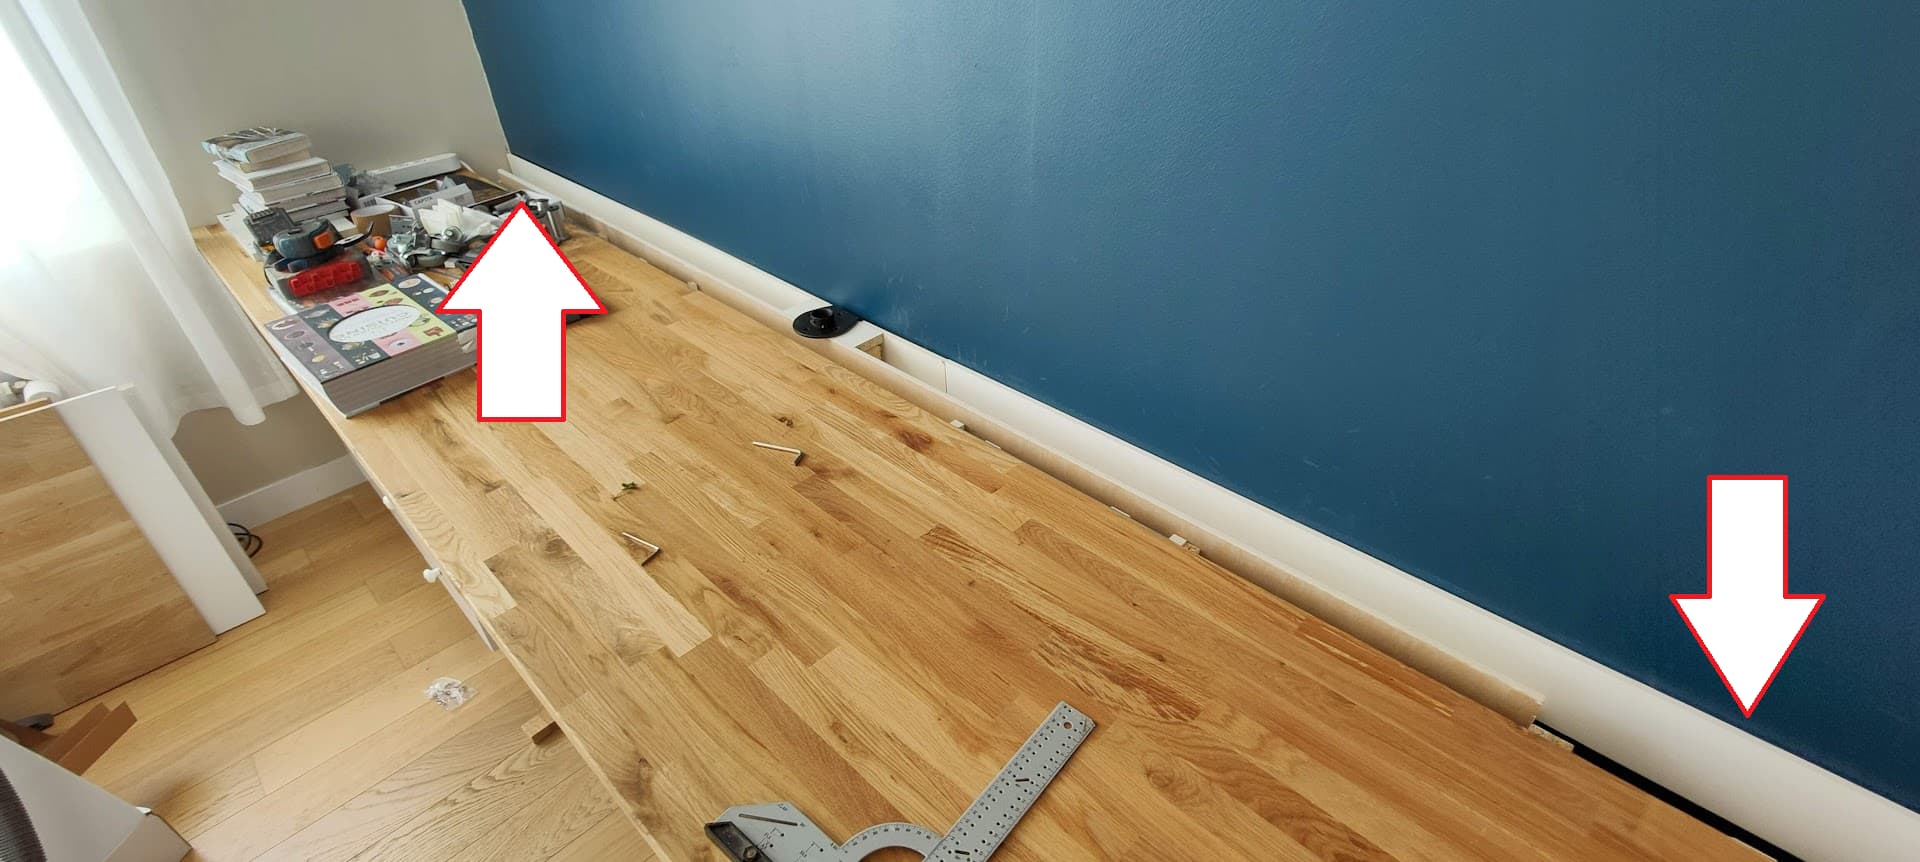
My plan was: there is a “path”/gap between the back wall and the back of the cabinet (3" gap) for cords and cables, and there will be holes in the table. However, I like your cable trough “box” idea, and will definitely consider it.
In your trough, where do cables that come up from under the table, enter into the trough? Are there holes in the sides or bottom of the trough somewhere?
There’s a gap on both sides of the gutter where all the wires can drop down to the wall outlet behind the cabinets
The right one is covered by the wall shelf on top of the worktop, the left one is just covered by the small panel covers I made (plus there’s a massive typography press right in front of it…)
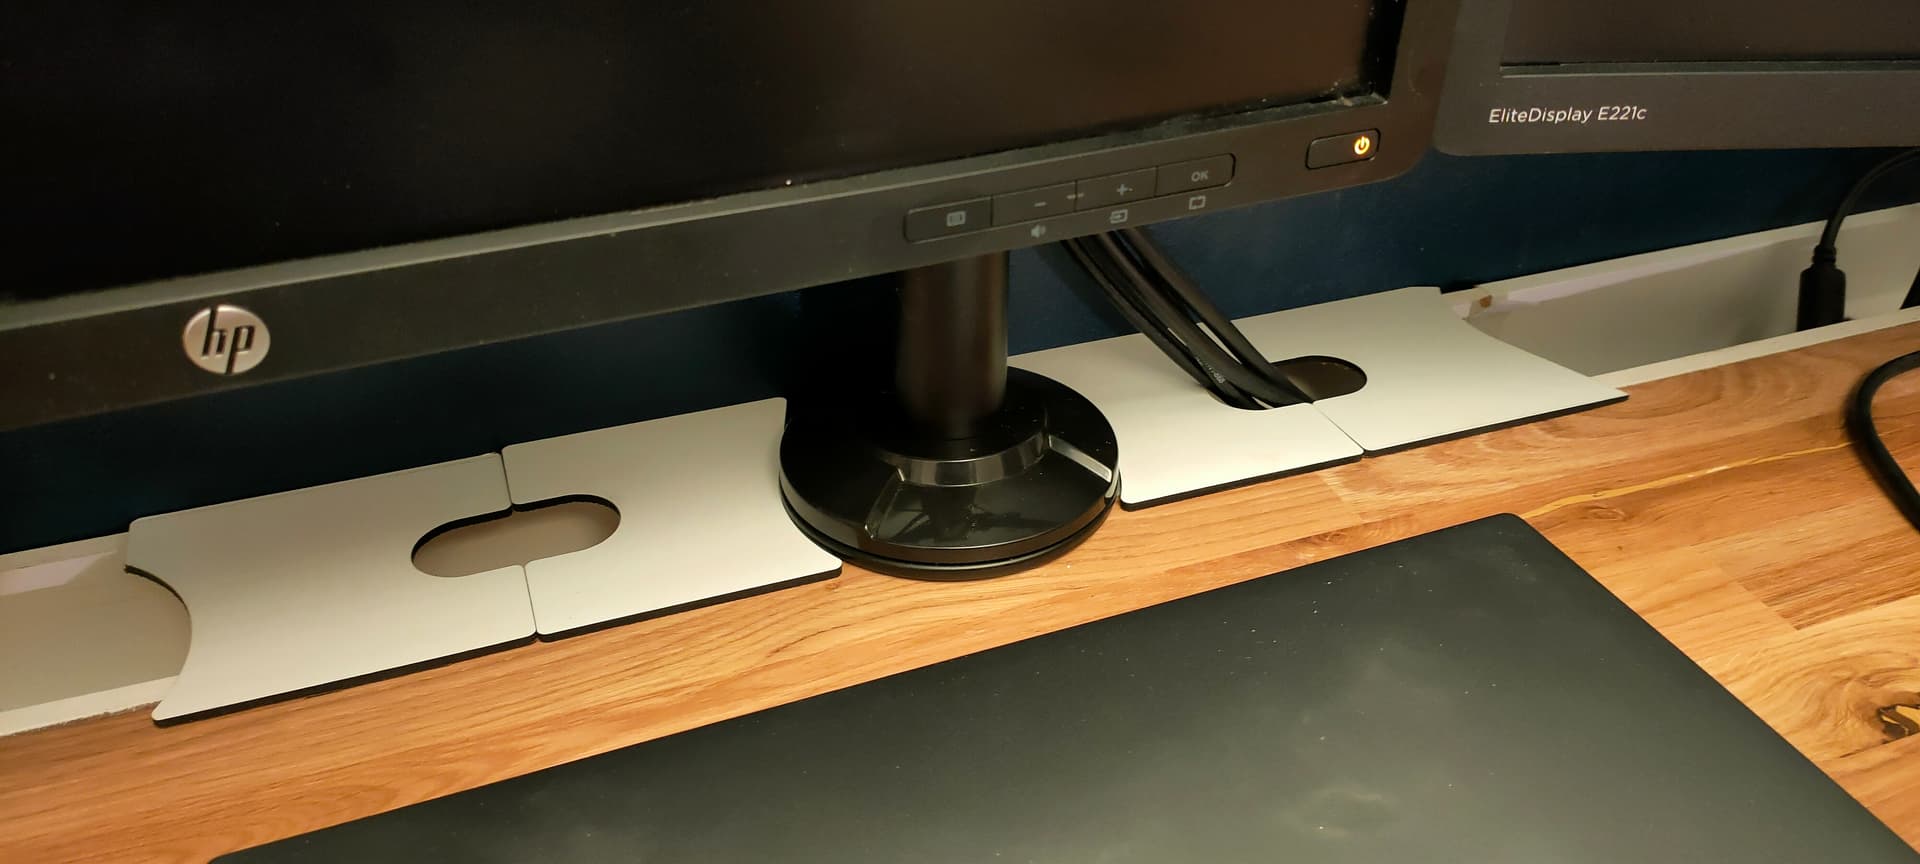
I also drilled a hole on the front face of the “gutter” in between the two cabinets (where i sit)
This one lets me route the screen and PC cables to the USB C Hub station I hanged on the side of one cabinet
(this one needs a little bit of care and finish, but still…)
It’s clean, and I can easily plug my headphones or any USB device without reaching too far back
I might add a hook for my headphones at some point too, maybe even a small “under desk” USB outlet in the front…
I also made sure the gutter was wide/deep enough to put some power outlets with plugged-in cords into it.
I have two of those 5-slots-outlet tucked inside the gutter, both with 2 USB charging ports
If you ever need to plug anything, you just remove a cover, and plug it to the outlet inside, no need to reach down o the floor, it’s a lot easier and accessible
Having the holes in the cover panels rather than the desk itself allows you to easily change where the cables go through depending on your setup.
Just change the lengthes of the covers and you can get any spacing/position of cable outputs
eg: I made small ones around the screen support post so that the cables go directly through
Also, one small advantage of this whole system is that, with the screen support attached to the gutter rather than the worktop, the desk has a bit more depth than your typical kitchen worktop (+10cm), and it gives you a bit more distance to the screens, which is comfortabl
The design is pretty specific to my use-case though, length will need to be adjusted…
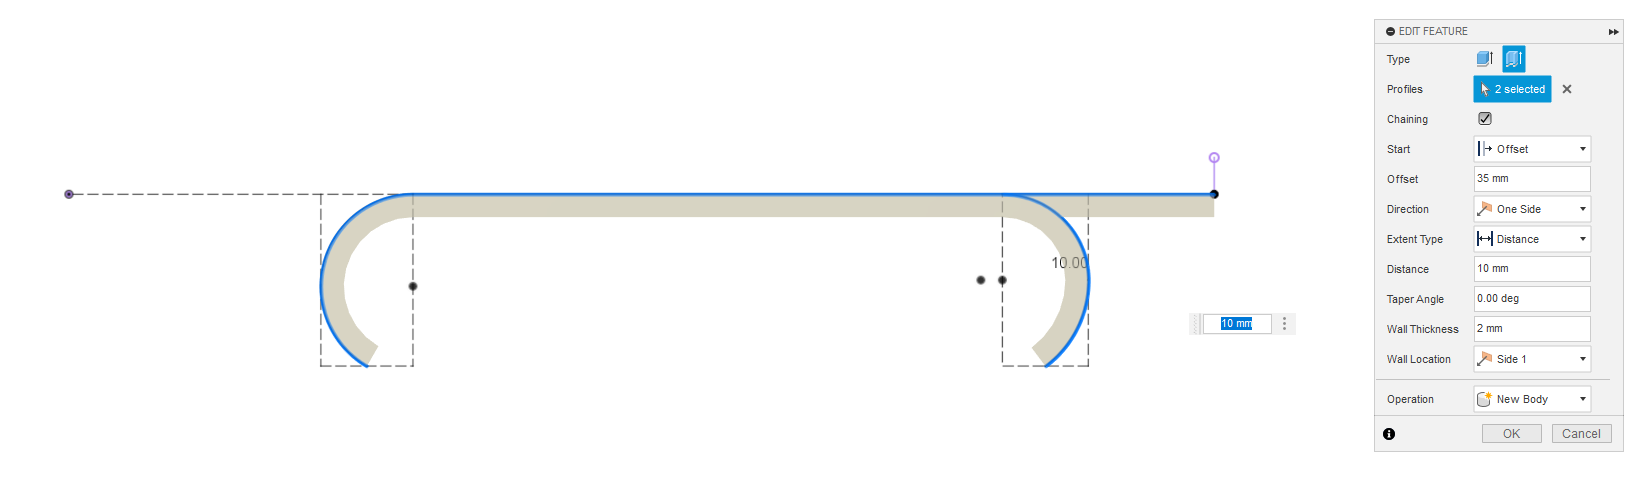
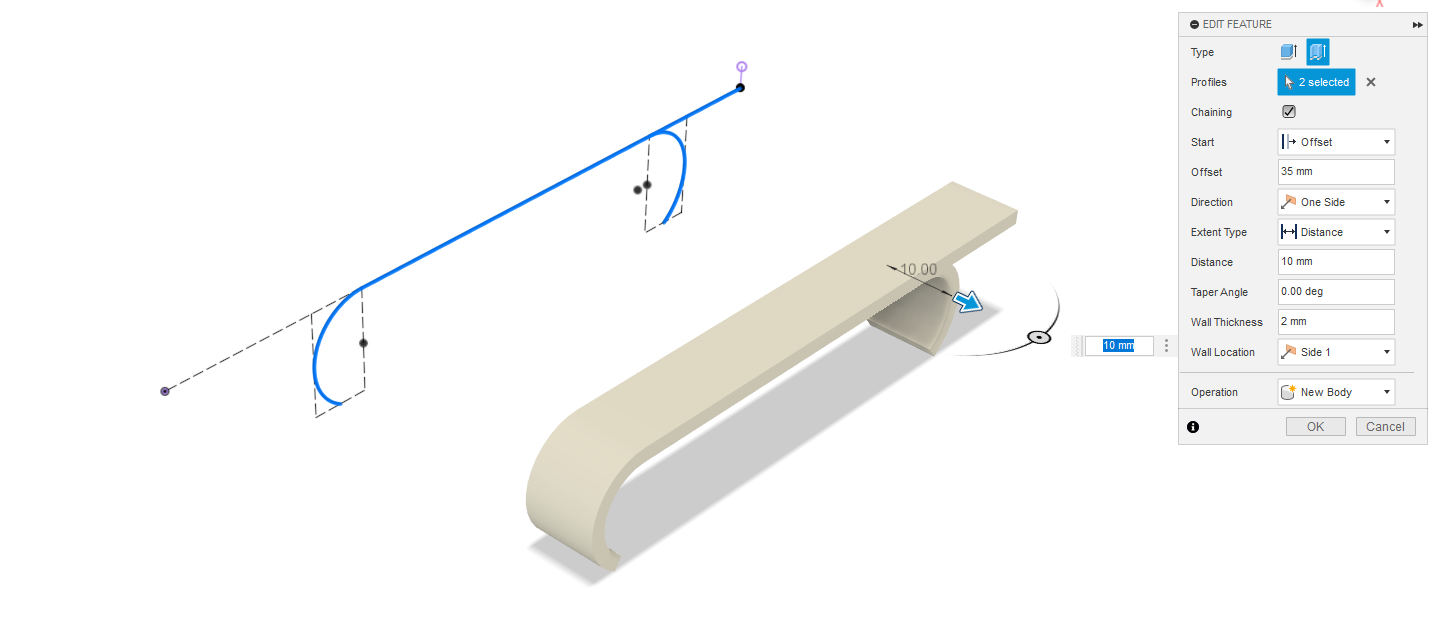
Also, I needed a small 2mm thick tab in the back to compensate for the gutter being slightly below the worktop’s height
This tab also serves as a reference to where I need to glue the part on the cover panel relative to the back of it…
The design can easily be replicated / adapted, it’s just two half circles and a line, with a 2mm thin extruded wall
I added a small fillet in the back for a bit more strength
Love seeing the seeing the LR making efficient work of the cabinet cuts, and good to hear it made first-time assembly so easy! That’s a great payoff for all your care in squaring and dimension-checking the whole system!
(Quick aside: the YouTube video your video title correctly says “v3 LowRider”, but in your description text, it’s listed as a ‘v2’ )